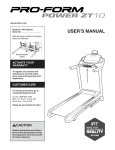
1
MATICARD
CARD DESIGN
SOFTWARE
USER MANUAL
Revision 3.01
Copyright
Important: the technical information contained in this
manual is property of MATICA System S.r.l. and is secured
by copyright. The terms of the license define and specify
permitted uses and other limitations.
Reproduction of any part of this manual, in any form, is
forbidden without the explicit written permission of MATICA
System S.r.l.
Technical information contained in the present manual is
subject to change without notice. If not otherwise specified,
any reference to companies, names, dates and addresses is
purely incidental and is only intended to illustrate the use of
the MATICA System S.r.l. product.
Every care has been taken in the collection and verification
of the documentation inserted in this manual; nevertheless
MATICA System S.r.l. cannot assume any responsibility
deriving from its use.
Copyright © 2005 MATICA System S.r.l.
All rights reserved
Published by MATICA System S.r.l.
Printed in Italy
Issue: December 2005
Revision 3.01
MATICA System S.r.l.
via Fabio Filzi, 15
20026 – Novate Milanese
MILAN - ITALY
Phone +39.02.391221
Fax +39.02.33240298
E-mail: [email protected]
Web: http://www.maticasystem.it
MatiCard Software Manual
Rev. 3.01
Page 2/96
Contents
Table of contents
Chapter 1 – MatiCard default functions ................................. 5
Paragraph
Paragraph
Paragraph
Paragraph
Paragraph
1.1
1.2
1.3
1.4
1.5
–
–
–
–
–
Creating a MatiCard job......................................... 6
Saving a MatiCard job ........................................... 8
Open or close a MatiCard job................................. 9
Printing a MatiCard job ......................................... 10
Resetting the machine .......................................... 13
Chapter 2 – Job personalization .............................................. 14
Paragraph
Paragraph
Paragraph
Paragraph
Paragraph
Paragraph
Paragraph
Paragraph
Paragraph
2.1
2.2
2.3
2.4
2.5
2.6
2.7
2.8
2.9
–
–
–
–
–
–
–
–
–
Inserting a text to emboss .................................... 15
Inserting a text to print ........................................ 18
Inserting a barcode............................................... 21
Inserting an image................................................ 25
Inserting a rectangle ............................................ 29
Inserting an oval................................................... 31
Inserting a line ..................................................... 33
Encoding magnetic tracks ..................................... 35
Chip personalization ............................................. 37
Chapter 3 – Mailer personalization ......................................... 40
Paragraph
Paragraph
Paragraph
Paragraph
Paragraph
3.1
3.2
3.3
3.4
3.5
–
–
–
–
–
MatiCard Software Manual
Mailer paper card positioning ................................ 41
Mailer paper personalization ................................. 43
Mailer paper Word file........................................... 44
Variable Mailer paper ............................................ 48
Mailer options ....................................................... 49
Rev. 3.01
Page 3/96
Contents
Chapter 4 – Database management ....................................... 51
Paragraph
Paragraph
Paragraph
Paragraph
Paragraph
Paragraph
Paragraph
Paragraph
Paragraph
Paragraph
4.1 – Creating a database .............................................. 52
4.2 – Open a database ................................................... 53
4.3 – Show database fields ............................................ 55
4.4 – Records search ..................................................... 57
4.5 – Records query ....................................................... 58
4.6 – Other DB Tools ...................................................... 60
4.7 – Counter fields ....................................................... 61
4.8 – Special fields......................................................... 62
4.9 – Sub fields.............................................................. 64
4.10 – External fields ..................................................... 65
Chapter 5 – Options and preferences ..................................... 67
Paragraph
Paragraph
Paragraph
Paragraph
Paragraph
Paragraph
Paragraph
Paragraph
Paragraph
5.1
5.2
5.3
5.4
5.5
5.6
5.7
5.8
5.9
–
–
–
–
–
–
–
–
–
Preferences........................................................... 68
Advanced parameters ........................................... 71
Encoding / embossing options .............................. 72
Smart card options................................................ 74
Thermal printer options ........................................ 75
ReadBack options ................................................. 77
Logs options ......................................................... 79
Various options ..................................................... 81
Job layout options................................................. 83
Chapter 6 – Users management .............................................. 84
Paragraph 6.1 – Defining users profiles .......................................... 85
Paragraph 6.2 – Users login and job password ............................... 88
Chapter 7 – Other commands .................................................. 89
Paragraph
Paragraph
Paragraph
Paragraph
7.1
7.2
7.3
7.4
–
–
–
–
Inserting an overlay.............................................. 90
Color settings........................................................ 92
Technical functions ............................................... 93
Objects management ............................................ 94
Appendix A – Advanced setup ................................................. 95
MatiCard Software Manual
Rev. 3.01
Page 4/96
Chapter 1 – MatiCard default functions
Chapter 1 – MatiCard default functions
MatiCard is the software used by all the Matica machines to perform the card
personalization.
In order to install and configure MatiCard, refer to the Installation Guide of the
related Matica machine.
The screenshot showed into this manual version are taken from MatiCard
version 3.19.
Run MatiCard to display the main program window.
Fig. 1.1: MatiCard main window.
The functions and objects present into the window depend on the chosen
configuration.
In this manual we will consider all the functions and objects that MatiCard
could manage regarding any possible configuration.
MatiCard Software Manual
Rev. 3.01
Page 5/96
Chapter 1 – MatiCard default functions
Paragraph 1.1 - Creating a MatiCard job
To create a new MatiCard job, press the New button
select the New command from the File menu.
In this way the front side of a new job will be displayed.
on the tool bar or
Fig. 1.2: New job.
To show the magstripe and/or the chip on the card, right-click on
select the desired option from the MagStripe/Chip command or
the related Card Options (see Paragraph 5.10).
To hide the magstripe and/or the chip on the card, right-click on
select the desired option from the MagStripe/Chip command or
check mark from the related Card Options (see Paragraph 5.10).
the job and
check mark
the job and
remove the
Fig. 1.3: Show magstripe/chip.
MatiCard Software Manual
Rev. 3.01
Page 6/96
Chapter 1 – MatiCard default functions
To display the rear side of the card, press the Front/Back button
tool bar.
on the
Fig. 1.4: Front side of the card.
To return to the front side of the card, press again the Front/Back button
on the tool bar
Fig. 1.5: Rear side of the card.
The tool bar shows only the buttons available for the card side displayed.
MatiCard Software Manual
Rev. 3.01
Page 7/96
Chapter 1 – MatiCard default functions
Paragraph 1.2 - Saving a MatiCard job
To save a MatiCard job, press the Save button
the Save Job command from the File menu.
In this way the Save As window will be displayed.
on the tool bar or select
Fig. 1.29: Save As window.
Choose the file name and the directory, then click on the Save button.
The file extension will be mgj (MatiCard Graphic Job).
A saving confirmation window will be displayed.
Fig. 1.6: Confirmation window.
If the current job was already saved, clicking the Save button just saves the
updated job with the same name in the same directory.
If an already saved job has to be saved with another name, select the Save
Job as command from the File menu and choose the new name and directory
in the Save As window, then click on the Save button.
MatiCard Software Manual
Rev. 3.01
Page 8/96
Chapter 1 – MatiCard default functions
Paragraph 1.3 - Open or close a MatiCard job
To open a MatiCard job, press the Open button
the Open Job command from the File menu.
In this way the Open window will be displayed.
on the tool bar or select
Fig. 1.7: Open window.
Choose the job to open with extension mgj, then click on the Open button.
The name and the path of the job will be displayed in the title bar.
To close a MatiCard job, select the Exit command from the File menu.
If the current job has been updated and not saved, MatiCard will display a
window asking to save the job; selecting the Yes button, the Save As window
described in Paragraph 1.2 will be displayed.
Fig. 1.8: Saving option.
MatiCard Software Manual
Rev. 3.01
Page 9/96
Chapter 1 – MatiCard default functions
Paragraph 1.4 - Printing a MatiCard job
Print fixed data
To print a MatiCard job with fixed data, press the Print button
bar or select the Print command from the File menu.
on the tool
If the Set Printer on Direct Printing advanced parameter is check marked,
the Print Options window will be displayed; otherwise clicking the Print
button the machine will print directly the job (see Paragraph 5.2).
Fig. 1.9: Print Options window.
To choose which modules have to personalize the card and which not, check
mark the related option into the Partial Production box.
The available functions are: Encode (see Paragraph 2.8), Emboss (see
Paragraph 2.1), Thermo (see from Paragraph 2.2 to Paragraph 2.7), Mail (see
Paragraph 3.2), SmartCard (see Paragraph 2.9) and End Program.
The End Program option enables to the Log on card end function (see
Paragraph 5.7).
If an option is not available, the related function is not requested by the job.
Set the production quantity into the Copies box.
To start printing, click on the Print Current button and the Print Status
window will be displayed.
MatiCard Software Manual
Rev. 3.01
Page 10/96
Chapter 1 – MatiCard default functions
The Print Status window reports the production statistics.
When the print is complete, the Print Status window will become green.
Fig. 1.10: Printing Status.
Fig. 1.11: Print complete.
Clicking the Terminate button, the machine finishes the loaded card
production, then stops and the Print Status window will become yellow.
Clicking the Stop button, the machine immediately stops the card production
and the Print Status window will become red.
Fig. 1.13: Print terminated.
MatiCard Software Manual
Fig. 1.13: Print aborted.
Rev. 3.01
Page 11/96
Chapter 1 – MatiCard default functions
Print variable data
To print a variable data job, press the Print button
select the Print command from the File menu.
on the tool bar or
If the Set Printer on Direct Printing advanced parameter is check marked,
the Print Options window will be displayed; otherwise with the Print button
the machine will print directly the current record job (see Paragraph 5.2).
Into the Print Options window, to print a records range digit the record number
from which the printing begins into the Record From box, and the record
number to which the printing finishes into the Record To box.
To set the number of records to print, starting from the one inserted into the
Record From box, digit the related value into the How Many box.
Fig. 1.14: Printing a variable data job.
The other options are the same as for the fixed data printing.
When all the options are inserted, click on the Print Current button to print
only the current record job or click on the Print Range button to print all the
specified records range.
The Print Status are the same as for the fixed data printing.
MatiCard Software Manual
Rev. 3.01
Page 12/96
Chapter 1 – MatiCard default functions
Paragraph 1.5 - Resetting the machine
In order to reset the machine, press the Reset button
on the toolbar or
select the Machine reset option of the Tech functions command from the
Tools menu.
In this way the Machine Reset window will be displayed.
To Stop the communication between MatiCard and the machine, click on the
related button; the Terminate button is not available for the reset.
Fig. 1.15: Machine Reset.
If the reset is completed the window will become green; if an error is
displayed, remove the error condition and press the Continue button.
Fig. 1.16: Restart complete.
MatiCard Software Manual
Fig. 1.17: Restart error window.
Rev. 3.01
Page 13/96
Chapter 2 – Job personalization
Chapter 2 – Job personalization
MatiCard can personalize a job in order to produce cards with the inserted
personalization and can also operate connected to a database (see Chapter 4);
this function allows to combine a large amount of variable data with a specific
job. In this way series of cards can be produced automatically, with the
possibility of repeating the process without reinserting the data.
Fig. 2.1: Job personalization.
These are the MatiCard main personalization:
•
•
•
•
•
•
•
•
•
•
Inserting a text to emboss.
Inserting a text to print.
Inserting a barcode.
Inserting an image.
Inserting a rectangle.
Inserting an oval.
Inserting a line.
Encoding magnetic tracks.
Chip personalization.
Inserting an overlay (see Paragraph 7.1).
MatiCard Software Manual
Rev. 3.01
Page 14/96
Chapter 2 – Job personalization
Paragraph 2.1 – Inserting a text to emboss
To insert a text for the Embosser module, press the Emboss Text button
on the tool bar and draw with the mouse the area where to edit the text.
Fig. 2.2: Draw Emboss text editing zone.
The Embossing Text Options window will be displayed.
Fig. 2.3: Embossing Text Options window.
MatiCard Software Manual
Rev. 3.01
Page 15/96
Chapter 2 – Job personalization
To adjust the position of the text, digit the X and Y Coordinates values into
the related boxes; the axis origins are the left edge and the upper edge of the
card, while the coordinates point is the lower left corner of the editing area.
The measure unit could be tenth of millimeters or hundredth of inches,
depending on the unit chosen in the Preferences (see Paragraph 5.1).
The editing area could also be moved by dragging it with the mouse.
If the machine has more than one Embosser module, select which module had
to emboss the text in the combo box named Head #.
Choose the desired Font in the related combo box.
This box shows only the fonts available for the current side of the card; so,
depending if the card side is front or rear, the font displayed will be different.
To set the space between two characters, digit the value in the CS box.
The CPI (characters per inch) value will be automatically calculated.
This values are measured in steps.
To align the text into the editing area click on the alignment buttons
.
If the alignment is to the left or in the center, set in the Width in Chars box
how many characters will be present into the editing area.
In the combo box next to the alignment buttons, select if the text is fixed or
variable.
If the text is fixed, write the Text to emboss in the related box and click on the
Apply button.
In this way the job will display the text inserted.
MatiCard Software Manual
Rev. 3.01
Page 16/96
Chapter 2 – Job personalization
To emboss variable data text, connect the job to a database as shown in
Paragraph 4.2; then press the Emboss Text button on the tool bar, draw the
editing area and select the Variable option into the combo box near the Text
box.
In this way the Text box becomes a combo box where to select the field
containing the data to emboss.
Together with the connected table fields, into the Text combo box there are
also two default fields named $DATE and $TIME; these fields are present even
with no database connection. To insert the current date and time on the job,
select the related field and it will be automatically updated.
To combine fixed and variable data, use the Special Fields function (see
Paragraph 4.8).
The other options are the same as for the fixed data.
When all the options are inserted, click on the Apply button.
Fig. 2.4: Embossing variable data.
MatiCard Software Manual
Rev. 3.01
Page 17/96
Chapter 2 – Job personalization
Paragraph 2.2 – Inserting a text to print
To insert a text for the Thermographic Printer, press the Text button
the tool bar and draw with the mouse the area where to edit the text.
on
Fig. 2.5: Draw Printer text editing zone.
The Text Options window will be displayed.
Fig. 2.6: Text Options window.
MatiCard Software Manual
Rev. 3.01
Page 18/96
Chapter 2 – Job personalization
To adjust the position of the text, digit the X and Y coordinates values into the
related boxes; the axis origins are the left edge and the upper edge of the
card, while the coordinates point is the upper left corner of the editing area.
To adjust the editing area dimensions, digit the width value into the W box and
the height value into the H box.
The measure unit could be tenth of millimeters or hundredth of inches,
depending on the unit chosen in the Preferences (see Paragraph 5.1).
The editing area could also be moved or resized with the mouse.
If the machine has more than one Thermographic Printer, select which module
had to print the text in the combo box named Head #.
To set the text Rotation, select in the related combo box the rotation degrees.
Choose the color of the text clicking on the Text Color box and the color of
the editing area clicking on the Background Color box. If the option
Transparent Text is check marked, the editing area won’t have any color.
To align the text into the editing area click on the alignment buttons
To set the style text click on the bold, italic or underline buttons
.
.
Click on the Choose Font button to select the font, its style, its size and its
script. It can be used each font present in the operating system, the choice will
be shown in the boxes near the button.
In the combo box under to the font boxes, select if the text is fixed or variable.
If the text is fixed, write the Text to print in the related box and click on the
Apply button.
In this way the job will display the text inserted.
The text could also be horizontally or vertically mirrored just clicking on a
corner of the editing area and dragging it to the opposite side.
MatiCard Software Manual
Rev. 3.01
Page 19/96
Chapter 2 – Job personalization
To print variable data text, connect the job to a database as shown in
Paragraph 4.2; then press the Text button on the tool bar, draw the editing
area and select the Variable option into the combo box near the Text box.
In this way the Text box becomes a combo box where to select the field
containing the data to print.
Together with the connected table fields, into the Text combo box there are
also two default fields named $DATE and $TIME; these fields are present even
with no database connection. To insert the current date and time on the job,
select the related field and it will be automatically updated.
To combine fixed and variable data, use the Special Fields function (see
Paragraph 4.8). The other options are the same as for the fixed data.
When all the options are inserted, click on the Apply button.
Fig. 2.7: Printing with variable data.
MatiCard Software Manual
Rev. 3.01
Page 20/96
Chapter 2 – Job personalization
Paragraph 2.3 – Inserting a barcode
To insert an barcode, press the BarCode button
with the mouse the inserting area on the job.
on the tool bar and draw
Fig. 2.8: Draw Barcode area.
The BarCode Options window will be displayed.
Fig. 2.9: BarCode Options window.
MatiCard Software Manual
Rev. 3.01
Page 21/96
Chapter 2 – Job personalization
To adjust the position of the barcode, digit the X and Y coordinates values into
the related boxes; the axis origins are the left edge and the upper edge of the
card, while the coordinates point is the upper left corner of the inserting area.
To adjust the barcode dimensions, digit the width value into the W box and the
height value into the H box, considering the barcode ratio limitations.
The measure unit could be tenth of millimeters or hundredth of inches,
depending on the unit chosen in the Preferences (see Paragraph 5.1).
The barcode could also be moved or resized with the mouse, with the
limitations related to the barcodes ratio.
If the machine has more than one Thermographic Printer, select which module
had to print the barcode in the combo box named Head #.
To set the barcode Rotation, select in the related combo box the rotation
degrees.
Select the BarCode type in the related combo box.
To calculate and show the check digit character of the selected barcode, check
mark the Compute Check Digit option.
Depending on the chosen barcode, other parameters related to that particular
type could be displayed and check marked; in fact selecting the Code 39
barcode the parameter Add Asterisks will be shown, and selecting the Code
128 barcode a new combo box with the parameters A, B and C will be shown.
MatiCard Software Manual
Rev. 3.01
Page 22/96
Chapter 2 – Job personalization
To set the barcode Narrow Bar Width, digit the desired value in the related
box; the measure unit is three hundredths of DPI (dots per inch).
To set the ratio between the narrow bands and the large bands of a barcode,
digit the desired value in the Bar Ratio box.
This parameter is not available for every type of barcode; in fact it can’t be
modified with the following types: Code 93, Code 128, EAN 128, UPC A, UPC E,
EAN 13, EAN 8, JAN 13, JAN 8, HIBC LIC 128 and HIBC EAN/UCC128.
To print also the numbers and/or the letters represented by the barcode bars
and spaces, check mark the Show HRC (Human Readable Characters) option.
Click on the Choose Font button to select the HCR font, its style, its size and
its script. It can be used each font present in the operating system, the choice
will be shown in the boxes near the button.
In the combo box under to the font boxes, select if the barcode text is fixed or
variable.
If the text is fixed, write the barcode Text in the related box and click on the
Apply button.
In this way the job will display the barcode inserted.
If the text written in the BarCode Option window is not compatible with the
selected type, the barcode displayed will be all yellow.
In this case double click on the yellow area and change the text in order to
make the barcode printable.
MatiCard Software Manual
Rev. 3.01
Page 23/96
Chapter 2 – Job personalization
To insert a barcode with variable data, connect the job to a database as shown
in Paragraph 4.2; then press the BarCode button on the tool bar, draw the
inserting area and select the Variable option into the combo box near the Text
box.
In this way the Text box becomes a combo box where to select the field
containing the data to use for the barcode.
Together with the connected table fields, into the Text combo box there is also
another field named $CARDID; this field is present even with no database
connection. To use the default card ID for the barcode data, select this field
and it will be automatically increased of one unit at each card printing.
To combine fixed and variable data, use the Special Fields function (see
Paragraph 4.8). The other options are the same as for the fixed data.
When all the options are inserted, click on the Apply button.
Fig. 2.10: Barcode with variable data.
MatiCard Software Manual
Rev. 3.01
Page 24/96
Chapter 2 – Job personalization
Paragraph 2.4 – Inserting an image
To insert an image, press the Image button
the mouse the inserting area on the job.
on the tool bar and draw with
Fig. 2.11: Draw Image area.
The Image Options window will be displayed.
Fig. 2.12: Image Options window.
MatiCard Software Manual
Rev. 3.01
Page 25/96
Chapter 2 – Job personalization
To adjust the position of the image, digit the X and Y coordinates values into
the related boxes; the axis origins are the left edge and the upper edge of the
card, while the coordinates point is the upper left corner of the inserting area.
To adjust the image dimensions, digit the width value into the W box and the
height value into the H box.
The measure unit could be tenth of millimeters or hundredth of inches,
depending on the unit chosen in the Preferences (see Paragraph 5.1).
The image could also be moved or resized with the mouse, but its proportion
will be locked if the option Maintain Proportions is check marked.
If the machine has more than one Thermographic Printer, select which module
had to print the image in the combo box named Head #.
To set the image Rotation, select in the related combo box the rotation
degrees.
Check mark the Black Panel options if the ribbon on the Thermographic
Printer is full colors and the image has to be printed only in black and white.
To set the type of ribbon see Paragraph 5.5.
In the combo box under to the Black Panel option, select if the image is fixed
or variable.
If the image is fixed, the related file can be simply browsed clicking on the
Search button; the chosen file and its path will be shown in the File Name
box.
MatiCard Software Manual
Rev. 3.01
Page 26/96
Chapter 2 – Job personalization
The image can also be acquired check marking the Image Acquisition option.
In this way a program can be used as interface for the acquisition, just
browsing it with the button near the External Program box (see MatiCard
Add-Ins documentation); or can be used a Twain Source already installed,
choosing it with related the combo box (see Paragraph 7.4).
Click on the Apply button and the job will display the image inserted; if the
ribbon is black or the Black Panel option is checked, the image displayed will
be black and white.
The image could also be horizontally or vertically mirrored just clicking on a
corner of the editing area and dragging it to the opposite side.
If the image colors, brightness or contrast have to be changed, double click on
the image inserted, then click on the Mod. Color button in the Image Options
window and the Color Gamma Settings window will be displayed.
To restore the Default Values click on the related button.
When all the desired modifications have been made, click on the OK button.
Fig. 2.13: Color Gamma Settings window.
MatiCard Software Manual
Rev. 3.01
Page 27/96
Chapter 2 – Job personalization
To insert an image with variable data, connect the job to a database as shown
in Paragraph 4.2; then press the Image button on the tool bar, draw the
inserting area and select the Variable option into the combo box near the File
Name box.
In this way the File Name box becomes a combo box where to select the field
containing the names of the images to print.
Also the Search button near the File Name becomes the Options button; click
on this button and the Variable Image Parameters window will be displayed.
Fig. 2.14: Variable Image Parameters.
Insert in the Image Path box where the images to print are saved, or browse
it clicking the button aside the box; then Select in the Image File Extension
combo box the images format and click on the Apply button.
If the images path and extension is already written in the selected database
field, together with the names, there’s no need to click the Option button.
To combine fixed and variable data, use the Special Fields function (see
Paragraph 4.8).
The other options are the same as for the fixed data. When all the options are
inserted, click on the Apply button in the Image Options window.
MatiCard Software Manual
Rev. 3.01
Page 28/96
Chapter 2 – Job personalization
Paragraph 2.5 – Inserting a rectangle
To insert a rectangle, press the Rectangle/Square button
bar and draw with the mouse the inserting area on the job.
on the tool
Fig. 2.15: Draw Rectangle.
Double click on the inserted shape and the Rectangle Options window will be
displayed.
Fig. 2.16: Rectangle Options window.
MatiCard Software Manual
Rev. 3.01
Page 29/96
Chapter 2 – Job personalization
To adjust the position of the rectangle, digit the X and Y coordinates values
into the related boxes; the axis origins are the left edge and the upper edge of
the card, while the coordinates point is the upper left corner of the inserting
area.
To adjust the rectangle dimensions, digit the width value into the W box and
the height value into the H box.
To obtain a square shape, the width and height values must be the same.
To obtain a vertical line, the with value must be zero.
To obtain an horizontal line, the height value must be zero.
The measure unit could be tenth of millimeters or hundredth of inches,
depending on the unit chosen in the Preferences (see Paragraph 5.1).
The rectangle could also be moved or resized with the mouse.
If the machine has more than one Thermographic Printer, select which module
had to print the rectangle in the combo box named Head #.
To set the rectangle Border Color click on the related box, then select it in the
Color window and click on the OK button.
To set the rectangle border Width digit the value in the related box; the
measure unit could be tenth of millimeters or hundredth of inches, depending
on the unit chosen in the Preferences (see Paragraph 5.1).
To set the rectangle color click on the Box Color, then select it in the Color
window and click on the OK button.
Click on the Apply button and the job will display the inserted rectangle.
MatiCard Software Manual
Rev. 3.01
Page 30/96
Chapter 2 – Job personalization
Paragraph 2.6 – Inserting an oval
To insert an oval, press the Oval/Circle button
with the mouse the inserting area on the job.
on the tool bar and draw
Fig. 2.17: Draw Oval area.
Double click on the inserted shape and the Ellipse Options window will be
displayed.
Fig. 2.18: Ellipse Options window.
MatiCard Software Manual
Rev. 3.01
Page 31/96
Chapter 2 – Job personalization
To adjust the position of the oval, digit the X and Y coordinates values into the
related boxes; the axis origins are the left edge and the upper edge of the
card, while the coordinates point is the upper left corner of the inserting area.
To adjust the oval dimensions, digit the width value into the W box and the
height value into the H box; the dimensions refer to an hypothetic rectangle
into which the oval is inscribed.
The measure unit could be tenth of millimeters or hundredth of inches,
depending on the unit chosen in the Preferences (see Paragraph 5.1).
The oval could also be moved or resized with the mouse.
If the oval area is selected, Inside the oval area two yellow curving points will
be displayed; dragging these points with the mouse changes the oval shape.
Moving the yellow points outward, the shape will be less curved and tend to
become a rectangle; while moving the yellow points inward, the shape will be
more curved and tend to be an ellipse.
To obtain an ellipse, the two yellow points must be exactly in the middle of the
shape area.
To obtain a circle , the two yellow points must be exactly in the middle of the
shape area and the width and height values must be the same.
If the machine has more than one Thermographic Printer, select which module
had to print the oval in the combo box named Head #.
To set the oval Border Color click on the related box, then select it in the
Color window and click on the OK button.
To set the oval border Width digit the value in the related box; the measure
unit could be tenth of millimeters or hundredth of inches, depending on the
unit chosen in the Preferences (see Paragraph 5.1).
To set the oval color click on the Box Color, then select it in the Color window
and click on the OK button.
Click on the Apply button and the job will display the inserted oval.
MatiCard Software Manual
Rev. 3.01
Page 32/96
Chapter 2 – Job personalization
Paragraph 2.7 – Inserting a line
To insert a line, press the Line button
mouse on the job.
on the tool bar and draw it with the
Fig. 2.19: Draw a line.
Double click on the inserted line and the Line Options window will be
displayed.
Fig. 2.20: Line Options window.
MatiCard Software Manual
Rev. 3.01
Page 33/96
Chapter 2 – Job personalization
To adjust the position, the length and the orientation of the line, digit the X
and Y coordinates values into the related boxes for one line end and the W
and H coordinates values into the related boxes for the other end; the axis
origins are the left edge and the upper edge of the card.
The measure unit could be tenth of millimeters or hundredth of inches,
depending on the unit chosen in the Preferences (see Paragraph 5.1).
The line could also be moved, reoriented or resized with the mouse.
To obtain a horizontal line the Y and H boxes values must be the same.
To obtain a vertical line the X and W boxes values must be the same.
To obtain a diagonal line of an hypothetic square, the difference between the X
and Y boxes values and between the W and H boxes values, or the difference
between the W and X boxes values and between the H and Y boxes values,
must be the same.
If the machine has more than one Thermographic Printer, select which module
had to print the line in the combo box named Head #.
To set the line Color click on the related box, then select it in the Color
window and click on the OK button.
To set the line Width digit the value in the related box; the measure unit could
be tenth of millimeters or hundredth of inches, depending on the unit chosen in
the Preferences (see Paragraph 5.1).
Click on the Apply button and the job will display the inserted line.
MatiCard Software Manual
Rev. 3.01
Page 34/96
Chapter 2 – Job personalization
Paragraph 2.8 - Encoding magnetic tracks
To code the magnetic tracks, press the Mag Stripe button
on the tool bar.
The MagStripe Definition window shows the three magnetic tracks.
Fig. 2.21: MagStripe definition window.
The Track 1 has 76 available characters both alphanumeric (upper case only)
and field separator, the Track 2 has 37 available characters both numeric and
field separators, the Track 3 has 104 available characters both numeric and
fields separator.
In the combo box near to each tracks, select if the data are fixed or variable.
In the Magstripe Encoding combo box, select if the coercivity is low (Lo-Co)
or if it’s high (Hi-Co). The coercivity is the density of the magnetic particles in
the stripe, this density is measured in Oersted (OE); Hi-co can have from
2.500 to 4.200 Oersted, Lo-co has 300 Oersted.
If is not selected any coercivity, is considered the default setup of the machine.
If the data are fixed, click on the desired tracks and type the data.
When all the fixed data are inserted, click on the Apply button.
MatiCard Software Manual
Rev. 3.01
Page 35/96
Chapter 2 – Job personalization
To encode variable data, connect the job to a database as shown in Paragraph
4.2; then press the Mag Stripe button on the tool bar and select the Variable
option into the combo box near the desired Track box.
In this way the related Track box becomes a combo box where to select the
field containing the data to encode.
To combine fixed and variable data in a single track, use the Special Fields
function (see Paragraph 4.8).
The other options are the same as for the fixed data.
When all the data are inserted, click on the Apply button.
Fig. 2.22: Encoding with variable data.
MatiCard Software Manual
Rev. 3.01
Page 36/96
Chapter 2 – Job personalization
Paragraph 2.9 – Chip personalization
To personalize the chip, press the Smart Card button
the Smart Card Definition window will be displayed.
on the toolbar and
Multi Chip Personalization
If the personalization is performed by a Multi Chip Module, select the Dynamic
Link Library (DLL) file into the Application Dll box; this DLL file can be
browsed clicking the button aside the box.
Into the Init Parameter DLL box can be specified other parameters
requested by the DLL file, thanks to the INIT() DLL function.
For further information refer to the MultiChip SDK documentation (Multi Chip
Module user guide and technical specifications).
Fig. 2.23: Multi Chip Smart Card.
The Data Definition button regards only the variable data personalization.
If the Data Definition function is not requested, click on the Apply button
when all the settings are inserted.
MatiCard Software Manual
Rev. 3.01
Page 37/96
Chapter 2 – Job personalization
Single Chip Personalization
If the personalization is performed by a Single Chip, select the Interface file
format into the related box of the Smart Card Definition window.
If the DLL format is selected, set the Application DLL file and the possible
other parameters requested, as described for the Multi Chip Module; then
select the serial port used in the Port Configuration combo box.
In the other Port Configuration box specify possible port configuration
parameters (for example 9600,n,8,1).
If the EXE format is selected, select the executable file into the SmartCard
Program box and the data interface file between MatiCard and the SmartCard
Program into the Interface File box; this files can be browsed clicking the
buttons aside the boxes.
It’s strongly recommended to select the EXE Ini File instead of the EXE
Single Line, in fact the last one is compatible only with previous systems.
Click on the Create Test File button to generate an interface test file.
For further information refer to the Single Chip SDK documentation (Interface
Smart Card).
Fig. 2.24: Single Chip DLL format.
Fig. 2.25: Single Chip EXE format.
The Data Definition button regards only the variable data personalization.
If the Data Definition function is not requested, click on the Apply button
when all the settings are inserted.
MatiCard Software Manual
Rev. 3.01
Page 38/96
Chapter 2 – Job personalization
Variable Data Personalization
To personalize the chip with variable data, connect the job to a database as
shown in Paragraph 4.2; then press the Smart Card button on the tool bar and
click on the Data Definition button into the Smart Card Definition window.
The following procedure is the same for Multi-Chip personalization and Single
Chip personalization.
The SmartCard Data Definition window will be displayed.
This window shows all the connected database table fields in the Field column.
If the database is not a read only file, the fields names could be changed
double clicking on the desired field.
Check mark the Send box near the Field to use for the chip personalization.
Fig. 2.26: Variable data definition.
When all the desired fields are check marked, click on the Apply button.
To combine fixed and variable data, use the Manage Special Fields command
(see Paragraph 4.7)
The other options are the same as for the fixed data.
When all the settings are inserted, click on the Apply button in the Smart Card
Definition window.
MatiCard Software Manual
Rev. 3.01
Page 39/96
Chapter 3 – Mailer personalization
Chapter 3 – Mailer personalization
MatiCard can personalize the Mailer paper layout, where the plastic cards has
to be attached, in order to print the inserted personalization on the paper.
To personalize the Mailer paper, press the Mailer button
tool bar and the Mailer window will be displayed.
on the MatiCard
Fig. 3.1: Mailer window.
MatiCard Software Manual
Rev. 3.01
Page 40/96
Chapter 3 – Mailer personalization
Paragraph 3.1 – Mailer paper cards positioning
To set the card position on the paper, press the Add the card button
the Mailer window objects bar.
In this way a card will be displayed on the Mailer paper layout.
on
Fig. 3.2: Adding a card.
Double click on the card and the Card Position window will be displayed.
Fig. 3.3: Card Position window.
To adjust the position of the card, digit the X and Y coordinates values into the
related boxes; the axis origins are the right edge and the lower edge of the
card, while the coordinates point is the lower right corner of the card.
The measure unit could be tenth of millimeters or hundredth of inches,
depending on the unit chosen in the Preferences (see Paragraph 5.1).
The card could also be moved dragging it with the mouse.
It can be positioned on the paper a maximum of six cards.
MatiCard Software Manual
Rev. 3.01
Page 41/96
Chapter 3 – Mailer personalization
To Show suggest positions for the card, press the related button
on
the Mailer window objects bar; the paper layout will display the suggested
positions for the maximum number of cards allowed.
Fig. 3.4: Suggest card positions.
In order to choose a suggested position, select with the mouse the area(s)
where to place the card(s).
If a suggested position is selected, the card will be marked with a number.
This means that, clicking on the Cancel Placing button
of the Mailer
window objects bar, the selected card will be automatically inserted on the
paper layout exactly in the suggested position. Also this card position can be
adjusted, double clicking on it, or moved with the mouse.
When all the cards are positioned, click on the OK button.
MatiCard Software Manual
Rev. 3.01
Page 42/96
Chapter 3 – Mailer personalization
Paragraph 3.2 – Mailer paper personalization
To insert a text on the paper, press the Add a Text button
window objects bar and draw with the mouse the editing area.
To set the text options, see Paragraph 2.2.
on the Mailer
To insert a barcode on the paper, press the Add the Barcode button
on
the Mailer window objects bar and draw with the mouse the inserting area.
To set the barcode options, see Paragraph 2.3.
The barcode on the paper layout is compulsory to avoid any mismatch with the
plastic card; the barcode data field must be univocal as with the $CARDID
field, to guarantee the check barcode control (see Paragraph 3.5).
To insert a rectangle on the paper, press the Add Rectangle button
the Mailer window objects bar and draw with the mouse the inserting area.
To set the rectangle options, see Paragraph 2.5.
The Add an Image button
on
is not available for the Mailer paper window.
Fig. 3.5: Inserting area.
When all the objects are inserted, click on the OK button.
MatiCard Software Manual
Rev. 3.01
Page 43/96
Chapter 3 – Mailer personalization
Paragraph 3.3 – Mailer paper Word file
Creating a Mailer Word file
To create a Microsoft® Word file for the Mailer paper, open the Word program.
To print a fixed data text, just insert the data in the desired position.
To print a variable data text, go in the desired position and insert a single
word; now highlight this word being careful to select the whole word and only
this one, without including also the line return or a tabulation.
Select the Bookmark command from the Insert menu and the Bookmark
window will be displayed.
Fig. 3.6: Bookmark window.
Insert, into the Bookmark name box, the name of the database table field
where are the desired data, followed by an underscore and a progressive
number; for example if the field name is ADDRESS, the bookmark name must
be ADDRESS_1. Then click on the Add button.
Repeat this function each time a variable data field had to be inserted into the
Word file.
To insert the same data field in more than one position, it’s enough to create
bookmarks with the field name and with greater progressive number; for
example ADDRESS_1, ADDRESS_2, ADDRESS_3 and so on.
In this way MatiCard will associate the bookmark to the connected table field
each time will found its name.
MatiCard Software Manual
Rev. 3.01
Page 44/96
Chapter 3 – Mailer personalization
To print a barcode, it’s necessary to purchase and install a barcode library; the
barcode library used by MatiCard is the ActiveX XbarCode.
To insert a barcode, select the Object command from the Insert menu and
the Object window will be displayed.
Fig. 3.7: BarCode Class object.
Select the BarCode Class option from the Object type combo box and click
on the OK button; the insertion area will be displayed.
Now right-click on the insertion area and select the Properties option of the
Barcode Class Object command; the BarCode Class Properties window will
be displayed.
Fig. 3.8: BarCode Class Properties.
MatiCard Software Manual
Rev. 3.01
Page 45/96
Chapter 3 – Mailer personalization
The suggested Symbol Type barcode is Interleaved 2 of 5.
The text inserted in the Message box is intended only for testing purpose.
Select all the desired barcode properties and click on the Apply button; the
barcode will be displayed into the Word file.
The barcode on the Mailer paper is compulsory to avoid any mismatch with the
plastic card; the barcode data field must be univocal as with the $CARDID
field, to guarantee the check barcode control (see Paragraph 3.5).
To associate the barcode data to a database table field, double click on the
inserted barcode or digit Alt + F11 on the keyboard to display the Macro
Editor; then select the ThisDocument option and insert into the related
window the following subroutine:
Sub ChangeMaticaBarcode(sField As String, sValue As String)
'------------------------------------------------------------If sField = "CARDID" Then
BarCode1.barMessage = sValue
End If
End Sub
In this way the barcode data will be associated to the $CARDID field.
Change the name between the quotation marks to associate another field.
Inserting a Mailer Word file
Press the Open a print file button
on the Mailer window objects bar, in
order to use a single Microsoft® Word file as Mailer paper.
The Text file option window will be displayed.
Fig. 3.9: Text file option window.
MatiCard Software Manual
Rev. 3.01
Page 46/96
Chapter 3 – Mailer personalization
In the Field type combo box, select the Fixed option.
To select which table fields are present into the Mailer paper Word file, check
mark the Send box aside the related Field box and click on the Apply button.
Fig. 3.10: Paper layout fields.
To select the Mailer paper Word file click on the Browse button.
The file extension can also be DCL (Data Control Language format).
Using this language syntax, the text and objects to insert into the Mailer paper
can be defined only with their parameters without displaying them.
The chosen file and its path will be shown in the Fix file to load box.
Click on the Apply button and the file name will be display above the Mailer
paper layout.
To Print a test paper, press the related button
objects bar.
MatiCard Software Manual
Rev. 3.01
on the Mailer window
Page 47/96
Chapter 3 – Mailer personalization
Paragraph 3.4 – Variable Mailer paper
To print a variable Microsoft® Word file as Mailer paper, connect the card job to
a database as shown in Paragraph 4.2; then press the Mailer button on the tool
bar and the Mailer window will be displayed.
To use a variable Mailer paper layout, press the Open a print file button
on the objects bar and the Text file option window will be displayed; then
select the Variable option into the Field Type combo box.
Select the field containing the names of the Word files to print into the
Variable Field box.
Insert into the Variable File Path box where the Word files to print are saved,
or Browse it clicking the button near the box; then Select into the File
Extension box the file format and click on the Apply button.
The files extension can be DOC (Word format), TXT (Text only format) or DCL
(Data Control Language format).
If the files path and extension is already written in the selected database field,
together with the names, there’s no need to insert them in the related Variable
File Path and File Extension boxes.
The other options are the same as for the single Word file.
When all the options are inserted, click on the Apply button in the Mailer
window.
MatiCard Software Manual
Rev. 3.01
Page 48/96
Chapter 3 – Mailer personalization
Paragraph 3.5 – Mailer options
To set the Mailer functions, select the Options command from the Options
menu and click on the Thermo folder into the Production Options window.
Fig. 3.11: Mailer options.
Into the Thermo folder, some parameters can have three different status.
When a parameter is displayed with the italic font style, it means that is
considered the default firmware setting.
When a parameter is displayed with the regular font style, it means that is not
activated.
When a parameter is check marked, it means that is considered the inserted
setting.
To avoid wrong adjustments, don’t digit any value in the following boxes: Chip
Offset, Barcode Offset, Label Start and Label Offset.
MatiCard Software Manual
Rev. 3.01
Page 49/96
Chapter 3 – Mailer personalization
When a Folder machine is present after the Mailer, check mark the Folder
present option.
To enable the control of the barcode printed on the Mailer paper, check mark
the Check paper barcode option. This function is compulsory to avoid any
mismatch with the card.
Select the connected table field to match with the barcode data, into the
Check field combo box; the barcode data field must be univocal as with the
$CARDID field, to guarantee the check barcode control.
To determine from which character position of the selected field start matching
the read barcode data, digit the position value into the Read from char box;
selecting the $CARDID field, this value must be 2.
Digit into the Length in chars box the value representing how many
characters must be matched, beginning from the Read from char value;
selecting the $CARDID field, this value must be 5.
To consider a series of cards as belonging to the same family, check mark the
Use card family option; this function is useful when more than one card had
to be attached to a specific Mailer paper.
Select, into the Get Family Id number from combo box, the connected table
field containing the same data for each record of the same cards family.
Select, into the Get number of cards from combo box, the connected table
fields containing the value representing how many cards of this family had to
be attached to the related Mailer paper; if this value exceed the job defined
number of attached cards to a single paper (see Paragraph 3.1), MatiCard
automatically will attached the job defined number of cards to the first paper
and the remaining cards to next papers, always printing the same paper layout
and respecting the job defined cards.
For example, if the job defined number of attached cards is 3 and the group is
composed by 8 cards, MatiCard will attach three cards to the first paper, three
card to the second paper and two card to the third paper, always printing the
same layout for all the three papers.
Select the Printer of the Mailer paper into the related combo box.
Select the Mailer Paper type into the related combo box; the available
formats are: A4, Letter and Legal.
To set the maximum number of paper managed by the Mailer buffer at the
same time, digit the value into the Max Sheets on machine box; this value is
2 for the MS10 Mailer system and is 4 for the MS20 Mailer system.
After setting the desired options, click on the OK button into the Production
Options window.
MatiCard Software Manual
Rev. 3.01
Page 50/96
Chapter 4 – Database management
Chapter 4 – Database management
MatiCard can fully manage the connected database; this function allows to use
the fields in a very versatile modality, also creating desired new fields starting
from the original ones.
The commands to manage the database connection are in the Database menu.
These are the MatiCard main functions with databases:
• Create a new database with the desired number of tables, fields and records.
• Open an existing database, created with the most common formats.
• Show each record of the database with all its fields.
• Find a specific record searching its fields.
• Make queries using data criteria.
• Mark records and show only them.
• Show only not produced records.
• Create counters.
• Combine different fields or fix and variable data.
• Create sub fields.
• Create external fields link.
MatiCard Software Manual
Rev. 3.01
Page 51/96
Chapter 4 – Database management
Paragraph 4.1 - Creating a database
To create a new database, select the Create Database command from the
Database menu. In this way the Create Database window will be displayed.
Fig. 4.1: Create Database window.
Insert the directory where to create the database into the DataBase Path box
or browse it clicking the button aside the box.
Insert the name of the database to create into the DataBase Name box or
browse it clicking the button aside the box.
Insert the name of the database Table into the related box.
Insert the table first Field Name and Width on the row marked with an arrow
into the Define database fields box; to insert other table fields, click on the
row marked with an asterisk.
When the database is completed, click on the Create button and a
confirmation window will be displayed.
Fig. 4.2: confirmation window.
The database is created in Access MDB format; it can be also created in DBF
format check marking the Create Also dB III option.
MatiCard Software Manual
Rev. 3.01
Page 52/96
Chapter 4 – Database management
Paragraph 4.2 - Open a database
To open a database, select the Open Database command from the Database
menu. In this way the Open Database window will be displayed.
Fig. 4.3: Open Database window.
Select the Database Type check marking the right option in the related box.
If the Access format is selected, the window will display a Password box,
while if the ODBC format is selected, the window will display an User ID and a
Password boxes; in fact these kind of databases could need those information
to be opened.
Insert in the Database box the name of the database to open with its path, or
browse it clicking the button aside the box.
If the chosen database is a Read-Only file, the related option won’t be
available; while if the file isn’t read only, the option could be check marked.
If the option is marked, the database cannot be changed; while if the option
isn’t marked, the database records can be written and modified with the Show
DB Fields command (see Paragraph 4.3).
Select the database Table into the related combo box.
To know the function of the Query button, see Paragraph 4.5.
Click on the Open button to connect the database to the MatiCard job.
MatiCard Software Manual
Rev. 3.01
Page 53/96
Chapter 4 – Database management
When a job is connected to a database, the MatiCard main window will
displayed the name and path of the database and also new functions.
Fig. 4.4: Job connected with a database.
The new functions are related to the database table fields.
The Show Db button
repeats the Show DB Fields command from the
Database menu (see paragraph 4.3).
It the UnMarked Field button
is present, (see paragraph 4.6).
The First record button
database table.
shows the job related with the first record of the
The Last record button
database table.
shows the job related with the last record of the
The Previous record button
shows the job related with the previous
record of the database table respect to the current one.
The Next record button
shows the job related with the next record of the
database table respect to the current one.
MatiCard Software Manual
Rev. 3.01
Page 54/96
Chapter 4 – Database management
Paragraph 4.3 – Show database fields
To see the connected database table fields, press the Show DB button
select the Show DB Fields command from the Database menu.
or
In this way the Database Data window will be displayed.
This window shows all the table records with theirs data into the related fields.
Fig. 4.5: Database data window.
In the window status bar, there are all the buttons
records as described in Paragraph 4.2.
There are also the Stay on top
buttons.
to browse the
and possibly the UnMarked Fields
The Stay on top button fixes the Database Data window over any other one.
After clicking the button, its picture changes
; to disable this function, click
again on the Stay on top button and the picture will return as before.
The UnMarked Fields button is described in Paragraph 4.6.
MatiCard Software Manual
Rev. 3.01
Page 55/96
Chapter 4 – Database management
If the database is not a read only file, the data into the fields can be modified
or deleted just clicking on them.
To Add a record, press the related button.
To Delete the current record, press the related button.
To make a Query, press the related button and see Paragraph 4.5.
To make a Search, press the related button and see Paragraph 4.4.
To Clear all the data in the current record, press the related button.
If the database is a read only file, the Add, Delete and Clear buttons won’t be
available.
To print the job with the Current record data or with the data of a particular
records Range, press the related button and the Print Options window will be
displayed (see Paragraph 1.4).
If the Set Printer on Direct Printing option in the Advance Parameters
window is check marked (see Paragraph 5.2), clicking on the Current or Range
button will always display the Print Options window; otherwise clicking on the
Current button will print directly the job.
To insert a variable data directly on the job, drag and drop the related field box
in the desired position.
In this way, a box will be displayed containing all the available personalization.
Select the desired personalization regarding the data inserted and the related
options window will be displayed.
When all the options are inserted, click on the Apply button.
MatiCard Software Manual
Rev. 3.01
Page 56/96
Chapter 4 – Database management
Paragraph 4.4 – Records search
To search records into a database, select the Search option of the DB Tools
command from the Database menu or press the Search button into the
Database Data window.
The Search window will be displayed.
Fig. 4.6: Search window.
Select the field where to search into the Field combo box.
Insert the text to search into the Search Text box.
If the inserted text is not exactly the one into the field but it’s only a part of it,
the Partial Search Field option must be check marked and the inserted
search text must be preceded or followed by an asterisk.
The asterisk must precedes the inserted search text if the remaining part of
the data is before this text, while it must follows the inserted search text if the
remaining part of the data is after this text.
The asterisk could also be in the middle of the inserted search text or
simultaneously after, before and in the middle of the inserted search text,
depending on where the remaining part of the data should be.
To Search a record with the inserted criteria, click on the related button.
To Search Next record with the inserted criteria, click on the related button.
To show a specific record, insert the record number into the Go to record box
and click on the Go to record button.
MatiCard Software Manual
Rev. 3.01
Page 57/96
Chapter 4 – Database management
Paragraph 4.5 – Records query
To make records query into a database, select the Query option of the DB
Tools command from the Database menu or press the Query button into the
Database Data window.
The Query editor window will be displayed.
Fig. 4.7: Query editor window.
The query editor uses the Structured Query Language (SQL).
Select the field where to make the query into the Field combo box.
Select the Compare Operator into the related combo box.
The compare operators available in the Wizard Sql are: LIKE, equal to (=),
more or less than (<>), less or equal than (<=), more or equal than (>=),
less than (<) and more than (>).
MatiCard Software Manual
Rev. 3.01
Page 58/96
Chapter 4 – Database management
Insert the data used as criterion by the query into the Data box.
The data inserted must be exactly as the ones present into the selected field;
only the LIKE operator allows to insert only a part of the data and use the
asterisks as described for the Search Text in Paragraph 4.4.
If more than one criterion is requested, select the Logical Operator in the
related combo box; then insert the other field, compare operator and data
criterion. The maximum criteria allowed into the Wizard Sql are four.
The logical operators available in the Wizard Sql are: AND, OR, AND NOT and
OR NOT.
Using the AND logical operator, the query satisfies the two criteria before and
after the operator.
Using the OR logical operator, the query satisfies at least one of the two
criteria before and after the operator.
Using the AND NOT logical operator, the query satisfies the criterion before the
operator and the opposite of the criterion after the operator.
Using the OR NOT logical operator, the query satisfies the criterion before the
operator or the opposite of the criterion after the operator.
Into the Direct Sql Command box can be written the desired criterion directly
with the structured query language.
To delete all the criteria inserted, click on the Clear All button.
When all the criteria have been inserted, click on the OK button; in this way
the Database Data window will show only the records that satisfy the query
and only these records can be displayed on the job and printed.
If the Save with the job option is check marked, the query criteria will be
saved closing the job; so when the job is opened again, the job will display
only the records that satisfies the query and not all the records.
MatiCard Software Manual
Rev. 3.01
Page 59/96
Chapter 4 – Database management
Paragraph 4.6 – Other DB Tools
Show not produced
If a determined field is present in the connected database table, when the
machine print a specific job, MatiCard automatically increase the related record
field value of one numeric unit (from 0 to 1, from 1 to 2 and so on).
This function is available only if the Log Text in DB option is activated, and if
the related field will be selected into the Quantity combo box of the Log Data
Fields Definition window (see Paragraph 5.7).
To display only the records jobs having this determined field records with value
0, select the Show not produced option of the DB Tools command from the
Database menu.
This tool is useful when have to be printed only the records not produced
before.
Show marked only
If a numeric field named MGMARK is present in the connected database table,
the Show marked only option of the DB Tools command from the Database
menu becomes available.
If this option is available, the UnMarked Field button
will be displayed in
the MatiCard main window and in the Database Data window; clicking on this
button, changes the MGMARK field value of the current record from 0 to 1.
and denomination (Marked
The UnMarked Field button has different aspect
Field) if the MGMARK field value of the current record is 1,; clicking on this
button changes the MGMARK field value of the current record from 1 to 0.
To display only the records having the MGMARK fields with value 0, select the
Show marked only option of the DB Tools command from the Database
menu.
This tool is useful when have to be printed only a part of the connected
database records.
It could be created also a program that changes automatically the MGMARK
value, following a particular criterion based on the production needs.
MatiCard Software Manual
Rev. 3.01
Page 60/96
Chapter 4 – Database management
Paragraph 4.7 –Counter fields
To insert a counter on the job, select the command Manage Special Fields
from the Database menu and click on the Counter folder into the Special
Fields window.
Fig. 4.8: Counter folder.
Insert the counter Name into the related box.
Select into the Type combo box the Local option, if the counter is linked to a
single specific job, or the Global option, if the counter is linked and updated
with any job opened.
To modify a counter on the job, check mark the related Mod option.
Digit the Start value of the counter into the related box.
Digit the Step value of the counter into the related box (i.e. if the start value
is 1 and the step value is 10, the next values will be 10, 20, 30 and so on).
Digit the counter length value, measured in characters, into the Len box.
Digit the Fill characters of the counter into the related box (i.e. if the length is
5 and the fill is 0, the counter number 1 will be displayed as 00001).
Digit the Current value to display on the job into the related box.
When all the values are inserted, click on the OK button; in this way the
counter will be added to the connected table fields and so it will be displayed
selecting the Show DB Field command (see Paragraph 4.3). The counter will be
also present into the variable text combo boxes, even with no database
connection.
The counter is not related to the records but to the cards produced (i.e. if a
records range is printed twice, the second card produced will have the same
record data of the first but the counter will be 2 instead of 1).
MatiCard Software Manual
Rev. 3.01
Page 61/96
Chapter 4 – Database management
Paragraph 4.8 –Special fields
To combine different fields and also fixed and variable data together, select the
command Manage Special Fields from the Database menu and click on the
Specials folder into the Special Fields window.
Fig. 4.9: Specials folder.
Press the Add button and the Add special field window will be displayed.
Fig. 4.10: Add special field window.
Digit the New special field name into the related box and click on the OK
button.
Select the created special field name into the Elements box of the Specials
folder.
MatiCard Software Manual
Rev. 3.01
Page 62/96
Chapter 4 – Database management
Select the first field to combine into the Element combo box, then digit into
the Pos box the value representing from which character position of the new
special field start inserting the first field.
Now click into the following line marked with the asterisk; then chose the
second element to aggregate to the first one; this element could be a second
field selected into the Element combo box or a fixed text inserted into the Text
box.
Specify into the Pos box, also for this second element, the value character
position of the new special field from which start inserting the second field or
the fixed text.
This procedure can go on until the desired number of different elements, both
fields and fixed texts, will be combined in a single special field.
The text field could also have just a blank space (HEX 20) between the
previous and the next element.
If an element finishes before the beginning of the next one, the special field
adds automatically spacing characters (HEX 20) between the two elements.
If an element starts before the ending of the previous one, the special field
deletes automatically the exceeding character of the previous element.
Put in the same element a field and a fixed text is not allowed.
Passing from one element to another one, the PO box will increase of one unit
starting from 0; so for the first element the PO will be 0, for the second will be
1 and so on.
This box determines the elements insertion order into the special field; this
default order can be changed just digit the desired position order value of the
elements in the related PO boxes.
When all the elements are inserted, click on the OK button; in this way the
new special field will be displayed selecting the Show DB Field command (see
Paragraph 4.3).
The special field will be also present into the variable text combo boxes.
If the special field has only fixed text elements or if regarding default fields as
$DATE or $TIME, it will be present into the variable combo boxes even with no
database connection.
MatiCard Software Manual
Rev. 3.01
Page 63/96
Chapter 4 – Database management
Paragraph 4.9 –Sub fields
To manage only a part of a field or to spilt a field into different subfields, select
the command Manage Special Fields from the Database menu and click on
the Sub Fields folder into the Special Fields window.
Fig. 4.11: Sub Fields folder.
Insert the sub field Name into the related box.
Select into the Source Field combo box the field from which to create the sub
field.
Digit into the Start box the value representing from which character position
of the source field start creating the sub field.
Digit in the Length box the value representing of how many characters the
sub field is composed, beginning from the start value.
When all the settings are inserted, click on the OK button; in this way the sub
field will be displayed selecting the Show DB Field command (see Paragraph
4.3).
The sub field will be also present into the variable text combo boxes, even with
no database connection if regarding default fields as $DATE or $TIME.
MatiCard Software Manual
Rev. 3.01
Page 64/96
Chapter 4 – Database management
Paragraph 4.10 –External fields
To link a field to an external program, select the command Manage Special
Fields from the Database menu and click on the External folder into the
Special Fields window.
Fig. 4.12: External folder.
Press the Add button and the Add external field window will be displayed.
Fig. 4.13: Add external field window.
Digit the New external field name into the related box and click on the OK
button.
Select the created external field name into the Elements box of the External
folder.
MatiCard Software Manual
Rev. 3.01
Page 65/96
Chapter 4 – Database management
Double click on the Visible box and select True to display the external field
data or False to display the source field data.
Double clicking on the Field Source box, the Select field window will be
displayed.
Fig. 4.14: Select field.
Select the field to link to the external program in order to get the external field
data and click on the OK button.
Double click into the External folder on the Dll\Exe box, then browse the
external program to which send the source field and from which receive the
external field data.
If the external program is a DLL file, digit the name of the function in the
Function Name [Dll] box; if it’s an EXE file, it’s not necessary.
Into the Function Field [Dll] box can be specified other parameters
requested by the external program.
When all the settings are inserted, click on the OK button; in this way the
external field will be displayed selecting the Show DB Field command (see
Paragraph 4.3).
The external field will be also present into the variable text combo boxes, even
with no database connection if regarding default fields as $DATE or $TIME.
If the are link errors with the external program or it doesn’t work, the external
field displayed on the job will be the source field.
MatiCard Software Manual
Rev. 3.01
Page 66/96
Chapter 5 –Options and preferences
Chapter 5 – Options and preferences
MatiCard offers a series of options and preferences in order to personalize
various aspects about the configuration of the machines and theirs modules.
The commands to manage this options and preferences are in the Options
menu.
These are the MatiCard main options:
• Job grid, orientation, background image and unit measure.
• Magnetic tracks read back modality.
• Report log file management.
• Smart card readers activation.
• Encoder coercivity.
• Embosser text conversion.
• Tipper activation, pressure and temperature.
• Thermal printer ribbon, printing side, contrast, quality and cleaning cycles.
• Mailer settings (see Paragraph 3.5).
• Error recovery modality.
• Machine configuration.
• Communication settings.
• Default jobs path, images path and language.
MatiCard Software Manual
Rev. 3.01
Page 67/96
Chapter 5 –Options and preferences
Paragraph 5.1 – Preferences
Select the Preferences command from the Options menu in order to set the
machine configuration, the communication settings, the default paths, the
language, the unit measure and the job grid; in this way the Preferences
window will be displayed.
Fig. 5.1: Preferences window.
Into the Preferences window title bar, is specified the name and path of the INI
file where the inserted preferences are stored.
Select the MatiCard Language into the related combo box; the available
default languages are English and Italiano.
To customize a language, open the MG_English.lng file into the MatiCard
directory with a word processor (for example Notepad) and change all the
labels, starting from the LANGUAGE one, with the desired names; then save
this file in the same directory with the name of the desired language preceded
by MG_ and with the LNG extension.
In this way, when the Language combo box is selected, it will be displayed also
the name of the LANGUAGE label saved.
To set the default directory to open when the Open button on the tool bar is
selected, digit the directory path into the Jobs Path box or browse is with the
Search button aside the box.
To set the default directory to open when the Image button on the tool bar is
selected, digit the directory path into the Images Path box or browse is with
the Search button aside the box.
MatiCard Software Manual
Rev. 3.01
Page 68/96
Chapter 5 –Options and preferences
To display a grid on the job, check mark the Show Grid option.
To set the distance between two grid points, digit the value into the Step box.
To move the inserted objects from one point of the grid to another one, check
mark the Snap to Grid option.
To set the default unit measure, select the mm (1/10) option representing
the tenth of millimeters or the inches (1/100) option representing the
hundredth of inches.
To set the machine, select the desired Printer type into the related combo
box; the available printers types are: Series Z, Metal C400, Metallino, Series Z
Modular, Eltron and Matica Chica.
Depending on the chosen printer, some functions and settings changes in this
window and also in other ones (for example the Production Options window).
When the Matica Chica printer is selected, the USB connection option will be
displayed; check mark this option if the printer is connected to an USB port.
When the Series Z Modular is selected, the Modular button is displayed; click
on this button to configure the machine module and the Setup modular
machine window will be displayed.
Fig. 5.2: Setup modular machine.
MatiCard Software Manual
Rev. 3.01
Page 69/96
Chapter 5 –Options and preferences
Select into the Module 1 combo box the first module and automatically the
window will display another combo box, under the first one, to select the next
module; go on until the machine configuration is completed.
The available modules are: Encoder, MultiSmartCard, Thermo, Embosser,
Tipper and Mailer.
If the Thermo module is selected, the window will display a combo box aside
the module, where to select the Thermo module communication port.
The modules can also be selected not observing the production order, but
respecting anyway the modules typology and the quantity of each module type
into the machine. The only tie is that the Mailer, if present, must always be the
last selected module.
Select the Serial Port used by the chosen printer into the related combo box;
there will be displayed only the com ports automatically detected by the
system. This combo box won’t be displayed choosing the Eltron or the Matica
Chica printers.
Select the communication Protocol used by the chosen printer into the related
combo box.
Choosing the Metal C400 or the Metallino printers, the only available protocol
will be XON-XOFF, while choosing the Series Z Modular printer, the only
available protocol will be SEP.
Choosing the Series Z printer, there will be two available protocols: XON-XOFF
and CHIP; the XON-XOFF must be selected with the standard configuration,
otherwise the CHIP protocol must be selected when the single chip is mounted
on the Encoder module.
The Protocol combo box won’t be displayed choosing the Eltron or the Matica
Chica printers.
Selecting the Series Z, the Metal C400 or the Metallino printers, the option
Printer Driver (‘MATICA’) will be displayed; choosing this option, MatiCard
will send the printing data to a driver and not directly to the com port.
Check marked this option and select the desired driver into the displayed
combo box. To print on the plastic card or metal plate, the Generic / Text Only
driver must be selected; otherwise the data will be printed on the paper printer
selected into the combo box driver.
After setting the desired preferences, click on the Apply button into the
Preferences window.
MatiCard Software Manual
Rev. 3.01
Page 70/96
Chapter 5 –Options and preferences
Paragraph 5.2 – Advanced Parameters
Click on the Advanced button into the Preferences window and the Advanced
Parameters window will be displayed.
Fig. 5.3: Advanced Parameters.
Check mark the Set Printer on Direct Printing option in order to display the
Print Options window, when selecting the Print button on the tool bar or the
Current button into the Database Data window.
Check mark the Automatically close print window option in order to close
the print Status window when the printing is finished.
Check mark the Use master file (*.mgs) with text database option when
an advanced use of the text database importation is requested.
Check mark the Autoclear Chip Error option in order
automatically the card production, when a chip error occurs.
to
continue
Check mark the Save Communication Protocol option in order to create a
directory named LOG under the MatiCard directory, where to save a log file
with the communication protocol.
Check mark the Show ‘Missing photo’ during print option to display a
yellow box in the image inserting area, when the related image is not found.
Check mark the Eltron Always DCL option if only the DCL language had to be
used to send command to the Elton printer.
After setting the desired advanced parameters, click on the Apply button.
MatiCard Software Manual
Rev. 3.01
Page 71/96
Chapter 5 –Options and preferences
Paragraph 5.3 – Encoding / embossing options
To set the Encoder, Tipper and Embosser functions, select the Options
command from the Options menu and click on the Enc/Emb folder into the
Production Options window.
Fig. 5.4: Encoder, Tipper and Embosser options.
Into the Enc/Emb folder, some parameters can have three different status.
When a parameter is displayed with the italic font style, it means that is
considered the default firmware setting.
When a parameter is displayed with the regular font style, it means that is not
activated.
When a parameter is check marked, it means that is considered the inserted
setting.
MatiCard Software Manual
Rev. 3.01
Page 72/96
Chapter 5 –Options and preferences
To determine the Encoder Coercivity, click on the related combo box.
The coercivity can be low (Lo-Co) or high (Hi-Co). The coercivity is the density
of the magnetic particles in the stripe, this density is measured in Oersted
(OE); Hi-co can have from 2.500 to 4.200 Oersted, Lo-co has 300 Oersted.
To determine the Tipper activation, check mark the Activate tipper option.
To determine the Tipper deactivation maintaining its temperature, remove the
check mark from the Activate tipper option.
To determine the Tipper pad pressure, digit the Pressure Impulse number
value into the related box.
To determine the dwell time of the Tipper pad over the card, digit the
milliseconds unit value into the Pressure ms time box.
To determine the Ribbon Rewind length between a one card tipping and the
next one, digit the impulse number value into the related box.
To determine the Tipper Power off decreasing its temperature, check mark
the related option.
To determine the deactivation of the Tipper Power off function, remove the
check mark from the related option.
To determine the Tipper Temperature, digit the degrees value into the related
box; if the value is out of the available range (60-200), the box becomes red.
Check mark the Rotate Emboss 180 degrees option when the dies are
mounted for reverse embossing (only for metal plate personalization).
To emboss only upper case, check mark the Convert emboss to upper case
option.
To activate the Farsi character writing modality, select into the Embosser
Conversion Table combo box the FARSI option.
After setting the desired options, click on the OK button into the Production
Options window.
MatiCard Software Manual
Rev. 3.01
Page 73/96
Chapter 5 –Options and preferences
Paragraph 5.4 – Smart Card options
To set the Multi Chip functions, select the Options command from the
Options menu and click on the SmartCard folder into the Production
Options window.
Fig. 5.5: Multi Chip options.
Digit the TCP/IP Address and Port of the computer, in order to communicate
with the Multi Chip module, into the related boxes.
To activate a specific chip reader, check mark the related number option
regarding the Tower1 or the Tower2.
After setting the desired options, click on the OK button into the Production
Options window.
MatiCard Software Manual
Rev. 3.01
Page 74/96
Chapter 5 –Options and preferences
Paragraph 5.5 – Thermal printer options
To set the Thermal printer functions, select the Options command from the
Options menu and click on the Thermo folder into the Production Options
window.
Fig. 5.6: Thermal printer options.
Into the Thermo folder, some parameters can have three different status.
When a parameter is displayed with the italic font style, it means that is
considered the default firmware setting.
When a parameter is displayed with the regular font style, it means that is not
activated.
When a parameter is check marked, it means that is considered the inserted
setting.
MatiCard Software Manual
Rev. 3.01
Page 75/96
Chapter 5 –Options and preferences
Check marking the Truncate Thermo Text too Long option, the Thermal
printer text characters, inserted into the job and exceeding the length of the
insertion area, won’t be displayed and won’t be printed; this function is
enabled only with variable data.
The Print Front/Back sides option is available only with Matica Chica Printer
Type preference (see Paragraph 5.1); check marking this option allows the
printing on both sides of the card with Duplo printer machine.
To print the same variable data (text, barcode or image) with two different
Thermal printer modules, if present, check mark the Thermo Color Parallel
option.
Into the Thermo Module 1 area, it’s possible to set the parameters of the
first Thermal printer.
To set the ribbon mounted on this Thermal printer, select the desired type into
the Ribbon Color combo box. The available ribbons are: black (K); black and
overlay (KO); yellow, magenta, cyan, black and overlay (YMCKO), yellow,
magenta, cyan, black and overlay with small panel (YMCKO_S), scratch-off
(SCR-OFF); yellow, magenta, cyan, black, overlay and black (YMCKO-K);
black and yellow, magenta, cyan, black, overlay (K-YMCKO).
Select the desired Print Side into the related combo box. This function also
sets the behavior of the Flip over module mounted before this Thermal printer.
To determine the printing Contrast and Quality of the black panel, digit the
desired value into the related boxes, or move with the mouse the indicating
pointer aside them; these options are not related to the color panels.
The suggested contrast value is 10, while the suggested quality value is 1;
increasing the quality decreases the production speed.
To determine after how many cards performing the Cleaning Cycles, digit the
cards number value into the related box; the suggested value is 50 while the
maximum value allowed is 999.
Into the Thermo Module 2 area, it’s possible to set the parameters of the
second Thermal printer, if present, as described for the first one.
After setting the desired options, click on the OK button into the Production
Options window.
MatiCard Software Manual
Rev. 3.01
Page 76/96
Chapter 5 –Options and preferences
Paragraph 5.6 – ReadBack options
The readback function match the data read on a magnetic track, on a chip, on
a barcode, on a OCR text, with a connected table field; in this way any job
personalization will concern only the database record containing the read data
into the matching field.
To set this function, select the Options command from the Options menu and
click on the ReadBack folder into the Production Options window.
Fig. 5.7: Readback options.
Check mark the Activate Read Back option to enable the function.
Select the source where to read the data into the Read Data From combo
box; the source can be the three magnetic tracks, the chip, a standard
barcode, a 2-D barcode (Barcode mode 2) or a OCR text (only on demand).
MatiCard Software Manual
Rev. 3.01
Page 77/96
Chapter 5 –Options and preferences
Digit into the Initial Char Position box the value representing from which
character position of the source start reading the data.
Digit into the Length box the value representing how many characters must
be read, beginning from the Initial Char Position value.
Select the connected table field to associate with the read data into the
Matching field combo box.
To stop the card production when there is a mismatch between the data read
and the selected field, check mark the Stop on Read Error function.
If the chosen source data is a chip, the Mode combo box becomes available;
select into this box the chip communication interface.
If the interface is an EXE program, it’s strongly recommended to select the
Exe_IniFile instead of the EXE_SingleLine, in fact the last one is compatible
only with previous systems.
Selecting one of these two options, the Reader Program, box will be
displayed; click on the button aside the box and browse the desired program.
If the selected interface is a Tcp/Ip protocol, the Reader IP box will be
displayed; digit into this box the address of the chip reader.
If the selected interface is a Dll, the Configure button will be displayed; click
on this button to display the Readback Smart Card Dll window.
Fig. 5.8: Readback Smart Card Dll window.
Browse the reader program clicking the button aside the Reader Prg box.
Insert possibly Dll Parameters into the related box.
Select the chip reader serial port into the Port Configuration combo box.
Insert possibly Port Configuration parameters into the related box.
Click on the Apply button.
After setting all the readback options, click on the OK button into the
Production Options window.
MatiCard Software Manual
Rev. 3.01
Page 78/96
Chapter 5 –Options and preferences
Paragraph 5.7 – Logs options
The log function automatically creates a file containing the production report
and changes record fields data when the related card is produced.
To set this function, select the Options command from the Options menu and
click on the Logs folder into the Production Options window.
Fig. 5.9: Logs options.
To create a report file with the job name and the log extension into the job
directory, check mark the Log Text option; into the combo box aside the
option, select the connected field that identifies the produced card record.
In this way the log file will contain the production date, the production time
and the selected field data of the produced card record for each line of text.
MatiCard Software Manual
Rev. 3.01
Page 79/96
Chapter 5 –Options and preferences
To change record fields when the related card is produced, check mark the Log
Text in DB option.
Select the connected field that identifies the produced card record into the
option combo box; this field must be a univocal index key for each record, so it
can’t be a field to update with the card production (as the LOG_QTY field).
Click the button aside the Text in DB option combo box and the Log Data
Fields Definition window will be displayed.
Fig. 5.10: Log Data Fields Definition.
Select the connected table field where to increase the value of one unit, each
time the related card record is produced, into the Quantity combo box.
Select the connected table fields where to insert the card record production
Date, Time and User, into the related combo boxes.
When all the requested fields are selected, click on the Apply button
If the Log Text in DB option is check marked, the Verify Redoing option
becomes available; check marking this last option enable a production control.
When the machine is going to produce a card resulting already produced in the
selected Quantity field, MatiCard asks if produce again the card or not; this
option is linked to the User Management Card Redo function; if the user
doesn’t have this right, the production will be stopped (see Paragraph 6.1).
To link an external program to a produced card record (for example an e-mail
could be automatically sent to the owner when its card is produced), check
marking the Log on card end option and select, into the related combo box,
the connected table field to identify the record; the program can be browsed
clicking the button under the field combo box. This function enable the End
Program option into the Print Status window (see paragraph 1.4).
To see the communication protocol in real time, check mark the Show
Communication Protocol option; this option decreases the production speed.
To save a PRN file into the drive temporary directory, containing an image of
each card job produced, but only for Thermal printer personalization, check
mark the Save .prn files option.
After setting all the logs options, click on the OK button into the Production
Options window.
MatiCard Software Manual
Rev. 3.01
Page 80/96
Chapter 5 –Options and preferences
Paragraph 5.8 – Various options
To set other production functions, select the Options command from the
Options menu and click on the Various folder into the Production Options
window.
Fig. 5.11: Various options.
Into the Various folder, some parameters can have three different status.
When a parameter is displayed with the italic font style, it means that is
considered the default firmware setting.
When a parameter is displayed with the regular font style, it means that is not
activated.
When a parameter is check marked, it means that is considered the inserted
setting.
MatiCard Software Manual
Rev. 3.01
Page 81/96
Chapter 5 –Options and preferences
MatiCard automatically removes the spaces (HEX 20) at the beginning and at
the end of the connected fields data. To maintain these spaces, check mark the
Do not remove spaces from DB fields option.
To manage and restore errors, select the desired error recovery modality into
the Select error management combo box.
When there is an error, selecting the Do not reproduce modality, MatiCard
simply will not reproduced the wrong cards.
When there is an error, selecting the Reproduce out of order modality,
MatiCard will reproduce the first available card not respecting the database
production sequence.
When there is an error, selecting the Reproduce in order modality, MatiCard
will eject the already loaded cards and will reproduce the first card to load
respecting the database production sequence.
If a Multi Chip module is present, this modality won’t be displayed; to respect
the sequence in this situation, see the Multi smart card recover error option.
The Number of autoclear errors function is not available.
If there is the Multi Chip module into the machine, the Multi smart card
recover error option will be displayed.
When there is an error on a chip reader, check marking this option, the
machine will stop the production and will reproduce the first card coming from
the previous module, rejecting only the wrong card and respecting the
database production sequence.
To Lock the keyboard on production and Restore the error only from
computer, check mark the related option.
This option is compulsory with the Reproduce in order modality, to avoid
pressing a wrong key on the keyboard that could damage the production
sequence.
After setting the desired options, click on the OK button into the Production
Options window.
MatiCard Software Manual
Rev. 3.01
Page 82/96
Chapter 5 –Options and preferences
Paragraph 5.9 – Job layout options
To set the job layout options, select the Card Options command from the
Options menu and the Layout Options window will be displayed.
Fig. 5.12: Job Layout Options window.
To Show the Chip position on the job, check mark the related option.
To Show the Magstripe Position on the job, check mark the related option.
To display an image on the job background of the card front or rear side, insert
the image name and path respectively into the Background Image – Front
box or into the Background Image – Back box, or browse it clicking on the
Search button aside the related box.
To Print the displayed background image, check mark the related option.
To print the displayed background image only in black and white when the full
color panel is mounted on the machine, check mark the Black Panel option.
To set the job size, select the desired Card Type into the related combo box;
for the plastic card printers as Series Z, Series Z Modular, Eltron and Matica
Chica, the available options are ISO CR-80- Landscape or ISO CR-80- Portrait,
while for the metal plate printers as Metal C400 and Metallino, also the
Personalized option is available.
The ISO CR-80 dimensions are fixed and only the orientation can be changed;
otherwise, with the Personalized option, the X and Y dimension can be inserted
into the related boxes. The measure unit could be tenth of millimeters or
hundredth of inches, depending on the unit chosen (see Paragraph 5.1).
After setting the job layout options, click on the Apply button.
If the Card Type is changed, a confirmation window will be displayed, warning
that all the current data will be lost.
MatiCard Software Manual
Rev. 3.01
Page 83/96
Chapter 6 – Users management
Chapter 6 – Users management
MatiCard can define different profiles for the users in order to allow or forbid
certain functions.
The commands to manage the users profiles are in the File menu.
The Users management command defines the profiles functions.
The Change Login command changes the current profile.
The Set Job Password command assigns a password to a specific job.
These are the users profiles functions:
• Add or delete users profiles.
• Modify a job.
• Produce automatically a specific card another time.
• Change the connected database.
• Change a job.
• Modify the connected fields data.
• Modify the Preferences.
• Print a card.
• Modify the Print Options.
MatiCard Software Manual
Rev. 3.01
Page 84/96
Chapter 6 – Users management
Paragraph 6.1 – Defining users profiles
To define the users profiles, select the Users Management command from
the File menu and the Users and Passwords Definition window will be
displayed.
Fig. 6.1: Users and Passwords Definition window.
To define a user profile, click on the New button; then insert the user name
into the displayed window and click on the OK button.
Fig. 6.2: User name.
Select the new user profile name into the Users box and digit the user
Password into the related box; now confirm the user password inserting it
again into the Password Check box. The user password is compulsory.
The two passwords must have exactly the same characters (for example small
and capital letters).
MatiCard Software Manual
Rev. 3.01
Page 85/96
Chapter 6 – Users management
To allow the new user adding, deleting or changing the other profiles, check
mark the Edit Users option. If this function is not check marked, selecting the
Users Management command, can only be changed the user password.
To allow the new user modifying the jobs, check mark the Edit Layout option.
If this function is not check marked, the Save Job and the Save as Job
commands from the File menu can’t be selected; furthermore the Save button
and all the job personalizing buttons on the toolbar will be disabled.
To allow the new user producing again a card record, which have into a
determined field a value different from 0, check mark the Card Redo option.
The Verify Redoing option into the Logs Production Options had to be check
marked to enable this function (see Paragraph 5.7). If the Card Redo function
is not check marked, the Verify Redoing option will be disabled.
To allow the new user creating or opening a database and managing special
fields, check mark the Select Database option. If this function is not check
marked, the Create database, Open Database and Manage Special Field
commands from the Database menu will be disabled.
To allow the new user opening a new job or a job previously created, check
mark the Select job option. If this function is not check marked, the New Job
and the Open Job commands from the File menu can’t be selected;
furthermore the New and the Open buttons on the toolbar will be disabled.
To allow the new user modifying the records data of the connected table fields,
check mark the Edit DB option. If this function is not check marked, the
records data into the Database Data window can’t be changed (see Paragraph
4.3); furthermore the Add, Delete and Clear buttons into the same window will
be disabled.
To allow the new user setting the MatiCard preferences, check mark the Setup
option. If this function is not check marked, the Preferences command from
the Option menu will be disabled (see Paragraph 5.1).
To allow the new user printing a job, check mark the Production option. If
this function is not check marked, the Print command from the File menu and
the Print button on the toolbar will be disabled.
To allow the new user choosing which modules have to personalize the card
and which not, into the Print Options window, check mark the Partial
Production option. If this function is not selected, the Print Options window
won’t display the modules options (see Paragraph 1.4).
When all the desired option have been selected, click on the Apply button and
then on the Exit button.
MatiCard Software Manual
Rev. 3.01
Page 86/96
Chapter 6 – Users management
It’s better to create the first user profile check marking all the option, to avoid
problems with possible disabled function.
To remove a user profile, select its name into the Users box, click on the
Delete button and, into the displayed confirmation window, click on the Yes
button.
To modify a user profile, select its name into the Users box and then check
mark or disable the desired options; then click on the Apply button.
Once the user profile has been defined, running the MatiCard program the
Login Authorization window will be displayed.
Fig. 6.3: User Login.
Select the desired user profile into the User combo box and its Password into
the related box; then click on the Continue button.
If the profile data are correct, the MatiCard will open respecting the functions
related to that particular user.
If the user name or the user password is wrong, an error window will be
displayed.
Fig. 6.4: Unknown Operator.
MatiCard Software Manual
Fig. 6.5: Wrong Password.
Rev. 3.01
Page 87/96
Chapter 6 – Users management
Paragraph 6.2 – Users login and job password
To change the current user profile, without exiting and running again MatiCard,
select the Change Login command from the File menu.
The Login Authorization window will be displayed.
Fig. 6.6: Change current user.
Select the profile to become the current user into the User combo box and its
Password into the related box; then click on the Continue button.
If the profile data are correct, the MatiCard functions will change respecting
the options related to that particular user. If the user name or the user
password is wrong, an error window will be displayed.
To define a password when a particular job is opened, select the Set Job
Password from the File menu.
Digit the desired password to open the current job, into the displayed window
box, and click on the OK button. The job password window will be displayed
each time the related job is opened.
Fig. 6.7: Job password.
If the job password is wrong, an error window will be displayed.
Fig. 6.8: Wrong job password.
MatiCard Software Manual
Rev. 3.01
Page 88/96
Chapter 7 – Other commands
Chapter 7 – Other commands
The commands related to the overlay, color settings, production counter,
firmware versions and machine parameters are present into the Tools menu.
The commands related to the layout zoom and to the objects management are
present into the Modify menu.
Select the Export Image command from the File menu to save the front and
rear sides of the job as two bitmap images into the MatiCard directory.
MatiCard Software Manual
Rev. 3.01
Page 89/96
Chapter 7 – Other commands
Paragraph 7.1 – Inserting an overlay
To insert an overlay on the job, into the Ribbon Color combo box of the
Thermo Production Options window (see Paragraph 5.5) must be selected a
ribbon type including the overlay panel.
To insert an overlay only on the front side of the job, into the Print Side combo
box of the Thermo Production Options window (see Paragraph 5.5) must be
selected the Front option; otherwise to insert an overlay only on the rear side
of the job, into the Print Side combo box must be selected the Back option.
Finally to insert an overlay on both sides of the job, into the Print Side combo
box must be selected the Front + Back option.
To define the overlay area, select the Overlay Settings – Front or the
Overlay Setting – Rear option, depending on the job side, of the Graphic
settings command from the Tools menu.
In both cases, the Overlay Settings window will be displayed.
Fig. 7.1: Overlay settings window.
Define the overlay area of the chosen job side into the Select overlay type
combo box.
Into the Overlay Preview area there is a representation of the job side
where, depending on the overlay type selected, the overlay area is displayed
black and the not overlay area is displayed white.
MatiCard Software Manual
Rev. 3.01
Page 90/96
Chapter 7 – Other commands
Choosing the Full varnish type, the overlay will be printed all over the job.
Choosing the Magstipe type, the overlay will be printed all over the job but
not over the magnetic stripe position (only for the job rear side).
Choosing the Smartcard ISO type, the overlay will be printed all over the job
but not over the standard ISO chip position (only for the job front side).
Choosing the Smartcard AFNOR type, the overlay will be printed all over the
job but not over the standard AFNOR chip position (only for the job front side).
Choosing the Select vanish type, the overlay area must be defined using the
coordinates into the Set overlay area; the Top and Left coordinates refers to
the upper left corner of the area, while the Bottom and Right coordinates
refers to the lower right corner of the area.
The Top coordinate value must be less than the Bottom coordinate value and
the Left coordinate value must be less than the Right coordinate value.
The unit measure is three hundredths of DPI (dots per inch).
Choosing the Select no vanish type, the not overlay area must be defined
using the coordinates as described for the Select vanish type.
Choosing the Bitmap area type, the overlay area is defined by a specific
bitmap file; insert the name and path of the file into the Overlay bitmap box
or Browse it clicking on the related button aside the box.
This file must have bitmap extension (BMP), 2 color format (black and white)
and 1016x648 dots dimensions; the black areas of the bitmap defines where to
print the overlay while the white areas of the bitmap defines where don’t print
the overlay.
This type is useful when two or more different areas of the job side must be
printed with the overlay.
Into the C:/temp directory are present the bitmap files used by MatiCard to
define the overlay type; in order to create a personalized file for the Bitmap
area overlay type, copy one of the files and draw the different areas with an
image editor. Be careful just to copy and not to modify these files.
MatiCard Software Manual
Rev. 3.01
Page 91/96
Chapter 7 – Other commands
Paragraph 7.2 – Color settings
To set at the same time all the Thermal printer objects inserted into the front
and rear job side, select the Color Settings option of the Graphic settings
command from the Tools menu.
The Color Gamma Settings window will be displayed, showing all the
Thermal printer objects of the current job side.
Fig. 7.2: Color Gamma Settings window.
The following settings are related only to the Thermal printer color panels:
yellow, magenta and cyan.
To set the Contrast for All Channels, digit the desired value into the related
box or move with the mouse the indicating pointer aside it.
To set the contrast of each single Red, Green or Blue Channel, digit the
desired values into the related boxes or move with the mouse the indicating
pointers aside them.
To set the Brightness, digit the desired value into the related box or move
with the mouse the indicating pointer aside it.
To restore the Default Values click on the related button.
When all the desired settings have been inserted, click on the OK button.
MatiCard Software Manual
Rev. 3.01
Page 92/96
Chapter 7 – Other commands
Paragraph 7.3 – Technical functions
To display how many cards have been produced, select the Production
Counter command from the Tools menu.
Fig. 7.3: Counter
To display the boards firmware versions, select the Machine versions and
FW option of the Tech functions command from the Tools menu.
To import the machine firmware parameters into the Production Options, select
the Get Params From Machine option of the Tech functions command from
the Tools menu; then click on the Yes button into the displayed confirmation
window. When the Machine versions and firmware window will disappear, it
means that the parameter has been imported.
Fig. 7.4: Versions read.
MatiCard Software Manual
Fig. 7.5: Reading parameters.
Rev. 3.01
Page 93/96
Chapter 7 – Other commands
Paragraph 7.4 – Objects management
A series of commands concerning the job objects management are present into
the Modify menu.
The Zoom command allows to magnify the job layout of two times (x2), of
three times (x3), of four times (x4) and return to the default view (x1).
To Delete an object on the job, click on it and select the related command.
To move an object in front of the other ones on the job, click on it and select
the Move to Front command.
To move an object behind the other ones on the job, click on it and select the
Move to Back command.
To Copy an object, click on it and select the related command.
To Paste an object, copy it and select the related command. If the copied
object has been deleted, MatiCard displays a window warning that is
impossible to paste.
To Duplicate an object, click on it and select the related command.
To apply these commands to more than one object at the same time, draw
with the mouse an area including the desired objects and select the command.
To get an image from a twain device, choose the source into the Image
Options window (see Paragraph 2.4) and select the Acquire Twain command;
MatiCard will automatically run the device driver.
To display the Properties of an object, click on it and select the related
command (or double click on the object).
To forbid inserting or moving the objects on both sides of the job, select the
Lock Objects command and a check mark will be displayed aside it.
To allow again inserting or moving the objects, select the Lock Objects
command another time and related check mark will disappear.
To align different objects, select them on the job one by one, pressing the Shift
key on the keyboard, and right click on them with the mouse; then select the
Align command into the displayed menu.
Now select the related Align command options to determine if the alignment
must be on the Left, Right, Top or Base side of the objects area; the other
objects coordinates will remain the same.
To set the same dimensions for different objects, select as first object the one
with the desired dimension and then select the other objects one by one,
pressing the Shift key on the keyboard. Now right click on the objects with the
mouse and select the Dimensions command into the displayed menu; to set
the Same Height or the Same Weight dimension, select the related
command option.
To Move to Front or Move to Back the chip and the magnetic stripe respect
to the other objects, right click with the mouse on the job and select, into the
displayed menu, the desired option from the MagStipe/Chip command.
MatiCard Software Manual
Rev. 3.01
Page 94/96
Appendix A – Advanced setup
Appendix A – Advanced setup
The Advanced Setup program is automatically installed together with the
MatiCard. This program includes a series of very particular setups for the
Matica machines.
In this Appendix will be shown only the compulsory parameters to correctly
configure some machines; for the other options, please refer to Matica
technical support.
Run the Advanced Setup from the MatiCard group of programs and the
related window will be displayed.
Into the message bar on the bottom of the window is displayed the path and
the name of the initialization file where the setting are stored; this file is
named Maticard.ini and is present into the MatiCard directory.
To open this file, select the Open Ini File from the File menu and double click
on it into the displayed window.
To install a machine including a Thermal printer module (for example T10, T20,
ZT10 or ZT20), the Create Internally Thermo Buffers option into the
Thermo folder must be check marked.
Fig. A.1: Thermal printer advanced setup.
MatiCard Software Manual
Rev. 3.01
Page 95/96
Appendix A – Advanced setup
When a machine is in line with a Mailer, the serial port used to communicate
between the computer and the Mailer must be selected into the In-Line
communication port combo box of the Mailer folder.
When a barcode or an OCR reader is connected directly to the computer, the
serial port used to communicate between the computer and the reader must
be selected into the Barcode Communication Port combo box of the Mailer
folder.
Fig. A.2: Mailer advanced setup.
When all the compulsory settings have been performed, click on the Save
button to store them into the Maticard.ini file.
MatiCard Software Manual
Rev. 3.01
Page 96/96