1
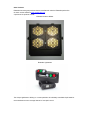
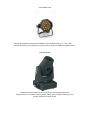
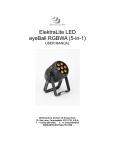
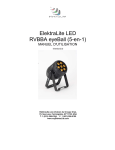
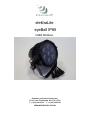
elektraLite eyeBall IP65 USER MANUAL Elektralite (a division of Group One), 70, Sea Lane, Farmingdale, NY11735, U.S.A. T. +1 (631)-396-0184. F. +1 (631)-396-0190 WWW.MYELEKTRALITE.COM 1. Unpacking Thank you for choosing the elektraLite eyeBall IP65 fixture. For your own safety, please read this manual before installing the fixture. This manual covers important information on installation and applications. Please keep this manual for future reference. The eyeBall IP65 fixture uses 7 high powered 12 watt leds in a balanced arrangement giving incredible output. Please unpack it carefully and check whether it was damaged in shipping. The following items should be in the box with the fixture:A short cable with a water resistant connector at one end and an Edison connector at the other. A short cable with a water resistant connector at one end and a 5pin Male DMX connector at the other. 2. Safety Instructions. This device has left the factory in perfect condition. In order to maintain this condition and to ensure a safe operation, it is absolutely necessary for the user to follow the safety instructions and warning notes written in this user manual. The eyeBall IP65 is a high voltage fixture. Be careful when dealing with high voltages. Please read this manual. If you do not read this manual and damages occur to the eyeBall IP65, then it could void the warranty. The electric connection must be carry out by a qualified person and it is absolutely essential that the eyeBall IP65 be grounded. This is imperative and is a safety issue. So under no circumstances break off the ground pin on the Edison plug or use the fixture where a ground is not present. A ground pin, like the fuse for the eyeBall IP65 is there for safety. Always disconnect the eyeBall IP65 from the power source, when the device is not in use or before cleaning it. Only unplug eyeBall IP65 from the power cord. Never pull out the plug out by pulling on the power cord. Please keep the eyeBall IP65 away from children and the general public. Please be intelligent and use common sense when operating the eyeBall IP65. 3. General Guidelines. ElektraLite eyeBall IP65 is a lighting fixture for professional use. ElektraLite eyeBall IP65 should only be operated at between 120 to 240 volts. ElektraLite eyeBall IP65 should not be operated 24/7 (24 hours a day; 7 days a week). ElektraLite eyeBall IP65 needs operation breaks to ensure that it will work for a long time without problems. Please do not shake the eyeBall IP65 and avoid using brute force when installing or operating it. When choosing the location to install the eyeBall IP65, please make sure that it is not exposed to extreme heat. Make sure that the fixture has a good amount of free space around it for air flow. Do not install it in a confined space or have insulation around the fixture. The minimum distance between the eyeBall IP65 and the illuminated surface must be more than 3 feet. Always mount the eyeBall IP65 with an appropriate safety cable. Operate the eyeBall IP65 only when you are familiar with the features on the fixture. Do not permit operation by persons not qualified. All modifications to the eyeBall IP65 will invalidate the warranty. There are absolutely no exceptions. If eyeBall IP65 is operated in any way different to the one described in this manual, eyeBall IP65 maybe damaged and the guarantee will be void. 4. Installation Please ensure that the eyeBall IP65 is hung using the appropriate "C" clamp or half cheeseboro. A safety chain or cable should also be used as a secondary point of holding the fixture in case the clamp comes loose. Never hang the fixture without a safety chain or cable. If you are not qualified or have any doubts about hanging the eyeBall IP65 then do NOT hang it. Do not clamp the cable to the U bracket or clamp. That is not a secondary safety point. A secondary safety point is any point that will adequately hold the eyeBall IP65 if the "C" clamp or half cheesboro fails. Then the safety cable would be the backup and stop the fixture from falling to the ground. So do NOT fix the safety to the same place that the "C" clamp is attached. The eyeBall IP65 is kept cool by conducting the heat away from the leds using the body's fin design. As a result the fins and the surrounding area should be "open" all around the fixture. Do not block the fixture into a tight location. For example,Do not try to mount the eyeBall IP65 like a "high hat" in a soffit surrounded by insulation; the fixture would fail to operate due to overheating. 5. DMX-512 Control Connection and Power Connection POWER: The eyeBall IP65 comes with an Edison 120V connector to an outdoor water resistant connector cable. Extension cables (water resistant connector to water resistant connector) are available as accessories. DMX 512 CONTROL: The eyeBall IP65 come with a 5 pin XLR connector to an outdoor water resistant 3 pin connector cable. Extension cables (water resistant connector to water resistant connector) are available as accessories. 6. Menus in the fixture. Root Menu STAT (STATIC LOOK) AUTO (AUTOMATIC) Sub Menu 1 Sub Menu 2 RED 0-255 GREEN 0-255 BLUE 0-255 WHITE 0-255 STROBE 0-255 Red Green Blue Yellow Cyan Purple White Effect #1 Effect #2 Effect #3 RUN DMX 512 SLAVE ADDRESS ASSIGN DMX CHANNEL 1-512 ID address 1-255 PERSONALITY STAG(E) ARC.1 ARC1.D ARC2 AR2.D AR2.S HSV SETTINGS FAN DTV NTSC/PAL RGB→White ON/OFF *** DIMMER 000(OFF), 001, 002, 003 or 004 RESET Password required* OFF AUTO LOW NORMAL HIGH OFF KEY LOCK OFF **SEE BELOW ON *The Password for the reset is using the up and down buttons when in the reset menu. The screen will initially display [ ]. The following needs to be pressed ↑↓↑↓↑↓ then press Enter. The screen will then display the word "OK" for 2 seconds and the fixture will reset. **The Password for Key Lock is the same as reset. If key lock is ON then everytime you power up the eyeBall IP65 the Password is requested. The password must be put in the eyeBall IP65 display otherwise no changes can be made to the operation of the eyeBall IP65. ***RGB→White. If this feature is turned on the Output of the RGB and white can be adjusted for maximum output. Normally the R, G, B, and W all default to maximum of 255 output. However this can be change for each of the color components from a value of 128 up to 255. 7. Static Look. The EyeBall IP65 can be set to a single static look quickly. Use the Menu button to get to STAT. Press Enter. The next screen will read U.000. This is addressing the UV leds. Use the ↑ or ↓ to increase or decrease the output of the leds. Numbers are expressed in DMX values so 0 is no output and 255 is highest output. Press Enter to save the value. The screen will automatically advance to the strobe. S.000 means the strobe is off Use the ↑ or↓ to increase or decrease the speed of the strobing or leave at S.000 if you want no strobe. S.001 is the slowest and S.020 is the fastest strobing. Press Enter to save the value. It will automatically bring you back to the output screen again. Press the Menu button to exit out of STAT and back to the Root directory. 8. Run Mode. Run allows the fixture to operate in either DMX or Slave operation. Using the Menu button in the root menu go to RUN. Press Enter to get to DMX mode. Press Enter again to save the RUN mode as DMX. A "ok" will appear and then the display will return to display RUN. If the fixture is to be run in Slave mode, then when DMX mode appears on the screen instead of pressing enter use the ↑ or ↓ to get to SLAV. Then press enter to save the SLAV mode setting. 9. DMX 512 Setting (address). Sets up the address for the dmx. Using the Menu button in the root menu go to DMX Press Enter to get into DMX menu and the display will read the current dmx channel. The display will read for example d.001 This means the fixture's current address is 001 To change it, use the ↑ or ↓ buttons to get to the correct address. Press Enter to save the dmx address. The display will momentarily display the word "OK" and then go back to the DMX menu. To exit out to the root directory, use the menu button. 10. Fixture Personality. There are several different choices on how the fixture will operate. What these "Personalities" do in terms of their channel assignments is detailed on the tables page 8. To change a Personality use the Menu button to get to PERS Press Enter and then using the ↑ or ↓ buttons go to the personality required. Press Enter to save the Personality. 11. ID Address. A fixture can be addressed (controlled) through the dmx or instead it can have its own unique ID address. There are a total of 255 different ID addresses from 1 to 255.To set up the address for a fixture, use the Menu button in the root menu go to ID Press Enter and then using the ↑ or ↓ buttons, to select the ID address. Press Enter to save the address. For the ID address to work you must chose the US id personality. This allows you to access the ID address system on channel 4. Set the DMX address to d.001 for the fixture. So if ID address 123 is chosen then go to channel 4 on the lighting board and set the level at 123. You will then be controlling only fixture(s) with ID address 123. 12. SET. (Set has several Sub Menus which allow functions to be used). 1). REST This resets all values to their default. Using the Menu button, go through the Root Menu until SET. Press Enter and then use the ↑ or ↓ buttons to get to REST. Press Enter. The display will have 4 dots across the bottom. The password needs to be entered. The password is the following sequence using the ↑ and ↓ buttons. ↑ ↓ ↑ ↓ then press Enter once, to complete the reset. The display will read "OK" followed by a return to the REST sub menu. The Menu button will need pressing to return to the Root Menu. Only when at the Root Menu will dmx control work. Please note the Reset also takes the dmx address back to 001. 2). DIM The Dim function allows different Dimmer curves to be chosen. There are 5 choices. Choice 1 :- this is Dim OFF. The Dimmer curve is 0 which means any change in dimmer level is instantaneous. Choice 2:- Dim 1. The dimmer curve has the shortest fade in and fade out time. nd Choice 3:- Dim 2. The dimmer curve has the 2 shortest fade in and fade out time. Choice 4:- Dim 3. The dimmer curve has the 3rd shortest fade in and fade out time Choice 5:- Dim 4. The dimmer curve has the longest fade in and the fade out time. Using the Menu button, go through the Root Menu until Set. Press Enter and then use the ↑ or ↓ buttons to get to DIM. Press Enter and then use the ↑ or ↓ buttons to get to the DIM choice required. Once chosen, press Enter to save it and then use the Menu button to exit back to the root directory. 3).DV The DV setting allows the ability of the leds to not flicker when using video camera. The choices are NTSC or PAL. NTSC is the USA system. Go through the Root Menu until Set. Press Enter and then use the ↑ or ↓ buttons to get to DV. Press Enter and then use the ↑ or↓ buttons to get to either NTSC or PAL. Once chosen, press Enter to save the setting and the Menu to exit back to the Root Menu. 13. KEY The Key function is an access password for the fixture. The KEY can be turned OFF or ON which then deactivates or activates the password. To set the KEY go through the Root Menu until KEY, press Enter and use the ↑ or ↓ to set the KEY to either OFF or ON. If the Key is turned ON then a password is required to go into sensitive Menus and to change functions. The password is ↑ ↓ ↑ ↓ (Up + Down + Up + Down) 14. The Personalities of the eyeBall IP65. Personality tables. (for the personality STAG please refer to the DMX channel assignments on page 9. STAG uses all 9 channels as shown in the dmx channel assignment table). ARC.1 1 0-255 RED 2 0-255 GREEN 3 0-255 BLUE 0-50 Linear dimmer speed(DIM=OFF) 51-100 nonlinear speed1(DIM1) 101-150 nonlinear speed 2(DIM2) 151-200 nonlinear speed 3(DIM3) 201-255 nonlinear speed 4(DIM4) 1 0-255 MASTER DIMMER 2 0-255 RED 3 0-255 GREEN 4 0-255 BLUE 0-50 Linear dimmer speed(DIM=OFF) 51-100 nonlinear speed 1(DIM1) 101-150 nonlinear speed 2(DIM2) 151-200 nonlinear speed 3(DIM3) 201-255 nonlinear speed 4(DIM4) 1 0-255 RED 2 0-255 GREEN 3 0-255 BLUE 4 0-255 WHITE 0-50 Linear dimmer speed(DIM=OFF) 51-100 nonlinear speed 1(DIM=1) 101-150 nonlinear speed 2(DIM=2) 151-200 nonlinear speed 3(DIM=3) 201-255 Nonlinear speed 4(DIM=4) 4 ARC1.D 5 ARC2 5 ARC2.D 1 0-255 MASTER DIMMER 2 0-255 RED 3 0-255 GREEN 4 0-255 BLUE 5 0-255 WHITE 0-50 Linear dimmer speed(DIM=OFF) 51-100 Nonlinear speed 1(DIM1) 101-150 Nonlinear speed 2(DIM2) 151-200 Nonlinear speed 3(DIM3) 201-255 Nonlinear speed 4 (DIM4) 1 0-255 MASTER DIMMER 2 0-255 RED 3 0-255 GREEN 4 0-255 BLUE 5 0-255 WHITE 6 0-255 STROBE (0 to 8 is no strobe. From slow at 9 to maximum flash rate 6 ARC2.S at 255) 0-50 Linear dimmer speed(DIM=OFF) 51-100 nonlinear speed 1(DIM1) 101-150 nonlinear speed 2(DIM2) 151-200 nonlinear speed 3(DIM3) 201-255 nonlinear speed 4(DIM4) 1 0-255 H hue 2 0-255 S saturation level 3 0-255 V brightness 0-50 Linear dimmer speed(DIM=OFF) 7 HSV 4 51-100 nonlinear speed 1(DIM1) 101-150 nonlinear speed 2(DIM2) 151-200 nonlinear speed 3(DIM3) 201-255 nonlinear speed 4(DIM4) DMX Channel Assignments. 1 Grand Master for RGBW 0-255 2 RED Leds 0-255 3 GREEN Leds 0-255 4 Blue Leds 0-255 5 White Leds 0-255 6 No effect 0-010 Snap to Red 255 Crossfade Red 255→000 Crossfade 011 Green 255→000 Crossfade Red 000→255 Crossfade Red 255→000 Red 255 Blue 000→255 051-090 Blue 255→000 Crossfade Snap to 012-050 Green 000→255 Green 255 091-130 White 000→ 255 131-150 Blue 000→255 White 255→ 000 151-170 Blue 255 White 255 171-200 Snap to White 1 (approximately 3200⁰K) 201-205 Snap to White 2 (approximately 3400⁰K) 206-210 Snap to White 3 (approximately 4200⁰K) 211-215 Snap to White 4 (approximately 4900⁰K) 216-220 Snap to White 5 (approximately 5600⁰K) 221-225 Snap to White 6 (approximately 5900⁰K) 226-230 Snap to White 7 (approximately 6500⁰K) 231-235 Snap to White 8 (approximately 7200⁰K) 236-240 Snap to White 9 (approximately 8000⁰K) 241-245 Snap to White 10 (approximately 8500⁰K) 246-250 Snap to White 11 (approximately 10000⁰K) 251-255 7 Strobe effect (0 to 8 is no strobe. From slow at 9 to maximum flash rate at 255) 000-255 8 No effect/function 000-010 Fan Off 011-020 Fan Low 021-025 Fan High 026-030 Fan Auto 031-040 No effect/function 041-050 Red 051-070 Green 071-090 Blue 091-110 Yellow 111-130 Cyan 131-150 Purple 151-170 White 171-190 Effect #1 (This is a chase loop; the speed of which is controlled by ch9 & cross fade by ch10). 191-210 16. Cleaning and maintenance. Now ignoring maintenance and cleaning is very good way of creating problems "down the road" and many companies and installations do just that. However the net result is, no matter what the fixture, premature failure! Changing the oil in a car most people do on a regular basis. So with the fixtures regular maintenance it an excellent practice, if you want the fixtures to last. So what is the maintenance for the fixture? The clear front glass cover for the lenses should be cleaned so the light output is maintained. With the elektraLite eyeBall IP65 turned off, use only a moist lint-free cloth, and clean the glass cover. Never use alcohol or solvents to clean the fixture. Never spray anything onto the fixture at the front or in any place on the fixture. Clean the heat sink “fins” at the back of the fixture. Finally inspect all cable REGULARLY, to make sure they have no cracks in the outer sheathing. 17. Technical Specification. Operating voltage 100 – 250v Frequency 50 – 60 Hertz 7 x 12 watt leds 100 VI Elektralite is a division of Group One. Group One and its divisions are constantly improving their product range and we reserve the right to make changes without prior notice. Other Products. Elektralite has other great products that are manufactured under the Elektralite product line. Go check out the website at www.myelektralite.com A preview of the products include:Elektralite Audience Blinder Elektralite LightStream The Unique LightStream. Utilizing 6 x 12 watt quad leds. All individually controllable. Split heads for more simultaneous room coverage. Manual or "auto-pilot" control. The Elektralite 1018 Using 18 high powered 12 watt leds, the Elektralite 1018 is available using 4-in-1 or 6-in-1 leds. Each led can produce any combination of colors as each led is either an RGBW or RGBWAI device Elektralite ML602 The ML602 utilizes a 90 watt Led and is a bright as a 250 discharge light source. Features include:- Color wheel, two gobo wheels, rotating gobos, rotating 3 facet prism, focus, dimmer, strobe and 16 bit pan and tilt.