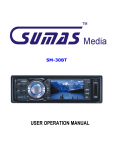
Download SM-310T - Sumas Media
Transcript
SM-310T
USER OPERATION MANUAL
TABLE OF CONTENTS
Safety Information ……………………………………………………………..
1
Park Wire/Brake Wire ………………………………………………………….. 1
Installation .……..…………………………………………………………………
2
Playable Disc, DVD Care, MP3 ……….……………………………………..
3
Maintenance …………………………………………………………………….…
3
Replacing Remote Control Battery ………….……………………………..
3
Remote Control …………………………………………………………………... 4
Remote Control Functions …………………………………………………….
5
Front Panel …………………………………………………………………………
6
Front Panel Functions ………………………………………………………….
7
Basic Setup …..…….……………………………………………………….…....
8-9
Radio Mode ………………………………………………………………………..
10
Music/MP3 Mode ………………………………………………………………..
10
DVD Mode ………………………………………………………………………….
10
USB Mode …………………………………………………………………….…….
11
Auxiliary Mode (Input).……………………………………………………….
11
Trouble Shooting …………………………………………………………..…….
12
Specification ………..……………………………………………………………..
13
Accessories ……………………………………………………………………..…
14
Safety Information
Please read this manual thoroughly and keep in your vehicle for easy future reference.
We highly recommend that you find a licensed professional installer for the installation of
this product, it is illegal to watch DVD player while driving.
CAUTION: This unit is a class 1 Laser Product. To prevent direct exposure to Laser
system, DO NOT OPEN the unit. The Laser Beam may hurt or damage your eyes. If the
unit requires adjustments, please contact Sumas Media.
USE THIS PRODUCT SAFELY
Make sure you fully understand the following safety information:
When Driving
Keep the unit at an appropriate sound level. Driving with the sound at a level that
prevents you from hearing the sounds outside and around the car may cause an
accident.
When cleaning your interior
Do not expose the product to any type of liquid or excessive moisture. This could cause
short circuit, fire or other severe damage to the unit or your vehicle.
When Parked
Parking in direct sunlight, especially in the summer time can produce very high
temperature inside you vehicle. This may cause the unit to not work properly. Let the
interior of your car to cool down before turning on the unit.
Note: Do not use or store player in dusty, high temperature or high humidity environments.
Park wire/Brake wire
Park wire is to be connected to your parking brake (Hand brake) or your unit will not
function, also for your safety; when car is operated, it will restrict you to play/watch DVD
while driving, display shows: “Safety off, do not play DVD”
But some make or model of automobiles don’t have a “Parking brake” wire, if you have
problems to connect to your brake,you can also ground this wire to your car’s chassis, unit
will play; but restriction will be disabled, so please do not watch your unit when driving!
Replacing the Fuse
When replacing the fuse, be sure to use one matching the amperage rating stated on the
original fuse.
WARNING!
NEVER replace any Fuse with higher amperage
than the original. This may cause damage to your
unit and/or your vehicle’s electrical wiring.
1
Installation
Note: Remove the protection screws (A)
before installing and operation the unit.
Please find the front panel inside carry caddy. Reinstall panel by placing as flipped
down position, insert panel left side into front adaptor first, then gently click right
side into place. When completed correctly panel should be flip up in place.
To remove the panel, gently pull out the right side first after flipped down.
o This unit is designed for 12V DC, (connecting to other than 12V unit will be damage)
negative ground operation system only.
o When replacing a fuse, be sure to match the amperage as the original fuse. Using the
wrong fuse may cause your unit not to function or even electrical shortage
o The negative battery terminal must be disconnected before making connections, which
can prevent damaging the unit due to short circuit.
o Be sure to connect the color coded leads correctly according to the wiring diagram.
Incorrect connections may cause damage or malfunction or even damage the vehicle’s
electrical system.
o Be sure to connect the speaker (-) leads to the speaker (-) terminal, and the speaker (+)
leads to the speaker (+) speaker terminal and so on. Never cross connect the left / right
channel speaker cables or to the vehicle body/frame.
o Do not block the unit’s vents or heat sink. Blocking can cause heat to build up inside and
may damage your unit.
o After the completion of the installation. Reconnect negative cable of vehicle to the (-)
battery terminal, and then press the RESET in the front panel with the push pin to set the
unit to initial status. Please refer below. ( see picture below)
Unit Reset
Unit Installation & Removal
2
Maintenance
Playable discs
DVD, Video CD and CD discs that display the logos shown below can be played back on this unit.
DVD video disc region numbers:
(This unit is for region one only, it will not play other region’s DVD)
If you encounter region problems, please call toll free service number on back page, we will help you resolve if.
DVD Care
If you use an irregular disc it may jam the DVD player or not play, for this reason only use round discs
Be sure to check all discs for cracks and scratches before playing, discs in those conditions will not play properly.
Also, be sure to avoid touching the recorded (plain) side of the disk
Avoid scratching the disc. Store CDs in case when not in use
Keep discs out of direct sunlight (it will cause them to warp and crack)
to clean the CDs, wipe with a soft cloth from the inside of the disc outward
MP3
MP3 files on CD-ROM, CD-R and CD-RW are compatible with this unit.
Discs compatible with ISO9660 level one and two or with ROMEO and JULIET, recorded discs with the multi sections can also be played.
MP3 files are incompatible with the transportation of read-in files.
The max character width of the folder name is 32.If the file is recorded through ROMEO and JULIET system, only the former 32 characters
are displayed. While playing discs with MP3 and CD-DA, such as CD EXTRA and MIXED MODE CD the system can only switch between
MP3 and CD-DA. The selected folder sequence of playing and other operations will be the sequence to write in the software. So the
anticipated sequence of playing should not conflict with the actual playing sequence. However, there is, indeed some software that play
sequence is allowed to be set. The file is compatible with Id3 label version 1.0 and 1.1, so as to display the music titles and authors. The
enhancing function is valid only when playing MP3 in 32, 44.1 and 48 KHz sample frequencies 16,22,05,24, 32, 44.1 KHz can be played.
The tone of MP3s file can usually be bettered when the bit rate is increased. This machine can play recordings between 8KBPS and 320
KBPS. However, in order to enjoy a good tone, we recommend discs over 128KBPS.
!!!!!IMPORTANT!!!!!
While naming an MP3 file, add relevant extending name “.mp3”
This machine will play files with .mp3 as MP3; do not use this extending name on non mp3 files to avoid noises and other problems.
MP4
Due to new DivX version restriction on decoding, this unit will play most of the DivX format but some of the newer version will not.
It can also play most of the .avi files with MPEG 4 codec.
Replacing Remote Control Battery
* When the remote control operation range becomes an issue or none functional at all. Replace the battery
with a new button cell. Make sure to purchase the same size battery.
1. Pull out the
Battery Holder while
pressing the stopper.
2. Put the button-type
battery (+) mark
upward into the
battery holder.
3
3. Insert the Battery
Holder into the
Remote Control.
Remote Control
4
REMOTE CONTROL FUNCTIONS
1. PWR: Power (on/off)
SUB-T/REC: Language subtitle (on/off)
MUTE: Mute enable/disable sound
SRC: To switch between modes
2. BND/RDM: To select different bands (radio mode) To turn on random playing
APS/PRG: Automatic scan/program (radio mode)
ST/RPT: Stereo/Mono switch (radio mode) Repeat on/off
3.
: Play/Pause
: Stop
Setup: For system settings
Title: Title Menu
Enter: Confirm/play
: Directional buttons
4. 0-9, 10+: Number buttons for searching tracks or chapter on CD/DVD’s
GOTO: GOTO search
5. AF/TA/PTY – None functional buttons.
6. N.P/Angle: Video switch/Angle Adjustment
R.L/Language: Left/Right soundtrack switch dialogue language
OSD: On Screen Display
7.
: Skip forward/next chapter/track
: Previous/last chapter/track
: Increase/decrease volume
SEL: System settings
CLK: Clock display button
EQ: Preset sound effects (equalizer)
DI- / DI+: No Function
5
Front Panel
1.
2.
3.
4.
5.
6.
7.
8.
Release Button
Menu Button
Band Select button
Source Button
Four Way Directional button
RPT
Mute Button
USB Port
9.
10.
11.
12.
13.
14.
15.
16.
6
Play/Pause/APS button
CLK/ Button
TFT LCD Screen
Volume Knob
Disc Slot
SD Slot
Reset Button
Eject Button
FRONT PANEL FUNCTIONS
1.
– Front panel release button
2. Menu – System settings
3. Band – To toggle change between FM1/FM2/FM3/AM1/AM2
4. Source/Power – To turn the unit on and toggle between Modes
DVD/CD/Tuner/USB/SD/AUX/Bluetooth modes
5. Four directional buttons – To change setting using up/down/left/right
6. RPT – Repeat on/off
7. Mute– Mute
8. USB Port – For inserting supported USB device
9. APS/
– Reception Scan/Play/Pause
10. CLK/
– Clock display/Stop button
11. TFT LCD Screen – 3” Full touch TFT LCD Screen
12. Volume Knob – For adjusting volume levels
13. Disc Slot – For inserting discs
14. SD/MMC Slot – Memory Card Slot
15. Reset – To reset all setting to factory default
16.
– To eject inserted discs
7
Basic Setup
Powering the unit ON/OFF
- Press the Source/Power button once to turn the unit on. Press and hold to turn off.
Note: When using the remote, just press “PWR” power button once to turn unit on/off.
Switching Modes
- Press the Source/Power Button on the unit repeatedly to cycle through the Modes.
When on the main screen, simply touch the desired icon. (see below)
Main Screen
Video Setting
-
To change settings, press MENU button on the panel or Setup on the remote control.
Scroll down or touch the option you want to change directly on the screen, press
to change settings. Play with these options to get the desired setting. Touch VMODE then
to cycle through preprogrammed video settings.
8
Audio Settings
-
To change settings, press the Menu or Setup on the remote control, then touch “AUDIO”
tab on the screen or press
on the remote. Touch the screen on the desired option, then
press
to change the settings. (Setup between 0-14) Play with these options to
get the desired audio output. For the preset equalizer settings, simply touch EQ then
to cycle through NORM, ROCK, POP and CLAS.
System Mode Settings
-
To change settings, press the Menu on the screen or Setup on the remote control then
touch “System” on the screen or press
twice on the remote. Touch the screen on the
to turn settings on/off. Play with these options to get
desired option then press
the desired setting. To change/set time touch or scroll down to TIME ADJ, then touch the
to adjust time, repeat steps to change minutes.
hour 00:00 section and press
Note: Time is set to military time only, (24hr time mode).
*Background function only on radio mode, which allow you to change/choice from four different color/graphics.
9
Basic Operation
Radio Mode
- Press Power/SRC button on the unit, and then touch the “Radio” icon the screen.
- Band Select: Touch “BAND” to select from FM1, FM2, FM3, AM1 or AM2.
- Manual Tuning: Touch
repeatedly to locate the desired frequency.
- Automatic Tuning: Touch and hold
for 3 seconds to search available frequencies.
- Storing Radio Stations: To store stations to the unit, locate the desired station using
, then press and hold the desired number on the remote control (from 1 to 6).
Unit will beep once set. Repeat steps for the rest of the numbers and Band section.
- Automatic Radio Station Storing: To randomly store available frequencies,
Simply touch and hold the “APS” button for about 2 seconds then release.
*NOTE: This unit can store up to 18 FM Stations (FM1=6, FM2=6, FM3=6) and up to 12 AM Stations (AM1=6 AM2=6).
Music/MP3 CD Mode
-
Inserting a CD: Press the
“Release” to open front panel, then insert a Music or MP3
Disc into the disc slot with label facing up. Then push front panel back into place. Unit should
automatically switch to “DISC” mode. The unit will start playing the first track on the CD.
Track Select: To skip forward or backwards through the tracks simply press
. Or
touch screen and submenu will appear with play control functions. (See Fig. A)
Random Playing: Press “Band/RDM” button once to play track in random order, press
again to turn random off.
Repeat Play: Press “ST/RPT” button to repeat what’s currently playing, press
again to turn off repeat play. For MP3 playing to repeat a whole folder press “RPT” 2x and 3x
to turn off random.
Fig. A
DVD Mode
- Inserting a DVD: Press the
“Release” button to open front panel to insert DVD or VCD
Disc into the disc slot. (Make sure label is facing up), Flip the panel back into place. Unit should
automatically switch to “DVD” mode. The unit will start playing the content of the DVD.
- To skip or find chapters press
on the unit or touch the screen to bring up submenu
controls. (See Fig. A)
- Press ►II to pause and play movie.
- For “Subtitle”. Simply press “SUB-T” on the remote to turn on/off.
- For “Repeat playing” press “RPT” once to repeat “Chapter” (current track), twice for “Title”
(the entire movie), and three times to end repeat play.
10
Basic Operation cont.
USB/SD/MMC Mode
Note: USB PORT is for flash drive only, will not work for IPOD.
- Inserting a USB media device: Remove the protective cover of the USB input, plug in
device into the unit. (Unit will automatically switch to USB mode). If audio files are present,
then the first track will play automatically. To view pictures press the ► right arrow on the
remote then ◄ left until the
is highlighted on the bottom of the screen, then press “Enter”
then press
up arrow and then “Enter” to play the first file. For playing Videos repeat above
on the bottom of the screen.
steps but highlight
- Inserting SD/MMC memory card: Remove front panel (see page 6). Then insert the memory
into the slot all the way in until the unit grabs the card, reinstall front panel back into the unit.
Turn unit back on, and select the SD mode from the main menu.
When removing memory card, first removed the panel, then lightly/quickly push the memory card in to eject
the card, then pull card out to remove.
*Note: Random play is only available on pictures and audio files. Repeat play is available on all.
AUX MODE (INPUT)
- To use “AUX” (auxiliary) mode: Plug RCA audio/video cables into the “AUX input” on
the back of the unit to your device. Press the SOURCE button repeatedly to select
Auxiliary mode or go to the main screen and press “Input” icon.
*Note: You can only control your device functions through the inserted device.
11
Trouble Shooting
Problem
Will not turn on.
Remote control not
functional.
DVD/CD will not play,
or play properly.
Reason/Cause
Conclusion/Solution
Incorrect wiring connections.
Insufficient battery power.
Remote sensor blocked.
Check all wires are properly connected.
Please refer to the wiring diagram
Replace battery. (page 3)/ Make sure there is
nothing blocking the remote control sensor.
Disk is dirty or scratched.
Disc isn’t compatible with unit.
Content of the disc is not
supported.
Check and make sure the disc is
inserted properly.
Disc content is not supported.
Clean the disc with a soft cloth.
Check disc compatibility. (see page 3)
Try another disc that is compatible.
No Sound/Volume or
will not increase.
Incorrect wiring connection.
Unit is on mute, playing frame by
frame, fast forwarding or
rewinding is turned on.
Check all the speaker wires are connected
properly with the unit and the speakers
themselves.
Un-Mute the unit.
LCD does not display
picture, or say “picture
off for safety.” on
screen.
“PARK” wire is not connected
properly to the hand brake wiring.
Car is moving. Parking brake is not
applied. (“Picture off for safety”);
wiring not properly connected
Pictures will only appear when parking brake is
applied for safety. Check wiring and make sure
everything is properly connected. Consult a
professional installer, Make sure “ PARK” wire
is properly connected to the park brake or
ground. (see page 1 )
Certain speaker will
not output sound.
Fader/Balance settings activated.
Speaker(s) might be damage.
Make sure all the connections linking the
speakers are properly connected.
Make sure all the speakers work properly.
When the unit powers
on, there is a loud
noise.
USB flash drive or SD
card will not read.
The unit is reading inserted disc.
The disc drive is resetting to its
normal position.
Loose or dirty connection.
Or no connecting properly
Some DVD movies will
not play. Displaying
message on the
screen.
Over capacity or not compatible
No subtitle.
Subtitle in the wrong
language.
Videos/Pictures are
obscure or blurred.
Does not play Music
files.
MP4 video will not
play.
Can’t set “BASS” or
“TREBLE” on set up
Subtitle not activated. / DVD
movie does not have subtitle in
the desired language.
Video/picture resolutions are low.
Files are not supported.
Require compatible MP4
format/codec.
“EQ” is not on “ NORM”
12
Eject disc and make sure it is properly
inserted (label facing up).
Make sure the DVD is Region 1. This unit
ONLY plays Region 1 DVD’s.
Normal function.
Check/clean connections.
Make sure the USB flash/SD card drive is
securely inserted into USB/SD port.
Unit can only read up to 2- 4GB, depending
on the size of the date
Press “SUB-T” on the remote to switch on.
Make sure DVD movie has subtitle with the
desired language.
Make sure the videos/pictures have the
appropriate resolution for a 3” screen.
Check that the files are supported.
(see page 3)
Make sure the files are converted correctly.
See page 3 (MP4).
When “EQ” is on other then “ NORM” no set
up can be change, set “EQ” to “ NORMAL”
Specifications
General
-
Power Requirements …........ 12 V DC
Load Impedance …………..……. 4Ω-8Ω
Tone Control …………………….… ±8dB (Bass 100Hz, Treble 10KHz)
Dimensions ……………………….… Approx. 7.36”D x 6.69”W x 2”H
Mounting Dimensions …....... 7.50”D x 6.75”W x 2.25”H
Weight …………………….………..…. 4.25lbs
DVD Deck Section
-
Disc Play ……………………..…….…. MP4, DVD, VCD 1.0/1.1/2.0/3.0, MP3, CD, CD-R, CD-RW, PICTURE-CD
Video System ……………..…….…. Auto/NTSC/AUTO
Mounting Angle ……………………. 0° to +/- 30°
Video Section
-
Video System ………………..….. 16:9 Wide screen
Video Output Level …….……... 1.0Vp-p 75 ohms
Horizontal Resolution ……….... 500 lines
Audio Section
-
Maximum Output Level …….... 2Vrms (+/-3dB)
Frequency Response ……….….. 20 to 20KHz
Signal-to-Noise Ratio ……….…. 85dB
Separation ……………….………….. 80dB
AM Tuner Section
-
Frequency Range …………………. 530-1710 (USA)
IF Range …………………….……..... 450 KHz
Usable Sensitivity (-20dB) ….. 25dB
FM Tuner Section
-
Tuning Range ………………………… 87.5 – 107.9
IF Range ……………………………….. 10.7 MHz
Usable Sensitivity (-30dB) ……. 15dB
Signal-to-Noise Ratio ……………. 60dB
Stereo Separation …………………. 30dB (1KHz)
Frequency Response …………….. 30~15000Hz
13
Accessories
Faceplate Frame
Dash Insert Casing
Push Pin
Wiring Harness
Faceplate Caddy
Screws
Extractors
Remote Control
Manual
Wiring Diagram
14


