1
Message repeater specifics:
1- Select the channel you will be using before applying power.
User Guide to R100B Looped Repeater
2- Place antenna for best height and coverage. Standard CATV coax can
be used to extend the antenna placement from the transmitter box.
3-To change programming, press the CD tray button to open the drawer.
Load a standard audio CD and close the tray.
Playback will begin automatically.
4- For best results, avoid using a cd that has
a short recording.
If your message is only a few minutes long, record
multiple copies on a single disks so that the total length is
about 40 mins or more. Longer lengths of cd insure best
exercising of internal components for years of useful
service.
R100B
CD Repeater Infocaster
Installation and User information
Landmark Audio Technology
FCC-ID
FM350 R100
TEL:
518-426-0171
Setting up your antenna for best results. Situation A - MAXIMUM coverage
1- Set up the antenna as HIGH as possible. If you live in a two story house, place
the flat twin-lead Dipole in a window box, pinned vertically using push pins, so
that as musch as possible of the “T” shaped radiator is in front of glass.
2- If using the simple whip antenna, arrange the wire so it is as vertical as possible,
using tape or a push pin to hold it in as straight and vertical as you can.
See the picture below for how to pin the dipole in an inside window frame. BE sure
to keep the first 18” to 2 feet of the feedline section at a clean right angle to the
main direction of the “T” radiator as shown.
3- Remember that the body of a building blocks FM signals whcih are line-of-sight,
so an unobstructed “view” from the antenna is key to good coverage.
Before going on the air - The most important step is choosing your channel.
Operating without a license still obligates you to refrain from causing interference.
And to do that - you must transmit on a frequency that is not in use locally.
Unless you live in a very remote part of the continental US, you will want to conduct a
personal frequency search. Using a good quality DIGITALLY tuned FM receiver, start
listening near the TOP of the FM band ( 107.1 Mhz is a good starting point for our USA
models ) You want to check each frequency while tuning slowly DOWN the band
looking for, ideally, 5 or more unused frequencies, or very weak channels between two
strong strong stations.
(If your FM tuner works in .1 mhz step - please understand that ONLY channels ending in
.1 .3.5.7 and .9 are standard assigned frequencies, sure to found on ALL possible FM
radio receivers) . If you are really lucky, you can find a bigger gap than the one we
suggest. Conversely, if you are in a major metropolitan area, you may have to settle for a
gap of just 3 stations. You want to be as much as possible, positioned in the CENTER of
stations on either side of your chosen frequency.
Once you find a good channel, you usually never have to change it.
It is important that your make sure you are not going to set your transmitter to a channel
that is already in use, since this can cause interference to other listeners within range.
In spite of the Part 15 license free status of the R100B , you are still bound by
numerous aspects of Federal Communications law. The most important is to not
knowingly cause interference, and to cease transmission promptly if notified, should
you be inadvertantly causing a problem with your transmission. And it's also the
courteous way to share FM spectrum. You should also be aware that it is a Federal
offense to adopt a call sign that was not issued to you by the FCC.
Are some channels better than others? YES most definitely. And the rule is this:
Rule 1. HIGHER frequencies are almost ALWAYS better.
Rule 2. Using MONO transmission increases range , and improves the receiver
signal-to- noise ratio as a bonus.
Applying RF shield blocks. You will find several clamshell style RF blocks,
supplied to prevent RF from travelling on the skin of the audio input lines and
causing distortion or buzzing sounds. The best way to apply them is as shown
with a full loop going though the block before closing. Two are supplied in the
event you are using two unbonded cables .
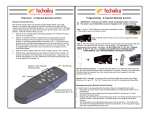
Remember that you can open the tray to stop playback and then feed LIVE sound via the audio jack on the rear
panel of the unit
The FM R100B's outstanding ability to tune every standard FM channel gives you all
the choice you need!
Where should I set up my R100B? Your antenna can be anywhere within about 100 to
200 feet of the receivers you want to reach, depending on the sensitivity of the radio
receiver. A "boombox" needs to be closer - a modern digital receiver can be much farther
away and still get an excellent clean signal. In situations where you want to cover a
bigger area, you can attach standard 75 ohm CATV coaxial cable and then place the actual
antenna at the area you want to cover. In general for best coverage, the antenna should be
at the center of the coverage area, as high above ground , and away from metal or
concrete walls, as is reasonably possible.
If you need greater coverage for professional applications involving public listening
assistance, governmental/institutional information broadcast , or temporary concert/event
use, consider the FM 350-P/W models. These can produce enough power , when used
with our 75 ohm "On Channel" antennas, to cover areas of from 1 to 15 Square Miles.
A special tip: For best coverage, straighten the antenna wire and align
so that the wire is vertical.
Opening the case to change channel and adjust volume: Remember that all settings are viewed from the REAR of the unit - looking toward the front.
Channel selection and any needed volume adjustment is done by removing the top cover. FIRST UNPLUG THE UNIT. Do not handle the unit or
remove the covers while it is plugged int to AC.
Open the case: Place the unit on a flat surface with the CD tray pointing toward you. Then side panels slide forward, and then can be removed. next
simply lift off the top cover.. Note that there is a legend that indicates the FRONT of each slide lock panel.
It is important that you match the orientation of the panels exactly when closign the cover after adjustment.
Now turn the unit 180 degrees so that you are now looking at it from the back as shown in the picture. The two blue screw adjustments are the left and
right volume, and the two black switches are the channel selector. Choose a channel and mode from the frequency table and set it while the unit is
turned off.
NOTE that all units leave the factory set on HEX 37 - which is the code for 99.1mHz Stereo .
The modulation ( volume ) adjustments are normally ideal at 11 o’clock but may need to be turned clockwise for quiet recordings and turned down a bit if you
recording has been highly processed by a recording studio.
A copy of the frequency look up table is on the next page - and also inside the unit on a bold metallic sticker.
Please do not plug in the transmitter until you have preset the channel
Setting Modulation
you intend to use! First look up the channel code for the the channel you want to
use, using the transmitter frequency table below.
There are a pair of volume controls for adjusting modulation.
There are two different codes for every FM channel, depending on whether or
For most channel settings and audio sources, the 12 o’clock or 50% setting
not you want stereo or mono operation. Remember - mono carries farther. The
is the right place to start. This is checked at the factory. However there is a
numbers in the table each corrrespond to FM US channels. To set your channel, slight variation in volume sensitivity that is based on the frequency you
find the frequency and decide if you want stereo or mono operation. Using the
transmit on. When using channels at the low end of the band ( appx 88.1 to
supplied 2.4 MM ( or a .1” blade) screwdriver, rotate the code switches to the
94. Mhz) you may want to increase the volume to as high as perhaps the 2
two digit HEX code for that frequency. Every transmitter leaves the factory set
o’clock position for consistent loudness and quality sound. And likewise - on
to 99.1 Mhz which is code number 37 in the chart. Here is a close up of the
the higher channels , above 103 Mhz or so - you may want to slightly
channel switches showing setting #37, as an example. Unused or invalid code
reduce the volume settings, to say 10 or 11 o’clock. Because of the superior
settings set the frequencies indicated at the end of the last column .
clarity and frequency response of the transmitter, you do not need to compete with commercial broadcasters for sheer volume, and since you do not
have the audio compression and other loudness enhancing tricks they do,
Landmark FM Codes • F = Frequency S = Stereo M = Mono
you should avoid trying to sound TOO loud , as this can cause over modulaF• S• M
F • S • MF • S • M F • S • M
tion, distortion and interference. The easy way to tell if your modulation is
88.1 00 80
98.5 34 B4
93.3 1A 9A
103.7 4E CE
88.3 01 81
98.7 35 B5
93.5 1B 9B
103.9 4F CF
too high is to watch out for “splashy” or over-emphasized “S” sounds and
88.5 02 82
98.9 36 B6
93.7 1C 9C
104.1 50 D0
88.7 03 83
99.1 37 B7
93.9 1D 9D
104.3 51 D1
sounds of distorted audio on volume peaks. A great way to zero in on
88.9 04 84
99.3 38 B8
94.1 1E 9E
104.5 52 D2
89.1 05 85
99.5 39 B9
94.3 1F 9F
104.7 53 D3
perfect modulation is to compare loudness with a prominent commercial
89.3 06 86
99.7 3A BA
94.5 20 A0
104.9 54 D4
89.5 07 87
99.9 3B BB
94.7 21 A1
105.1 55 D5
broadcaster, and then set your modulation ( transmitter volume ) to be
89.7 08 88
100.1 3C BC 105.3 56 D6
94.9 22 A2
89.9 09 89
100.3 3D BD
95.1 23 A3
105.5 57 D7
quieter.
90.1 0A 8A
100.5 3E BE 105.7 58 D8
95.3 24 A4
90.3
90.5
90.7
90.9
91.1
91.3
91.5
91.7
91.9
92.1
92.3
92.5
92.7
92.9
93.1
0B
0C
0D
0E
0F
10
11
12
13
14
15
16
17
18
19
8B
8C
8D
8E
8F
90
91
92
93
94
95
96
97
98
99
95.5
95.7
95.9
96.1
96.3
96.5
96.7
96.9
97.1
97.3
97.5
97.7
97.9
98.1
98.3
25
26
27
28
29
2A
2B
2C
2D
2E
2F
30
31
32
33
A5
A6
A7
A8
A9
AA
AB
AC
AD
AE
AF
B0
B1
B2
B3
100.7
100.9
101.1
101.3
101.5
101.7
101.9
102.1
102.3
102.5
102.7
102.9
103.1
103.3
103.5
3F
40
41
42
43
44
45
46
47
48
49
4A
4B
4C
4D
BF
C0
C1
C2
C3
C4
C5
C6
C7
C8
C9
CA
CB
CC
CD
105.9 59 D9
106.1 5A DA
106.3 5B DB
106.5 5C DC
106.7 5D DD
106.9 5E DE
107.1 5F DF
107.3 60 E0
107.5 61 E1
107.7 62 E2
107.9 63 E3
107.9 64-6F E4-EF
88.1 70-7F F0-FF
Notice that the codes are Hexadecimal, meaning they use
combinations of numbers and the letters A -F.
While your transmitter performs well on all channels, each unit is factory
adjusted for peak modulation quality for the range of 95 to 105 Mhz. On
advice from the factory, any unit can be field adjusted to further surpass FM
broacast sonic standards for ANY channel that you choose from 92 mHz
and above. NOTE that teh standard R100 repeater protects Public radio
. Contact the factory if you require a unit capable
allocations below 92 mHz
of 88 to 92 mhz operation
You can adjust modulation using the volume controls in individual Windows
player applications, and over time, experience with the sources you are
broadasting will be your best guide to learning the best setting for master
volume.