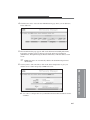
1
KODAK Image Station 4000R
User’s Guide
IB5426004 04/07
© Carestream Health, Inc., 2005-2007. All rights are reserved. No section of this manual may be photocopied, reproduced, translated to another language, stored in a retrieval system, or transmitted in any form
without the prior written consent of Carestream Health, Inc.
The information contained in this manual is subject to change without notice.Carestream Health, Inc.
makes no warranty of any kind with regard to this written material. Carestream Health, Inc. assumes no
responsibility for any errors that may appear in this document.
Apple, FireWire, and Macintosh are registered trademark of Apple Computer, Incorporated.
Coomassie is a registered trademark of Imperial Chemical Industries, Limited.
Count Off is a trademark of PerkinElmer Life Sciences, Incorporated.
Formula 409 is a registered trademark of Clorox Company.
Goo Gone is a trademark of Magic American Company.
IEEE 1394 is a trademark of The Institute of Electrical and Electronics Engineers Standards Association.
Kodak is a trademark of Kodak used under license.
X-OMAT, and BioMax are trademarks of Carestream Health, Inc.
SYPRO and SYBR are trademarks of Molecular Probes, Incorporated.
Windows, Windows 2000, and Windows XP are registered trademarks of Microsoft Corporation.
All other products or name brands are trademarks of their respective holders.
rad PADD patent number 6,346,707 Issued 2/12/2002.
For laboratory research use only. Not suitable for human or animal diagnostic or therapeutic use.
Table of Contents
Table of Contents
Introduction . . . . . . . . . . . . . . . . . . . . . . . . . . . . . . . . . . . . . . . . 1-1
About the User’s Guide . . . . . . . . . . . . . . . . . . . . . . . . . . . . . . . . . . . . . . . . . . . . . . 1-2
Navigating through the User’s Guide . . . . . . . . . . . . . . . . . . . . . . . . . . . . . . . . . . . 1-3
What’s in the IS4000R Package . . . . . . . . . . . . . . . . . . . . . . . . . . . . . . . . . . . . . . . 1-4
System Requirements . . . . . . . . . . . . . . . . . . . . . . . . . . . . . . . . . . . . . . . . . . . . . . . 1-5
Registering the IS4000R System . . . . . . . . . . . . . . . . . . . . . . . . . . . . . . . . . . . . . . . 1-6
Obtaining Technical Support. . . . . . . . . . . . . . . . . . . . . . . . . . . . . . . . . . . . . . . . . . 1-7
Hardware Overview . . . . . . . . . . . . . . . . . . . . . . . . . . . . . . . . . . 2-1
Front View of the IS4000R . . . . . . . . . . . . . . . . . . . . . . . . . . . . . . . . . . . . . . . . . . . 2-2
Rear View of the IS4000R . . . . . . . . . . . . . . . . . . . . . . . . . . . . . . . . . . . . . . . . . . . . 2-3
Sample Work Area . . . . . . . . . . . . . . . . . . . . . . . . . . . . . . . . . . . . . . . . . . . . . . . . . 2-4
Closed Optical Path Image (COPI) Chamber . . . . . . . . . . . . . . . . . . . . . . . . . . . . . 2-7
IS4000R Capture System Chamber . . . . . . . . . . . . . . . . . . . . . . . . . . . . . . . . . . . . 2-10
The KODAK rad PADD (Optional Accessory) . . . . . . . . . . . . . . . . . . . . . . . . . . 2-13
Software Overview . . . . . . . . . . . . . . . . . . . . . . . . . . . . . . . . . . . 3-1
IS4000R Acquire Window. . . . . . . . . . . . . . . . . . . . . . . . . . . . . . . . . . . . . . . . . . . . 3-4
Preview Window . . . . . . . . . . . . . . . . . . . . . . . . . . . . . . . . . . . . . . . . . . . . . . . . . . 3-18
Capture Status Windows . . . . . . . . . . . . . . . . . . . . . . . . . . . . . . . . . . . . . . . . . . . . 3-19
Preferences Window . . . . . . . . . . . . . . . . . . . . . . . . . . . . . . . . . . . . . . . . . . . . . . . 3-29
Setting Up for Capture . . . . . . . . . . . . . . . . . . . . . . . . . . . . . . . . 4-1
Sample Illumination/Detection Guidelines . . . . . . . . . . . . . . . . . . . . . . . . . . . . . . . 4-1
Preparing the IS4000R for Imaging . . . . . . . . . . . . . . . . . . . . . . . . . . . . . . . . . . . . . 4-5
Launching the Software. . . . . . . . . . . . . . . . . . . . . . . . . . . . . . . . . . . . . . . . . . . . . . 4-6
Orienting the Sample for Capture . . . . . . . . . . . . . . . . . . . . . . . . . . . . . . . . . . . . . . 4-8
Previewing the Image . . . . . . . . . . . . . . . . . . . . . . . . . . . . . . . . . . . . . . . . . . . . . . 4-10
Choosing the Filter and Illumination Conditions . . . . . . . . . . . . . . . . . . . . . . . . . 4-12
i
Setting the f-Stop . . . . . . . . . . . . . . . . . . . . . . . . . . . . . . . . . . . . . . . . . . . . . . . . . . 4-16
Image Capture Guidelines Summary. . . . . . . . . . . . . . . . . . . . . . . . . . . . . . . . . . . 4-17
Using the Focus Tool. . . . . . . . . . . . . . . . . . . . . . . . . . . . . . . . . . . . . . . . . . . . . . . 4-18
Capturing Images . . . . . . . . . . . . . . . . . . . . . . . . . . . . . . . . . . . . 5-1
Using the Standard Exposure Option . . . . . . . . . . . . . . . . . . . . . . . . . . . . . . . . . . . 5-2
Using the Time Lapse Exposure Option . . . . . . . . . . . . . . . . . . . . . . . . . . . . . . . . . 5-8
Using the Progressive Exposure Option . . . . . . . . . . . . . . . . . . . . . . . . . . . . . . . . 5-13
Using the rad PADD Exposure Option . . . . . . . . . . . . . . . . . . . . . . . . . . . . . . . . . 5-18
Applying an Automatic Illumination Reference File . . . . . . . . . . . . . . . . . . . . . . 5-23
Generating an Illumination Reference File Library . . . . . . . . . . . . . . . . . . . . . . . 5-24
Custom Capture Settings . . . . . . . . . . . . . . . . . . . . . . . . . . . . . . . . . . . . . . . . . . . . 5-26
Maintaining the System . . . . . . . . . . . . . . . . . . . . . . . . . . . . . . . 6-1
Regular Maintenance . . . . . . . . . . . . . . . . . . . . . . . . . . . . . . . . . . . . . . . . . . . . . . . . 6-2
Replacing or Changing an Emission Filter . . . . . . . . . . . . . . . . . . . . . . . . . . . . . . . 6-3
rad PADD Care and Maintenance . . . . . . . . . . . . . . . . . . . . . . . . . . . . . . . . . . . . . . 6-6
Transilluminator Lid Bulb Replacement . . . . . . . . . . . . . . . . . . . . . . . . . . . . . . . . . 6-7
Troubleshooting the System . . . . . . . . . . . . . . . . . . . . . . . . . . . 7-1
Obtaining Technical Support . . . . . . . . . . . . . . . . . . . . . . . . . . . . . . . . . . . . . . . . . . 7-2
Common Instrument Questions. . . . . . . . . . . . . . . . . . . . . . . . . . . . . . . . . . . . . . . . 7-3
Common Image Questions . . . . . . . . . . . . . . . . . . . . . . . . . . . . . . . . . . . . . . . . . . . 7-4
Common Software Questions . . . . . . . . . . . . . . . . . . . . . . . . . . . . . . . . . . . . . . . . . 7-7
Installing the System . . . . . . . . . . . . . . . . . . . . . . . . . . . . . . . . . 8-1
Environmental Requirements . . . . . . . . . . . . . . . . . . . . . . . . . . . . . . . . . . . . . . . . . 8-2
Electrical Requirements. . . . . . . . . . . . . . . . . . . . . . . . . . . . . . . . . . . . . . . . . . . . . . 8-2
Space Requirements . . . . . . . . . . . . . . . . . . . . . . . . . . . . . . . . . . . . . . . . . . . . . . . . 8-2
Installing the IS4000R . . . . . . . . . . . . . . . . . . . . . . . . . . . . . . . . . . . . . . . . . . . . . . . 8-3
Installing the KODAK Image Station Transilluminator Lid (Optional Accessory) . 8-4
Installing KODAK Software–Windows . . . . . . . . . . . . . . . . . . . . . . . . . . . . . . . . . 8-8
Installing KODAK Software–Macintosh . . . . . . . . . . . . . . . . . . . . . . . . . . . . . . . 8-14
Launching KODAK Molecular Imaging Software for the First Time . . . . . . . . . 8-23
Repackaging or Moving the IS4000 . . . . . . . . . . . . . . . . . . . . . . . . . . . . . . . . . . . 8-30
ii
Warranty & Regulatory Information . . . . . . . . . . . . . . . . . . . . . . 9-1
IS4000R Limited Warranty . . . . . . . . . . . . . . . . . . . . . . . . . . . . . . . . . . . . . . . . . . . 9-2
Table of Contents
Software License Agreement . . . . . . . . . . . . . . . . . . . . . . . . . . . . . . . . . . . . . . . . . 9-6
Regulatory Information . . . . . . . . . . . . . . . . . . . . . . . . . . . . . . . . . . . . . . . . . . . . . . 9-9
Appendix A: Digital Imaging Concepts . . . . . . . . . . . . . . . . . . . A-1
Appendix B: UV Epi-Illumination . . . . . . . . . . . . . . . . . . . . . . . . B-1
Appendix C: Image Correction. . . . . . . . . . . . . . . . . . . . . . . . . . C-1
Glossary . . . . . . . . . . . . . . . . . . . . . . . . . . . . . . . . . . . . . . . . . . . G-1
iii
iv
Introduction
Thank you for purchasing the KODAK Image Station 4000R (IS4000R) system. We know
you will be pleased with this multi-purpose system for imaging of chemiluminescence,
radioactive, fluorescence, and chromogenic gels and blots. The IS4000R is as sensitive as
autoradiography films for most chemiluminescent blots and detects fluorescent signals at
picomole to femtomole levels. In addition, when used with the patented rad PADD
(radioisotopic phosphor assisted detection device), you can capture high energy betaemitting radioisotopes such as 32P.
The affordable system combines a thermoelectrically cooled charged-coupled device
(CCD) camera, an innovative closed optical path image (COPI) style chamber, and the
powerful KODAK Molecular Imaging Software (KODAK MI) to provide a sensitive and
quantitative benchtop imaging solution for your laboratory.
1
Introduction
The cooled CCD camera, combined with the 10X zoom lens, captures true 16-bit images
that can be accumulated to 32-bit files at a pixel density of 2048 x 2048. This generates an
image with a resolution of 10 microns/pixel at full zoom. The COPI chamber provides a
light-tight environment, so there is no need to use a darkroom. The IS4000R Acquire
window, within KODAK MI, accumulates and displays multiple image captures so you
can view and optimize the quality of your image.
The KODAK Transilluminator Lid Accessory provides built-in UV transillumination that
is ideal for imaging fluorescent samples like ethidium bromide stained gels. The White
Light PADD (Phosphor Assisted Detection Device) can be placed over the
transilluminator to convert UV light to white light and is an excellent way to image
Coomassie gels or for densitometry of films. The transilluminator lid is easily installed by
replacing your standard IS4000R lid.
.
1-1
About the User’s Guide
The KODAK Image Station 4000R User’s Guide provides you with all of the information
you need to capture images. It is designed to be used in conjunction with the KODAK
Molecular Imaging Software User’s Guide and manuals you received with your computer.
If you are like most users, you will want to get started right away; but before you do, you
need to have basic computer skills. Refer to your computer manual to become familiar
with the basic operation of you computer.
Conventions
This User’s Guide uses the following conventions:
✔ Windows and dialog boxes are displayed as they appear in Windows XP. They may
appear differently on your screen depending your computer’s operating system.
✔ Menu commands, tool names, and window names are capitalized.
✔ Tips, examples, and notes appear in the text as follows:
☞
NOTE: Molecular Imaging Systems provides maximum performance products.
✔ Important safety warnings appear in the text as follows:
WARNING: This symbol is used in the User’s Guide to designate a warning or
caution statement.
WARNING: This symbol is used in the User’s Guide to designate where electrical
shock is possible.
WARNING: This symbol is used in the User’s Guide to designate when there is a
potential exposure to hazardous ultraviolet light.
WARNING: This symbol is used on the instrument to indicate protective earth.
1-2
Navigating through the User’s Guide
The KODAK IS4000R User’s Guide is divided into the chapters listed below. In each
chapter, you will find helpful hints and troubleshooting information.
✔ Chapter 1: Introduction provides you with information on what’s in your package,
how to navigate through this User’s Guide, and how to obtain technical support.
✔ Chapter 2: Hardware Overview details the instrument hardware related to the
IS4000R.
✔ Chapter 3: Software Overview reviews the main windows specific to IS4000R
image capture.
✔ Chapter 4: Setting Up for Capture describes the steps necessary to set up your
sample and system for imaging.
1
✔ Chapter 5: Capturing Images walks you, step-by-step, through the process of
Introduction
capturing images using standard, time lapse, progressive and rad PADD exposures.
✔ Chapter 6: Maintaining the System provides guidelines for the care and
maintenance of your system.
✔ Chapter 7: Troubleshooting the System provides an outline for solving problems
you may encounter.
✔ Chapter 8: Installing the System describes the installation process of your IS4000R.
✔ Chapter 9: Warranty & Regulatory Information provides detailed information on
the IS4000R warranty, software licenses, and regulatory information.
✔ Appendix A: Digital Imaging Concepts discusses the basics of resolution and
image histograms, and how they apply to the IS4000R.
✔ Appendix B: UV Epi-Illumination describes the specifications of the epiillumination used in the IS4000R.
✔ Appendix C: Image Correction reviews the details of CCD, lens, and illumination
corrections relating to the IS4000R.
✔ Glossary defines terms that are used in the User’s Guide.
1-3
What’s in the IS4000R Package
Prior to using your new system, please take a moment to ensure that all necessary parts
have been received. If the system you ordered includes a computer, the computer may be
shipped separately.
KODAK IS4000R Chamber and Capture System (1)
✔ Image Station 4000R instrument (1)
✔ Compression Pad, located inside the instrument lid (1)
✔ 120 Volt Power Cord (1) and/or 230 Volt Power Cords (2)
✔ IEEE 1394 (FireWire) Camera/Computer Interface Cable (1)
✔ Light Diffuser (1)
✔ Camera Calibration CD (1)
✔ Quick Reference Guide (1)
✔ User’s Guide (1)
✔ Registration Form (1)
✔ 600 nm WB Em Filter (Ethidium Bromide) (1)
✔ rad PADD (Optional Accessory) (1)
✔ Image Station Transilluminator Lid Accessory (Optional Accessory) (1)
KODAK Molecular Imaging Software
✔ Molecular Imaging Software 3 User Package (1)
- Molecular Imaging Software CD (1)
- User Registration Card (1)
- Molecular Imaging Software User’s Guide (3)
- Copy Protection Device (3)
(or)
✔ Molecular Imaging Software Network Edition (Custom Package)
- Molecular Imaging Software Network Edition CD (1)
- Molecular Imaging Software Network Edition Administrator’s Manual (1)
- Molecular Imaging Software User’s Guides (3)
1-4
System Requirements
These are minimum specifications required, however, we cannot ensure that all hardware
and software systems are compatible. For optimal performance, we strongly suggest
dedicating a computer exclusively for use with IS4000R and that the IS4000R be the only
device on the IEEE 1394 (FireWire) bus.
Minimum System Requirements—Windows
✔ Personal computer with an IEEE 1394 (FireWire) and a USB port
✔ Pentium IV (or equivalent) processor greater than 1 GHz, greater than 2 GHz
recommended
✔ Windows 2000 (Service Pack 4 or greater) or Windows XP (Service Pack 2 or
1
greater) operating system software
Introduction
Check your operating system version by right-clicking on the My
☞ NOTE:
Computer icon and then on Properties
✔ 17 in. display—1280 x 1024 resolution
✔ Minimum 1 GB of available RAM, 2 GB recommended
✔ Minimum 10 GB of available hard disk space
✔ CD drive, CD-RW drive recommended
Minimum System Requirements—Macintosh
✔ Macintosh Power PC G4 processor or better
✔ Personal computer with an IEEE 1394 (FireWire) and a USB port
✔ Mac OS 10.3.8 or greater
Check your operating system version by selecting About this Mac
☞ NOTE:
under the Apple menu item.
✔ 17 in. display—1280 x 1024 resolution
✔ Minimum 1 GB of available RAM, 2 GB recommended
✔ Minimum of 10 GB of available hard disk space
✔ CD drive, CD-RW drive recommended
1-5
Registering the IS4000R System
To be eligible for maintenance releases, upgrade programs, and to receive new product
information, you must register your system by completing and returning the enclosed
registration cards. For best product support, please take the time to complete and return the
enclosed cards.
1-6
Obtaining Technical Support
For technical support, contact Technical Support or your Molecular Imaging Systems
dealer. For up to date dealer information, visit our WEB site at
www.carestreamhealth.com/go/molecular. When contacting technical support, please have
the following information available:
✔ The serial number of your IS4000R system located on the back of the unit and the
camera serial number located on the camera.
✔ The serial number and version number of your KODAK MI software.
With KODAK MI running, select About KODAK MI under the Help
☞ NOTE:
menu (Windows) or select About KODAK MI under the Apple menu item
(Macintosh).
1
Introduction
✔ The type of computer you are using (make, model).
✔ Operating system software version.
Check your operating system version by right-clicking on the My
☞ NOTE:
Computer icon and then on Properties (Windows) or select About This Mac
under the Apple menu item (Macintosh).
✔ The type of image you are capturing or analyzing.
✔ The problem you are having and what you were doing when the problem occurred.
Please note the exact wording of any error messages, including any error numbers
displayed.
Molecular Imaging Systems Technical Support
Contact Molecular Imaging Systems Technical Support by:
✔ Utilizing our World Wide Web support pages at:
http://www.carestreamhealth.com/go/molecular
✔ Calling Molecular Imaging Systems Technical Support at:
877-747-4357 or 203-786-5657, between the hours of 8:00 a.m. and 6:00 p.m.
(Eastern Standard Time) Monday through Friday
✔ E-mailing Molecular Imaging Systems Technical Support at:
[email protected]
✔ Faxing Molecular Imaging Systems Technical Support at:
203-786-5656
1-7
1-8
Hardware Overview
This section provides an overview of the KODAK Image Station 4000R (IS4000R) system.
You will review the principles of operation and get a better understanding of the critical
components—the Sample Work Area, the closed optical path image (COPI) chamber
which also contains the UV illumination source, and the capture system.
2
Hardware Overview
2-1
Front View of the IS4000R
A
B
C
D
E
F
A The Lid accesses the Sample Work Area and provides a light-tight environment for imaging and capturing fluorescent, luminescent, or radioactive
images.
B The Sample Work Area is a water-tight surface with overall dimensions of 52 x
33 cm.
C The Platen is the imaging window that accommodates samples up to 20 x 20
cm.
D The Fan ensures the heat from the radiator dissipates. The Radiator dissipates
heat from the thermoelectric cooler.
E The Capture System Chamber includes the four position Filter Wheel, a 10X
zoom lens, and a cooled CCD camera.
F The Closed Optical Path Image (COPI) Chamber isolates the optical path
from the outside environment. It contains the 45° high efficiency mirrors
which directs the light from the sample to the camera lens. The internal UV
light sources are also contained in the COPI chamber.
2-2
Rear View of the IS4000R
A
B
C
C
D
A The IEEE 1394 (FireWire) Camera Cable Connector (not shown) couples the
camera in the IS4000R to the computer with a special Camera/Computer Interface Cable.
WARNING: Use only the provided IEEE 1394 (FireWire) Camera/
Computer Cable to attach the IS4000R to your computer.
WARNING: Be sure to orient the IEEE 1394 (FireWire) Camera/
Computer Cable properly with the narrow end pointing down to avoid
damage to the circuitry and voiding the warranty.
2
Hardware Overview
WARNING: We recommend connecting the IS4000R as the only device on
the IEEE 1394 (FireWire) bus.
B The BNC Connector on the supervisor cover is designed for future accessories.
C The Power Cord Connector is the receptacle for the power cord which provides electricity needed to power the instrument.
If the optional Image Station Transilluminator Lid Accessory is used,
☞ NOTE:
the power outlet on the main chassis is connected to the lid and the lid is
connected to the wall outlet.
D The Circuit Breaker protects the unit in the unlikely event that there is an electrical short circuit.
E RS232 Serial Ports provide output for future accessories.
2-3
Sample Work Area
The Sample Work Area is made up of two main components—the Lid and the Platen. Let's
review their features.
Standard Lid
The Standard Lid design provides easy access to the Sample Work Area for positioning a
sample in Preview Mode. When closed, the lid creates a light-tight environment for
capturing fluorescent, radioisotopic, or luminescent images. When opened, external room
light (with the Light Diffuser) provides even white light transillumination.
A
B
C
D
A The Clasp secures the closed lid to produce a light-tight environment.
B The Clip holds the Compression Pad in the correct position.
C The Compression Pad is a double-sided pad (black side and a white side) with
a foam interior. The Compression Pad acts as a good background for imaging
and holds thin samples flat and in place when the lid is closed. It can be easily
removed to accommodate thicker samples.
D The Gasket surrounding the lid to ensure a light-tight seal for the Sample
Work Area.
2-4
KODAK Image Station Transilluminator Lid Accessory (Optional)
The KODAK Image Station Transilluminator Lid Accessory provides built-in broadband
UV transillumination and is ideal for imaging fluorescent samples like ethidium bromide
stained gels. The White Light PADD (Phosphor Assisted Detection Device) can be placed
over the transilluminator to convert UV light to white light and is an excellent way to
image Coomassie gels or for densitometry of films. The transilluminator lid is easily
installed by replacing your standard IS4000R lid.
A
B
B
C
B
A The UV Switch powers the UV transilluminator only when the lid is closed
and locked into place and the Illumination Switch is turned to the ON position. The Auto Shut-Off Switch activates the automatic timer which automatically turns off the transilluminator lights after 15 minutes.
2
Hardware Overview
B The Thumbscrews (3) hold the White Light PADD in the correct position.
C The UV Transilluminator provides a uniform intense (306 nm peak emission)
source of ultraviolet radiation. Although the Sample Work Area is 52 x 33 cm,
the UV imaging area is limited to 20 x 20 cm.
WARNING: DANGER—Ultraviolet radiation emitted from this product. Avoid
exposure. ALWAYS WEAR PROTECTIVE CLOTHING. EXPOSURE MAY
CAUSE PREMATURE AGING OF THE SKIN AND CANCER. ALWAYS
WEAR PROTECTIVE EYEWEAR; FAILURE TO DO SO MAY RESULT IN
SEVERE BURNS OR LONG TERM INJURY TO EYE. Never look directly into
the lamp. In individuals with a photosensitivity disease, exposure can cause a
wide variety of effects, not just allergenicity.
2-5
WARNING: Some medications, cosmetics or diseases may increase your
sensitivity to ultraviolet radiation. Consult a physician before operating this
product if you are using medications or have a history of skin problems or
believe yourself especially sensitive to sunlight. For Laboratory Use Only.
The UV source does not operate when the lid is open. Do not attempt to override
this feature.
Platen
The imaging window is a scratch resistant optical grade material called the Platen. The
Platen is framed in a coated steel panel mounted on the unit base. The Sample Work Area
is water-tight, has been designed for easy cleanup and is well suited for both wet and dry
samples.
WARNING:Do not use metal utensils or tweezers since they may scratch and
permanently damage the Platen. This type of damage is not covered by the
warranty.
WARNING:Do not expose the Platen to strong chemical solvents such as ketones,
hexanes, acids and alkalis that may permanently damage the Platen. This type of
damage is not covered by the warranty.
A
B
A The Platen is a coated clear plate which accommodates up to a 20 x 20 cm
sample for image capture.
B The Platen Gasket lies under the Sample Work Area and creates a water-tight
environment.
2-6
Closed Optical Path Image (COPI) Chamber
The IS4000R provides three standard forms of illumination including transillumination,
epi-illumination, and luminescent (no-illumination) modes. An optional lid may be
purchased for UV and white light transillumination. In the standard transillumination
mode external (room) light (with a Light Diffuser) is utilized for absorbance imaging of
samples such as Coomassie gels or autoradiography films. The Light Diffuser, a white
plate of translucent acrylic, is placed over the sample to diffuse light uniformly across the
sample area. The UV epi-illumination mode utilizes UV bulbs in the illumination chamber
to provide 300–400 nm UV excitation of a wide range of fluorochromes. The UV epiillumination mode can also be used for accurate fluorescence quenching measurements of
samples such as TLC plates or chromogenic blots. The “no-illumination” mode is used for
luminescent samples, such as chemiluminescent blots or radioactive blots using the rad
PADD optional accessory.
Schematic of IS4000R in “No-Illumination” Mode—Luminescence
Luminescent
Sample
Lid Closed
Platen
2
Mirror
OFF
Hardware Overview
UV
Illumination
UV
Illumination
OFF
2-7
Schematic of IS4000R in UV Epi-Illumination Mode
Lid Closed
Fluorescent
Sample
Mirror
UV
Illumination
ON
UV
Illumination
ON
Schematic of IS4000R in “No-Illumination” Mode—Radioactive
Sample in rad PADD
Lid Closed
Mirror
UV
Illumination
OFF
2-8
UV
Illumination
OFF
Schematic of IS4000R in White Light Transillumination Mode with
Ambient Light and Diffuser
Ambient Room Light—
dim, diffuse room
light yield the most
uniform illumination
Lid Open
Light Diffuser
Absorbance
Sample
Mirror
Schematic of IS4000R Using the Image Station Transilluminator Lid
Accessory
2
Hardware Overview
Transillumination
Fluorescent
Sample
2-9
IS4000R Capture System Chamber
The cooled CCD camera, lens, and Filter Wheel are located in the Capture System
Chamber.
Cooled CCD Camera
The IS4000R camera has been custom designed to provide the highest sensitivity for
molecular detection. The camera CCD is thermoelectrically cooled to maximize the
sensitivity of the camera. The cooled camera collects the image data on a 2048 x 2048
pixel CCD. Single frame image data is digitized at 16-bits, and presented in software as a
16-bit floating point image with a maximum signal-to-noise ratio of greater than 5000.
You can accumulate data from multiple exposures into a 32-bit image file. When you
capture and accumulate multiple frames (up to 100 minutes per frame), each frame is
added to the previous and the resultant image is available for analysis as a KODAK MI
project. In multiple capture mode, you can save independent and/or accumulated images,
providing a linear dynamic range signal-to-noise ratio of greater than 5000 times the
square root of the number of accumulated images. For instance, a 16-image accumulation
file has a maximum range of 20,000, exceeding 4 OD units.
The instrument utilizes a high efficiency mirror in the illumination chamber that projects
the light from the sample into the lens system. This unique design minimizes focal length
and thereby reduces loss of signal due to light scatter. The lens system is parfocal at all
field of view settings. Therefore, once a plane of focus is determined, the lens focus should
not need further adjustment.
You can manually adjust the focus, field of view, or aperture (f-stop) settings of the lens.
The digital camera has a 10X zoom lens that will capture images from 20 x 20 cm (100
microns/pixel) to 2 x 2 cm (10 microns/pixel).
2-10
Capture System Chamber
E
F
A
G
I
B
C
D
A The UV ON/OFF Switch powers the UV light source. Always turn the switch
to the OFF position when not in use to maximize the life of the UV bulbs. An
indicator light is displayed when the UV light is powered. The Power Switch
must also be powered to operate the UV light source.
B The Focus Ring adjusts the focus of the lens. Once the lens is in focus (parfocal), no adjustment is required at any of the field of view settings. The Focus
Ring is demarked to designate the distance in mm (-5–25) of the plane of
focus above the Platen. Position 0 is in focus at the Platen.
C The Field of View (FOV) Ring adjusts the field of view setting of the lens from
20 x 20 cm (100 microns/pixel) to 2 x 2 cm (10 microns/pixel).
D The f-Stop Ring regulates the amount of light reaching the sensor for an exposure and influences the depth of focus.
E The Filter Selection Dial changes the filter in front of the lens.
F The Power Switch powers the IS4000R and activates the camera and communication hardware. An indicator is displayed when the camera is on.
G The Serial Number Label identifies your unique camera.
H The Lens (labeled B, C and D) is parfocal. At f-stop O (Open), the maximum
amount of light is passed through the lens.
I The Cooled CCD Camera is mounted to the base of the instrument. The camera captures 2048 x 2048 pixel images. To use, turn the Power Switch on.
2
Hardware Overview
2-11
Filter Wheel
A Filter Wheel is located inside the Capture System Chamber in front of the lens
assembly. This wheel has four filter cassette holders, each of which holds a custom 72 mm
filter cassette. The IS4000R system includes the 600 WB 35 filter for imaging ethidium
bromide stained gels. Molecular Imaging Systems offers additional filters that are suited
for a variety of imaging needs. Position “0” is usually reserved as an open (no filter)
position for luminescence, rad PADD, and transmission mode images. To change a filter,
remove the Filter Access Panel inside the camera chamber. See Replacing or Changing an
Emission Filter in Chapter 6: Maintaining the System. This light-tight door gives you
direct access to the Filter Wheel. Use the pins on the Filter Access Panel to remove the
filter by locating the pins in the two holes provided in the filter cassette and withdraw the
filter. Replace the filter by aligning the tracks on the filter cassette with the Filter Wheel
and then inserting the cassette.
WARNING: Remove the Filter Access Panel only when it is necessary to change a
filter.
B
A The Filter Wheel (not shown) holds the filters for detection of different fluorephors. There are four spaces in the wheel. Position “0” is preferably open,
without a cassette. Based on your applications, select the appropriate filters for
the remaining three positions.
B The Filter Access Panel provides access to the Filter Wheel and is light-tight.
2-12
The KODAK rad PADD (Optional Accessory)
The patented rad PADD (radioisotopic phosphor assisted detection device) is an optional
accessory, which converts emissions from radioisotope samples into light that can be
imaged on the IS4000R. An optical plate beneath the phosphor efficiently couples the
screen output to the lens system. Autoradiography capture times are comparable to that of
KODAK X-OMAT AR film with a KODAK X-OMAT intensifying screen for exposures
less than 4 hours.
☞
NOTE: To decontaminate your screen, refer to Radiological Decontamination
Procedure in Chapter 6: Maintaining the System.
A
D
B
C
2
Hardware Overview
A The Cassette provides a convenient isolated environment for your radioactive
sample.
B The Phosphor Screen (cassette open) is where you place your sample. If your
object is opaque (blot), orient the sample side downward—if translucent/
transparent (gel), orient the sample either way.
C IS4000R Platen—position the rad PADD with the phosphor screen so that the
underside (with the interference filter) is facing the Platen.
D rad PADD Cassette Screws located on either end of the cassette may be
removed to lift out the rad PADD Cassette Lid to accommodate thick samples
such as microwell plates.
2-13
2-14
Software Overview
3
Software Overview
This section provides an overview of the KODAK Image Station 4000R (IS4000R) Image
Acquire Software. This software is accessed from within KODAK Molecular Imaging
Software (KODAK MI). The IS4000R supports a wide variety of image capture methods
including single capture exposure, multiple capture exposure (accumulated into a single
file or as separate files), time lapse exposures, progressive exposures, and rad PADD
exposures. Using these exposure modes, the minimum and maximum exposure times are
0.05 second and 100 minutes, respectively. In addition, the rad PADD exposures allow for
a single capture exposure or multiple exposures (final accumulated image).
✔ Standard Exposure—Final Accumulation (Single) The IS4000R cooled CCD
Camera with a 16-bit A/D converter provides a 16-bit data file. After capture, the
image file automatically opens as a KODAK MI project.
✔ Standard Exposure—Final Accumulation (Multi) adds successive captures into a
single accumulated n-bit image. The maximum number of images accumulated is
32. The final accumulated image is automatically opened as a KODAK MI project.
Σ(Images 1-5)
✔ Standard Exposure—Separate Images generates single captures in a multiple
exposure as KODAK MI projects. The maximum number of exposures is 32. Each
file is automatically saved to your hard drive.
5 Separate Images are Saved
✔ Standard Exposure—All Accumulations saves an intermediate (incremental) series
of captures as KODAK MI projects. The maximum number of exposures is 32.
Each intermediate accumulation file is automatically saved to your hard drive.
Σ(1-2)
Σ(1-3) Σ(1-4)
Σ(1-5)
Intermediate Images
are Saved
3-1
✔ Standard Exposure—All Images saves all intermediate and separate images. The
maximum number of images that may be captured is 32 accumulated and 32
separate images. Each intermediate accumulation and separate file is automatically
saved to your hard drive. The final accumulated image automatically opens as a
KODAK MI project.
Σ(1-2)
Σ(1-3) Σ(1-4)
Σ(1-5)
Intermediate Images
are Saved
5 Separate Images are Saved
✔ Time Lapse Exposure provides exposures at set intervals. You can set the exposure
time, the time lapse interval, the total exposure time, and the total number of
images. The maximum duration time is 150 hours. The maximum number of
images that may be captured is 32. Each file is automatically saved to your hard
drive.
Time Increments
✔ Progressive Exposures is designed to take multiple exposures at increasingly
different exposure times. This automates complex exposure options—thereby
eliminating the need to manually set each exposure time. The maximum number of
images that may be captured is 32. Each file is automatically saved to your hard
drive.
Time Increments
3-2
✔ rad PADD—Final Accumulation (Single) captures one optimized 16-bit image.
3
After capture, the image file automatically opens as a KODAK MI project.
✔ rad PADD—Final Accumulation (Multi) adds successive captures into a single
Software Overview
accumulated n-bit image. The maximum number of images accumulated is 32. The
final accumulated image is automatically opened as a KODAK MI project.
Σ(Images 1-5)
✔ rad PADD—Separate Images generates single captures in a multiple exposure as
KODAK MI projects. The maximum number of exposures is 32. Each file is
automatically saved to your hard drive.
5 Separate Images are Saved
✔ rad PADD—All Images saves an intermediate (incremental) series of captures as
KODAK MI projects. The maximum number of images accumulated is 32. Each
intermediate accumulation file is automatically saved to your hard drive.
Σ(1-2)
Σ(1-3) Σ(1-4)
Σ(1-5)
Intermediate Images
are Saved
3-3
IS4000R Acquire Window
The IS4000R Acquire window is accessed from within KODAK MI Software. Choose
Select Digital Camera from the KODAK MI File menu and IS4000R from the Digital
Camera pop-up menu. After launching IS4000R, the IS4000R Acquire window appears.
This window is divided into five sections. Let’s review each section.
A
B
E
C
D
A The User section contains options to select a predefined setting, record your
name, and add annotations on the image for printing.
B The Exposure section provides you with the various exposure methods and
options associated with capturing images.
C The Illumination section designates the type of illumination used to capture
your image and applies the appropriate Illumination Reference File, when
necessary.
D The Set Camera To section allows you to record the position of the camera
lens f-stop and field of view. In addition, it provides a pop-up menu for recording the filter used during capture. These parameters are important for documetation and calibration of your image.
E The Buttons section contains the Preview, Expose, Preferences, and Done buttons used to navigate through an image capture.
3-4
User Section of the IS4000R Acquire Window
3
Software Overview
The User section of the IS4000R Acquire window contains the Settings, User Name, and
Annotation options. Let’s review each option:
Settings Option
You can speed up the capture process by creating
custom capture settings for the various types of
experiments or for specific personal preferences.
Once saved, these settings can be conveniently
applied to future image captures.
You can modify a saved settings (i.e., change
exposure time, Illumination Reference File, etc.),
update, edit, or delete a setting.
Once saved, settings remembered include:
✔
✔
✔
✔
✔
✔
✔
✔
✔
✔
✔
Exposure time
Number of exposures
Illumination settings
f-Stop and field of view settings
Camera filter (Filter location on Filter Wheel, but not filter name)
Image orientation
Preferences information
Rotation
Saturation levels
Application of lens or Illumination Reference Files
X and/or Y binning
3-5
In addition, only the filter location is retained in a user setting file. If you save a setting
with one filter and later replace that filter and edit the name using the Filter Edit button, the
new filter name appears in the Filter pop-up menu.
☞
☞
NOTE: If your instrument is a shared resource, make sure that the appropriate
filter name is in the Filter pop-up menu.
NOTE: User defined settings are saved as individual files in the KODAK MI
Extensions> IS4000R_Settings (Macintosh) or C:\KODAK
MI\IS4000R\IS4000R_Settings (Windows) subfolders. Any settings files in this
folder automatically appear in the Settings pop-up menu.
User Name Option
Use the User Name text edit box to type in your name. To save a new name for future
experiments, choose Add User from the pop-up menu next to the User Name text edit box
(down arrow). The name appears in the menu. Names can be deleted in the same manner
by choosing Delete User.
Annotation Option
You can tag your image with an Annotation bar with up to 48 characters of text. In
addition, the Annotation bar lists the time and date of the capture of the image, the
exposure time, and the illumination source. The text appears on the long axis at the top of
the printed annotations page.
All items in the Annotation bar are separate objects and are displayed in the Annotation
window. This allows you to edit the text, change the font style, color, or size prior to
printing. The contents are grouped, therefore, you must ungroup these objects prior to
editing.
3-6
☞
NOTE: Each time you capture an image, the Annotation text edit box is cleared
and can not be saved with the User Settings.
☞
NOTE: The Annotation bar is only available prior to image capture. Once you
capture an image, you cannot add the Annotation bar.
☞
NOTE: Display or hide the Annotation bar by selecting the Show Annotation bar
from within the Annotation panel. This is only available if one is present.
Exposure Section of the IS4000R Acquire Window
3
Software Overview
Use the IS4000R to take standard exposures (single and/or multiple exposure
accumulations), time lapse exposures, progressive exposures, or rad PADD exposures. In
addition, you can generate an Illumination Reference File. The pop-up menu at the top of
this section sets the type of image captures to be performed.
To increase sensitivity, you may also choose to X and/or Y bin your image. Binning is the
process by which adjacent CCD signal values are added together and then each pixel value
is replaced with the new added value. For example, if two adjacent pixels have an intensity
value of 100 and 150, when binning has been applied, both pixels are assigned an intensity
value of 250. Binning can be applied on the X and/or Y axis of an image. While binning
decreases the resolution of the image, it increases the intensity of the signal. Refer to
Appendix A: Digital Imaging Concepts for a technical explanation of binning and other
digital imaging concepts.
Standard Exposure
The Standard Exposure option lets you take a single image or capture multiple images.
When you capture multiple images you can choose to save each capture as a separate file,
accumulate all the captures in a single file, or generate a series of intermediate
accumulations. To increase sensitivity you may also choose to X and/or Y bin your image.
✔ The Exposure Time text edit box and Units pop-up menu defines the exposure. The
minimum and maximum exposure times are 0.05 second per exposure and 100
minutes per exposure, respectively. The minimum exposure time for a binned
image is 1 second. The time units can be set as seconds or minutes. The minimum
increment is 0.1 second.
✔ Use the No. Exposures text edit box to choose the total number of exposures. The
maximum number of exposures is 32.
Generally multiple captures are not appropriate unless exposure times
☞ NOTE:
are greater than 20 minutes per capture or a single capture is close to
saturation.
3-7
✔ The Predict button is ideal for estimating exposure times for luminescence and rad
PADD images. Once selected, the Predict Exposure dialog box appears where you
can enter the desired number of gray levels (GL). When the Calculate button is
clicked, the camera takes a series of exposures to help predict the optimal exposure
time. Once determined, the predicted exposure time and number of exposure are
automatically updated in the IS4000R Acquire window for single capture
determinations only. In a multiple frame exposure, the calculated times and number
of exposures must be entered manually.
—The Analysis text edit box and GL pop-up menu allows you to enter the number
of gray levels you want your exposure to achieve.
—The Max Exposure Time indicates when the image will become saturated.
Increasing exposures beyond this time may adversely affect your analysis data.
—The Total Time equals the total time required to achieve the desired number of
gray levels.
✔ To increase sensitivity with luminescence or rad PADD imaging, you may also
choose to X and/or Y bin your image. X Binning and Y Binning options allow you
to select from None (no binning), 2 pixel, 4 pixel, 8 pixel or 16 pixel binning in one
or both the X and Y directions.
Binning is asymmetric in one direction. X-direction/horizontal
on the Platen supports the long axis for asymmetric binning.
Bin options are none, 1 x 2, 1 x 4, 1 x 8, 2 x 2, 2 x 4, 2 x 8, 4 x
4, 4 x 8, 8 x 8, and 16 x16.
✔ Export Options defines the final image—choose from Final Accumulation, All
Accumulations, All Images, or Separate Images.
3-8
Time Lapse Exposure
3
Software Overview
The Time Lapse Exposure option is designed to take multiple exposures over fixed time
intervals. For example, you may take a 10 second exposure every hour over the next 10
hours.
✔ The Exposure Time text edit box and Units pop-up menu defines the exposure. The
minimum and maximum exposure times are 0.05 second per frame and 100
minutes per frame, respectively. The time units can be set as seconds or minutes.
The maximum duration time is 150 hours. The minimal increment is 0.1 second.
✔ The Interval is the time interval between the beginning of one exposure and the
beginning of the next exposure. The minimum and maximum intervals are 1
second and 24 hours, respectively.
☞ NOTE: An interval must be at least 1 second greater than an exposure time.
✔ Stop After determines when to stop time lapse captures. You can set stop criteria
based on experimental duration or by the number of frames.
✔ To increase sensitivity with luminescence or rad PADD imaging, you may also
choose to X and/or Y bin your image. X Binning and Y Binning options allow you
to select from None (no binning), 2 pixel, 4 pixel, 8 pixel or 16 pixel binning in one
or both the X and Y directions.
Binning is asymmetric in one direction. X-direction/horizontal
on the Platen supports the long axis for asymmetric binning.
Bin options are none, 1 x 2, 1 x 4, 1 x 8, 2 x 2, 2 x 4, 2 x 8, 4 x
4, 4 x 8, 8 x 8, and 16 x16.
3-9
Progressive Exposure
The Progressive Exposure option is designed to take a continuous sequence of exposures
at different exposure times. You can automate complex exposure options—rather than
manually having to set each exposure time. For example, you may want to capture an
image at each of the following exposure times: 10, 20, 40, and 80 seconds.
✔ The Exposure Time text edit box and Units pop-up menu defines the exposure. The
minimum and maximum exposure times are 0.05 second per frame and 100
minutes per frame, respectively. The time units can be set as seconds or minutes.
✔ The Increment determines each new exposure time. The smallest increment for
exposures is 1 second. For example, if you set 60 second increments—each
subsequent exposure will be 60 seconds longer than the previous exposure.
Another example would be to set an increment of 2X (Multiplier #X): If the first
exposure was 1 minute, each successive exposure is double the previous exposure
(2, 4, 8, 16 minutes, etc.). In addition, you can input the geometric order for
generating exposure times. In this case the number entered will be the power to
which successive exposure times will be raised.
✔ Use the No. Exposures text edit box to choose the total number of exposures. The
maximum number of exposures is 32.
✔ To increase sensitivity with luminescence or rad PADD imaging, you may also
choose to X and/or Y bin your image. X Binning and Y Binning options allow you
to select from None (no binning), 2 pixel, 4 pixel, 8 pixel or 16 pixel binning in one
or both the X and Y directions.
Binning is asymmetric in one direction. X direction/horizontal
on the Platen supports the long axis for asymmetric binning.
Bin options are none, 1 x 2, 1 x 4, 1 x 8, 2 x 2, 2 x 4, 2 x 8, 4 x
4, 4 x 8, 8 x 8, and 16 x16.
3-10
rad PADD
You can take a single image or capture multiple images. When you capture multiple
images you can choose to save each capture as a separate file, accumulate all the captures
in a single file, or generate a series of intermediate accumulations. To increase sensitivity
you may also choose to X and/or Y bin your image.
✔ The Exposure Time text edit box and Units pop-up menu defines the exposure. The
minimum and maximum exposure times are 0.05 second per exposure and 100
minutes per exposure, respectively. The time units can be set as seconds or
minutes. The minimum increment is 0.1 second.
✔ Use the No. Exposures text edit box to choose the total number of exposures. The
maximum number of exposures is 32.
✔ The Predict button opens a dialog box where you can calculate a prediction of the
optimal exposure time based upon the desired number of gray levels (GL). When
the Calculate button is clicked, the camera takes a series of exposures to help
predict the optimal exposure time. Once determined, the predicted exposure time
and number of exposure are automatically updated in the IS4000R Acquire window
for single capture determinations only. In a multiple frame exposure, the calculated
times and number of exposures must be entered manually.
3-11
3
Software Overview
The rad PADD is designed to image samples that have equivalent signal to a 4 hour or less
film exposure.
—The Analysis text edit box and GL pop-up menu allows you to enter the number
of gray levels you want your exposure to achieve.
—The Max Exposure Time indicates when the image will become saturated.
Increasing exposures beyond this time may adversely affect your analysis data.
—The Total Time equals the total time required to achieve the desired number of
gray levels.
✔ To increase sensitivity with luminescence or rad PADD imaging, you may also
choose to X and/or Y bin your image. X Binning and Y Binning options allow you
to select from None (no binning), 2 pixel, 4 pixel, 8 pixel or 16 pixel binning in one
or both the X and Y directions.
Binning is asymmetric in one direction. X direction/horizontal
on the Platen supports the long axis for asymmetric binning.
Bin options are none, 1 x 2, 1 x 4, 1 x 8, 2 x 2, 2 x 4, 2 x 8, 4 x
4, 4 x 8, 8 x 8, and 16 x16.
✔ Export Options defines the final image—choose from Final Accumulation, All
Accumulations, All Images, or Separate Images.
3-12
Illumination Reference
3
Software Overview
When a light source (UV or ambient light) is used, an illumination reference can be used
to improve the quality of your data. The nonuniformity in the illumination generated by
the UV bulbs or ambient white light is highly reproducible and may be corrected by
simply normalizing the image by an illumination reference image. The f-stop and field of
view settings used to capture the image must be the same as those used to generate the
Illumination Reference File. See Generating an Illumination Reference File Library in
Chapter 5: Capturing Images.
✔ The Exposure Time defines the exposure. The minimum and maximum exposure
times are 0.05 second per exposure and 100 minutes per exposure, respectively.
The time units can be set as seconds or minutes. The minimum increment is 0.1
second.
3-13
Illumination Section of the IS4000R Acquire Window
The Illumination section of the IS4000R Acquire window contains the options to select the
Illumination Source and Illumination Reference File. The IS4000R captures images for
many different applications including:
✔ Luminescence—a luminescent sample needs no additional illumination for
capture—it emits light. The amount of light emitted by the sample is directly
proportional to the limiting chemical component of the luminescent reaction,
usually an enzyme-tagged molecular target. The CCD camera captures the emitted
light and represents the signal in the image with very high fidelity (linear response
at high precision).
✔ UV Transillumination—a fluorescent sample requires illumination to excite
fluorescent molecules (called fluorochromes or fluorophores), which emit light.
Ultraviolet transillumination is provided by the optional Image Station
Transilluminator Lid Accessory. The spectrum of UV illumination has a peak
emission at 306 nm. The UV light excites the sample and the camera detects the
signal.
Fluorophores typically emit light in a manner that is proportional to their amount,
and the CCD camera captures the fluorescent light and represents the signal in the
image with very high fidelity (linear response at high precision).
✔ UV Epi-illumination—a fluorescent sample requires illumination to excite
fluorescent molecules (called fluorochromes or fluorophores), which emit light.
Internal ultraviolet illumination is provided by the IS4000R. The spectrum of UV
illumination is between 300–400 nm. The UV illumination is designed to irradiate
the sample at a 45° angle (called epi-illumination), and requires that the light
interact with the sample in order to eventually enter the lens. Further, the CCD is
relatively insensitive to the UV, and it is covered with a filter that blocks infrared
radiation that emanates from any light source.
Fluorophores typically emit light in a manner that is proportional to their amount,
and the CCD camera captures the fluorescent light and represents the signal in the
image with very high fidelity (linear response at high precision).
3-14
✔ White Light Transillumination—a sample that absorbs light needs illumination to
distinguish the absorbing molecules (called chromogens or chromophores). The
CCD captures the light that is not absorbed in a highly linear manner. Generally,
chromogens that absorb light do so in a manner that is proportional to the negative
logarithm of the chromogen concentration. In terms of classical densitometry, this
functional dependence is called absorbance or optical density (OD), and is related
to the chromogen concentration by an extinction coefficient.
Absorbance can be measured by capturing the light that is transmitted through a
sample. Transmission of light through a sample can be accomplished using the
IS4000R, simply by opening the lid and permitting external light to be transmitted
through a sample or using the optional Image Station Transilluminator Lid
Accessory with the White Light PADD.
R with the rad PADD accessory, you are
✔ rad PADD—If you purchased your IS4000
32 90 111
able to capture high energy isotopes ( P, Y, I) samples. Radioisotopes emit
beta particles that interact with the phosphor screen in the rad PADD and convert
energy to light. Capture time will be comparable to that of KODAK BioMax MS
film with a KODAK HE intensifying screen, the fastest film/screen combination
available for autoradiography.
✔ Custom—provides a custom setting option.
Applying an Illumination Reference File
Improve the quality of your data by applying an illumination correction to images
captured in the UV or white light imaging modes. The illumination non-uniformity is
highly reproducible and may be corrected by normalizing the sample image to an
illumination reference image.
The Apply Reference pop-up menu allows you to select a reference file. A reference file
must have the same capture setting (f-stop, field of view) as the image. To create an
Illumination Reference File, see Generating an Illumination Reference File Library in
Chapter 5: Capturing Images.
There is also an automatic option that allows you to capture your image and automatically
correct for illumination. When this option is selected, you capture your image and the
software guides you through a second image capture as a reference file, see Applying an
Automatic Illumination Reference File in Chapter 5: Capturing Images.
3-15
3
Software Overview
UV/Fluorescence Quenching—detecting absorbance by reflected light, for samples
such as chromogenic blots, may be accomplished using the UV epi-illumination
provided by the IS4000R. In the case of a clear sample, the white backing of the
Compression Pad may be used to assure light return. This method is an example of
fluorescence quenching, which is actually an absorbance methodology.
The Set Camera To Section of the IS4000R Acquire Window
The Set Camera To section of the IS4000R Acquire window allows you to enter
information about the capture settings used. Documenting this information is critical,
since KODAK MI uses this data to perform lens correction and illumination field
flattening to optimize the image for display and analysis. In addition, these settings are
recorded as part of the file history and can be used as a reference for similar type
experiments.
✔ The f-Stop slider should match the aperture corresponding to the f-stop setting on
your IS4000R camera. We do not recommend using f-stops over 11 for most
applications.
✔ The FOV (mm) slider is used to record the field of view to the corresponding
settings on your IS4000R camera. For example, when you select 150 on the slider,
your 150 x 150 mm image will be labelled as such.
✔ The Focal Plane (mm) slider should match the current focus setting. The default
value is 0 (focus to the Platen without interfering filters).
✔ The Filter pop-up menu should match the filter selected on your IS4000R. You can
also access the Available Filters dialog box by clicking the Edit button which
allows you to edit the positions of the filters to correspond with the filter positions
in the IS4000R Filter Wheel. The factory default is Position 0: None—Open.
Position 1 is 600 nm WB Filter (Ethidium Bromide).
The Set Camera To sliders do not adjust the lens or filters, they only
☞ NOTE:
provide you a convenient place to record current settings.
3-16
Buttons Section of the IS4000R Acquire Windows
✔ The Preview button previews the CCD image. The Preview
window is described in more detail in the next section.
✔ The Expose button begins the image capture, opening a
Capture Status window. The various Capture Status
windows are described in more detail later in this chapter.
✔ The Preferences button opens the IS4000R Preferences
window where you can customize certain capture
parameters. The IS4000R Preferences window is described
in more detail later in this chapter.
✔ The Done button closes the IS4000R Acquire window and
returns you to KODAK MI.
3-17
3
Software Overview
The Buttons section of the IS4000R Acquire window is used to
navigate through an image capture.
Preview Window
The Preview button opens an IS4000R Preview window. The preview is used primarily for
sample placement and is limited to a single frame capture. However, these frames are
displayed in a continuous/successive sequence to allow for sample adjustment in a “live”
mode. Set a shorter time to get a faster preview update.
✔ The Exposure Time text field shows current preview exposure time.
✔ The Exposure Time slider sets the exposure time for the preview image. The
maximum exposure time is 5 seconds.
The Preview Exposure Time is remembered between sessions and is
☞ NOTE:
independent of the current exposure time in the IS4000R Acquire window.
✔ The Exposure Time progress bar gives you feedback on the current status of the
preview image.
✔ The Done button stops the preview and returns you to the IS4000R Acquire
window.
The Preview Exposure Time may not be an exact predictor of time for
☞ NOTE:
a full exposure. Use Predict for a more accurate exposure time estimate.
✔ The Focus check box accesses the software-assisted focusing aid.
3-18
Capture Status Windows
3
Software Overview
Once an exposure is initiated a Capture Status window appears. There are two capture
status windows—the Single Capture Status window (Standard) and the Multiple Capture
Status window (Standard, Progressive, Time Lapse, rad PADD). Let’s review.
Standard Exposure Capture Status Window
The Expose button starts the acquisition process. Immediately after the Expose button is
selected, one of the capture status windows appears (depends on the exposure type).
For single frame captures, the following window appears:
✔ The Current Capture text field indicates the exposure time that was set and
underway.
✔ The Current Capture progress bar displays the status of the capture.
✔ The Elapsed Time text field indicates the elapsed time since the beginning of the
exposure.
✔ The Hide button closes the window without stopping the exposure. You can access
the window by selecting IS4000R Capture from the KODAK MI File menu or the
IS4000R Capture button on the Status bar.
✔ The Stop Capture button interrupts the capture and returns you to the IS4000R
Acquire window. Stopping a single image capture will not save the current image.
No image is opened or saved.
3-19
Standard Exposure (Multiple Exposure) Capture Status Window
The Expose button starts the acquisition process. If the acquisition you have selected is a
standard exposure with multiple image captures, the following window appears:
✔ The Elapsed Time text field shows the elapsed time since the beginning of the
exposure.
✔ The Current Capture text field indicates the current exposure being captured.
✔ The Current Capture progress bar displays the status of the current capture.
✔ The Expt Duration text field displays the total time from the beginning of the first
frame to the end of the last frame—regardless of the exposure type.
✔ The Expt Duration progress bar shows the status of the entire experiment
(including all captures).
✔ The Stop Capture button interrupts the current capture and returns you to the
IS4000R Acquire window. Any images saved to the hard drive prior to clicking this
button are preserved. All the appropriate image filters/corrections are applied. If
selected, a final accumulated image is opened in the Project window.
3-20
✔ Dynamic Range provides histogram information about the image being captured.
✔ The Analyze button transfers the last completed image or accumulation captured to
KODAK Molecular Imaging Software for analysis. You can choose this option
anytime during the capture process to open intermediate images. Selecting this
option will not stop the capture in progress.
✔ The Hide button closes the window without stopping the exposure. You can access
the window by selecting IS4000R Capture from the KODAK MI File menu or by
using the IS4000R Capture button on the Status bar.
✔ The Information bar directly below the image contains the current exposure type
and user name.
3-21
3
Software Overview
Min and Max text fields display the current minimum and maximum signal values
within the image. The Show Saturation check box shows any saturated pixels in the
image in red. The Auto Stop at check box sets a dynamic range at which the capture
process is interrupted. For example, you can set the auto stop value at 10,000 in the
Auto Stop at text edit box. Whenever an accumulation is added and the difference
between the maximum and minimum gray level values is greater than 10,000 then
the capture process stops and the image is transferred to KODAK MI Software.
The default value is 65,535 signal intensities.
Time Lapse Exposure Capture Status Window
The Expose button starts the acquisition process. If the acquisition you have selected is a
time lapse exposure, the following window appears:
✔ The Elapsed Time text field shows the elapsed time since the beginning of the
exposure.
✔ The Current Capture text field indicates the number of captures in the time lapse
series.
✔ The Current Capture progress bar displays the status of the capture.
✔ The Interval text field shows the elapsed time within the current time interval. The
interval corresponds to the time between the beginning of one capture and the
beginning of the next capture.
✔ The Interval progress bar displays the status of the current time interval.
✔ The Expt Duration text field displays total time from the beginning of the first
frame to the end of the last frame—regardless of the exposure type.
✔ The Expt Duration progress bar shows the status of the entire experiment,
including all time lapse exposures.
3-22
✔ The Stop Capture button interrupts the current capture and returns you to the
✔ Dynamic Range provides histogram information about the image being captured.
Min and Max text fields display the current minimum and maximum signal values
within the image. The Show Saturation check box shows any saturated pixels in the
image in red.
✔ The Analyze button transfers the last completed image or accumulation captured to
KODAK MI for analysis. You can choose this option anytime during the capture
process to open intermediate images. Selecting this option will not stop the capture
in progress.
✔ The Hide button closes the window without stopping the exposure. You can access
the window by selecting IS4000R Capture from the File menu or by using the
IS4000R Capture button on the Status bar.
✔ The Information bar directly below the image contains the current exposure type
and user name.
3-23
3
Software Overview
IS4000R Acquire window. Any images saved to the hard drive prior to clicking this
button are preserved. All the appropriate image filters/corrections are applied, if
selected a final accumulated image is opened.
Progressive Exposure Capture Status Window
The Expose button starts the acquisition process. If the acquisition you have selected is a
progressive exposure, the following window appears.
✔ The Elapsed Time text field shows the elapsed time since the beginning of the
exposure.
✔ The Current Capture text field indicates the number of the current exposure in the
progressive series being captured.
✔ The Current Capture progress bar displays the status of the capture.
✔ The Expt Duration text field displays total time from the beginning of the first
frame to the end of the last frame—regardless of the exposure type.
✔ The Expt Duration progress bar shows the status of the entire experiment including
all progressive exposures.
✔ The Stop Capture button interrupts the current capture and returns you to the
KODAK MI main window. Any images saved to the hard drive prior to clicking
this button are preserved. All the appropriate image filters/corrections will be
applied. For example, you can stop the progressive capture at any current exposure
without having to wait for the entire number of captures to be completed.
3-24
✔ Dynamic Range provides histogram information about the image being captured.
✔ The Analyze button transfers the last completed image or accumulation captured to
for analysis. You can choose this option anytime during the capture process to open
intermediate images. Selecting this option will not stop the capture in progress.
✔ The Hide button closes the window without stopping the exposure. You can access
the window by selecting IS4000R from the File menu or by using the IS4000R
Capture button on the Status bar.
✔ The Information bar directly below the image contains the current exposure type
and user name.
3-25
3
Software Overview
Min and Max text fields display the current minimum and maximum signal values
within the image. The Show Saturation check box shows any saturated pixels in the
image in red. The Auto Stop at check box sets a dynamic range at which the capture
process is interrupted. For example, you can set the auto stop value at 10,000 in the
Auto Stop at text edit box. Whenever an accumulation is added and the difference
between the maximum and minimum gray level values is greater than 10,000 then
the capture process stops and the image is transferred. The default value is 65,535
signal intensities.
rad PADD—Single Exposure Capture Status Window
For single frame captures, the following window appears:
✔ The Current Capture text field indicates the exposure time that was set and
underway.
✔ The Current Capture progress bar displays the status of the capture.
✔ The Elapsed Time text field indicates the elapsed time since the beginning of the
exposure.
✔ The Hide button closes the window without stopping the exposure. You can access
the window by selecting IS4000R from the File menu or by using the IS4000R
Capture button on the Status bar.
✔ The Stop Capture button interrupts the capture and returns you to the IS4000R
Acquire window. No image is opened or saved after stopping a single image
capture.
3-26
rad PADD—Multiple Exposures Capture Status Window
3
Software Overview
The Expose button starts the acquisition process. If the acquisition you have selected is a
rad PADD with multiple image captures, the following window appears:
✔ The Elapsed Time text field shows the elapsed time since the beginning of the
exposure.
✔ The Current Capture text field indicates the current exposure being captured.
✔ The Current Capture progress bar displays the status of the capture.
✔ The Expt Duration text field displays the total time from the beginning of the first
frame to the end of the last frame—regardless of the exposure type.
✔ The Expt Duration progress bar shows the status of the entire rad PADD exposure.
✔ The Stop Capture button interrupts the current capture and returns you to the
KODAK MI Main window. Any images saved to the hard drive prior to clicking
this button will remain and not be deleted.
3-27
✔ Dynamic Range provides histogram information about the image being captured.
Min and Max text fields display the current minimum and maximum signal values
within the image. The Show Saturation check box shows any saturated pixels in the
image in red. The Auto Stop at check box sets a dynamic range at which the capture
process is interrupted. For example, you can set the auto stop value at 10,000 in the
Auto Stop at text edit box. Whenever an accumulation is added and the difference
between the maximum and minimum gray level values is greater than 10,000 then
the capture process stops and the image is transferred. The default value is 65,535
signal intensities.
✔ The Analyze button transfers the current image frame in the window for analysis.
✔ The Hide button closes the window without stopping the exposure. You can access
the window by selecting IS4000R from the File menu or by using the IS4000R
Capture button on the Status bar.
✔ The Information bar directly below the image contains the current exposure type
and user name.
3-28
Preferences Window
3
Software Overview
The IS4000R Preferences window sets camera and software parameters including the
image saturation level, orientation, and maximum exposure time. To access the IS4000R
Preferences window, select the Preferences button from the IS4000R Acquire window.
✔ Orientation of Submitted Image option automatically rotates a newly captured
image to a desired orientation while it is being downloaded.
The image is in the default orientation.
The image is flipped horizontally.
Rotates the image 90˚ clockwise.
Rotates the image 90˚ clockwise and flipped vertically.
The Rotation buttons do not change the orientation of the preview
☞ NOTE:
image. The rotation occurs during image submission.
Check the Play sound after exposure check box to be audibly notified
☞ ofNOTE:
the completion of each frame capture.
3-29
✔ The Stop if image is saturated at check box stops the image capture when the last
completed capture becomes saturated to the extent noted in Preferences. For
example, if 1% is designated, the capture will stop when 1% of the image is
saturated. This setting applies to multiple captures only. Use the Stop if image is
saturated at text edit field to select the percentage of pixels that can become
saturated in the image. The image pixels turn red when the saturation level is
reached if the Show Saturation check box is selected in the Capture Status window.
The saturation levels for single and multiple frame capture can be set
independently.
✔ Use the Apply Illumination Correction to check box to apply illumination
correction or select an Illumination Reference File in the IS4000R Acquire window
to apply to standard exposure images saved to your hard drive. In Standard
Exposure mode you can save all exposures, all intermediate accumulations, and the
final accumulation. For the separate exposures and the intermediate accumulations,
you may or may not want to apply illumination correction. For example, if you are
interested in doing subsequent calculations, the application of illumination
correction introduces errors.
✔ The Apply Lens Corrections to option provides you with two options:
—Analysis Images check box to applies lens correction to a single frame capture,
the final accumulation of multiple frame captures, progressive exposure
captures, time lapse captures, and images submitted to KODAK MI from the
Capture Status window which are opened as KODAK MI projects.
—Intermediate Images Saved on Hard Drive applies ONLY to the standard
exposures. For separate exposures and intermediate accumulations (which are
saved on the hard drive), you can select whether lens correction should be
applied.
✔ Apply Warping to All Images check box turns image warping on or off. Image
warping is especially useful for correcting for lens distortion at low
magnifications—i.e., 96 well plates, macroarrays.
To save the updated preferences, click Done. To reset the preferences to the factory default
settings, click Defaults.
3-30
Setting Up for Capture
Now you will step through the KODAK Image Station 4000R (IS4000R) set up procedures
for image capture including preparing the sample, setting illumination, and previewing the
image.
Sample Illumination/Detection Guidelines
The IS4000R captures images for many different applications. When performing
experiments, it is important that the appropriate capture conditions are used. The capture
parameters relating to four major modes of detection are described below. Later in this
chapter, you will find step-by-step procedures for preparing for image capture, setting
illumination, and previewing your image.
4
Setting Up
Luminescence Imaging
A luminescent sample needs no additional illumination for capture—it emits light. The
amount of light emitted by the sample is directly proportional to the limiting chemical
component of the luminescent reaction, usually an enzyme-tagged molecular target. The
CCD camera captures the emitted light and represents the signal in the image with very
high fidelity (linear response at high precision).
Luminescent samples can vary greatly in signal intensity. Many luminescent signals are
dim and may not fill all the signal levels in the Image Histogram in a reasonable period of
time. Therefore, luminescent signals may require binning in both the X and Y directions.
Minimally, greater than 500 gray levels is desired, particularly if multiple objects are to be
measured. In general, the total exposure time for luminescent captures on the IS4000R will
be close to that of autoradiography film. For higher signal levels and a wider dynamic
range, increase the exposure time. If no significant signal is visible, select an exposure
time of up to 20 minutes with a single capture. If no signal is apparent after 20 minutes of
exposure, the IS4000R system is not detecting the signal. Verify that your sample is
generating signal by exposing with film.
Filters can be used to discriminate and differentially display different kinds of
luminescence. However, for maximum sensitivity (usually a priority in luminescence
experiments), do not use a filter, open the camera aperture (fO), choose the highest binning
state, and an extended exposure time (multiple minutes).
4-1
UV Epi-Illumination and Transillumination
Internal ultraviolet epi-illumination is provided by the IS4000R. The spectrum of UV epiillumination is between 300 and 400 nm; for details refer to Appendix B: UV Illumination
of this User’s Guide. A fluorescent sample requires illumination to excite fluorescent
molecules (called fluorochromes or fluorophores), which emit light. The Image Station
4000R UV epi-illumination is designed to irradiate the sample at a 45° angle, and requires
that the light interact with the sample in order to eventually enter the lens. The CCD is
relatively insensitive to the UV, and any IR from the light source will be filtered by the UV
emission filters.
Also available as an option, the KODAK Image Station Transilluminator Lid Accessory
provides UV ideal for imaging fluorescent samples like ethidium bromide stained gels.
The spectrum of UV illumination has a peak emission at 306 nm. The UV light excites the
sample and the camera detects the signal.
Fluorochromes typically emit light in a manner that is proportional to their amount, and
the CCD camera captures the fluorescent light and represents the signal in the image with
very high fidelity (linear response at high precision).
Fluorescence detection usually generates enough signal within a reasonable period of time
to preclude the need for binning. However, binning may be convenient if consistent with
the spatial resolution of the sample. Asymmetric binning (in one direction) may enhance
signal without significant loss of resolution.
For documentation purposes, achieving 1000 signal levels of a target feature is sufficient.
For high quality quantitation, greater than 4,000 signal levels is recommended. In
situations where high background fluorescence consumes much of the available gray
scale, accumulating images to greater than 20,000 signal levels may be necessary for good
quantitation.
Autofluorescence from surrounding materials often presents an interfering background in
a fluorescent detection experiment. To diminish the autofluorescent background, a series
of filters are available that can be inserted into the IS4000R Filter Wheel. Selecting a filter
may optimize the fluorescent signal by discriminating against background and/or
differentiating between multiple fluorochromes within the experimental sample.
4-2
White Light Transillumination
A sample that absorbs light needs illumination to distinguish the absorbing molecules
(called chromogens or chromophores). The CCD captures the light that is not absorbed in
a highly linear manner. Generally, chromogens that absorb light do so in a manner that is
proportional to the negative logarithm of the amount of chromogen. In terms of classical
densitometry, this functional dependence is called absorbance or optical density (OD), and
is related to the chromogen concentration by an extinction coefficient.
Absorbance can be measured by capturing the light that is transmitted through a sample.
Transmission of light through a sample can be accomplished using the IS4000R, simply by
opening the lid and permitting external light to be transmitted through a sample. To
minimize imaging artifacts, a translucent panel (Light Diffuser) is placed above the
sample on the Platen, optimally scattering the incoming light. Because of the high
sensitivity of the camera, dim ambient light usually suffices.
4
Setting Up
Similarly, you can use the optional Image Station Transilluminator Lid Accessory to
generate white light. The White Light PADD (Phosphor Assisted Detection Device) can be
placed over the transilluminator to convert UV transillumination to white light for imaging
Coomassie gels or for densitometry of films.
Alternatively, detecting absorbance by reflected light, for samples such as chromogenic
blots, may be accomplished using the UV epi-illumination provided by the IS4000R. In the
case of a clear sample, the white backing of the Compression Pad may be used to assure
light return. Generally, better absorbance data may be generated using filtered epiillumination.
Using transillumination, ample signal is provided and short exposure times are expected.
Binning is never necessary and exposure times per capture will be approximately 0.1
second or less. Increasing the f-stop up to f8 extends exposure times. Care should be taken
not to saturate the image (pixels turn red). Saturation precludes the appropriate calculation
of optical density for absorbance measurements. Utilize the accumulation mode to
approach 60,000 signal levels to maximize the range of the optical density.
For improved sample quantitation, it is recommended that filters be used for detection
using absorbance methods. For example, a blue dye presents maximum contrast (signal
difference) if a red or yellow filter is used.
4-3
rad PADD Imaging Guidelines
The rad PADD utilizes patented technology to convert high-energy beta particles (32P, 90Y,
111In, 125I) into light (photons) that are collected by the IS4000R lens. The rad PADD
cassette provides containment of radioactively labelled samples, reducing cross
contamination of sample which can cause imaging artifacts.
When using the rad PADD with the IS4000R for exposure times of 4 hours or less, you
will detect signals equivalent to KODAK X-OMAT AR film and KODAK X-OMAT
Screens.
Like luminescent samples, radiolabeled samples can vary greatly in signal intensity. Low
signals may generate images that do not fill all the signal levels in the Image Histogram in
a reasonable period of time. Therefore, low signal levels may require binning in both the X
and Y directions. Generally, greater than 300 gray levels is desired, particularly if multiple
objects are to be measured. The total exposure time for radiolabeled samples on the
IS4000R is typically close to that of autoradiography film for short exposures (< 2 hours)
For higher signal levels and wider dynamic range, increase the exposure time.
4-4
Preparing the IS4000R for Imaging
Your IS4000R should be installed, see Chapter 8: Installing the System. The camera should
be turned on and cooled prior to capturing images. The cooling of the camera is critical for
low-level signal detection. The software warns you if you try to capture an image before
the camera has sufficiently cooled (typically 20 minutes is required to stabilize
temperature).
Be sure that the Platen surface is clean prior to any sample placement. Dust, fingerprints,
or scratches on the Platen may introduce artifacts in your data. Extra care should be taken
when cleaning the Platen to avoid scratches.
1 Open the Capture Chamber door.
4
2 Turn the Camera Power Switch on. An indicator light is displayed when the camera is
☞
Setting Up
operational. For maximum sensitivity allow the camera to cool down for
approximately 30 minutes before beginning your imaging.
NOTE: We recommend that you keep the camera powered on continuously.
Turning the camera on and off may cause condensation in the optics. Power
consumption is minimal.
3 Open the IS4000R lid.
4 Use an ammonia based spray cleaner. Wipe the Platen and the Surface Work Area with
a lint-free soft cloth or damp paper towel.
☞
NOTE: Special care should be taken if your sample is dry. Assure a dry surface
by a quick ethanol wipe.
WARNING: Ammonia based spray cleaners may cause eye irritation. Consult the
manufacturer’s material safety data sheet for additional information prior to use.
WARNING: Do not use metal utensils or tweezers since they may scratch and
permanently damage the Platen. This type of damage is not covered by the
warranty.
WARNING: Do not expose the Platen to strong chemical solvents such as ketones,
hexanes, acids and alkalis that may permanently damage the Platen. This type of
damage is not covered by the warranty.
4-5
Launching the Software
A few minutes before image capture, prepare the system by opening the IS4000R Acquire
window.
1 Launch KODAK Molecular Imaging Software by clicking the KODAK MI icon found
in the KODAK MI folder.
2 Choose Select Digital Camera from the File menu and IS4000R from the Digital
Camera pop-up menu.
✔ If you have previously used the IS4000R, click the IS4000R Capture button on the
Status bar. The software searches for that camera in the port configuration last
used.
✔ If the IS4000R camera is not found, the Select Digital Camera dialog box appears
allowing you to select the camera. Choose IS4000R from the Digital Camera popup menu and click OK.
The Port and Connection Speed pop-up menus will be disabled
☞ NOTE:
because these are not user-defined options for IEEE 1394 (FireWire) devices.
✔ If a IS4000R camera is found, the software remembers the camera port and in the
future automatically looks at this port first. The File menu and the Status bar
Camera Access button updates to reflect the current camera selection.
3 You will be prompted upon first selection of the IS4000R to state whether you have
purchased the optional Image Station Transilluminator Lid Accessory. Select Yes or
No as appropriate.
4-6
4 The IS4000R Acquire window appears.
4
Setting Up
4-7
Orienting the Sample for Capture
Now that the Platen is clean and the IS4000R Acquire window is open, you are ready to
orient your sample on the center of the Platen. Placement of your sample is similar to placing
a document on a photocopier.
Non-Radioactive Sample Orientation
The Platen accommodates samples up to 20 x 20 cm. The Platen area is water-tight and
inert, ideal for biochemical, luminescence, and other photochemical reactions.
1 Open the IS4000R lid.
2 Place the sample on the center of the Platen. Use plastic tweezers (included with the
system) to avoid scratching the Platen.
✔ For opaque samples (blots, small animals, plants)—orient the sample labelled side
face down on the Platen.
✔ For translucent samples (gels, autorads, culture plates, flasks and well plates)—
orient the sample either way on the Platen.
✔ If the sample is wet (gels, blots), puddle water or buffer on the Platen prior to
placement of the sample to minimize bubble artifacts.
☞
NOTE: Leave the lid open to use ambient light for visualizing the sample.
WARNING: Do not use metal utensils or tweezers since they may scratch and
permanently damage the Platen. This type of damage is not covered by the
warranty.
WARNING: Do not expose the Platen to strong chemical solvents such as ketones,
hexanes, acids and alkalis that may permanently damage the Platen. This type of
damage is not covered by the warranty.
3 Proceed to Previewing the Image, later in this chapter.
4-8
Radioactive Sample Orientation Using the rad PADD Accessory
The rad PADD accommodates blots, membranes, or gels up to 16 x 16 cm.
1 Open the rad PADD cassette—the phosphor screen of the cassette should be placed
facing on the Platen.
2 Place the sample on the center of the phosphor screen.
4
Setting Up
☞
NOTE: Leave the lid open to use ambient light for visualizing the sample. After
previewing, close the cassette and close the IS4000R lid.
☞
NOTE: To decontaminate your screen, refer to Radiological Decontamination
Procedure in Chapter 6: Maintaining the System.
4-9
Previewing the Image
The Preview mode offers you a way to position your sample and preview what the camera
will image. It is important to maximize the number of pixels across the area you want to
image and make sure that the image is in focus.
1 Click the Preview button to view the sample on the screen. The IS4000R Preview
window opens.
The Preview is designed to aid you in sample placement using ambient light.
2 Use the Exposure Time slider to set an appropriate preview exposure time. The
maximum exposure time is 5 seconds.
☞
4-10
NOTE: Focusing the camera should not be necessary for most samples placed
on the Platen. To focus, adjust the Focus Ring on the camera lens. A special
mark has been placed in the approximate parfocal location at the Platen.
☞
NOTE: Precision focus is available using the software-assisted focusing tool in
the Preview mode. See Using the Focusing Tool, later in this chapter.
☞
NOTE: Focus adjustments are required when using the rad PADD.
3 Adjust the Field of View (FOV) Ring on the camera lens to fill the entire frame with
the sample image or features of interest. This maximizes the number of pixels within
your sample image.
☞
NOTE: The field of view setting relates directly to the image resolution. The
IS4000R CCD has a pixel resolution of 2048 x 2048 pixels. At the smallest field
of view (FOV 20), the number of pixels are spread over a 2 x 2 cm area
producing a resolution of ~10 microns/pixel. At the largest field of view setting
(FOV 200), the pixels are spread over a 20 x 20 cm area (~100 microns/pixel).
An important consideration is the number of pixels that are applied to the
smallest feature of interest.
Setting Up
4 Click Done when you are satisfied with your field of view.
4
5 Record the field of view setting using the FOV slider in the Set Camera To section of
the IS4000R Acquire window.
4-11
Choosing the Filter and Illumination Conditions
This section contains the basic guidelines on how to set up the illumination and filters
prior to image capture.
1 Select the filter using the Filter Selection Dial located at the top of the Capture System
Chamber. The filters available for the IS4000R are described in Table 4.2: Filter
Selection.
Table 4.1: Filter Selection
Filter
No Filter
Wavelength
—
600 nm WB 600 nm ± 35
670 nm WB 670 nm ± 35
film, Coomassie stained
gels, chemiluminescence
and radioisotopic
ethidium bromide, Ruby
Red, Texas Red, Ruby
Orange
Cy-5, TOT3, Acrydine
Orange-RNA
Comments
Transmission mode
densitometry, rad PADD,
chemiluminescence
Suppresses fluorescein and
Cy-5
Discriminates against
fluoresceins and
suppresses ethidium
bromide and Cy-3
Suppresses Cy-5
570 nm WB 570 nm ± 35
Cy-3, Pyronin Y
535 nm WB 535 nm ± 35
Fluorescein, Rhodamine,
Suppresses ethidium
Eosin, SYBR Green, SYBR bromide and discriminates
Gold, Acrydine Orangeagainst Cy-5
DNA
DAPI, Hoescht, SYTO Blue,
dansyl chloride
435 nm WB 435 nm ± 35
☞
4-12
Applications
NOTE: IS4000R is supplied with the 600 nm WB filter (ethidium bromide).
Specialized filters, as described above, are available through Molecular Imaging
Systems. To change a filter, refer to Replacing or Changing an Emission Filter
in Chapter 6: Maintaining the System.
2 Record the filter selection using the Filter pop-up menu in the Set Camera To section
of the IS4000R Acquire window.
4
NOTE: If your filter is not listed in the Filter pop-up menu, use the Edit button to
define the filter using the Available Filter dialog box. See Replacing or
Changing an Emission Filter in Chapter 6: Maintaining the System.
3 Choose the appropriate sample background:
✔ Luminescence
Blot (flat)—use the black side of the Compression Pad to apply modest sample
pressure.
✔ UV Epi-illumination
Thick samples (gel or other)—remove the Compression Pad from the lid.
Thin samples (blot or other)—use the black side of the Compression Pad to apply
modest sample pressure.
UV fluorescence quenching with an autofluorescing sample (blot, TLC)—use the
black side of the Compression Pad to apply modest sample pressure.
UV fluorescence quenching with a clear sample (thin gel, microscope slide)—use
the white side of the Compression Pad to assure light return and to apply modest
sample pressure. Assemble gel sandwich wet.
✔ UV Transillumination UV with the optional Image Station Transilluminator Lid
Accessory—make sure the transilluminator is clean.
4-13
Setting Up
☞
✔ White Light Transillumination with Light Diffuser
Thin samples (transmission)—place the Light Diffuser directly onto the sample to
provide even distribution of external light and modest sample pressure.
Thick samples (transmission)—use the Light Diffuser Risers or add shims to space
the diffuser from the sample.
✔ White Light Transillumination with the optional Image Station Transilluminator
Lid Accessory—make sure the transilluminator is clean. Attach the White Light
PADD.
✔ Radioisotopic—use the rad PADD accessory cassette. Place the sample on the
phosphor screen and close the cassette.
4 If your sample requires illumination, power the illumination source.
✔ Luminescence—none
✔ UV Epi-illumination—use the UV ON/OFF switch on the front of the Capture
System Chamber.
✔ UV fluorescence—use the UV ON/OFF switch on the front of the Capture System
Chamber.
✔ UV Transillumination with the optional Image Station Transilluminator Lid
Accessory—use the ON/OFF switch on the front of the lid.
✔ White Light Transillumination with Light Diffuser—none
✔ White Light Transillumination with the optional Image Station Transilluminator
Lid Accessory—use the ON/OFF switch on the front of the lid.
✔ Radioisotopic—none
☞
4-14
NOTE: Most UV and transmissions images will benefit from using illumination
reference to correct non-uniform in sample illumination. If you have generated
an Illumination Reference File, apply by selecting an Illumination Reference
File with the corresponding f-stop and FOV from the pop-up menu. The f-stop
and field of view settings used to capture the image must be the same as those
used to generate the Illumination Reference File. If you need to create a new
reference file, see Generating an Illumination Reference File Library in Chapter
5: Capturing Images.
5 Depending on the illumination mode, you may need to close and clasp the lid.
✔
✔
✔
✔
Luminescence—closed
UV Epi-illumination—closed
UV fluorescence—closed
UV Transillumination with the optional Image Station Transilluminator Lid
Accessory—closed
✔ White Light Transillumination with Light Diffuser—open
✔ White Light Transillumination with the optional Image Station Transilluminator
Lid Accessory—closed
✔ Radioisotopic—closed (both rad PADD cassette and lid
4
Setting Up
4-15
Setting the f-Stop
The f-stop or lens aperture determines the amount of light that passes through the lens,
while the exposure time controls how long the CCD is exposed. You will improve
resolution using a higher f-stop (smaller apertures), however since signal is reduced, a
longer exposure time may be required.
Generally, we recommend that you use f-stop O (Open) for speed and resolution. For flat
formats, f-stops higher than fO will not substantially contribute to image resolution.
However, you may need to increase the f-stop for unusually thick samples. Note that the
exposure time is related to the inverse square of the f-stop.
1 Set the f-stop by using the f-Stop Ring on the lens. Use these guidelines:
✔ Luminescence—use the largest aperture f O to maximize signal
✔ UV epi-illumination—when exposure time is unusually long (dim fluorescence),
use f 2.8
✔ UV transillumination—use fO to f2.8
✔ White Light Transillumination—use f2.8 to f11 to extend exposure time so you
have greater control of your dynamic range
✔ Radioisotopic—use the largest aperture fO to maximize signal
2 Record the f-stop setting using the f-Stop slider in the Set Camera To section of the
IS4000R Acquire window.
☞
4-16
NOTE: The f-stop on the IS4000R lens is adjustable. It is important that you
record the setting for accurate lens correction.
Image Capture Guidelines Summary
The following table is a summary of these guidelines and helpful suggestions:
Table 4.2: Image Capture Guidelines
Detection
Method
Examples
Exposure
Type*
f-stop
Illumination
Typical Exposure
Time
Comments
Standard
exposure,
binning,
fO (Open)
None
Equal to film exposure.
< 15 minute for single
exposure, > 15 min for
multiple exposures
accumulated
Lid closed.
Use Black Pad.
UV epiillumination
Gels and
blots
Standard
exposure, no
binning,
fO (Open)
UV epiillumination ,
Lid closed
5 second single
exposure
Lid closed.
Use Black Pad.
UV
Transillumina
tion
Ethidium
bromide gels
and
fluorescent
blots
Standard
exposure, no
binning
fO–f8
Transilluminator < 1 second single
Lid Accessory
exposure
Optional Image
Station
Transilluminator Lid
Accessory
White Light
transilluminat
ion
Autorad film
Coomassie
gels
plates
Standard
exposure, no
binning
f2.8–f11
External or
ambient
overhead
0.05 second single
exposure
Lid open.
Use Light Diffuser
White Light
transilluminat
ion
Autorad film
Coomassie
gels
plates
Standard
exposure, no
binning
f2.8–f11
External or
ambient
overhead
0.05 second single
exposure
Optional Image
Station
Transilluminator Lid
Accessory
UV epiillumination
Fluorescence
Quenching
(opaque
sample)
Chromogenic Standard
blots
exposure, no
binning
fO (Open)
f8
UV epiillumination
0.5–2 second(s) single
exposure
Lid closed.
Lid closed.
Use Black Pad.
fO (Open)
–f8
UV epiillumination
0.5 second single
exposure
Lid closed.
Use White Pad
fO (Open)
None
Equal to film exposure.
< 3 minute for single
high signal option. > 3
min for multiple
exposures
accumulated—low
signal option
rad PADD accessory
is required for this
capture mode.
Sample in closed
cassette, IS4000R lid
closed.
TLC plates
UV epiStained gels
illumination
Fluorescence
Quenching
(clear sample)
Radioisotopes Northern/
Southern
blots, TLC,
Kinetic
experiments
Standard
exposure, no
binning,
rad PADD, 4
x 4 binning,
* Standard Single exposures provide excellent quality 16-bit images that are good for most
applications, Standard multiple accumulated image options may also be used to improve
quantitation and dynamic range—beyond 16-bit.
4-17
4
Setting Up
Luminescence Chemi blots
Using the Focusing Tool
The IS4000R has been designed to be parfocal at the Platen. If you should you need to
adjust the focus, use the Focus Ring.
If your samples vary in thickness or are using the rad PADD, the software-assisted
focusing tool is available in the Preview mode. The software determines camera focus by
using the sharpness of edges within the image. To adjust focus:
1 Place your sample on the Platen.
2 Click Preview.
3 Adjust the Zoom to fill your field of view with the sample.
4 Place a ruler or any sharp edged flat object on top of your sample.
5 Click the Focus Camera checkbox. A selection rectangle will appear on screen, in the
center of the image.
6 Adjust the Focus Ring to maximize the numerical value appearing in the text box.
✔ Increasing values indicate focus is sharpening, whereas decreasing values indicate
blurring of the image.
✔ A contrast target placed at the same focal plane will improve your determination of
focus.
To exit the focusing mode, uncheck the Focus Camera checkbox.
4-18
Capturing Images
Now you will step through the procedures for capturing and submitting KODAK Image
Station 4000R (IS4000R) images. The IS4000R supports a wide variety of capture modes,
providing you with a flexible, multi-purpose imaging system for your laboratory. Capture
modes include single frame, multiple frame, time lapse, progressive, and rad PADD
exposures.
5
Capturing Images
5-1
Using the Standard Exposure Option
Use the Standard Exposure option to take a single image or capture multiple images.
When you capture multiple images you can choose to save each capture as a separate file,
accumulate all the captures in a single file, or generate a series of accumulations. To
increase sensitivity you may also choose to X and/or Y bin your image.
1 Choose Standard Exposure from the Exposure pop-up menu. The Standard Exposure
options appear.
2 Enter the desired exposure time using the Exposure Time text edit box and the Units
pop-up menu. Choose an exposure time to maximize the use of all available signal
levels in the image without saturation.
The minimum and maximum exposure times are 0.05 second and 100 minutes per
capture, respectively. The minimum time for binned exposures is 1 second. The time
units can be set as seconds or minutes. The minimal increment is 0.1 second.
✔ Luminescence—use the exposure time you typically use with film or use the
Predict button.
✔ UV Epi-illumination—start with an exposure time of 5 seconds per capture.
✔ UV Transillumination with the optional Image Station Transilluminator Lid
Accessory—start with an exposure time of 0.5 second per capture.
✔ White Light Transillumination with Light Diffuser—start with an exposure time of
0.1 second per capture.
✔ White Light transillumination with the optional Image Station Transilluminator
Lid Accessory and White Light PADD—start with an exposure time of 0.05 second
per capture.
✔ rad PADD—use the exposure time you typically use with film or use the Predict
button.
5-2
☞
☞
NOTE: For chemiluminescence and rad PADD, use the Predict button to open a
dialog box to get a prediction of the optimal exposure time based upon the desired
number of gray levels (GL). When the Calculate button is pressed, the camera
takes a series of exposures to predict the optimal exposure time. Once determined,
the predicted exposure time and number of exposures are automatically updated in
the Exposure Time and No. Exposures text edit boxes.
NOTE: For multiple captures, use the IS4000R Preferences window to set a
capture preference that automatically stops image capture when saturation
occurs in a single frame. Additionally, in the Capture Status window, you can
choose to display the saturated pixels on screen in red.
3 Enter the number of exposures using the No. Exposure text edit box. You can choose to
take up to 32 exposures.
✔ Multiple captures are recommended for weak signal samples where exposures of
greater than 20 minutes are required. You may also choose to do multiple exposures
if you want to increase dynamic range.
4 To increase sensitivity, you may also choose to X and/or Y bin your image using the X
Binning and Y Binning pop-up menus.
✔ Select binning options for low signal conditions, such as luminescent and rad
5
Capturing Images
PADD exposures. Experimental considerations can also influence the choice of
binning settings, such as preferential spatial resolution in either the X or Y
direction. Therefore, if you need to resolve closely spaced bands in the Y-direction,
consider binning only in the X direction to preserve the integrity of band resolution
in the Y-direction while enhancing signal. This is called asymmetric binning,
enabling a maximum of 8 x 1 binning that yields an 8X signal increase. When
necessary, use the pop-up menus to select X and/or Y binning and the number of
pixels.
✔ Selecting X and/or Y binning combines the values from two, four, eight or sixteen
adjacent pixel signals in the direction(s) selected. Expect up to a 256-fold increase
in the rate of signal accumulation when 16 x 16 X and Y binning are selected.
5-3
5 For multiple exposures, you can choose the types of images you want to generate from
the exposure using the Export options pop-up menu.
✔ Final Accumulation opens only the final image as a project.
✔ All Accumulations saves each accumulation to the hard drive and opens the final
accumulation.
✔ All Images displays the final accumulation as a project and saves the intermediate
accumulations and each of the separate image files on your hard drive.
✔ Separate Images saves each separate exposure on you hard disk.
6 Optional: Select your name from the User pop-up menu or enter your name in the User
text edit box in the User section of the IS4000R Acquire window. Select Add User to
save the user name.
7 Optional: Type text (up to 48 characters) in the Annotation text edit box. The
Annotation bar is appended to the image upon printing and to the image when opened
in the Annotation mode.
✔ When you choose to annotate your image, illumination type, time of capture, and
exposure time and date are appended to your annotation.
✔ Each time you take a picture the Annotation text edit box is cleared.
✔ Display or hide the Annotation bar by selecting the Show Annotation bar from
within the Annotation panel.
✔ All items in the Annotation bar are separate objects in the Annotation window. This
allows you to edit or change the font style, color, or size prior to printing. The
contents, however are grouped and must be ungrouped prior to editing.
8 Choose the Illumination Source from the pop-up menu in the IS4000R Acquire
window.
9 Choose a reference file (as appropriate) from the Apply Reference pop-up menu.
✔ Use a reference file to correct for uneven illumination when imaging using epiillumination or Transillumination light sources.
✔ A library of illumination corrections can be generated for your convenience, refer
to Generating an Illumination Reference File Library section later in this chapter.
5-4
✔ Reference files must match illumination and capture settings of the image you are
capturing. A warning message appears if you try to apply a reference file with
incorrect parameters.
✔ Automatic can be chosen to create a reference file at the time of image capture.
10 Click Expose. If you have set multiple exposures with intermediate or separate files
options, the Save dialog box appears prompting you to select a location to save the
files. Choose the destination drive and file name (and folder for multiple image
captures). Click Save to start the capture.
☞
NOTE: You can save your capture parameters using the Settings option in the
User section of the IS4000R Acquire window. See Custom Capture Settings later
in this chapter.
11 The Capture Status window appears.
For single image captures, the following window appears.
✔ The Current Capture text field indicates the exposure time that was set for the
5
capture in progress.
Capturing Images
✔ The Current Capture progress bar displays the status of the capture.
✔ The Elapsed Time text field indicates the elapsed time since the beginning of the
exposure.
✔ Use the Hide button to close the window without stopping the exposure. You can
access the window by selecting IS4000R from the File menu or the IS4000R
Capture button on the Status bar.
✔ Use the Stop Capture button to interrupt the capture and return to the IS4000R.
Acquire window. No Image is saved.
12 Turn off the light source, if appropriate.
5-5
13 For multiple image captures, the following window appears.
✔ The Elapsed Time text field shows the elapsed time since the beginning of the
exposure.
✔ The Current Capture text field indicates the current capture in the series.
✔ The Current Capture progress bar indicates the status of the current exposure.
✔ The Expt Duration text field displays the total time from the beginning of the first
frame to the end of the last frame—regardless of the exposure type.
✔ The Expt Duration progress bar shows the status of the entire experiment
(including all exposures).
✔ Use the Stop Capture button to interrupt the current capture and return to the Image
Window. Any images saved to the hard drive prior to selecting this button are
preserved. All the appropriate image filters/corrections are applied. If selected, a
final accumulated image is opened.
✔ Dynamic Range provides signal intensity information about the image being
captured. Min and Max text fields display the current minimum and maximum
signal values within the image. The Show Saturation check box shows any
5-6
saturated pixels in the image in red. The Auto Stop at check box sets a dynamic
range at which the capture process is interrupted. For example, you can set the auto
stop at value to 10,000 in the AutoStop at text edit box. Whenever an accumulation
is added and the difference between the maximum and minimum values is greater
than 10,000 signal values, the capture process stops and the image is opened.
☞
NOTE: If the image reaches saturation immediately (image turns red), decrease
the exposure time or use a higher f-stop setting.
☞
NOTE: If the image is not near saturation, estimate the exposure time by using
the Predict button.
☞
NOTE: To achieve the maximum dynamic range, the exposure time estimate
determined above (filling the 16-bit scale with a single capture) should be
implemented using the accumulation of 32 captures (filling the floating point bit
scale with accumulated signal). Intermediate levels of dynamic range may be
achieved by accumulating fewer images.
✔ The Analyze button transfers the last completed image or accumulation captured
for analysis. Use this option anytime during the capture process to open
intermediate images. Selecting this option will not stop the capture in progress.
✔ Use the Hide button to close the window without stopping the exposure. You can
access the window by selecting IS4000R from the File menu or by using the
IS4000R Capture button on the Status bar.
✔ The Information bar directly below the image contains the current exposure type
and user name.
5
Upon completion a dialog box appears alerting you that the capture is complete.
Capturing Images
14 Once the exposure(s) are completed, you are ready to print, analyze, or annotate your
image.
✔
✔
✔
✔
Single captures are opened as KODAK MI projects on your desktop.
Final accumulation images are opened as projects on your desktop.
Intermediate accumulations are saved as projects to your hard drive.
Separate images from a multiple image capture are saved as projects to your hard
drive.
15 Turn off the light source, if appropriate.
5-7
Using the Time Lapse Exposure Option
The Time Lapse exposure option is designed to take multiple exposures over fixed time
intervals. For example, you may take a 10 second exposure every hour over the next 32
hours.
1 Choose Time Lapse Exposure from the Exposure pop-up menu. The Time Lapse
Exposure options appear.
2 Enter the desired exposure time using the Exposure Time text edit box and the Units
pop-up menu. Choose an exposure time to maximize the use of all available signal
levels in the image without saturation.
The minimum and maximum exposure times are 0.05 second and 100 minutes per
capture, respectively. The time units can be set as seconds or minutes. The minimal
increment is 0.1 second.
✔ Luminescence—use the exposure time you typically use with film.
✔ UV Epi-illumination—start with an exposure time of 5 seconds per capture.
✔ UV Transillumination with the optional Image Station Transilluminator Lid
Accessory—start with an exposure time of 0.1 second per capture.
✔ White Light Transillumination with Light Diffuser—start with an exposure time of
0.2 second per capture.
✔ White Light transillumination with the optional Image Station Transilluminator
Lid Accessory and White Light PADD)—start with an exposure time of 0.05
second per capture.
✔ rad PADD—use the exposure time you typically use with film.
☞
5-8
NOTE: For multiple captures, use the IS4000R Preferences window to set a
capture preference that automatically stops image capture when saturation
occurs in a single frame. Additionally, in the Capture Status window, you can
choose to display the saturated pixels on screen in red.
3 Enter the interval in the Interval text edit box and the Units pop-up menu. The time
interval is the time between the beginning of one exposure and the beginning of the
next exposure. Thus, it must exceed the entry for the exposure time. The maximum
time interval is 24 hours.
4 Enter the stop criteria using the Stop After text edit box and the Units pop-up menu.
Using this pop-up menu you can choose to set the stop criteria based on a total elapsed
time or by the number of frames. The maximum duration is 150 hours or 32 captures.
5 To increase sensitivity, you may also choose to X and/or Y bin your image using the X
Binning and Y Binning pop-up menus.
✔ Select binning options for low signal conditions, such as luminescent and rad
PADD exposures. Experimental considerations can also influence the choice of
binning settings, such as preferential spatial resolution in either the X or Y
direction. Therefore, if you need to resolve closely spaced bands in the Y-direction,
consider binning only in the X direction to preserve the integrity of band resolution
in the Y-direction while enhancing signal. This is called asymmetric binning,
enabling a maximum of 8 x 1 binning that yields an 8X signal increase. When
necessary, use the pop-up menus to select X and/or Y binning and the number of
pixels.
5
Capturing Images
✔ Selecting X and/or Y binning combines the values from two, four, eight or sixteen
adjacent pixel signals in the direction(s) selected. Expect up to a 256-fold increase
in the rate of signal accumulation when 16 x 16 X and Y binning are selected.
6 Optional: Select your name from the User pop-up menu or enter your name in the User
text edit box in the User section of the IS4000R Acquire window. Select Add User to
save the user name.
5-9
7 Optional: Type text (up to 48 characters) in the Annotation text edit box. The
Annotation bar is appended to the image upon printing and to the image when opened
in the Annotation mode.
✔ When you choose to annotate your image, illumination type, time of capture, and
exposure time and date are appended to your annotation.
✔ Each time you take a picture the Annotation text edit box is cleared.
✔ Display or hide the Annotation bar by selecting the Show Annotation bar from
within the Annotation panel.
✔ All items in the Annotation bar are separate objects in the Annotation window. This
allows you to edit or change the font style, color, or size prior to printing. The
contents, however are grouped and must be ungrouped prior to editing.
8 Choose the Illumination Source from the pop-up menu in the IS4000R Acquire
window.
9 Choose a reference file (as appropriate) from the Apply Reference pop-up menu.
✔ Use a reference file to correct for uneven illumination when imaging using epiillumination or Transillumination light sources.
✔ A library of illumination corrections can be generated for your convenience, refer
to Generating an Illumination Reference File Library later in this chapter.
✔ Reference files must match illumination and capture setting to the image you are
applying them. A warning message appears if you try to apply a reference file with
incorrect parameters.
10 Click Expose. A Save dialog box appears prompting you to select a location to save the
files. Choose the destination drive and folder. Enter the file name and click Save.
☞
5-10
NOTE: You can save your capture parameters using the Settings option in the
User section of the IS4000R Acquire window. See Custom Capture Settings
later in this chapter.
11 The Time Lapse Capture Status window appears.
✔ The Elapsed Time text field shows the elapsed time since the beginning of the
exposure.
✔ The Current Capture text field indicates the current capture in the Time Lapse
5
series.
interval corresponds to the time between the beginning of one capture and the
beginning of the next capture.
✔ The Interval progress bar displays the status of the capture during the current time
interval.
✔ The Expt Duration text field displays the total time from the beginning of the first
frame to the end of the last frame—regardless of the exposure type.
✔ The Expt Duration progress bar shows the status of the entire experiment
(including all exposures).
5-11
Capturing Images
✔ The Current Capture progress bar displays the status of the current capture.
✔ The Interval text field shows the elapsed time in the current time interval. The
✔ Use the Stop Capture button to interrupt the current capture and return to the
IS4000R Acquire window. Any images saved to the hard drive prior to clicking this
button are preserved and all the appropriate image filters/corrections are applied.
✔ Dynamic Range provides signal intensity information about the image being
captured. Min and Max text fields display the current minimum and maximum
signal values within the image. The Show Saturation check box shows any
saturated pixels in the image in red.
If the image reaches saturation immediately (image turns red),
☞ NOTE:
decrease the exposure time or set a higher f-stop setting.
✔ The Analyze button transfers the last completed image or accumulation for
analysis. You can choose this option anytime during the capture process to open
intermediate images. Selecting this option will not stop the capture in progress.
✔ The Hide button closes the window without stopping the exposure. Access the
window by selecting IS4000R from the File menu or by using the IS4000R Capture
button on the Status bar.
✔ The Information bar directly below the image contains the current exposure type
and user name.
Upon completion a dialog box appears alerting you that the capture is complete.
12 Turn off the light source, if appropriate.
13 Once the exposure(s) are completed, you are ready to print, analyze, or annotate your
image. Each separate image is saved as a project on your hard drive.
5-12
Using the Progressive Exposure Option
The Progressive Exposure option is designed to take a continuous sequence of exposures
at different exposure times. You can automate complex exposure options—rather than
manually having to set each exposure time. For example, you may want to capture an
image at each of the following exposure times: 10, 20, 40, and 80 seconds.
1 Choose Progressive Exposure from the Exposure pop-up menu. The Progressive
Exposure options appear.
2 Enter the desired exposure time using the Exposure Time text edit box and the Units
pop-up menu. Choose an exposure time to maximize the use of all available signal
levels in the image without saturation.
The minimum and maximum exposure times are 0.05 second and 100 minutes per
capture, respectively. The minimum exposure time for a binned image is 1 second. The
time units can be set as seconds or minutes. The minimal increment is 0.1 second.
✔ Luminescence—use the exposure time you typically use with film.
✔ UV Epi-illumination—start with an exposure time of 5 seconds per capture.
✔ UV Transillumination with the optional Image Station Transilluminator Lid
5
Accessory—start with an exposure time of 0.5 second per capture.
0.01 second per capture.
✔ White Light transillumination with the optional Image Station Transilluminator
Lid Accessory and White Light PADD—start with an exposure time of 0.05 second
per capture.
✔ rad PADD—use the exposure time you typically use with film.
☞
NOTE: For multiple captures, use the IS4000R Preferences window to set a
capture preference that automatically stops image capture when saturation
occurs in a single frame. Additionally, in the Capture Status window, you can
choose to display the saturated pixels on screen in red.
5-13
Capturing Images
✔ White Light Transillumination with Light Diffuser—start with an exposure time of
3 Enter the increment value for each exposure, using the Increment text edit box and the
Units pop-up menu. The minimum exposure time increment is 0.1 second.
✔ The Additive option of Sec or Min adds the increment value to each exposure. For
example: 2 sec + 2 sec = 4 sec, 4 sec + 2 sec = 6 sec, 6 sec + 2 sec = 8 sec.
✔ The Multiplier option multiplies the increment to create a new exposure. For
example: 2 sec x 2 sec = 4 sec, 4 sec x 2 sec = 8 sec, 8 sec x 2 sec = 16 sec.
time to the power of the
✔ The Geometric Order option raises each exposure
2
2
increment value entered. For example: (2 sec) = 4 sec, (4 sec) = 16 sec, (16 sec)2
= 256 sec. This option is particularly relevant to maximize the signal-to-noise ratio
of a CCD image.
4 Enter the number of exposures using the No. Exposure text edit box. You can choose to
take up to 32 exposures.
5 To increase sensitivity, you may also choose to X and/or Y bin your image using the X
Binning and Y Binning pop-up menus.
✔ Select binning options for low signal conditions, such as luminescent and rad
PADD exposures. Experimental considerations can also influence the choice of
binning settings, such as preferential spatial resolution in either the X or Y
direction. Therefore, if you need to resolve closely spaced bands in the Y-direction,
consider binning only in the X direction to preserve the integrity of band resolution
in the Y-direction while enhancing signal. This is called asymmetric binning,
enabling a maximum of 8 x 1 binning that yields an 8X signal increase. When
necessary, use the pop-up menus to select X and/or Y binning and the number of
pixels.
✔ Selecting X and/or Y binning combines the values from two, four, eight or sixteen
adjacent pixel signals in the direction(s) selected. Expect up to a 256-fold increase
in the rate of signal accumulation when 16 x 16 X and Y binning are selected.
6 Optional: Select your name from the User pop-up menu or enter your name in the User
text edit box in the User section of the IS4000R Acquire window. Select Add User to
save the user name.
5-14
7 Optional: Type text (up to 48 characters) in the Annotation text edit box. The
Annotation bar is appended to the image upon printing and to the image when opened
in the Annotation mode.
✔ When you choose to annotate your image, illumination type, time of capture, and
exposure time and date are appended to your annotation.
✔ Each time you take a picture the Annotation text edit box is cleared.
✔ Display or hide the Annotation bar by selecting the Show Annotation bar from
within the Annotation panel.
✔ All items in the Annotation bar are separate objects in the Annotation window. This
allows you to edit or change the font style, color, or size prior to printing. The
contents, however, are grouped and must be ungrouped prior to editing.
8 Choose the Illumination Source from the pop-up menu in the IS4000R Acquire
window.
9 Choose a reference file (as appropriate) from the Apply Reference pop-up menu.
✔ Use a reference file to correct for uneven illumination when imaging using epiillumination or Transillumination light sources.
✔ A library of illumination corrections can be generated for your convenience, refer
to Generating an Illumination Reference File Library later in this chapter.
✔ Reference files must match illumination and capture setting to the image you are
applying them. A warning message appears if you try to apply a reference file with
incorrect parameters.
10 Click Expose. A Save dialog box appears allowing you to select a destination drive and
folder. Enter the file name and click Save.
Capturing Images
11 Turn off the light source, if appropriate.
5
5-15
12 The Progressive Capture Status window appears.
✔ The Elapsed Time text field shows the elapsed time since the beginning of the
exposure.
✔ The Current Capture text field indicates the number of the current exposure in the
progressive series being captured.
✔ The Current Capture progress bar displays the status of the current capture.
✔ The Expt Duration text field displays total time from the beginning of the first
frame to the end of the last frame—regardless of the exposure type.
✔ The Expt Duration progress bar shows the status of the entire experiment including
all progressive exposures.
✔ Use the Stop Capture button to interrupt the current capture and return to the
IS4000R Acquire window. Any images saved to the hard drive prior to clicking this
button are preserved and all the appropriate image filters/corrections are applied.
✔ Dynamic Range provides signal intensity information about the image being
captured. Min and Max text fields display the current minimum and maximum
signal values within the image. The Show Saturation check box shows any
5-16
saturated pixels in the image in red. The Auto Stop at check box sets a dynamic
range at which the capture process is interrupted. For example, you can set the auto
stop value at 10,000 in the Auto Stop at text edit box. Whenever an accumulation is
added and the difference between the maximum and minimum value is greater than
10,000, the capture process stops and the image is transferred. The default setting
is 65,535 signal intensities.
If the image reaches saturation immediately (image turns red),
☞ NOTE:
decrease the exposure time or set a higher f-stop setting.
✔ The Analyze button transfers the last completed image or accumulation for
analysis. Use this option anytime during the capture process to open intermediate
images. Selecting this option will not stop the capture in progress.
✔ Use the Hide button to close the window without stopping the exposure. You can
access the window by selecting IS4000R from the File menu or by using the
IS4000R Capture button on the Status bar.
✔ The Information bar directly below the image contains the current exposure type
and user name.
Upon completion a dialog box appears alerting you that the capture is complete.
13 Turn off the light source, if appropriate.
14 Once the exposure(s) are completed, you are ready to print, analyze, or annotate your
image. Each separate image is saved as a project on your hard drive.
5
Capturing Images
5-17
Using the rad PADD Exposure Option
The rad PADD cassette is an optional accessory available for your IS4000R, allowing
detection of high energy radioisotopes. This option allows you to take a single image or
capture multiple images. When you capture multiple images you can choose to save each
capture as a separate file, accumulate all the captures in a single file, or generate a series of
accumulations. To increase sensitivity you may also choose to X and/or Y bin your image.
1 Choose rad PADD from the Exposure pop-up menu. The rad PADD options appear.
2 Enter the desired exposure time using the Exposure Time text edit box and the Units
pop-up menu. Choose an exposure time to maximize the use of all available signal
levels in the image without saturation.
The minimum and maximum exposure times are 0.05 second and 100 minutes per
capture, respectively. The minimum exposure time for binned images is 1 second. The
time units can be set as seconds or minutes. The minimal increment is 0.1 second.
✔ rad PADD—use the exposure time you typically use with film or use the Predict
button.
☞
☞
NOTE: For rad PADD, use the Predict button to open a dialog box to get a
prediction of the optimal exposure time based upon the desired number of gray
levels (GL). When the Calculate button is pressed, the camera takes a series of
exposures to predict the optimal exposure time. Once determined, the exposure
time and number of exposures are automatically entered in the Exposure Time and
No. Exposures text edit boxes.
NOTE: For multiple captures, use the IS4000R Preferences window to set a
capture preference that automatically stops image capture when saturation
occurs in a single frame. Additionally, in the Capture Status window, you can
choose to display the saturated pixels on screen in red.
3 Enter the number of exposures using the No. Exposure text edit box. You can choose to
take up to 32 exposures.
5-18
4 To increase sensitivity, you may also choose to X and/or Y bin your image using the X
Binning and Y Binning pop-up menus.
✔ Select binning options for low signal conditions, such as luminescent and rad
PADD exposures. Experimental considerations can also influence the choice of
binning settings, such as preferential spatial resolution in either the X or Y
direction. Therefore, if you need to resolve closely spaced bands in the Y-direction,
consider binning only in the X direction to preserve the integrity of band resolution
in the Y-direction while enhancing signal. This is called asymmetric binning,
enabling a maximum of 8 x 1 binning that yields an 8X signal increase. When
necessary, use the pop-up menus to select X and/or Y binning and the number of
pixels.
✔ Selecting X and/or Y binning combines the values from two, four, eight or sixteen
adjacent pixel signals in the direction(s) selected. Expect up to a 256-fold increase
in the rate of signal accumulation when 16 x 16 X and Y binning are selected.
5 For multiple exposures, you can choose the type of file you want to generate from the
exposure using the Export options pop-up menu.
5
accumulation.
✔ All Images displays the final accumulation as a project and saves the intermediate
accumulations and each of the separate image files on your hard drive.
✔ Separate Images displays each image as it is captured.
6 Optional: Select your name from the User pop-up menu or enter your name in the User
text edit box in the User section of the IS4000R Acquire window. Select Add User to
save the user name.
5-19
Capturing Images
✔ Final Accumulation opens only the final image as a project.
✔ All Accumulations saves each accumulation to the hard drive and opens the final
7 Optional: Type text (up to 48 characters) in the Annotation text edit box. The
Annotation bar is appended to the image upon printing and to the image when opened
in the Annotation mode.
✔ When you choose to annotate your image, illumination type, time of capture, and
exposure time and date are appended to your annotation.
✔ Each time you take a picture the Annotation text edit box is cleared.
✔ Display or hide the Annotation bar by selecting the Show Annotation bar from
within the Annotation panel.
✔ All items in the Annotation bar are separate objects in the Annotation window. This
allows you to edit or change the font style, color, or size prior to printing. The
contents, however, are grouped and must be ungrouped prior to editing.
8 Click Expose. If you have set multiple exposures with intermediate or separate files
options, the Save dialog box appears allowing you to select a location to save the files.
Choose the destination drive and folder. Enter the filename and click Save.
☞
NOTE: You can save your capture parameters using the Settings option in the
User section of the IS4000R Acquire window. See Custom Capture Settings later
in this chapter.
9 The Capture Status window appears.
For single image captures, the following window appears.
✔ The Current Capture text field indicates the exposure time that was set for the
capture in progress.
✔ The Current Capture progress bar displays the status of the capture.
✔ The Elapsed Time text field indicates the elapsed time since the beginning of the
exposure.
✔ Use the Hide button to close the window without stopping the exposure. You can
access the window by selecting IS4000R from the File menu or the IS4000R
Capture button on the Status bar.
5-20
✔ Use the Stop Capture button to interrupt the capture and return to the IS4000R
Acquire window. No image is saved.
For multiple image captures, the following window appears.
Capturing Images
✔
5
The Elapsed Time text field shows the elapsed time since the beginning of the
exposure.
✔ The Current Capture text field indicates the number of the current exposure in the
progressive series being captured.
✔ The Current Capture progress bar displays the status of the current capture.
✔ The Expt Duration text field displays total time from the beginning of the first
frame to the end of the last frame—regardless of the exposure type.
✔ The Expt Duration progress bar shows the status of the capture, including all
exposures.
5-21
✔ Use the Stop Capture button to interrupt the current capture and return to the
IS4000R Acquire window. Any images saved to the hard drive prior to clicking this
button are preserved and all the appropriate image filters/corrections are applied. If
selected, a final accumulated image is opened.
✔ Dynamic Range provides signal intensity information about the image being
captured. Min and Max text fields display the current minimum and maximum
signal values within the image. The Show Saturation check box shows any
saturated pixels in the image in red. The Auto Stop at check box sets a dynamic
range at which the capture process is interrupted. For example, you can set the auto
stop value at 10,000 in the Auto Stop at text edit box. Whenever an accumulation is
added and the difference between the maximum and minimum value is greater than
10,000, the capture process stops and the image is transferred. The default setting
is 65,535 signal intensities.
If the image reaches saturation immediately (image turns red),
☞ NOTE:
decrease the exposure time or set a higher f-stop setting.
✔ The Analyze button transfers the last completed image or accumulation for
analysis. Use this option anytime during the capture process to open intermediate
images. Selecting this option will not stop the capture in progress.
✔ Use the Hide button to close the window without stopping the exposure. You can
access the window by selecting IS4000R from the File menu or by using the
IS4000R Capture button on the Status bar.
✔ The Information bar directly below the image contains the current exposure type
and user name.
Upon completion a dialog box appears alerting you that the capture is complete.
10 Once the exposure(s) are completed, you are ready to print, analyze, or annotate your
image.
✔
✔
✔
✔
5-22
Single captures are opened as projects.
Final accumulation images are opened as projects.
Intermediate accumulations are saved as projects to your hard drive.
Separate images from a multiple image capture are saved as projects to your hard
drive.
Applying an Automatic Illumination Reference File
Improve the quality of your data by applying field illumination correction to images
captured. The illumination non-uniformity is highly reproducible and may be corrected by
dividing the sample image by an illumination reference image. You can choose to create a
library of illumination correction files (see Generating an Illumination Reference File
Library) or generate an automatic illumination file following the procedure in this section.
To apply an automatic Illumination Reference file it is important to capture a reference
image of the illumination field using the same camera settings (f-stop, zoom) used at the
time you are capturing the image to be corrected.
1 Prior to capturing the image select the Automatic from the Apply Reference File popup window.
2 Capture an image as described in Capturing Images, earlier in this chapter.
☞
NOTE: Do not adjust the f-stop, zoom, exposure time, or position of lid. Upon
completion of the capture the illumination correction dialog box appears.
5
3 Remove the sample from the imaging cabinet and clean the surface.
4 Enter a name in the Output name text edit box.
new project.
☞
NOTE: You can not do an illumination reference correction if you have saturated
pixels in your images.
5-23
Capturing Images
5 Click Continue. The illumination reference is applied and the output file opens as a
Generating an Illumination Reference File Library
Improve the quality of your data by applying field illumination correction to images
captured in the UV or white light imaging modes. The illumination non-uniformity is
highly reproducible and may be corrected by dividing the sample image by an illumination
reference image. It is important to capture a reference image of the illumination field using
the same camera settings (f-stop, field of view) used when capturing the image to be
corrected.
Preparing the Instrument for Creating Illumination Reference Files
1 Remove the sample from the Platen and clean the Platen surface. Prepare the surface of
the imaging area as follows.
✔ For Epi-illumination—Place the Compression Pad with the white side against the
Platen. For best results, make sure that the Compression Pad is clean. Close the lid.
Turn the Illuminator Power switch on.
When using the optional Image Station Transilluminator Lid
☞ NOTE:
Accessory, a library of illumination correction files with varying f-stop and
field of view combinations can be generated in advance. These files are saved
in the Illumination Reference folder and are then available for application
during image capture.
✔ For White Light Transillumination with the Light Diffuser—place the Light
Diffuser on the Platen. For best results, make sure that the Light Diffuser is clean.
Open the lid to allow dim, ambient light to evenly illuminate the surface.
Make sure that you maintain the same lid position when creating the
☞ NOTE:
Illumination Reference File and imaging your sample.
✔ For White Light Transillumination with the optional Image Station
Transilluminator Lid Accessory—make sure the transilluminator is clean. For
white light attach the White Light PADD.
For transillumination using the Image Station Transilluminator Lid
☞ NOTE:
Accessory, a library of illumination correction files with varying f-stop and
field of view combinations can be generated in advance. These files are saved
in the Illumination Reference folder and are then available for application
during image capture.
2 Set the appropriate f-stop using the f-Stop Ring on the camera lens.
3 Set the field of view setting using the Field of View (FOV) Ring on the camera lens.
5-24
4 Move the Filter Selection Dial to position #1 to select the 600 nm WB filter (included
with IS4000R).
5 Open the IS4000R Acquire window by choosing IS4000R from the File menu or by
using the IS4000R Capture button on the Status bar.
6 Select Illumination Reference Exposure from the Exposure Type pop-up menu.
7 Set the exposure time.
✔ For most transilluminated samples, set the exposure time to 0.05 second or
adequate time to generate > 10,000 levels in a single exposure.
✔ For most epi-illuminated (fluorescence) samples, set the exposure time between 10
to 30 seconds to generate > 10,000 gray levels.
8 Set X and Y binning to None.
9 Select the Illumination Source (UV/Fluorescence or Transmission/Absorbance).
10 Record the f-stop and FOV settings in the Set Camera To section to match the
corresponding settings on the camera lens.
5
11 Record any filters you may be using with the Filter pop-up menus.
12 Click the Expose button. A dialog box appears asking you to enter a name for the file
13 Click OK. The file is saved.
14 The Illumination Reference File opens as a file and the IS4000R Acquire window
appears. The newly created Illumination Reference File is now available to apply to a
new image.
☞
NOTE: Illumination Reference Files may also be applied later in software using
the Image Field Correction from the Edit menu.
☞
NOTE: Upon application, the illumination file does not alter the mean value of
the image to which it is applied.
15 Turn off the light source.
5-25
Capturing Images
(a default name will be entered using the selected illumination source, f-stop, and FOV
settings).
Custom Capture Settings
You can speed up the capture process by creating custom capture settings for the various
types of experiments or specific personal preferences. Once saved, KODAK MI
remembers the camera settings which include:
✔
✔
✔
✔
✔
✔
✔
✔
✔
✔
✔
Exposure time
Number of exposures
Illumination settings
f-Stop, field of view (FOV)
Emission filter
Image orientation
Preferences
Rotation
Saturation levels
Lens, warping, and illumination correction
X and/or Y binning
☞
IMPORTANT: Settings will NOT save the User Name or Annotations.
Saving Custom Settings
1 Make all your selections from within the IS4000R Acquire window.
2 Choose the Save Settings from the Settings pop-up menu. A File Name dialog box
appears.
3 Enter a name to describe your custom settings.
4 Click OK. The settings are saved and will appear in the list of available settings.
☞
☞
5-26
NOTE: If you choose a Custom Acquire Setting, and then make modifications,
they will not be saved unless the user chooses to update them manually by
selecting Update Settings from the settings pop-up menu.
NOTE: The Custom settings are files that are saved in the MI Extensions
subfolder in the KODAK MI folder. To remove the Settings from the list,
discard the file.
Updating Custom User Settings
1 Select a custom setting from the Settings pop-up menu.
2 Modify settings as desired.
3 Choose Update Settings in the Settings pop-up menu.
Deleting Custom User Settings
1 Select a custom setting from the Settings pop-up menu.
2 Choose Delete Settings.
5
Capturing Images
5-27
5-28
Maintaining the System
6
Maintaining
The IS4000R Capture System Chamber is resistant to mild chemicals, water-tight, and
therefore, easy to maintain. Periodically, some parts of the IS4000R may need to be
replaced. This chapter reviews daily maintenance and user serviceable repairs.
6-1
Regular Maintenance
On a regular basis, the IS4000R requires little maintenance and is easy to clean. After each
use, the Sample Work Area should be wiped down. Care is needed to avoid scratching the
Platen. Clean the instrument with a soft lint-free cloth or lens paper.
Cleaning the Sample Work Area
1 Open the IS4000R lid.
2 Using an ammonia based spray cleaner, wipe the Platen, Sample Work Area and
Compression Pad surfaces with a lint-free soft cloth or lens paper.
3 Be sure the Platen area is dry and without dust particles.
☞
NOTE: Always turn the UV light source off when not in use.
WARNING:Ammonia based spray cleaners may cause eye irritation. Consult the
manufacturer’s material safety data sheet for additional information prior to use.
WARNING:Do not use metal utensils or tweezers since they may scratch and
permanently damage the Platen. This type of damage to the Platen is not covered
by the warranty.
WARNING:Do not expose the Platen to strong chemical solvents such as ketones,
hexanes, acids and alkalis that may permanently damage the Platen. This type of
damage is not covered by the warranty.
6-2
Replacing or Changing an Emission Filter
6
Maintaining
Use the following procedure to replace or change an emission filter. The IS4000R is
supplied with a 600 nm WB (ethidium bromide) filter. Specialized filters are available
through Molecular Imaging Systems. Remember that the filter number that is indicated on
the Filter Selection Dial does not correspond to the filter appearing at the Filter Access
window as described in the chart below.
Changing or Replacing an Emission Filter
1 Open the Capture Chamber Door.
2 Loosen the two retaining screws and remove the Filter Access Panel.
3 Rotate the Filter Selection Dial so that the desired filter slot is located in the Filter
Access window.
☞
NOTE: The filter viewed in the Filter Access window is one position behind
(counterclockwise) from the position indicated on the Filter Selection Dial.
Table 6.1: Filter Knob Position at Access Panel Relationship
Filter Knob
Position
Filter at Access
Window
0
1
2
3
3
0
1
2
6-3
4 To remove the Filter Cassette, insert the pins on the Filter Access Panel into the two
holes in the Filter Cassette and withdraw the filter.
5 Carefully slide in the new Filter Cassette and align the “wings” on the Filter Cassette
with the Filter Wheel. Be careful not to touch the filter element. The Filter Cassette
will lock into place when it is fully inserted.
☞
NOTE: Do not force the filter. If the filter does not lock in place, remove the
filter and realign before attempting to reinsert.
6 Replace the Filter Access Panel by aligning the pins in the holes and tightening the two
(2) retaining screws.
7 Proceed to Updating IS4000R Acquire Window.
6-4
Updating the IS4000R Acquire Window
6
If you change or replace a filter, you will need to update the IS4000R Acquire window.
Maintaining
1 Launch KODAK Molecular Imaging Software by clicking on the KODAK MI icon
found in the KODAK MI folder.
2 Choose the IS4000R Capture button or Select Digital Camera from the File menu and
IS4000R from the Digital Camera pop-up menu.
3 The IS4000R Acquire window appears.
4 Choose the Edit button in the Set camera To section of the IS4000R window.
5 The Available Filters dialog box appears.
6 Edit the appropriate filter information in the Filter Location using the Filter text edit
boxes.
7 Click OK to save the changes.
6-5
rad PADD Care and Maintenance
The rad PADD is a optional accessory. We recommend that you clean your rad PADD after
each use. Care should be taken when handling the rad PADD cassette to avoid tearing the
phosphor screen.
1 Open the rad PADD cassette and remove your sample.
2 Wearing latex or blue vinyl gloves, use a GM-type radioactivity meter calibrated in
counts per minute (CPM) to determine the background readings on the rad PADD.
3 If any part of the rad PADD is found to show readings higher than background, wipe
the area using Count Off™ (PerkinElmer Life Sciences) or another similar
commercially available detergent and paper towels. If none are available, use Formula
409™-like solution or a mild detergent.
☞
☞
WARNING: Care should be taken to avoid tearing the phosphor screen.
WARNING: If rad PADD has unremovable contamination after
continued washing and the dpm/cm2 remains constant above 100 of a
short half-life isotope such as 32P, the unit may be stored for 10 halflives of both isotopic decay and the decontamination procedure
repeated.
4 As you clean, discard liquid and solid waste (gloves and paper towels) according to
your local and institutional regulations for radioactive material disposal. Continue
washing until the GM meter reading for the contaminated area(s) is equal to or below
background.
☞
6-6
NOTE: It may be helpful to wrap your sample in plastic wrap when using wet
samples on the rad PADD to minimize radioisotope contamination.
Transilluminator Lid Bulb Replacement
6
Tools Needed
Maintaining
✔ Image Station Transilluminator Lid Bulb Set
✔ 5/64 in. hex drive
1 Turn the lid illuminator power switch to the OFF position and unplug the power cord
from the electrical outlet.
2 Open the lid to the full, upright position.
3 Using a 5/64 in. hex drive remove the 10 screws around the bulb cover.
4 Remove the bulb cover assembly.
5 The four bulbs are located at the perimeter of the light reflector. Rotate each bulb a 1/4
turn and remove. Always replace all 4 bulbs at the same time.
6 Replace the bulb cover, fasten the screws to secure.
7 Plug the power cord into a power receptacle.
6-7
6-8
Troubleshooting the System
In this chapter, common questions are addressed. The questions are divided into three
sections: Instrument, Image, and Software. If you still have questions after reading this
section and the corresponding information in the User’s Guide, contact Technical Support.
Please have your serial number and any technical information available.
7
Troubleshooting
7-1
Obtaining Technical Support
For technical support, contact Technical Support or your Molecular Imaging Systems
dealer. For up to date dealer information, visit our WEB site at
www.carestreamhealth.com/go/molecular. When contacting technical support, please have
the following information available:
✔ The serial number of your IS4000R system located on the back of the unit and the
camera serial number located on the camera.
✔ The serial number and version number of your software.
With KODAK MI running, select About KODAK MI under the Help
☞ NOTE:
menu (Windows) or select About KODAK MI under the Apple menu item
(Macintosh).
✔ The type of computer you are using (make, model).
✔ Operating system software version.
Check your operating system version by right-clicking on the My
☞ NOTE:
Computer icon and then on Properties (Windows) or select About This Mac
under the Apple menu item (Macintosh).
✔ The type of image you are capturing or analyzing.
✔ The problem you are having and what you were doing when the problem occurred.
Please note the exact wording of any error messages, including any error numbers
displayed.
Molecular Imaging Systems Technical Support
Contact Molecular Imaging Systems Technical Support by:
✔ Utilizing our World Wide Web support pages at:
http://www.carestreamhealth.com/go/molecular
✔ Calling Molecular Imaging Systems Technical Support at:
877-747-4357 or (203) 786-5657, between the hours of 8:00 a.m. and 6:00 p.m.
(Eastern Standard Time) Monday through Friday
✔ E-mailing Molecular Imaging Systems Technical Support at:
[email protected]
✔ Faxing Molecular Imaging Systems Technical Support at:
203-786-5656
7-2
Common Instrument Questions
Problem
Probable Cause
Cannot access the
FireWire Camera/Computer
IS4000R capture system. Interface Cable is not properly
connected.
The FireWire cable that came
with the IS4000R was not used.
Solution
Check the FireWire connections on
the back of the IS4000R and the
computer.
Make sure that the cable being used
is the one you received with your
IS4000R.
Check the IEEE 1394 (FireWire)
Camera/Computer Interface Cable.
No power to the camera or power Verify green LED on top of camera
supply failure.
is lit. Check the Power Switch/
Circuit Breaker.
Camera drivers not loaded
properly.
Temperature Error
The camera is not cooled to
displayed when trying to temperature.
acquire images.
Shut down computer, turn the
instrument’s Power Switch to the
ON position and then restart the
computer.
Troubleshooting
Computer was powered prior to
powering the camera.
7
Wait 30 minutes after turning the
camera on. We recommend always
keeping the camera switch in the
ON position.
From the IS4000R Acquire window,
press the Control or Ctrl and T keys
simultaneously to view the CCD
temperature. If the temperature is
higher than minus 23º C, contact
Technical Support.
Check the environmental conditions
required to operate the instrument.
Requires 6 inches (15.2 cm) of
clearance from wall or other
objects. See Chapter 8: Installing
the System.
UV light source not
working.
No power to the UV light
sources.
Check that the UV light source
switch is turned on.
Check that the power cord is
properly attached and that the outlet
is supplying power.
Check that the circuit breaker
switch on the back panel is turned
to on.
UV light source is faulty.
Contact Technical Support.
7-3
Common Image Questions
Problem
Probable Cause
Need a new filter.
7-4
Solution
Follow the procedure in Replacing
and Changing an Emission Filter in
Chapter 6: Maintaining the System.
Image is black or too
dark.
Not enough light for a good
contrast exposure.
Open the f-stop to O (Open) or
increase the exposure time. See
Chapter 4: Setting up for Capture.
Image is white or too
light.
Too much light during the
exposure.
Close down the f-stop (larger
number for less light) and/or use the
Light Diffuser for transmitted light
samples. Do not use a f-stop larger
than f8. Rotate Attenuator dial/knob
to decrease output. See Chapter 4:
Setting up for Capture.
Image is blurred.
Image is not in focus.
For thin samples, set the focus on or
around the white mark on the Focus
Ring. For thicker samples, adjust
the Focus Ring and/or increase the
depth of field by increasing the fstop setting. Use the Focusing tool
in the Preview mode to optimize.
Dirty or cracked filter.
Capture an image with a different
filter selected to verify cause;
replace filter.
Contaminated optics.
Contact Technical Support.
Condensation on the CCD
window from running at low
temperatures or high dew point.
Leave the camera power on at all
times. The condensation forms
from fast cool down in less than
ideal environmental conditions. If
camera is left on, the condensation
will dissipate and does not reoccur
unless the camera is cycled on and
off.
Lens came loose.
Call Technical Support. See
Obtaining Technical Support in
Chapter 1: Introduction.
Problem
Bright imaging artifacts
not coming from the
sample.
Probable Cause
Light leak.
Solution
Check that the Filter Access Panel
is properly in place.
Ensure the lid has been closed and
latched in place.
Ensure the Lid Gasket is clean and
free of debris.
Verify by performing a 5 minute
exposure with the lid closed, X and
Y binning (8 x 8) selected, no
illumination, and no sample. Save
the image.
Expose an additional image with
the same settings, but this time
place the Light Diffuser over the
Platen, remove the Compression
Pad and close the lid. If significant
increase in artifact signal is seen,
the light leak is due to a faulty Lid
Gasket. Call Technical Support.
7
Troubleshooting
If a signal artifact continues and is
not changed in the above procedure,
call Technical Support to diagnose
the leak and to obtain further
instructions.
Image appears with many Dust or dirt on the Platen.
speckles in an UV
illuminated image.
Image partially blocked.
See Preparing the IS4000R for
Imaging in Chapter 4: Setting up for
Capture.
Camera correction files are
incorrect or not installed.
Verify that the camera CD matches
your camera serial number.
Filter not centered over the lens
properly.
Check that the Filter Selection Dial
is lined up with the filter selection
properly. View the Filter Wheel
alignment by looking down into the
Platen.
7-5
Problem
Lines in the image.
Probable Cause
Scratched Platen.
Contact Technical Support for
further instructions.
Image transfer was interrupted
Check cables and connections.
Upon opening image, the Improper or no Illumination
background illumination Reference File was used for
in the image is uneven.
correction.
Be sure the proper Illumination
Reference File is used.
The image is not the
correct size.
f-stop and FOV settings recorded Be sure the proper f-stop and FOV
in Set Camera To dialog box are inputs are used.
not the same as those used to
capture the image.
Dark center (circle) on
brightfield image.
Condensation in window.
Leave the camera power on at all
times. The condensation forms
from fast cool down in less than
ideal environmental conditions. If
camera is left on, the condensation
will dissipate and does not reoccur
unless the camera is cycled on and
off.
Smear in image not
related to sample that
does not change with
settings.
Contaminated optics.
Requires service. Contact Technical
Support.
Cannot detect radioactive Not using the rad PADD
signal.
accessory.
7-6
Solution
To image radioactive signal, you
will need to use the optional rad
PADD accessory, contact
Molecular Imaging Systems for
ordering information.
Sample is not in the proper
orientation.
If your object is opaque (blot),
orient the sample side downward—
if translucent (gel), orient the
sample either way.
No radioactive label on sample.
Use a GM-type radioactivity meter
calibrated in counts per minute
(CPM) to check for activity.
Wrong radioisotope.
The rad PADD and IS4000R are
design to detect high-energy betaemitters such as 32P, or 125I.
Common Software Questions
Problem
Probable Cause
Solution
Copy protection error.
The copy protection device is
not responding.
Error communicating with
camera.
System/Display sleep mode set Windows: right-click on the
incorrectly.
desktop and select Properties.
Select the Screen Saver tab.
Click on the Power tab. Click
on the Power Scheme tab
(Power Schemes should be
Always On and settings should
be set to Never.
7
Troubleshooting
No Illumination Reference File Capture settings do not match
available in the pop-up menu.
those in the reference file.
Check the connections and
restart the software and
computer. Refer to the KODAK
Molecular Imaging Software
User's Guide.
Create Illumination Reference
File to match current capture
settings.
7-7
7-8
Installing the System
This section details the installation of the IS4000R system. This information will be used
by your local representative when your equipment is initially installed. Should you need to
install the IS4000R system, this section will tell you how to unpack the equipment and
what to consider in selecting a new location for the equipment. In addition, it contains
instrument performance checks, necessary after installation, and how to repackage and
prepare the equipment for a move.
8
Installing the System
8-1
Environmental Requirements
The IS4000R system is designed to operate effectively within the temperature and
humidity ranges typically found in laboratories. For effective operation, the temperature
and relative humidity should be:
✔ Temperature: 17° to 27° C
✔ Relative Humidity: < 75%, non-condensing
✔ Altitude: This product is designed for use at altitudes up to 2000 meters.
This product is designed for indoor use only. This product meets Pollution Degree 2
standards in accordance with IEC 664.
Electrical Requirements
✔ 100–240 VAC*, 50/60Hz, 1A
* Supply voltage fluctuations should not to exceed ±10%.
Space Requirements
The IS4000R and computer must be placed on a bench or table that is level and capable of
supporting 250 pounds (118 kg), located not more than 3 feet (91 cm) from an electrical
outlet.
The IS4000R system, including computer CPU, monitor and keyboard, requires a
minimum space 69 inches wide, 24 inches deep and 26 inches high (175 x 61 x 66 cm).
These dimensions do not allow for a printer or other peripheral device.
WARNING: Maintain a minimum of 6 inches (~15 cm) clearance around the
Radiator to allow for proper cooling.
☞
NOTE: Additional space adjacent to, above or behind the IS4000R will allow for
easier operation.
This product is designed to withstand transient overvoltage according to Installation
Category II.
Refer to your computer operators's manual for its electrical requirements.
8-2
Installing the IS4000R
Setting Up the IS4000R Hardware
1 Remove the instrument from the shipping container. Remove packing materials.
☞
NOTE: Retain the box and packing material in case you need to repackage and
move the system or return the system for repair.
2 Verify components using the list in What’s in the IS4000R Package in Chapter 1:
Introduction of this User’s Guide.
3 Position the IS4000R next to the computer.
☞
IMPORTANT: Do not attach the IS4000R to the computer until after KODAK
Molecular Imaging Software has been installed.
4 Install your Emission filters. Refer to Replacing or Changing an Emission Filter in
Chapter 6: Maintaining the System.
5 Proceed to Installing KODAK Software—Windows or Installing KODAK Software—
Macintosh
Installing the IEEE 1394 (FireWire) Card
If your computer is not equipped with IEEE 1394 (FireWire) ports, contact your computer
manufacturer for assistance in obtaining an add-on IEEE 1394 (FireWire) card. The IEEE
1394 (FireWire) card enables your computer to communicate with your camera. Follow
the manufacturer’s directions for installation of the IEEE 1394 (FireWire) card.
8
Installing the System
WARNING: The card is stored in an antistatic bag because it is sensitive to
static electricity. Be careful when you handle the card.
WARNING: Refer to your computer user’s manual for information on
opening your computer case. Follow the installation instructions for
the IEEE 1394 (FireWire) card and software drivers that are enclosed
with your IEEE 1394 (FireWire) Add-on card.
Proceed to Installing KODAK Software—Windows or Installing KODAK Software—
Mainctosh.
8-3
Installing the KODAK Image Station Transilluminator
Lid (Optional Accessory)
The Image Station Transilluminator Lid Accessory is an optional accessory. The lid
accessory is easily installed by replacing your standard IS4000R Lid.
WARNING:DANGER—Ultraviolet radiation emitted from this product. Avoid
exposure. ALWAYS WEAR PROTECTIVE CLOTHING. EXPOSURE MAY
CAUSE PREMATURE AGING OF THE SKIN AND CANCER. ALWAYS
WEAR PROTECTIVE EYEWEAR; FAILURE TO DO SO MAY RESULT IN
SEVERE BURNS OR LONG TERM INJURY TO EYE. Never look directly into
the lamp. In individuals with a photosensitivity disease, exposure can cause a
wide variety of effects, not just allergenicity. Some medications, cosmetics or
diseases may increase your sensitivity to ultraviolet radiation. Consult a
physician before operating this product if you are using medications or have a
history of skin problems or believe yourself especially sensitive to sunlight. For
Laboratory Use Only.
Package Contents
When unpacking your Image Station Transilluminator Lid Accessory, please take a
moment to ensure that all the necessary parts have been received.
Unpack and carefully examine all parts. A slight rattling sound in the unit is normal from
the movement of small particles that are present inside the fluorescent bulbs. Your package
should contain:
✔ Transilluminator Lid (1)
✔ Rod Retainer Clip and Screw
(2)
✔
✔
✔
✔
✔
✔
✔
✔
✔
8-4
Spring Bracket (1)
Spring Cover (1)
Upper Spring Rod (1)
Springs (2) (not shown)
Lower Spring Rod (1)
Jumper Cable (1)
Shim (1)
White Light PADD (not shown)
Lid Liner (not shown)
Tools Needed
✔ #2 Phillips Screwdriver
✔ 5/32 in. hex drive
1 Shut down the computer that is attached to your IS4000R.
2 Turn the power to the IS4000R off and remove the power cord from the wall and from
the unit.
3 Disconnect the IS4000R from your computer.
4 Position the IS4000R to allow access to front
and rear of the unit, and so the lid may be fully
opened.
5 Facing the rear, remove the lower bolts on each
hinge using a 5/32 in. hex drive. Save the bolts
for installation of the new lid.
6 Remove the lid from the IS4000R cabinet.
7 Place the Lid Illuminator on the Image
Station.
8 Place a Shim under the left hinge and
fasten loosely with 2 bolts using a 5/32 in.
hex drive.
8
Installing the System
8-5
9 Attach the Spring Bracket under the right-side
hinge and fasten tightly to the cabinet with 2
hinge bolts using a 5/32 in. hex drive.
☞
NOTE: To ensure proper alignment, tilt
the spring bracket so the top left edge fits
snug under the safety switch
10 With a #2 Phillips screwdriver tighten the hinge
tension screws on both hinges.
11 Slide the Upper Spring Rod through the right
holes of the Spring Bracket and Spring Cover.
12 Slide the Upper Spring Rod through the left holes in the Spring Bracket and Spring
Cover.
13 Slide the Springs over the Upper Spring
Rod.
14 Adjust the Upper Spring Rod to fit flush
on each side of the Spring Bracket.
☞
NOTE: Upper Spring Rod must be
centered in the Spring Bracket to
provide proper balance and
tension.
15 Slide the Lower Spring Rod through the
Spring Cover and Springs.
16 Raise the lid so it is perpendicular to the
Sample Work Area on the cabinet
allowing the Lower Spring Rod o reach
the Lower Spring Bracket.
8-6
17 Position the Spring slightly forcing the Lower
Spring Rod under the Spring Bracket, seating
the groove at each end of the rod in the slot on
both sides of the Spring Bracket.
18 Position the Rod Retainer Clips
over the lower spring rod and fasten
with a #6 screw through the upper
hole into the Spring Bracket with a
hex drive.
☞
NOTE: After installation of
the hinge according to these
directions, the Safety ShutOff lever on the hinge should
function in a way as to allow
the lights to go on when the
lid is closed and then off
when the lid opens.
8
Installing the System
19 Using the Jumper Cable, plug the Lid Illuminator into the IS4000R cabinet.
20 Plug the Lid Illuminator in using the Image Station line cord.
21 Verify proper activation of UV lights by taking a 2-second exposure with the lid closed
and no filter in place. The image should demonstrate light intensity significantly above
the image without lights powered.
☞
NOTE: The Auto Shut-Off Switch activates the automatic UV light shut-off.
When the switch is in the on position, the UV Transilluminator will
automatically turn off after 15 minutes.
22 Close and latch the lid. With the UV lights off, the lens aperture to fO, take a 5-minute,
binning 8 x 8 exposure and verify that the image is dark.
23 Your installation is complete, proceed to Launching KODAK Molecular Imaging
Software for the First Time.
8-7
Installing KODAK Software—Windows
Any prior versions of KODAK and/or camera software that are loaded on the computer
must be uninstalled prior to installation. If you are a new user, proceed to KODAK
Molecular Imaging Software Installation—Windows. Windows 2000 and Windows XP
installations may require administrator privileges.
If you have purchased the KODAK Molecular Imaging Software Network Edition
(KODAK MI NE) to use with your Image Station 4000R:
✔ Follow the instructions in the KODAK Molecular Imaging Software Network
Edition Administrator’s Manual to install KODAK MI NE Software.
✔ Then proceed to KODAK Image Station 4000R Camera Files Installation—
Windows and Connecting the KODAK Image Station 4000R to a IEEE 1394
(FireWire) Port—Windows, later in this chapter.
If you have purchased the KODAK Molecular Imaging Software, Regulatory Edition with
Network Licensing (KODAK MI RE) to use with your Image Station 4000R:
✔ Follow the instructions in the KODAK Molecular Imaging Software, Regulatory
Edition Network Administrator’s Manual to install KODAK MI RE Software.
✔ Then proceed to KODAK Image Station 4000R Camera Files Installation—
Windows and Connecting the KODAK Image Station 4000R to a IEEE 1394
(FireWire) Port—Windows, later in this chapter.
Uninstalling a Previous Version of KODAK MI or KODAK 1D
Software—Windows
1 Remove your KODAK MI or 1D copy protection device from your computer.
2 Inactivate any virus protection software.
☞
NOTE: Norton Utilities and Norton Antivirus software must be deactivated
before you uninstall the KODAK Software. The software might not uninstall
properly with the virus protection left running. After installation, you can restart
your virus protection software.
3 Close all software applications that may be running on your computer.
☞
8-8
NOTE: KODAK cameras should not be connected to the computer while
uninstalling the software.
4 Move any customized standards or templates and any projects from their respective
subfolders in your existing KODAK MI or KODAK 1D X.X folder to a temporary
folder outside the Kodak folder. If you are currently using the KODAK MI database,
also move the database folder. The database folder labeled GMPDB is located in the
C:\Programs Files\KODAK MI\KodakAdminPortal folder.
5 Uninstall previous version(s) of KODAK MI or KODAK 1D Software.
✔ Uninstall KODAK MI by choosing Control Panel from the Start menu and Add/
Remove Programs. Scroll to locate Kodak MI 4.X and click the Remove button.
You can also uninstall the application using your KODAK MI CD. The installer
shield automatically detects that you have the software loaded and offers an
uninstall option.
✔ Uninstall KODAK 1D by choosing Programs from the Start menu and selecting
Remove KODAK 1D X.X from the KODAK 1D X.X submenu.
✔ Uninstall KODAK MI NE or KODAK 1D NE following the instructions provided
in your Network Administrator’s Manual.
6 Uninstall additional KODAK Software by choosing Control Panel from the Start menu
and Add/Remove Programs. Scroll to locate Sentinel System Driver. Click to select.
7 Click the Add/Remove button and follow the on-screen instructions to uninstall.
☞
NOTE: Automated uninstall features on some systems may not remove all
previous program elements. Check drives for residual folders and files. Manual
deletion of these folders and files may be necessary.
8 Restart your computer.
8
9 Proceed to KODAK Molecular Imaging Software Installation—Windows.
Installing the System
8-9
KODAK Molecular Imaging Software Installation—Windows
KODAK Molecular Imaging Software is installed like most Windows application
programs and requires administrator privileges.
1 Inactivate any virus protection software.
☞
NOTE: Norton Utilities and Norton Antivirus Software must be deactivated
before you install the KODAK Software. The installation might not run properly
with the virus protection left running. After installation, you can restart your
virus protection software.
2 Close all software applications that may be running on your computer.
☞
NOTE: Kodak cameras should not be connected to the computer while installing
the software.
☞
NOTE: Remove any copy protection devices attached to your computer during
installation.
3 Insert the KODAK Molecular Imaging Software Version 4.X CD into your CD drive
and double-click on the KODAK MI Installer.exe icon to launch the installer.
4 The installer leads you through the installation process. Make sure to select the
Complete Setup to install the software in the default directory to ensure full
functionality of the system.
☞
NOTE: The Select Components window allows you to install MI without the
database. Only install the database in the location that you want to maintain
images acquired from the system.
5 While the software installation is occurring, complete your KODAK Software
Registration Card and mail the card. This ensures that you receive information on new
software releases, periodic maintenance releases, and technical bulletins.
6 A dialog box appears when the installation is complete. Select the option to restart the
computer and click Finish.
7 Proceed to Copy Protection Device Installation.
8-10
Copy Protection Device Installation
KODAK MI Software is copy protected using a device that plugs into the USB port of
your computer. It will not launch unless this device is attached to your computer. If you
are installing the system for the first time, locate and install the copy protection device
according to the instructions below. If you are upgrading your system, your package may
or may not contain a new copy protection device.
To install the copy protection device:
1 Plug the copy protection device into a USB port of your computer. Please make sure
that the connection is secure.
☞
☞
☞
NOTE: Windows XP Users: A Welcome to the Found New Found Hardware
Wizard dialog box appears on screen. You will be asked if you want the
Windows update to search for software. Click No not at this time and advance
through the installation wizard.
NOTE: If you are upgrading from a previous version of the KODAK MI or 1D
Software and received a new copy protection device, you must attach both the
old and new copy protection devices to your computer. After you launch the
newest version for the first time, your old copy protection device is be
deactivated. Remove and discard the old key.
NOTE: If your computer has multiple USB ports, you can plug the copy
protection device into any of them. The software, when launched, checks all
available USB ports.
8
2 Proceed to Setting Windows Power Settings.
Installing the System
Setting Windows Power Settings
1 KODAK Imaging Systems require that your computer Energy Saver features be
disabled.
2 Click the Power Options icon from the Start menu and the Control Panel.
3 Click Power Schemes tab and select Always On from the Power Schemes pop-up
menu.
4 The settings for Turn off monitor, Turn off hard disks, System standby and System
hibernates functions become Never.
5 Proceed to Image Station 4000R Camera Files Installation—Windows.
8-11
Image Station 4000R Camera Files Installation—Windows
1 Inactivate any virus protection software.
☞
NOTE: Norton Utilities and Norton Antivirus Software must be deactivated
before you install the KODAK Software. The installation might not run properly
with the virus protection left active. After installation, you can restart your virus
protection software.
2 Insert the KODAK Image Station Camera Files CD into your CD drive and doubleclick the IS4000 Support Setup.exe icon to launch the Windows installer application.
☞
☞
NOTE: KODAK MI Software must be installed prior to the camera files
installation.
NOTE: If you received your Image Station with KODAK 1D Image Analysis
Software you will have to move the IS4000_HMPS and IS4000_DCRS folders
from the C:\Program Files\KODAK 1D 3.6\IS4000 to C:\Program
Files\KODAK MI\MI Application\IS4000. If you no longer have the files
installed, copy the files from your KODAK IS4000 Camera Files CD.
3 The installer will proceed and display a dialog box when installation is complete.
4 Verify that the appropriate KODAK IS4000_HMPS and IS4000_DCRS files have been
installed in the proper location. Navigate to C:\Program Files\KODAK MI\MI
Application IS4000.
5 Click OK and proceed to Connecting the KODAK Image Station 4000R to Your IEEE
1394 (FireWire) Port—Windows.
8-12
Connecting the Image Station 4000R to Your IEEE 1394 (FireWire)
Port—Windows
Transferring images via IEEE 1394 (FireWire) port is much faster than either serial or
USB port connections. IS4000R requires that your computer is equipped with an IEEE
1394 port or an IEEE 1394 PCMCIA adapter (notebook users).
Once you have installed KODAK MI Software and your copy protection device, you can
connect the IS4000R to your computer.
WARNING:Your computer should be turned off when connecting your camera to
your computer.
1 Connect the IEEE 1394 (FireWire) Camera/Computer Interface Cable to the connector
at the rear of the IS4000R. The smaller end of the connector should be facing down
when connecting to the instruments port.
WARNING: Be sure to insert the IEEE 1394 (FireWire) Camera/Cable
Interface Cable in the correct orientation. Incorrect placement will
permanently damage your camera circuitry and will void the warranty.
2 Connect the other end of the IEEE 1394 (FireWire) Camera/Computer Interface Cable
to the IEEE 1394 (FireWire) port of your computer. Refer to the figure to properly
align the plug with the por.
8
Installing the System
3 Attach the AC line cord to the power input module at rear of the instrument and plug
into an appropriate AC (MAINS) outlet.
8-13
WARNING:Select the appropriate modular plug to match your local AC
(MAINS) outlet.
4 Turn the circuit breaker (located on the back of the unit) on.
5 Turn the power switch (located on the front of the unit) on.
6 Start up your computer.
☞
NOTE: WINDOWS: A Found New Hardware Wizard dialog box appears on
screen. Click Next to advance through the installation wizard.
NOTE: A Welcome to the Found New Found Hardware Wizard dialog box may
☞ appear
on screen. You will be asked if you want the windows update to search for
software. Click No not at this time and advance through the installation wizard.
☞
NOTE: During the installation, a dialog box will appear stating Digital
Signature Not Found. Click Yes to continue the installation.
7 Click Finish when the wizard is complete.
8 Proceed to Launching the Kodak Molecular Imaging Software for the First Time, later
in this chapter.
8-14
Installing KODAK Software—Macintosh
Any prior versions of KODAK and/or camera software that are loaded on the computer
must be uninstalled prior to installation. If you are a new user, proceed to KODAK
Molecular Imaging Software Installation—Macintosh. Macintosh OS X installations may
require authentication of permissions.
If you have purchased the KODAK Molecular Imaging Software Network Edition
(KODAK MI NE) to use with your Image Station 4000R:
✔ Follow the instructions in the KODAK Molecular Imaging Software Network
Edition Administrator’s Manual to install KODAK MI NE Software.
✔ Then proceed to KODAK IS4000R Camera Files Installation—Macintosh and
Connecting the KODAK Image Station 4000R to a IEEE 1394 (FireWire) Port—
Macintosh, later in this chapter.
If you have purchased the KODAK Molecular Imaging Software, Regulatory Edition with
Network Licensing (KODAK MI RE) to use with your Image Station 4000R:
✔ Follow the instructions in the KODAK Molecular Imaging Software, Regulatory
Edition Network Administrator’s Manual to install KODAK MI RE Software.
✔ Then proceed to KODAK IS4000R Camera Files Installation—Macintosh and
Connecting the KODAK Image Station 4000R to a IEEE 1394 (FireWire) Port—
Macintosh, later in this chapter.
Uninstalling a Previous Version of KODAK MI or KODAK 1D
Software—Macintosh
8
1 Remove your KODAK MI or 1D copy protection device from your computer.
☞
NOTE: Norton Utilities and Norton Antivirus software must be deactivated
before you uninstall the KODAK Software. The software might not uninstall
properly with the virus protection left running. After installation, you can restart
your virus protection software.
3 Close all software applications that may be running on your computer.
☞
NOTE: KODAK cameras should not be connected to the computer while
uninstalling the software.
8-15
Installing the System
2 Inactivate any virus protection software.
4 Move any customized standards or templates and any projects from their respective
subfolders in your existing Kodak MI 4.X or KODAK 1D X.X folder to a temporary
folder outside the Kodak folder. If you are currently using the KODAK MI database,
also move the database folder. Click the Applications folder and locate the database
folder labeled GMPDB located in the KODAK MI folder KodakAdminPortal
subfolder.
5 Place the Kodak MI 4.X or KODAK 1D X.X folder in the Trash.
6 Restart your computer.
7 Empty the Trash.
8 Proceed to KODAK Molecular Imaging Software Installation—Macintosh.
8-16
KODAK Molecular Imaging Software Installation—Macintosh
1 Inactivate any virus protection software.
☞
NOTE: Norton Utilities and Norton Antivirus Software must be deactivated
before you install the KODAK Software. The installation might not run properly
with the virus protection left running. After installation, you can restart your
virus protection software.
2 Close all software applications that might be running on your computer.
KODAK cameras should not be connected to the computer while
☞ NOTE:
installing the software.
Remove any copy protection devices attached to your computer during
☞ NOTE:
installation.
3 Insert the KODAK Molecular Imaging Software Version 4.X CD into your CD drive
and double-click the KODAK MI.mpkg icon to launch the installer application.
4 The installer leads you through the installation process. Make sure to select the Easy
Install to install the software in the default directory and ensure full functionality of the
system.
☞
NOTE: The Select Components window allows you to install MI without the
database. Only install the database in the location that you want to maintain
images acquired from the system.
5 While the software installation is occurring, complete your KODAK MI Software
6 The installer notifies you when the installation is complete. Click Restart.
7 Proceed to Copy Protection Device Installation
8-17
8
Installing the System
Registration Card and return the card by mail. This process takes only a few minutes to
complete and ensures that you receive information regarding new software releases,
periodic maintenance releases, and technical bulletins.
Copy Protection Device Installation
KODAK MI Software is copy protected using a device that plugs into the USB port of
your computer. KODAK MI will not launch unless this device is attached to your
computer. If you are installing the system for the first time, locate and install the copy
protection device according to the instructions below. If you are upgrading your system,
your package may or may not contain a new copy protection device.
To install the copy protection device:
1 Plug the copy protection device into a USB port of your computer. Please make sure
that the connection is secure.
☞
NOTE: If you are upgrading from a previous version of the KODAK MI or
KODAK 1D Software and received a new copy protection device, you must
attach both the old and new copy protection devices to your computer. After you
launch the newest version for the first time, your old copy protection device is
deactivated. Remove and discard the old key.
2 Proceed to Macintosh Power Settings.
8-18
Macintosh Power Settings
KODAK Imaging Systems require that the Energy Saver settings on your computer be
disabled.
To disable the system sleep features
1 Choose Energy Saver from the File menu and the System Preferences submenu or
from System Preferences on the Dock. The Energy Saver window opens.
2 Click the Sleep tab and set the Computer and Display sleep sliders to Never. Ensure
8
the Put the hard disk(s) to sleep when possible checkbox is unchecked.
Installing the System
3 Proceed to Image Station 4000R Camera File Installation—Macintosh.
8-19
Image Station 4000R Camera File Installation—Macintosh
1 Insert the KODAK IS4000 Camera Files CD into your CD drive and double-click the
Camera Files Installer to launch the installer application.
☞
☞
☞
NOTE: KODAK MI Software must be installed prior to the camera files
installation.
NOTE: If you received your Image Station with KODAK 1D Image Analysis
Software you will have to move the IS4000_HPMS and IS4000_DCRS folders
manually. Click the Application Folder and navigate to the KODAK 1D 3.6 and
the IS4000 folder. Copy the files to the KODAK MI\MI Extensions\IS4000
folder. If you no longer have the files installed, copy the files from your
KODAK IS4000 Camera Files CD.
NOTE: In a manual copy operation, the HPMS and DCRS folders must have
their Ownership & Permissions reset in OS X to allow access by other user
accounts. After copying, select the folders one at a time and click Get Info from
the File menu. Set the Others pop-up menu in the Ownership & Permissions
section to Read & Write. Click Apply.
2 The installer will proceed and display a dialog boxes when installation is complete.
3 Verify that the the IS4000_HPMS and IS4000_DCRS files have been installed in the
proper location Applications\KODAK MI\MI Extensions\IS4000.
4 Your installation is complete, proceed to Connecting the Image Station 4000R to Your
IEEE 1394 (FireWire) Port—Macintosh.
8-20
Connecting the Image Station 4000R to Your IEEE 1394 (FireWire)
Port—Macintosh
Transferring images via IEEE 1394 (FireWire) port is much faster than either serial or
USB port connections. IS4000R requires that your computer is equipped with an IEEE
1394 port or an IEEE 1394 PCMCIA adapter (notebook users).
Once you have installed KODAK MI Software and your copy protection device, you can
connect the IS4000R to your computer.
WARNING:Your computer should be turned off when connecting your camera to
your computer.
1 Connect the IEEE 1394 (FireWire) Camera/Computer Interface Cable to the connector
at the rear of the IS4000R. The smaller end of the connector should be facing down
when connecting to the instruments port.
WARNING: Be sure to insert the IEEE 1394 (FireWire) Camera/Cable
Interface Cable in the correct orientation. Incorrect placement will
permanently damage your camera circuitry and will void the warranty.
2 Connect the other end of the IEEE 1394 (FireWire) Camera/Computer Interface Cable
to the IEEE 1394 (FireWire) port of your computer. Refer to the figure to properly
align the plug with the port.
8
Installing the System
3 Attach the AC line cord to the power input module at rear of the instrument and plug
into an appropriate AC (MAINS) outlet.
8-21
WARNING: Select the appropriate modular plug to match your local AC
(MAINS) outlet.
4 Turn the circuit breaker on (located on the back of the unit).
5 Turn the power switch (located on the front of the unit) on.
6 Start up your computer.
7 Proceed to Launching the KODAK Molecular Imaging Software for the First Time,
later in this chapter.
8-22
Launching KODAK Molecular Imaging Software for the
First Time
1 Launch KODAK Molecular Imaging Software.
✔ Windows Users—Click Programs from the Start menu and select KODAK MI.exe
from the Kodak MI submenu or by double-clicking on the KODAK MI.exe icon
found in the C:\Program Files\KODAK MI\MI Application folder.
Consider placing a Shortcut to the KODAK MI.exe file on your
☞ NOTE:
desktop. Navigate to the KODAK MI.exe file as shown above. Right-click on
the KODAK MI.exe icon and choose Create Shortcut. A Shortcut is created in
the MI Application folder. Drag the shortcut to the desktop.
✔ Macintosh Users—Select Applications from the Go menu and click the KODAK
MI icon found in the KODAK MI folder and the MI Application subfolder.
Consider placing an Alias to the KODAK MI executable program file
☞ NOTE:
on your desktop. To create an Alias, single-click the KODAK MI icon and
choose Make Alias from the File menu. An Alias is created in the MI
Application folder. Drag the Alias onto the desktop. Alternately, drag the
KODAK MI icon to the Dock to create an Alias on the Dock.
✔ KODAK MI NE Users—Click Programs from the Start menu and select KODAK
MI 4.X Network.exe from the KODAK MI submenu or by double-clicking on the
KODAK MI 4.X Network.exe icon found in the C:/Program Files/KODAK MI 4.X
Network/MI Application folder (Windows) or Select Applications from the Go
menu and click the Kodak MI 4.X Network icon found in the Kodak MI 4.X folder
and the MI Application subfolder (Macintosh).
or Login Required from the pop-up menu. Click Continue.
☞
NOTE: The selected KODAK MI Security feature applies to your new KODAK
MI installation for all users.
8-23
Installing the System
2 The KODAK MI Security Setup dialog box appears. You must select either No Login
8
3 The Login window appears. Enter “Admin” as the Username and “password” as the
Password. The Host Name default value will cause KODAK MI to search your local
drive for the KODAK MI database. If the KODAK MI database is located on another
machine or file server, enter the IP address of that machine in the Host Name field.
Click Login.
☞
☞
NOTE: The initial installation of KODAK MI Software comes with a single user
with the User Name “Admin” and the Password “password”. Use this User
name to gain access to KODAK MI Security Manager to set up users.
NOTE: If no KODAK MI database is detected at the Host Name location, you
will be asked if you would like to continue without connection to a database.
4 If you selected No Login in the KODAK MI Security Setup dialog box, future
launches of KODAK MI will skip the login windows and open to a MI Project
window. Proceed to Step 6 to enter your User Name, Company and KODAK MI
Software serial number.
5 If you selected Login Required in the KODAK MI Security Setup dialog box, you will
be prompted to contact database administrator. Click OK to open KODAK MI. Future
launches of KODAK MI will require both Username and Password to gain access to
KODAK MI software and the KODAK MI database.
6 Type your Name and Organization in the boxes provided.
7 Enter your Serial Number exactly (including dashes) as provided on your registration
card or serial number card included in your KODAK MI package.
☞
8-24
NOTE: The serial number is required when installing KODAK MI or when
contacting Technical Support. Keep the serial number in a safe location.
8 Click OK. The MI Project window appears. Your installation is complete.
☞
☞
NOTE: Previous KODAK MI or 1D users may move any customized standards
or templates, any projects, and database folders back into the new KODAK MI
folder.
NOTE: If you selected Login Required in the KODAK MI Security Setup dialog
box when KODAK MI Software was first launched, you can set up User Names
and Passwords for each KODAK MI Software user. Proceed to KODAK MI
Security Manager, later in this chapter.
9 Your hardware setup and software installation are now complete. To learn about
capturing images with your Image Station 4000R, proceed to Chapter 4: Setting Up for
Capture.
8
Installing the System
8-25
KODAK MI Security Manager
KODAK Molecular Imaging Software has two security modes: No Login (No Security)
and Login Required (Password Security). When you launch KODAK MI Software for the
first time, you are asked which mode you would like to use for this installation.
✔ In No Login Mode—all users gain access to KODAK MI Software bypassing the
login screen.
✔ In Password Mode—requires you to enter your User Name and Password every
time KODAK MI Software starts up.
The initial installation of KODAK MI Software comes with a single
☞ NOTE:
user with the User Name “Admin” and the Password “password”. Use this
User name to gain access to KODAK MI Security Manager to set up users.
1 Select Database from the Navigation panel.
2 Your web browser launches and displays the KODAK Security Manager window
opens.
3 Select the default Username, “Admin”, type the Password “password” (No quotation
marks) and click Login.
8-26
4 Click the Users tab to access the User Administration page, where you can add users.
Select Add Users.
5 The User Information page appears. Fill out the information including First Name,
Last Name, Username (enter a temporary password), Password, Job Function
(Administrator, Principal Investigator, Research Scientist), an E-mail address. Click
Create
☞
NOTE: New Users are automatically added to the default Investigation and
default Study.
6 You may want to take some time to click on the Server Setup button to give your
database server a name and specify a SMTP mail server.
8
or number.
8-27
Installing the System
✔ Server ID—is a unique name for your machine. The Server ID can either be a name
✔ Administrator E-mail—this indicates the e-mail address of the Administrators’s.
✔ Days until password expire—allows administrators to determine how frequently
passwords expire. When a User password expires, you will be prompted to enter a
new password. the minimum is 2 days.
✔ SMTP Server—This mail server can be used for sending out E-mails and
broadcasting messages. This is a mandatory field that must be entered. The SMTP
mail server is required when users click the Forgot Password button.
✔ If the checkbox Enable the forget password button for administrator is checked. A
user with system administrator privileges can use the forget password function.
7 An additional feature of KODAK MI Security Manager is the ability to broadcast email messages to users. Administrators can enter a subject and message in the fields
provided and click Send. All users receive the broadcast message. To send/receive a
message, the user must have a valid e-mail address entered.
8-28
8Click Logout to exit KODAK MI Security Manager. On the next restart of KODAK MI
software, new users must enter their Username and password. The user will then be
prompted to access the web portal to change their password.
8
Installing the System
8-29
Launching KODAK Molecular Imaging Software with
the KODAK Image Station 4000R
1 Launch the software by clicking Programs from the Start menu and selecting KODAK
MI.exe from the KODAK MI menu (Windows) or by clicking on the KODAK MI icon
found in the KODAK MI folder (Macintosh). The project window appears.
2 Choose Select Digital Camera from the File menu. Choose the IS4000R from the
Digital Camera pop-up menu. The software systematically searches the appropriate
computer port(s). If the selected imaging device is not found, one of several messages
will appear on-screen depending upon the imaging system selected.
✔ If a KODAK Image Station 4000 System is not found, a message appears stating
Error Connecting with the Camera. Ensure that IS4000R is properly connected and
powered on, and that the IS4000R was selected in the Digital Camera pop-up
menu.
3 Once IS4000R is found, the File menu and the Status bar Camera Access buttons
reflect the current selection.
4 If no camera is found, the Select Digital Camera dialog box appears, allowing you to
reselect the camera. Use the Digital Camera pop-up menu to select the IS4000R.
5 Click OK.
8-30
Repackaging or Moving the IS4000R
If you plan to ship your IS4000R, packing the components correctly is essential to
protecting the imaging chamber and computer. Inappropriate packing will void the
IS4000R warranty. Follow these directions when packing the IS4000R for shipment.
All returned material must be cleaned and decontaminated prior to shipping. To meet
Federal and State Regulatory and Safety standards, please follow the decontamination
procedure given here if radioactive materials are used with this product or are used in the
vicinity of where this apparatus has been used or stored. If you are sending the unit for
repair, contact Technical Support.
General Cleaning Procedure
For materials not contaminated with biological or radiological substances, components
may be gently washed using water or an ammonia based spray cleaner using soft lint-free
cloth or lens paper.
WARNING:Do not expose the Platen to strong chemical solvents such as ketones,
hexanes, acids and alkalis that may permanently damage the Platen. This type of
damage is not covered by the warranty.
Radiological Decontamination Procedure
For beta or gamma-emitting isotopes such as 32P, use a GM-type radioactivity meter
calibrated in counts per minute (CPM) to determine the background readings for your
work area. Wearing latex gloves, survey the unit to be returned with the GM meter. If any
part of the unit is found to show readings higher than background, wash the area using
Count Off™ (PerkinElmer Life Sciences) or another similar commercially available
detergent and paper towels. If none are available, a Formula 409™-like solution or a mild
detergent will do. As you clean, discard liquid and solid waste (gloves and paper towels)
according to your local and institutional regulations for radioactive material disposal.
Continue washing until the GM meter reading for the contaminated area(s) is equal to or
below background.
8
Installing the System
To decontaminate units where a GM-meter is not useful for detection, such as with 3H or
35S, it will be necessary to perform swipes of the unit and detect using a scintillation
counter. The unit should be dry. Wipe surfaces with dry paper circles (these are
commercially available or you can make your own). Areas can be charted, so that
individual swipes can be done on different surfaces to better isolate areas of
8-31
contamination. These swipes are then placed into individual scintillation vials with an
appropriate fluor and then analyzed on a properly programmed scintillation counter. If
contamination above 100 disintegrations per minute dpm/100 cm2 (dpm = CPM/
efficiency) is found, wash the area as described above for beta emitting isotope
decontamination. After cleaning the area, swipe it a second time to determine the amount
of contamination remaining. If the area still has a greater than 100 dpm/cm2, continue the
cycle of swipes and washing until you achieve a reading of less than 100 dpm/cm.2
Once the unit has been determined to be radiation free (< 100 dpm/cm2), remove all the
hazardous and radioactive labels from the unit. If the labels cannot be removed, deface
them. Failure to do so may result in significant delay or a refusal of repair.
If your unit has unremovable contamination (detectable with a GM-meter and not with
paper swipes, or detectable with paper swipes but after continued washing the dpm/cm2
remains constant above 100) of a short half-life isotope such as 32P, the unit may be stored
for 10 half-lives of isotopic decay and the decontamination procedure repeated.
☞
NOTE: Units contaminated with unremovable long half-life isotopes should not
be shipped without proper procedures.
Repacking the IS4000R
Inappropriate packing will void the IS4000R warranty. Follow these directions when
packing the IS4000R for shipment.
1 Decontaminate the IS4000R as described above.
2 Close and latch the lid.
3 Remove the power cord and IEEE 1394 (FireWire) Camera/ Computer Interface Cable
from the IS4000R.
4 Remove any filters from the Filter Wheel and cradle the camera using foam padding.
5 Secure the Filter Access Panel to the filter housing with masking tape.
6 Put the IS4000R in its original plastic bag.
7 Pack the IS4000R in its original box. If you have discarded the original packing
material, call your Molecular Imaging Systems dealer or Technical Support to arrange
for delivery of new packing material.
8-32
Warranty & Regulatory
Information
9
Warranty
This section contains the IS4000R warranty and software license agreements information.
9-1
IS4000R Limited Warranty
Warranty Time Period
Carestream Health, Inc. warrants the KODAK Image Station 4000R (IS4000R) to function
properly for one year from the date of purchase. Specific system components warranted by
Carestream Health, Inc. are the IS4000R chamber, the hardware components installed
within the chamber, the IEEE 1394 (FireWire) Camera/Computer Interface Cable, power
cord, the KODAK Molecular Imaging Software, and optional Image Station
Transilluminator Lid Accessory. Other components included with the IS4000R system,
including the computer, monitor and illuminator are under separate warranty provided by
their respective manufacturer.
Days and Hours of Coverage
Arrangements for service through Technical Support can be made Monday through Friday
8:00 a.m. to 6:00 p.m. EST in the United States, except for locally observed holidays.
Hours of coverage outside the United States may vary. Contact your local Molecular
Imaging Systems dealer for hours of coverage.
Warranty Repair Coverage
If the equipment does not function properly during the warranty period due to defects in
either materials or workmanship, Carestream Health, Inc. will, at its option, either repair
or replace the equipment without charge, subject to the conditions and limitations stated
herein. Such repair service will include all labor as well as any necessary adjustments and/
or replacement parts.
If replacement parts are used in making repairs, these parts may be remanufactured, or
may contain remanufactured materials. If it is necessary to replace the entire system, it
may be replaced with a remanufactured system.
Carestream Health, Inc. will also provide telephone assistance during the warranty period.
Limitations
WARRANTY SERVICE WILL NOT BE PROVIDED WITHOUT DATED PROOF OF
PURCHASE. PLEASE RETURN THE WARRANTY REGISTRATION CARD WITHIN
30 DAYS OF PURCHASE.
9-2
THIS WARRANTY BECOMES NULL AND VOID IF YOU FAIL TO PACK YOUR
INSTRUMENT IN A MANNER CONSISTENT WITH THE ORIGINAL PRODUCT
PACKAGING AND DAMAGE OCCURS DURING PRODUCT SHIPMENT.
9
Warranty
THIS WARRANTY DOES NOT COVER: CIRCUMSTANCES BEYOND
CARESTREAM HEALTH, INC.'S CONTROL; SERVICE OR PARTS TO CORRECT
PROBLEMS RESULTING FROM THE USE OF ATTACHMENTS, ACCESSORIES OR
ALTERATIONS NOT MARKETED BY CARESTREAM HEALTH, INC.; SERVICE
REQUIRED AS THE RESULT OF UNAUTHORIZED MODIFICATIONS OR
SERVICE; MISUSE, ABUSE; FAILURE TO FOLLOW CARESTREAM HEALTH,
INC.'S OPERATING, MAINTENANCE OR REPACKAGING INSTRUCTIONS; OR
FAILURE TO USE ITEMS SUPPLIED BY CARESTREAM HEALTH, INC. (SUCH AS
ADAPTERS AND CABLES).
CARESTREAM HEALTH, INC. MAKES NO OTHER WARRANTIES, EXPRESS,
IMPLIED, OR OF MERCHANTABILITY OR FITNESS FOR A PARTICULAR
PURPOSE FOR THIS EQUIPMENT OR SOFTWARE.
REPAIR OR REPLACEMENT WITHOUT CHARGE ARE CARESTREAM HEALTH,
INC.'S ONLY OBLIGATION UNDER THIS WARRANTY. CARESTREAM HEALTH,
INC. WILL NOT BE RESPONSIBLE FOR ANY SPECIAL, CONSEQUENTIAL OR
INCIDENTAL DAMAGES RESULTING FROM THE PURCHASE, USE, OR
IMPROPER FUNCTIONING OF THIS EQUIPMENT REGARDLESS OF THE CAUSE.
SUCH DAMAGES FOR WHICH CARESTREAM HEALTH, INC. WILL NOT BE
RESPONSIBLE INCLUDE, BUT ARE NOT LIMITED TO, LOSS OF REVENUE OR
PROFIT, DOWNTIME COSTS, LOSS OF USE OF THE EQUIPMENT, COST OF ANY
SUBSTITUTE EQUIPMENT, FACILITIES OR SERVICES, OR CLAIMS OF YOUR
CUSTOMERS FOR SUCH DAMAGES.
Depending on your geographical location, some limitations and exclusions may not apply.
How to Obtain Service
If the instrument does not function properly during the warranty period, contact Carestream
Health, Inc. or your local Carestream Health, Inc. dealer to arrange for service. If your unit
needs to be returned for any reason, please contact your local Carestream Health, Inc.
dealer to obtain a return authorization. All returned units must be decontaminated prior to
their return, as described below. No returns will be accepted without a return authorization
and proper decontamination documentation.
When contacting technical support, please have the following information available:
9-3
✔ The serial number of your IS2000R system located on the back of the unit and the
camera serial number located on the camera.
✔ The serial number and version number of your KODAK Software.
With the software running, select About KODAK MI under the Help
☞ NOTE:
menu (Windows) or select About KODAK MI under the Apple menu item
(Macintosh).
✔ The type of computer you are using (make, model and operating system version).
Check your operating system version by right-clicking on the My
☞ NOTE:
Computer icon and then on Properties (Windows) or select About This Mac
under the Apple menu item (Macintosh).
✔ The problem you are having and what you were doing when the problem occurred.
Please note the exact wording of any error messages, including any error numbers
displayed.
When contacting technical support by telephone, you will be assisted best if you are seated
in front of your computer with KODAK MI Software running.
Contact Molecular Imaging Systems Technical Support by:
✔ Utilizing our World Wide Web support pages at:
http://www.carestreamhealth.com/go/molecular
✔ Calling Molecular Imaging Systems Technical Support toll free at:
877-747-4357, between the hours of 8:00 a.m. and 6:00 p.m. (Eastern Standard
Time) Monday through Friday
✔ E-mailing Molecular Imaging Systems Technical Support at:
[email protected]
✔ Faxing Molecular Imaging Systems Technical Support at:
203-786-5656
For up-to-date dealer information, visit our WEB site at www.carestreamhealth.com/go/
molecular.
9-4
General Instructions for Cleaning and Decontamination for Return of
the Kodak IS4000R
9
Warranty
All returned material must be cleaned and decontaminated prior to shipping. To meet
Federal and State Regulatory and Safety standards, please follow the decontamination
procedure given here if radioactive materials are used with this product or are used in the
vicinity of where this apparatus has been used or stored. You will be required to sign a
certificate of decontamination prior to sending the IS4000R for repair. Any instruments
received with contamination will be subject to a charge for decontamination.
General Cleaning Procedure
For materials not contaminated with biological or radiological substances, components
may be gently washed using water or an ammonia based spray cleaner using soft lint-free
cloth or lens paper.
WARNING:Ammonia based spray cleaners may cause eye irritation. Consult
the manufacturer’s material safety data sheet for additional information prior
to use.
WARNING:Do not expose the Platen to strong chemical solvents such as
ketones, hexanes, acids and alkalis that may permanently damage the Platen.
This type of damage is not covered by the warranty.
Radiological Decontamination Procedure
WARNING:Carestream Health, Inc. cannot accept return of products which
are contaminated with any radioactivity.
For beta-or gamma-emitting isotopes such as 32P, use a GM-type survey meter with a thinend window detector, calibrated in counts per minute (CPM) to determine the background
readings for your work area. Wearing latex gloves, survey the unit to be returned with the
GM meter. If any part of the unit is found to show readings higher than background, wash
the area using Count Off™ (PerkinElmer Life Sciences) or another similar commercially
available detergent and paper towels. If none are available, a Formula 409™-like solution
or a mild detergent will do. As you clean, discard liquid and solid waste (gloves and paper
towels) according to your local and institutional regulations for radioactive material
disposal. Continue washing until the GM meter reading for the contaminated area(s) is
equal to or below background.
To decontaminate units where a GM-meter is not useful for detection, such as with 3H, it
9-5
will be necessary to perform swipes of the unit and detect using a scintillation counter. The
unit should be dry. Wipe surfaces with dry paper circles (these are commercially available
or you can make your own). Areas can be charted, so that individual swipes can be done
on different surfaces to better isolate areas of contamination. These swipes are then placed
into individual scintillation vials with an appropriate fluor and then analyzed on a properly
programmed scintillation counter. If contamination above 100 disintegrations per minute
dpm/100 cm2 (dpm = CPM/efficiency) is found, wash the area as described above for betaemitting isotope decontamination. After cleaning the area, swipe it a second time to
determine the amount of contamination remaining. If the area still has a greater than 100
dpm/cm2, continue the cycle of swipes and washing until you achieve a reading of less
than 100 dpm/cm.2
Once the unit has been determined to be radiation free (< 100 dpm/cm2), remove all the
hazardous and radioactive labels from the unit. If the labels cannot be removed, deface
them. Failure to do so may result in significant delay or a refusal of repair.
If your unit has unremovable decontamination (detectable with a GM-meter and not with
paper swipes, or detectable with paper swipes but after continued washing the dpm/cm2
remains constant above 100) of a short half-life isotope such as 32P, the unit may be stored
for 10 half-lives of isotopic decay and the decontamination procedure repeated.
☞
NOTE: Units contaminated with unremovable, long half-life isotopes may not
be returned.
Repackaging the IS4000R
Damage to the instrument due to inappropriate packing is not covered by the IS4000R
warranty. Follow these directions when packing the IS4000R for shipment.
1 Decontaminate the IS4000R as described above.
2 Close and latch the lid.
3 Remove the power cord and IEEE 1394 (FireWire) Camera/ Computer Interface Cable
from the IS4000R.
4 Remove any filters from the Filter Wheel and cradle the camera using foam padding.
5 Secure the Filter Access Panel to the filter housing with masking tape.
6 Put the IS4000R in its original plastic bag.
7 Pack the IS4000R in its original box. If you have discarded the original packing
material, call your dealer or Technical Support to arrange for delivery of new packing
material.
9-6
Software License Agreement
9
Warranty
You should carefully read the following terms and conditions before using this software
package. Using the KODAK Molecular Imaging Software indicates your acceptance of
these terms and conditions. If you do not agree with them, you should promptly return the
disk package unopened, along with its accompanying materials, and your money will be
refunded.
Carestream Health, Inc. provides this program and licenses its use. You assume
responsibility for selection of the program to achieve your intended results, and for
installation, use, and results obtained from the program.
License
You may:
a.
use the program on a single machine, or if you have purchased a network license, on
the number of machines authorized by your network license (as indicated on the
invoice for that license);
b.
copy the program into any machine-readable or printed form for backup or
modification purposes in support of your use of the program;
c.
transfer the program and license to another party if the other party agrees to accept the
terms and conditions of this Agreement. If you transfer the program, you must at the
same time either transfer all copies whether in printed or machine-readable form to
the same party or destroy any copies not transferred; this includes all modifications
and portions of the program contained or merged into other programs.
You must reproduce and include the copyright notice on any copy, modification, or portion
merged into another program.
You may not use, copy, modify, or transfer the program, or any copy, modification, or
merged portion, in whole or in part, except as expressly provided for in this license.
If you transfer possession of any copy, modification, or merged portion of the program to
another party, your license is automatically terminated.
9-7
Term
The license is effective until terminated. You may terminate it at any time by destroying
the program together with all copies, modifications, and merged portions in any form. It
will also terminate upon conditions set forth elsewhere in this Agreement or if you fail to
comply with any term or condition of this Agreement. You agree upon such termination to
destroy the program together with all copies, modifications, and merged portions in any
form.
Limitation of Liability and Remedy
Carestream Health, Inc. warrants that it has full power to enter into this Agreement and to
grant you the rights provided herein and that the software will substantially conform to
Carestream Health, Inc.’s published specifications. Carestream Health, Inc. further
warrants that it will defend you against any claim that the software supplied hereunder
infringes a patent, copyright, or other third party intellectual property right, and
Carestream Health, Inc. will pay any costs and damages that a court finally awards against
you as a result of such claim, provided you give Carestream Health, Inc. prompt written
notice of such claim and tender to Carestream Health, Inc. the defense and all related
settlement negotiations. Carestream Health, Inc. shall have no obligation with respect to
any such claim based upon your modification of software of its combination, operation, or
use with data or programs not furnished by Carestream Health, Inc. or with other than the
specified computer system. At any time during the course of any litigation arising out of
such a claim, or if, in Carestream Health, Inc.’s opinion, the software or any part thereof is
likely to become the subject of a claim of infringement, Carestream Health, Inc. will, at its
option and at its expense, either procure for you the right to continue using the software,
replace or modify the same so that it becomes non-infringing, or grant you a credit for the
software as depreciated, and accept its return. The depreciation will be an equal amount
per year over the lifetime of the software as established by Carestream Health, Inc.
EXCEPT FOR REPLACEMENT OF UNMODIFIED COPIES OF SOFTWARE FOUND
BY CARESTREAM HEALTH, INC. TO BE DEFECTIVELY REPRODUCED OR
DAMAGED PRIOR TO DELIVERY TO YOU, CARESTREAM HEALTH, INC.
EXPRESSLY EXCLUDES ALL OTHER REMEDIES OR WARRANTIES OTHER
THAN THE FOREGOING, EXPRESS OR IMPLIED, IN RELATION TO THE
SOFTWARE (AND ANY SERVICES RENDERED TO SUPPORT THE SOFTWARE),
INCLUDING ANY WARRANTY OF MERCHANTABILITY OR OF FITNESS FOR A
PARTICULAR PURPOSE.
In particular, Carestream Health, Inc. does not warrant that the functions contained in the
program will meet your requirements or that the operation of the program will be
uninterrupted or error free.
9-8
Neither you nor any other third party claiming rights through you will hold Carestream
Health, Inc., or any third party from whom it has derived rights in the Software Products,
liable for any loss or damage because of any defect or ineffectiveness of the Software
Products, including without limitation, any interruption of business, loss of profits, lost
data, or indirect, consequential, or incidental damages.
9
Warranty
CARESTREAM HEALTH, INC.’S LICENSOR(S) MAKES NO WARRANTIES,
EXPRESS OR IMPLIED, INCLUDING WITHOUT LIMITATION THE IMPLIED
WARRANTIES OF MERCHANTABILITY AND FITNESS FOR A PARTICULAR
PURPOSE, REGARDING THE SOFTWARE. CARESTREAM HEALTH, INC.’S
LICENSOR(S) DOES NOT WARRANT, GUARANTEE, OR MAKE ANY
REPRESENTATIONS REGARDING THE USE OR THE RESULTS OF THE USE OF
THE SOFTWARE IN TERMS OF ITS CORRECTNESS, ACCURACY, RELIABILITY,
CURRENTNESS OR OTHERWISE. THE ENTIRE RISK AS TO THE RESULTS AND
PERFORMANCE OF THE SOFTWARE IS ASSUMED BY YOU. THE EXCLUSION
OF IMPLIED WARRANTIES IS NOT PERMITTED BY SOME JURISDICTIONS; THE
ABOVE EXCLUSION MAY NOT APPLY TO YOU.
IN NO EVENT WILL CARESTREAM HEALTH, INC.’S LICENSOR(S), THEIR
DIRECTORS, OFFICERS, EMPLOYEES OR AGENTS (COLLECTIVELY
CARESTREAM HEALTH, INC.’S LICENSOR) BE LIABLE TO YOU FOR ANY
CONSEQUENTIAL, INCIDENTAL, OR INDIRECT DAMAGES (INCLUDING
DAMAGES FOR LOSS OF BUSINESS PROFITS, BUSINESS INTERRUPTION, LOSS
OF BUSINESS INFORMATION AND THE LIKE) ARISING OUT OF THE USE OR
INABILITY TO USE THE SOFTWARE EVEN IF CARESTREAM HEALTH, INC.’S
LICENSOR HAS BEEN ADVISED OF THE POSSIBILITY OF SUCH DAMAGES.
BECAUSE SOME JURISDICTIONS DO NOT ALLOW THE EXCLUSION OR
LIMITATION OF LIABILITY FOR CONSEQUENTIAL OR INCIDENTAL
DAMAGES; THE ABOVE LIMITATIONS MAY NOT APPLY TO YOU.
General
You may not sublicense, assign, or transfer the license or the program except as expressly
provided for in this Agreement. Any attempt otherwise to sublicense, assign, or transfer
any of the rights, duties, or obligations hereunder is void.
This Agreement will be governed by the laws of the State of New York.
Should you have any questions concerning this agreement, contact Technical Service,
Molecular Imaging Systems, Carestream Health, Inc., 4 Science Park West, New Haven,
CT 06511, USA.
9-9
Regulatory Information
“This equipment has been tested and found to comply with the limits for a Class A digital
device pursuant to Part 15 of the FCC rules. These limits are designed to provide
reasonable protection against harmful interference when the equipment is operated in a
commercial environment. This equipment generates, uses, and can radiate radio frequency
energy and, if not installed and used in accordance with the instruction manual, may cause
harmful interference to radio communications. Operation of this equipment in a residential
area is likely to cause harmful interference in which case the user will be required to
correct the interference at his own expense. Any changes or modifications not expressly
approved by the party responsible for compliance could void the user’s authority to
operate the equipment. Where shielded interface cables have been provided with the
product or specified additional components or accessories elsewhere defined to be used
with the installation of the product, they must be used in order to ensure compliance with
FCC regulations.
This Class A digital apparatus meets all requirement of the Canadian Interference-Causing
Equipment Regulations.
Cet appareil numérique de la classe A respecte toutes les exigences du Réglement sur le
matériel brouilleur du Canada.”
For Use in European Union
WARNING
This is a class A product. In a domestic environment this product may cause radio
interference in which case the user may be required to take adequate measures.
For Use in Japan
9-10
For Use in Taiwan
9
Warranty
The IS4000R contains small amounts of lead in the lens and circuit boards and mercury in
the lamps. Disposal of these materials may be regulated due to environmental
considerations. For disposal or recycling information, please contact your local authorities,
or in the U.S.A., contact the Electronics Industry Alliance web site at www.eiae.org
9-11
9-12
Digital Imaging Concepts
Digital imaging principles as they relate to the IS4000R are discussed in this appendix in
somewhat greater detail than elsewhere in the manual. Gaining a working knowledge of
these concepts will be helpful in making you at home with digital, electronic and
quantitative imaging technology. The discussion is presented in an order that starts with
the most difficult concept, resolution. The concept of image resolution is central to the
understanding of all aspects of digital and quantitative imaging.
A
Digital Imaging
A-1
Image Resolution
Image resolution generally refers to the capability to distinguish objects of interest. This
discussion focuses on image data in an effort to clarify the point that the information in an
image data file has a limited capacity to resolve objects, whether or not those objects may
be visibly resolved. In digital imaging, resolution can be discussed with greater clarity
since the fundamental concepts and terms are well-defined and amenable to measure. The
concepts of bit depth, grayscale, CCD, noise, pixels and many other relevant terms are
briefly defined in the Glossary. To simplify the following discussion, the term “objects”
refers to physical items located on a flat surface that emit or modulate light that is captured
by an imaging system. The image information resides in an image data file, and the word
“image” most often refers to the data file. A subsequent representation of the image may
be printed or displayed on screen for viewing; hence, the image data may be visualized as
a “perceived image”.
As defined above, an object in a plane is emitting a signal or is otherwise modulating light,
creating contrast that is construed as signal. The signal is captured, and an image
represents that object within a measurable precision or level of error. The image data may
be conceived as having an X,Y plane, and a signal (G) associated with each point on the
X,Y plane. See Figure 1. Each of the image variables X, Y, and G have an uncertainty or
an error introduced by the imaging system. The capability of the imaging data to resolve
two objects depends upon the uncertainty of each of these variables. The uncertainty in the
X and Y image coordinates is called the spatial component of resolution, and depends
upon the number of CCD pixels and the limitation of all elements in the optical path. The
uncertainty in the signal G is called the dynamic range component of resolution and
depends upon the CCD and supporting electronics. The smaller any of these uncertainties,
the higher the precision and the higher the resolution. While the variables X, Y, and G are
not necessarily separable variables in an image, resolution is generally simplified into
spatial and dynamic range considerations.
A-2
Figure 1.
Image resolution is related to the
volume of information in a cube with
dimensions X and Y (the image
plane) and G (the dynamic range).
Binning the adjacent Y-pixels, by a
factor of 2 or 4, doubles or quadruples
the signal G resolution, but halves or
quarters the Y-resolution.
A
Digital Imaging
If the coordinate X (a position X in the X,Y plane of the image) has an inherent error or
uncertainty ΔX, then the X coordinate may be divided into X/ΔX increments, each one of
which significantly differs from its neighbor by the margin of error ΔX. See Figure 1.
Similarly, Y is divided into Y/ΔY increments. The fundamental element having a
dimension of ΔX and ΔY is defined as the smallest spatial element in the image that may
be resolved in the X,Y plane. Similarly, the signal variable G has an uncertainty ΔG, and
can be divided into G/ΔG increments. The signal error is generally called noise; hence, the
number of significantly different signal increments (G/ΔG) is the signal/noise ratio, which
is the most relevant measure of dynamic range. Thus, the smallest increment of the signal
scale that may be resolved within the spatial element ΔXΔY is ΔG. Both the spatial and
dynamic range components of an image are discussed later in this section.
A-3
Spatial Resolution
Assuming the spatial resolution is CCD limited, the smallest spatial element in the image
is represented by a “pixel”, having the dimension ΔX by ΔY. Depending upon the image
magnification, a certain total number of image pixels of a CCD are applied to an object
area, limiting the spatial resolution to a certain number of pixels per object area, often
referred to as pixel density. To simplify, the pixel limitation of resolution is usually quoted
for only one dimension (as in pixels/mm), assuming that X and Y magnification are
identical and the pixels are square. The pixel limited spatial resolution of the IS4000R is
variable (zoom lens), ranging from a low resolution of about 10 pixels/mm to a high
resolution of about 10 pixels/mm.
Other measures or quotations are often associated with spatial resolution. The measure of
dots/inch or dots/mm is often used in the printing industry, and is a true measure of printed
resolution; it is clearly analogous to the pixels/mm quoted above. Another common
measure used in imaging is line-pairs/mm, a number which corresponds to one-half of the
above pixels/mm; two pixels are needed to present the same information as one line-pair.
As a general rule of thumb, a minimum of two image pixels or one line-pair must be
applied to an object to “resolve” the object in the image. The same applies to the distance
between two objects that are to be resolved. For example, objects 0.2 mm apart will
require at least 10 pixels/mm or 5 line-pairs/mm to discern the space between them
(spatially resolve the objects). While this general rule may be a mathematical necessity for
spatial resolution, it is not sufficient. Although similar objects within an image captured at
a high signal/noise may be well resolved using a spatial resolution of two or more image
pixels per object, objects having extreme differences in signal may not be resolved, or
objects captured with a low signal/noise may not be resolved.
A-4
Pixels/
Distance
Relative
Signal
Relative
Noise
A
1
1
1
B
1/3
1
1
C
1
1
3
D
1
1/3
1
Figure 2. Resolution depends upon spatial and dynamic range variables.
A
Digital Imaging
A relevant example of image resolution is displayed in Figure 2, in which two bands are
perceived as being nearly “resolved” in the upper left panel (A). If the image is
manipulated to reduce the spatial resolution (1/3 pixels/distance (B)), or alternatively
manipulated to reduce the signal resolution (3X noise) (C) and (1/3 signal (D)), the
resolution of the bands is obscured. Hence, image resolution depends on both spatial and
dynamic range considerations.
A-5
Dynamic Range
Dynamic range is the name given to the scale of signal or signal/noise ratio of a digital
camera system. The maximum signal/noise that is quoted for an imaging system is the
ratio of the maximum signal to the minimum noise. The maximum signal of the IS4000R
is 16-bits per capture, or 65,536 signal levels. The minimum noise is approximately 12
signal levels. Therefore, the maximum signal/noise ratio (65,536/12) is about 5,460, and is
related to the number of significantly different signals G/ΔG in the above discussion of
Resolution.
The dynamic range of a camera may be increased by adding different image captures of an
object together. The signal scale must be increased to accommodate higher numbers; the
IS4000R software provides a 32-bit scale (4.3 x 10⁹), providing more signal levels than
needed for the accumulation of multiple images. While signal among accumulated images
directly adds, the noise among the images generally does not. If the noise level of a series
of independent (but otherwise identical) images is random, then the noise level of the
accumulated image will be the product of the noise (of any one image) and the square root
of the number of accumulated images. Thus, the signal/noise ratio of an accumulated
image is increased by the square root of the number of images participating in the
accumulation. The maximum signal/noise ratio of the IS4000R accumulated image is
ideally achieved with the addition of 32 images, giving a maximum ratio of (65,536 x √
32)/12, which is about 30,889.
A-6
Noise
Image noise is a random deviation in signal and is identified with the signal error or
uncertainty ΔG in the previous discussion on Resolution. Noise may be measured among
pixel signals within an image (for example, background), or among the signals derived
from the same pixel from different but otherwise identical images. Noise is most often
represented as a standard deviation of a collection of signals about a mean. Noise arising
from a digital camera system has two distinct causes:
✔ The supporting electronics contribute “read” noise as the CCD pixel signals are
converted to digital signals. The read noise may appear nearly random in a single
capture, but usually has subtle non-random components, which become apparent
upon adding a large number of images wherein structured features are obvious. For
a single exposure (one “read”), the read noise of the IS4000R is about 12 signal
levels using a 16-bit scale.
A
✔ The dark (no light) charge accumulation within a CCD pixel increases with
Digital Imaging
exposure time contributing “dark current noise”. Dark current noise is directly
related to exposure time, and is significantly reduced with operating temperature
(thermoelectric cooling). The “dark” component of noise is generally quoted as a
coefficient of time. The IS4000R has a cooled CCD, and the nominal dark noise is
very low.
Noise components in imaging generally add according to the square root of the sum of the
squares of the components. A summary of the IS4000R dark noise components is shown in
the following graph
A-7
Figure 3. IS4000R noise estimates.
Upon studying the graph, it becomes clear that guidelines relating to the number of
captures and exposure time per capture can be established for the IS4000R to minimize
noise. There will be some variation among IS4000R cameras, and extreme ambient
temperature may influence the dark noise. It is most likely, however, that a single capture
will minimize unless extremely low light is limiting the signal. Should multiple capture
accumulations be necessary to attain signal significance, a rule of thumb for the above
graph suggests that a single exposure of 1360/binning number (in minutes) should be
utilized, where binning number is the product of the bin state. For example, for 8 X 8
binning, 1360/64 = 21 minutes, so an accumulation of 21 minutes captures maximizes the
signal/noise ratio for 688.
Note that the above guidelines are based upon image noise only, and give no consideration
to signal or other aspects of the typical image capture. The above guidelines relate to those
captures that are signal-limited, typical luminescent captures, wherein noise minimization
is crucial. For those imaging experiments with ample signal to fill the available scales in a
relatively short amount of time, the above guidelines do not relate. In most fluorescent
images, the experimental background noise will be determined by the materials used in the
experimental sample rather than the noise contributed by the electronic system; thus, a
large number of “reads” will not significantly detract from the image quality, and may lend
an element of experimental convenience as the image display and histogram “grows” in
significance as the images accumulate.
A-8
Binning Pixels
The total amount of information the image file is capable of containing is the summation
of all elements in the X,Y,G volume, or the product (Y/ΔY)(X/ΔX)(G/ΔG) (See Figure 1).
Just as information is the capability to distinguish between alternatives, then the total
volume of the cube is related to the image resolution and it is the basis for discerning
objects. Note that the information volume may be unchanged if the shape of the cube is
changed or distorted (any one dimension may increase with a proportional decrease of
another).
The CCD has a special hardware capability that can transform the shape in this
information cube. The capability is called binning, and it is the addition of the signal levels
of adjacent pixels without the addition of noise. If adjacent pixels are binned in the Y
dimension yielding half or a quarter of the Y levels, the number of levels on the signal
scale will double or quadruple. Should both the X and Y dimensions be binned, the signal
scale will be 1X, 4X, 16X, 64X and 256X corresponding to 1 x 1, 2 x 2, 4 x 4, 8 x 8, and
16 X 16 binning states. Binning in both X and Y directions can be a 2X or 4X bin in each
direction. The maximum signal scale is 16X. The volume of the cube remains the same,
hence the image resolution has not changed. If an image has a spatial resolution that far
exceeds the need to resolve an object, then the apparent resolution of the object is
increased by binning. This increase is usually associated with an apparent increase in
detection sensitivity when binning is effectively applied. To reduce confusion, asymmetric
binning is limited to the horizontal direction of the user perspective. Asymmetric binning
is useful in the case where spacial resolution can be sacrificed in one direction only,
typically in a separatory experiment (a gel or blot). Hence, the gel is oriented so that the
sample wells are horizontal. Upon image capture in the 4 X 4 and X 1 states, the band
resolution in the Y direction is conserved, and the signal is enhanced by 4 X at the expense
of reduced sample well resolution.
A
Digital Imaging
A-9
Background Subtraction
The background signal level, shown in Figure 4, is associated
with the absence of experimental signal. In a image histogram,
background is a peak of signal frequency, having a mean
background level and a breadth related to image noise. The low
signal side of the peak diminishes to a pixel frequency of zero at a
signal level of about 200 on a 65,535 scale for a single image
capture of the IS4000R. Below the level of zero pixel frequency
(200 in this case) there is no image information, and this level is
simply the total electronic background. The electronic
background is composed of a dark current (electronic charges
emanating from the CCD and amplifier), and an intentional
voltage offset to assure that the electronic background is always
positive.
The electronic background diminishes the total dynamic range of
the IS4000R by a small amount, resulting in a net signal level
maximum of about 65,535 - 200 = 65,335. While the background
is small, it may be inconvenient or detrimental to a subsequent
analysis and it is best subtracted. Electronic background
subtraction is managed by the IS4000R Image Acquire software.
Figure 4
Electronic background subtraction must be executed with sufficient precision to assure
that the zero-level of signal equals the actual level of no light. Given an appropriate nolight/zero-signal, lens and illumination correction may be executed with precision. See
Appendix C: Image Correction. As many as half the pixel signal levels become zero upon
subtracting electronic background from a perfectly dark image. Only the upper half of the
background noise peak represented by the histogram remains, consequently estimates of
the background electronic noise are distorted, but are nevertheless consistent throughout
the image. Subsequent lens correction will further distort the background noise with a
function that increases in a radial manner (from the middle of the image outward). Should
an image of uniform background noise be desirable for analysis, the file must be saved
prior to lens correction.
Software management of the electronic background is camera-specific, and the only the
software registered to the specific IS4000R camera properly encodes the appropriate
background and defective pixel information.
A-10
UV Epi-Illumination
In the following section, you will learn about the principles of UV Epi-illumination as
they relate to the IS4000R.
WARNING:According to “Recommended Practice for Photobiological Safety
for Lamps & Lamp Systems—General Requirements (ANSI/IESNA)”, the UV
light emitted from the IS4000R during normal or continuous use is safe for the
general population. The safety of the IS4000R relates to both skin and eye
exposure. By comparison, the UV exposure is similar to that received from
common overhead lighting in laboratories, and is much less than that received by
sunlight at sea-level. Hence, no safety warning is issued, nor is any appropriate,
for the normal use of the IS4000R. However, as noted in the cited publication,
there are certain photosensitive individuals whose tolerance to UV is reduced, but
guidelines have not been established.
B
UV Illumination
B-1
The KODAK Image Station 4000R supplies UV irradiation to the sample Platen from the
inside of the chamber. The light is directed at a 45° angle to the underside of the Platen,
which is generally called “epi-illumination”. The illumination system has been designed
to optimize the physical features that relate to the fluorescent excitation of samples placed
on the Platen, among which are:
1 The optical elements that manage the illumination have been designed to provide a
reasonably uniform distribution of excitation energy over the Platen area. While it is
not possible to design absolutely uniform illumination from light sources at the
distance used in this system, the design does achieve a uniformity that is at about the
same quality that a camera lens can represent. The KODAK Molecular Imaging
Software provides corrections that address both the lens and illumination distortions,
thus contributing to a quality analysis of the image data.
2 The epi-illumination angle requires that the excitation photons interact with the sample
and be re-emitted in order have an angle appropriate to enter the camera lens. Photons
simply reflected by a planar surface at the platen will not enter the lens, obviating the
required use of special optical filters that reject the excitation energy. However,
reflected light from curved surfaces in a sample can enter the lens and will present
artifacts in fluorescent images. There are specialized filters to accommodate these
artifacts.
3 The energy spectrum of the illumination has been designed to provide a broad range of
light (300–400 nm, see Figure) within the range of wavelengths called the UVA
(ultraviolet absorbance). The 300–400 nm range of wavelengths effectively excites a
very large number of fluorochromes in common usage. Even fluorochromes that are
particularly suited to laser-excitation at a much higher wavelength may also be excited
by the IS4000R UV epi-illumination.
4 Compared to commonly used UV transilluminators or hand-held UV light source, the
energy spectrum of the IS4000R UV epi-illumination system emits very little energy
below 300 nm. See Figure. Compared to the 300–400 nm range of light, light below
300 nm contributes very little to the excitation of fluorochromes in common usage, but
does substantially contribute to the general fluorescence of commonly used materials
in laboratory samples. Hence, lower autofluorescent background may be anticipated in
the fluorescent image applications supported by the IS4000R.
The absence of energy below 300 nm in the IS4000R contributes to its safe usage.
Wavelengths below 300 nm are hazardous. See Figure and Safety Statement.
5 The total energy of the IS4000R UV epi-illumination is very low, nominally 50 µW/
B-2
cm2 at the Platen surface. However, the digital camera is sufficiently sensitive to assure
that fluorescence data can be accumulated over a reasonable period of time with UV
epi-illumination, provided. Additionally, the low intensity reduces the possibility that a
fluorescent response is the result of multi-photon molecular processes that can
contribute to the autofluorescence of solid materials commonly used in laboratory
samples (such as nylon).
The reduced energy of the IS4000R UV epi-illumination eliminates the possibility of
visualizing the fluorescence of a sample, so its usefulness for cutting bands out of gels
is precluded, and should never be attempted on an optical surface critical to image
quality.
The total energy emanating from the IS4000R Platen is less than 200-fold less than
commonly used UV transilluminators, contributing to its safe usage. See Figure and
Safety Statement.
B
UV Illumination
Figure B-1. Emission spectra of UV illumination.
B-3
B-4
Image Correction
C
Image Correction
In the following section, you will learn about the principles of image correction as they
relate to the IS4000R.
Image capture with a CCD camera has the distinct advantages of speed and nearly live
representation of image data. There are associated disadvantages, the most important of
which are the image distortions associated with any lens and defects associated with the
CCD sensor. Another important image correction is that associated with the non-uniform
illumination of the object.
The removal of defective pixel information is automatic. Defective pixels are
characteristic of a particular CCD, have elevated signals (dark current), are always present
and amount to about 0.1% of all pixels. Defective pixels in an image are corrected by
recalculating their signal value by interpolating the values of their nearest neighbor pixels.
For long exposures times occasional “bright” (or high-signal) pixels may be observed.
Generally, you will find those pixels will not be reproduced in other exposures. The
“spontaneous” bright pixel cannot be prevented and is likely the result of a spurious charge
on the sensor or other spontaneous event such as background gamma-rays
The lens distorts the image of a flat object in two significant ways: the object intensity is
reduced as a function of the distance from the center of the image, and the magnification
of the image is slightly increased as a function of the same distance (referred to as
spherical aberration or “pin-cushion” distortion). Some distortion is apparent using the
widest field of view.
A distinct advantage of the IS4000R system is that a flat object on the Platen is at a fixed
distance from the camera. Consequently, the extent of image distortion is a function of the
magnification (FOV) only. The IS4000R image distortion has been characterized as a
function of FOV, and the appropriate correction may be applied by selecting the Warping
option in the IS4000R Acquire window (Preferences). Since the extent of distortion is a
function of magnification, care must be taken to accurately record the lens FOV setting in
the acquisition interface.
Most important to quantitative imaging is the intensity correction, since any lens will
cause a reduction of object intensity as a function of its distance from the center of the
image (vignetting). The corresponding correction is a complicated function of both f-stop
and FOV. The IS4000R image intensity has been characterized as a function of f-stop and
C-1
FOV, and the appropriate correction may be applied by selecting the Lens Correction
option in the Preferences section of the IS4000R Acquire window. Since the extent of
intensity correction is a function of both f-stop and FOV, care must be taken to accurately
record both lens settings in the acquisition interface. Upon accurately providing that
information, an appropriate image transform is applied to the image to correct all intensity
information throughout the field of view. This correction will apply to any luminescent
image and transmission images in which care is taken (proper use of the Light Diffuser) to
supply uniform illumination to the Platen. Use of a filter should not significantly influence
the correction. Except for the very corner of the field at the widest angle and the lowest fstop, the representation of the intensity will conform to a nominal 1% accuracy.
Application of the lens correction does not change the global mean signal of the image.
For UV illuminated images, field illumination correction should also be applied. The
extent of UV illumination non-uniformity will cause approximately the same amount of
quantitation error as the lens distortion of the IS4000R. It is critical to capture a reference
image (to be used for image correction) of the illumination field using optical parameters
(f-stop and FOV) that are identical to an image that is to be corrected. The illumination
non-uniformity is highly reproducible and may be corrected by mathematically dividing
an image by a reference image captured by the IS4000R, using the protocol outline in the
Generating an Illumination Reference File in Chapter 5: Capturing Images.
The reference image used for correction will be filtered to remove noise and artifacts (such
as scratches and particulate dust). The filtered reference image is normalized and divided
into the experimental image to be corrected. Regions of the experimental image that
experienced a greater-than-average illumination are divided by a number greater than one,
while those experiencing a less-than-average illumination are divided by a number less
than one.As with the lens correction, the global mean signal of the image is unchanged by
illumination correction. Application of illumination correction precludes the need for lens
correction.
It is recommended that multiple reference images at varying f-stops and field of view
(FOV) be captured and clearly designated as a library of images from which reference
images may be selected for use in illumination correction. For the sake of accuracy, create
reference files at all f-stop and FOV settings commonly used, and make certain that the
settings are made and documented precisely; it is suggested that only f-stop and FOV
adjustments that are indexed be chosen for experiments or reference files.
It is likely that such a library could be applied for an extended time period, because the
field illumination should be constant for many hundreds of hours. A suggested library of
C-2
UV illumination reference files is listed in following table. (18 reference files).
C
Table 1: Suggested library of UV illumination files
0
4.0
5.8
Image Correction
f-stop Setting
FOV Setting
20, 30, 40, 60, 100, 150
20, 30, 40, 60, 100, 150
20, 30, 40, 60, 100, 150
C-3
C-4
Glossary
Analog Signal—A signal that is continuous and uninterrupted. Variations in voltage
correspond to variations in brightness. This differs from digital, where a signal is
represented in discrete steps of digital value (1's, 0's).
Analog to Digital (A/D) Converter—An integrated circuit that transforms an analog
(voltage level) to a binary (or digital) value. The IS4000R camera converts the analog
signal into a digital signal using an A/D converter.
Aperture—The opening within a lens that limits light passage, usually adjustable and
referred to as the f-stop.
Autoradiography—A method of capturing radioactive signals by contact-exposure of
film to a flat sample consisting of radioactive objects or labeled molecules.
Glossary
Band-Pass Filters—Clear optical elements that transmit only a limited spectrum of light
(limited range of wavelengths) and may be of two general types: colorimetric or
interference.
Binning—The process by which adjacent CCD signal values are added together and then
each pixel value is replaced with the new added value. For example, if two adjacent pixels
have an intensity value of 100 and 150, when binning has been applied, both pixels will be
assigned a value of 250. Binning can be applied on X and/or Y axis of an image. While
binning decreases the resolution of the image, it increases the sensitivity of the signal.
Bit (Binary Digit)—The smallest amount (unit) of information, measured on a binary
scale (integer exponents of 2), where combinations of 0's and 1's are used to code
information. See Bit Depth. Eight bits of information is called one byte.
Bit Depth (Bits-Per-Pixel or Pixel Depth)—The number of intensity values that can be
assigned to each pixel. Images usually fall between 8 and 24 bits. The IS4000R camera
produces a 16-bit image in the single capture mode or n-bit in the multiple capture mode.
A 12-bit image has 4,096 gray levels, 14-bit image has 16,384 gray levels, while a 16-bit
image has 65,536 gray levels.
G-1
Black Point—Corresponds to an intensity value in the image that represents pure black in
the screen image. The black point can be adjusted using the histogram sliders to help
visualize different features in the image. Features with intensity values below the black
point can no longer be seen in the screen image. Adjustments to the black point alter the
screen image and do not alter the data that is transferred to KODAK Molecular Imaging
Software for analysis.
Blooming—If the CCD is overexposed, the CCD pixels do not have the capacity to hold
the charge and will “bloom” or spill into the adjacent pixel. Blooming distorts the image.
However, excessive signal may often be associated with the property of the object and not
the blooming of the CCD.
Blot—A methodology in which molecules/particles of interest are transferred and affixed
to a solid support (membrane), usually for the sake of detection and imaging. A liquid
sample may be applied to a membrane as a spot, dot, or slot (band), defining a formatted
sample array as a Dot or Slot Blot. Electrophoresis gels used to length-resolve DNA, RNA
or protein molecules may be similarly transferred to membranes by mechanical extrusion
or electrophoresis; such blots are respectively called Southern, Northern, or Western Blots.
Brightness—A relative measure of light associated with a pixel representing its gray level
from black and white, through intermediate levels of gray. Perceived brightness increases
from dark to bright, or black to white through intermediate levels of gray. However, the
convention of quantitative imaging is quite the opposite, wherein the gray scale is
increased from white to black.
CCD (Charged-Coupled Device)—An electronic sensor used for imaging light. A silicon
crystal, etched to produce micro-electronic circuitry, for the purpose of transforming a real
image into an electronic image. A photon impinging upon the silicon is converted to an
electron (a negative charge, stable in the crystal matrix), that may be subsequently
managed (collected and transported) by the circuitry. The CCD in the IS4000R has 2,048 x
2,048 = 4,194,304 imaging elements (pixels) defined by etchings.
Chemifluorescence—Chemically mediated production of a fluorochrome. Fluorescent
molecules may be produced by the chemical (enzymatic) conversion of a non-fluorescent
molecule (substrate), upon excitation (laser or UV illumination).
Chemiluminescence—Chemically mediated production of light. Luminescence or light
emission may be produced by a chemical reaction or an enzyme operating on a substrate.
G-2
Contrast—The contrast of an image represents the perceived differences in intensity
between dark and light areas within the image. A low contrast image contains gray levels
that are similar in visual intensity, whereas a high contrast image contains extreme
differences in visual intensity.
COPI (Closed Optical Path Image)—Chamber design used in the IS4000R. Provides a
light-tight environment for imaging laboratory samples, reducing the possibility of
contamination of the optical path of the instrument.
Cosmic Ray—a event in nature that generates a photon which can expose a pixel on a
CCD.
Dark Current Noise—Electronic noise inherent to the CCD sensor and circuitry, which is
increased with extended exposure time. Cooling the CCD helps reduce dark current noise.
The IS4000R camera is capable of about 1 hour exposure times with only a doubling of
noise.
Glossary
Digital Camera—A camera that uses an electronic sensor to record an image in a digital
binary format.
Dynamic Range—The maximum range of significant digits over which system hardware
performs electronic imaging, usually expressed as a signal-to-noise ratio. The IS4000R
camera provides a 16-bit (65,536 gray levels) signal range for single captures. These
single captures can be accumulated by addition in software into a n-bit file.
Electrophoresis—Separation of molecules on the basis of charge and size.
Epi-illumination—Illumination of an object in a direction other than the optical axis
defined by an object and sensor. IS4000R illuminates objects at a 45° acute angle from the
optical axis of the lens.
Filter Cassette—A predefined shaped cassette containing UV filters for fluorescent
capture mode.
Floating Point—A means of representing a signal as real numbers (fractions or decimals).
Floating point calculations are important in maintaining the accuracy of analysis data. The
KODAK Molecular Imaging Software uses floating point numbers.
f-stop—The ratio of focal length to the aperture diameter in the lens.
Fluorescence—The emission of light from a substance having been excited by light
absorption.
G-3
Gamma—A mathematical transformation function that can be used to improve image
appearance by decreasing or increasing the contrast of an element of interest in an image.
Adjusting the gamma of an image disproportionately skews the gray level distribution,
higher gamma values lighten the image and lower gamma values darken the image.
Adjusting the gamma does not alter the image data file and is only used to enhance the
viewing of the image.
Gel—A separation matrix which is typically agarose or acrylamide and is used for
electrophoresis.
Gray Level—The digital signal assigned to a pixel associated with a level of light (from
black to white). For example, an 8-bit and a 16-bit system includes gray level values
between 0–255 and 0–65,535, respectively.
Histogram—The frequency of the distribution of pixels over the range of signals within
an image. The horizontal axis represents the gray level and the vertical axis represents the
number of pixels. See Appendix A.
Image Accumulation—The addition of multiple exposures (also referred to as frame
captures). The data from all the summed images are used to generate the final image for
analysis.
Image Compression—A computational operation upon image data that results in a
reduction of data storage volume. Usually results in some loss of image data.
Interpolation—A numerical estimate of a value within a range of empirical data, based
on the mathematical trend of data. Contrasts with extrapolation, in which a value outside
the range of data is estimated.
Noise—Random and/or persistent deviations in signal. In a digital camera the CCD has
noise associated with the collection, reading and amplification of the signal that may affect
image quality. The IS4000R camera reduces noise by cooling the CCD using
thermoelectrical cooling. Also see Dark Current Noise and Read Noise.
Photon—The smallest unit of light, or any electromagnetic radiation. Characterized by
wavelength.
Pixel—The fundamental element in a digital image. In a digital camera, the pixels
represents the light sensitive elements on the CCD.
G-4
rad PADD—(radioisotopic phosphor assisted detection device) is an optional cassette
accessory that converts beta particles emitting from radioisotope samples into light which
can be imaged on the IS4000R.
Read Noise—Electronic distortions in signal introduced when converting the analog
signal to a digital signal.
Resolution—The capability to distinguish between objects of interest. It is customary,
when describing the characteristics of a digital imaging device or image, to describe the
resolution by specifying the number of pixels it captures in the horizontal by vertical
direction.
Saturation—The limitation of signal imposed by either the CCD or the digital scale in
which the signal is being represented. If the signal becomes too large the individual pixels
on the CCD will be filled and no additional signal can be detected.
Glossary
Thermoelectrical Cooling—A system that uses electron flow through semiconductors to
generate temperature differences. The CCD is mounted on the cool side and the heat is
dissipated by cooling fans. IS4000R uses a thermoelectrical cooling system to reduce
image noise generated by the heat from within the camera’s CCD.
TIFF—(Tagged Image File Format) is an industry standard file format for storing images.
Images from KODAK Molecular Imaging Software can be saved in TIFF format for use
with other computer programs.
Transmission—Mode of image capture, usually absorbance, in which light passes
through the illuminated object.
Ultraviolet Light (UV)—Generally refers to the spectrum of electromagnetic energy
from about 4 to 400 nm in wavelength. Wavelengths of 200–400 nm are useful in the usual
laboratory environment.
Vignetting—An imaging artifact that is associated with the limitation of the lens.
Vignetting generally appears as signal reduction around the edges of the image.
White Light—Light that is in the visual part (400–700 nm) of the spectrum (daylight,
regular light bulbs).
G-5
White Point—Corresponds to an intensity value in the image that represents pure white in
the screen image. The white point can be adjusted using the histogram sliders to help
visualize different features in the image. Features with intensity values above the white
point can no longer be seen in the screen image. Adjustments to the white point alter the
screen image and do not alter the data that will be transferred to KODAK Molecular
Imaging Software for analysis.
X and/or Y Binning—See Binning.
G-6
Index
A
About the User Guide 1-2
Acquire software
launching 4-6—4-7, 8-23
Preferences 3-29—3-30
Window 3-4—3-17
Acquire Window 3-4
Buttons section 3-4, 3-17
Exposure section 3-4, 3-7—3-12
Illumination section 3-4, 3-14—3-15
Illumination reference 3-13
Set Camera To section 3-16
User section 3-4, 3-5—3-6
Analyze button 3-20—3-21, 3-22—3-23,
3-24—3-25, 3-27—3-28
Annotation bar 3-5—3-6
Automatic Illumination Reference File
5-23
B
background subtraction A-10
binning A-9, G-1
applying 3-7—3-8, 3-19, 3-10, 311—3-12, 5-3, 5-9, 5-14, 5-19
Cable Connector, Camera 2-3, 8-13, 8-21
Camera
About 2-10
computer interface cable 2-3, 8-13, 821
FOV ring 2-11, 4-11
f-Stop ring 2-11, 4-16, 4-17
Focus ring 2-11, 4-11—4-12, 4-18
Focusing Tool 4-18
D
digital imaging concepts A-1—A-10
decontamination 8-30—8-31, 9-3—9-4
dynamic range A-6, G-3
E
Exposure
Progressive 3-2, 3-10, 5-13—5-17
I
Index
C
Lens 2-11, 4-11—4-12
noise A-7
Capture System Chamber 2-10–2-11
Capture Status windows 3-19—3-28
Progressive 3-2, 3-24—3-25. 5-16—
5-17
rad PADD 3-3, 3-26–3-28, 5-18–5-22
Standard, single 3-1, 3-19, 5-5
Standard, multiple 3-1—3-2, 3-20—
3-21, 5-5—5-7
Time Lapse 3-2, 3-22—3-23, 5-11—
5-12
Charged-Coupled-Device (CCD) 2-10, G2
Circuit Breaker 2-3
cleaning 6-2
Closed Optical Path Image (COPI)
Chamber 2-7–2-9
Compression Pad 2-4, 2-5
conventions, User’s Guide 1-2
copy protection device 8-11, 8-18
corrections C-1—C-3
illumination 3-13, 3-29—3-30, 523—5-25
lens 3-29—3-30
warping 3-29—3-30
custom capture settings 5-26—5-27
rad PADD 3-3, 3-11—3-12, 5-18—522
Standard 3-1—3-2, 3-7—3-8, 5-2—57
Time Lapse 3-2, 3-9, 5-8—5-12
Time text edit box 3-7, 3-9, 3-10—311
types 3-1—3-3
F
f-Stop
ring 2-11, 4-16, 4-17
setting 2-11, 3-16, 4-16
slider 3-4, 3-16
file
Illumination Reference 3-13, 3-29—
3-30, 5-23—5-25
filter
applying 4-12—4-13
changing 6-3—6-5
choosing 4-12—4-13
Selection Dial 2-11, 4-12
Filter Wheel 2-12
Access Panel 2-12
FireWire - See IEEE 1394
Focusing Tool 4-18
Focus Ring 2-11, 4-10—4-11, 4-18
FOV
ring 2-11
slider 3-4, 3-16, 4-11
setting 4-11
H
hardware
overview 2-1—2-12
setup 8-3
Transilluminator Lid 8-4—8-7
I
IEEE 1394
II
Camera Cable Connector 2-3, 8-13, 821
installing 8-3
Illumination
automatic Correction 5-23
choosing 4-12—4-15
correction C-1—C-3
Reference File 3-13, 3-29—3-30, 523—5-25
Reference Library 5-24—5-25
UV epi-illumination 4-2, 4-13
UV fluorescence quenching 4-13
UV transillumination 4-2, 4-13
white light transillumination 4-3, 4-14
Image
capture settings 4-17
illumination correction 3-13, 3-29—
3-30, C-1—C-3
lens correction 3-29—3-30
orientation 4-8—4-9
previewing 4-10—4-11
saturation 3-29—3-30
warping 3-29—3-30
Imaging Software, KODAK Molecular
installation 8-8—8-22
launching 4-6—4-7, 8-23
package contents 1-4
system requirements 1-5
installation
copy protection device 8-11, 8-18
hardware 8-3
IEEE 1394 (FireWire) card 8-3
Molecular Imaging Software 8-8—822
L
launching software 4-6—4-7, 8-23
lens
Focusing Tool 4-18
Focus ring 2-11, 4-10—4-11, 4-18
f-stop 2-11, 3-4, 3-16, 4-16, 4-17
Lid
clasp 2-4
compression pad 2-4
illuminator bulb 6-7
transilluminator 2-5, 8-4—8-7
luminescence 4-2
M
Macintosh
requirements 1-5
software installation 8-14—8-22
maintenance 6-1—6-7
N
noise, digital imaging systems A-7—A-8
P
package contents
IS4000R 1-4
Molecular Imaging Software1-4
Platen 2-5—2-6
care 2-6, 6-2
Preferences
button 3-17
dialog box 3-29—3-30
Preview window 3-18, 4-10–4-11
Progressive Exposure 3-2, 3-10, 5-13—517
Radiator 2-2
radioisotopic 2-13, 4-4
sample handling 4-9
decontamination 6-6, 8-30—8-31
rad PADD 2-13, 4-4
cleaning 6-6
exposure 3-3, 3-11, 5-18—5-22
sample orientation 4-8—4-9
using 3-11—3-12
registering 1-6
regulatory information 9-9
S
Sample
orienting 4-8—4-9
Platen 2-4
Work Area 2-4—2-6
saturation 3-29—3-30, G-5
saving settings 3-5—3-6
software
installation 8-8—8-22
launching 4-6—4-7, 8-23
license agreement 9-6—9-8
package contents 1-4
preferences 3-29—3-30
previewing 4-10—4-11
system requirements 1-5
Standard Capture 3-1—3-2, 3-7—3-8, 52—5-7
Stop Preview button 3-18, 4-10
System, IS4000R
components 1-4
front view 2-2
hardware 2-1–2-12
installation 8-3
Lid, standard 2-4
Lid, Transillumination 2-5
maintaining 6-1—6-7
rear view 2-3
registering 1-6
regulatory information 9-9
repacking 8-30—8-31
requirements 1-5, 8-2
software 3-1–3-30
troubleshooting 7-1—7-7
III
Index
R
repacking 8-30—8-31
requirements
electrical 8-2
environment 8-2
software 1-5
space 8-2
resolution
image A-2—A3
spatial A-4—A-5
T
Technical Support 1-7, 7-2
Time Lapse Exposure 3-2, 3-9, 5-8—5-12
Troubleshooting 7-1—7-7
images 7-4—7-6
instrument 7-3
software 7-7
U
updating settings 3-4, 3-5—3-6, 5-26—527
user name option 3-4, 3-5—3-6
User's Guide
about the 1-2
conventions 1-2
navigating 1-3
Molecular Imaging Software1-2
User section 3-4, 3-5—3-6
UV illumination 4-2, B-1—B-3
IV
epi 4-2
trans 4-2
W
warranty 9-1—9-5
coverage 9-2
limitations 9-5
registration 1-6
service 9-2
time period 9-2
Windows
requirements 1-5
software installation 8-8—8-22
white light transillumination 4-3