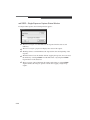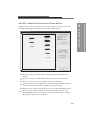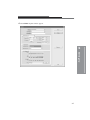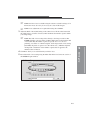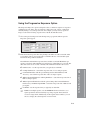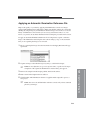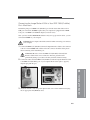
1
✔ White Light Transillumination with Light Diffuser
Thin samples (transmission)—place the Light Diffuser directly onto the sample to
provide even distribution of external light and modest sample pressure.
Thick samples (transmission)—use the Light Diffuser Risers or add shims to space
the diffuser from the sample.
✔ White Light Transillumination with the optional Image Station Transilluminator
Lid Accessory—make sure the transilluminator is clean. Attach the White Light
PADD.
✔ Radioisotopic—use the rad PADD accessory cassette. Place the sample on the
phosphor screen and close the cassette.
4 If your sample requires illumination, power the illumination source.
✔ Luminescence—none
✔ UV Epi-illumination—use the UV ON/OFF switch on the front of the Capture
System Chamber.
✔ UV fluorescence—use the UV ON/OFF switch on the front of the Capture System
Chamber.
✔ UV Transillumination with the optional Image Station Transilluminator Lid
Accessory—use the ON/OFF switch on the front of the lid.
✔ White Light Transillumination with Light Diffuser—none
✔ White Light Transillumination with the optional Image Station Transilluminator
Lid Accessory—use the ON/OFF switch on the front of the lid.
✔ Radioisotopic—none
☞
4-14
NOTE: Most UV and transmissions images will benefit from using illumination
reference to correct non-uniform in sample illumination. If you have generated
an Illumination Reference File, apply by selecting an Illumination Reference
File with the corresponding f-stop and FOV from the pop-up menu. The f-stop
and field of view settings used to capture the image must be the same as those
used to generate the Illumination Reference File. If you need to create a new
reference file, see Generating an Illumination Reference File Library in Chapter
5: Capturing Images.