1
Ocean
QA Software for
Barracuda and Piranha
Ocean User's Manual - English - Version 2.4A
RTI article number: 9604550-00
Ocean User's Manual
2013-01-02/2.4A
Welcome to Ocean
Ocean is a is a powerful tool for
everybody working with Quality
Assurance of X-ray systems. Ocean
can be used with the X-ray meters
Pirahna and Barracuda from RTI
Electronics..
NOTICE
RTI Electronics AB reserves all rights to make changes in the Ocean
software, and the information in this document without prior notice.
RTI Electronics AB assumes no responsibility for any errors or
consequential damages that may result from the use or misinterpretation of
any information contained in this document.
Copyright © 2010-2013 by RTI Electronics AB. All rights reserved.
Content of this document may not be reproduced for any other purpose
than supporting the use of the product without prior permission from RTI
Electronics AB.
Microsoft, Microsoft Excel, Microsoft Access, Windows, Win32, Windows 95, 98, ME, NT, 2000, XP, 2003,
Vista, Windows 7 and Windows 8 are either registered trademarks or trademarks of Microsoft Corporation in
the United States and/or other countries.
OpenOffice.org and OpenOffice.org Calc are registred trademarks of OpenOffice.org.
BLUETOOTH is a trademark owned by Bluetooth SIG, Inc., USA.
Contact Information World-Wide
Contact Information United States
RTI Electronics AB
Flöjelbergsgatan 8 C
SE-431 37 MÖLNDAL
Sweden
RTI Electronics Inc.
33 Jacksonville Road, Building 1
Towaco, NJ 07082
USA
Phone: Int. +46 31 7463600
Phone: 800-222-7537 (Toll free)
Int. +1-973-439-0242
Fax: Int. +1-973-439-0248
E-mail
Sales: [email protected]
Support: [email protected]
Service: [email protected]
Web site: http://www.rti.se
E-mail
Sales: [email protected]
Support: [email protected]
Service: [email protected]
Web site: http://www.rtielectronics.com
Ocean User's Manual
2013-01-02/2.4A
Intended Use of the Ocean Software
Together with instruments from RTI Electronics AB it is to be used for independent service and
quality control, as well as measurements of kerma, kerma rate, kVp, tube current, exposure time,
luminance, and illuminance within limitations stated below.
If installed according to accompanying documents, the product is intended to be used together
with all diagnostic X-ray equipment except for:
- therapeutical X-ray sources.
- X-ray equipment with tube potential below 20 kV.
- X-ray equipment on which the instrument cannot be mounted properly, e.g. equipment where the
beam field size is narrower than the active part of the detector.
- specific types of X-ray equipment listed in the instructions for use or in additional information
from the manufacturer.
With the X-ray installation in stand-by conditions without patients present, the product is intended
to be used:
- to provide the operator with information on radiation beam parameters that might influence
further steps in an examination but not an ongoing exposure.
- for assessing the performance of the X-ray equipment.
- for evaluation of examination techniques and procedures.
- for service and maintenance measurements.
- for quality control measurements.
- for educational purposes, authority supervision etc.
The product is intended to be used by hospital physicists, X-ray engineers, manufacturer's
service teams, and other professionals with similar tasks and competencies. The operator needs
a short training to be able to use the product as intended. This training can be achieved either by
careful study of the manual, studies of the built-in help function in measurement software or, on
request, in a short course ordered from the manufacturer.
The product is intended to be used inside X-ray rooms ready for clinical use and can safely be left
switched on and in any measuring mode in the vicinity of patients.
The product is NOT intended to be used:
- for direct control of diagnostic X-ray equipment performance during irradiation of a patient.
- so that patients or other unqualified persons can change settings of operating parameters during
and immediately before and after measurements.
2013-01-02/2.4A
Ocean User's Manual
Ocean User's Manual
2013-01-02/2.4A
7
Contents
Table of Contents
1
Welcome
..............................................................................................................
to Ocean
10
1.1
General
information
..............................................................................................................................
10
1.2
Important
definitions
..............................................................................................................................
11
1.3
Main screen
.............................................................................................................................. 12
1.3.1 Ribbon ...................................................................................................................... 12
1.3.2 Status bars
...................................................................................................................... 12
1.3.3 Database
browser
......................................................................................................................
12
1.4
Getting
started
..............................................................................................................................
16
1.4.1
1.4.2
1.4.3
1.4.4
2
Installation
...................................................................................................................... 16
Licence......................................................................................................................
for your meter
16
Display ......................................................................................................................
and Connect
16
Professional
...................................................................................................................... 16
Application
..............................................................................................................
menu
26
2.1
New .............................................................................................................................. 27
2.2
Save .............................................................................................................................. 28
2.3
Save ..............................................................................................................................
as...
29
2.4
Print .............................................................................................................................. 32
2.5
Export.............................................................................................................................. 33
2.6
Import.............................................................................................................................. 36
2.7
Close.............................................................................................................................. 37
2.8
Program
options
..............................................................................................................................
38
2.9
Locate
data during import and export
..............................................................................................................................
46
2.10 Exit Ocean
.............................................................................................................................. 47
3
Main
..............................................................................................................
functions
50
3.1
Measure
.............................................................................................................................. 50
3.2
Design
.............................................................................................................................. 55
3.3
Data link
.............................................................................................................................. 60
3.3.1 Send data
from Excel to Ocean
......................................................................................................................
60
3.4
Appearance
.............................................................................................................................. 63
3.5
Reporting
.............................................................................................................................. 67
3.6
Central
Database
..............................................................................................................................
68
3.7
Help .............................................................................................................................. 69
2013-01-02/2.4A
Ocean User's Manual
8
Contents
3.7.1 Import examples
...................................................................................................................... 69
3.7.2 Import site
information
......................................................................................................................
69
4
Frequently
..............................................................................................................
asked questions
74
4.1
General
.............................................................................................................................. 74
4.2
Measuring
.............................................................................................................................. 75
4.3
Data export
to Excel or Calc
..............................................................................................................................
75
4.4
Design
.............................................................................................................................. 75
4.5
Reporting
.............................................................................................................................. 76
Index
................................................................................................................. 77
Ocean User's Manual
2013-01-02/2.4A
Chapter 1
Welcome to Ocean
10
1
Welcome to Ocean
Welcome to Ocean
Ocean is a p o w e rfu l so ft w are fo r X-ray Q u alit y
A ssu ran c e w o rk. U se O c e an w it h t h e P iran h a o r
Barrac u d a t o sig n ific an t ly in c re ase t h e q u alit y
an d e ffic ie n c y o f yo u r X-ray Q A p ro c e ss.
Y o u c an se t u p t e m p lat e s t o au t o m at e X-ray
e q u ip m e n t t e st in g , an alyse t h e t e st d at a an d
st o re t h e d at a, w ave fo rm s an d an alysis re su lt s
fo r fu t u re re fe re n c e o r re -u se .
There are three different levels for Ocean: Display, Connect and Professional.
Display
This mode is used as a "display" for your meter. You can choose the measurements you want,
customize your display appearance and save your choices as a template. When you use a template, you
will see the measurements, data analysis along with available waveforms on the screen. You can easily
recall any template you made when you need it.
Connect
This mode offers everything that Display does, plus the convenience of exporting your data directly into
Excel or OpenOffice Calc. You can design your own spreadsheet and Ocean, in this mode, automatically
fills out your spreadsheet with the measured values from the meter.
Professional
This mode offers everything that Display and Connect does, plus the possibility to set up templates that
perform a complete job for you, including measuring data with the meter, checklists and analyse the data
according to the pass/fail criteria you have set up. The data is stored and a report is generated.
1.1
General information
Your meter must have an Ocean license key installed before you can use the software and the Piranha or
Barracuda together. When you connect your meter to Ocean the license key is validated and Ocean will
show the license level on the main caption bar. There are three license levels available to you: Display,
Connect or Professional.
The Display license level is free and you can get a licence from our website at http://www.rti.se/tryocean-for-free/.
If you purchase the Connect or Professional licence after you purchased the meter, you will receive an
installer along with your meter and the licence information will be installed into your meter when you
connect Ocean and the meter together the first time. If you purchase Connect or Professional at the
same time as you purchase your meter, the meter will come with the licence information permanently
installed and no licence key is required.
We have added a 'keyboard mode" feature to Ocean that allows you to use the software without the
meter connected to it. It's a great way to create templates right at your desk, or if you need to do
some quick testing and don't want to set up the meter, you can just make your measurements and
enter the data by hand. Since almost every functionality your licence level offers is available in this mode
(except items you can only do while connected to a Piranha or Barracuda), you can experience the
power and versatility of this software even if you don't own a Piranha or Barracuda presently. We are
confident that once you tried Ocean, you will not only want to use the software but harness it's true
potential by purchasing a Piranha or Barracuda as well.
To skip the rest of the information and get started right away, go to the Getting started topic now.
Ocean User's Manual
2013-01-02/2.4A
11
Welcome to Ocean
This User's Manual does not contain everything about Ocean. If you need a more detailed knowledge of
Ocean's features, please read the Ocean Reference Manual. You can find the Reference Manual on your
Product CD under the file name "OceanReferenceManual.pdf".
1.2
Important definitions
The follwoing definitions are important to understand when you use this help text.
Acceptance limits
The pass and fail criteria set up in a test by the user.
Analysis
A calculation done on a selected number of exposures to evaluate the performance of an x-ray generator
or other equipment.
Checklist
A checklist is a list containing questions or tasks that is part of the x-ray equipment quality assurance
process and done as part of regular preventative maintenance. Acceptable answers are pre-determined
and set up by the user.
Equipment
The equipment in a room that is to be tested.
General settings
Set values that are common for the entire test.
Grid
The grid is where all measured data and set values are stored. It consists of a number of columns and
rows.
Meter settings
Settings for the Piranha or Barracuda that control meter functions.
Real-time display (RTD)
The real-time display is a feature used to make quick measurements when data needs to be collected
quickly. The data is presented in a series of displays chosen by the user and stored in a log.
Session
A session is specifying a complete job (a preventative maintenance schedule, for example). It normally
consists of a number of test protocols (templates) and one or more checklists.
Site
A site is the place where a testing procedure (session) is performed. A site is a facility, department and a
room with its equipment.
Template
A template is a session, test, checklist or real-time display without any measured data.
2013-01-02/2.4A
Ocean User's Manual
12
1.3
Welcome to Ocean
Main screen
Click to enlarge
Here is a picture of the Main screen. There is a lot of information on this screen so make sure you read
carefully your menu choices. All key functions are found on the "ribbon" bar for easy access. The ribbon
is divided into six tabs and each tab has a collection of similar functions:
Measure - here you will find everything related to measurements (such as detector selection, connect
to meter, set bias, get waveforms, etc.)
Design - under this tab you will find all the functions for creating, saving and editing templates
Data link - this tab has the choices for customizing your data link to Microsoft Excel or OpenOffice Calc
Appearance - you can change how things are shown on the main screen with these functions
Reporting - these are all the functions you need to create, edit and print out reports the way you like
it
Help - get help
Just below the ribbon and on the bottom of the main screen you find two status bars.
The status bar located just below the ribbon status bar is divided into two parts: the left part indicates
what the meter is doing right now and the right part is used to display messages and information.
The status bar located at the very bottom of the main screen shows current meter being used, work
mode, battery indicator for the meter and more.
There are two tabs (Measurements and Library) located on the top left of the main screen just below
the ribbon.
Measurements - This is where you will find all your measured and saved data. The saved data from the
real-time display is also found here. If you are using Professional license, you can also see your facilities,
rooms and tubes here with their corresponding data.
Library - This is where all your templates are stored. A template is a "blank protocol" without any
measured data recorded.
Ocean User's Manual
2013-01-02/2.4A
13
Welcome to Ocean
1.3.1
Ribbon
The ribbon is the command bar that organizes Ocean's features for easy access via tabs located at the
top of the Main screen window. There are six of these tabs to keep similar functions grouped together.
To read what's on the ribbon go to main functions.
Click to compress
There is an Application button located on the top left of the Main screen. If you click it, the
Application menu is shown. There is also a Quick Access Toolbar located next to the application
button.
Click to compress
You can customize the Quick Access Toolbar to suit your own preference by selecting the More
commands... option. Use the Minimize the Ribbon function if you want to compress the Ribbon.
This is especially useful when using a Netbook since the screen height on a Netbook computer is limited.
1.3.2
Status bars
There are two status bars providing information to assist you while working with Ocean.
Upper status bar
The upper status bar (Status bar #1) is divided into two sections. The left is used to indicate what the
meter is doing right now:
Click to enlarge
While the background is red, don't click on any buttons or make exposures. The meter will not respond
to commands while adjusting itself.
The right part shows messages that will guide you in certain situations:
2013-01-02/2.4A
Ocean User's Manual
14
Welcome to Ocean
Click to enlarge
When the background is yellow, Ocean is showing an important message that requires you to take some
kind of action. Read the message and follow the instructions.
Lower status bar
The lower status bar (Status bar #2) is divided into five sections:
Click to enlarge
Section #1 (left) shows which meter currently is used
Section #2 shows what you are working on currently
Section #3 shows which working mode you are in currently ("Log mode" is shown when you are
recording data and "Design mode" is shown when you are creating/modifying a template)
Section #4 shows the battery status for the connected meter
Section #5 shows the title of the object you are working with currently
Section #6 shows if you are connected to Ocean Central
Section #7 shows air pressure (only Barracuda with EMM-Bias W delivered before March 1, 2012. EMMBias W modules delivered after this date doesn't have any sensor and will not report the air pressure.)
IMPORTANT!
Design mode: If you are working in Design mode, no measured data is saved when you click the save
button. Only the empty template is saved in this mode.
Log mode: If you are in Log mode, everything is saved including the measured data.
1.3.3
Database browser
All your data, measured sessions, measured real-time displays and templates, are stored in the database.
The database is divided into two main parts, Measurements and Library. In Measurements are measured
sessions and real-time displays stored and in the Library are templates stored.
You can browse through your measurements and templates buy clicking on the two tabs Measurements
and Library:
Click to enlarge
Ocean User's Manual
2013-01-02/2.4A
15
Welcome to Ocean
Click on Measurements to browse the measurements:
Click to enlarge
The left part shows the "database tree" and the right part shows the content of the selected "folder".
You can browse through templates in the same way. There is a search function available.
You can right-click on a "folder" and select Expand all to open it and all its sub folders:
Click to enlarge
If you click in an item belonging to the site (facility, department, room, generator, tube or user-defined
equipment) the corresponding details are shown to the right:
2013-01-02/2.4A
Ocean User's Manual
16
Welcome to Ocean
Click to enlarge
If you instead click on a folder its content is shown on the right side:
Click to enlarge
1.4
Getting started
To get started, install Ocean on your computer and make sure that your meter has an Ocean license in
it. There are three possible license choices: Display, Connect and Professional. The Display is a free
license and is already installed in all new units. Older units may not have this license and in this case you
can get one from our website at http://www.rti.se/try-ocean-for-free/.
There are two topics describing how to make your first measurement: "Display and Connect" and
"Professional". If you are using the Professional license, read both sections, as both are relevant to you
Ocean User's Manual
2013-01-02/2.4A
17
Welcome to Ocean
and available for your use. If you use Display or Connect license read the "Display and Connect" section
only as this is the only option available for you.
Before using your meter with Ocean, make sure that your Piranha or Barracuda has the latest firmware.
1.4.1
Installation
You must have Windows XP, Window Vista or Windows 7 to run Ocean. Your computer must also have
USB port or Bluetooth. Display graphics should be 800X600 or higher.
The Ocean installer is located on the Product CD you received with your Instrument. To install please
follow the steps below:
Note! You must have administrator level access to the computer you are installing Ocean on to install
the software.
1. Insert the product CD into the CD drive. The CD menu starts automatically (if not, locate and run
Start.exe). If you are not installing Ocean from a Product CD, run the file Setup Ocean.exe.
2. Move the cursor to Install and select Ocean.
3. Follow the instructions on the screen to complete the installation process.
4. When the installation of Ocean is completed, the installer for the Microsoft Access database
engine starts automatically. Microsoft Access database engine is required to run Ocean.
5. There are two possible scenarios:
You already have Microsoft Access database engine on your computer
If you already have Microsoft Access on your computer, a dialogue will be shown asking if you want to
Reinstall/Repair or Uninstall the database engine. You want neither, so click on the Cancel button at the
bottom of the dialogue. Confirm that you want to abort and continue.
You don't have Microsoft Access database engine on your computer
If you don't have Microsoft Access on your computer, there is a copy of the database engine included in
your Product CD and the installation will be done automatically. Just follow the instructions on the
screen to complete the installation.
6. A dialogue is shown when the installation process is complete. Here you can select the "Start Ocean"
checkbox and Ocean will start immediately upon closing the dialogue box.
When you run Ocean for the first time a Start up wizard will guide you through a series of steps to
choose the default settings according to your preference. You will also be asked which meter you have
and what you use it for to allow Ocean to load your database with suitable templates and examples.
These examples will be placed in Library folders called Examples (RTI). This folder is a system folder and
cannot be erased, nor can you erase content from these folders.
1.4.2
Licence for your meter
The license level is stored in your meter. Each time you start Ocean with a meter it adapts to the
license level of the currently connected meter. For example, if you have a Piranha with Professional
license that you normally use, but you borrowed your colleague's Barracuda with only a Connect license
and connected it to your Ocean, when Ocean communicates with the Barracuda, only the Connect
license options will be available to you. If you are unsure which level you have, follow the steps below to
find out:
1. Power on your meter.
2. Connect the meter to your computer (or make sure that you have a Bluetooth connection).
3. Start Ocean. If it is the very first time you start Ocean a "Start-up wizard" will help you get started.
Provide the information required by the wizard.
2013-01-02/2.4A
Ocean User's Manual
18
Welcome to Ocean
4. A window titled "Select favorite" is now shown. Click Cancel to close it.
5. Go to the Measure tab on the ribbon and choose Connect.
6. Ocean will now try to connect to your meter. If your meter has a license, the upper status bar
below the ribbon will show Connected (see picture below) and you can start measuring. If you meter
doesn't have a license, Ocean will ask you to provide one. You can get the free Display license key from
our website at http://www.rti.se/try-ocean-for-free/ or contact us to purchase a Connect or Professional
license.
NOTE: You cannot use Ocean without a license and if you don't have one, you must abort at this point
until you obtain a license key. Once you have a license key, continue from this point by following the
steps to load the license key into your meter.
7. Now check the main title bar at the top of the Ocean Main screen and it will show what license level
you have:
Depending on what license level you are using, read:
- Getting started with Display and Connect
- Getting started with Professional
1.4.3
Display and Connect
The example below shows how to start a real-time display from the Favorites screen. You can load any
real-time display template from the Library tab at any time. Read the topic Start a new real-time display
for a complete description of how this is done.
To start a real-time display from the Favorites screen, follow the instructions below:
1. Connect the meter to your computer (or make sure that you have a Bluetooth connection).
2. Power on your meter.
3. Start Ocean. If it is the very first time you start Ocean a "Start-up wizard" will be shown. Provide
the information required by the wizard.
4. When the wizard is done, the Favorites window (see below) is shown.
Ocean User's Manual
2013-01-02/2.4A
19
Welcome to Ocean
Click to enlarge
5. Select a real-time display suitable for the work you want to do and that is available to your meter.
You will see the available choices on the left side of the screen under the "Templates" heading (see
picture above).
6. Click OK.
7. Ocean will now connect to your meter and load the chosen real-time display.
Click to enlarge
8. If you are measuring on mammography or CT you may want to select another calibration. The
calibration shown is in the lower left corner of the display. Click on it if you want to change it:
2013-01-02/2.4A
Ocean User's Manual
20
Welcome to Ocean
Click to enlarge
9. You are now ready to make an exposure.
10. When the exposure is finished, the results will be shown in the displays and a waveform will be
shown in the waveform window on the bottom left of your screen.
11. You can continue making exposures one after another until your task is complete.
12. Click on the save button when you are done (on the Quick Access Toolbar or on the Application
menu) to save your work. You will be asked to specify a name for the measurements you have just
completed.
13. Your work is now saved in the database. If you want to see it again later, you can look for it under
the Measurements tab to the right of the displays.
You can load any template from the Favorites screen by clicking on the Favorites button, or from the
Library tab located to the left of the displays. Read more about real-time displays by clicking on the links
below:
- How to start a new real-time display - click here...
- How to design a real-time display template - click here...
1.4.4
Professional
This example shows how to start a session from the Favorites screen. You can load any session or realtime display template from the Library tab. Read Start a new session for a more detailed description of
this topic. To read more on how to start a real-time display, go to the Display and Connect topic.
To start a session from the Favorites screen follow the steps as described below:
Ocean User's Manual
2013-01-02/2.4A
21
Welcome to Ocean
1. Power on your meter.
2. Connect the meter to your computer (or make sure that you have a Bluetooth connection).
3. Start Ocean. If it is the very first time you start Ocean a "Start-up wizard" will be shown. Provide
the information required by the wizard.
4. When the wizard is done, the Favorites window (see below) is shown:
Click to enlarge
5. Select a session suitable for the work you want to do and that is available to your meter. You will
see the available choices on the left side of the screen under the "Templates" heading (see picture
above).
6. Click OK.
7. Ocean will now connect to your meter and load the chosen session.
8. The first thing you will be asked to do is to specify a site (a hospital or medical clinic) where this
session will be used. If this is the first time you use Ocean, there will be no available sites so you will
need to create a site, department, room and equipment. To learn how to create a new site read the
topic New site. We have added a "test site" for you to try out the different features Ocean has to
offer, and for this example, click on the "Test facility". There is only one department, so select
"Department 1". Finally, select a suitable room (for this example, choose the "Rad room").
2013-01-02/2.4A
Ocean User's Manual
22
Welcome to Ocean
Click to enlarge
9. Click Next to continue.
10. You are now asked to provide your name and the organization name you work for (company). If
you ran the start-up wizard previously, this information would already be filled out.
Click to enlarge
11. Click Next to continue.
12. You need to specify a name for your session (the default name is a date and time stamp) For this
example, just leave the name at the default setting.
Ocean User's Manual
2013-01-02/2.4A
23
Welcome to Ocean
Click to enlarge
13. Click Finish.
14. You have now opened the session. When you open a session Ocean will automatically start you off
with the first test in the session. Before you can start making measurements, you will need to select the
equipment you will be testing. To learn more about how to add new equipment to a site, read the Add
more departments and rooms topic of this manual.
Click to enlarge
15. For this example, choose the "Rad tube" and click OK.
16. The first test in the session (in this case the HVL test) is activated and your cursor is positioned on
the first row in the grid. You are now ready to make exposures according to the conditions specified in
the test.
17. As you make your exposures, you will see measured data appearing in the grid along with the
corresponding waveforms in the waveform window to the bottom left of the grid and the analysis will
appear in the analysis window next to the waveform window.
2013-01-02/2.4A
Ocean User's Manual
24
Welcome to Ocean
Click to enlarge
18. Click on the save button to save your measurements. You don't need to choose a name here,
since we left the session name at the default date and time stamp earlier.
You can load any template from the Favorites screen by clicking on the Favorites button, or from the
Library tab located to the left of the displays. Read the topics below for more information:
-
How
How
How
How
to
to
to
to
start a
design
design
design
Ocean User's Manual
new session - read the topic Start a new session
a test template - read the topic Design a test template
a checklist template - read the topic Design a checklist template
a session template - read the topic Design a session template
2013-01-02/2.4A
Chapter 2
Application menu
26
2
Application menu
Application menu
You can access the Application menu by clicking on the Application button (see picture below) located
at the upper left corner of the Ribbon bar.
Click to compress
The Application menu offers quick, convenient access to the most frequently used commands such as
New, Save, Import, Export, etc. and the most recently used files (see the picture below).
Click to compress
You will find the following functions on the Application menu:
Ocean User's Manual
2013-01-02/2.4A
27
Application menu
New
Save
Save as
Print
Export
Import
Close
2.1
Start a new session, real-time display or site
Save what you currently is working with
Make a template of the current job or rename existing objects
Print current job
Export sessions, tests, checklists or real-time displays to a file (use this to share data with
others)
Import sessions, tests, checklists or real-time displays from a file (use this to receive data
from others)
Close current job
New
The Save function is located on the Application button drop-down menu. You can use New three
ways:
Click to compress
New Session - Start a new QA session
Use this function when you want to start a new QA session for a certain room. The new session
wizard will appear and will help you create the session. The wizard will ask you to:
·
·
·
·
Select the facility, the department and the room where you perform your job
Select the session template you want to use
Specify your name and your organization (data from setup is used as defaults)
Specify a name for your job (the name used when the job is saved in the database)
When the wizard finishes the session is created saved under the Measurements tab for the new
room you just created.
Read more here...
New Real-time display - Start a new real time display
Use this function when you want to start making measurements with a new real-time display. The
2013-01-02/2.4A
Ocean User's Manual
28
Application menu
real-time display wizard will appear and will help you create the real-time display. The wizard will ask
you if you want to use an existing real-time display template or create a new real-time display from
scratch. If you chose to create a new real-time display, the wizard will ask you to:
· Select modality
· Select displays, detectors and calibrations
· Specify where you have connected the detectors (only for Barracuda)
Once the wizard finished, you can start making measurements right away if your meter is connected
to the computer. The data from each exposure is shown in the displays and stored in the table. A
new row is automatically created in the log for every new exposure (if the cursor is located on the
last row). If you need to change meter settings use the Meter Adjust function to the right in the
main window.
New Site - Create a new site (facility/department/room/generator/tube)
Use this function when you want to add a new site. The new site wizard will appear and will help
you add the new site. The wizard will ask you to:
·
·
·
·
·
Specify
Specify
Specify
Specify
Specify
a
a
a
a
a
facility (name, address, phone number, contact person, etc.).
department (name, etc.).
room (name, room ID etc.).
generator (name, manufacturer, model, serial number, etc.).
tube (name, manufacturer, serial number, etc.)
When the wizard finishes, you will be able to view your new site under the Measurements tab.
The generator and tube is located under the Equipment tab.
2.2
Save
The Save function is located on the Application button drop-down menu. You can use this to save your
current work. What is saved depends on what you are working on at the time you press Save.
Click to compress
Working with an opened session
Ocean User's Manual
2013-01-02/2.4A
29
Application menu
When you press Save you the session is saved with the measured data to the same location and
name. It is not possible to change the location of the session using this function. If you want to
change the location, you must first close the session and then move it by using the drag-and-drop
feature of the database tree. If you want to save the session as a template (no measured data)
use Save as function.
Working with a real-time display
When you press Save the real-time display is saved to the same location and name under the
Measurements tab. You will be asked to choose a name and location if this is the first time the
real-time display is saved. It is not possible to change the location of the real-time display using this
function. If you want to change the name and/or location, you must first close the real-time display
and then move it by using the drag-and-drop feature of the database tree. If you want to save the
real-time display as a template (no measured data) use Save as function.
Working with a template
When you press Save the template is saved (no measured data). You will be asked to specify a
name and location if it is a new template. If you want to change the name and/or location, use the
Save as function.
The following message may be displayed when you go to save your work:
Click to compress
It means that minimum license required to re-open the object changed (became more restrictive). You
may see this message if:
· you use different meters with different Ocean licenses (Display, Connect or Professional) with the
same Ocean.
· you start a trial period to test a higher license than you currently have.
2.3
Save as...
The Save as function is located on the Application button drop-down menu. You can use this function
to do the following:
· Rename an object (real-time display, session or a template).
· Change the location of an object (not for sessions).
· Change the object type (toggle between template and measurement types). For example, you can
use this function if you have a session that you wish to make into a template, or vice versa.
· You have the option of saving a test or checklist as a separate object to be included in your future
sessions.
Save as functions available while working with sessions
2013-01-02/2.4A
Ocean User's Manual
30
Application menu
Click to decompress
Save as a Session
If you use Save as to rename a session, it will create a copy of the existing session and all future
work will be saved in the new copy. The new copy will be saved in the same site and room where
the original session was located. It is not possible to change the location of the new copy using this
function. If you want to change the new copy location, you must first close the session and then
move it by using the drag-and-drop feature of the database tree.
Important: Please make every effort to save the session to the correct site and room, before you
use it. Once a session is used in a certain room and on a certain tube, the equipment information is
stored in Ocean and when you move it to a new room, the equipment information from the old
room will be moved to the new room as well. This can cause significant problems for you, as no two
rooms of equipment is identical. The room and equipment data is used by Ocean to determine what
measurements are available to you and, as a result, you may not be able to use certain tests in the
session and the test results that you get on other tests may not be accurate.
Save as Session template
You can use Save as Session template if you want to rename an existing template or if you have a
session open that you are working on, you can use this function to save it as a template in the
Library.
Save current Test as template
You can use Save current Test as template if you want to pick out one individual test of a session or
session template and save it for future use as a test template in the Library. You can then use this
test template in other session templates as well.
Save current Checklist as template
You can use Save current Checklist as template if you want to pick out one individual checklist of a
session or session template and save it for future use as a checklist template in the Library. You
can then use this test template in other session templates as well.
Save as functions available while working with real-time displays
Ocean User's Manual
2013-01-02/2.4A
31
Application menu
Click to compress
Save as a Real-time display
If you use Save as a Real-time display to rename and/or change the location of a real-time display, it
will create a copy of the existing real-time display with all of its measured data and all future work will
be saved in the new copy.
Save as a Real-time display template
You can use this in two different situations:
· If you use Save as a Real-time display template to rename and/or change the location of a realtime display template, it will create a copy of the existing real-time display template (without
measured data) and all future work will be saved in the new copy at the location you chose.
· You can also use this function if you are making measurements in a real-time display and want to
save the real-time display you are working on as a template (no measured data) in the Library.
All further work will be saved as a real-time display template (no measured data) in the new
copy.
Save as a Test template
You can use Save as a Test template to convert a real-time display to a test template and save it in
the Library. Any measured data will not be saved and future work will be saved in the test
template.
Save as function while in Design mode
Use Save as if you want to rename or change the location of a template you are working on
currently.
2013-01-02/2.4A
Ocean User's Manual
32
2.4
Application menu
Print
This function is used to print your current work. You can print on a printer or create PDF files.
Click to enlarge
You can print or preview the following:
· Complete reports - if you are working with a session, the complete session is printed/previewed
complete with a cover sheet, including all tests (with waveforms if so chosen) and checklists.
· Real-time display - the real-time display currently open in Ocean is printed.
· A test or a checklist during design work - we added this feature to allow you to print out the
templates you are working with during design.
NOTE: You can only print or preview one item at a time.
Print
It is important to remember that this function prints the current session/template you are working
on and is open in Ocean. The print dialogue (see picture below) is shown when you choose the
print function from the drop-down menu on the Application button:
Ocean User's Manual
2013-01-02/2.4A
33
Application menu
Click to compress
You can select the following:
· the printer you want to use and set its properties
· which pages to print
· number of copies
Preview
The preview function can be found by hovering your mouse cursor over the print function in the
drop-down menu on the Application button. Choose the preview option if you want to check your
work before printing. You are able to print directly from the preview window, or you do have the
option to store your work in a PDF file. If you choose to create a PDF file, a file save dialogue is
shown, allowing you to give a name to your work and to specify a destination anywhere on your
computer, network or mobile media.
2.5
Export
This function is used export items (sessions, real-time displays and templates) to an external file or via email as an attachment. The export and import functions enable you to easily share your work with your
colleagues and regulatory authorities.
2013-01-02/2.4A
Ocean User's Manual
34
Application menu
Click to minimize
There are three types of Ocean data you can export:
1. Measurements - (.ome) files
2. Templates - (.ote) files
3. Sites - (.ome) files
The files are identified by the following icons:
Exporting measurements
Use this type of export when you want to export measurements; sessions and real-time displays.
To begin the export process, click on the Application button, then hover the mouse over the export
function from the drop-down menu (see picture above). You will be offered three choices (export
measurements, export templates and export sites). To export measurements, follow the two easy
steps as described below:
Step #1
When you select the "Export measurements" option a wizard starts automatically to allow you to
select the items you want to export. Select all items you wish to export. You can select individual
measurements or right click on a folder and select "Export...". In the later case, all measurements in
that folder and below will be selected for export. Click on the Next button to continue.
Step #2
Once your selection is made, the next screen will offer you a choice between creating a file only, or
send the export directly to another Ocean user as an e-mail attachment. You can also add an
optional message to your file for the user or regulatory authority to whom you are sending the data.
This message will be shown when the user imports the data.
Ocean User's Manual
2013-01-02/2.4A
Application menu
35
Click Finish when you are ready and the export file will be generated with an ".ome" extension and
you will be asked to choose a file name and location to store the file. If you chose the option to
send the file via e-mail, your e-mail program will be opened and a blank e-mail started with the
".ome" file added as an attachment. All you have to do now is to complete the e-mail and then
send it.
Exporting templates
Use this type of export when you want to export templates; sessions, tests, checklists and real-time
displays.
To begin the export process, click on the Application button, then hover the mouse over the export
function from the drop-down menu (see picture above). You will be offered three choices (export
measurements, export templates and export sites). To export templates, follow the two easy steps
as described below:
Step #1
When you select the "Export templates" option a wizard starts automatically to allow you to select
the items from your library that will be exported. Select all items you wish to export. You can select
individual templates or right click on a folder and select "Export...". In the later case, all templates in
that folder and below will be selected for export. Click on the Next button to continue.
Step #2
Once your selection is made, the next screen will offer you a choice between creating a file only, or
send the export directly to another Ocean user as an e-mail attachment. You can also add an
optional message to your file for the user or regulatory authority to whom you are sending the data.
This message will be shown when the user imports the data.
Click Finish when you are ready and the export file will be generated with an ".ote" extension and
you will be asked to choose a file name and location to store the file. If you chose the option to
send the file via e-mail, your e-mail program will be opened and a blank e-mail started with the ".ote"
file added as an attachment. All you have to do now is to complete the e-mail and then send it.
Exporting sites
Use this type of export when you want to export sites. It exports all site information (facility,
departments, rooms and all equipment).
To begin the export process, click on the Application button, then hover the mouse over the export
function from the drop-down menu (see picture above). You will be offered three choices (export
measurements, export templates and export sites). To export sites, follow the two easy steps as
described below:
Step #1
When you select the "Export sites" option a wizard starts automatically to allow you to select the
facilities. Select all items you wish to export. Click on the Next button to continue.
Step #2
Once your selection is made, the next screen will offer you a choice between creating a file only, or
send the export directly to another Ocean user as an e-mail attachment. You can also add an
optional message to your file for the user or regulatory authority to whom you are sending the data.
This message will be shown when the user imports the data.
Click Finish when you are ready and the export file will be generated with an ".ome" extension and
you will be asked to choose a file name and location to store the file. If you chose the option to
send the file via e-mail, your e-mail program will be opened and a blank e-mail started with the
".ome" file added as an attachment. All you have to do now is to complete the e-mail and then
send it.
2013-01-02/2.4A
Ocean User's Manual
36
2.6
Application menu
Import
We added the Import function to give you the opportunity to share your work with other Ocean users.
This is especially helpful in large organizations where more than one person is working on equipment at a
site. To begin the import process, click on the Application button, then select the import function from
the drop-down menu (see picture below):
Click to minimize
Import from the Application menu
After you selected Import, a dialogue box will appear to help you select the files you want to import. If
you wish to exclude certain files from the import, just uncheck the item by clicking on the checkbox in
front of the item. There are two types of Ocean files you can import:
(.ome) files -- these are the measurements
(.ote) files -- these are the templates
Once you made your selection, click Open. A new dialogue box is now shown with the number of items
selected for import, the file type (such as session or real-time display) and the destination path.
When you finished making the choices for import, click the Finish button to complete the process.
Import directly from Windows
You can now import a file directly from Windows by double-clicking on the file. For this example, let's
assume that we have a file with measurements or templates on the desktop:
Ocean User's Manual
2013-01-02/2.4A
37
Application menu
When we double-click on the file icon, Ocean will start up and will automatically begin the import process.
Destination
· The templates are imported into the "templates" inbox and real-time displays are imported into the
"real-time display" inbox.
· Sessions are imported into the facility/department/room they belong to. If the site doesn't exist on
our computer, Ocean will give the choice to create the site or skip the item from the import list.
2.7
Close
Click on this button if you want close what you currently are working with.
NOTE: The Close button will only close the current job you are working on but it will not exit Ocean.
Click to compress
If you have unsaved work while trying to close the current task, you will be given the choice to save and
then close.
2013-01-02/2.4A
Ocean User's Manual
38
2.8
Application menu
Program options
The program options menu contains settings that control how Ocean works. This menu is available as a
button called "Options" located on the bottom right of the Application menu.
Click to compress
Click on the button to open the Program options:
Ocean User's Manual
2013-01-02/2.4A
39
Application menu
Click to compress
The following four sections are found under the Options button:
General settings
These are global setting stored in Ocean.
Inspector
This is where you change the inspector name in Ocean. This name will
appear as the inspector name when working on a session.
Company
This is where you change the company name the inspector works for.
Specify signature
This is a pciture of your signature that can be added to the summary page of
the report when you sign the report.
Password used to
sign the report
This password must be specified to be able to sign and close a report.
Preferences - The settings below are user-chosen preferences to customize Ocean.
The settings listed here control how Ocean works.
2013-01-02/2.4A
Ocean User's Manual
40
Application menu
Click to compress
Appearance
Select the color scheme for Ocean (Luna is recommended).
Show inactive records
The default is checked. If unchecked, items set to "inactive" in the
database are not shown.
Favorites screen
Defines when the user wants to see the Favorites list. Three choices
are available: always, only at start up) or only when the Favorites
button is clicked.
Office suite
User selection to use Microsoft Excel or OpenOffice Calc with the
Connect and Professional license levels.
Locate records during
import using
User selection to locate items by "Name" or by "ID". Default is that
items are located by "Name".
Language
Select language (only American English is presently available).
Backup of database at
start up
If this box is checked, a back-up of the databse will be performed
every time you start Ocean.
Show warning dialog if
A message is shown when saving a document if the required license
document license
level to open it again, is raised.
becoming more restrictive
Rows each test uses
Space allocated for each test when a complete session is dumped to
Excel or Calc.
Office document waveform Select size for waveform pictures that are exported to Excel or Calc.
size
Show hints automatically If this is checked, hints are shown automatically.
Auto start session
If checked, the session starts automatically when it is opened.
Use inspection scheduler
Enable the option to set inspection dates. You will also be reminded
to set the next date when you start an inspection.
Ocean User's Manual
2013-01-02/2.4A
41
Application menu
Show Generator name
with session name in the
"tree"
Show the generator name with the session name in the room's
Measurements folder.
Show Tube information
Show tube information with the session name in the room's
with Session names in the Measurements folder.
"tree"
Auto-scroll analysis
When a "one row analysis" (AGD, CTDP(helical scan/in phantom),
CTDP(helical scan/free-in-air) and QuickHVL) the analysis automatically
scrolls to show the analysis.
Confirm exit
Show a dialgue before Ocean closes.
Show warnings for
uncompensated values
If checked, a warning is shown if a measured value is not auto
compensated. Default value is unchecked.
Meter preferences - The settings below are user-chosen preferences for the meter.
The settings listed here controls the meter.
Click to compress
Automatic position check Defines when user wants to be notified to do a position check.
Active messages
If checked, active messages will be displayed for each measuring
mode.
Auto-close position check If checked, position check closes automatically when it is successful.
Defaults - These settings control functions within Ocean related to measurements and templates
2013-01-02/2.4A
Ocean User's Manual
42
Application menu
These are the settings that will be the defaults related to measurements.
Click to compress
Meter type
This is used when you work off-line during template design. You can
select "Piranha" or "Barracuda". You can use a template designed for
a Piranha with a Barracuda and vice versa. The only requirement for
connecting to a meter is that the meter have an Ocean license.
Temperature
Reference temperature used when calculating the TP-factor for ion
chambers.
Pressure
Reference pressure used when calculating the TP-factor for ion
chambers.
Default inspection interval Default inspection interval (months) for room.
Default units - These settings control functions within Ocean related to measurements and
templates
These are the default units, they can be changed "locally" in each template.
Units
This is where you can define the default units you want to work with.
The choice you make here will affect all new ttemplates you design,
but you can change them any time.
Free texts - Edit user-defined labels
Here is it possible to specify the user-defined labels that are available for facility, department, room,
generator, tube, user-defined equipment and all type of templates.
Ocean User's Manual
2013-01-02/2.4A
43
Application menu
Click to minimize
First select object type and then edit the free texts.
Click to minimize
The free texts are labels for the user-defined fields that are available for all site objects:
2013-01-02/2.4A
Ocean User's Manual
44
Application menu
Click to minimize
These fields are also shown in the report and can be used to specify user-defined data.
If you change the labels here it only affects the default labels that are used when you create new
templates. If you want to use the new labels in already existing templates do the following:
1. Go to the design page.
2. Click on "Use default labels".
Click to minimize
Reports - Define different templates for the report
Here is it possible to define individual header and footer for cover page and test pages, content and
print options. It is possible to use standard texts, user-defined texts and pictures (for example a
logo). One report template can be set as "default" and will automatically be used when new session
templates are created. Different report templates can be created and you can quickly chose
between them when you create your report.
Ocean User's Manual
2013-01-02/2.4A
45
Application menu
Click to minimize
Central database - Settings if you are going to connect to a central database
Click to minimize
2013-01-02/2.4A
Ocean User's Manual
46
Application menu
You will get instructions from the system administrator for Ocean Central how to set these
parameters if this option is used.
2.9
Locate data during import and export
There are two ways to locate session data when export and import is used between different users. This
is applicable both the the standard import/export function when e-mail is used and when Ocean Central
is used. Location of data can be done with "Name" or "ID". Measured session are organized based on the
site information (facility, department and room). The session also includes information about tested
equipment (generator, tube and any user-defined equipment). All these items are recognized either by
its name or by an ID it has been given. The default way to locate data is by Name. If you want more
data integrity you may use ID instead. In this case must a all items (facilities, departments, rooms and all
equipment) that are used have an ID specified. This ID is then used to decided where data goes when it
is imported/exported.
If you want to use ID instead of name, go to the Preference page in the Program Options and select
ID.
ID can be any text string and it must for each level be unique (all facilities must have a unique ID, all
departments within a facility must have unique ID, and so on). If ID is selected the uniqueness is
checked every time you click on the button "Check IDs" on the Design page of the ribbon bar.
If there are duplicated IDs the following is shown:
Click to enlarge
All duplicated IDs will be shown. You can double-click on a row and the corresponding ID will be located
and you can modify it:
Modify the ID and click on the Refresh button to update the list.
Ocean User's Manual
2013-01-02/2.4A
47
Application menu
2.10
Exit Ocean
To exit Ocean, simply click on the Application button and then choose the Close Ocean button located
on the bottom right of the Application menu.
NOTE: The Close button in the Application menu and on the Ribbon bar will only close the current job
you are working on but it will not exit Ocean.
Click to compress
If you have unsaved work while trying to exit Ocean, you will be given the choice to save and then exit.
2013-01-02/2.4A
Ocean User's Manual
Ocean User's Manual
2013-01-02/2.4A
Chapter 3
Main functions
50
3
Main functions
Main functions
In this topic the main functions on the Ribbon are described.
Click to compress
The main functions are:
Measure
Functions you need when you do measurements
Design
Functions you need when you create or modify templates
Data link
Functions you need when you use Ocean with Microsoft Excel or OpenOffice Calc
Appearance
Functions you need when you want to change how things appear on the screen
Reporting
Functions you need for reporting
Central
Database
Functions you need when you are connected to a central database
Help
Here you will find help on how to use Ocean topic by topic
Many of the functions are also available via a "right-click" with your mouse. Simply right-click on an object
and a menu will be shown with the functions available to you.
3.1
Measure
Most of the functions you will need when you make measurements are located on the Measure tab of
the Ribbon bar. There are three groups of functions you will need to know about: Meter functions,
Editing functions and Measure functions. See below a more detailed discussion on all three groups of
functions.
When you are measuring, the lower status bar shows "Log mode".
This indicates that measures data are saved when you click on the save button.
Meter
These are functions related to
controlling your instrument.
The settings are also available on
the Meter adjust tabs on the
right of the Ocean Main screen.
NOTE: If you do not own a Piranha or a Barracuda, just ignore the meter adjust tabs.
Ocean User's Manual
2013-01-02/2.4A
51
Main functions
Connect - This function establishes communication between your instrument and Ocean
Make sure that the meter is connected to the computer (via USB cable or Bluetooth).
You can toggle between Ke yb o ard and Co n n e c t e d by clicking on the upper part of the button.
With Ke yb o ard active you must enter all measured data by hand via the keyboard. When the meter
is connected the measured data is transferred automatically from the meter to the Main screen grid.
If you click on the lower part of the button a third option, Disc o n n e c t , is available. Use this option
only in the event you need to:
· Turn your meter off and then back on again.
· If you need to restart meter communication (for example, if you want to switch from one meter
to another one). See also Auto start and auto connect.
· If you want to stop meter communication (for example if another program should use the meter
while Ocean still is running).
Note!
It is recommended that you turn off power save mode or sleep mode on your computer while you
make your measurements with a meter connected. You may experience problems with meter
communication if your computer goes to sleep mode or power save mode automatically.
Reset - Manual reset (zero-adjust)
You click on this button when you need to reset the meter. This is normally done automatically but
you may have to do it manually in certain situations, for example:
· When you measure at very low signals and use "Free run" measuring mode.
· When you switch detectors after a test is already loaded and the meter is prepared for an
exposure (this is relevant only for Barracuda).
· When you suspect that the meter, for some reason, measured an incorrect zero-level.
Start - Start measuring manually
This button is used in Free run and Timed mode to start the measuring sequence.
Capture - Click this button to capture a value manually
You can use this button during long measuring sequences (for example when testing a fluoroscopy
unit) to capture the data at a time of you choosing. For example, you may wish to wait until the
data is stable before capturing a value. You must always use this button to capture the measured
data when Free run mode is used.
The waveform is also captured at the same time as you click on this button (if the checkbox Get
waveform is checked). Note - free run mode doesn't provide a waveform.
Pause - Pause measurement
This button is used if you don't want the meter to measure even if the detector gets radiation or
trigger for some other reason. You can use it for example when you use fluoro and the monitor to
position a detector on the image intensifier.
Position check - Verify that your kVp detector is positioned correctly
You can use this to verify that the kVp detector is correctly positioned in the X-ray field. It is always
recommended to use this function, but it is especially important in the situations described below:
2013-01-02/2.4A
Ocean User's Manual
52
Main functions
· Whenever you measure on mammography (after every change of target/filter)
· For all small X-ray fields or when there is a risk that the entire detector may not be irradiated (for
example CT and dental)
· If the detector is positioned very close to the focus point
The position check results are not stored with the measured data. If you wish to store this value,
you can add a special column to your test and the position check results will be saved with the test
in a column of its own.
Position check is always initiated automatically for mammography. This function can be turned of in
the Program options.
Meter infromation - Get meter information
Click on this button if you want to know more about the connected meter and Ocean. The
following information is provided:
·
·
·
·
·
·
Meter DLL location and version
Ocean version
Meter serial number
Hardware versions
Model
Calibrations
Charging of Barracuda
If you are using Barracuda, charging is turned on and off from this screen:
Click to compress
Ocean User's Manual
2013-01-02/2.4A
53
Main functions
Edit
These functions are used for
editing the measured data.
Clear row - Clear current row (removes all measured data from current row)
Click on this button if you want to clear the current row. The set values will not be removed with
this command.
Clear all - erase all data in the object you are working with (removes all measured data from the
entire grid)
Click on this button if you want to clear all the rows. The set values will not be removed with this
command.
Close - Close your current work (this command will not close Ocean)
Click on this button if you want close the current job you are working on. You will be prompted to
save any unsaved data before closing.
This is the same as Close on the Application menu.
Detector - Change the detector
Use this button if you want to choose another detector for your current measurement. Read more
in the topic Detector selection.
Measure
From here you can open the
Favorites list and find some
functions that control how
measured data are acquired.
Favorites - Shows the favorites list
Click on this button to show the Favorites list.
Get waveform - Enable waveform acquisition for every exposure
The default for this function is CHECKED. This means that a waveform will be acquired for every
exposure. Uncheck this box if you don't want waveforms to be acquired for each exposure.
If you prefer to acquire waveforms sometimes but not all the time, you can specify in the test
template whether or not you want to acquire the waveform. For example, if your test template
contains four measurements, and you only want to acquire two waveforms, you can choose which
two of the four measurements will acquire the waveform and which two will not. If you use this
2013-01-02/2.4A
Ocean User's Manual
54
Main functions
option it will override the Get waveform checkbox.
Exposure assistant - Not available in this version
Compare
From here you can do trend
analysis and easily look up previous
measurements done earlier in the
same room.
History - Shows previous similar tests from the same room
Click on this button to view the history of similar measurements in current room.
Trend - Trend analysis
Click on this button to start trend analysis. You can compare how different parameters change over
time.
Bias
Bias off - Turns off the bias (only Barracuda)
Click on this button to turn off the bias when using Barracuda. If you use Piranha the bias is turned
on when you power on the Chamber Adapter.
Scheduling
To do list - Shows your To do list
Click on this button to show the To do list.
Update inspection dates - Update inspection dates from the Central Database (only if Ocean Central
is used)
This button is only used if Ocean Central is used. Read more here.
Ocean User's Manual
2013-01-02/2.4A
55
Main functions
3.2
Design
Most of the functions you will need when you make templates are located on the Design tab of the
Ribbon bar. There are six groups of functions you will need to know about: New, Session, Test/
checklist, Real-time display, Miscellaneous and Analysis. See below a more detailed discussion on all of
these groups of functions.
New
These two functions you
use when you want to
create something new (a
template or a site).
Template - Design a new template
A template is an object without any measured data. It is like a pre-defined test protocol without
any actual measurements in it. A template has all the necessary information to perform a certain
task (either a measurement, a group of measurements or a checklist). The template contains any or
all of the following:
·
·
·
·
set values
meter settings
analysis (with it's own pre-defined pass/fail criteria)
pre-defined pass/fail answers to quality assurance compliance questions (checklists)
Using a template to perform a certain task, therefore, is a fast and efficient way of doing quality
assurance compliance testing for X-ray systems. You can create four different types of templates
that will be stored in the database for future use. They can be used individually (session and realtime display) to quickly repeat standard measurements. Test and checklist templates are used as
"building blocks" for creating session templates containing a complete set of measurements and
checklists to complete specific quality assurance compliance testing required by regulatory agencies
responsible for X-ray system quality control. Once these templates are created, you can share them
with your colleagues and regulatory agencies if you like.
When you click on the Template button you can select the type of template you
want to create. The four template choices are listed below:
· New Session template
· New Test template
· New Checklist template
· New Real-time display template
New Session template
When you click on the Session template choice, it starts a wizard to help you create your new
session template. A session template is a collection of tests and/or checklists that together define a
complete job. When you make measurements with a session template, a report can be generated
upon completion of all the measurements. The wizard lets you:
2013-01-02/2.4A
Ocean User's Manual
56
Main functions
· Select test and checklist templates from the Library
· Specify a title and other information for the session template
· Specify options that control the report generation process
When the wizard is done the session template is created and opened. It is possible to add and
remove tests and checklists "on the fly" after the session template has already been created and
saved.
Click on Save to save the session template. You can find your new session template under the
Library tab to the Left of the Main screen grid under Session templates. Read more about session
templates in the topic Design a session template.
New Test template
When you click on the Test template choice, it starts a wizard to help you create your new test
template. A test template is a table with a number of exposures. The measuring conditions, meter
settings and required calculations are specified for each exposure. You can assign different types of
analysis calculations to one or several of the exposures in the template. When you use the
template, you will be able to see the analysis results on the right side of the screen below the grid.
The analysis calculations will be made on the row or several rows you specify and will be saved with
the measured data. The wizard will take you through a number of steps to create the basics of a
test template.
When you start the Test template wizard it will help you do the following:
·
·
·
·
Specify a name and other information for your new test template
Select a modality
Select the number of columns, detectors and calibrations you wish to use
Select other general settings for your new template
Just follow the wizard's guidance and making a template will be easy. When the wizard is done the
test template is created and opened. To complete your new test template you also have to do the
following:
·
·
·
·
Specify set values (generator, conditions and so on)
Adjust the meter settings for each row if necessary
Add one ore more analysis with pass and fail criteria
Modify appearance: you can change the order of columns, modify the number of decimal places
for the numeric values, choose the measurement units to be used and you can change the size
and location of the different windows on your screen
Click on Save to save the test template. You can find your new test template under the Library tab
to the Left of the Main screen grid under Test templates.
You can go ahead and use your new template now if you have your instrument connected to
Ocean and your instrument has the capability to make the measurements required by your template.
This way you can try your new template and adjust the settings if necessary to make sure the
template is exactly what you wanted.
NOTE: A test template cannot be stored with measured data. Read more about this in the topic
Design a test template.
New Checklist template
When you click on the Checklist template choice, it starts a wizard to help you create a new
checklist. A checklist is a number of questions and/or tasks that need to be performed and
confirmed. For each row you can specify the following:
· A question or task text
· The type of answer (choose from yes/no, text, value or user-defined options)
· Additional information (extensive text and picture information related to the question or task you
are working on)
· Add pass/fail criteria
· Recommendation in case of failure
Ocean User's Manual
2013-01-02/2.4A
57
Main functions
· Name for the checklist and other additional information
Click on Save to save the checklist template. You can find your new checklist template under the
Library tab to the Left of the Main screen grid under Checklist templates.
NOTE: A checklist template has no answers in it and it cannot be saved with results. Read more
about this in the topic Design a checklist template.
New Real-time display template
When you click on the Real-time meter template choice, it starts a wizard to help you create your
new real-time display. A real-time display is a template with a number of displays and a grid where
measurements are logged. The wizard will take you through the following steps to create the realtime display template:
· Select a modality the template will be used with
· Select the number of columns, detectors and calibrations you wish to have
· Select other general settings
Just follow the wizard's guidance and making a real-time display will be easy. When the wizard is
done the real-time display template is created and opened. To complete your new real-time display
you also have to do the following:
· Specify set values (generator, conditions and so on)
· Adjust the meter settings for each row as necessary
· Modify appearance: you can change the order of columns, modify the number of decimal places
for the numeric values, choose the measurement units to be used and you can change the size
and location of the different windows on your screen
Click on Save to save the real-time display template. You can find your new real-time display under
the Library tab to the Left of the Main screen grid under Real-time display templates.
You can go ahead and use your new template now if you have your instrument connected to
Ocean and your instrument has the capability to make the measurements required by your template.
This way you can try your new template and adjust the settings if necessary to make sure the
template is exactly what you wanted.
You may also choose to save your real-time display with the measured data. In this instance, the
real-time display with the measurements will be saved under the Measurements tab to the left of
the Main screen grid. Read more on this in the topic Design a real-time display template.
-EndSite - Create a new site (facility/department/room/generator/tube)
When you click on the Site button, it starts a wizard that will help you create a new site. A site is a
description of a location and equipment to be tested. The wizard will take you through a number of
steps to do the following:
· Create a facility, department and room
· Create a generator and tube
When the wizard is done, a new site is created. To find your new site, look under the
Measurements tab to the left of the Main screen grid. The equipment belonging to the new site
you just created is found under the Equipment tab to the right of the Main screen grid. You can
add more equipment to a room and more rooms to a site at any time by right-clicking on the room
name or site name in the tree to which you wish to add new items (see picture below).
2013-01-02/2.4A
Ocean User's Manual
58
Main functions
Read more in the topic New site.
Session
These are the functions to
use when you wish to edit a
Session template.
Modify - Modify current session
If you click the Modify button the session template building wizard starts. This wizard will let you
modify the following:
· Session template information
· Add/remove test and checklist template
· Change settings for the report
Add Test - Add a new test to current session template
If you click on this button you can add an existing test template to the session template you are
working with or build a completely new one and add it "on-the-fly". Read more in the topic Add/
Delete a test to a session.
Add Checklist - Add a new checklist to current session template
When you click this button you can add an existing checklist template to the session template you
are working with or build a completely new checklist and add it "on-the-fly". Read more in the topic
Add/Delete checklist to a session.
Test/Checklist
These functions are used to
edit an existing test or
checklist template.
Ocean User's Manual
2013-01-02/2.4A
59
Main functions
Insert row(s) - Add more rows to current test or checklist
With this function you can do the following:
· Number of rows to insert
· Insert first, last or before/after active row
Inserted rows will not be assigned to any analysis.
Duplicate row - Duplicates selected row
Selected row is duplicated, the new row(s) will be a copy of the selected row, including any analysis.
Delete row(s) - Delete selected rows
Delete the selected row(s). By default, this function deletes the current active row. You do have
the option to select a range of rows for deletion by using multi-selection.
Use default labels - Force user-defined labels into the template
When you click this button is active template updated with default labels as they are specified in
Program Options.
Edit questions - Edit questions in a checklist
Click this button if you want to edit a question is a checklist.
Modify - Modify current test or checklist
When you click this button, the checklist design mode is enabled. You can go back to working
mode again by clicking the Modify button again or by clicking the Close button.
Real-time display
These functions are used when
you want to edit a real-time
display template.
Add display - Modify current real-time display
Use this button if you want to add or delete displays in your real-time display template.
Auto new row - Select if you want to add new rows automatically
If you have Display license level, this checkbox is always checked.
If you have Connect or Professional license level, you have the ability to create real-time display
templates with a specific number of rows pre-defined. When you use a real-time display template,
just make your measurements and when you wish to stop, uncheck this box and no further rows will
be created.
2013-01-02/2.4A
Ocean User's Manual
60
Main functions
Micelleneous
These functions are used
when editing a Session or
Test template.
Detector - Select or change the detectors to be used
When you click the Detector button, the detector selection dialogue will be shown and you may
select any detector you have in the list to be used with your template. Read more about this in the
topic Detector selection.
Protection - Add protection to templates
A session or real-time template template can be protected from modification. Read more on this in
topic Protection.
Check ID-s - Check for duplicated IDs
A session or real-time template template can be protected from modification. Read more on this in
topic Locate data during import and export.
Analysis
This function is to add or change
analyses in the current test template.
Setup - Add/modify analysis in the current test template
Use this button if you wish to add an analysis to your test template, or if you want to change the
current analysis to something else. Read more about this in the topic Analysis (Definitions).
3.3
Data link
The functions you need when you want to send data to Microsoft Excel or OpenOffice Calc are located
on the Data link tab of the Ribbon bar. You can select Excel or Calc in the Program options. Functions
are divided into two different groups:
Data link
These functions are related
to exporting data to a
spreadsheet.
Send data - Send data manually to a spreadsheet
You can manually send data to a spreadsheet by using this button. The data will be sent to the
Ocean User's Manual
2013-01-02/2.4A
61
Main functions
spreadsheet according to the currently selected data export mode. You can also read data from the
spreadsheet into Ocean if you use linked cells. This makes it possible to import data from other
meters into Ocean.
Direction - Manually select direction to fill the spreadsheet (horizontal/vertical)
Data can be sent using the Down or Across direction. This is used only when you are not using
direct linking between cells in Ocean and in Microsoft Excel (or OpenOffice Calc).
Click to compress
Auto send - Enable auto send
With auto send on, data is transferred automatically from your meter to the spreadsheet after each
exposure. Auto send can be used with all link modes, but it's optional since the data can always be
sent by using the "Data send" button.
Show linked cells - Enable indication for linked cells
This is only used for cell-to-cell mode to indicate which Ocean cells that are linked to a spreadsheet.
Waveform size - Size of exported waveform graphs
You can select the size for the waveform graphs that are exported to the spreadsheet. Three
different sizes are available.
Workbook
These functions are to help you
quickly connect or disconnect a
workbook to a session or to a realtime display.
Send Session - Send a complete session to a workbook
2013-01-02/2.4A
Ocean User's Manual
62
Main functions
You can send a complete session to a workbook.
Read more on this in topic Send Session.
Add - "Link" a workbook to current session or real-time display
This button is used to "link" a workbook to a session or a real-time display. There are three ways to
"link" workbooks:
Embed workbook: When you use this type of "link", a copy of the "linked" workbook is stored
(embedded) inside the session or real-time display.
NOTE: In this case, Ocean works with the embedded copy of the workbook and the original file is
not needed when you use the session template or real-time display template to which the workbook
was "linked". Using this function gives users the benefit of never losing the workbook by accident.
Read more on this in topic Associate or embed a workbook.
Associate workbook: When you use this type of "link", it will be established to a user-specified
workbook.
NOTE: Once you "linked" a workbook to a session template or a real-time display using the Associate
function, that workbook must be available on your computer (or other media such as a CD or flash
drive) so Ocean can find it and create the link whenever you use the session template or real-time
display to which the workbook was linked. It is, therefore, recommended that you either store your
"linked" workbooks in a clearly identified folder on the computer you usually use Ocean with or on
other media (such as a CD or flash drive) that is clearly marked and readily accessible when you use
Ocean.
Read more on this in topic Associate or embed a workbook.
Free workbook: Use this type "link" when you just want to create a temporary link.
NOTE: In this case the link is not saved when you save the real-time display or the session.
Read more on this in topic Free workbook.
Remove - Delete the link to the workbook
Use this function to delete a link to an associated workbook or remove an embedded workbook.
Read more on this in topic Associate or embed a workbook.
3.3.1
Send data from Excel to Ocean
It is also possible to read data from Excel into Ocean if you have linked cells. The picture below shows an
example:
Click to compress
Ocean User's Manual
2013-01-02/2.4A
63
Main functions
Measured data are available in Excel and we want to move them into Ocean. The different cells are
linked as described in previous section.
1. Click on the lower part of the Send Data button:
Click to compress
2. Select "Read data from Office spreadsheet". Data are now copied from Excel into Ocean.
Click to compress
3.4
Appearance
The controls customize the Main screen layout (your workspace) are found on the Appearance tab of
the Ribbon bar. There are screen layout functions, display layout functions and waveform appearance
functions available on this tab. Each group of functions is discussed separately below.
Screen
These functions are related
to the Main screen layout
and appearance.
Layout - Change the layout for the workspace
This button is used to toggle between the three different pre-defined layout choices Ocean offers.
You can also arrange the screen layout manually if none of the three layout choices are to your
liking. Read more screen layout in topic Screen layout.
2013-01-02/2.4A
Ocean User's Manual
64
Main functions
Restore windows - Restore windows
This button is used to restore the default screen layout Screen layout.
Font - Select main font size
Font size selection is not available in this version of Ocean.
Show keyboard indicator - Indicates that a column needs manual keyboard input
When you use Ocean without a Piranha or Barracuda, or if you don't have a certain detector for the
job, you have the option to use this function to mark columns that will need to have values entered
into them manually. The special columns requiring input from you via the keyboard are marked with
a green outline as you see on the above picture.
Show detector name in column heading - Show the detector name in the column heading
This checkbox is used to show or hide the detector name in the column heading:
Displays
These are the functions you will
use to connect or disconnect a
workbook to a session or to a realtime display.
Position - Select position for the displays
Ocean provides three options, Left, Right or Center for display positioning.
Ocean User's Manual
2013-01-02/2.4A
65
Main functions
Top
Left
Right
Color - Select color for the displays
You can change background and font color of the displays by clicking on this button. Any changes
you make here will affect all of displays. However, if you want each of your displays to have a
different font color, you can do that by right-clicking on each display and choose the change color
option.
2013-01-02/2.4A
Ocean User's Manual
66
Main functions
Size - Select size for the displays
You can change the font size of the displays by clicking on this button. Any changes you make here
will affect all of displays. However, if you want each of your displays to have a font size, you can do
that by right-clicking on each display and choose the change display font size option.
Show detector label - Show detector name/serial number
When you are using several detectors at the same time, it would be very
useful in some cases to see which display is showing readings from which
detector. If you check this box, the detector information will be shown in
the displays.
Waveform
These functions are related to the
export feature of Ocean.
Style - Change the style of the waveform graph
There are three pre-defined styles of waveform graphs to choose from: Normal, Paper and
Scientific.
Ocean User's Manual
2013-01-02/2.4A
67
Main functions
Font - Select the font size for the waveform graph
There are three possible sizes for the text in the waveform graph: Small, Medium and Large.
Line - Select the line width for the waveform plot
There are three possible line widths for waveform plotting: "Thin", "Normal" and "Thick".
3.5
Reporting
The functions for creating and editing reports as well as print the reports are found on the Reporting tab
of the Ribbon Bar. a report or print out are found on the Ribbon Reporting tab. The report control
functions are divided into Report functions and Setup functions and each group is described below:
Report
These are the functions
you will use to generate a
printed report.
Printer setup - Opens the printer setup dialogue
Click here to open the printer set up dialogue.
Preview - Preview the report on the screen
This is a print preview function that allows you to see what is in your report and how it will appear
on the pages when it is printed.
Click to compress
There is a menu available at the top of the window picture below:
2013-01-02/2.4A
Ocean User's Manual
68
Main functions
Click to compress
If you want to create a PDF file to send to someone, click the PDF button.
Print - Print the report
Use this button when you want to print your reports.
Sign - Click here to sign the report
You can specify a signature that can be used to digitally sign the report. A signed report is locked
from further modification. Read more in section Signing.
If you click on this button and the report is already signed, you will be asked if you want to remove
the signature.
Setup
Here you can modify the report
template that defines the layout
for the report.
You can here select report template or modify current report.
3.6
Central Database
This section is only relevant if you use Ocean Central. Ocean Central allows you to directly connect via a
local network or internet to a computer that has a central Ocean database.
Functions are divided into two groups:
Ocean User's Manual
2013-01-02/2.4A
69
Main functions
Click to minimize
Submit
Functions for submitting measured data to Ocean Central.
Download
Functions for downloading templates from Ocean Central.
There is an indicator on the lower Status bar that shows when you are connected to Ocean Central (via
a local network or via internet):
3.7
Help
The help system contains topic by topic detailed information on Ocean's many features and functions to
help you get the most out of Ocean. You can easily access the help system by clicking on the Help tab
on the Ribbon bar if you are not sure how to use a certain function or feature.
Help
These two buttons give you
quick access to the help
system table of contents and
the FAQ section.
Tutorials
We have added these tutorials to
help you get started with Ocean
quickly and efficiently.
2013-01-02/2.4A
Ocean User's Manual
70
Main functions
Support
This section is for you to use if you
need to report an error or get
some example templates.
Import examples
Click on this button, and you can import new example templates into Ocean to help you get started.
This function is useful after an update if new examples are available. For further reading see topic Import
Examples.
Contact RTI
Use this button if you want to contact RTI or report a problem or suggest an improvement. There are
two choices:
· Review - Send comments, suggest improvements and new functions.
· Make support file - Create a support file to report a problem or suggest an improvement. For further
reading see topic Create support file.
Activate meter
Use this button to install a new license into your meter. For further reading see topic Activate meter.
Check update
This function will check if you are running the latest Ocean software and meter firmware. Note that the
meter firmware is only checked when your meter is connected to Ocean. To use this feature your
computer must be able to use the internet.
Trial
Click this button if you are using Display or Connect and want to try a higher license level with your
meter. You then get a 45-day trial period. Please note that you can only do this once.
Note: You can click on this button at any time if you want to try another license level without a meter
connected. For further reading see topic Trial.
About
Clicking this button shows the program version and contact information.
Database
We have added these features to
manage your database.
Import
You can import site information from
· Facilities, rooms,generators and tubes from oRTIgo (or the Canadian version XR).
· Facilities, departments, rooms, generators, tubes and user-defined equipment from Excel or Calc.
oRTIgo is not using "Departments" as Ocean does.
be named "Department".
Ocean User's Manual
All departments for imported facilities in Ocean will
2013-01-02/2.4A
71
Main functions
Backup
Click on this button when you want to make a backup of your database. A dialogue will be shown asking
you to choose where you want to store the back-up file. It is highly recommended that you back up
your data on regular basis.
Location of the database file
Depending on the operating system you have, the database file can be found at the following location:
XP:
Documents and Settings\All Users\Application Data\RTI Electronics\Ocean
Vista or Win7: ProgramData\RTI Electronics\Ocean
3.7.1
Import examples
When you installed Ocean you had the opportunity to load example templates ready to use directly. You
can at any time import more examples (if you didn't select all of them when you installed Ocean or after
an update). Go to the Help page and click on Import examples.
Click to compress
The Ocean Setup Wizard starts. Click on the Next button until you come to the Examples page.
Click to compress
Select the modalities and parameters you want to load examples for.
2013-01-02/2.4A
Ocean User's Manual
72
Main functions
Note!
Existing examples will be updated if you reload examples you already have loaded before. Make sure, if
you want to modify an example template, to copy it to another place.
Ocean User's Manual
2013-01-02/2.4A
Chapter 4
Frequently asked questions
74
4
Frequently asked questions
Frequently asked questions
This topic covers questions frequently are asked by Ocean users. The questions are organized by
category.
4.1
General
Where can I find the reference manual?
Open the documentation folder on your product CD. Go to the Ocean folder and look up the file
"Ocean - Reference Manual - English v1.0A.pdf".
I don't have a licence in my meter. How can I get one?
Every Ocean user must have a license to use Ocean. The free Display license is available for anyone
by sending a request to RTI Electronics AB website at http://www.rti.se/try-ocean-for-free/. If you
want to purchase the Connect or Professional license for your existing Piranha or Barracuda, or if you
wish to purchase a new meter and Ocean, please contact your local distributor.
Can I make a back-up of the database?
Yes you can. Go to the help tab on the ribbon bar and click on the button Back-up.
Where is the Ocean database located?
XP:
Vista:
Documents and Settings\All Users\Application Data\RTI Electronics\Ocean
ProgramData\RTI Electronics\Ocean
Can I import data from Ortigo?
You can import site data (facilities, rooms, generators and tubes) but not templates and
measurements.
I get a strange message when I use my CT Dose Profiler probe?
Ocean says that the CT Dose profiler is not compatible and shows the following message:
Click to compress
Piranha CT Dose Profiler Probes delivered before March 2012 has incorrect detector type stored in its
memory. THis must be corrected before it can be used. THis is done, as described in the message,
with the Detector Manager.
Ocean User's Manual
2013-01-02/2.4A
75
Frequently asked questions
I have a CT-SD16 probe, why can't I see it in Ocean?
Ocean is not supporting this probe. You have to upgrade to a CT Dose Profiler probe if you want to
measure CT dose profiles with Ocean.
4.2
Measuring
Why isn't the analysis giving a result, it is just showing "---"?
The analysis cannot do the required calculations. This is normally caused by:
· A missing measured value (too few measurements).
· There is a measuring error of some kind.
· A set value is missing or not specified correctly.
Ocean is not connecting to my meter?
If you are using USB, please check that the cable is connected properly. If you are using
BLUETOOTH, open Windows BLUETOOTH device window and verify that your meter is listed as a
know BLUETOOTH device. If it is listed but you still can't connect, delete it and use "Find nearby
devices" to re-connect.
My measured data was not saved. Why?
You are maybe working with a template in design mode. When you click on save in design mode,
only the template is saved. You must be in Log mode if you want your measured data to be saved.
I cannot edit a set value in a test. Why?
This normally happens when you are working with a session and the template you are trying to edit
not open (active). You can look at all tests/checklists in a session, but you can only modify the one
that is currently active.
Where can I specify the scatter factor?
In Ocean the scatter factor is called "Beam correction factor". This factor can be used to apply a
correction on the measured exposure or exposure rate. You can find this parameter on the meter
adjust tabs for exposure detectors or in the grid if specified as column or general setting.
4.3
Data export to Excel or Calc
Can I export certain cells from an Ocean test to Excel?
Yes you can. You can use something that is called "Cell-to-cell". You can then "link" individual cells
in Ocean with individual cells in Excel or OpenOffice Calc. By doing this, you get full control over
where your data appears in the spreadsheet. You can read more in the topic Link a session to Excel
(or OpenOffice Calc).
4.4
Design
I cannot edit a set value in a test. Why?
This normally happens when you are working with a session and the template you are trying to edit
not open (active). You can look at all tests/checklists in a session, but you can only modify the one
that is currently active.
2013-01-02/2.4A
Ocean User's Manual
76
Frequently asked questions
Can I change the acceptance limits in a test?
Yes. Right-click on the analysis window and click on "Modify analysis", select the analysis you want to
change the limits for. The limits are now shown and you can modify them. Read more in topic
Acceptance limits.
Can I have different acceptance limits for each row in a test?
Yes. Right-click on the analysis window and click on "Modify analysis", select the analysis you want to
change the limits for. The limits are now shown and you can modify them for individual rows. Read
more in topic Acceptance limits.
What is a template?
There are four different types of templates:
·
·
·
·
Test template
Checklist template
Session template
Real-time display template
A template is an object without any measured data but with all other necessary information to
perform a measurement and required analysis.
I want to see my exposure values both in "R" and "mGy". Can I do that?
Yes. You can just right-click on the column head and select "Unit" from the menu. If you are
working with a real-time display, just click on the unit in the display. A list with available units is
shown, select the unit you want.
Where can I specify the scatter factor?
In Ocean the scatter factor is called "Beam correction factor". This factor can be used to apply a
correction on the measured exposure or exposure rate. You can find this parameter on the meter
adjust tabs for exposure detectors or in the grid if specified as column or general setting.
4.5
Reporting
Why don't I get any waveforms in the report?
There are no waveforms included in the report by default. You must select waveforms you want to
appear in the report manually. To include a waveform in the report, right-click on a row in the grid
and select "Include waveform(s) in report".
Can I exclude columns from the report?
Yes. It is possible to exclude columns (and other items) from the report. To exclude a column from
the report, right-click on the column heading. Uncheck "Include in report" to remove the column
from the report.
Can I design my own report?
No. The report template is fixed at this time.
Ocean User's Manual
2013-01-02/2.4A
77
Index
Free
60
Header
60
Linked cells
Pin
60
Set pin
60
Index
-.-
Database
browse
location
.ome
33, 36
.ote
33, 36
About
69
Active error message
50
Analysis
55
Appearance
63
Application button
13, 26
Application menu
13, 26
Associate
60
Auto-scroll
38
-BBackup of databse
Battery
charging
50
69
Battery indicator
13
Browse
database
14
63
Dublicate
row
55
-EEdit questions
55
Embedd
60
Examples (RTI)
17
Excel
40
Exit
47
confirm
38
Export
46
multi-select
Exposure assitant
33
50
Favorites
50
Firmware
69
Font
63
Free
60
Free texts
38
Calc
40
Capture
50
Cell-to-cell
60
Central
46
Charging
Barracuda
50
-G-
Close
37
Confirm
exit
38
Connect
10, 50
Cover page
print
67
74
-D-
2013-01-02/2.4A
Disconnect
50
Display
10
Color
63
Detector label
Size
63
-F-
-C-
Data link
Auto export
Cell-to-cell
14
69
Detector label
show
63
-A-
CT Dose Profiler
60
Getting started
16
Connect
18
Display
18
Professional
20
real-time display
18
session
20
-H60
60
Header
60
Help
69
Hint
55
Ocean User's Manual
78
Index
History
50
Hold
50
Options
38
Ortigo
69
-I-
-P-
ID
duplicated
PDF file
67
PDF-file
32
Pin
60
Position check
Preview
32
report
67
46
Import
36, 46
sites from Ortigo
Import examples
Insert
row
55
69
71
Inspection scheduler
Installation
17
Print
32
cover page
38
Printer
setup
-KKeyboard indicator
63
38
63
14
16, 17, 28, 69
10
10
Location
database
Logo
67
67
Professional
10
Program options
Defaults
38
General setting
38
Preferences
38
Reporting
38
User-defined texts
38
-LLabels
Layout
Library
License
free
install
41, 50
-QQuick access toolbar
Quit
47
13
-R-
69
38
Report
create pdf file
preview
67
print
67
-MMeasurements
14
Meter information
50
Reporting
38
Reset
50
Restore windows
63
Ribbon
13
Right-click menu
13
Row
dublicate
55
insert
55
-NName
46
New
Checklist template
55
real-time display
27
Real-time display template
session
27
Session template
55
Site
27, 55
Test template
55
-OOcean Central
46, 68
OpenOffice
40
Ocean User's Manual
67
55
-SSave
Real-time display
Session
28
Template
28
28
Save as
29
Scatter factor
75
Scheduling
38, 50
2013-01-02/2.4A
79
Index
Screen
Font
63
Layout
63
Send data
to Ocean
62
Session
send to spreadsheet
Setup
printer
60
67
Site information
user-defined fields
38
Standard templates
Status bar
13
Support file
69
71
-TTemplate
55
To do list
50
Trend
50
Trial
69
Tutorials
69
-UUpdate
69
Use defult lables
User-defined
labels
38
User-defined fields
site infromation
55
38
-VVista
69
-WWarning
38
Workbook
Add
60
Associate
60
Embedd
60
Remove
60
-XXP
69
2013-01-02/2.4A
Ocean User's Manual


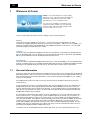
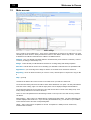


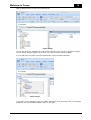
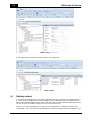

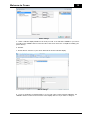
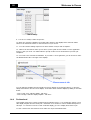
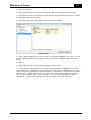
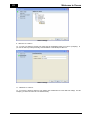
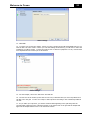
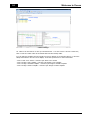

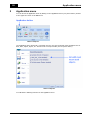
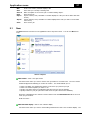


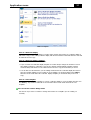
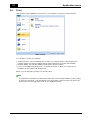

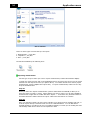


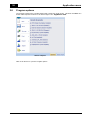
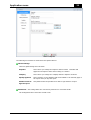
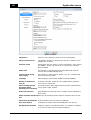
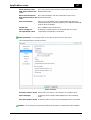
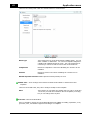
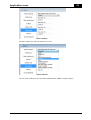
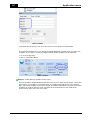
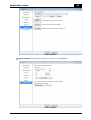
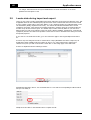
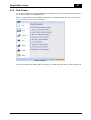


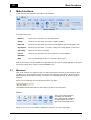


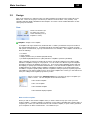


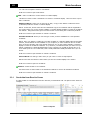
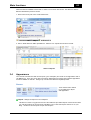

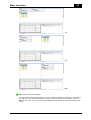
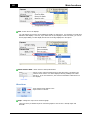
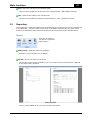
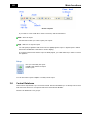
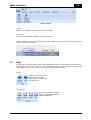

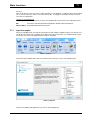


![IA [impact assessment] template user manual](http://vs1.manualzilla.com/store/data/006900770_1-df6c75c7a80350a4ef518ef06058013e-150x150.png)