1
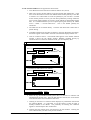
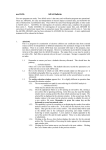
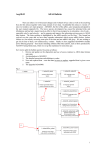
The file selection window has the appearance shown below
1. Two data files must be selected in indentical manner at a) and d).
2. Data root a) shows the full pathway to the appropriate data subdirectory. Click
the Central Data button to insert the default central ADAS pathway to the data
or click the User Data button to insert the pathway to your own data. It would
be the normal practice to access your own data produced by running ADAS701
since central ADAS perfoms no archiving of the ADAS701 intermediate output
files. It is recommended that you use a special passing file directory for ADAS
series 7 called /.../<userid>/adas/autos/. This is the default pathway for
ADAS703.
3. The Data root can be edited directly. Click the Edit Path Name button first to
permit editing.
4. Available sub-directories and files are shown in the large file display window b).
Scroll bars appear if the number of entries exceed the file display window size.
5. Click on a name to select it. The selected name appears in the smaller selection
window c) above the file display window. Datafiles produced directly by
ADAS701 have no extension unlike the usual .pass for temporary files.
ADAS703 INPUT
AUTOSTRUCTURE General File (olg) Details :Data root
/home/mog/adas/autos
Central data
Edit Path Name
User data
a)
olg
c)
R
'DWD )LOH
RLF
RLFX
ROJ b)
AUTOSTRUCTURE Rate File (oic) Details :Data root
/home/mog/adas/autos
Central data
User data
Edit Path Name
d)
oic
R
'DWD )LOH
RLF
RLFX
ROJ Browse Comments
Cancel
Done
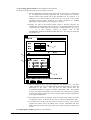
6. Select the olg AUTOSTRUCTURE general file at a) and the oic radiative and
autoionisation rate file at d). Once the data files are selected, the set of buttons
at the bottom of the main window become active.
7. Clicking on the Browse Comments button displays any information stored with
the selected datafile. It is important to use this facility to find out what is
broadly available in the dataset. The possibility of browsing the comments
appears in the subsequent main window also.
8. Clicking the Done button moves you forward to the next window. Clicking the
Cancel button takes you back to the previous window
ADAS User manual
Chap8-03
17 March 2003