1
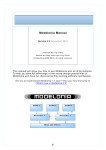
Horizon Information Portal User’s Manual
1.
INTRODUCTION
In spring 2004 the Library began to implement the integrated library system Horizon
produced by Dynix. This was possible thanks to financial support of the European Centre
Natolin.
A major part of the system is the Library catalogue (OPAC called HiP – Horizon
Information Portal) http://hip.coleurop.pl which currently contains detailed
bibliographic records for the following library documents:
-
books acquired and registered after 2004 (approx. 7000 items)
periodicals, annuals, working papers (all)
EDC periodicals (all)
EDC monographs (approx. 800 items)
Master Theses (all)
The cataloguing process of the entire Library collection is being continued and new
entries are regularly added to the system. For the items that are not catalogued within
the new catlogue yet the old database called MAK should be consulted.
2.
SEARCH OPTIONS
Horizon Information Portal provides three searching tools: Search, Browse and Advanced
Search.
2.1 Search
Basic Search option opens as a default window when you open the Horizon Information
Portal. It lets you search the Library's catalog by a single author, title, or subject
keyword, etc.
To conduct a Basic Search simply enter the search term that you want to use in the
selected Search field and click Go.
Tip: You can also search for items using a "wildcard" symbol or
a truncation symbol. This is useful if you do not know the exact
term for which you want to find. (For example, you may not
know how to spell an author's name.)
The wildcard symbol represents a group of unknown characters
in addition to those in your search criteria. You use the asterisk
( * ) for the wildcard. (For example, if you enter "man*" for an
Author Keyword search, Information Portal displays titles by
authors named "Mansen," "Mandell," "Manhattan," and so
forth.)
The truncation symbol represents a single character in addition
to those in your search criteria. You use the question mark ( ? )
for truncation. (For example, if you enter "man?" for an Author
Keyword search, Information Portal displays titles by authors
named "Man," "Mang," "Mann," "Mans," and so forth.)
1
Horizon Information Portal User’s Manual
2.2 Browse
When you choose a browse search, Information Portal displays an alphabetical list (of
titles, subjects, authors, etc.) beginning with your search term. To do a browse search
simply enter the search term that you want to use in the selected Browse field and click
Go.
2.3 Advanced search
Advanced search lets you refine your search by entering more criteria than you can use
with the Basic search. Advanced search allows you also to define limits and sort your
search results by specific criteria.
To do an Advanced search click the Advanced tab and enter your search terms in one or
more of the fields provided and combine them with Boolean operators. Your list of search
results will be shorter and more detailed as you enter more information. With advanced
search you can also use "wildcard" or a truncation symbols.
If you wish you can refine your search by using a pre-defined limits (Collection and/or
Language). After entering search terms choose a limiting option from the Limits list
provided. You can choose multiple limits by holding down CTRL and clicking each limit
that you want to use.
You can also sort your search results by choosing the sorting option from the Sorting
drop-down list.
2.4 History
Each time you search for library items, Information Portal keeps a temporary record of all
the searches that you perform. Search History lists each search term that you entered
and the search type you have used (Basic, Advanced, or Browse).
If you want to repeat any search in the history click the shortcut for the search next to a
selected search. If you want to edit the search before you repeat it, click the Edit link
next to the shortcut for the search. Edit the search criteria as desired, and then click Go.
You can clear the entire Search History when the search terms are no longer useful by
clicking the Clear History button.
3.
VIEWING AND INTERPRETING SEARCH RESULTS
3.1 Summary search results
When you choose a keyword search (basic or advanced), Information Portal displays a
summary list of titles matching your search. If your search returns only a single item,
Information Portal displays detailed information about the item rather than first
displaying the item in a summary list.
For each library item in a summary list of titles, Information Portal displays specific
information such as the item's title, author, publisher, publication date, call number, and
status. Here is an example:
2
Horizon Information Portal User’s Manual
After your search results are returned in a summary list, you can:
Sort your search results.
You can sort your search results in a summary list by author, title or publication
date. Use the Sort by drop-down menu.
Limit your search results.
You can refine your search by limiting it to selected language(s) or/and collection(s)
Use the Limit by drop-down menu. To choose more than one options use Ctrl +
click.
E-mail your search results.
Scroll to the bottom of the search results page. Mark the format in which you would
like the information to appear (HTML, plain text or delimited) enter the subject and
your e-mail address and click Send.
Add items to My List.
Use the Add to My List button next to the item. The selected item(s) will be added
to your current My List. The button will change into Remove option. Click on this if
you want to remove the selected item(s) previously added to current My List.
You can also enter the line numbers of all of the items in the summary list that you
want to be added to (or removed) My List in the field Add/Remove MyList below.
(For example, enter "1,3,5-10".) and click Add or Remove button.
3.2 Browse search results
When you choose a browse search, Information Portal displays an alphabetical list (of
titles, subjects, authors, etc.) beginning with your search term. From your browse results
list, you can choose one or more results to view.
If you choose a browse result that refers to only a single item, Information Portal
displays detailed information about the item. If your browse result refers to more than
one item the system displays the items in a summary list first.
You can also choose one or more your browse results to view in a summary list. In order
to do so enter the line numbers of all of the browse results that you want to be displayed
in a summary list in the Select field below (For example, enter "1,3,5-10".) and click
Search. Information Portal will display your choices in a summary list.
3.3 Detailed information for a specific record
After doing a search, you can view more information about a particular item listed in the
search results. Information Portal displays a full bibliographic record, holdings
information (availability) for the item or summary of holds for serials (periodicals and
annuals).
3
Horizon Information Portal User’s Manual
After viewing information about a specific item, you can:
Add the item to My List
Use the Add to My List button next to the bibliographic record. The selected item
will be added to your current My List. The button will change into Remove option.
Click on it if you want to remove the from current My List.
You can also choose a link Add Copy to My List next to item details in
Copy/Holdings Information panel below the bibliographic record.
E-mail information about the item
Scroll to the bottom of the page. Mark the format in which you would like the
information to appear (HTML, plain text or delimited), enter the subject and your email address and click Send.
Request the item that is checked out by other user
With the Horizon Information Portal you can request the items that are checked out
by other users. System will register your request and will notify you once the item
is returned and ready for loan.
If the status of the item that you retrieved is checked out (not available) click the
link Request Copy next to the item details in Copy/Holdings Information panel
below the bibliographic record. If you are not logged on to your user account the
system will first ask you to log on before you can place request for an item.
4.
USER ACCOUNT
Your user account is a record of your personal information, any items that you have
currently checked out, any holds that you have requested, blocks on your account, and
any lists that you have created or saved. You are provided with your Borrower’s barcode
and your Personal Identification Number (PIN) by the Library prior to your first logging to
My Account.
To log in to My Account click the My Account tab or click the Login icon on the Toolbar.
Enter your borrower’s barcode (from your library card) and your PIN in the requested
fields. Click Login or press ENTER.
4.1 Account Overview
Information Portal displays the Account Overview page, listing the different functions
that you can access from your user account. Click one of these links to see details about
your account:
4.2 Checked Out
This link allows you to view a list of library items you have currently checked out. Each
item is listed by title and includes basic information about the item (Title, Due Date etc.).
If you want to sort the list, click the name of the column you want to sort by. The link
also provides the option to renew checked out items before they are due.
To renew all the items in the list, mark the box to the left of the Title column and click
Renew. To renew selected items or just one item mark the box next to the item(s) you
4
Horizon Information Portal User’s Manual
want to renew and click Renew button. Information Portal will renew the item(s) and
then display a new due date for the item in the Due Date column.
Please remeber that you can not renew the overdue items nor the items requested by
other users.
Please remember that borrowing privileges are granted only to the students
and academic staff of the College of Europe. The maximum number of
items which you can now borrow is ten. The loan period is two weeks.
External users can consult the library material and documents only on site.
4.3 Holds
With the Horizon Information Portal you can request the items that are checked out by
other users. The link Holds lets you view the status of items that have been filled and
are waiting to be picked up, as well as hold requests that are still pending. If you want to
sort the list of holds, click the name of the column you want to sort by.
You can also activate, suspend, or cancel a hold request. Suspending a request
temporarily defers it until you decide to activate it again or cancel it. You can activate
any suspended hold request when you are ready to put the item back on your hold
request list.
To suspend a hold request (or activate a suspended one) mark the box next to the
items for which you want to change the status (or mark the box to the left of the Title
column if you want to change the status of all the items in the list) and click Change
Status. If you suspended a hold request and you want Information Portal to
automatically activate it at any specific time, choose the date that you want in the
Suspend until fields.
To cancel a hold request mark the box next to the items for which you want to change
the status (or mark the box to the left of the Title column if you want to change the
status of all the items in the list) and click Cancel Request.
4.4 Blocks
This link allows you to view any messages on your user account such as cancelled holds,
overdue messages, address corrections, or any other messages from the library
concerning your user account. If you want to sort the list of blocks, click the name of the
column you want to sort by.
4.5 Profile
This link allows you to view or change information in your user profile. Your user profile is
a record of contact information such as your name, phone number, and e-mail address.
You can also update your PIN.
If you need to change the personal information that are displayed in your account profile,
you can submit a request to your library by using a Request Change button.
Information Portal sends a message to the library staff indicating that you want to
change your personal information. Library staff will contact you by phone, mail, or in
person to change your personal information as requested.
5
Horizon Information Portal User’s Manual
To update your e-mail address or PIN simply enter the apropriate data in the fields
provided and click Update.
When you are finished, log out of your user account.
5.
MY LIST
My List is a feature that lets you create a temporary list of items from your search
results. You can view the list, sort the list, add or remove items from the list, or e-mail
the list. You can also save a list of items for future reference. From a saved list, you can
move items to another list, rename the list, or delete it.
5.1 Adding items to My List
If you want to add the item to My List, click Add to My List button next to the item
displayed in a summary list or in a detailed view. You can also use add a specific copy of
the title to My List, display the detailed information about the title (or the full
bibliographic information) and click Add Copy to My List link next to the copy that you
want to add.
You can also add more than one item at the same time when you have your search
results displayed in a summary list. Enter the line numbers of all of the items in the
summary list that you want to be added to My List in the field Add/Remove MyList
below. (For example, enter "1,3,5-10".) and click Add button. Information Portal adds
the library item to My List.
After you have added an item to My List, you can do the following tasks:
5.2 Viewing My List
To view the current My List click the My List icon on the Toolbar. Information Portal
displays all the items in the current My List. If you have not added any items to My List,
Information Portal displays the message "No items in list". If you want to sort the list,
click the name of the column you want to sort by.
Your current My List will be deleted after your current search session. If you need it for
future reference you have to save it. Please remember that you are not able to save your
current list when you are not logged on to your user account.
5.3 Saving a list
To save your current My List click My List link on the Toolbar and view the current My
List. Mark the boxes next to the items in the current list that you want to save to a new
list. Choose New List from the Move To drop-down list and click Go. Enter a name for
the new list in the field. (e.g. “EU integration history”) Click OK. Information Portal saves
the selected items in a new list and returns to the temporary My List.
6
Horizon Information Portal User’s Manual
5.4 Removing an item from a List
You can remove an item from My List in either of these situations:
•
When you first add a specific copy of a title and immediately decide that you do
not want it. In a summary list click Remove button next to item detail. In a
detailed display view click Remove button next to full bibliographic display or
click Remove Copy from My List link next to item detail on the Copy/Holdings
Information panel below the bibliographic record.
•
When you want to remove an item from My List later. View the current My List or
the saved list from which you want to remove an item. Mark the box next to each
•
item that you want to remove from the list (if you want to remove all the items
from the list at once, mark the box to the left of the Title column) and click
Remove. Information Portal removes the items from the List. As you remove
items from your current list, Information Portal displays the number of items
remaining in the list next to the My List icon on the Toolbar.
5.5 Managing the lists
You can save as many lists as you need. To view your saved list choose the saved list
you want to view from the Other Lists drop-down list right and click Go.
If you want to see all your lists click Manage lists. Information Portal will display all
your saved lists. You can sort your list by clicking a selected column; you can rename or
delete selected lists.
You can also move items from one list to another. If you want to move all of the items in
the list, mark the box to the left of the Title column. If you want to move selected items
mark the box next to the items you want to move. Choose the saved list to which you
want to move the items from the Move To drop-down list and click Go. Information
Portal moves each item you selected to the saved list you chose.
5.5 E-mail My List
After you create or save a list of items, you can use an e-mail to send the list to a
specific e-mail address. Click the Email this List link at the bottom of the list.
Information Portal displays the Email My List page. Mark the format in which you would
like the list to appear (HTML, plain text or delimited) then enter the subject and the email address to where you want to send the list in the Email to field. Click Send.
Information Portal sends a copy of the list to the e-mail address you specified.
7