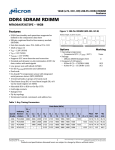
1
User's Manual
© 2006 ... Dennis Baggott and Sons
2
QUAD Help Desk Client Server Edition 2006
1
Introduction
1.1
Overview
The QUAD comes from QUick And Dirty. The standard edition, when first released, really was a Quick
and Dirty Help Desk solution for those wanting an affordable, easy to use program for recording,
updating and reporting on Callers and Calls from those callers. The standard edition of QUAD Help
Desk proved to be quite popular and continues to work well for many organizations.
However, even though QUAD Help Desk was multi-user capable, at no additional charge, I began
receiving requests for a variation of the program. Some people wanted the ability to limit staff
members to viewing and updating only calls they received or were assigned. In response to these
emails I developed QUAD Help Desk Professional Edition. Still very easy to use, the Pro Edition added
user and procedure security. The pro edition allows the manager of a small staff to view and update all
calls while the staff were limited to viewing and updating calls assigned to them. The Pro Edition also
included the ability for automatic updating of the browse calls screens so that the manager could sit
and watch the status of calls change, new calls being entered in the database, and so on without any
delay. Some of the people that wrote me wanting the user and procedure security settings indicated
they wanted to really restrict their staff. The wrote me for example, that if a staff member could access
the "assigned to" field when updating a call record, some of them would be likely to assign a call they
didn't want to some other staff member! Imagine that. The QUAD Help Desk Pro Edition does restrict
the staff from being able to do that, and depending on how you setup the procedure security they can
be restricted from viewing caller information, or being able to add or edit a caller record.
Recently I had an email from a person who really liked the features in QUAD Help Desk Pro Edition but
wanted to use a Microsoft SQL Server database on the back end. I have already developed a Client
Server Edition of our popular IT Help Desk program - the AccessAble Help Desk © and have been
contemplating a Client Server Edition of one of our other generic customer support programs Proactive Customer Support, but I decided to add a level to the QUAD Help Desk © line of programs. I
also have been using Microsoft SQL Server 2005 Express Edition and decided that I would
recommend Microsoft SQL Server 2005 or Microsoft SQL Server 2005 Express Edition for the back
end database of QUAD Help Desk Client Server Edition 2006. In order to use QUAD Help Desk Client
Server you will need to already have one of these two back ends available to you. I am providing a
script to create the database tables but you will need to be able to 1) create the database and 2) run
the script to create the database structure using the provided script. All the program files can be
installed to the same folder on your client workstations (or a shared folder on your server) except for
one file - the quadcs.ini file should be in the windows directory on each PC and edited with your
connection settings for your server and database. QUAD Help Desk Client Server Edition will read the
contents from the quadcs.ini file and use these settings to connect to the database. It's really not that
hard to set up and you can try the program out using Microsoft's free MS SQL Server 2005 Express
edition to see if you like it. If you are a smaller company but growing fast, you will be able to easily
migrate to the other versions or editions of Microsoft SQL Server 2005 and use the same edition of
QUAD Help Desk Client Server Edition 2006. There are no per user charges for QUAD Help Desk
Client Server Edition 2006 so even if you start with just one person using the program - yourself - you
can add as many staff members as you like without purchasing an additional license for QUAD HD CS
2006.
I have decided to provide two separate programs which each use the same database structure. One
version is for those who may not care about the user and procedure security features. That version
does not require users logins and there is no separate browse screen for "calls assigned to me". This
may be the version you want to use if you are just starting out or testing the program - or if you are one
of those small organizations where you trust your staff members to not "mess with" another staff
members calls. I am sure there are more than few out there. The other version uses the same
database structure but uses additional files - not in the SQL SERVER database, but saved in the same
folder as the .exe file. These files contain the user logins and procedure security files.
© 2006 ... Dennis Baggott and Sons
Introduction
3
Look at the screen shots below to see the differences. The title bar of the first version shown below
has NL at the end. This is for No Login and is the version where all staff are "trusted". There is no
separate option for "calls assigned to me". All of the users of this version have unrestricted access to
all screens and reports.
Below is the version that includes the user and procedure security files. Notice first of all the login
screen. If a correct login and password combination is not entered, you will not be able to access any
part of the program. You will also notice an additional menu option between Reports and Utilities
named Security and a drop down button on the tool bar named Security. The Security options include
user and procedure setup - only available to users with the Administrator option for their login, as well
as a Login and Change Password options. When initially setting up users and procedure security it
may be useful to you to login as the user you just created, to test the security options you have set for
each new user.
Also notice on the screen below that there is a button for Calls Assigned to Me. You can setup user
and procedure security so that staff members can only access that browse screen, not the screen for
all calls. Many users of QUAD Help Desk Pro Edition are set up that way.
© 2006 ... Dennis Baggott and Sons
4
QUAD Help Desk Client Server Edition 2006
The screen below shows the main menu and tool bar buttons. The first button will display a screen
showing caller information. The All Calls screen shows all calls regardless of to whom they are
assigned. This may be restricted based on login. The Calls Assigned to Me button will show calls
assigned to the person currently logged in. The FAQs button is for those who wish to maintain a table
with frequently asked questions - and the answers to them. The last three buttons on the tool bar have
additional options which will drop down when you click on the button or the arrow.
© 2006 ... Dennis Baggott and Sons
Introduction
1.2
5
Installation
The first thing you need is to have is Microsoft SQL Server 2005 or the free Microsoft SQL Server 2005
Express Edition.
You can download the free express edition from Microsoft's web site, and you may also want to
download (so you can run the .sql script) the SQL Server Management Studio Express software. If
you aren't already using Microsoft SQL Server 2005, you may want to visit this link:
http://www.microsoft.com/sql/editions/express/default.mspx - at least that URL was valid at the time of
this writing.
In the screen shot below, I have SQL Server Studio Express open - here is where you connect to your
server, you will need to know your SA password.
© 2006 ... Dennis Baggott and Sons
6
QUAD Help Desk Client Server Edition 2006
If you already have one of these versions installed, the next step is to create a database, for my
examples I will call it QUADHDCS, you right click on the Databases branch of the tree and choose
New Database.
© 2006 ... Dennis Baggott and Sons
Introduction
7
above I have given the database a name and click OK. You may then have to press the F5 key to
refresh the database list.
and then load the .sql file provided in the quadcs.zip file and execute it with your newly created
database selected.
Notice I have the database I created
selected in the drop down list. One I have the .sql file loaded I click the ! execute button to run the
script. When you have the .sql file loaded you should see something like below.
© 2006 ... Dennis Baggott and Sons
8
QUAD Help Desk Client Server Edition 2006
After executing the script, you can expand the Tables section of the tree and should see something like
the below - you may have to refresh the screen.
This will create the tables need to run QUAD Help desk Client Server 2006. You may want to create a
user login with dbo rights for that database rather than use the SA account, but you will need to have
the following information available:
1) Your server name (or IP address) and instance name.
2) The name of the database you created and ran the .sql script on
3) User id and password
© 2006 ... Dennis Baggott and Sons
Introduction
9
You can now close the Studio Express window, and you should now have the information you need to
edit the quadcs.ini file and when this is correct you should be able to run the setup for QUAD Help
Desk Client Server Edition 2006 and launch the program from the created icon. NOTE: be sure your
.ini file is correct or you the program will not be able to connect to the database. Also, remember the
database tables are at this point empty. You will want to start by adding data for the lookup tables,
then add or import callers, and so on.
The .zip file includes an .ini file named quadcs.ini - this file will also be installed to the client
workstation's windows directory during installation. You will want to at least run the setup once, even if
you plan on having all client computers with a shortcut to the .exe in a shared folder on your server. All
the required files for running QUAD CS 2006 will go in the directory you specify - except for the .ini file
which needs to go in the workstation's windows directory. TIP: The windows directory is not always
c:\windows - you can check the setting by typing "set" and pressing enter at a dos prompt. You will
need to edit the quadcs.ini with the items above for your installation. The database connection uses
the quadcs.ini file when the program is launched to get the database connected - if the information in
the .ini file is not correct, you may get prompted with a sql logon screen.
Sample quadcs.ini is shown below:
[quadcs]
connect=yourserveripaddress\SQLEXPRESS,quadhdcs,sa,sapassword
The first part of the connect section is your SQL Server name or IP address followed by the Instance
name, this may default to SQLEXPRESS, then the database name (in my example I used quadhdcs)
then the user id and finally the password.
NOTE: When testing your modified quadcs.ini file on workstations a couple of important notes - 1) If
you are installing the Express edition of MS SQL Server 2005 you may need to verify that you have the
server set up for local AND remote and the TCP/IP is enabled. 2) If using Microsoft Windows 2000 Pro
Edition at the client, be sure you have the latest version of MDAC (Microsoft Data Access
Components) installed. I think this is version 2.8, at least at the time of this writing. You may also want
to insure the SQL Server driver is configured to dynamically determine the port. This can be done in
the control panel, Administrative Tools, ODBC Configuration by creating a new DSN, choosing the Sql
Server drive, then check the box to dynamically determine the port. Finally, I recommend Windows XP
Professional Edition for the client workstations - not the Windows XP Home Edition.
For those who will be using the user and security procedures version, certain data files (security files)
not in the SQL Database must be in the same folder as the .exe file. These files are name gsGRP.tps,
gsPRO.tps, gsSEC.tps and gsTRK.tps - if these files are not in the same folder as the .exe and .dll files
the program will notify you security files are missing. I have provided default logins of admin and
password of admin and staff with password of staff to get you started. NOTE: The password is CaSe
Sensitive - ADMIN is not the same as admin.
More information on user and procedure security is in this section of the help file.
NOTE: All of my programs are provided as fully functional 30 day trial versions - I really don't want you
to order one of my programs until you have tested it and found it meets your needs. So when you first
launch either version your will see first a window like the one below:
© 2006 ... Dennis Baggott and Sons
10
QUAD Help Desk Client Server Edition 2006
Click the first button that says OK. Later, if you decide to buy a license you can click the Buy Now!
button, or go to one of my web sites for ordering information. The middle button is for use if you decide
to buy a license. You will receive a very long registration code via email. The combination of your
Register To name and the Registration Key will remove the trial limitation - and you may use the same
key on all computers running the program at your location. All of my help desk and customer support
programs are sold as a site license - no per user charges. Anyway, after clicking OK you will see
another window, shown below:
This window has the same buttons as the first one but will remind you how many days you have left.
The 30 days is calculated from the day you first launch the program. Again, while testing the program,
just click the OK button again. You will then see the login screen below. Remember I have provided a
sample login of admin and password of admin. After using the program, and creating other users you
may want to change the password. This part of the help file explains user security, and this section is
on procedure security.
If you have any problems or questions installing or using the program, please don't hesitate to email
me at [email protected] - but please include a subject line, something more than "Help". It will be
helpful to me if you include QUAD Help Desk Client Server in the subject of your email.
1.3
Technical Support and Licensing
Technical support is free, just limited to email. Also, you do not have to have purchased your site
license to email me with any questions. In fact, if you have problems during installation or evaluation I
really prefer you email me before you buy a license. It may be the problem is something on "my end"
and I would certainly want to know about it. Often it is some small detail that can be figured out with a
little email exchange. Write to me at [email protected]
Pricing for all my customer support and help desk software is on a site license basis. I do not charge
any per user charges - your cost is the same whether you are the only person at your location using the
program or if you have a staff of dozens. Now if you want to use my software at more than one
location - say on a server on the east coast and another on the west coast you would need to purchase
two site licenses. However, I believe you will still find my prices to be very competitive -if not downright
© 2006 ... Dennis Baggott and Sons
Introduction
11
cheap compared to similar programs you may find elsewhere. In fact the thing I hear most often from
our "Chief Financial Officer, Budget Analyst, and Accountant" - (my wife) is that I am selling my
software too cheaply. Try my software for up to 30 days to see if it meets your needs. If you find the
program to be a value, please go ahead and buy a site license. If you agree with my wife that my
software is not priced highly enough, just email me - I am sure we can arrange to sell you a license at a
much higher price :-)
Check our web site for pricing - prices are subject to change, sometimes more, sometimes less. My
goal is always to sell software that you will find a value to your organization. How am I doing?
Dennis Baggott
(the Dad in Dennis Baggott and Sons)
http://www.dbandsons.com
[email protected]
2
QUAD Help Desk Client Server 2006
2.1
Getting Started
Entering data in QUAD Help Desk Client Server 2006 is pretty simple. Whatever database table you
want to edit you will first see data in rows and columns like a spreadsheet. These screens let you view
or "browse" the data already in a table. When you add (insert) or update (change) a record an Update
form will be displayed. NOTE: When you click a Delete button to delete a record from a table you may
see this same update form again to give you a chance to be sure you want to Delete the record.
Several screens for data entry use drop down list boxes to "lookup" data from another table. This
helps to make data entry quick for these commonly used values and help to insure data is entered the
same way each time. The lookup tables are a good place to start as you begin using the program, but
if you are in the middle of adding a record at some other point in time, and the value you wanted is not
in the drop down list, you can type a new value and an update form will be displayed to let you add the
new value.
Start by selecting the File option on the main menu and go down to lookup tables.
This menu option displays several menu choices: Call Types, Call Status, Call Priority, Organizations
and the Staff Member Table.
© 2006 ... Dennis Baggott and Sons
12
QUAD Help Desk Client Server Edition 2006
Depending on your needs, you may or may not use the Organizations table. It may be that you will be
using the program for internal support within your organization and so you may find it useful to use this
field for Departments. You may however, be recording calls from consumers - not part of any
organization, so you may not use the Organization table at all. Still, the operation of the organizations
lookup table browse/update form is the same as the other tables.
Now that you have an idea of how the program works, move on to looking at caller information. Then,
you will want to read about call information.
2.2
View Wizard
The Calls and Caller browse screens allow you to create custom "views" of your data. This is just the
order of columns, you can choose to hide certain columns, and using the Advanced button you can
rename a column heading. Unlike just clicking on column headers or dragging and dropping columns,
you can save your views and recall them whenever you want. There may be sometimes you want a
particular order and display on the browse screen with maybe only a few displayed columns, and other
times you may have a different way you want the data displayed. NOTE: When you use the Output
button to send the contents of a browse screen to a Microsoft Excel spreadsheet, the current View will
be used. The Reset View button restores the screen to my original design.
The screen below shows a modified view of the Calls screen. I have renamed the Organizations
column to Department and have renamed Caller Name to Employee. Keep reading to see screen
shots of the process of creating a custom view.
Start by clicking the Define Views button. If you not created and saved any views yet, the list will be
© 2006 ... Dennis Baggott and Sons
QUAD Help Desk Client Server 2006
13
empty and so you would click the New button and give the view a name.
The first step is to choose the fields you want to include - ore remove and use the up and down arrow
to rearrange column order.
Choose a column and click the Advanced button and you can rename the Column header. The next
button will let you choose the sort order.
© 2006 ... Dennis Baggott and Sons
14
QUAD Help Desk Client Server Edition 2006
In the example above, I chose to Define a Sort Order which includes two columns: Call Date and
Organization.
You can sort on up to 4 columns.
The final step let's you enter notes about your View.
© 2006 ... Dennis Baggott and Sons
QUAD Help Desk Client Server 2006
15
It is really pretty easy and I think many will find this capability useful. An additional help file is installed
on the program group for the View Wizard.
2.3
Query Wizard and Quick Filter
The Query Wizard is available at many places in this program: browse screens, reports, the spread
sheet wizard. However, the Quick Filter button is only available on the Calls browse screens. Unlike
the Query Wizard, the Quick Filter is for searching only on a single field for a specific value and queries
created with the Quick Filter button cannot be saved and recalled by name. However, there will still
many times when the Quick Filter is all you really need. For example, if you want to quickly filter the
screen to only show calls with a status equal to new, click Quick Filter button, choose Status as the
field to search and enter New as the value to search and click the OK button. The browse will be
filtered showing only calls with a status of New.
© 2006 ... Dennis Baggott and Sons
16
QUAD Help Desk Client Server Edition 2006
To remove a filter condition created with either the Quick Filter or the Query Wizard just click the Reset
button to show all records.
The Query Wizard is much more powerful than the Quick Filter button, but still very easy to use. You
can still create a query like the one above, but you can also create searches using the "contains"
operator to search for text within a field. You can use the Query Wizard to search a range of dates.
You can add query condition together using AND/OR and more. One very handy feature is the ability
to compare a field value with an expression. Say you want to create a query that you would use every
day that would only show you calls with the call date equal to that day. You might use this for a daily
report. If you just used the pop up calendar to choose the filter date, this would only be valid for one
day. The answer is to use the expression Today() and to check for Absolute Values (this is important
because the Call Date and Time are really a single field in the SQL database. Look at the screens
below to see how to create such a query.
When you first start using the program there won't be any Saved Queries in the list above. You would
click the New button to create a new query. Let's look at the Query using the Current Date.
© 2006 ... Dennis Baggott and Sons
QUAD Help Desk Client Server 2006
17
We start by choosing the Call Date as the field to search. Next you can choose one of many operators
appropriate for a date field. You could for example, search between two dates or use the Month
number to search for calls in a particular month. We will use the Equal to operator.
© 2006 ... Dennis Baggott and Sons
18
QUAD Help Desk Client Server Edition 2006
Ordinarily you would choose the first option, to search for a Constant Value. In the case of date
formatted fields you could then use the popup calendar to select the date for comparison. In other
cases you might want to search another field. For example if you wanted to filter the browse where the
Call was completed the same date it was received you might compare the Call Date field to the
Complete Date field. In this case we will use an expression - today(). You click the ... button to get to
the expression builder, shown below.
You can add a Note about a query, as I have done in this case.
© 2006 ... Dennis Baggott and Sons
QUAD Help Desk Client Server 2006
19
Finally you give the Query a name, or can change the name if an existing query.
If you are comfortable enough to not use the Query Wizard you can even click the Manual button to
enter a query by hand. My example would look like this:
© 2006 ... Dennis Baggott and Sons
20
QUAD Help Desk Client Server Edition 2006
I hope you will find the Query Wizard and Quick Filter options easy to use. An additional help file is
installed on the program group for the Query Wizard.
2.4
Spreadsheet Wizard
While in most cases the button on the browse screen to output the data to Excel will be adequate, I
have also provided under the Utility Menu options for creating reusable spreadsheet layouts. These
utilities allow you to choose the columns to be included, the order in which they should be displayed,
you can rename column headings. After saving the spreadsheet layout when you select it you will
have the option to use the Query Wizard to filter the results. You will then be able to Edit of View the
results immediately, or save the data in Excel, HTML, ASCII (csv) or dbase III (dbf) format. I hope this
will be useful to you. A separate help file on the Spreadsheet Wizard is installed on the program
group.
2.5
Report Wizard
The Report Wizard will allow you to create custom list style reports for ad hoc or repeated use and you
may use the Query Wizard to filter the reports. The first step is to click the New button. The Copy
button will let you make a copy of an existing report rather than starting from scratch. The Modify
button will let you change the highlighted report while the Rename button will let you change the name
of the report (note: the name of the report will be printed as the title on the report). The Delete button
will let you delete the highlighted report and Info displays information about the report.
© 2006 ... Dennis Baggott and Sons
QUAD Help Desk Client Server 2006
21
So, after clicking the New button we first give the report a name.
and then we choose the columns we want on the report. NOTE: You do not have to include a column
in the report if you want to use it for sorting or grouping.
© 2006 ... Dennis Baggott and Sons
22
QUAD Help Desk Client Server Edition 2006
You can click the advanced button and choose a different name or heading for the column, apply
special formatting or change the column width.
You can choose a default sort order, or use the sort designer.
© 2006 ... Dennis Baggott and Sons
QUAD Help Desk Client Server 2006
23
You may next choose group heading settings.
Notice in the screen shot from my completed report, the Customer name shows up on the report since
I grouped on that field, even thought I did not add it as a column.
© 2006 ... Dennis Baggott and Sons
24
QUAD Help Desk Client Server Edition 2006
Notice the button at the far right after the Step setting for zoom. This will allow you to save the report
as a PDF file.
I hope you will find the Report Wizard easy to use. An additional help file on the report wizard is
installed on the program group.
2.6
Browse Callers
This screen is used to view Caller Information in rows and columns like a spreadsheet.
© 2006 ... Dennis Baggott and Sons
QUAD Help Desk Client Server 2006
25
You can use click on any column header to sort on that column, or you can right click on a column
header for a menu that will let you Hide or Show columns and sort in Ascending or Descending order.
You can also left click within a column and drag the column to move it left of right. A better way of
customizing the Browse View is to use the Define Views button to create a reusable View of your data,
or select a view you created previously. You may also use that button to Copy or Delete views you
have created. This will let you choose which columns you want displayed, and in what order, and you
may also rename column headers. Then, you may use the Reset View to remove your custom view
and restore the default view.
The Insert button will call up the screen to add a new record, the Change button will let you edit the
currently selected (highlighted) record and the Delete button will let you remove the selected record
from the database. A button is also provided to let you Print a quick report of the selected record.
Updating Callers
2.7
Update Callers
This screen is used to Add or Change Caller information.
2.8
Browse Calls
The screen below shows All Calls.
© 2006 ... Dennis Baggott and Sons
26
QUAD Help Desk Client Server Edition 2006
You can use click on any column header to sort on that column, or you can right click on a column
header for a menu that will let you Hide or Show columns and sort in Ascending or Descending order.
You can also left click within a column and drag the column to move it left of right. A better way of
customizing the Browse View is to use the Define Views button to create a reusable View of your data,
or select a view you created previously. You may also use that button to Copy or Delete views you
have created. This will let you choose which columns you want displayed, and in what order, and you
may also rename column headers. Then, you may use the Reset View to remove your custom view
and restore the default view.
The Insert button will call up the screen to add a new record, the Change button will let you edit the
currently selected (highlighted) record and the Delete button will let you remove the selected record
from the database. A button is also provided to let you Print a quick report of the selected record.
Updating Call Information
© 2006 ... Dennis Baggott and Sons
QUAD Help Desk Client Server 2006
2.9
27
Browse Calls Assigned to Me
You can use click on any column header to sort on that column, or you can right click on a column
header for a menu that will let you Hide or Show columns and sort in Ascending or Descending order.
You can also left click within a column and drag the column to move it left of right. A better way of
customizing the Browse View is to use the Define Views button to create a reusable View of your data,
or select a view you created previously. You may also use that button to Copy or Delete views you
have created. This will let you choose which columns you want displayed, and in what order, and you
may also rename column headers. Then, you may use the Reset View to remove your custom view
and restore the default view.
The Insert button will call up the screen to add a new record, the Change button will let you edit the
currently selected (highlighted) record and the Delete button will let you remove the selected record
from the database. A button is also provided to let you Print a quick report of the selected record.
Updating Calls Assigned to You
2.10
Update Calls
If you are using the version of QUAD Help Desk 2006 without user and procedure security you (and
your staff) will be using only the screen like below. Let's go through this screen field by field. When
you click the Insert button to add a new record, the current date will be used to fill in the Call Date field
and the Current Time will be used to fill in the Call Time. Now, if using the version with user and
procedure security the Taken By and Assigned To fields would default with the login name used at
program start. However, in this case you need to select these field values from the drop down list for
each. NOTE: These fields are not required and if you are in the minority and will be the only person
using the program you could skip them. The Caller Name is required, and can be selected from the
drop down list box. When you select a Caller from the list, their phone number, organization, and email
© 2006 ... Dennis Baggott and Sons
28
QUAD Help Desk Client Server Edition 2006
(if any) will be looked up and filled in from the Callers table. What? This is a new caller and you
haven't set the caller record up, yet? No problem, when you type in a caller name that is not found in
the list, the update caller will be displayed so you add the caller details "on the fly".
In addition to the Caller Name, the only other required field on this screen is the Caller Details.
However, you may find it helpful to also record the Call Type, which can be selected from the drop
down list. The Priority will default to Normal, however, you can change this if needed selecting a value
from the drop down list. Now if you don't have an immediate answer to this call you may want to enter
something to that effect in the Solution field, then skip down to the Status field and change it from New
to "Active" or "In Process" or "Assigned" or whatever you like. However, if you are able to complete the
call as you enter it, click the Complete! button. This will automatically fill in the Complete Date with the
Current Date and the Complete Time with the current time and will change the Status to Complete. If
using the version with User and Procedure Security, this will be filled in, too, based on your current
login name. Another tab on this screen will let you add any additional notes you may want to record
about this call. Finally, notice there is a Print button. This will create something like a screen shot but
with the advantage of opening in the Report Previewer so you can either send it to the printer or create
a PDF file of the call record. Click OK to save the record and you will be returned to the browse screen
you started from when you clicked Insert.
The Tab below is provided to let you record any notes you want to about this call.
© 2006 ... Dennis Baggott and Sons
QUAD Help Desk Client Server 2006
2.11
29
Update Calls Assigned To Me
This screen is used to update calls when you are using the version of QUAD Help Desk Client Server
Edition 2006 with user and procedure security. Notice the differences between this screen and the
Update All Calls screen. The Taken By and Assigned To fields are not drop down lists - you can't edit
them. This is for those Staff members who might want to assign a call they didn't want to someone
else.
When you click the Insert button to add a new record, the current date will be used to fill in the Call
Date field and the Current Time will be used to fill in the Call Time. The Taken By and Assigned To
fields would default with the login name used at program start. The Caller Name is required, and can
be selected from the drop down list box. When you select a Caller from the list, their phone number,
organization, and email (if any) will be looked up and filled in from the Callers table. What? This is a
new caller and you haven't set the caller record up, yet? No problem, when you type in a caller name
that is not found in the list, the update caller will be displayed so you add the caller details "on the fly".
In addition to the Caller Name, the only other required field on this screen is the Caller Details.
However, you may find it helpful to also record the Call Type, which can be selected from the drop
down list. The Priority will default to Normal, however, you can change this if needed selecting a value
from the drop down list. Now if you don't have an immediate answer to this call you may want to enter
something to that effect in the Solution field, then skip down to the Status field and change it from New
to "Active" or "In Process" or "Assigned" or whatever you like. However, if you are able to complete the
call as you enter it, click the Complete! button. This will automatically fill in the Complete Date with the
Current Date and the Complete Time with the current time and will change the Status to Complete.
The Completed By field will be filled in with your current login name. Another tab on this screen will let
you add any additional notes you may want to record about this call. Finally, notice there is a Print
button. This will create something like a screen shot but with the advantage of opening in the Report
Previewer so you can either send it to the printer or create a PDF file of the call record. Click OK to
save the record and you will be returned to the browse screen you started from when you clicked
Insert.
© 2006 ... Dennis Baggott and Sons
30
QUAD Help Desk Client Server Edition 2006
The Tab below is provided to let you record any notes you want to about this call.
© 2006 ... Dennis Baggott and Sons
QUAD Help Desk Client Server 2006
2.12
31
Reports
There are really a few ways to get information out of the database. If you use Microsoft Excel, you can
quickly export all information in a browse screen by clicking the Output All to Excel button. Under the
Utilities menu, I have provided options to let you create reusable Excel Spreadsheet formats for Calls,
Callers and FAQs. Once created you can recall these saved spreadsheet formats at any time and
apply a filter with the query wizard if you like, then open with Microsoft Excel or save in other formats.
The browse screens for Calls and Callers also have a Print button to let you create a Quick and Dirty
one page report of the selected record. The update screens have a Print button as well, but this works
sort of like a Print Screen. You will have to see which works best for you.
Finally, while I have provided a few sample list style reports you can also use the Custom Report
Wizard to create and save your own reports. You can choose your own column headings and more easily. An additional help file is installed on the program group about the Report Wizard.
2.13
Browse FAQs
This screen is used to view frequently asked questions. A Query button will call up the Query Wizard
to let you search and filter the table. A print button will let you print a Report of the currently selected
(highlighted) record in the browse screen. Insert button will add a new record, Change to edit the
selected record, and delete to delete the selected record.
© 2006 ... Dennis Baggott and Sons
32
2.14
QUAD Help Desk Client Server Edition 2006
Update FAQs
This screen is used to Add and Update Frequently Asked Questions. The ID will be automatically
generated each time a record is added. The Topic field is optional, but both the Question and Answer
are required, so will be highlighted in Red as you Tab in to each field.
2.15
Browse Staff Members
This screen shows the staff members you have set up in the database. It is very important since the
value in the Person name field is used to populate the drop down boxes for taken by, assigned to and
completed by. If using the version with User and Procedure Security, the Person Name field must be
the same as the User Name (Display Name) field in the User Security setup. However, if you are not
using the version with user logins, the Person Name is still used to provide the values for the Taken
By, Assigned To and Completed By drop downs.
© 2006 ... Dennis Baggott and Sons
QUAD Help Desk Client Server 2006
2.16
33
Update Staff Members
This screen is used to update staff member information. The only required field is the Person Name
and this is used to populate drop down list boxes for the Taken By, Assigned To, and Completed By
fields. The other fields are optional. I am still debating providing a web interface for this program.
This may be free to registered (licensed) users, or may be made available as a separate purchase. If
you are interested in a web interface (would use Microsoft IIS as the web server and consist of .asp
and .html pages) please email me at [email protected] - I really do appreciate input from both
customers and potential customers.
While you may use whatever you like for the password, I recommend making the Person Name and
Web Login Name the same thing. While the person name will be used as a look up value for the
Taken By, Assigned To and Completed By fields in the windows application, and the person name will
be matched to the display name in user and procedure security, the web interface will use the web
© 2006 ... Dennis Baggott and Sons
34
QUAD Help Desk Client Server Edition 2006
login field to match the currently logged in staff member to the Assigned To field to limit displayed
records in the Calls Assigned to Me web page. Just something to think about if you may be interested
in the web interface.
2.17
Importing Callers
The process of importing data is really pretty simple. When you first choose the import option, you will
see a browse screen with any records you have already added displayed.
Click the Import button and choose the type of data you will be importing, such as an Excel file,
Access, another SQL Server database or ODBC data source.
© 2006 ... Dennis Baggott and Sons
QUAD Help Desk Client Server 2006
35
In this example, I will use the Northwind database from Microsoft's Office. I then expand the tree and
choose the table I want to import from, in this case customers.
© 2006 ... Dennis Baggott and Sons
36
QUAD Help Desk Client Server Edition 2006
I can click the arrow with the table selected to add all fields, or select individual fields and click the
arrow. I will select all fields.
On the next screen you match the fields in your source with the corresponding field in the target table.
Clicking the arrow button with the + on it will try to match fields automatically, but this seldom matches
all field at first. You may then drag and drop or use the arrow button to match remaining fields.
© 2006 ... Dennis Baggott and Sons
QUAD Help Desk Client Server 2006
37
The next two screens would let you filter and sort the data to be imported, but I will skip that since it is
usually not needed.
The screen shot below shows the data that will be imported. In the case of Caller data, however, you
might want to sort on the caller name field.
© 2006 ... Dennis Baggott and Sons
38
QUAD Help Desk Client Server Edition 2006
When you finish your imported callers will be displayed in a browse screen, but this does not include
update buttons. You will want to close that window and open the Browse Callers screen where you
can edit caller information using the update callers form.
2.18
Importing Calls
Like Importing Callers, Importing Calls is a matter of selecting a data source and matching columns
from the source to the target fields. When you first choose the Import option you will see a browse
screen with any calls you may have already added.
Click the Import button to begin the process. I first have to choose the type of data source, such as an
Excel file, Access .mdb and so on.
© 2006 ... Dennis Baggott and Sons
QUAD Help Desk Client Server 2006
39
For this example I will use a small Microsoft Excel file. I click the ... button to browse to my .xls file and
my sheets will be loaded on the left. I can expand the tree and choose fields one by one then click the
arrow, or just select the sheet itself and move all fields to the right side.
© 2006 ... Dennis Baggott and Sons
40
QUAD Help Desk Client Server Edition 2006
When I click the Next button, I then match my fields from the spreadsheet to my calls table.
You can drag and drop fields one by one, click the arrow with the + sign to let the program try and
match fields, and then manually match any other fields.
© 2006 ... Dennis Baggott and Sons
QUAD Help Desk Client Server 2006
41
In this case, I have separate date and time fields. In your case your import file may not have a time
field, or it may be combined in a field with date. If that were the case you might assign your date field
to both the corresponding date and time fields.
I have skipped the screens to let you filter the imported data and choose a sort order. The data I am
about to import is shown below.
When I click the next button my data will be imported and the import browse screen will be displayed.
© 2006 ... Dennis Baggott and Sons
42
QUAD Help Desk Client Server Edition 2006
There are no update buttons on this screen, so now I close this screen and use one of the browse calls
screen to view and edit the imported data as if I had entered it myself, rather than import it.
2.19
User Security
The User Security Browse screen is shown below. The first column is the User ID field. This can be a
number or combination of letters and numbers. I suggest keeping this simple to start with, but it is up
to you. the User Name is also known as a Display Name. When the User ID is typed in during login, if
the user exists the Display Name will be shown. The next column indicates if the user is setup as an
Administrator (the A) and only administrators can access this screen. The V is for View Only. Even if
a user is setup with an access level higher than required for the procedure they want to access, if the
View only is set they won't be able to Add, Change or importantly - Deleted records. Finally the Access
Level is a numeric value. Once you or staff member have logged in, the User Access Level will be
compared with the Procedure Access Level. If the procedure requires a higher level than the currently
logged in user, a message will be displayed and access to that procedure will not be allowed. Be sure
to read the section on procedure security.
© 2006 ... Dennis Baggott and Sons
QUAD Help Desk Client Server 2006
43
I have supplied an initial set of security files (they all start with gs and end with .tps) and the program
will look for these files in the same folder as the .exe file. Now this is important. Suppose you will be
using the program with yourself (the administrator) and others as the staff members. You have chosen
to install the program locally at each workstation, modified the quadcs.ini file in the windows directory
so that each of you are connecting to the same SQL database. You then go to your computer and
setup the accounts you want your staff to use when logging. You would need to copy the security files
from your c:\install directory to each of your staff members computers overwriting the sample security
files installed. If not, when they start the program they would be using my original security files, not
your customized ones. On the other hand you may have installed the program to a shared folder on
your server and this created the shortcut at your computer with the .exe and security files to set based
on the START IN property created by the installation. Maybe you installed to P:\QUADCS. You have
edited the quadcs.in file on your computer and emailed a copy to your staff on the LAN with
instructions to save the file to their windows directory. As long as they create a shortcut to the .exe on
your server in P:\QUADCS they will all be using the security files that you have modified. (Read the
above a couple of times, it is really not that hard to do, but email me if you have questions [email protected] )
The screen below is used to add or edit the user accounts.
© 2006 ... Dennis Baggott and Sons
44
2.20
QUAD Help Desk Client Server Edition 2006
Procedure Security
The screen below shows a browse screen of procedure security settings. A procedure may be a
browse or an update screen, a report or a process, like importing. If the logged in user has a security
setting lower than the Access Level need to access a procedure they will get a window telling them so
and will not be able to access that procedure or function. The Procedure name is followed by a
description and then the Access levels. Let's first consider a report. You may want to restrict staff
from viewing a report. If that is the case, set the Access level higher than the users level and they
won't be able to view the report. What about Add, Edit and Delete? These are for the Update
procedures. Say for example you setup you staff with a level of 2 at the user level. You want them to
be able to view calls assigned to them, and you want them to be able add and change calls, but you
don't want them to be able to Delete a call. Maybe they think if they delete a call assigned to them they
won't have to do the work.. All you need to do is for the Update procedure make the Delete Access
level higher than their user access level, say 3 as below. The Delete function will then not be available
to them. You, however, may have a much higher level, higher than any of the Procedure security
levels. That's fine - you will never be denied access to any part of the program. NOTE: It is not
enough to be setup as an Administrator. The administrator option just means you can access the user
and procedure functions - if your access level is lower than a procedure requires you will have access
denied. But since you are an Administrator you can decrease the procedure access level - or increase
your user security access level. Also note that if you set up a user as View only, it doesn't matter if
they have a higher access level for a procedure or not - they won't be able to do anything but view
records.
© 2006 ... Dennis Baggott and Sons
QUAD Help Desk Client Server 2006
45
Notice on the screen below you can change a description of a procedure and you can increase or
decrease the Access Levels for a procedure.
2.21
Staff Chat
This simple tool is to allow staff who have the program installed and have the Staff Chat window open
to type messages to each other. When more than one person is running this program on the LAN and
have the Staff Chat window open a list of available "chatters" will be shown. Each can type in a brief
message and send this text to the other chatters. I have included this facility in some of my other
programs but really haven't heard back to know if people are using this feature - or not. If your
organization finds it useful I would be glad to hear from you so I can decide whether to include it in
© 2006 ... Dennis Baggott and Sons
46
QUAD Help Desk Client Server Edition 2006
future versions - or not.
3
Lookup Tables
There are several places in the program where I provide a drop down list. This is easier than typing a
value over and over, and also insures the data is entered the same way. There are a lot of advantages
to using lookup tables. Lookup tables include:
call types
call status
call priority
organizations
Staff Members are similar but a more than a single value. Also, the Caller Information table is used
when adding or editing calls but it is really one of the main tables since there are so many fields, and
choose a Caller Name from the drop down list fills in several values when adding or editing a call
record.
3.1
Browse Call Types
This screen shows call types you have setup. This is an optional field for adding calls and will depend
on your individual needs. It may be that all calls are simply phone calls, however, it may helpful for
reporting purposes if you use this field for describing the type of call.
3.2
Update Call Types
This screen is used to add or update call types.
© 2006 ... Dennis Baggott and Sons
Lookup Tables
3.3
47
Browse Call Status
This screen shows the Call Statuses you have set up. At a minimum you should set up at least New
and Complete. These values are hard coded - New when a call is added, and Complete when you
click the Complete button. However, these values should be present in the lookup table or they will not
be available from the drop down list when editing a Calls record.
3.4
Update Call Status
This screen is used to Add or Update Call Statuses.
3.5
Browse Priority Table
This screen shows the Call Priorities you have set up. At a minimum you should have a priority of
Normal since this value is used by default when adding new Call Records.
© 2006 ... Dennis Baggott and Sons
48
3.6
QUAD Help Desk Client Server Edition 2006
Update Priority Table
This screen is used to Add or Update the Call Priority table.
3.7
Browse Organizations
This screen shows the organizations you have set up. The Organization field is optional and some may
not use this field. Others may use it for the caller's Company name, while others may be using the
program for supporting internal users and so might use the field for department names.
© 2006 ... Dennis Baggott and Sons
Lookup Tables
3.8
Update Organizations
This screen is used to Add or Update organizations.
© 2006 ... Dennis Baggott and Sons
49