1
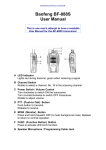
ATTENDANCE TAKER DESIGN PROJECT
______________________Requirements Specification__________________________
Background:
The University of Illinois approached Design Group 16 to help the classroom
attendance problem that many college professors face. Design Group 16 is a group
consisting two electrical engineers and one computer engineer. The problem that was
faced was that even though the professors could mandate attendance, there wasn’t any
efficient way to do so. The solution that was achieved will save the University of Illinois
time and money. Design Group 16 figured out a way to quickly and efficiently take
attendance. The end result was an electronic attendance machine for use with the I-Card
system. The Attendance Taker receives the I-Card data electronically and allows the
administrator access to easily insert the information into a database.
When it comes to the purchasing decisions, Design Group 16 would like the
customers to believe they have the following option:
1. Take attendance by having a sign up sheet and passing it around the classroom.
2. Take roll call by yelling out names of the students.
3. Spend less than $100 on the Attendance Taker, which is a long-lasting, time
saving device that takes attendance electronically.
This document is the requirements specification for an electronic device that helps save
time by taking attendance electronically. Attendance Taker can be used by anyone who
knows how to slide a card through a card reader.
The Deliverables:
There are seven deliverables as listed below:
1. One working prototypes of the electronics, including the packaging, and the
software for the transfer of data into the database.
2. The following manufacturing related artwork and documentation:
(a) wiring artwork
(b) silkscreen artwork
(c) parts list, assembly drawing, and assembly instruction
(d) bill of materials
(e) a report detailing a manufacturing test plan and the related analysis
(f) A preliminary manufacturing tests specification. This includes the details
of required tests of the card reader and the contents of the memory after a
scan. It also includes the test for the program that collects the data and
inputs it to a database.
3. User’s manual
4. System specifications with design concepts, block diagrams, functional
descriptions of the blocks, a system description, and analysis during the system
design.
Attendance Taker Design Project
5. Schematic diagram and circuit description
6. Flowchart of the programs implemented
7. The program to interface the data in the removable media with a database
Special Restrictions:
1. The printed circuit boards and electronic components should be compatible with
an inexpensive microcontroller and a floppy disk drive for the transfer media.
2. The user interface cannot be changed.
Principle of Operation:
The attendance taker will be place outside the classroom
near the entrance. The students will slide a card through the card reader. The attendance
taker will scan the card, collect the number and place it in the memory. The attendance
taker will display a message indicating that the scan was successful.
When the
administrator places a floppy disk into the floppy drive and slides the administrative card,
the collected data will be downloaded into the blank media. The administrator then
transfer the data into a database using the software included in the package.
User Interface:
The user interface consists of an LCD screen, a card reader, an
on/off switch, and a floppy disk drive. The interfaces are to be arranged as shown in the
figures.
Input:
Hardware – The input for the hardware is the numbers contained in the bar code on the
card. The user slides the card and the card reader scans the bar code and enters it to the
memory.
Software – The input for the software is the data contained in the floppy drive. The
program extracts the data and places it into a data base containing the roster for the class.
Output:
Hardware – The output for the hardware is a confirmation or error message in the LCD
screen after the user slides the card. If the administrator slides his card, the screen
displays a message that the data is being downloaded while the attendance taker
downloads the data into the floppy drive.
Software – The output for the software is a mark next to the name corresponding to the
number scanned from the card of the student.
The User’s Manual: The Attendance Taker is an electronic device data collection
terminal. Designed to be used in any data collection environment, the Attendance Taker
offers a large user memory for attendance validation. In addition to the hardware, a
-2-
Attendance Taker Design Project
program is implemented to transfer data from a floppy disk into a database with ease.
This versatile, ergonomically designed terminal will simplify and reduce the time needed
in the time consuming attendance taking. In order to operate the terminal, follow the
instructions below:
¾ Turn on the Attendance Taker by switching the on/off switch to on.
Users
• Slide the Card through the card reader.
• Wait for the message indicating a successful scan.
• If an error message is shown, slide the card again and wait for the message.
• If the scan was successful, proceed into the classroom.
Administrator
• Insert a blank floppy disk into the floppy disk drive.
• Slide the administrator card through the card reader
• If the message shows a “downloading” message, wait until the data is downloaded
into the disk.
• If the message shows an error message, repeat the above steps.
• If the download is successful, remove the floppy drive.
To place the data into the database
• First install the program by inserting the software disk in the cd rom drive and
click install
• Once the program is installed
♦ Insert the disk containing the data from the attendance taker
♦ Run the program
♦ Click the button indicating “insert into database”
Acceptance Tests:
1.
2.
3.
The performance testing will be done at three levels:
Design Group 16 will test the microcontroller and the assembly program used in
the microcontroller.
Design Group 16 will test the Attendance Taker terminal with their card and
checking if the Attendance Taker scans the correct data and insert it into the
memory.
After the actual hardware testing is completed, Design Group 16 will test the
program that inserts the scanned data into the database
The product cost test will be based on parts costs as explained in the section on
product cost.
Acceptance Tests for the Microcontroller:
1. Read the flowchart included.
2. Identify what the program is supposed to accomplish.
3. Use a program like THRSIM11 to test the program that will interface the
microcontroller with the LCD display and the floppy drive.
-3-
Attendance Taker Design Project
4.
5.
6.
The program must contain error checking and comments
Test possible problems that can occur.
Test if the data scanned is inserted into the correct location in memory.
Acceptance Tests for the Attendance Taker Terminal:
1. Obtain several cards containing bar code to be scanned through the card reader.
2. Each card will be scanned through the card reader.
3. Scan the card and check the LCD display to see any response.
4. The percentage of success against trials must be at least 97 %.
5. The speed of the scan and response through the LCD must be less that one
second.
6. If the scan was successful, check the memory if it contains the correct data in the
correct location.
7. The percentage of correct data must be no less than 99%.
Acceptance Tests for the Attendance Taker Program:
1. Obtain a blank floppy disk and manually insert data in a text file.
2. The disk will be inserted into a computer and the program will be tested.
3. Click the “insert into database” icon and see if the database accurately contains
the correct data.
4. The database must contain the correct data in the correct location.
5. The percentage of correct data must be 97% in order for it to pass.
If the program downloaded into the microcontroller was able to correctly interface
with the LCD display and the floppy drive, and the scanned data is correctly saved into
the correct location in memory, the Attendance Taker is deemed acceptable. Otherwise,
at the discretion of Design Group 16 and their Advisor, the Attendance Taker can be
deemed unacceptable.
Product Cost: The end product cost is approximately proportional to the cost of the
parts. In order to accomplish the inexpensive manufactured per unit cost, the cost of the
parts used in the Attendance Taker must be less than $100. The parts include the
microcontroller, the case, the floppy drive, the electronic components, the LCD, the
switch, the floppy disk containing the execute program, any connectors and any printed
circuit boards.
-4-