1
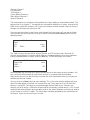
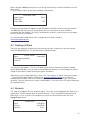
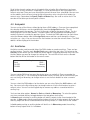
Tiger DMX 60
User Manual Version 1.1
CHAUVET
3000 North 29th Ct.
Hollywood, FL 33020 USA
Tel: 954-929-1115 Fax: 954-929-5560
www.CHAUVETlighting.com
Warranty Information
We take great pride in the quality, value and performance of our products and believe that it should offer you trouble free
operation throughout its lifetime providing you take care to follow the simple instructions in this manual.
LIMITED WARRANTY USA
a)
CHAUVET provides, from the date of purchase, to the original purchaser, a 24-month limited warranty on all DMX
products, a 12-month limited warranty on special effect fixtures and controllers and a 3-month limited warranty on items
with an “NV” prefix. This limited warranty covers manufacturing defects in material and workmanship only. At the time of
service, the owner will need to be able to provide evidence of date and place of purchase and serial number.
b)
CHAUVET does not cover damage or failure caused by abuse, misuse, faulty installation, improper maintenance, or any
repairs not carried out by CHAUVET.
c)
Items which are not covered by warranty are those considered as parts which are prone to failure due to general wear and
tear. For example – lamps, fuses, brushes and belts. Laser diodes carry a (90day) warranty. For foggers, see user
manual.
d)
There will be no obligations or liability on the part of CHAUVET for consequential damages arising from the use of the
product or any indirect damages with respect to loss of property, revenue, or costs for removal, installation, or reinstallation.
e)
For warranty service the product must be reported to CHAUVET to receive a unique RA# (returns authorization number)
and at that time you will be advised of where to send the faulty product.
f)
All shipping charges for returns should be pre-paid. If the requested repairs or service are within the terms of this warranty
then the item will be returned to you on completion without any charge. The unit must be in its original packaging with any
original accessories. CHAUVET will not be responsible or accept any liabilities for any loss or damage to additional items
which are sent with returned product.
g)
If this product is not covered under the terms of this warranty, CHAUVET will advise you of the costs to carry out any
repairs necessary and the unit will be shipped to you on receipt of payment for the work including the return freight
charges.
h)
Please allow 2 to 4 weeks for return of your product. Under normal circumstances we try to ensure we carry out warranty
repairs within 5 working days. We cannot be held responsible for delays in shipping.
Title
First Name
Initials
Last Name
Address
Apt.
City
State
Country
Zip Code
e-mail
Date of
Purchase
Or Postal Code
Date of Birth
Telephone # (include area code)
Purchase Price
(before tax)
Dealer
To return via fax:
Or Province
954-929-5560
Model
Serial #
City
Country
To return via mail:
CHAUVET U.S.A.
Warranty Registration
3000 North 29th Ct.
Hollywood, FL 33020 U.S.A.
2
1 Index
1
2
3
4
5
6
7
8
9
Index ......................................................................................................................................3
Introduction ............................................................................................................................5
2.1
Operational Overview .....................................................................................................5
2.2
Terminology....................................................................................................................6
2.3
Front Panel Controls and Displays .................................................................................6
2.3.1
LCD Display and Soft Buttons.................................................................................6
2.3.2
Faders and Flash Buttons .......................................................................................7
2.3.3
Joystick....................................................................................................................7
2.3.4
Auxiliary Buttons......................................................................................................7
Quick Start .............................................................................................................................8
3.1
Set-up .............................................................................................................................8
3.2
Program a Memory.......................................................................................................10
3.3
Programming a Sequence............................................................................................12
Setting up the Console ........................................................................................................14
4.1
Assigning and Patching a Fixture. ................................................................................14
4.2
Editing/Creating a Fixture .............................................................................................16
4.3
Loading a Fixture..........................................................................................................18
4.4
Generics .......................................................................................................................18
4.5
Autopatch .....................................................................................................................19
4.6
Auxiliaries .....................................................................................................................19
Programming .......................................................................................................................20
5.1
Programming a Memory ...............................................................................................20
5.2
Replaying a Memory.....................................................................................................22
5.3
Effects...........................................................................................................................23
5.3.1
Movement effects ..................................................................................................23
5.3.2
Fans ......................................................................................................................24
5.4
Programming a Sequence............................................................................................24
Playback ..............................................................................................................................28
6.1
Memories......................................................................................................................28
6.2
Live! ..............................................................................................................................28
6.3
Sequences....................................................................................................................29
6.3.1
Manual Sequence .................................................................................................29
6.3.2
Auto Sequences ....................................................................................................29
6.3.3
Beat Sequences ....................................................................................................29
6.3.4
Sound to Light Sequences ....................................................................................29
6.4
Page Chases and Page Ripples...................................................................................29
6.5
View and Preview .........................................................................................................30
6.6
Blackout........................................................................................................................31
Memory Module ...................................................................................................................32
7.1
Saving a show. .............................................................................................................32
Super User Functions ..........................................................................................................33
8.1
Clear all Memories and Sequences..............................................................................33
8.2
Start Up Mode ..............................................................................................................33
8.3
Lock Mode ....................................................................................................................34
8.4
Reset ............................................................................................................................34
8.5
Pan and Tilt Default Settings ........................................................................................35
8.6
Other LTP Default Settings...........................................................................................35
8.7
LCD Settings ................................................................................................................35
8.8
Test Function................................................................................................................35
8.9
Version Information ......................................................................................................35
Connections.........................................................................................................................36
3
9.1
Power Connection ........................................................................................................36
9.2
Remote Go/Step Input..................................................................................................36
9.3
DMX Out Connection....................................................................................................37
9.4
Audio Input ...................................................................................................................37
9.5
Memory Module............................................................................................................37
10
PC Software .....................................................................................................................38
11
Menu Navigation Flow Chart............................................................................................39
4
2 Introduction
2.1 Operational Overview
The Tiger is a lighting controller that allows for the control of intelligent and generic lighting in a
seamless manner. It can be used in a variety of applications from clubs to theatre to television.
The Tiger can control up to 18 intelligent fixtures using a maximum of 18HTP and 99LTP
channels. It can also control an additional 18 HTP generic channels. There are 4 auxiliary
buttons which can be used to trigger DMX devices like smoke machines, strobes etc.
Up to 108 memories can be programmed and saved. The memories are accessed via 9
submaster faders on 12 pages. The programmed memories can also be used to program 12
separate sequences each of which can contain a maximum of 250 steps. The sequences can
be played back either manually as a playback stack, or automatically as a chase.
Crossfade times, sequence drive, sequence speed and sequence direction are not recorded,
but are adjusted live by the user in Run Mode. Sequence direction can be forwards, backwards,
bounce or random.
5
There are two ways to approach the manual. If you are impatient to get started simply go to
section 3 Quick Start and leap in. If you want a more detailed explanation then you will need to
work your way through each section of the manual.
2.2 Terminology
MemorySequenceParameterIBCF-
Tells one or more fixtures to change settings for intensity, beam,
color and position. Other names are scene, cue or look.
Memories grouped together to run one after another. These can be
triggered manually, automatically or to music.
An attribute of a fixture. A parcan has one attribute, intensity. A
moving light has several, usually pan and tilt, color, beam and intensity.
Refers to intensity, beam, colour and focus (position).
Intensity how bright the fixture is, not all fixtures have a dowser/dimmer.
Beam refers to things like gobo wheels, prisms, shutter speeds etc.
Color refers to color wheels, CYM mixing etc.
Focus refers to the position of the picture, the pan and tilt attributes.
Symbol and Text Conventions used in the manual.
This Text for buttons to push on the console
This Text for buttons or text appearing on the LCD display.
2.3 Front Panel Controls and Displays
2.3.1 LCD Display and Soft Buttons
The main user interface is via a menu driven 4 line, 20 characters per line, backlit LCD display
with 6 Soft Buttons (arranged 3 each side). The top line of the display will typically show the
current menu page title. The lines below will indicate the current function of the 6 soft buttons.
One soft button will typically be ‘Back’ to return to the menu above. If more than 5 other options
are applicable, one soft button will be ‘More..’ to go to more options.
The various functions of the desk like patching, recording and playback will all be done using
softkeys and commands on the LCD screen.
6
2.3.2 Faders and Flash Buttons
The faders and flash buttons are used to perform different functions depending on the mode the
console is in. In playback mode the first 9 faders on each page are used to trigger memories
while the flash buttons bump the memories to full. The three faders on the extreme right are
used to control the memory stack.
In programming mode the faders and buttons are used to select fixtures and then set the
parameters to the required value. The faders functions will change depending on the type of
fixture selected. The three faders on the extreme right will always be assigned to pan, tilt and
intensity.
2.3.3 Joystick
The joystick is used to control the pan and tilt position of the selected fixture/s. The more
extreme the movement of the joystick the faster the fixture will move.
2.3.4 Auxiliary Buttons
These four buttons can be assigned to trigger DMX devices. It makes the use of strobes, smoke
machines etc simple while ensuring they are co-ordinated with the lighting. It is possible to use
an Auxiliary button as a master black out button. You would set the button to solo mode. By
pressing it all lights with a dimmer or dowser will fade to zero.
7
3
Quick Start
This section will assume that you are turning the console on for the first time and you have not
assigned or patched any fixtures.
3.1 Set-up
When you turn the console on you will see the following screen on the LCD:
Page01 Step---
Run 1
PageChase
Live!
More..
Page+
Page-
PageChase will only be visible of there
are memories recorded on the page.
The first thing that we need to do is to assign the fixtures that we have and then patch these and
any dimmers. To do this you need to press the More.. key twice.
This will take you to the following menu screen:
Page01 Step--View/Pvw
Assign/Patch
Load/Save
Run 3
Blackout
More..
Select the Assign/Patch soft-key. You will see the following menu screen:
Assign/Patch
Back
Fixtures
Generics
FixtProfiles
AutoPatch
Aux’s
The first thing we will do is assign and patch a fixture. Select the Fixtures softkey. You will now
see the following screen:
Fixture 01
←
+
-
Unassigned
DMX: ---
Edit
Select the Edit Key. The screen now shows:
Assign Fixture 03
←
<
DMX: ---
Unassigned
>
OK
8
The softkeys on either side of the < Unassigned > command will scroll you through the fixtures
stored on the console. For the purpose of this manual we will assume we have four Chauvet
250XR fittings. Use the softkeys to scroll through until you have the name of the fixture on the
screen. Now press the softkey next to the DMX: --- this will take you to the screen that allows
you to patch the fixture to the DMX address you wish to use.
Assign Fixture 01
Back
Up
Down
Unpatch
DMX: --OK
You can use the Up and Down keys to set the DMX address or you can use the flash buttons to
type in the value, for instance 100. You will need to make sure that the address matches the
fixtures DMX address.
Use the OK to take you back to the previous screen. Use the + and – keys to select the next
fixture you wish to assign and patch.
Repeat these steps until you have assigned all the fixtures you wish to use. Once a fixture has
been assigned the yellow LED on the relevant flash button will be illuminated.
You also have 18 generic channels of control. These are patched automatically to DMX value 1
to 18. If you wish to change these values go back to this screen using the Back or ← keys:
Assign/Patch
Back
Fixtures
Generics
FixtProfiles
AutoPatch
Aux’s
Select the Generics soft-key. Scroll to the channel number you wish to patch either using the Up
or Down keys or using the flash buttons as a numeric entry tool. Once you have selected the
relevant channel then select Edit. You can now set the address for the channel using the Up or
Down keys or by using the flash buttons for numeric entry.
You can assign all the fixtures without giving them a DMX address. Once complete select the
AutoPatch key from the Assign/Patch menu. This will automatically patch the console. The first
18 channels will be for the generic fittings. The first moving light will start at DMX address 19
and the others will be patched to according to the number of channels used by the previous
fixture. To check the DMX addresses for each fixture select the Fixtures button and then scroll
through the fixtures using the + or – keys. You can also use the flash buttons to select the
relevant fixture. The DMX address will be displayed in the window.
When you are finished use the Back key to take you to the default screen.You are now ready to
start programming.
9
3.2 Program a Memory
You should be on the following screen:
Page01 Step--Page+
Page-
Run 1
PageChase
Live!
More..
PageChase will only be visible of there
are memories recorded on the page.
Press the More.. key to move to the following menu screen:
Page01 Step--Flash On
Sound Off
Dir Fwd
Run 2
ProgMem
ProgSeq
More..
Select the ProgMem key to take you to:
Page01 Step--- Select Memory
Back
Page +
Page The Tiger has 12 pages that you can record memories on. Use the Page + or Page – keys to go
to the page you wish to record on. To select where you want to store a memory select a flash
button. If the Yellow LED is lit on a flash button there is already a memory recorded on that
fader. You can over record it or by selecting it edit its contents. Once you have pressed the
relevant flash button the menu changes:
Edit Fixtures
Back
Save As
Save
01-09
Home
Channels
More.
The flash buttons have now also changed function to be the controls for the various moving
lights. The flash buttons which have yellow LED’s lit are the ones to which fixtures have been
assigned. When you select a fixture the red LED will light. It is possible to select multiple
fixtures, for instance if you want to select fixture 1 to 4 hold down button 1 and then press button
4. You can deselect fixtures in the same way.
Having selected the fixtures you can turn them on by raising the relevant slider. This will only
work if the fixture has a channel dedicated to dimming. Those fixtures that work with shutters
will not turn on this way.
Alternatively you can use the Home key. This will turn the fixture on and centre it. To adjust the
various attributes select the Channels Key. This changes the faders to attribute mode. The flash
buttons with lit Yellow LEDs have attributes assigned to their faders. By moving the faders you
can set the relevant attributes to the required values. Pressing the flash buttons will show what
attribute is associated with the fader. The information is displayed on the bottom line of the LCD.
The numeric display shows what the current level is set to.
10
If a parameter has been changed the yellow LED flashes. This indicates that that parameter will
be included in the memory.
IMPORTANT INFORMATION
The Tiger console records only what is selected/tagged. The Yellow LED
will flash if that attribute is going to be included in the memory. If you wish
to include an attribute in the memory and the yellow LED is not flashing
then hold the button down for 2 second. To deselect an attribute so it is
not included in the memory hold the button down until the yellow LED
stops flashing.
By being able to record to parameter level the Tiger is a very powerful
console. It is possible for instance to make up looks that just have colors
recorded in them. You can also make up looks that just have positions
recorded. This means that it is possible for instance to have a position
sequence running as a chase and then manually change colours, beams
or other attributes. It is also possible to have a page chase running on top
of a sequence.
Please remember that only the fixtures selected/tagged will be recorded in
a memory.
Once you have set the look that you want use the Back key to go back to the previous menu:
Edit Fixtures
Back
Save As
Save
01-09
Home
Channels
More.
You can use the Save key to store the look in the flash button you originally selected.
Alternatively you can use the Save As key to select where you wish to store the memory. You
can change to a different page if desired. Pushing a flash button will store the memory.
Continue to store some further looks so that we can put them into a sequence.
To replay a memory simply raise the fader associated with the memory. It is possible to play
back multiple memories. If you change pages the memory will remain outputting until the DMX
outputs are changed by a different memory outputting or until you move the fader associated
with the memory back to zero.
11
3.3 Programming a Sequence
Once you have programmed memories you can store them in sequences and replay these
either manually, to a beat, triggered by sound or by setting the speed.
To store a sequence go to the following menu:
Page01 Step--Flash On
Sound Off
Dir Fwd
Run 2
ProgMem
ProgSeq
More..
Select the ProgSeq soft key. This will take you to the following menu:
Program Sequence 01
Back
(000 Steps)
Up
Down
Select
It is possible to store up to 12 Sequences each of 250 steps. To select a different sequence
number use the Up or Down soft keys to select the number you want. If the number next to
Steps has a value other than 000 then it has already had memories stored in it.
To program the sequence press the soft key associated with Select. You now have two options,
Auto Seq or Steps.. If you use Auto Seq it will use all the recorded memories to make up a
sequence. If you select Steps you can make up your own sequence. Selecting Steps.. will take
you to the following screen:
Step 001
Back
Seq05
Insert Step
This will take you to the following screen:
Page01
Back
Page+
Page-
Step 001
Use the Page + or Page – keys to take you to the page that the memory you want is on. Select
the memory by pushing the flash button the memory is stored on. Flash buttons that have
memories stored on them will have the Yellow LED lit. Each time you press a flash button the
number of steps will increment by 1. You will see the change in the top right hand corner of the
LCD display.
12
Once you have set the number of steps you require use the Back key twice to take you to the
save menu page.
Program Sequence
Cancel
Save As
Save
01
Delete Seq
Auto Seq
Steps..
From this page you can save the chase or if you do not want to keep it then you can use cancel.
You now need to use the Back key to go to the default menu page.
Page01 Step--Page+
Page-
Run 1
PageChase
Live!
More..
To playback your sequence select the sequence number using the Page+ or Page- keys. Having
selected the sequence raise the Master fader. You can then set the speed of the chase and the
fade time between steps by using the Speed and Fade faders. If you wish to trigger the chase
manually leave the Speed fader set to zero and use the Flash button under Master to step
through the sequence. You can still use the Fade fader to set the fade time for each step. The
Yellow LED in the fade button will indicate a fade is in progress by flashing.
It is also possible to adjust the direction of the sequence by using the More.. key. This will take
you to the following menu screen:
Page01 Step--Flash On
Sound Off
Dir Fwd
Run 2
ProgMem
ProgSeq
More..
By using the bottom left soft key it is possible to select Dir Fwd, Dir Rev, Dir <>or Dir Rnd. This
will affect in which order the sequence steps are replayed. If you select Sound On it is also
possible to trigger the sequence using the onboard microphone or using a sound input. The
sequence steps will trigger on the music’s beat.
It is also possible to set the sequence to run to a beat. If you tap the Speed twice the time lag
between taps will set the beat or delay between each step of the sequence.
To stop a sequence reset the Speed fader to zero.
13
4
Setting up the Console
The Tiger is a DMX lighting console. As such devices that are to be controlled will have a DMX
address. Some devices make use of more than one DMX channel. For instance a moving light
may have 12 DMX channels. If the address of this fixture is set to 1 the next available DMX
address will be 13. A library of common devices is supplied with the console. This means that
when a device is selected and the DMX address is set the Tiger will allocate the correct number
of channels required for that device. It will not let you patch another device to those channels.
The Tiger has 18 generic channels that are generally used to control dimmer or switch pack
devices. 18 HTP channels are also allocated for use with moving lights. There are also a total of
99 LTP channels that can be allocated to moving lights. This means that you could for instance
control 18 moving lights with the Tiger. Each fixture could have a dimmer channel and 5 LTP
channels. Alternatively you could have 9 moving lights each with a dimmer channel and 11 LTP
channels. Or you could have 1 fixture with a single dimmer channel and 99 LTP channels.
Important Note:
Htp:- Stands for highest takes precedence. This is usually used on dimmer
channels. It means that if a light is being controlled from two memories and one
memory has it set at 50% and the other at 75% then the light will be outputting
at 75%.
LTP:- Stands for latest takes precedence. This means that the last DMX
command sent will be what sets the level for a channel. It is usually used to
control the beam, colour and position attributes of a moving light. If memory 1
has channel 1 at 50% and is played back channel one will go to 50% if in
memory 2 it is set to 25% and memory 2 is played back the channel will go to
25%. LTP channels are also not affected by the Blackout button or the Master
fader.
4.1 Assigning and Patching a Fixture.
There are two things that must be done before a fixture can be used on the Tiger console.
Firstly the fixture type must be selected and then it must be given a DMX address. The Tiger is
supplied with 18 Chauvet fixtures stored on it. There is however a comprehensive library of
fixtures available for downloading. There is also a fixture creation software package available for
free. To upload different fixtures to the console it is necessary to acquire a PC to Tiger cable,
part number ______.
It is also possible to create fixtures on the Tiger console (see section 4. b.).
When you turn the console on you will see the following screen on the LCD:
Page01 Step---
Run 1
Page+
Page-
Live!
More..
You now need to assign and patch the fixtures that you have. To do this you need to press the
More.. key twice. This will take you to the following menu screen:
14
Page01 Step--View/Pvw
Assign/Patch
Load/Save
Run 3
Blackout
More..
Select the Assign/Patch soft-key. This will bring up the following menu:
Assign/Patch
Back
Fixtures
Generics
FixtProfiles
AutoPatch
Aux’s
Select the Fixtures softkey. You will now see the following screen:
Fixture 01
←
+
-
Unassigned
DMX: ---
Edit
Select the Edit Key. The screen now shows:
Assign Fixture 01
←
<
DMX: ---
Unassigned
>
OK
The softkeys on either side of the < Unassigned > command will scroll you through the fixtures
stored on the console. The last 18 fixtures used remain stored on the Tiger. Use the softkeys to
scroll through until you have the name of the fixture on the screen. Now press the softkey next
to the DMX: --- this will take you to the screen that allows you to patch the fixture to the DMX
address you wish to use.
Assign Fixture 01
Back
Up
Down
Unpatch
DMX: --OK
You can use the Up and Down keys to set the DMX address or you can use the flash buttons to
type in the value, for instance 100. You will need to make sure that the address matches the
fixtures DMX address.
Use the OK to take you back to the previous screen. Use the + and – keys to select the next
fixture you wish to assign and patch.
15
Repeat these steps until you have assigned all the fixtures you wish to use. Once a fixture has
been assigned the yellow LED on the relevant flash button will be illuminated.
If the fixture you wish to use is not stored on the console you can either download it from a
fixture library with the optional cable, use a memory module with fixtures stored on it, or you can
create a fixture on the console.
4.2 Editing/Creating a Fixture
Assign/Patch
Back
Fixtures
Generics
FixtProfiles
AutoPatch
Aux’s
From this menu select the FixtProfiles soft-key. From the next menu select the Create/Edit softkey. You can now choose one of the fixtures stored on the console and edit this if it is similar to
the fixture you want to choose. Alternatively you can create a whole new fixture.
If you want to edit an existing fixture use the middle keys to scroll through the available fixtures.
Once you reach the correct one press Edit. This will bring up an edit screen.
Edit Profile: Dimmer
Back
Ch+
Ch-
Dimmer
DMX 001
Delete
Insert
Edit
The middle line provides information on what attribute is currently selected, for instance
Dimmer. The line immediately below shows you the channel number of the associated attribute,
in the example above DMX001.To change attributes use the Ch+ or Ch- keys. The options you
have available are Delete, Insert, or Edit.
Delete will allow you to remove that attribute from the fixture. Insert allows you to add an
additional attribute, for instance a second colour wheel. Press Insert. This will take you to a new
screen:
Edit Profile: Ch01
Name: Other
DMX: 007
Home: 000
Back
OK
Using the soft-key Name will toggle through the options available. Select the one you require.
The DMX key will take you to a screen where you can select which channel number is
associated with the attribute. Use the Up or Down keys to do this. Alternatively you can type a
value in using the flash buttons.
Please note you are not setting the DMX address. You need to look at the attribute file for the
fixture and select the number associated with the required attribute. For example lets assume
we are editing a 6 channel fixture with the following characteristics:
16
Dimmer Channel 1
Pan Channel 2
Tilt Channel 3
Colour Wheel Channel 4
Gobo Wheel Channel 5
Speed Channel 6
The manufacturer has launched a new model of the fixture adding a second colour wheel. The
colour wheel is on channel 7. You would have selected the attribute as a colour, then go to the
DMX screen select 007 and press OK. If you have made a mistake and don’t want to save the
changes use the back key rather than OK
If you are going to create a new fixture scroll through the fixture types until you get to a blank.
You can then use the Create key to set up a fixture. Having selected Create you will see the
following screen:
Edit Profile:Dimmer
Back
Ch+
Ch-
DMX---
Insert
Edit
The Tiger assumes that you will be using a Dimmer (or HTP channel) and a Pan and Tilt
Channel for each fixture. Using the Ch+ or CH- keys to toggle between these three attributes.
Having selected Pan for instance select the Edit key. This will bring up a new screen:
Edit Profile:Pan
Name: N/A
DMX : --Home: ---
Back
OK
Selecting DMX key will bring up a screen to allow you to set the correct channel number. You
can use the Up or Down keys to select which channel is associated with that attribute.
Alternatively you can use the flash keys to select the value. Remember there can only be one
attribute per channel number.
You can also set a Home value for each attribute. This is the value that the attribute will go to
when the home button is pushed. For instance Pan and Tilt are normal set to 128 while the
dimmer is set to 255. The values are not percentages but the DMX values. Dimmers are
normally set to full which is 255 while the pan and tilt are normally centred which is 128. You will
need to check what attributes give you open white on the colour attributes and what you need to
set the shutter to so that it is open. This information should be provided by the manufacture of
the fixturer. If you are not sure leave it at zero.
17
When setting the Home value you can use the Up or Down keys or the flash button to set the
home value.
To set the colour, beam or any other attributes select Insert.
Edit Profile: Ch01
Name: Other
DMX: 007
Home: 000
Back
OK
Using the soft-key Name will toggle through the options available. Select the one you require.
The DMX key will take you to a screen where you can select which channel number is
associated with the attribute. Use the Up or Down keys to do this. Alternatively you can type a
value in using the flash buttons.
It is also possible to load fixtures from a comprehensive library stored at
www.chauvetlighting.com .
4.3 Loading a Fixture
There are two methods of loading a fixture onto the console. In both cases you will need to
select the FixtProfiles key. This will bring up the following menu:
Fixture Profiles
Back
From MemoryModule
From PC
Create/Edit
You now have two options. The first is to load fixtures that are stored on a memory module.
Select MemoryModule. You can now use the middle two soft keys to scroll through the fixtures
stored on the module. Select the one you require and load it.
Alternatively you can download fixtures from a PC. This requires a special cable, part number ---. You will need to download the software from www.chauvetlighting.com or use the disk
provided with the cable. Connect the cable to your PC’s USB port and the 5 Pin XLR to your
controller. From the above menu screen select From PC. You now use the PC tool to download
the required fixtures.
4.4 Generics
The Tiger also supports the use of generic lights. These are usually plugged into a dimmer or a
switch pack. You can control up to 18 generic channels. These are patched automatically to
DMX value 1 to 18. If you wish to change these values go select Generics from the main
Assign/Patch screen:
Assign/Patch
Back
Fixtures
Generics
FixtProfiles
AutoPatch
Aux’s
18
Scroll to the channel number you wish to patch either using the Up or Down keys to change
pages or the <> keys to move in single digits. It is also possible to use the flash buttons as a
numeric entry tool. Once you have selected the relevant channel then select Edit. You can now
set the address for the channel using the Up or Down keys or by using the flash buttons for
numeric entry. Remember the Speed, Fade and Master keys are used as entries for 0. The
console will not allow you to over patch a fixture.
4.5 Autopatch
You can assign all the fixtures without giving them a DMX address. Once you have completed
the selection of fixtures use the AutoPatch key from the Assign/Patch menu. This will
automatically patch the console. The first 18 channels will be for the generic fittings. The first
moving light will start at DMX address 19 and the others will be patched to according to the
number of channels used by the previous fixture. To check the DMX addresses for each fixture
select the Fixtures button from the Assign/Patch menu and then scroll through the fixtures
using the + or – keys. You can also use the flash buttons to select the relevant fixture. The DMX
address will be displayed in the window.
4.6 Auxiliaries
Auxiliaries can be used to control things like DMX strobes or smoke machines. There are four
auxiliary buttons. From the main Assign/Patch menu select the Aux’s key. This brings up the
Auxiliary screen where you can select the various options associated with each key. Press the
Auxiliary button you want to change the settings for. The red LED will flash on the selected
button and that will be the header on the menu screen.
Auxiliary 1
Back
On 255
Off 000
DMX--Normal
Momentary
You can set the DMX level you want the device to turn on and off at. Please remember the
value is 0-255, 50% is 128. Selecting the On or Off screens will take you to a menu where you
can use the Up or Down keys to change values or use the flash buttons to enter a numeric
value.
You can select the DMX address for the device you are using. Select the DMX address softkey. You can use the Up or Down keys to change values or use the flash buttons to enter a
numeric value. You can use the Unpatch key to remove any address associated with the
auxiliary key.
You have two other options, Normal or Solo and Latch or Momentary. To select the options
use the associated soft-key to toggle between the two options for that key.
In Normal mode selecting an auxiliary button will add it’s outputs to the current output of the
console. In Solo mode selecting and auxiliary button will turn off all other outputs of the console
and only output the device associated with that auxiliary button, it is ideal for use with strobes.
In Latch mode pushing an auxiliary button will lock it on. In Momentary mode the auxiliary
button will only output while it is held down.
19
5 Programming
The Tiger console can store 108 base memories that can be used to build up a range of
sequences and chases. When recording a memory you can select which attributes and which
fixtures and channels you want recorded in each memory. It is therefore possible to build up
memories that have only certain fixtures in them or have only certain colours or gobo’s in them.
This makes the programming of complex shows and looks simple.
If you would rather record memories that include all the parameters of the selected fixtures this
can be done as well. When you are working in programming mode the LED’s in the flash
buttons are used to indicate different modes. Please note what the different combinations mean
in the following explanations on programming.
To assist in programming there is an effects generator for movements and a Fan function that
can be used with any attribute to set looks. These will be explained in detail below.
5.1 Programming a Memory
You should be on the following screen:
Page01 Step--Page+
Page-
Run 1
PageChase
Live!
More..
Press the More.. key to move to the following menu screen:
Page01 Step--Flash On
Sound Off
Dir Fwd
Run 2
ProgMem
ProgSeq
More..
Select the ProgMem key to take you to:
Page01 Step--- Select Memory
Back
Page +
Page The Tiger has 12 pages that you can record memories on. Use the Page + or Page – keys to go
to the page you wish to record on. To select where you want to store a memory select a flash
button. If the Yellow LED is lit on a flash button there is already a memory recorded on that
fader. To preview the memory raise the fader. Using the flash button will select the memory and
you can edit it or over record it.
20
Once you have pressed the relevant flash button the menu changes:
Edit Fixtures
Back
Save As
Save
01-09
Home
Channels
More.
The flash buttons and faders have now also changed function. They now allow you to select
fixtures or control the intensity of generic channels and fixtures. The flash buttons which have
yellow LED’s lit are the ones to which fixtures have been assigned. To select a fixture press the
flash button, the red LED will light. It is possible to select multiple fixtures. For instance if you
want to select fixture 1 to 4 hold down button 1 and then press button 4. You can deselect
fixtures in the same way. The LED of the last selected fixture will flash. This is known as the
primary fixture and the information associated with this fixture will be shown on the LCD display.
Pressing a flash button in Channels mode will show what attribute is associated with the fader.
The More.. key will take you to different pages of fixtures. The relevant information as to which
page of
Please note that if you select different types of fixtures simultaneously you may
fixtures
have different types of attributes on the same faders. This can lead to some
you are
interesting effects!
on is
shown on the top line of the LCD screen. The options are:
Edit Fixtures 01-09
Edit Fixtures 10-18
Movement Effect
Edit Generics 01-09
Edit Generics 10-18
Having selected the fixtures you can turn them on by raising the relevant slider. This will only
work if the fixture has a channel dedicated to dimming. Those fixtures that work with shutters
will not turn on this way.
Alternatively you can use the Home key. This will turn the fixture on and centre it. To adjust the
various attributes select the Channels soft-key.
This changes the faders to attribute mode. By moving the faders you can set the relevant
attributes to the required values. Pressing the flash buttons will show what attribute is
associated with the fader. The information is displayed on the bottom line of the LCD display.
Only faders that have a Yellow LED lit on the flash button below have attributes associated with
them. The numeric display shows what the current level is set to. If there are more attributes
than the 12 faders allow you can change the other attributes by changing pages. You use the +
or – soft-keys to do this.
If a parameter has been changed the yellow LED flashes. This indicates that that parameter will
be included in the memory.
21
IMPORTANT INFORMATION
The Tiger console records only what is selected/tagged. The Yellow LED will
flash if that attribute is going to be included in the memory. If you wish to include
an attribute in the memory and the yellow LED is not flashing then hold the
button down for 2 second. To deselect an attribute so it is not included in the
memory hold the button down until the yellow LED stops flashing.
By being able to record to parameter level the Tiger is a very powerful console.
It is possible for instance to make up looks that just have colors recorded in
them. You can also make up looks that just have positions recorded. This
means that it is possible for instance to have a position sequence running as a
chase and then manually change colours, beams or other attributes. It is also
possible to have a page chase running on top of a sequence.
Please remember that only the fixtures selected/tagged will be recorded in a
memory.
To set Generic channel levels use the More.. soft-key to get the generic channel pages. The
faders will control the intensity of the generic channels.
Once you have set the look that you want use the Back key to go back to the previous menu:
Edit Fixtures
Back
Save As
Save
01-09
Home
Channels
More.
You can use the Save key to store the look in the flash button you originally selected.
Alternatively you can use the Save As key to select where you wish to store the memory. You
can change to a different page if desired by using the Up or Down soft-keys. Pushing a flash
button will store the memory.
You can now select a new place to store a memory and continue the process.
5.2 Replaying a Memory
To replay a memory raise the fader associated with the memory or push the flash button. It is
possible to play back multiple memories. If you change pages the memory will remain outputting
until the DMX outputs are changed by a different memory outputting or until you move the fader
associated with the memory back to zero.
22
5.3 Effects
The effects tools provided on the Tiger are aimed at aiding with programming speed. There are
two types of effect, Movement and Fan.
The Movement function allows you to quickly program a circle or a square. You can change the
size of the X and Y parameters and you can also set the speed. By varying the X and Y values it
is possible to generate ellipses, quads or simple straight lines.
The Fan function allows you to quickly offset lights. It is a quick way of programming a rainbow
colour effect, setting different lights to different shutter speeds or setting offsets on pan and tilt.
The best way to understand the power of the effects engines is to use them and play with the
different settings.
To access the effects you need to be in program mode and have selected the lights that you
want to work with. You then need to select the Channel soft-key to bring up the following menu:
Grp01
Back
+
-
Edit Channels
Home
Fan
Mvmnt
5.3.1 Movement effects
To program a movement effect select the Mvmnt soft-key. This will bring us the next menu:
Movement Effect
Back
Save As
Save
01-09
None
More..
The Back soft-key will take you back to the memory select page.
Save As will allow you to select where you want to save a memory to.
Save will store the current output in the memory number you selected at the beginning of the
programming selection.
The soft-key next to the 01-09 or 10-18 display will allow you to select fixtures from another page.
The None soft-key will allow you to toggle between Circle, Square and Unprog. This allows you
to select the effect that you want. Unprog will continue the effect running from a previous
memory. It allows for instance a color change with out changing the effect.
More.. will take you back to the fixture and generic select menu’s.
Having selected the effect you wish to use you need to select the fixtures that you wish to apply
the effect to. The flash buttons with lit Yellow LED’s can be selected. Press the flash button to
select. Having selected a fixture the Yellow LED will flash.
To set the X and Y sizes use the Pan and Tilt faders. The Brightness fader will determine the
direction and the speed of the effect. Once you have the required effect it is still possible to add
23
a colour or a gobo to a fixture. Use the More.. key to go back to the fixture selection page. From
here you can access the Channels function.
5.3.2 Fans
Fans are a quick way to set an attribute on different lights to a different value. Having gone into
program mode and selected the lights you wish to work with select Channels. Select the attribute
you wish to work with. For instance to create a rainbow you would select a Colour parameter.
Select Fan function.
The faders now represent the fixtures assigned. To see what parameter you are working with
press the flash button. That will tell what fixture you are working with and what parameter has
been tagged for the fan. Selecting fixtures with different attributes can lead to some strange
effects!
By moving the fader for each fixture you can quickly set each fixture to a different value. For
instance to make a rainbow you may set fader 1 to 10% which is red on fixture 1, fader 2 to 20%
which is blue on fixture 2, fader 3 to 30% which is green on fixture 3 and fader 4 to 40% which is
yellow on fixture 4.
You can use the fan function on any parameter including pan and tilt. This is a very effective
way of getting lights into diagonal lines for instance.
Having set one parameter it is possible to go back and select a different attribute and repeat the
process.
The best way to understand the power of this function is to try it.
5.4 Programming a Sequence
Once you have programmed more than one memory it is possible to put the memories into
stacks to play them back as sequences. These can be replayed either manually, to a beat,
triggered by sound or by setting an auto speed.
To store a sequence go to the following menu:
Page01 Step--Flash On
Sound Off
Dir Fwd
Run 2
ProgMem
ProgSeq
More..
Select the ProgSeq soft key. This will take you to the following menu:
24
Program Sequence 01
Back
(000 Steps)
Up
Down
Select
It is possible to store up to 12 Sequences each of 250 steps. To select a different sequence
number use the Up or Down soft keys to select the sequence number you want. If the number
next to steps has a value other than 000 then it has already had memories stored in it. By
selecting a sequence that already has steps in it it is possible to add, delete or edit steps.
To program a new sequence press the soft key associated with Select. You now have two
options, Auto Seq or Steps.. If you use Auto Seq it will use all the recorded memories to make
up a chase starting with the first recorded memory and ending with the last.
If you select Steps you can make up your own sequence. Selecting Steps.. will take you to the
following screen:
Step 001
Back
Seq05
Insert Step
Select Insert Step this will take you to the following screen:
Page01
Back
Page+
Page-
Step 001
Use the Page + or Page – keys to take you to the page that the memory you want is on. Select
the memory by pushing the flash button the memory is stored on. Flash buttons that have
memories stored on them will have the Yellow LED lit. Each time you press a flash button the
number of steps will increment by 1. You will see the change in the top right hand corner of the
LCD display. To preview memory you are about to add as a step raise the fader. This will output
the memory.
Once you have set the number of steps you require use the Back key twice to take you to the
save menu page.
Program Sequence
Cancel
Save As
Save
01
Delete Seq
Auto Seq
Steps..
From this page you can save the chase or if you do not want to keep it then you can use cancel.
You now need to use the Back key to go to the default menu page.
25
Page01 Step--Page+
Page-
Run 1
PageChase
Live!
More..
To playback your sequence select the sequence number using the Page+ or Page- keys. Having
selected the sequence raise the Master fader. You can then set the speed of the chase and the
fade time between steps by using the Speed and Fade faders. If you wish to trigger the chase
manually leave the Speed fader set to zero and use the Flash button under Master to step
through the sequence. You can still use the Fade fader to set the fade time for each step. The
Yellow LED in the fade button will indicate a fade is in progress by flashing.
It is also possible to adjust the direction of the sequence by using the More.. key. This will take
you to the following menu screen:
Page01 Step--Flash On
Sound Off
Dir Fwd
Run 2
ProgMem
ProgSeq
More..
By using the bottom left soft key it is possible to select Dir Fwd, Dir Rev, Dir <>or Dir Rnd. This
will affect in which order the sequence steps are replayed, try the different modes to see how it
changes your sequence. If you select Sound On it is also possible to trigger the sequence
using the onboard microphone or using a sound input. The sequence steps will trigger on the
music’s beat. To enable this set the Speed fader to Zero.
It is also possible to set the sequence to run to a beat. If you tap the Speed flash button twice
the time lag between taps will set the beat or delay between each step of the sequence.
26
To stop a sequence reset the Speed fader to zero.
To edit an existing Sequence select the sequence after having gone into program sequence
mode. This will bring up a new menu:
Program Sequence -Cancel
Save As
Save
Delete Seq
Auto Seq
Steps..
Cancel will take you back a to the previous menu.
Save As will allow you to save the sequence with a different number.
Save will save any changes to the current sequence.
Delete Seq will delete all the steps in the current sequence.
Auto Seq will change the sequence to include all current recorded memories.
Steps.. will take you to a new menu screen:
Step --Back
Step+
Step-
(Mem---)
Seq-Delete Step
Insert Step
Edit Step
The top line of the display shows you which step is currently outputting, which memory number
is being used for the step and which sequence you are editing.
Back will take you back to the previous memory.
The Step+ and Step- control keys will take you through the various steps stored in the current
sequence.
Delete Step will erase the currently selected step.
Insert Step will add allow you to add a new step immediately following the currently selected
step.
Edit Step will allow you to select a different memory for the currently selected step.
27
6 Playback
6.1 Memories
To playback a memory you need to be on the following menu or Run 2 or Run 3 menu screens:
Page-Page+
Page-
Step---
Run 1
Page Chase
Live!
More..
The Page+ or Page- soft-keys will allow you to navigate between the 12 pages of memories.
Each page has nine memories and one sequence stored on it. A lit Yellow LED means that
there is a memory stored on the associated flash button and fader. To replay a memory you can
either raise the fader or press the flash button. You can output more than one memory at a time.
Note that it is possible to set the way the flash buttons work in playback mode. From the main
playback menu select More.. which will bring up the following menu:
Pg-- Step--Flash On
Sound On
Dir Fwd
Run 2
ProgMem
ProgSeq
More..
By using the top left soft-key it is possible to set the flash buttons to work in one of three ways:
Flash On: the memory will trigger when the flash button is pressed.
Flash Solo: the memory will trigger when the flash button is pressed and all other outputs will
be cut.
Flash Off: nothing will happen when the flash button is pressed.
6.2 Live!
The Live! soft-key allows you to access any fixture or generic channel so that you can alter it. If
you have a memory outputting and select Live you can then change outputs as you would in
program mode and save the changes as a new memory or into the currently selected memory.
To do this you would use the Save As soft-key.
There is also a ClearAll soft-key available as part of the live function. Pressing this key will clear
the HTP outputs. Holding this key down will clear the LTP outputs and home all the fixtures. It is
a useful tool for stopping a show or clearing all outputs to allow you to start programming on a
blank canvas.
28
6.3 Sequences
There are several options as to how a sequence can be played back. Firstly use the Page+ or
Page- soft-keys to select which sequence you want to output.
To replay a sequence the Master Fader must always be above zero.
6.3.1 Manual Sequence
If you wish to play back a sequence in manual mode then you can trigger each step by pressing
the Master Flash Button. If you want to set a fade time between each step in the sequence
then you can do so by using the Fade Fader. The higher the setting the longer the fade will be.
The Yellow LED in the Fade Flash Button will flash to indicate a fade is in progress.
Manual playback of sequences is useful in a theatrical type of application where you wish to
playback memories in a predetermined sequence. You can set a different fade time for each
step of the sequences. Holding down the Master Flash Button will force the sequence back to
the first step. If you have changed pages holding down the Master Flash Button will start the
sequence on the currently select page.
6.3.2 Auto Sequences
To play back a sequence without needing to trigger each step manually can be achieved by
raising the Speed Fader. The higher the setting the faster the sequence will run. You can still
also set a fade time for each step using the Fade Fader.
6.3.3 Beat Sequences
If the Speed Flash Button is pressed twice the time between presses will be used to determine
the delay between the triggering of steps. It is a useful way of setting a sequence to run in time
to music. Tapping the button on the first beat and then tapping it again on the next beat will
mean the lights follow the music. It is again possible to set a fade time for each step using the
Fade Fader.
6.3.4 Sound to Light Sequences
It is possible to trigger the sequence using a sound input or the onboard microphone. From the
main playback menu screen select the More.. soft-key. This will bring up a new menu. Use the
middle left soft-key to toggle the Sound On or Sound Off. With sound set to on and the Speed
fader at zero the sequence will trigger on the bass beat.
If you have connected the console to your sound system the microphone will not work.
6.4 Page Chases and Page Ripples
Apart from being able to play back the 12 sequences that you have recorded it is also possible
to play back the memories on each page as a sequence. The page chases take their fade and
speed settings from those currently set for the sequence. For instance if you have a sequence
running with the speed set to 7, triggering from sound this will be the same settings used on the
page chases you select. The page and ripple chases only run in a forward direction.
Page chases are a useful way of overlaying effects onto a sequence. In a club environment you
may have recorded a sequence of movements. You could add colour to this movement
29
sequence by having programmed a page of memories that only contain the colour attributes of
the fixtures. Triggering the page chase will mean the fixtures change colour each time they
move.
For a Page chase to work you need to have the Master Fader set above zero. From the main
playback menu select the PageChase soft-key. The PageChase legend will start to flash. This
indicates that the page chase on the selected page is outputting. You can now change pages
and trigger further page chases. It is possible to have all 12 pages outputting a page chase. Be
aware this can be confusing if you have not thought about your programming.
In PageChase mode the fixtures will all change simultaneously from one memory to the next. If
the PageChase soft-key is pressed for a second time the legend will change to read PageRipple.
This changes the way the chase works. It will start with the first fixture and change it to the first
memory on the page. It will then change the second fixture, third fixture etc. This can be an
interesting effect when used with things like colour or position. The best way to understand how
it works is to program a page of colour memories and play them back first as a page chase and
then as a page ripple.
To turn off a page chase press the PageChase soft-key again. When the legend stops flashing
the chase will be deactivated.
6.5 View and Preview
There is a View/Preview menu which allows you to see what the output of the console is. From
the main playback menu:
Page-Page+
Page-
Step---
Run 1
Page Chase
Live!
More..
press the More.. soft-key twice. This will take you to the page with the View/Pvw soft-key,
pressing this will bring up the View/Preview menu:
To see the current output of the Generic channels select the Generic soft-key. You can use the
Up and Down soft-keys to go through the different channel numbers.
To see the current output for fixtures select the Fixture soft-key. You can use the Up and Down
soft-keys to move through the different parameter channels for the selected fixture. To change
fixtures use the + or – soft-keys. The selected fixture number is shown in the top line of the LCD
display.
The DMX soft-key allows you to scroll through all 512 DMX channels to see what each one’s
output is. This can be useful for fault finding. Again use the Up and Down soft-keys to go
through the DMX channel numbers.
The Memories soft-key allows you to preview the intensity of the generics and fixtures for any
memory. The Up and Down soft-keys scroll through the generic and fixture intensity channels.
The + or – soft-keys will change the selected memory. The memory selected for preview is
shown on the top line of the LCD display.
The Sequences soft-key allows you to preview the steps of a sequence. This allows you to see
which memory makes up each step of a sequence. The Up and Down soft-keys scroll through
30
the steps of the selected sequence. The + or – soft-keys will change the selected sequence.
The sequence selected for preview is shown on the top line of the LCD display.
6.6 Blackout
There is a blackout soft-key to allow for snap black outs. From the main playback menu:
Page--
Step---
Page+
Page-
Run 1
Page Chase
Live!
More..
select the More.. soft-key twice. This will take you to the following menu:
Page-Step--View/Pvw
Assign/Patch
Load/Save
Run 3
Blackout
More..
Pressing the Blackout soft-key will snap all HTP channels to zero. The word Blackout will flash
while the desk is in blackout mode. Pressing the Blackout soft-key again will result in the HTP
channels returning to their set levels.
If you want instant access to a blackout button a useful tip is to use one of the
auxiliary keys. Set it to operate in Solo mode. Pressing an auxiliary key set up
in this way will also set all HTP channels to zero.
31
7 Memory Module
Each Tiger console is shipped with a memory module. The memory module allows you to back
up a show or store a show while the desk is used for a different event. It is also possible to store
different fixture types on the module.
7.1 Saving a show.
From the main playback menu:
Page--
Step---
Page+
Page-
Run 1
Page Chase
Live!
More..
select the More.. soft-key twice. This will take you to the following menu:
Page-Step--View/Pvw
Assign/Patch
Load/Save
Run 3
Blackout
More..
Use the Load/Save soft-key to enter the Load/Save Functions menu.
Load/Save Functions
Back
Test Module
Load Show
Save Show
You have three options.
To test the memory module use the Test Module soft-key, it will either return a result of OK, Fail
or Not Present.
To load a previously stored show onto the Tiger use the Load Show soft-key. The LCD will show
an OK or Fail indication.
To save the show currently programmed onto the Tiger use the Save Show soft-key. The LCD
will show an OK or Fail indication.
The Back soft-key will return you to the main menu.
32
8 Super User Functions
The Tiger Console has a set up menu that is not accessible during usual operation. The
functions available in this mode are generally only used when setting the console up for
personal preferences. There are three super user menus, the More.. soft-key on each page will
allow you to move to the next menu.
It is accessed while the LCD display is on the main menu:
Page--
Step---
Page+
Page-
Run 1
Page Chase
Live!
More..
To access the Super User menu hold down the two top soft-keys simultaneously. This will bring
up the first page of the Super User menu:
Super User
Back
Clear Mem/Seq
Startup@Last
Lock
Reset
More..
The Back soft-key will take you back to the main menu.
8.1 Clear all Memories and Sequences
Selecting the Clear Mem/Seq soft-key brings up a menu that gives you two options. Cancel will
return you to the Super User menu without deleting any information. OK will delete all the
memories and sequences currently stored on the console. Information regarding fixtures and
patch are unaffected by the clearing of the memories and sequences.
Do not press OK unless you are sure that you no longer need the current show stored on the
console!
8.2 Start Up Mode
This option allows the user to set the desk, so that at power up it either recovers the sequence
step that it was last on or resets the current sequence back to step one. To restore to the last
output step the bottom left line on the LCD display should read Startup@Last. If it reads
Start@1 the currently selected sequence will restart at step 1. To toggle between these two
choices use the soft-key.
Usually if you are running a theatrical type show manually stepping through the show you would
set the function to Startup@Last. If for some reason the power fails the console on powering
back up will be on the correct memory.
The Startup@Last function will only work when the sequence is being operated in manual
mode. It will not function if the sequence is operating in Auto, Beat or Sound mode.
33
8.3 Lock Mode
The desk may be locked to prevent unauthorised modification to the show data. No memories or
sequences can be recorded, edited or deleted. The desk will still however output memories and
sequences. It is also not possible to change the patch or fixture selection.
To select Lock mode use the Lock soft-key. If the desk is unlocked the user will be asked to
enter the four digit lock code using the fader flash buttons. The default lock code of the Tiger is
0000. Having entered the correct code you have two options:
1. Change Code: this will allow you to input a unique code for the console. Please make
sure you remember this code or the desk will be locked permanently. You will need to
contact Chauvet Lighting for the master unlock code. Once you have input the code you
will return to the main Super User menu.
2. Lock: selecting this function will lock the console and no changes to the show data will
be possible. You will be returned to the main Super User menu. The word Lock will
flash on the LCD display to indicate the desk is now locked.
If the desk locked and the Lock soft-key is selected you will be prompted for the four digit unlock
code. If this is entered correctly the console will be unlocked and changes to show data can be
made.
8.4 Reset
The Reset soft-key will set all the desk parameters to their default state. The default settings are
as follows:
Mode:
Memory Page:
Flash Mode:
Sound Input:
Sequence Direction:
Blackout:
Generic/Fixture Levels:
Memories:
Sequences:
Fixtures:
Generics:
Auxiliaries:
Pan/Tilt LTP action:
Other LTP action:
Lock Code:
Run
1
On
Off
Forward
Off
All at 0%
All unprogrammed
All unprogrammed
No Fixtures assigned or Patched
18 channels patched to DMX channels 1 to 18
Unpatched, Momentary, Normal Mode, On=255, Off=0
Fade
Snap
0000
Before resetting the console please be aware that you will lose all your current show data
including your fixture selection and patch. Any fixtures that have been loaded to the console will
also be lost and it will revert to the original fixture library supplied with the console.
34
8.5 Pan and Tilt Default Settings
You can toggle between two settings for Pan and Tilt. The soft-key for this function is on the
second page of super user options. In Snap mode the pan and tilt changes will happen
instantaneously. If Fade mode is chosen the changes will happen according to the time set on
the Fade Master when a memory is triggered.
8.6 Other LTP Default Settings
You can toggle between two settings for all the LTP channels other than pan and tilt. This will
include all colour and beam shape parameters. The soft-key for this function is on the second
page of super user options. In Snap mode LTP changes will happen instantaneously. If Fade
mode is chosen the changes will happen according to the time set on the Fade Master when a
memory is triggered.
8.7 LCD Settings
This option is available on the third page of super user functions. Selecting the LCD B soft-key
will allow you to change the backlight brightness of the LCD screen. Using the Up and Down
soft-keys will allow you to alter the settings.
Selecting the LCD C soft-key will allow you to change the contrast of the LCD screen. Using the
Up and Down soft-keys will allow you to alter the settings.
8.8 Test Function
This option is available on the third page of super user functions. In this mode, all normal
button/fader operation is disabled, and the desk enters factory test mode. Fader values, sound
to light readings, button states etc. are displayed on the main LCD. Normal operation should not
require you to use this function. It is only needed for servicing of the console.
Test mode is exited using the ← soft-key.
8.9 Version Information
Selecting the Version soft-key will display information on the current Firmware version and the
Serial number of the console. A customer service representative may ask you for this
information if you are seeking technical support.
35
9 Connections
There are five connections on the rear panel of the Tiger Console.
9.1 Power Connection
A four pin ring locking DIN connector is provided for the connection of a remote power supply.
DC Connections:
Pin 1 – + 10 Volts @ 400mA (650mA)
Pin 2 – 0 Volts signal ground
Pin 3 – +20 Volts @ 200mA
Pin 4 – Not Used
9.2 Remote Go/Step Input
A ¼ inch Jack input shall be provide for the use of a remote go. Closing the connection between
the tip and the sleeve shall trigger a step.
36
9.3 DMX Out Connection
A single 5 pin Female out shall be provided to connect the Tiger console to DMX devices.
Wiring shall be in compliance with DMX 512 1990 standards. The connection is not isolated but
has voltage protection. Data shall be transmitted on all 512 channels.
Pin 1 0V Signal Ground
Pin 2 DMX Drive Compliant
Pin 3 DMX Drive True
Pin 4 Not Connected
Pin 5 Not Connected
9.4 Audio Input
A stero ¼ Jack shall be provided to allow connection to a sound system. Connecting a Jack will
disconnect the internal microphone. Input >10 k ; 100mV to 10V.
Connections:
Tip – Left Channel
Ring – Right Channel
Sleeve – 0V Signal Ground
9.5 Memory Module
32 kbyte EEPROM cartridge with 9 pin D Type male connector.
37
10 PC Software
To use the PC software to upload fixture libraries you will require a PC operating Windows with
a USB port. The fixture library and the software needed to transfer fixtures to the Tiger is
available for downloading from www.chauvetlighting.com. Install the software using the
onscreen help. The cable can be purchased from any Chauvet dealer.
Once the software is loaded on your PC select the fixture library file you require. Open this and
select the manufacture of the fixture required. Select the fixture/s that you wish to upload to the
Tiger.
From the Fixture Profiles menu select the From PC softkey. The cable needs to be connected
to the Tiger DMX port and the PC’s USB port. Select the upload option in the PC software. The
fixtures on the Tiger will be replaced with the ones you have selected. It is possible to load 20
different fixtures to the console at any one time.
Having loaded new fixtures to the console if you save the show to a memory module these
fixtures will be accessible from the memory module for future use.
The supplied software also allows you create your own fixture profiles. Instructions for this are
available as part of the download.
38
11 Menu Navigation Flow Chart
This flowchart details the basic menu navigation structure of the Tiger Desk.
Run Mode
(Edit Live, Flash Mode, Sequence Drive/Direction, Memory Page, Blackout)
Program
Memories
Program
Sequences
View /
Preview
Assign &
Patch Fns
Load/Save
Show Fns
Super User
Functions
Generics
Fixture
select
Fixture edit
Fan edit
Home fn
Movement
effect
Save
Save As
Create seq.
Copy seq.
Delete seq.
Insert step
Delete step
Auto seq.
View
generic
outputs
View fixture
outputs
View DMX
outputs
Preview
memories
Preview
sequences
Assign &
Patch
fixtures
Patch
Generics
Assign
Auxiliaries
Auto-patch
Create/Edit
Fixture
Profile
Load Fixture
Profile from
PC /
Memory
Module
Load Show
Save Show
Check
Module
Lock Desk
Reset Desk
Clear
Memories /
Sequences
Startup Seq.
Step
LTP
snap/fade
LCD
Brightness/
Contrast
Version info
Factory Test
39