1
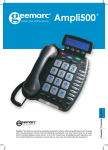
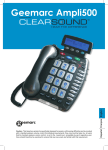
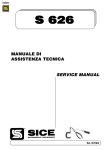
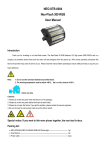
CONTENTS
CONTENTS
2
INTRODUCTION
Unpacking the Ampli600
3
INSTALLATION
Setting Up
Wall mount installation
4
5
DESCRIPTION
6-10
SETTINGS
Ringer Volume
Ringer Tones
Alarm & Ringer Settings
Dialling Mode
Date/time format & setting
Language Setting
Screen Contrast Adjustment
Auto On Hook
Auto screen Sizing
Area & LDS Code Setting
11
11
11
12
13
14
15
15
16
17
USING THE TELEPHONE
Answering a Call
Making a Call
Switching between Speakerphone
and Handset
Call Time Counter
Last Number Redial
Recalling Recent Numbers
Deleting Recent Numbers
Mute function
Flash
One Touch Memory Keys
EMERGENCY CONTACT
Create Emergency Contact SOS
Numbers
Create the Emergency Message
Play the Emergency Message
Using the Emergency Contact
Telephone
Testing the Remote Band
Change the Remote Band Battery
Cancel and Emergency Contact Call
2
18
18
19
19
19
20
20
20
21
22
23
23
24
25
25
26
26
26
REMOTE MONITORING
Remote Audio Monitoring
Activate Remote Audio Monitoring
Setttting the Remote Audio
Monitoring Access PIN Code
Using Remote Audio Monitoring
27
27
OPTIONAL ACCESSORIES
Headset
Neckloop
Shaker
29
29
30
VOLUME AND TONE
Sending Level Adjustment
Receiving Level Adjustment
Handset Amplifier
31
31
32
PHONEBOOK
Create a Phonebook Entry
Create and Entry from the
Caller Display Log
Make a Call from a Phonebook Entry
Delete a Phonebook entry
Modify a Phonebook Entry
CALLER DISPLAY
Use a Number from the
Caller Display log
Delete a number from the
Caller Display Log
Delete all Numbers from the
Caller Display Log
Call Waiting
26
26
33
34
35
35
36
37
38
38
39
39
NEW CALL/MESSAGE LED
Message Waiting LED
40
40
TROUBLESHOOTING
43
SAFETY INFORMATION
44
REGULATORY COMPLIANCE
45
GUARANTEE
48
INTRODUCTION
Congratulations on purchasing your AMPLI600 telephone.
This is a multifunction telephone which offers features such as hands free
use, phonebook and caller display*. It also has the added benefits of send
and receive amplification. There are two emergency features – the first allows
you to call emergency contacts either using a remote band or with one touch
of a button on the base. The other feature is called remote audio monitoring,
this allows your contacts to call and speak to you without the need for you to
pick up the phone. Both feature are very useful in times of emergency.
Its is important that you read the instructions below in order to use your
AMPLI600 to its full potential. Keep this user guide in a safe place for future
reference.
*To use the caller display facility, you must subscribe to your network
provider’s caller display service
CAUTION: This telephone product is specifically designed for people with
hearing difficulties and is provided with a handset earpiece volume control
for individual requirements. Due care must be taken by all users that the
handset earpiece volume control is set to the lowest level acceptable by
each respective user. Care should therefore be exercised to ensure that
any new users are familiar with this requirement.
Unpacking the Ampli600
When unpacking the telephone, you should find the following in the box:
• 1 Telephone base unit
• 1 Telephone handset
• 1 Handset curly cord
• 1 8 inch short telephone line
• 1 6ft telephone line cord
• 1 AC Adapter
• 1 Screwdriver
• 1 Wall plate adapter
• 1 User guide
3
INSTALLATION
Setting Up
Connect the curly cord and the handset.
Remove the screw of the battery compartment using the screwdriver provided and open the battery compartment.
Insert 4 good quality alkaline batteries (AAA size, 1.5V type, not supplied)
into the battery compartment located on the base of the telephone.
Note : Do not use rechargeable batteries. Do not put batteries into the
household rubbish, pay attention to battery regulations regarding battery
disposal.
Replace the battery cover.
Desk Installation
Connect the 6ft line cord to the jack located at rear of telephone then connect the plug to the telephone wall socket.
Connect the power supply to the jack located on the back of the telephone
then plug into the wall socket. Please choose a socket near your telephone
socket to enable you to unplug the mains power quickly in case of a problem.
Lift the handset; if there is a dial tone, the telephone is ready for use. If there
is no dial tone, check that everything is plugged in as described above.
Note: Mains power is required to power the multifunction features of
the telephone. Fit 4 x AAA sized batteries in order to save and use
stored numbers in case of power failure. Without mains or battery
power, the telephone can still be used to answer calls or to manually
dial out calls but all stored numbers will be lost.
4
INSTALLATION
Wall Mount Installation
Slide the handset hanger bar out and rotate it 180 degrees. Slide it back
into place. The hook will now point up. This ensures the handset will not fall
out of the cradle when it is mounted on the wall.
Plug the 8in short phone cord into the telephone jack on the AMPLI600, now
run the phone cord under the wall plate adapter and through the opening.
Insert the Wall Plate adapter. Hold it so that the raised mounting pins line
up with the phone’s keyholes on the AMPLI600. Once the holes are lined
up, push the wall plate adapter in towards the AMPLI600 and then slide the
plate upwards until it is securely placed on the phone.
Once the Wall Plate adapter is installed, plug the 8 inch short cord into the
jack on the wall.
Holding the phone slightly above the mounting screws on the wall jack,
push the phone against the mounting screws so they are hooked into upper
and lower key-hole slots on the back of the phone. Slowly slide the phone
down until it snaps into place.
Connect the handset curly cord to the handset and the other end to the
telephone.
Lift the handset, if there is a dial tone, the telephone is ready for use. If there
is no dial tone, check that everything is plugged in as described above.
screw
Wall mounting holes
5
DESCRIPTION
Tone reception
adjustment
Priority memories
P1,P2,P3
Key to activate tone
and volume adjustment
function
Aerial
Speaker
Volume
reception adjustment
Speaker volume
adjustment
Stop
SOS
Direct memories
SOS
key
Memory storing key
SOS key stop
SOS key
Hands free
dialling & amplifier
Remote control
Hands free
microphone
Last number redial
Time break recall button
Flashing incoming call
indicator (strobe light)
6
Headset button
Message waiting /
newcall LED
Mute button
DESCRIPTION
Screen example (On hook position)
Minutes
Power network icon
Hours
Day
Month
Cancel key
Validation key
Up/down keys
OK button is used to confirm action or a choice on the
screen.
▲ ▼ “UP / DOWN arrow” buttons are used to highlight or scroll through the menu.
C button is used to cancel or confirm an action/entry
or clear a stored Caller ID call.
8
DESCRIPTION
Screen display
Your CL600 has a screen with different icons which
help you to use the telephone.
The telephone is supplied by battery +
battery indicator
The telephone is powered by AC adapter.
Memory storing is required.
Screen contrast level.
“Mute” is activated.
Speakerphone is activated.
Precede the CID call record number.
To show new records.
9
SETTINGS
Ringer Volume
The ringer volume can be adjusted as high as 95 +dB.
A switch located on right side allows the ringer to be switched to OFF, LOW,
HIGH.
Your telephone comes with the ringer switched to ‘High’.
Ringer Tones
Press MUTE
Use ▲ or ▼ to select ‘SET PHONE’
Press OK
Use ▲ or ▼ to select ‘SET RING’
Press OK
Select desired ring tone. Use ▲ or ▼ to scroll through
and listen to the 4 tones available
Press OK to select desired ring tone
Press C three times to exit or do nothing for 20 seconds and
the ring type will automatically be saved ready for the
next incoming call
Alarm and Ringer Settings
A 3-position switch located on the right side of the phone allows the settings
below:
Ringer and strobe flash are activated (Normal Setting)
The other two settings are only effective when an optional vibrator pad
has been added.
Ringer, shaker and strobe flash are activated
Ringer and shaker are activated
11
SETTINGS
Dialling Mode
The Tone/Pulse is factory pre-set to Tone (Tone). In the US, all telephone
exchanges now use Tone dialling. If your phone does not dial out, it is
probably being used from an older private switch-board (PBX). In this case,
theTone/Pulse setting must be moved to Pulse (Pulse).
Press MUTE
Use ▲ or ▼ to select ‘SET PHONE’
Press OK
Use ▲ or ▼ to select ‘TONE /PULSE’
Press OK
Select ‘TONE’or‘PULSE’
Press OK to confirm
Press C three times to exit
12
SETTINGS
Date / Time Format and setting
Format
You can choose between Day-Month or Month-Day , and between 12h-24h
Press MUTE
Use ▲ or ▼ to select ‘SET PHONE’
Press OK
Use ▲ or ▼ to select ‘DATE FORMAT’
Press OK
Select ‘DAY-MONTH’or‘MONTH-DAY’
Press OK to confirm
Use ▲ or ▼ to select ‘HOUR FORMAT’
Press OK
Select ‘12 HOUR’or‘24 HOUR’
Press OK to confirm
Press C twice to exit
13
SETTINGS
Setting Time/date
If you subscribe to Caller Display, these parameters will usually be set
automatically when you receive your first call.
Press MUTE
Use ▲ or ▼ to select ‘SET TIME’
Press OK
Use ▲ or ▼ to select the desired digit
Press OK to confirm and pass to next digit
You will set time first then the date
Press C to exit
Language Setting
You can choose between 16 different languages including English and
French. The default is American English (English 1).
Note: Do not change to a language you cannot read or understand as it will
be difficult to return to a language on screen that you do understand!
Press MUTE
Use ▲ or ▼ to select ‘SET PHONE’
Press OK
Use ▲ or ▼ to select ‘SET LANGUAGE’
Press OK
Use ▲ or ▼ to select required language
Press OK to confirm
Press C twice to exit
14
SETTINGS
Screen Contrast Adjustment
Your screen has a backlight that automatically switches off after 15 seconds
of inactivity. To decrease or increase the contrast of the backlight:
Press MUTE
Use ▲ or ▼ to select ‘SET PHONE’
Press OK
Use ▲ or ▼ to select ‘LCD CONTRAST’
Press OK
Use ▲ or ▼ to select the contrast level that is correct for you
Press OK to exit (it will automatically return to time and date screen)
Auto On Hook
When this feature is ON, if you leave the telephone off the hook by mistake,
the AMPLI600 will automatically disconnect the line after 5-8 minutes and
your telephone will be ready to take another incoming call.
Press MUTE
Use ▲ or ▼ to select ‘SET PHONE’
Press OK
Use ▲ or ▼ to select ‘AUTO ON HOOK’
Press OK
Use ▲ or ▼ to select ‘ON’ or ‘OFF’
Press OK to confirm
Press C twice to exit
15
SETTINGS
Auto Screen Sizing –DIM:X-->x
The phone can show a maximum of 8 digits at full size. You can choose
to see the complete number (up to a maximum of 18 digits) by selecting
‘Auto Screen Sizing’. When activated, the phone will display at full size but
automatically switch to display small numbers when there is a number with
more than 8 digits. The default on arrival is activated. However, if you ever
need to change this setting, see below:
Press MUTE
Use ▲ or ▼ to select ‘SET PHONE’
Press OK
Use ▲ or ▼ to select ‘DIM X--->x’
Press OK
Use ▲ or ▼ to select ‘ON’ or ‘OFF’
Press OK to confirm
Press C twice to exit
16
SETTINGS
Area and Long Distance Code Setting
When you use your phone for the first time or if you have moved to a
different area code, you need to enter your area code into the phone. This
assures that when dialing a call out of memory or your phonebook, the
number is formatted properly. To set your area code & LDS Code:
Press MUTE
Use ▲ or ▼ to select ‘SET PHONE’
Press OK
Use ▲ or ▼ to select ‘SET AREA & LDS’
Press OK
Use ▲ or ▼ to enter your area code. The phone accommodates
up to six (6) digits (allows for International codes).
Once you have entered your area code, even if you are not using
all six (6) digits, press the OK button until you reach
the ‘SET LDS CODE’ screen
The LDS Code is your long distance code. In the U.S. your long
distance code is 1. The telephone is pre-set for the U.S.
(NOTE: Do not change the LDS code unless you are leaving the U.S.)
If you wish to change the LDS, use ▲ or ▼ to enter your LDS code.
Press OK to confirm
Press C to exit
17
USING THE TELEPHONE
Answering A Call
During an incoming call, your phone will ring and then the number and/or the
name of the caller will be displayed on the screen, if you have subscribed to
a Caller Display service.
Using the handset
● Lift the handset and speak.
● To end the call, replace the handset.
Hands free
● Your Ampli600 allows you to speak hands free. When the phone rings,
press SPKR. The caller’s voice will be heard through the loudspeaker
and they will hear your voice via the microphone near the SPKR button.
The speakerphone symbol will appear on the display.
● To end the call, press SPKR again.
Using the inductive coupler for hearing aids
● Turn your hearing aid to the ‘T’ setting.
● Use the phone handset as usual but the inductive coupler will feed the
incoming call directly into your hearing aid.
Note: users of digital hearing aids must make sure their aids have been
programmed for use with the ‘T’ setting.
Making A Call
Using the handset
● Lift the handset and when you hear the dialling tone, dial the number
on the keypad.
● To end the call, replace the handset.
Pre-dialling
● Key in the required number without lifting the handset.
● Use the C key if necessary to cancel and correct a wrong digit.
● Lift the handset and the number will be automatically dialled.
● To end the call, replace the handset.
18
USING THE TELEPHONE
Hands free
● Key in the required number without lifting the handset.
● Use the C key if necessary to cancel and correct a wrong digit.
● Press SPKR and the number will be automatically dialled. The speakerphone symbol will appear on the display.
● When the call is answered, simply speak into the microphone located
on the base
● You can adjust the speaker level with the slide button located on the
left side of your telephone.
● To end the call, press the hands free button again.
Switching between Speakerphone and Handset
To stop using speakerphone during a call, simply lift the handset.
To activate speakerphone during a call, press SPKR and replace the headset on the cradle at the same time
Hands free calls can also be made using an optional headset –see Optional
Accessories chapter
Call Time Counter
The call time counter will be displayed a few seconds after the phone number is connected and starts ringing.
To stop the time counter, press C
If you press C twice, the time counter will be reset to 0.
Last Number Redial
Lift the handset or press SPKR or press Headset
(if headset plugged in)
Await the dial tone and press REDIAL
The previously dialled number will be automatically redialled
19
USING THE TELEPHONE
Recalling Recent Numbers
You can call back any of the last 30 numbers dialed
Press OK
Screen will display ‘DIALLED’, the last number dialled, total number
of numbers dialled plus time and date of displayed number
Use ▲ or ▼ to to select the number you wish to dial
Lift the handset or press SPKR or press Headset
(if headset plugged in), the number will be automatically dialled
Deleting Recent Numbers
Press OK
Screen will display ‘DIALLED’, the last number dialled, total number
of numbers dialled plus time and date of displayed number
Use ▲ or ▼ to to select the number you wish to delete
Press C, the screen will display ‘DEL?’
Press C to confirm
Press OK to exit
Mute Function
If you wish, you can speak privately to someone else in the room without
your caller overhearing. You will still be able to hear the caller but they
cannot hear you during the mute operation.
During a call, press MUTE
The screen will display ‘X’ which indicates that your voice is muted
to the call and that they cannot hear you speaking.
Press MUTE again to resume the conversation. The mute
symbol will disappear from the screen.
20
USING THE TELEPHONE
Flash
This is used with the new services provided on digital exchanges e.g. the
flash button can be used to disconnect a call and re-establish a dial tone or
switch to another caller when using services such as Call Waiting.
For details please contact your network operator.
Press MUTE
Use ▲ or ▼ to to select ‘SET PHONE’
Press OK
Use ▲ or ▼ to to select ‘REG FLASH’
Press OK
Use ▲ or ▼ to to select FLASH300 or FLASH600
Press OK
Press C twice to exit
Default in US.: 600ms
21
USING THE TELEPHONE
One Touch Memory Keys
Your phone has a total of 11 one-touch memory keys.
The 3 priority P1, P2, P3 memories allow you to store priority numbers in
case of emergencies, such as:
– Local police station,
– Your doctor
– Your neighbour
There are also 8 one-touch memories for frequently used numbers.
To store a number
Lift the handset
Press PROG
Dial the number you wish to store, checking on the display that you
have keyed it in correctly.(30 digits per telephone number allowed)
Press the one touch key button (Priority or Memory dial)
where you wish to store it.
The screen will display ‘SAVE OK’
Note: Numbers will be lost after a few hours if you disconnect your phone.
Dialling stored Numbers
Lift the handset or press SPKR or press Headset
(if headset plugged in)
Press the appropriate one touch memory key and the stored
number will be dialled automatically
There is an index card located under the base of your phone for you to make
a list of which numbers are stored under which one touch memory key.
22
EMERGENCY CONTACT
If there is an emergency and you require help, the AMPLI600 allows you
to call for help effortlessly. In order for this facility to work, you must preset
your emergency contact SOS numbers (up to 6 telephone numbers) and
record an emergency message that will be heard by the people you call.
The AMPLI600 can hold up to 6 emergency contact SOS telephone numbers (18 digits per telephone number). Ensure that you have discussed
and agreed that you can use people’s telephone number as an emergency
contact SOS number. Good examples of telephone numbers to use would
be those of relatives, neighbours or friends. The friend, relative or neighbour you choose must have a touchtone phone service and a phone that
will generate touch-tone codes. Do not use the emergency services as
emergency contact SOS numbers.
Note: We suggest that both the Remote Audio Monitoring & Auto On Hook
features of the AMPLI600 are ON to ensure the Emergency Contact Feature
works correctly.
Create Emergency Contact SOS Numbers
Press MUTE
Use ▲ or ▼ to select ‘SET SOS’
Press OK
Use ▲ or ▼ to select ‘SET SOS NUMBER 1’
Press OK
Enter the emergency connect SOS number,
(you can use the C key to delete previousdigit).
Press OK to confirm
To program another emergency contact SOS number
select ‘SOS NUMBER 2’ (or 3, 4, 5, 6) from the menu and
do the same as above.
Press C three times to exit
23
EMERGENCY CONTACT
In order to change an emergency contact SOS number simply do as above
but select the emergency contact SOS number you wish to change from
the menu then type over the existing number.
NOTE: If you only want to program one phone number, you should store
this number in all six of the memory locations
Create the Emergency SOS Message
This is the message that the emergency contact will hear if the call is answered. The message can be up to 10 seconds long.
Press MUTE
Use▲ or ▼ to select ‘SET SOS’
Press OK
Use▲ or ▼ to select ‘SOS SOUND’
Press OK
Record your emergency contact SOS message by speaking
clearly into the speakerphone. You must be less than 1 ft away
from the phone. The message can be up to 10 seconds long.
A good example of a message would be: ‘This is Mrs. Doppler.
I have a problem, please press any key on your keypad to
talk and listen.
Press OK to stop recording
Press C three times to exit
24
EMERGENCY CONTACT
Play the Emergency SOS Message
Press MUTE
Use ▲ or ▼ to select ‘SET SOS’
Press OK
Use ▲ or ▼ to select ‘SOS SOUND’
Press OK
Use ▲ or ▼ to select ‘PLAY SOUND’
Press OK to play your message
Press C three times to exit
Using the Emergency Contact Telephone
Once the Emergency Contact SOS numbers and the emergency message
have been created and stored, this function is ready for use. Simply press
the red Emergency button on the remote band or telephone base. Once
pressed, the AMPLI600 will automatically dial your emergency contact SOS
numbers starting with number 1. If this number is busy or nobody answers
within 30 seconds, the AMPLI600 will dial the second emergency contact
SOS number. This process will continue until all 6 numbers have been
dialed twice unless someone picks up the call. When a person answers
the emergency call, they will hear the emergency message. The person
must press one of the keypad keys (0-9, * or #) to confirm that the emergency contact SOS message has been received and this will also stop the
AMPLI600 from dialling the next number. The AMPL600 will then turn on
the speakerphone automatically allowing you to speak to the emergency
SOS contact.
25
EMERGENCY CONTACT
Testing the Remote Band
You should test the emergency contact button on your remote band at least
once a month.
Note: You must warn your emergency SOS contacts that you are about to
do this.
If the remote band does not work well from locations in which it has worked
before, replace the battery immediately 9see below) and check that the
phone’s antenna is positioned correctly.
Change the Remote Band Battery
Lift the remote band and unscrew the three small screws found on the
base. Lift the cover to find the battery. Replace with 1 alkaline “23A” 12V
size cigarette lighter battery. Take note and insert with the correct polarity.
Replace the cover
Cancel an Emergency Contact SOS Call
In cases of a false alarm, you can press the X button on the remote band
or STOP button on the phone base to deactivate the emergency contact
SOS function.
Remote Audio Monitoring
By giving an emergency contact a Monitor Access Code to your telephone,
it allows them to call and speak to you without you having to pick up the
phone as they can switch on the speakerphone remotely. This may be
useful for them if a situation arises where they have become worried about
26
REMOTE MONITORING
you or after they have called for help.
IMPORTANT: This feature will not work with telephones attached to answering machines or using voice mail services.
All answering machine or systems connected to the same phone number
as the AMPLI600 must be unplugged or deactivated.
Activate Remote Audio Monitoring
Press MUTE
Use ▲ or ▼ to select ‘SET SOS’
Press OK
Use ▲ or ▼ to select ‘AUTO TURN’
Press OK
Use ▲ or ▼ to select ‘ON’ (off to deactivate)
Press OK
Press C twice to exit
27
REMOTE MONITORING
Setting the Remote Audio Monitoring Access PIN Code
The speakerphone will identify the PIN number for Remote Audio Monitoring. The Access PIN code is factory preset to the sequence 1234. It can be
changed as follows:
Press MUTE
Use ▲ or ▼ to select ‘SET SOS’
Press OK
Use ▲ or ▼ to select ‘PIN CODE’
Press OK
Use C to delete existing digits
Enter your new code (max 4 digits)
Press OK
Press C twice to exit
Using Remote Audio Monitoring
These are instructions for your remote emergency contact caller. Ensure
you provide them with the remote PIN code!
1. Dial as if it was a regular phone call. You will hear a “beep” after 10
dialing tones.
2. You will have 10 seconds to enter the Remote Audio Monitor Access
PIN Code on your keypad (the access code is 1234 unless it has been
changed). This turns on the speakerphone of the AMPLI600 phone
and allows you to listen in and have a two-way conversation.
3. Every 2 minutes another “beep” will be audible and you will need to
press any of the 0-9 keys to continue; otherwise the AMPLI600 will
hang up.
28
OPTIONAL ACCESSORIES
Headset
You can also use your Ampli600 in hands free mode with an optional headset, this is ideal for use with a computer screen.
To use the headset
Connect the headset into the headset socket located
at the back of your telephone.
Press the headset key to get the dial tone
Dial the number
To answer a call, press Headset key whilst the phone is ringing
You can adjust the volume and tone level of calls received with the
VOLUME and TONE slide buttons located on the top of the phone (if function is active) and the sending level with the 3 position switch located on
the right side.
Neckloop
Connect the neckloop into the neckloop socket
located at the back of your telephone.
Press SPKR or lift handset to activate the neckloop and
speak into the microphone on the neckloop or handset respectively
The neckloop also has a volume control
To answer a call, press SPKR or lift handset whilst the phone is ringing
Note: The Ampli600 must be connected to the mains in order to use a neck
loop.
29
OPTIONAL ACCESSORIES
Shaker
If you would like to be alerted to incoming phone calls by a vibrating shaker,
you can use an optional shaker.
Connect the shaker into the shaker socket located at the back of your
phone. When an incoming call is received, the shaker will be activated and
vibrate while the phone rings.
One of the shaker settings must be selected, using the 3 position switch
located on the right side of the phone.
(See Settings chapter)
For these optionals accessories , consult the retailer ( see contact
details at the end of this manual)
30
VOLUME AND TONE
Sending Level Adjustment
If your voice is quiet or the person you have called has difficulty hearing,
you can increase the sending level volume with the switch located on the
right side. You can also decrease the sending volume if required. There are
three levels, Min, Normal and Max (outgoing volume up to 12dB)
Receiving Volume and Tone Adjustment
You can increase the receiving volume and adjust the receiving tone according to your own hearing requirements. The AMPLI button allows extra
receiving and tone functions to be activated during the conversation in an
ad hoc fashion. When the function is activated, the red light to the left of
the button is lit. Use the TONE and VOLUME slider buttons to adjust the
level according to your own hearing requirements. When AMPLI is on, the
receiving volume adjustment is 15- 30dB. The tone control allows you to
either boost low or high frequency range. When AMPLI is off, the receiving
volume adjustment is 0 - 15dB. The tone control cannot be used.
When the call is finished, the telephone will reset to standard mode i.e.
AMPLI turned off.
Extra Volume Adjustment Switch
In order to override the standard setting i.e. AMPLI switched off, turn the
extra volume adjustment switch, located on the rear panel of the telephone,
to On. (use the tip of a pencil or small screwdriver if necessary).
ON: When the switch is ON, the extra receiving volume and tone functions
are automatically activated each time you use the phone. You do not need
to use the AMPLI button. (during any call, you can temporarily switch off
and on the extra volume override by pressing the AMPLI button.)
OFF: When the switch is switched OFF, you will need to activate the function by pressing the AMPLI button in order to get use of the extra volume
and tone functions.
This override is useful if the person using the telephone will always need
the amplification setting.
31
VOLUME AND TONE
Handset Amplifier
In both cases, you can also boost the reception volume by an extra 12 dB
by holding down the handset amplifier button located on the handset.
Note: The button must be released while talking or it will act as a mute
button
Caution: Exposure to high amplification levels to people without hearing loss may cause damage to hearing.
32
PHONEBOOK
Create a Phonebook Entry
You can store 99 entries into the phone book with the name and phone
numbers of your correspondent.
Press MUTE
Use ▲ or ▼ to select ‘PHONEBOOK’
Press OK
Use ▲ or ▼ to select ‘ADD’
Press OK
Enter the number (30 digits max per memory)
When the number is correct, press OK to confirm and enter the
name corresponding to entered number.
Select the desired letter by a pressing on the corresponding key
(see table below)
When the name is correct, press OK for 3 seconds to confirm
the Number and Name storage and press C to exit
You can use this table or the letters printed on the keypad to help you
create a phone book entry.
Key
1
2
3
5
6
7
8
9
10
Characters
1. ? - " ' < 1
ABCabc2ÆØ
DEFdef3 4 GHIghi4
JKLjkl5
MNOmno6ÖØ
P Q R S p q r s7
TUVtuv8U
WXYZwxyz9
0+&@/$%
33
PHONEBOOK
Example: To input the letter ‘b’ press the 2 key 5 times. The letter ‘b’ will
show in the display
To insert a ‘space’, press on the OK key twice.
If the next letter is the same as the previous letter (or located on the same
key), press first on the OK key to move and select the desired letter.
Use the C key to delete a wrong number or letter.
Note : If you wish to insert a pause in the stored number, press the REDIAL
key whilst entering (a P will be displayed on the screen).
Create an Entry from the Caller Display Log
You can store 99 entries into the phone book with the name and phone
numbers of your correspondent.
Use ▲ or ▼ to display incoming calls on the screen
Use ▲ or ▼ to select the number you wish to store
in the phonebook
Press and hold OK until the last number digit flashes
You can now modify or enter the name of the caller, as shown
above, or press and hold the OK key for 3 seconds to confirm the
proposed Caller Display name.
Press C to exit
34
PHONEBOOK
Make a call from a Phonebook Entry
Press MUTE
Use ▲ or ▼ to select ‘PHONEBOOK’
Press OK
Use ▲ or ▼ to select ‘REVIEW’
Press OK
Use p or q to select number you wish to dial. You can also get
quick access to a phonebook entry by entering the first letter
of the name
Lift the handset or press SPKR or press Headset
(if headset plugged in), the number will be automatically dialled
Delete a Phonebook Entry
Press MUTE
Use ▲ or ▼ to select ‘PHONEBOOK’
Press OK
Use ▲ or ▼ to select ‘REVIEW’
Press OK
Use ▲ or ▼ to select number you wish to delete
Press C, the screen will display ‘DEL?’
Press C to confirm
Press OK to exit
35
PHONEBOOK
Modify a Phonebook Entry
Press MUTE
Use ▲ or ▼ to select ‘PHONEBOOK’
Press OK
Use ▲ or ▼ to select ‘REVIEW’
Press OK
Use▲ or ▼ to select number you wish to modify
Press and hold OK until the last number digit flashes
Press C to modify the number and insert new number
Press OK
You can now modify the name. Press the C key to delete a letter
Press OK for 3 seconds to confirm the new entry then C to exit.
36
CALLER DISPLAY
The features described in this section are only available if you subscribe to
a Caller Display service from your network provider.
Caller Display means you can see who is calling on your LCD display (provided the number is not withheld, unavailable or is an international call).
When your telephone rings, the time, date, the caller’s phone number and
name and a count number (1-99) is displayed on the LCD display. The
most recent call will have the highest count.
Every received call that is not answered is stored in the call log and the new
calls count together with total calls count displayed on the standby screen
increases by one. The LCD display will return to standby 10 seconds after
the last ringing burst if the call is not answered.
This new call will also activate the new call indicator to blink. This will continue
to blink until the new calls are reviewed and saved/deleted in the call log.
Note: Area code and LDS code must be set correctly (see Settings chapter)
for the telephone to recognize and dial calls from the Caller Display log.
If the caller does not wish to show his phone number or his name, the
screen will display ‘PRIVATE NAME’ or ‘PRIVATE CALLER’. depending
on whether simply name or name and number are being withheld. If
‘UNKNOWN NAME’ or ‘UNKNOWN CALLER’ are displayed if means the
telephone company does have information about either the name or the
name and telephone number.
If the number is unknown from the telephone centre (international incoming
call for example), the screen will display ‘OUT OF AREA’.
To review the new calls, use the ▲ or ▼ keys. When all new calls have been
reviewed, the new call LED will disappear and the screen will come back to
idle state after a few seconds. The total number of incoming call entries on the
incoming call log will still be displayed on the screen. When the incoming call log
is empty (if records have been deleted for example) the screen will display ‘00’.
37
CALLER DISPLAY
Use a Number from the Caller Display Log
There are two ways to use numbers from the call log. Firstly, find the
number and then lift the handset:
Use ▲ or ▼ to access the log and scroll until you find the
required number for dialling
Lift the handset or press SPKR or press Headset (if headset
plugged in), the number will be automatically dialled
Alternatively you can lift the handset and then find the number:
Lift the handset and then use ▲ or ▼ to access the log and
scroll until you find the required number for dialling
Press OK and the number will be automatically dialled
Note: You cannot use either of these methods to recall a number that
displays PRIVATE or OUT OF AREA.
Delete a Number from the Caller Display Log
Use ▲ or ▼ to access the log and scroll until you find the required
number for deleting
Press C, the screen will display ‘DEL?’
Press C to confirm
Press OK to exit
38
CALLER DISPLAY
Delete all Numbers from the Caller Display Log
Use ▲ or ▼ to access the log
Press and hold C until the screen displays ‘ALL DEL?’
Press C to confirm
Press OK to exit
Call Waiting
With this service, you are made aware that a new call is coming through
when you are in conversation. You can take this call and switch between
callers. To use this feature, you must have subscribed to this service with
your network provider.
Press MUTE
Use ▲ or ▼ to select ‘SET PHONE’
Press OK
Use ▲ or ▼ to select ‘CALL WAITING’
Press OK
Use ▲ or ▼ to select ‘ON’
Press OK
Press C twice
39
CALLER DISPLAY
Call Waiting in Practice
When you are in conversation with caller no.1, their name and number will
be displayed on the screen.
A beep tone will be heard when a second call is incoming and their name
and number will be displayed on the screen. If you chose to answer the
call, press FLASH or the phone hook button to transfer.
Note : If you don’t answer the second call, the number will be recorded into
the incoming call log and you will be able to call them back later.
For more information about subscribing to Call Waiting, contact your network provider.
40
NEW CALL/MESSAGE LED
The red LED on the front of the phone will flash to indicate missed calls.
To cancel the flashing light, review your new calls. Simply use ▲ or ▼ to
access the log and scroll through all the new calls.
Alternatively, you can delete the log of unreviewed calls
Use ▲ or ▼ to access the log
Press and hold C until the screen displays ‘ALL DEL?’
Press C to confirm
Press OK to exit
If you do not subscribe to caller display or message waiting service simply
press ▲ or ▼once.
To turn off this feature, set the ‘MSG’ switch on the base of the phone to
‘OFF’. New calls will still be indicated with ‘N’ on the screen but the LED
will not flash.
Message Waiting LED
If you are connected to certain type of switchboards, you may get a message
waiting/voicemail service. ‘MSG WAITING’ will be displayed on screen and
the red LED will be lit continuously. You must retrieve your message in
order to turn the red light off.
41
TROUBLESHOOTING
No display
● Make sure that the power adaptor is plugged in correctly and is not
damaged
● Make sure the batteries are inserted correctly
● Make sure that the batteries are fully charged
Telephone does not ring
● Make sure that the telephone line cord is plugged in correctly and is
not damaged
● Connect another telephone to the telephone PTT socket or move your
telephone to another socket to track if the failure is coming from your
telephone or your PTT socket
● There may be too many communication devices connected to a single
telephone line e.g. another telephone, modem or facsimile machine.
Contact your network provider for help in calculating the limit for your
home or business line
● Check that the button ringer on the right side is not set to OFF position.
● Check that the phone is in the ON HOOK position
No dial tone
● Make sure that the telephone line cord is plugged in correctly and is
not damaged
● Connect another telephone to the telephone PTT socket or move your
telephone to another socket to track if the failure is coming from your
telephone or your PTT socket
● There may be too many communication devices connected to a single
telephone line e.g. another telephone, modem or facsimile machine.
Contact your network provider for help in calculating the limit for your
home or business line
No number is displayed when the telephone rings:
● Please contact your telephone network provider to obtain the caller
display service or ensure that it has been activated if you have subscribed already
● Even if you have subscribed to caller display, if the caller does not want
to show their number, the display will show Private number or if the
42
TROUBLESHOOTING
call is from an area not providing caller display, Unavailable number
will be displayed
● It could be a call from a PBX. Caller display may not work properly if
the telephone is connected to a PBX
No response on LCD display
● If you have experienced a power failure the batteries may become
weak. If the power is restored and the LCD display still does not respond then replace the batteries with new ones.
No Strobe Ringer and/or bed shaker will not activate
● Make sure the strobe and/or shaker switch is turned “ON
● Make sure the Bed Shaker is plugged in correctly
No amplification
● 1. Check to see if the AMPLI amplify button is “ON”. You should see
the red light
There is Interference on the line
● A filter may be required for homes with DSL line.
There is a red light that continues to flash.
● You have un-reviewed Caller ID / Call Waiting information or missed a
call.
No Numbers in memory
● No number stored in that memory button.
● If your phone has been disconnected for a few hours the numbers
stored will be lost.
Emergency Connect button is not working
● There may be a phone off the hook somewhere in your home.
● Check the Auto On Hook Feature
● The remote band’s battery is low or is not installed properly.
● Check the antenna on base.
43
SAFETY INFORMATION
General
Only use the correct authorised power supply with the product.
Do not open the unit (except to replace the batteries). Contact the helpline
for all repairs.
Never dispose of batteries in a fire. There is a serious risk of explosion and/
or the release of toxic chemicals.
Cleaning
Clean the telephone with a soft cloth. Keep the base and handset charging
contacts clean. Never use polishes or cleaning agents - they could damage
the finish or the electrics inside.
Environmental
Do not expose to direct sunlight.
Always ensure there is a free flow of air over the surfaces of the telephone.
Do not place any part of your product in water and do not use it in damp or
humid conditions e.g. bathrooms.
Do not expose your product to fire or other hazardous conditions.
Unplug your phone from the telephone socket during thunderstorms because it could damage your telephone. Your guarantee does not cover
thunderstorm damage.
Do not use the telephone if there is a gas leak. Any spark that might be
created by the electrical contacts found in the telephone could ignite a large
amount of leaking gas.
The telephone is designed for working within a temperature range of 5°C
to 45°C.
44
REGULATORY COMPLIANCE
- This equipment complies with Part 68 of the FCC rules and the requirements adopted by the ACTA. On the bottom of this equipment is a label
that contains, among other information, a product identifier in the format
US:AAAEQ##TXXXX. If requested, this number must be provided to the
telephone company.
- All applicable certification jacks Universal Service Order Codes (USOC)
for the equipment is provided (i.e. RJ11C) in the package with each piece
of approved terminal equipment.
- A plug and jack used to connect this equipment to the premises wiring and
telephone network must comply with the applicable FCC Part 68 rules and requirement adopted by the ACTA. A compliant telephone cord and modular plug
is provided with this product. It is designed to be connected to a compatible
modular jack that is also compliant. See installation instructions for details.
- The REN is useful to determine the quantity of devices you may connect
to your telephone line and still have all of those devices ring when your telephone number is called. In most, but not all areas, the sum of the REN’s of
all devices connected to one line should not exceed five (5.0). To be certain
of the number of devices you may connect to your line, as determined by
the REN, you should contact your local telephone company to determine
the maximum REN for your calling area.
- If this equipment causes harm to the telephone network, the telephone
company will notify you in advance that temporary discontinuance of service
may be required. But if advance notice isn’t practical, the telephone company
will notify the customer as soon as possible. Also, you will be advised of your
rights to file a complaint with the FCC if you believe it is necessary.
- The telephone company may make changes in its facilities, equipment,
operation or procedures that could affect the operation of the equipment. If
this happens the telephone company will provide advance notice in order for
you to make necessary modifications to maintain uninterrupted service.
- This equipment may not be used on coin service provided by the telephone company. Connection to party lines is subject to state tariffs. This
equipment is hearing aid compatible.
Warning: Changes or modifications to this unit not expressly approved
by the party responsible for compliance could void the user’s authority to
operate the equipment.
45
REGULATORY COMPLIANCE
NOTE: This equipment has been tested and found to comply with the limits for
a Class B digital device, pursuant to Part 15 of the FCC Rules. These limits
are designed to provide reasonable protection against harmful interference in
a residential installation. Some cordless telephones operate at frequencies that
may cause interference to nearby TV’s and VCR’s; to minimize or prevent such
interference, the base of the cordless telephone should not be placed near or
on top of a TV or VCR; and, if interference is experienced, moving the cordless
telephone farther away from the TV or VCR will often reduce or eliminate the
interference. However, there is no guarantee that interference will not occur in a
particular installation. If this equipment does cause harmful interference to radio
or television reception, which can be determined by turning the equipment off
and on, the user is encouraged to try to correct the interference by one or more
of the following measures:
• Reorient or relocate the receiving antenna.
• Increase the separation between the equipment and receiver.
• Connect the equipment into an outlet on a circuit different from that
to which the receiver is connected.
• Consult the dealer or an experienced radio TV technician for help.
- If trouble is experienced with this equipment, for repair or warranty information, please contact our customer service staff at: 248-577-5400
If the equipment is causing harm to the telephone network, the telephone company
may request that you disconnect the equipment until the problem is resolved.
- Please follow instructions for repairing if any; otherwise do not alter or
repair any part of device except as specified.
Opening the equipment or any attempt to perform repairs will void the
warranty.
- Connection to party line service is subject to state tariffs. Contact the state public
utility commission, public service commission or corporation for information.
- If your home has specially wired alarm equipment connected to the telephone line, ensure the installation of this telephone equipment does not
disable your alarm equipment. If you have questions about what will disable
alarm equipment, consult your telephone company or a qualified installer.
- This equipment is hearing aid compatible.
46
GUARANTEE
Sonic Alert warrants the phone against any defect in materials or workmanship for the period of one year from the date of purchase.
Should you experience a problem, contact our customer service department
Be sure to save your sales receipt as proof of purchase date should you
need warranty service.
Within a period of one year from purchase date, Sonic Alert will repair or
replace (our discretion) your phone at no cost, if a defect in materials or
workmanship is found. If we elect to replace your phone, we may replace it
with a new or reconditioned product of the same or similar design.
Repair or replacement will be warranted for a period of 90 days or the
original time on the original warranty, whichever is longer.
The warranty does not cover accidents, negligence or breakage to any
parts. This includes shipping damage, failure to follow instructions, misuse,
fire, floods, use of incompatible accessories, Acts of God or failure in your
phone service carrier’s line service. The product must not be tampered with
or taken apart by anyone who is not an authorized
Sonic Alert representative. Tampering with the phone will void ant written or
implied warranties
Sonic Alert shall not be responsible for loss of time, inconvenience, property
damage caused by your phone or any other accidental or consequential
damages
Warranty service is available only with proof of purchase.
47