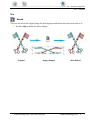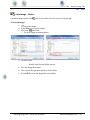
1
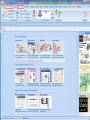
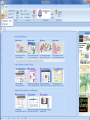
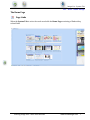
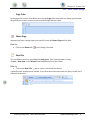
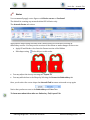
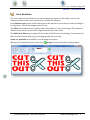
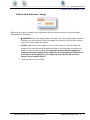
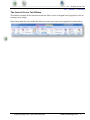
Design Era Universal – Interactive Manual I Manual Feedback Index Page Welcome You are about to experience a new way to learn Design Era. Have you ever been working on something and just went blank? In the past I have relied on posting to the SEU Group but there were occasions that my hour of need was in the middle of the night. With so many functions and tools to remember I needed a backup plan and I started writing things down and then I put it all together and the Interactive Manual was born. It’s nice that you can have the pdf open behind Design Era while you work and if you need a little help it’s got your back, a quick Alt+tab and it is ready for you to click and learn about the tool. The initial level offers the same information that is currently in the Sierra Manual, every effort has been made to keep the information concise cliff notes. The confusing jargon has been replaced with just the facts. Only the information you need in order to get back to working on your design. • Navigating the IManual is very easy; just click on a topic and then review the information. At the top of every page you can find additional answers if they are available. Click to Begin • • • • • • Back IManual Home Instruction Video Test Close Back: This will take you to the parent window for the topic IManual home: This will take you to the IManual home page. Instruction: This will take you to a Lesson Page where you can purchase Workbook lessons. Video: This will take you to a Video Page to view the video. Test: Test your skills with a test on the Tab functions. Close: This will close the IManual.pdf Before you begin click here to review the Installation & Setup section to assure that your work environment is optimized for successful design creation. It will also ensure that your defaults are the same as any lesson you participate in. You will be returned to the IManual Home page when completed or Click on any IManual Home Learning Design ERA – Stitch ERA Universal icon to begin exploring. www.lorileedesigns.com Completed tabs: System / Artwork / Artwork Image/ Artwork Vector Select the tab title to read overview Select the Title to return to Main Menu .- A "~ '- ;,J ,~ R.a..:tion Elrbroid«y "Set 50", l. Set iv>J< -;::1 _or .... otote • -'" - G, a G, () G , 0 0 0 , 0 , ,0 ,0 ,0 Tr ~«lCY : G, , 'f0 - i""I Scr ~tng D .~ "-~ , • To Elrbroid«y "~, " ," o 1"" 9"' • """, ' , ,.. " ~ ., , • • ~ ~ ~ ~ ~ ~ I ~ ~ ~ ~ • . """"" , """,', , """,', • , • ,, ~ • 0 < ~ • 142 ~ · , Vocton; • Embroid..,. Stitch Era / Design Era – Installation & Setup Installation & Set up Design Era Universal V11.10 November 2011 Stitch Era / Design Era – Installation & Setup Table of Contents Table of Contents Welcome to Stitch ERA Universal - Embroidery Digitizing software. ............................... 1 Computer Requirements ......................................................................................................................... 2 Before Installation..................................................................................................................................... 3 Installation ................................................................................................................................................... 3 After Installation........................................................................................................................................ 4 Creating an Acception in Your Virus Scanning software. ....................................................... 4 Registration .................................................................................................................................................. 4 Confirming Activation for Free User License ............................................................................... 5 Getting Support .......................................................................................................................................... 5 Getting Started Using Design ERA ..................................................................................................... 5 Interactive Manual.................................................................................................................................... 5 Stitch Era / Design Era – Installation & Setup Design Era Universal – Installation & Setup Welcome to Stitch ERA Universal - Embroidery Digitizing software. This software will allow you create custom embroidery up to 40,000 stitches per design. The program and your designs are stored on your computer. A high speed internet connection is required for user license authentication and its constant connection to the internet security dongle is required for its use. This Free Software is offered through Licensed Dealers of Stitch ERA Universal / Design ERA. You may install the software from a download version obtained from an authorized dealer web site but it is highly recommended that you install the software directly from a CD to ensure that the program is complete and error free and that you have a physical backup if you would experience computer problems that would require re-installation of the software. Learning Design ERA – Stitch ERA Universal www.lorileedesigns.com 1 Stitch Era / Design Era – Installation & Setup Design Era Universal – Installation & Setup Computer Requirements To have the best experience with the software follow the minimum /maximum computer requirement guide below. Your computer must be within the guide range to be eligible for Sierras Technical Support service. Running the software out of these ranges may result in unexpected errors or malfunction. A complete listing of Authorized Dealers can be obtained from www.freesierrasoftware.com Stitch Era Universal has been developed to work on Microsoft® Windows® XP Professional SP3, Microsoft® Windows® Vista (Home Premium or superior) and Microsoft® Windows® 7 (Home Premium or superior) operating systems; therefore, it is essential that any of them be installed and running properly. Item Processor Memory Video Monitor Free disk space CDR Unit Minimun configuration Pentium 4 - 2.8 GHz or equivalent in Duo technology (Intel 7300 Series) 1 Gb 1024 x 768 pixels True color (32 bits) with OpenGL acceleration 17 inches wide 1 Gb CD Reader 24x-speed Floppy Disk 3.5" HD non USB Ports RS232 Serial port Other Permanent internet connection. Valid e-mail account Learning Design ERA – Stitch ERA Universal Recommended configuration Pentium 4 - 3.2 GHz or equivalent in Duo technology (Intel 8500 Series) 2 Gb 1440 x 900 pixels True color (32 bits or better) with OpenGL acceleration 19 inches wide 20 Gb CD-DVD Reader\Writer 52x-speed 3.5" HD non USB Required if you need to transport designs from the computer to embroidery machines using diskettes RS232 Serial port Required if you will use Direct Connection to embroidery machines using diskettes. May requires additional hardware\cable Permanent (DSL\Cable) internet connection. Valid e-mail account www.lorileedesigns.com 2 Stitch Era / Design Era – Installation & Setup Design Era Universal – Installation & Setup Before Installation It is essential that you have your windows operating system current and up to date. If you do not have a basic understanding of the Windows® environment you should refer to Windows® Help section or professional assistance in performing the following in their respective order. Perform a routine virus scan. Perform a routine registry clean. Perform a Disk Cleanup. Perform a Disk Defragmentation. Perform a Windows update. Turn off the Windows Firewall. Turn off your Anti Virus software. Installation • • • • • • Please have a pen and paper handy. Place the Stitch ERA Universal CD in the CD drive of your computer. Depending on your computer defaults one of several things will occur. The CD will launch the installation program. The CD will launch the Browse folder for the drive and you should select the setup.exe file. Nothing will happen and you will have to access manually by clicking on the Windows start icon and then select Computer to access the CD drive files, then click on the setup.exe file. STITCH ERA UNIVERSAL UTILIZES THE Windows® ENVIROMENT, THE INSTALL DEFAULT IS FOR DRIVE C:\ CHANGING THE INSTALLATION DRIVE WILL RESULT IN POTENTIAL PROBLEMS WITH PROGRAM FUNCTIONS. Please note: The installation process may take some time to complete. If you experience any errors during installation write them down. Search for solutions in the installation section of www.embroideryabc.com Once installation has completed, Remove the installation CD from the drive and store it. Turn the Windows firewall and Anti virus software back on. Learning Design ERA – Stitch ERA Universal www.lorileedesigns.com 3 Stitch Era / Design Era – Installation & Setup Design Era Universal – Installation & Setup After Installation Once the installation is complete it is advisable to run a quick virus scan to detect the security files in the software. Once any Sierra file is detected, you will create an exception in the anti virus software which will “accept” them as valid during future scans. Blocking any of the Sierra files will result in an unstable environment and unexpected shutdowns, errors, and failures will occur. Creating an Acception in Your Virus Scanning software. If you are running a free version antivirus you may have difficulties in creating an exception, consult your virus documentation or contact their site for assistance. Paid for Anti Virus like ex: AVAST® can detect installation changes and will offer you the opportunity to accept its presence in Design ERA/Sierra and it associated files/folders. Sierra files contain the security protocol that is required to allow your computer access to the server for program usage. Block access to these files and you will not have the license validation needed to run the software. A good virus protection program making an exception to Sierra related folders is still alert to any future attempt to install a Malware version of this file elsewhere on your computer. Always READ the warnings offered by your anti virus software before accepting or denying access. Registration The first time that Design ERA is opened you must complete the registration form to activate your Free User License. Locate the DESIGN ERA icon on your Desktop. Select the icon to launch the software. o If no icon is present on the desktop: Access manually by left clicking on the Windows start icon, Select All Programs to expand the view Locate the Sierra Folder from within the folder locate the Design ERA icon rt click on the icon then Select “SEND TO” and choose “Desktop” to place an icon on your desktop for future access. Left click to launch Design ERA . Learning Design ERA – Stitch ERA Universal www.lorileedesigns.com 4 Stitch Era / Design Era – Installation & Setup Design Era Universal – Installation & Setup Confirming Activation for Free User License After the form is complete Design ERA will send the registration and close the program. At this time you will need to access the email address that was entered in the registration form, open the message, and click on the link to activate your User License. If the email from Sierra is not in your Inbox, please check your Spam folder in the event that your email carrier moved it. You must successfully complete the activation process or Design ERA will not move past the registration screen. Getting Support Sources for support and assistance for the Free Version of Stitch /Design ERA are provided through the Yahoo group which is peer supported and EmbroideryABC Getting Started Using Design ERA Once Design ERA has been successfully activated you can begin learning the program functions, tools and processing for creating your own custom embroidery designs, lettering, motifs, editing and additions to existing machine format designs. Learning to create or edit designs requires time and effort; your success will depend on how much of each you want to put in. Interactive Manual Most manuals require you to have some knowledge of the subject in order to navigate its structure; with the Interactive Manual you simply click on an icon and you will be taken to your point of interest to learn more about its function. You may have the manual open behind Design/Stitch Era enabling you to reference the material quickly. Video and Exercise options can be found on the upper right of the topic screen. Help Icon Learning Design ERA – Stitch ERA Universal Video Icon Lesson icon www.lorileedesigns.com 5 Design Era – System Tab The System Tab THE SYSTEM TAB/RIBBON ................................................................................................................................................... 1 FILE .................................................................................................................................................................................. 2 Create Icon ......................................................................................................................................................................... 2 FILE .................................................................................................................................................................................. 3 New ▼ ............................................................................................................................................................................... 3 Blank Design ...................................................................................................................................................................................... 3 Start Wizard ...................................................................................................................................................................................... 4 FILE .................................................................................................................................................................................. 5 File Open ............................................................................................................................................................................ 5 PRODUCT & RELEASE ............................................................................................................................................................ 6 LICENSED TO ....................................................................................................................................................................... 6 AUTHORIZED DEALER ............................................................................................................................................................ 6 BUY STITCH ERA .................................................................................................................................................................. 6 THE HOME PAGE .................................................................................................................................................................. 7 PAGE LINKS ........................................................................................................................................................................ 7 Basic Learning Resources ................................................................................................................................................... 8 Links to Embroidery Software & Services ........................................................................................................................... 8 Additional Training, Assistance & Troubleshooting ........................................................................................................... 8 PAGE TABS ......................................................................................................................................................................... 9 Home Page ......................................................................................................................................................................... 9 New File .............................................................................................................................................................................. 9 Learning Design ERA – Stitch ERA Universal www.lorileedesigns.com Design Era – System Tab System Tab / Ribbon – Overview The System Tab/Ribbon When Design ERA opens the first screen visible is the System Tab. The ribbon and work area (home page) contain General Information that pertains to the software, creating designs, and embroidery industry related links. • • • Select a Section of the Ribbon to learn more about its feature. Artwork Tab Overview The Difference between Raster /expanded and Vector/condensed images. Learning Design ERA – Stitch ERA Universal www.lorileedesigns.com 1 Design Era – System Tab File – Create Icon File Create Icon The File section allows you to Create a New Design or Open a Saved Embroidery Design in either Era format or an expanded Machine format file The short-cut is based on the default setting within the: Options and Preferences /Application /Project/General: Depending on the Default settings one of two things will occur. 1. If the setting is: Start New Design Using Wizard selection = unchecked. Selecting the Create Icon will create new blank work area. Or 2. If the setting is: Start New Design Using Wizard selection = checked. • Selecting the Create Icon will launch Start Wizard interface where you will be offered a selection of options to: • • • • Quick start with a blank design using Simple Wizard. Quick start with a blank design using Complete Wizard. Open a .dsg design file Open a machine format design file ( anything not .dsg) The default setting can be turned on/off at your preference. Regardless of the default setting, the end result is an open work area. It will have a design or it will be blank. It is assumed that you will eventually change the default to none and uncheck the Start Wizard to open to a blank design work area. Learning Design ERA – Stitch ERA Universal www.lorileedesigns.com 2 Design Era – System Tab File – New – Blank Design File New ▼ Blank Design This icon creates a new blank work area for design creation. It will apply the defaults stored in the Options & Preference settings. How to: • Select the Blank Design A new work area has been created. icon. To learn more about Options and Preference settings see: Application Button / Menu Learning Design ERA – Stitch ERA Universal www.lorileedesigns.com 3 Design Era – System Tab File – New – Blank Design Start Wizard This icon is a short cut to the Start Wizard. How to: • Select the Start Wizard The Start Wizard window appears. icon. You may select any of the options from the window to create, open, or be offered assistance using the simple or complete wizard for defining the aspects of creating and storing designs. To learn more about the Start Wizard see: Application Button / Menu Learning Design ERA – Stitch ERA Universal www.lorileedesigns.com 4 Design Era – System Tab File – New – Blank Design File File Open Selecting the icon opens the Open File Window it allows you to scan your computer or external drives to locate a design file in either condensed (.dsg) or expanded machine file format. How to: • Select the File Open icon. The Open Design Window appears. You may open designs from the computer, drives, or Design Library. The window operates as any Windows open window function, you may change the Look in folder or how you view the folder and file details. • Options: Allows you to open a condensed .dsg file directly into an expanded machine format file. It will create a copy of the condensed file and then strip the condensed framework and information before it appears on the work area. o To save the expanded file you will need to Export to Machine Embroidery File Format. • Expanded to Condensed: This will open an expanded machine format file by passing through a filter that will create condensed sections from the characteristics of the expanded file. To learn more about the features mentioned here see: Application Button / Menu Learning Design ERA – Stitch ERA Universal www.lorileedesigns.com 5 Design Era – System Tab File – New – Blank Design Product & Release • • • Current version that is installed. Serial number that is assigned. Update icon – This icon will signal you when there is an update available for download Licensed to • • Registration information with the Registrants name, company name, and email address that Era has been registered to. Link to Embroidery ABC where you can register and use learning and troubleshooting resources for SEU Authorized Dealer • Your Authorized Dealer information and links to contact them via email or website Buy Stitch Era This link will take you to the Sierra site to upgrade your level of software. Learning Design ERA – Stitch ERA Universal www.lorileedesigns.com 6 Design Era – System Tab File – New – Blank Design The Home Page Page Links When the System Tab is active the work area holds the Home Page consisting of Embroidery related links. Learning Design ERA – Stitch ERA Universal www.lorileedesigns.com 7 Design Era – System Tab File – New – Blank Design Basic Learning Resources Basic Learning Resources: This area contains links to the Updated User Manual, Video Tutorials and Quick Start guides for Design ERA. The tutorials and videos are based on previous versions of ERA but they do offer an overview of how the software functions. Links to Embroidery Software & Services Get acquainted with other Sierra products and services. The links provided offer information on the software levels to keep you informed of your options to use when you are ready to upgrade. Planet Embroidery offers a fee embroidery service, monograms, and photo stitch. Additional Training, Assistance & Troubleshooting These links keep you in touch with Embroidery ABC to help you troubleshoot any concerns you may encounter. The yahoo peer support group is a friendly resource for learning how to use Design ERA. There have been several of Era users that have posted on Youtube to give you visual instruction so you can see how a function is performed. Learning Design ERA – Stitch ERA Universal www.lorileedesigns.com 8 Design Era – System Tab File – New – Blank Design Page Tabs In the upper left corner of the Home area are the Page tabs, these tabs are always present and they allow you to have several access several designs that are open. Home Page Anytime you have a design open you can still access the Home Page and its links. How to: • Click on the Home tab icon to bring it forward. New File You can directly access a new blank file work area. This is an alternate to using Create – New icon or the Wizard from the File section of the ribbon. How to: • Click on the New File tab to create a new blank work area. A new file work area has been created. If you have more than one work are open you will see it reflected in the tabs. Learning Design ERA – Stitch ERA Universal www.lorileedesigns.com 9 Stitch Era – Artwork Tab The Artwork Tab • • Artwork Tab Overview The Difference between Raster /expanded and Vector/condensed images. THE ARTWORK TAB/RIBBON................................................................................................................................................ 1 RASTER/EXPANDED – VECTOR/CONDENSED .............................................................................................................................. 1 What is the difference between Raster and Vector Images? ............................................................................................. 2 RASTER.............................................................................................................................................................................. 5 Open Image ........................................................................................................................................................................ 5 Capture Image File ............................................................................................................................................................. 6 Save scanned Image: ......................................................................................................................................................................... 6 Paste Bitmap Image ........................................................................................................................................................... 7 Save Pasted Image: ........................................................................................................................................................................... 7 VECTOR ............................................................................................................................................................................. 8 Open File ............................................................................................................................................................................ 8 Get From Application ......................................................................................................................................................... 9 Paste EMF Vector ............................................................................................................................................................. 10 Save Pasted Image: ........................................................................................................................................................................ 10 CLOSED SHAPES ................................................................................................................................................................. 11 Closed Shapes ................................................................................................................................................................... 11 Open Shapes..................................................................................................................................................................... 12 Text................................................................................................................................................................................... 13 Create Text Vectors ......................................................................................................................................................................... 13 Save Text Shapes:............................................................................................................................................................................ 14 Bezier ................................................................................................................................................................................ 15 Freehand .......................................................................................................................................................................... 16 Save Bezier & Freehand Shapes: ..................................................................................................................................................... 16 Learning Design ERA – Stitch ERA Universal www.lorileedesigns.com Stitch Era – Artwork Tab The Artwork Tab – Overview The Artwork Tab/Ribbon This ribbon contains short-cuts to the Raster/Artwork Image and Vector/Artwork Vector tabs as well as access create your own vector artwork using Closed Shapes, Open Shapes, Text Vectors, Bezier, or Freehand. • Review the Difference between Raster & Vector Formats Learning Design ERA – Stitch ERA Universal www.lorileedesigns.com 1 Stitch Era – Artwork Tab Raster/expanded – Vector/condensed Raster/Expanded – Vector/Condensed What is the difference between Raster and Vector Images? The following information is based on my own perception of the differences between the file types Raster Image: Raster images or bitmaps may be thought of as a grid of colored points (called pixels). Resolution is based on columns in a grid. The larger the “grid” or resolution an image will look better to the human eye. The squares of the grid are called points, each point can hold a color value; this value is determined by the Color Depth or format capabilities of the saved as format which affects image quality. Color depth is the computer eye; it’s what determines image suitability for digitizing. Image Formats The following formats are compatible with Stitch Era. Bitmaps (bmp) JPEG (jpg) PCX (pcx) Targa (tga) Clipboard Format (CLP) Gif without compression (gif) Vector Image: Vector images or outlines are files that contain information of objects, with their shapes and fillings. The shapes are stored as a sequence of nodes tied by lines (vectors) that defines their shapes. Vector images do does not rely on pixels so you may scale without losing definition. It is easier to change colors and other properties of every shape and these conditions give versatility, Stitch Era creates stitch patterns based on the same shape technology. This versatility is why you can create and work with vector based images. Vectors may be also imported from popular applications like Corel DRAW and Adobe Illustrator. Vector Formats The following formats are compatible with Stitch Era: Windows MetaFiles (wmf) Enhanced MetaFiles (emf) CorelDraw (cdr) Corel Presentation Exchange (cmx) Adobe Ilustrator (ai) Regardless of what format the image is in; you must be able to select the best digitizing technique to apply to the image for best results. Manual digitizing does not rely on color depth because you control the outcome of each section. Image format is not a primary factor. Auto features do rely on color depth for raster images. Use of the Artwork Image-EditionColor Reduction will allow you to see what the computer sees before generating a section into Stitches. Reducing color depth before generation will result in cleaner processing. It will also reduce generation errors such as too many colors or image not adequate. Learning Design ERA – Stitch ERA Universal www.lorileedesigns.com 2 Stitch Era – Artwork Tab Raster/expanded – Vector/condensed That being said, here’s the rub. Just because an image format reads a raster or vector extension doesn’t make it so. Use the extension as a guide to how the image was most recently saved. If you cannot verify the program it was created in then apply the following tools to assist you with a little detective work to determine its quality for yourself. You will learn that there are two different types of embroidery files. • • Expanded which contains only machine commands necessary for sew out. i.e.: needle number, lock stitches, trims, consider this rigid. (.dst, .pes, …) Condensed formats contain machine and software commands, i.e.: needle numbers, colors, component types, densities, etc… consider this flexible. (.dsg) We have learned that there are two types of Image files “Raster and Vector”. Here is a comparison to Expanded and Condensed embroidery files. Comparison 1 • • Raster being the expanded version is comprised of pixels and rigid in nature making it difficult to make color changes or size adjustments. When editing a color within an image area it may appear one color when in reality each pixel within the area may contain a variation of that base color that the eye perceiving as solid. Graphic vector images saved as a raster format most likely will have less variation of color depth than photographic images saved in the same file format. Like machine format files, image file information contains only what is needed to execute it to a printer or view on screen. Vector being the condensed version. The flexibility of the vector format makes it the most desirable format to use in creating auto and assisted designs. When editing a color within a vector image - one click will flood an entire area with color it then conforms to the shape of the defined area. Like Condensed embroidery files (.dsg) they contain important information regarding how it was created that allow you to access and change its properties when editing. Comparison 2 Let’s turn to a visual representation. We have a loop of string (6”) that represents the expanded format, and a loop of elastic (4”) that represents the condensed format To see the editing differences between them, pull the string outward, it’ll stretch a bit and depending on how hard you pulled; distortion or even breakage can occur. Now on a piece of paper draw a 5” line and place the string along the edge of the Line, try as you will there is always going to be extra string. Now take the elastic, match it up with the string then place it along the edge and skootch it in a bit. Do you see what’s happening here? This is called compensation, an expanded format can be manipulated but the changes will not compensate, it will either pile up or stretch out causing either pixilation or density issues - it’s rigid. A condensed format will compensate changes because of its flexible nature. Learning Design ERA – Stitch ERA Universal www.lorileedesigns.com 3 Stitch Era – Artwork Tab Raster/expanded – Vector/condensed The Artwork Image-Edition-Color Reduction tool will generate the colors detected within an image to enable you the opportunity to reduce it for better auto generation results. Photo quality Raster - jpg Detects 1000 color depths Will not generate a section. Generation errors are only correctable by improving image quality. Graphic quality Raster Detects 1 color depth Will generate a section that contains many nodes. Editing is probable. Graphic Vector Detects 1 color Will generate a section of optimal quality that contains minimal nodes. Editing may not be needed. It’s important to note that a condensed file format may be opened or even “saved as” in various software. This doesn’t mean that the software can read or write the condensed information within the file. If this is the case editing the file would be based on expanded format limitations. One way to determine if the object properties were included in the file is to select an object within your editing software, (i.e.: Adobe, Corel, Embroidery software) select and right click the object; a submenu would list any editable properties within the object. Learning Design ERA – Stitch ERA Universal www.lorileedesigns.com 4 Stitch Era – Artwork Tab Raster – Open Image Raster Open Image This section assumes that you have an understanding of the differences between the two types of images files that can be brought into Design Era. Once you have opened a blank work area Design Era offers you options for the next step in creating an embroidery file. In most case you will already have an image that you want to create a design from. It is important that you know whether the file is Raster of Vector format in order to locate it using the Raster or Vector section of the ribbon. • Select the Open Image icon. The OPEN IMAGE window opens. You can search your hard or external drives for a raster image format file. Raster formats that can be opened into the work area. .bmp .clp .jpg .gif .pcx .tga Bit map Clipboard format Joint Photographic Experts Group. Graphical Interchange Format. Paintbrush file. Targa Learning Design ERA – Stitch ERA Universal www.lorileedesigns.com 5 Stitch Era – Artwork Tab Raster – Capture Image File Capture Image File You may scan an image into the software, the link provided will open your scanner software and on completion the image will be placed into your work area. • You must first configure the scanner to work with SEU using the scanner setup option. You may capture an image in color or black and white. Regardless of the scan mode save your image as .bmp - from the drop down arrow in Save As Type select monochrome for black and white images and 16 or 256 bitmap for color images.. Take into account the following recommendations when scanning images: • • Only scan the area of the image that you will work on. This will result in smaller, manageable images. Use low resolution settings. In most cases, a 300-dpi resolution is enough. If you are going to work with the Photo type, the image used must have a high contrast level. Typical Raster formats for scanners that can be scanned into SEU: o .bmp o .jpg Bit map Joint Photographic Experts Group. Save scanned Image: Scanning will access the Artwork Image Tab • Select the work area. Save Image icon to save this file or it will be lost when you close the It’s a good idea to save it to the same folder that you will be saving the design. Learn more about your scanner from the documentation within the scanning software or Google the manufacturer website. Learning Design ERA – Stitch ERA Universal www.lorileedesigns.com 6 Stitch Era – Artwork Tab Raster – Paste Bitmap Image Paste Bitmap Image SEU has the ability to paste files that were copied to the Windows clipboard. If you selected and copied a file in any Vector Art Program that uses the Windows clipboard then the Paste Icon in SEU will be active. • Select the work area. paste bitmap icon to place the contents of the windows clipboard onto the Save Pasted Image: A pasted raster image will activate the Artwork Image Tab You may use any feature on the Artwork Image tab to make adjustments to the image. • • Select the Save Image icon to save this file, select your preferred format from the drop down option. If you do not save the file it will be lost when you close the work area. It’s a good idea to save it to the same folder that you will be saving the design. Learning Design ERA – Stitch ERA Universal www.lorileedesigns.com 7 Stitch Era – Artwork Tab Vector – Open File Vector Open File • Select the Open Vector Image icon. The OPEN IMAGE window opens. You can search your hard drive or external drives for a Vector image format file. Vector formats that can be used in SEU are: .emf Enhanced Windows Metafile .wmf Windows Metafile .cmx Corel Metafile Exchange The following vector formats must be converted to one of the above file types if you do not have Corel Draw or Adobe Illustrator on your computer: .ai .cdr Adobe Illustrator Corel Draw Learning Design ERA – Stitch ERA Universal www.lorileedesigns.com 8 Stitch Era – Artwork Tab Vector – Get From Application Get From Application Selecting this icon will reveal the drop down▼ menu options. • • • Select the Program from which you want to transfer a copy of a vector file that is in the work area of either: CorelDRAW© Adobe Illustrator©. Learning Design ERA – Stitch ERA Universal www.lorileedesigns.com 9 Stitch Era – Artwork Tab Vector – Paste EMF Vector Paste EMF Vector SEU has the ability to paste files that were copied to the Windows clipboard. If you selected and copied a file in a vector based software that uses the Windows clipboard then the paste icon in SEU will be active. • Select the work area. paste EMF icon to place the contents of the windows clipboard onto the A pasted image will activate the Artwork Vector Tab • Use the ribbon sections to edit the image file if needed. Save Pasted Image: • Select the Layout Tab to bring it forward. • In the Export section of the ribbon select the Save EMF Vector Image icon to save this file or it will be lost when you close the work area. The only Save As option is .emf which is a Windows© enhanced metafile. • It’s a good idea to save it to the same folder that you will be saving the design. Learning Design ERA – Stitch ERA Universal www.lorileedesigns.com 10 Stitch Era – Artwork Tab Closed Shapes – Closed Shapes Closed Shapes Closed Shapes You can create Pre-Defined Geometric Vector Shape Artwork or add it to an existing raster or vector image file. Select the Closed Shapes icon. o From the menu options click to select a shape. The shape feature has been active. • Click and drag a shape onto the work area and release. • The Artwork Vector tab actives. You may use the sections of the ribbon to make changes to the vector. • • You may adjust the size by selecting the Layout tab You may add stitches to the Shape by Selecting the Convert to Embroidery tab. Once you de-select the vector shape the Artwork Tab becomes active and on top again. Notice that you have access to the Embroidery and View Tabs. To learn more about these tabs see: Embroiery Tab, Layout Tab. Learning Design ERA – Stitch ERA Universal www.lorileedesigns.com 11 Stitch Era – Artwork Tab Closed Shapes – Open Shapes Open Shapes You can create Pre-Defined Open Vector Shape Artwork or add it to existing raster or vector image file. Apply stitches to pre-defined vector motifs. Select the Open Shapes icon. o From the menu options click to select a shape. The shape feature has been active. • Click and drag a shape onto the work area and release. • The Artwork Vector tab actives. You may use the sections of the ribbon to make changes to the vector. • • You may adjust the size by selecting the Layout tab You may add stitches to the Shape by Selecting the Convert to Embroidery tab. Once you de-select the vector shape the Artwork Tab becomes active and on top again. Notice that you have access to the Embroidery and View Tabs. To learn more about these tabs see: Embroiery Tab, Layout Tab. Learning Design ERA – Stitch ERA Universal www.lorileedesigns.com 12 Stitch Era – Artwork Tab Closed Shapes – Text Text There are just some TT fonts that are not suited for auto generated embroidery texts. Straight line text vectors are available from any TrueType font on your computer. You have the ability to split the vector shapes into sections more suited for auto completed sections. For manual digitizing text vectors present the clean outlines needed for manually digitizing font characters. Create Text Vectors • • • • Select the Text icon to open the Vector Text dialog box. Type the line of text or press enter to add lines of text, Select the font, size, alignment and presentation. Press the green check . This tool has a very simple nature there are no other bells or whistle, just vector shapes that look like text. Manipulate them using the tools on the Image Vector ribbon. The Artwork Vector tab actives. You may use the sections of the ribbon to make changes to the vector. • • You may adjust the size by selecting the Layout tab You may add stitches to the Shape by Selecting the Convert to Embroidery tab. Once you de-select the vector shape the Artwork Tab becomes active and on top again. Learning Design ERA – Stitch ERA Universal www.lorileedesigns.com 13 Stitch Era – Artwork Tab Closed Shapes – Text Notice that you have access to the Embroidery and View Tabs. To learn more about these tabs see: Embroiery Tab, Layout Tab. Save Text Shapes: • • • Select the Layout Tab to bring it forward. In the Export section of the ribbon select the Save EMF Vector Image icon to save this file or it will be lost when you close the work area. The only save format option is .emf which is a Windows© enhanced metafile. It’s a good idea to save it to the same folder that you will be saving the design. Learning Design ERA – Stitch ERA Universal www.lorileedesigns.com 14 Stitch Era – Artwork Tab Closed Shapes – Bezier Bezier You can manually apply vector figures with Bezier curves or Freehand. The default for creating any artwork within SEU is Bezier only. The Artwork Vector tab actives. Apply Bezier shapes using the same node characteristics as used when creating an embroidery section. You may use the sections of the ribbon to make changes to the vector. • Apply fill and Border color from the Format section of the Ribbon. • • • Edit shapes using Select Object to edit nodes. You may adjust the size by selecting the Layout tab You may add stitches to the Shape by Selecting the Convert to Embroidery tab. Once you de-select the vector shape the Artwork Tab becomes active and on top again. Notice that you have access to the Embroidery and View Tabs. To learn more about these tabs see: Embroiery Tab, Layout Tab. Learning Design ERA – Stitch ERA Universal www.lorileedesigns.com 15 Stitch Era – Artwork Tab Closed Shapes – Freehand Freehand Apply open figures, by drawing directly in the work area. • Apply fill and Border color from the Format section of the Ribbon. • Edit shapes using Select Object to edit nodes. Be creative, explore all the vector shape options to create and edit your own unique n artwork. There are 2 modes for creating freehand vector shapes. • • Active: Create Perfect Figures will automatically close a shape once the mouse button is released. example: circles De-selected: Allows only literal line placement, it will not allow a shape to close. Example: lines Once you de-select the vector shape the Artwork Tab becomes active and on top again. Notice that you have access to the Embroidery and View Tabs. To learn more about these tabs see: Embroiery Tab, Layout Tab. Save Bezier & Freehand Shapes: • • • Select the Layout Tab to bring it forward. In the Export section of the ribbon select the Save EMF Vector Image icon to save this file or it will be lost when you close the work area. The only save format option is .emf which is a Windows© enhanced metafile. It’s a good idea to save it to the same folder that you will be saving the design. Learning Design ERA – Stitch ERA Universal www.lorileedesigns.com 16 Stitch Era – Artwork Image Tab Artwork Image Tab THE ARTWORK IMAGE TAB/RIBBON .................................................................................................................................... 1 EDITION ............................................................................................................................................................................. 2 Crop Image ......................................................................................................................................................................... 2 Color Reduction .................................................................................................................................................................. 3 SCALE & SHAPE ................................................................................................................................................................... 4 Set Size ............................................................................................................................................................................... 4 Set Angle ............................................................................................................................................................................ 5 MIRROR/ROTATE ................................................................................................................................................................ 6 PROPERTIES: ....................................................................................................................................................................... 7 Image Properties ................................................................................................................................................................ 7 Embed, Link, Reference: Image ......................................................................................................................................... 8 FILE .................................................................................................................................................................................. 9 Reload ................................................................................................................................................................................ 9 Save Image – Raster ......................................................................................................................................................... 10 Learning Design ERA – Stitch ERA Universal www.lorileedesigns.com Stitch Era – Artwork Image Tab Artwork Image Tab – Overview The Artwork Image Tab/Ribbon The ribbon contains all the essential tools to Edit, Scale, Rotate, View Properties, Attach/Embed an Image, as well as Reload or Save the raster image file. Learning Design ERA – Stitch ERA Universal www.lorileedesigns.com 1 Stitch Era – Artwork Image Tab Edition – Crop Image Edition Crop Image • • • Select the Crop Image icon and the cursor will change indicating that it is suitable for cutting. The icon indicates that it does not detect the image area at this time.. Move the icon over the image. Click and hold the mouse button, to drag a selection box around the area of the image that you want to crop, everything inside the selection box will remain as the cropped area when you release the button. If you miscalculate the crop area select the • Quick Access toolbar. try again. Set new size as needed. undo icon from the then you may reactivate the crop and Save Image changes as a new file name. Learning Design ERA – Stitch ERA Universal www.lorileedesigns.com 2 Stitch Era – Artwork Image Tab Edition – Color Reduction Color Reduction The color reduction tool allows you to take an image that appears to have basic colors to the human eye and see what color variations are seen by the computer. In the Reduce up to section of the ribbon type in the amount of colors that you want the image to be reduced to. Include the background as a color. The Filter button allows you to quickly reduce the number of colors of the image. The window is divided in two panes, one shows the original and the other the results. The Small area filter may be applied if the results of the Filter are not pleasing. You may need to filter several selection until you get the image quality that you want. Zoom and pan tools are available to see the image area better. When you are satisfied with the result press Learning Design ERA – Stitch ERA Universal accept to return the main working window. www.lorileedesigns.com 3 Stitch Era – Artwork Image Tab Scale & Shape – Set Size Scale & Shape Set Size It’s best to make sure that your image is the size you want your design to be. To check the image size: • • • • • • • Select the Image. Select the set size icon. Select the edge of the image you wish to start the measure. Click and hold the mouse button while dragging across the image, you can do horizontal or vertical sizing. When you reach the other edge of the image, release the mouse butt and the Image Scaling window appears. The box that is highlighted is the measure that you completed. Type in the new dimension. Press Enter key or OK to set the new size. Learning Design ERA – Stitch ERA Universal www.lorileedesigns.com 4 Stitch Era – Artwork Image Tab Scale & Shape – Set Angle Set Angle Fixing the rotation angle is useful for images that need precision. In the sample below the image is at an angle which may have been the intention or the cause of a bad scan so for embroidery sake we would like to see the ship sale on the horizon. To set a new angle on artwork: • • • • • • • Select the Image. Select the set angle icon. Select an an angle within the picture Click and hold the mouse button while dragging across the image, you can do horizontal is an easier calculation on new degree angle. When you have an angle line, release the mouse butt and the Block Rotation window appears. The box that is highlighted is the current angle. Type in and angle degree that you want that line to be. In this example we want it to be “0” which will make the horizon line level. Press Enter key or OK to set the new angle. This new rotation is saved in the embroidery file, and does not affect the original image. Learning Design ERA – Stitch ERA Universal www.lorileedesigns.com 5 Stitch Era – Artwork Image Tab Shape & Scale – Mirror/Rotate Mirror/Rotate To rotate an image to specific angles or to mirror vertically / horizontally within the working window: • Select the Mirror/Rotate icon to reveal the hard rotation options. • Select an angle to rotate the image. SEU version allows only the Rotate option for images Learning Design ERA – Stitch ERA Universal www.lorileedesigns.com 6 Stitch Era – Artwork Image Tab Properties – Image Properties Properties: Image Properties Saturation, Brightness and Contrast and Transparency Changes made within this section are for your comfort. At times you may experience eye fatigue or just have difficulty in visualizing sections against the image. The available tools will allow you to digitize more comfortably. This type of edition is the same as with any basic image editor. • • • Select the Image. By moving the sliders on the controls you can see the changes being applied. Adjust the Saturation, Brightness and Contrast levels until you find a comfortable combination Transparency: modify the level of visualization of the image you have in the working area. If you reduce the percentage of transparence to the minimum the image will tend to disappear. Move the slider to check the level of visibility which you want to work with. Adjusting levels are only applied to the selected image, if you have more than one image on Screen; each image will need to be adjusted if needed. The new properties are saved in the embroidery file, and does not affect the original image. Learning Design ERA – Stitch ERA Universal www.lorileedesigns.com 7 Stitch Era – Artwork Image Tab Embed/Link – Embed / Link Embed, Link, Reference: Image When you work with an image in the application, there are several modes to store the image information for the design. • • Embedded: Saves the image inside the design. If you move the design to another computer you do not have to move the image too, because it will already contain a copy of the image within the design. Linked: Adds a link to the image, so the next time that you open the design the image will be retrieved and load with the design. It will remember the properties; position, size and rotation angle. It is important to know that the image must remain in the same location (folder) and have the same name as it had when it was linked to the design file or you will get an error that the file cannot be located , do you want to find it? Reference is not a part of SEU. Learning Design ERA – Stitch ERA Universal www.lorileedesigns.com 8 Stitch Era – Artwork Image Tab File – Reload File Reload This tool will reload the original image file deleting any modifications that have been made to it.. Reload is only available for Raster Images. Original Image changed Learning Design ERA – Stitch ERA Universal After Reload www.lorileedesigns.com 9 Stitch Era - Artwork Image Tab File – Save Save Image – Raster A scanned image needs to be To save an image: saved or it will be lost once you close the design. • • • Select the image. In the File section of the ribbon Select the Save icon . o The Save Image window appears. • Create a folder. • • • o Double click the new folder open it Give the image file a name Select a Save As type from the drop down menu. Press SAVE to save the image file to the folder. Learning Design ERA – Stitch ERA Universal www.lorileedesigns.com 10 Stitch Era - Artwork Vector Tab Artwork Vector Tab Contents THE ARTWORK VECTOR TAB/RIBBON .................................................................................................................................. 1 INSERT............................................................................................................................................................................... 2 Closed Shapes ..................................................................................................................................................................... 2 Open Shapes....................................................................................................................................................................... 3 Text..................................................................................................................................................................................... 4 Create Text Vectors ........................................................................................................................................................................... 4 Save Text Shapes:.............................................................................................................................................................................. 4 Bezier .................................................................................................................................................................................. 5 Freehand ............................................................................................................................................................................ 6 Save Bezier & Freehand Shapes: ....................................................................................................................................................... 6 NODES .............................................................................................................................................................................. 7 Nodes ................................................................................................................................................................................. 7 Nodes Properties .............................................................................................................................................................................. 7 FORMAT ............................................................................................................................................................................ 8 Format ................................................................................................................................................................................ 8 Setting / Editing Colors from the Color Palette ................................................................................................................................. 8 RESHAPE ............................................................................................................................................................................ 9 Remove Holes ..................................................................................................................................................................... 9 Split Vectors ..................................................................................................................................................................... 10 COMBINE ......................................................................................................................................................................... 11 Combine Vectors .............................................................................................................................................................. 11 GROUPING ....................................................................................................................................................................... 12 Group / Ungroup / Ungroup All........................................................................................................................................ 12 Create a Group ................................................................................................................................................................................ 12 To Ungroup ..................................................................................................................................................................................... 12 To Ungroup All ................................................................................................................................................................................ 12 ORDER ............................................................................................................................................................................ 13 Forward / Backward ......................................................................................................................................................... 13 Learning Design ERA – Stitch ERA Universal www.lorileedesigns.com Stitch Era - Artwork Vector Tab Tab / Ribbon - Overview The Artwork Vector Tab/Ribbon This ribbon contains all the functions needed to either create an original vector graphic or edit an existing vector image. Experiment with the tools within the ribbon to create your own vector graphics for embroidery.. Learning Design ERA – Stitch ERA Universal www.lorileedesigns.com 1 Stitch Era - Artwork Vector Tab Insert – Closed Shapes Insert Closed Shapes You can create Pre-Defined Geometric Vector Shape Artwork or add it to existing raster or vector image file. Apply stitches to Pre-Defined Geometric vector shapes. You simply click and drag a shape onto the work area and release. Adjust the size using the selection box nodes then press Enter to confirm the section with stitches or right click to the sub menu for other options. • This feature is available for: o Path Border (Path stitches) • o Area Body (Elastic and Fill stitches) This feature is accessed by selecting and Insert type from Embroidery Tab. Create Sections or the Also located on the Artwork Tab Learning Design ERA – Stitch ERA Universal www.lorileedesigns.com 2 Stitch Era - Artwork Vector Tab Insert – Open Shapes Open Shapes You can create Pre-Defined Open Vector Shape Artwork or add it to existing raster or vector image file. Apply stitches to pre-defined vector motifs. You simply click and drag a shape onto the work area and release; adjust the size using the selection box nodes then press enter to confirm the section with stitches or right click to the sub menu for other options. • • This feature is available for: o Path Border (Path stitches) This feature is accessed by selecting and Insert type from Embroidery Tab. Create Sections or the Also located on the Artwork Tab Learning Design ERA – Stitch ERA Universal www.lorileedesigns.com 3 Stitch Era - Artwork Vector Tab Insert - Text Text There are just some TT fonts that are not suited for auto generated embroidery texts. Straight line text vectors are available from any TrueType font on your computer. You have the ability to split the vector shapes into sections more suited for auto completed sections. For manual digitizing text vectors present the clean outlines needed for manually digitizing font characters. Create Text Vectors • • • • Select the Text icon to open the Vector Text dialog box. Type the line of text or press enter to add lines of text, Select the font, size, alignment and presentation. Press the green check. This tool has a very simple nature there are no other bells or whistle, just vector shapes that look like text. Manipulate them using the tools on the Image Vector ribbon. Save Text Shapes: • • • Select the Layout Tab to bring it forward. In the Export section of the ribbon select the Save EMF Vector Image icon to save this file or it will be lost when you close the work area. The only save format option is .emf which is a Windows© enhanced metafile. It’s a good idea to save it to the same folder that you will be saving the design. Also located on the Artwork Tab Learning Design ERA – Stitch ERA Universal www.lorileedesigns.com 4 Stitch Era - Artwork Vector Tab Insert - Bezier Bezier You can manually apply vector figures with bezier curves or freehand. The default for creating any artwork within SEU is Bezier only. Apply Bezier shapes using the same node characteristics as used when creating an embroidery section. • • Apply fill and Border color from the Format section of the Ribbon. Edit shapes using Select Object to edit nodes. Also located on the Artwork Tab Learning Design ERA – Stitch ERA Universal www.lorileedesigns.com 5 Stitch Era - Artwork Vector Tab Insert - Freehand Freehand Apply open figures, by drawing directly in the work area. • • Apply fill and Border color from the Format section of the Ribbon. Edit shapes using Select Object to edit nodes. Be creative, explore all the vector shape options to create and edit your own unique n artwork. There are 2 modes for creating freehand vector shapes. • • Active: Create Perfect Figures will automatically close a shape once the mouse button is released. example: circles De-selected: Allows only literal line placement, it will not allow a shape to close. Example: lines Save Bezier & Freehand Shapes: • • • Select the Layout Tab to bring it forward. In the Export section of the ribbon select the Save EMF Vector Image icon to save this file or it will be lost when you close the work area. The only save format option is .emf which is a Windows© enhanced metafile. It’s a good idea to save it to the same folder that you will be saving the design. Also located on the Artwork Tab Learning Design ERA – Stitch ERA Universal www.lorileedesigns.com 6 Stitch Era - Artwork Vector Tab Nodes Nodes Nodes The vector-based figures are made of nodes that behave similarly to those that are used to create embroidery sections. Once the vector-based figure has been created you can modify the nodes that give shape to it as well as the layout of each node’s handles Converting the shape to Curves will allow you to alter its geometry, by modifying the node position, property and position of its handles. You can also eliminate nodes, create new ones, etc. The following node properties will explain how the node type selection changes the line that passes though it affecting the geometry of the shape. Nodes Properties Straight: Displayed with square marks Produce straight lines between nodes. Curved: Displayed with Circular marks Produce curved lines between nodes. Normal: Displayed with White marks Produce smooth curves Corner: Displayed with blue nodes Produces abrupt changes in curvature. Symmetrical: Dragging one handle forces a symmetrical movement of the opposite handle Uniform: Allows for the curvatures on both sides of the node to be different Working with beziers requires ALOT of practice do not be discouraged when editing nodes. There are a lot of variables and unique combinations that will change the above definitions of node properties. When you find difficulties in editing look to the node type before or after the selected node; it may be what is affecting how the selected node needs to be edited you may need to simply relocate the position to gain better leverage on handle movement or change its properties. There is no hard and fast rule how to create vector shapes just work on the visual presentation and the rest will work itself out. Learning Design ERA – Stitch ERA Universal www.lorileedesigns.com 7 Stitch Era - Artwork Vector Tab Format Format Format The Artwork Vector Tab - Format section of the ribbon allows you to add, remove, or change the color of the border or padding of figures created in the work area. You can choose to create a section filled, outline, or both. From the same box you can change the thickness of the border. This utility is useful for cases where it must operate on several figures that are one above the other. Observe the left picture, it has predefined color figures. In the right figure you can see that the color of each figure has been modified improving the visualization of the elements. Setting / Editing Colors from the Color Palette The color bar or color palette may be used to set or change the border and fill color of vector shapes. Set colors before creating vector shape. • • Left mouse click on any color within the color bar to select the Fill Color before creating a vector shape. Right mouse click on any color within the color bar to select the Border Color before creating a vector shape. Edit colors of a selected vector shape: • • Left mouse click on any color within the color bar to apply Fill Color changes to the selection. Right mouse click on any color within the color bar to apply Border Color changes to the selection. Learning Design ERA – Stitch ERA Universal www.lorileedesigns.com 8 Stitch Era - Artwork Vector Tab Reshape – Remove Holes Reshape Remove Holes Automatically deletes the holes of the selected vector object. This tool is also available from the context menu, Learning Design ERA – Stitch ERA Universal www.lorileedesigns.com 9 Stitch Era - Artwork Vector Tab Reshape – Split Vectors Split Vectors This tool allows you to split a vector object using an arbitrary line defined by a sequence of nodes. Once the splitting line is defined, press the Enter key, to execute the operation. This tool is also available from the context menu. Learning Design ERA – Stitch ERA Universal www.lorileedesigns.com 10 Stitch Era - Artwork Vector Tab Combine – Combine Vectors Combine Combine Vectors These tools will take two or more vectors and produce a new one that is the result of the applied operation. Most of these operations require that the initial vectors are partially or totally overlapped. The available operations and an example of the resulting object are listed below This will be important for some situations where the vector order produce different results. Start with Overlapping Vector Shapes Example Results of each menu selection being applied to the same example. Addition Subtraction Intersection Exclusion Trim Simplify Learning Design ERA – Stitch ERA Universal www.lorileedesigns.com 11 Stitch Era - Artwork Vector Tab Grouping – Group / Ungroup / Ungroup All Grouping Group / Ungroup / Ungroup All It is possible to take two or more vector-based shapes and Group them as a unit. It will then be possible to move them, apply the same transformations in shape and other changes to all the figures in the group at the same time. It is also possible to merge other groups already created, thus creating nested groups. Create a Group • • Select two or more image shapes to activate the From the Ribbon or from the context menu click on the To Ungroup • Group icon Select the group and then choose the option shapes that had been combined into the group. Group icon to complete. Ungroup this will separate all the Please note that if the there are nested groups these are considered levels and each click of ungroup will release a level at a time. Check the ungroup status by selecting the shapes again if the ungroup icon is active that level will need to be ungrouped as well. To Ungroup All This option is very important whenever you insert .wmf or .emf images, since these Image Vectors are nested groups in order to edit any of these figures, you must first apply this function. • • Select the nested group, the entire image will be selected Click on After applying the Ungroup All from the Ribbon or context menu. Ungroup All you will be able to move/edit/scale each shape within the image. Learning Design ERA – Stitch ERA Universal www.lorileedesigns.com 12 Stitch Era - Artwork Vector Tab Order – Forward / Backward Order Forward / Backward When working with multiple vector objects will often find that an object is covering up another. When editing vector figures you can change the order of vector shapes. This is because the shapes are stacked in the order they were created, this may cause an ungrouped image to now look out of order. Bring to Front: ends the selected element to the front, before the rest of the objects, placing it in the forefront. Send to Back: It places the selected object behind the rest of the objects. Bring Forward: The figure selected moves one level forward. Send Backward: The figure selected moves one level backwards. Learning Design ERA – Stitch ERA Universal www.lorileedesigns.com 13