1
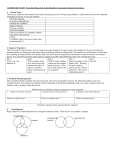
INDUSTRIAL TECHNOLOGY From Kim Huegerich, South Hamilton Community Schools, Jewell, Iowa
1. Power Thinking
After presenting various ways of doing things, concepts, vocabulary, etc., the students can categorize types of finishes, types of power
tools, types of measuring tools, types of cutting tools, etc. You can give them a list of items and they have to provide the category
(Power 2) or you can give them the Power 1 and Power 2s and they provide the details.
2. Selective Underlining/Highlighting
As they read the directions or manual for maintenance of a machine, have them highlight the key words or vocabulary. This could be
used in conjunction with power thinking, using a different color for each power as they read.
3. Pattern Puzzles
Write out the steps to a process (cleaning a machine, using a particular tool, following a procedure, etc). Cut apart each step and have
the students put the steps back in order. Anything that involves a process is a great candidate for pattern puzzles. This can be used to
introduce a concept or review a concept. For example, to introduce a process, do the above. Each student/group may come up with a
different process. Have them explain why they chose to do it the way they did. You can question their procedure by providing “what
if” scenarios based on their process. This allows them to “experiment” with the procedure without the element of safety concerns.
4. Think-Pair-Share
This is sometimes called Think-Ink-Pair-Share (TIPS). Anytime you have them do a worksheet or textbook problem, this is an ideal
time for this. They think about the answer, “ink” it, share their response with a partner and then share/demonstrate with the whole
class. This builds in wait time for the slower students, builds confidence because they are sharing and validating their answers with
another student (collaborative work, teamwork skills), possibly even some reciprocal teaching may be going on if their answers don’t
agree, and then sharing one thought-out answer with their peers.
5. Mind Streaming
This is a great way to assess the students’ background knowledge. In pairs, a topic is given, such as a construction aspect (plumbing,
electrical, carpet laying, etc), a tool, a process, or any other concept. One student talks for 1 minute, saying everything s/he knows
about the topic. The other student may not say anything, however gestures such as nodding or smiling may be used. At the end of the
minute, the roles are reversed. The second student may repeat what the first student said, but again must continue talking for the whole
time.
6. ABC Brainstorming
This is also another way to elicit background knowledge about a topic or to review already demonstrated material. You can use the
whole alphabet or just a few letters. You can assign certain letters to a group of students/individuals. This is a quick way to know what
the students know.
7. Carousel Brainstorming
A question or topic is posed to the class. The students work in groups or independently to come up with an answer. Ideas are shared
one-by-one as you go around the room (carousel). The ideas can be gathered and used in a later discussion or answers can be
discussed right away.
8. Three-Minute Pause
After explaining and modeling how to use a new power tool, put kids in groups of 3, identifying person A, B, and C. Each student
speaks for 1 min. You may choose to do more or less, depending on the topic, objective or group of kids. Student A: explains its use,
purpose, etc.; Student B: continues the explanation; Student C: asks a question. This usually works best immediately following an
explanation, as the brain wants to organize the information, provoking students to talk about it.
9. Read-and-Say Something
When reading a complex process or text, break it into “chunks”. This could be paragraphs or smaller sections between bolded
headings. Students read in pairs or small groups. Each reads the chunk and one-by-one the students paraphrase each section. An
alternative to this is to “read-and-write something”. The same concept is there, but they are writing, rather than discussing. They can
form groups after reading/writing and discuss what they wrote. Using only their notes, they come up with a new text to explain what
they read.
10. Read-Recall-Check-Summarize
This is very similar to #8, but this usually involves a process. They continually ask themselves (check) if what they are
reading/summarizing (recall) makes sense (summarize).
11. Magnet Summaries
You can have them discuss all four “magnets” or just 1-2 or a different one each day/piece.
Concept/idea/vocab #1
Concept/idea/vocab #2
switch
Main idea
Concept/idea/vocab #3
outlet
Electrical troubleshooting
Concept/idea/vocab #4
Light fixture
wiring
12. One-Sentence Summary
After explaining a concept, and giving the students time to work on the idea in class, ask them to summarize what they have learned
into one sentence. This can be done on a sticky note or orally as a “ticket out” or “ticket in” to the room to ensure brevity in their
explanation. It is a quick way to assess whether the students understood your objective. (See Manual p. 113 for summary frames.)
13. Problem-Solving Organizer
Select a problem that has multiple steps (measure parts with metric and English systems, set up and use portable drills, demonstrate
welding of ______materials, etc.) The following graphic is put into a worksheet format. The students can combine written explanation
with pictorial explanation such as in a user’s manual. Lastly, the students create a summary about the process. As students become
more proficient in this, ask them to create the organizer from scratch.
1.
student writes first step here
Picture to explain step 1.
Problem: How to weld _______.
2. Student writes second step here
3. Student writes third step here
Picture to explain step 2.
Picture to explain step 3.
(Summary statement about the welding process.)
14. Sticky Note Discussion
As students read a text, see a demonstration, or hear a process, they write comments, questions, or connecting (text to text, text to self,
and text to world) statements about what they see or hear. Sticky notes are later used to answer questions and create deeper
discussions.
15. Seed Discussions
After starting a conversation/explanation or at the end of a “unit” as a review, students create a seed question that will result in a
deeper discussion. This may be a problem-solving topic, such as, “You have just been hired as a general contractor to build a house
for your neighbor.” Questions may include budget, types of materials to be used, where to get the materials, etc.
16. Roles within Cooperative Groups
As “hands-on” teachers, this could take on a whole new look than traditionally seen in classrooms. When working together on a
project, each person could have unique construction/repair duties. As one type of job is happening on the project, other students could
be planning the next step, critiquing the current job, be a “gopher”, or become the “cleaner-upper”.
17. (QAR) Question-Answer Relationships
This involves using a textbook or user’s manual and answering questions about what is read. By knowing the type of questions that
are asked, the answer can be found quickly. There are two types of questions: In the Book and In my Head. In the Book questions can
be divided into two additional types of questions: Right There and Think and Search. These questions can be found in the book, as the
name suggests. In my Head can also be divided into two additional types of questions: Author and You and On my Own. These types
of questions the student must think a little deeper about them. Often students try to look for an answer that isn’t there. Helping them to
realize that a question should come from their background knowledge and not from the book can be a revelation to them.
18. Reciprocal Teaching
Anytime a teacher can create a situation/environment in which students are teaching their peers is an ideal situation. We remember
90% of what we teach another person. Getting students to summarize, question, clarify and then predict is how they will teach other
students. Anytime a student has a question and you think another student knows the answer or can figure it out, send him/her to that
student. It will boost their confidence and force them to go through the process and explanation again.
19. KWL Plus
Introduce a new tool/procedure to the students.
K: they identify what they already know…this could be from their own experience with a parent, or what they’ve read
W: they will be creating a project using it so…what do they want (need) to know about this process in particular?
L: after it has been practiced….what is new/unique to this tool/procedure? What did they learn, transform, change?
The “plus” of this strategy is to get the students to identify categories of information in the K, so that they can identify what they Want
in order to Learn. Categories could be tools, steps, vocabulary used, etc.
20. Anticipation Guides
This gets at what they already know (background knowledge). It can identify misconceptions they have of tools, procedures, safety
rules, etc. This could be done via a checklist, agree/disagree. This may serve as a pre-/post- test. In between, the students create a
project, demonstrate the use of the tool, and then see if they were correct in their evaluation of the concept.
21. Concept Map
Students create a concept map, breaking down the concept into deeper, more detailed descriptions. This can be combined with powers.
_______
Arc__________
/
mig
___\ welding
/
tig
22. Comparison Organizer
Helps students see comparisons, similarities and difference between concepts and vocabulary items. These can become very complex
in nature.
arc
mig
tig
23. Sequence Organizers
This is for step-by-step processes, such as 1) demonstrate basic pipe fitting techniques, 2) clean and store precision measurement tools,
or 3) set up and use horizontal saw. The students are the ones becoming the meaning-makers by creating the steps rather than just
listening to them or reading them.
Step 1
Step 2
Step 3
Step 4
Step 5
24. Picture Notes
As you explain how to use a piece of equipment, the students are taking notes in the form of pictures. “A picture is worth 1000 words”
would best describe this strategy. For the visual learners, this is the preferred method. Often, the lower-achieving students are the ones
who prefer to take notes via pictures. The non-traditional students are the hands-on learners.
25. Content Frames
This is used to see relationships between concepts. Students/class will write comments in each blank explaining the particular item.
material
speed
use
power source
ABC
XYZ
Saw #1
Saw #2
Saw #3
Saw #4
26. Semantic Feature Analysis
This is similar to a content frame, except the students are just identifying whether the saw (tool) has each characteristic or not.
variable speed
cuts multiple materials
battery or electrical
123
Saw #1
+
+
+
Saw #2
+
Saw #3
+
+
Saw #4
+
+
+ has this characteristic
- does not have this characteristic
27. Two-Column Notes
Students write a concept in column one and the definition or explanation in column two. This could take on the look of three-column
notes if you wanted to add another column for a picture/graphic or an example.
Manufacturing enterprises
Types of
organization and
ownership
Marketing safety
management
Product liability
28. Observation Entries/You Ought to Be in Pictures
This is used to imagine what life was like “way back when”. You could show pictures of how machines were used at the turn of the
century, have students guess what they were used for, if no longer used or available, describe/explain what replaced that use, the
advantages of modern machinery, etc.
29. RAFT (Role, Audience, Format, Topic)
Students take on the role of another person or inanimate object. They must describe or explain another operation. For example, a
student may choose write from the perspective of a saw (Role) and the paper is written in the same theme as “Three Trees”
(Audience); each saw dreams (Format) of cutting something special someday (Topic). Each gets his/her goal, but in a different way.
Throughout the paper, the purposes of the saw, the unique characteristics, etc are documented, showing the student’s knowledge of the
various types of saws.
30. Writing Templates
This is a quick way to know if students understand the objective. This is similar to a one-sentence summary except they are
completing a few sentences in their own words to summarize the lesson/concept. For example…Cuts can be made using a variety of
tools, such as ________________. When cutting ___________, the best tool for the job would be ________________ because…
31. Word Map
This involves great knowledge of a particular vocabulary word. The student must “dissect” the word and put it back together without
repeating any words/vocabulary. A full understanding of the term is necessary.
32. Frayer Model
This strategy uses the characteristics of a vocabulary word or concept. It identifies the essential and nonessential characteristics as well
as examples and nonexamples. Sometimes overgeneralization takes place so identifying what something is not is better than actually
identifying what it is.
Essential characteristics
Non essential characteristics
What it must have
What it may have
Examples
What is it?
Definition, in own words
Non examples
What is it not?
Antonym