1
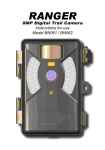
RANGER
Digital Trail Camera
Instructions for use:
Model BN057
Index
1. Introduction......................................................... 3
2. Specifications...................................................... 3
3. Parts identification............................................... 5
4. Package contents............................................... 6
5. Battery and SD card installation.......................... 6
6. Setting up your camera....................................... 7
6.1Setting camera delay..................................... 9
6.2Setting camera state and resolution.............. 9
6.3Setting the date and time............................. 10
6.4Display number of images / videos stored... 12
7. Using the camera.............................................. 12
7.1Mounting the camera................................... 12
7.2Turning on the camera................................. 13
7.3Testing the camera coverage area.............. 13
7.4Securing the camera................................... 14
7.5Replacing batteries...................................... 14
8. Viewing images and videos.............................. 15
9. PC Camera....................................................... 15
10. Glossary............................................................ 16
11. Warranty............................................................ 20
-2-
1. Introduction
Trail cameras record the activity of wildlife unattended
by taking still images or short videos of anything that
intrudes the passive infrared (PIR) sensor coverage
area.
RANGER digital trail camera BN057 is ultra-compact
(122mm x 82mm x 41mm) and water resistant and
may be mounted outdoors for long periods of time.
The camera can take up to 15 photos a day and 15
photos a night for six months on a single set of four
AA batteries.
2. Specifications
Product Name
RANGER Trail Camera
Model Number
BN057
Image Sensor Type
1/2 Inch CMOS
Effective Pixels
2.0-Megapixel
Effective Focal Length
9.3 mm
Lens Aperture
f/2.8
Camera field of view
52 Degrees
IR Filter
Fully automatic
Display
LCD
PIR sensor
Yes
PIR sensor field of view
52 Degrees
Trigger Speed
1.5 second
Trigger test mode
Yes
-3-
Number of IR LEDs
15
Maximum illumination
distance for night shots
10 metres
Image storage
1 x SD Card up to 32 GB
capacity
Low Battery Indicator
Yes
Time delay between shots
5 seconds to 60 minutes
(default 1 minute)
Image resolution
2.0MP or 0.8MP
Multiple frames per PIR
sensor trigger event
Yes. 1, 3 or video
Video resolution
Video: AVI 640 x 480 pixels
at 30 fps for 15 seconds
File formats
JPEG for still images, AVI
for videos
Date & time imprint
Yes
Moon phase imprint
Yes
Exposure
Auto
White balance
Auto
Menu language
English
Power supply
4 x AA batteries
Tripod socket
Yes
Water resistant
Yes
-4-
3.Parts Identification
-5-
4.Package Contents
1 x Digital scouting camera
1 x User Manual (this document)
1 x USB cable
1 x Mounting Kit
5. Battery and SD Card Installation
NOTE: Make sure camera is OFF whenever installing
or removing batteries.
• Use 4 x AA Alkaline batteries.
▲
When replacing batteries please make sure
battery voltage and polarity (+/-) are correct.
Incorrect voltage or polarity will damage the
camera.
Memory
The expandable media card slot is capable of
accepting SD cards with capacity up to 32GB (sold
separately).
-6-
Inserting SD card
NOTE: Make sure camera is OFF whenever installing
or removing the memory card.
• Insert the SD memory card into the SD card slot
with the copper contacts facing up as shown on
the sticker located at the side of the housing.
• To remove the SD memory card, depress it so it
pops out and pull gently.
▲
SD cards must be clean and contain no data
or images from other sources. If you are using
the SD card from other devices, please make
sure you format the SD card prior to use in the
camera. New cards may be used straight from
the package.
6. Setting up Your Camera
Menu Items
Date
MM/DD
Time
HH:MM (24 hour clock)
Image / Video
Mode
Photo
1P
0.8MP(Lo)
2.0MP(Hi)
3P
0.8MP(Li)
2.0MP(Hi)
Video
640x480
Camera delay
5 seconds to 60 minutes
Number of
photos on card
Display only
-7-
LCD Menu
1.
2.
3.
4.
5.
6.
7.
Date
Time
Four digit display
Still image resolution selection
Video recording
Camera delay
SD Card
Setup Mode
If the camera is off, turn it on.
Press SETUP to enter the setup mode, which starts
by flashing the word “DATE”. Press UP or DOWN to
access the previous or next menu option, and OK to
-8-
adjust the current setting. Once you are satisfied with
the changes you have made press SETUP to accept
the changes and put the camera into sleep mode.
6.1 Setting Camera Delay
Camera Delay specifies the amount of time in minutes
and seconds between successive PIR triggered
photos. This setting ranges from 5 seconds to 60
minutes 59 seconds. Default is 1 minute.
1. Enter setup mode as described on page 8. The
LCD will flash “DATE”.
2. Press the UP or DOWN button until icon #6
“Camera delay” is blinking then press OK.
3. By default the LCD will display “0100”, the first
two digits represent minutes and last two digits
represent seconds.
4. When the cursor flashes on minutes, press UP or
DOWN to change the value (from 01-60), press
OK to confirm.
5. The cursor will now be flashing seconds. Press
UP or DOWN to change the value (from 05-59)
and press OK to confirm.
6. Press SETUP to save and exit.
6.2 Setting Camera State and Photo Resolution
Set the number of pictures the camera will take each
time the PIR detects movement. One still image, three
still images or one continuous 15 second video.
1. Enter setup mode as descibed on page 8. The
-9-
LCD will flash “DATE”.
2. Press the UP or DOWN button until both icons #4
and #5 are blinking, press OK to enter.
3. Press the UP or DOWN button to select #4
(Picture mode) or #5 (Video mode).
4. To select Video mode, press OK when #5 is
flashing. Videos are 15 seconds long and take up
to 20MB of memory each.
5. To select Picture mode, press OK when #4 is
flashing. Select between “1P” to take one photo at
a time or “3P” to take three photos. Press OK to
confirm.
6. The LCD will now display “LoHi” which indicates
the image resolution. “Lo” represents 0.8MP and
“Hi” represents 2.0MP. Press UP or DOWN to
select and press OK to confirm. Default is “Hi”.
▲
Lo = 1024 x 768 pixels (0.8MP)
Hi = 1600 x 1200 pixels (2.0MP)
▲
Video is 15 seconds at 640x480 pixels (20Mb)
7. Press SETUP to save and exit.
6.3 Setting the Date and Time
Setting the Date, Year and Time. This information is
stored on each image along with the temperature and
moon phase.
Date
1. Enter setup mode as described on page 8. The
LCD will flash “DATE”.
2. Press OK.
- 10 -
3. The first two digits on the LCD represent the
month (MM) and last two digits represent day
(DD).
4. Press UP or DOWN to select month between 0112 and press OK to confirm.
5. Press UP or DOWN to select day between 01-31
and press OK to confirm.
6. Press UP or DOWN to select year between 00-99
(2000-2099) and press OK to confirm.
7. Press SETUP to save and exit.
Time
1. Enter setup mode as described on page 8. The
LCD will flash “DATE”.
2. Press UP or DOWN until #2 “TIME” is blinking
and press OK.
3. The first two digits on the LCD represent hours
(HH) and last two digits represent minutes (MM).
4. Press UP or DOWN to select the hour between
00-23 and press OK to confirm.
5. Press UP or DOWN to select minutes between
00-59 and press OK to confirm.
6. Press SETUP to save and exit.
▲
▲
In order to conserve battery power during
storage the date and time will reset to zero if
the unit is switched off for more than an hour.
Remember to reset the date and time whenever
you set the camera up.
Remove batteries if the camera is to remain
unused for a long period of time.
- 11 -
6.4Display number of images / videos stored
1. Enter setup mode as described on page 8. The
LCD will flash “DATE”.
2. Press UP or DOWN until #8 “SD card” is blinking.
3. The LCD will display the total number of pictures
and videos stored on the SD card.
4. Press SETUP to exit.
7.Using the Camera
7.1 Mounting the Camera
It is recommended that you mount the camera 1.2 to
1.5 metres off the ground with the camera pointed at a
slight downward angle. Be sure to avoid mounting the
camera facing east or west as the rising and setting of
the sun could produce false triggers and overexposed
images. Clear branches and other debris away from
the front of the camera so as not to block the camera
lens or PIR sensor.
Insert the strap through the strap slots on the rear
housing and wrap the strap around the mounting
surface. Secure the strap and tighten the buckle in
- 12 -
order to secure the camera.
▲
In order to obtain proper weather resistance,
please make sure that both door latches are
securely locked in place.
7.2Turn on the Camera
If the camera is off, turn it on . The camera
automatically enters sleep mode and will start taking
photographs or video after the delay time (see 6.1
Setting Camera Delay on page 9).
7.3 Testing the Camera Coverage Area
After mounting the camera enter setup mode as
described on page 8. A red indicator light on the
front (the Working Indicator) will blink when you
have intruded the PIR coverage area. Adjust the
camera position as needed and repeat testing
until the desired coverage area is achieved.
▲
Make sure you exit setup after you have
finished testing the camera coverage.
- 13 -
7.4 Secure Your Camera
A small padlock can be used to lock the camera
cover.
7.5Replacing the Battery
If the battery is low, the red indicator light will flash
three times and then turn off. This indicates that the
battery should be replaced as soon as possible.
- 14 -
8.Viewing the Images and Videos
To connect the camera to a PC
1. Slide the toggle switch to “ON”.
2. Press SETUP button.
3. Connect your camera to the PC using the USB
cable provided. The PC will recognize the new
device and display a new disk icon. The LCD will
display “STO”.
4. Images and videos on the SD card can now be
viewed, copied, moved and deleted.
Read Images Using a Card Reader
1. Depress the SD card and gently pull out the card.
2. Insert SD card into the card reader.
3. Read images and videos from the card reader as
normal.
9.PC Camera
Using the Camera as a PC Webcam
1. Slide the toggle switch to “ON”.
2. Press SETUP button.
3. Connect your camera to the PC using the USB
cable provided. The PC will recognize the new
device and display a new disk icon. The LCD will
display “STO”.
4. Press OK and the camera will enter the “PC
camera” mode. The LCD will display “PC”.
- 15 -
10.Glossary
PIR: Passive Infrared Sensor. Senses motion like
a typical security motion detector. Requires a
moving heat source to trigger.
Camera Delay:
Time that will elapse between photos while
events are sensed and recorded. This is userset based on wildlife activity in area.
Resolution:
The resolution selection that you choose.
MP = Mega Pixels = 1 million pixels.
Hi (1600 x 1200): 2.0M pixels image (high
image quality, large file size)
Lo (1024 x 768): 0.8M pixels image (medium
image quality, medium file size)
Video resolution (640 x 480 @ 30fps for 15
seconds) 20MB file.
- 16 -
FPS: Frames per second. This is the measurement
of the frequency (rate) at which an imaging
device produces unique consecutive images.
30 fps means that the camera produces video
at 30 frames per second.
Video Length:
All videos taken with RANGER Trail Camera
are 15 seconds long.
Moon Phase Imprint:
The moon phase is imprinted on each image.
IR Flash:
Also called IR LED Array. Emits a burst of
infrared light which is invisible to the human
eye. Especially useful for night photos when a
visible flash is undesirable. Although the light
emitted by the LEDs is invisible, the LED array
may be seen as a dull red glow if looked at
directly.
- 17 -
SD Card:
Memory card used to store images and videos.
The camera is compatible with up to 32GB
capacity SD cards.
Battery Life:
Time that camera will function in the field. This
time is dependent on several factors including
temperature, number of images and number
of flashes. Based on our new advanced power
system, this camera can support on average 30
pictures per day for six months of surveillance.
Burst: The number of pictures the camera will take per
PIR trigger event:
1P: A single image is captured
3P: Three images are captured
FULL:When the memory capacity of the SD card is
full, the LCD screen will show “FULL”.
- 18 -
- 19 -
RANGER One Year Warranty
RANGER Digital Trail Cameras are sold with a one
year warranty against original defects in material and/
or workmanship provided that it has not been abused,
taken apart or tampered with in any way whatsoever.
Should it become necessary to repair your camera,
package the unit carefully and return it to your dealer,
or directly to:
The Lynx Service Centre
PO Box 98078
Sloane Park
South Africa, 2152
Include this page or a copy of it, your name, address
and telephone number, and a note with a full and
accurate description of the problem. In the event that
the repair is not covered by this warranty an estimate
will be sent for your approval.
Lynx shall not be held liable for any consequential,
incidental or contingent damage whatsoever.
Purchase date:........................................................
Dealer name
and signature or
dealer stamp
Distributed by
Lynx Optics (Pty) Limited
tel 011 792 6644 • email [email protected]
fax 011 792 8923 • visit: www.lynx.co.za