1
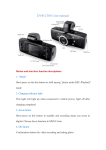
User Manual User M anu al ID station® and ID station pro® August 2013 Page 1 ID station User Manual User Manual Introduction This is the User Manual of ID station, the biometric ID and passport photo system. This user guide helps you in everyday use. If your ID station has not been installed yet please first read the "Getting Started" manual. Contents 1. Power On and Off 2. Capture 2.1 Wireless mode 2.2 Memory card mode 2.3 Photomatic mode 2.4 Using a Sony C200 camera 2.5 Using a Sony C300 camera 3. Auto formatting 4. Check 5. Print 6. Save and Email 7. Open an Image from the archives 8. Passport photos for other countries 9. Overview of all buttons 10. Replace paper and ribbon 11. Further reading and troubleshooting User Mode – Expert Mode ID station will by default start in User mode. User mode is the normal operating mode, allowing users to operate the ID station with all basic features enabled. More sophisticated features are only available in Expert mode. These include for example changing the systems settings and preferences through the Config tool. Page 2 ID station User Manual User Manual Switching from User mode to Expert mode : click on the ID of the ID station logo (upper-right of the screen). You will be asked to enter the PIN code. This PIN code is set during the system setup (using the setup wizard). If the PIN code is not set try 123. In the Expert mode you will be able to change all settings and preferences. Also you will be able to specify which features are available in User mode. Page 3 ID station User Manual User Manual Chapter 1. Power On and Off ID station Powering on your ID station involves: - Power on printer - Power on Tablet PC The ON/OFF button of the printer is located at the back-side of the printer. Make sure the printer is switched ON first. Otherwise you will get an error message stating that the printer is not on-line. Press the On/Off button of the Tablet PC. The On/Off switch is located on the left side of the tablet PC. The newer models have the On/Off switch at the right side. If you see the welcome screen after switching the unit on swipe upwards with your finder. Press the On/OFF button of the tablet PC again to switch it off. You may leave the printer switched on if you like. If your system is not used for some time, the "screen saver" will start. To stop the screensaver just touch the monitor. When the system is not used for a long time the power-save mode will start. The screen is black and only the button with the blue light on the front is active. Press the ON/OFF button and the power save mode will be stopped and ID station will be switched on immediately. ID station pro The On/Off switch is located on the right side of the touchPC: To start the ID station pro just press this button once. Make sure the printer is switched on at startup. Best to leave the printer on at all times. Page 4 ID station User Manual User Manual Chapter 2. Capture Once ID station is started you can begin capturing images. ID station supports several ways of working with cameras. The most important are: 1. 2. 3. 4. Wireless Memory Card mode : Card from camera is inserted in ID station Wired : use the USB cable and set D station in Photomatic™ mode Use a Sony C200 or C300 camera Tip: When taking pictures, do NOT try to make a “perfect fit” passport photo! The ID station software will do that for you. Automatically. Just make sure the customer’s face is not too much zoomed in: Captured OK. Too much zoom. Face too low. Face too high. 2.1 Wireless Every ID station includes an Eye-Fi card. Put the Eye-Fi card in your camera (SD card slot!) you're ready to start taking pictures. Some cameras such as the Canon EOS 1100d have a menu option for enabling or disabling Wi-Fi. Make sure the Wi-Fi mode is enabled! Every picture is automatically sent to the ID station. The transfer of the pictures takes a few seconds per picture, depending on the size. We recommend M-size standard Page 5 ID station User Manual User Manual JPEG compression. The progress is shown on screen. Every picture that has been transferred will be shown on screen. Select a picture by clicking on it. For more information please read “How to : Use the Eye-Fi card”. 2.2 Memory Card Mode You can take ID pictures with a camera containing a memory card and insert that memory card into the card reader of an ID station and read the pictures from the card just as if they were coming in wirelessly. For this you have to set ID station into a different mode. Go to the Config Tool, start the ScanFolder Settings and select the “memory card mode”. Now you have to specify the folder that will contain the images on the card. You may browse to find that folder (click on Browse, make sure the card is inserted in the reader). Once the settings are correct and saved close the Config tool and now you will see a new button on the main screen: If you click on this button the software will start reading the card and will show you all pictures on it. If the images are upside down on flipped just change this setting in the Config tool. For more information please read “How to : Read images from a memory card”. Page 6 ID station User Manual User Manual 2.3 Use the USB cable to connect a camera : the Photomatic™ method Another way of making passport photos is the Photomatic ™ method. The Photomatic method works only with Canon EOS cameras and requires a USB cable between the camera and the ID station. The USB cable is included with every ID station. Connect the USB cable to the ID station and the Canon camera. Next, change the software settings to Photomatic. Start the Config tool, select the "Scanfolder" settings and choose input mode Photomatic. Save the settings and restart the system. After restarting a new button appears : Capture. Click on this button and the camera will be activated. May be you'll get a warning that the camera mode is not the same as the default settings, but this is not important right now. See the How to page on the Photomatic mode for more info on this and how to change the settings. Taking a picture can be using the cameras release button but can also be done using the software, via a button on the screen. The Live View image from the camera is displayed on the monitor. Handy! Page 7 ID station User Manual User Manual Captured images will automatically appear on the screen, quickly and reliably. The Photomatic ™ method was developed for less experienced users to enable them to make passport photos, which are always of excellent quality. For more information please read “How to : Using the Photomatic™ mode”. 2.4 Using a Sony C200 camera Take a picture just as you’re used to with this camera. Just remember that you no longer have to worry about position and size of the customer’s face! Just make sure there’s enough space around the head, so don’t zoom in too much. After taking the pictures do not switch the camera to play, but connect the camera to the ID station using the USB cable: After the camera has been connected to ID station click on the button Read Camera. The pictures taken will be shown. Select one of the pictures just by clicking on it. Please read chapter 10 if you need to switch from one camera type to the other. There’s a C200 “How To” manual containing a more elaborate description including a “troubleshooting” section. 2.5 Using a Sony C300 camera Just as with the C200 camera you may use the Sony C300 camera to capture images and import them into your ID station. Taking pictures remains the same as you were used to, except for the fact that now you don’t have to worry about getting the face size right when taking the picture. Just make sure there’s some space around the head so don’t zoom in too much. Page 8 ID station User Manual User Manual Connect the C300 camera to the ID station using an USB cable. The USB cable connector of the Sony C300 camera is next to the DC power supply connector and external flash connector: The USB cable may be connected to the camera at all times. Now capture the images as usual. You may take as many images as you like. After capturing, follow this procedure to connect the camera to the ID station: 1. Switch the camera OFF 2. Press both PRINT and CAPTURE at the same time and keep them pressed, now switch on the camera 3. Keep the PRINT and CAPTURE buttons pressed until the connection is made (sound from the ID station, menu will pop-up on the camera’s display). Now the camera will be connected to the ID station and you will be able to read all captured images from the camera into the ID station by pressing the Read Camera button. There’s a C300 “How To” manual in the appendix containing a more elaborate description including a “troubleshooting” section. Page 9 ID station User Manual User Manual Chapter 3. Select : show how the auto formatting does the work Select one of the captured images by clicking on it. Now sit back and let ID station do the work. The picture is automatically formatted into a passport photo in accordance with the requirements of the selected country. Once the auto formatting is finished the final result will be shown. To verify that the auto formatting is successful an overlay is drawn over the ID photo. The example on the right shows an ID photo formatted for Germany. The chin is on the lower dash and the crown should be between the top two red lines are where the green is the average height. The height of the eyes is also important: eyes must sit in the green square. If all these requirements are met, the photo is well laid out. The software does it all automatically! Of course there will be situations in which you need or want to adjust the formatting manually. This is not a malfunctioning of the system! It’s perfectly fine to do this. The buttons to do this are normally hidden, but you can show them by clicking on the Show button in the short blue menu bar in the upper right side of the screen: Page 10 ID station User Manual User Manual Click on "Show". See the red arrow. The buttons to manually adjust the ID photo will be displayed. Now adjust the formatting by using these buttons. The black and white button convert the image to black and white. Click on Show / Hide again to hide the buttons. Look closely at the ID photo!. The overlay with control lines are there for you to verify whether the passport photo is properly formatted. It is important to check this! Chapter 4. Check! Before we print and save the passport photo we should make sure the passport Photo is OK and meets all requirements for official passport photos. It is very important to do this while the customer is still here, preferably still sitting in front of the camera. The requirements for passport photos and ID photos are strict. Check each and every passport photo before you print it. ID station software will check every photo after it is formatted automatically. Page 11 ID station User Manual User Manual The software checks every Photo on: ICAO (ISO/IEC 19794-5) requirements Local requirements depending in the selected country Geometry (face size and position) Background The results are shown on screen: A green mark indicated a successful test. A red mark indicates the photo is rejected on one or more tests. Your system may be configured to check the background too. This depends on the actual settings in the Config tool. If your ID station checks the background too there will be three results: Page 12 ID station User Manual User Manual What to do when a test has failed? ISO tool : this is an image quality test. When this check fails click on this button and you will see the full test result. Depending on which test has failed you may decide to capture a new image of this customer. If for example the eyes are not visible the image if just not suitable for a passport photo. Hotspots indicate that parts of the face are over-exposed or covered by hair. In that case you need to take a new picture. You may decide to print a passport photo even though one of the image quality test functions failed. The software can be set to allow this. Geometry : if the face size or face position does not meet the requirements of the selected country you can try to adjust this manually using the zoom – and + buttons and the shift buttons. There’s a limit to how far the face position can be adjusted. If the captured image is not centered, you may need to retake the picture: Captured OK. Too much zoom. Captured too low and too high. If the captured image is not OK you may not be able to manually adjust the geometry! In that case you need to take a new picture. Page 13 ID station User Manual User Manual Background : If the background test fails the measured background color does not meet the requirements of the selected country. For example the preferred background color for Canadian passport photos is white. The preferred background color for passport photos for the UK is light gray. If you capture an image using white background and you select UK as country you will get a background error. In this example the image is captured using a light gray background while the selected country is Canada. The background test fails. Click on the background tool button to start the background tool: 1 2 The background tool will present detailed information on the measured background color and also the preferred background color. The full result of the test is shown too. You may use the background tool to change the background color. Press [1] to automatically change the background. If the result is not satisfactory, press undo and press [2] to change the background manually. Click in the area you want the color to be changed. You may click several times…. Page 14 ID station User Manual User Manual Please read the “How To : background tool” for a more elaborate and detailed description how to do this. Remember that software helps you checking the passport photo. But the final decision to print or to capture another image is up to you! The software will allow you to print or save a passport photo even if one of the tests failed (note that this is a Config tool setting so it may be the case that you are not allowed to print or save a rejected photo). Use these buttons to manually adjust the result of the auto processing software. Page 15 ID station User Manual User Manual Chapter 5. Print Printing the photo is really simple. Press "Print" and the passport photos will be printed. After the photo is printed you'll see a green check mark button. The number behind Print tells you how many prints are left in the printer. Handy! The default print layout is preset (in the country template). The print layout is called “Print Template”. ID station supports many print templates. If you want to select a print template, instead of printing the default one, click on Print options: A new window will be shown in which you can select a print combination by scrolling through the options before you decide what combination you print. It also provides an interesting extra option: the DUO print. The DUO is an option to print two sets of ID photos on one sheet of paper. This option is typically used to print ID photos of someone with and without glasses or to print official passport photos and a “free style” photo with a smiling person. Page 16 ID station User Manual User Manual Click on Previous or Next to browse between the various print templates. Each template will be shown on screen exactly how it is printed. Order Number ID station generates a unique number for each customer. This is called the Order Number. The order number is used to archive the original captured image, to save the ID photo and it is printed along with the passport photos on paper. The order number is also shown above the preview in the main window. Page 17 ID station User Manual User Manual Chapter 6. Save and Email Saving or Emailing is as easy as printing. Just click on “Save” or Email and ID station will present the save options in a new window: There are How To manual pages for saving and emailing. If you need more information on these functions please read these manual pages. Page 18 ID station User Manual User Manual Click on one of the buttons. For example: click on the "Facebook" button. This button allows you to save the ID photo for upload to Facebook. The only thing you have to do is enter the name under which the image is saved. The folder where the image is saved and the size is already set. You need only fill in the name and click "Save" button. A button in this Save window is really a Save Template that is executed when you click on the button. You can easily add or modify them because the Save Templates are, just as print templates and all other templates, editable and you can make new templates yourself. This allows you to provide a save button for every save application you need. Please read : “How to : Save Templates” for more information. Similar to saving an ID photo there are templates for Emailing and Uploading them. Please read : “How to : Email and Upload Templates ”. Page 19 ID station User Manual User Manual Chapter 7. Open an Image from the archives ID station will save every processed input image into the archives. You can open previously saved images (and of course any other saved image) using the button “Open”. Click on this button and an “Open File Dialog” will appear: Select an Image by double clicking it. The image will be opened and automatically formatted into a passport photo, exactly the same as captured images from a camera are processed. The archive of processed images is stored on the C drive under my pictures. There is a sunfolder for Year, Month, Day. Folders are being created automatically. Images are stored using their order number. Page 20 ID station User Manual User Manual Chapter 8. Passport photos for other countries Every picture you take or every image you open will be processed and formatted for the country you previously selected. Usually this will be the default country. The selected country is shown as a button in the menu bar: In the example above the selected country is “Deutschland”. If you want to change this, click on the country button: Page 21 ID station User Manual User Manual ID station will open a new window allowing you to choose another country. Every button represents a country template. A country template is a file containing all relevant information on the requirements for passport photos for a country. Country Templates Just as all other templates, Country Templates can be modified, deleted and new templates can be added. For this, the configuration tool contains a ‘country template tool”. Please read “How to : Country Template Tool” if you want to use this tool. Chapter 9. Overview of all buttons An overview of all buttons in the main window: Main functions Read Camera Button to start capturing images in Photomatic mode and the modes to work with connected cameras such as the Sony UPXC300. This button depends on the selected input mode and can also be the Eye-Fo icon if in wireless mode. Open File Open a file from disc or storage media. Print Print default print template. Save Save the ID photo. Will open the save options window. Email Email the ID photo. Sames as saving except the JPEG file is immediately emailed to the customer. Requires a valid email address of the customer. Print Options Go to a new window showing a preview of what will be printed. This window allows you to select other print templates too. Page 22 ID station User Manual User Manual Menu buttons Home : Clear the screen, reset all settings. Passport mode : Switch between passport mode and freestyle mode. Country : button to select a country template. Button name indicates current template. . ISO / ICAO tool : ISO / ICAO test. Click to view the complete test result. Config tool : Start the configuration tool. Edit tool : Start the edit tool. Edit color, brightnes etc. Background tool : Start background tool to change the background color. Upload Email tool : Tool for Emailing and uploading of ID photos. Show / Hide : Click to show or hide the buttons to manually position and scale the ID Photo. Exit (X) : Quit. Switch to EXPERT mode : Click on the ID part of the logo to switch from user mode to EXPERT mode (and back again). Switching you EXPERT mode requires a PIN code! In EXPERT mode all features will be available, including changing all system settings and preferences. Therefore only privileged users should have access to the EXPERT mode. Page 23 ID station User Manual User Manual Formatting buttons Move Up Move Left Move Right Move Down Zoom Out Zoom In Rotate left (1 degree) Rotate right (1 degree) Convert to Grayscale (B&W) Rotate -90 and Rotate +90 degrees Page 24 ID station User Manual User Manual Chapter 10. Replace paper and ribbon Important : always replace both paper and ribbon at the same time. Replace Ribbon Gently open the printer’s front cover. If there’s an old ribbon in the printer remove it by pushing the black lever (red arrow) sideways. There’s a sticker showing the direction. The old cartridge can now be taken out from the printer. Place the new cartridge into the printer. Make sure the cartridge is pushed firmly into the printer allowing the lever to click back. Replace the paper Take out the paper container by pushing the orange button: The paper container will be released and can be taken out. If there was a paper jam it might be necessary to first manually rewind the paper. This is done using the large orange knob. Now open the container (push the other orange lever down) and remove the old paper roll. Bear in mind that the two flanges (green and gray) are needed for the new roll. So don’t throw them away! Also remove all the old paper strips that are cut off during printing. If not removed they will cause the printer to malfunction. Page 25 ID station User Manual User Manual Now take out a new roll of paper and load in into the container according to following instructions: Gently insert the paper container into the printer. Close the cover. The printer will check the ribbon and paper and will show a green light of they are installed properly. Note that fingers touching the paper will result in stains on the first print. Sometimes even on the first couple of prints. Page 26 ID station User Manual User Manual Chapter 11. Further reading and troubleshooting Please refer to the various How to pages for further reading. There is a lot of information at www.idstation.eu about : - Templates - how to add your own print template - changing layouts of prints, adding your own logo - customizing the user interface - connecting cameras - wireless camera connection and trouble shooting - much more Thank you for purchasing ID station and we hope you will have as much success and pleasure using it as we did developing it. The DPS team. Page 27 ID station User Manual