1
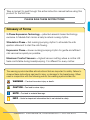
Freestyle
®
EN Instructions | FR Instructions
#27260
ALWAYS
BPA - free
TOUJOURS
sans - BPA
Thank you for choosing the Freestyle Breastpump. Breastmilk is the natural choice
for your baby, but there are reasons and situations where breastfeeding is not
possible. For over 50 years, it has been Medela’s conviction that these mothers
and babies can be supported. In close co-operation with breastfeeding experts,
Medela, one of the market leaders, has researched and developed breastpumps
that perfectly meet breastfeeding mothers needs. For mothers who insist on the
best for their babies and themselves. Because you care.
Medela vous remercie d’avoir acheté un tire-lait Freestyle. Le lait maternel est le
meilleur aliment pour votre enfant, mais il existe de nombreuses raisons et
circonstances pour lesquelles l’allaite-ment au sein n’est pas possible. Depuis plus
de 50 ans, l’objectif de Medela, un des leaders sur le marché des tire-laits et
accessoires pour l’allaitement, est de soutenir le bien-être des mamans et de leur
bébé. Medela a développé des tire-laits qui répondent de façon optimale aux
besoins des mamans allaitantes, en collaboration avec des experts de l’allaitement
et des chercheurs avant-gardistes. Pour les mamans qui ne veulent que le meilleur
pour elles et pour leur bébé. “Parce que c'est important pour vous”.
EN
04–47
FR
48-91
#1 Choice of Hospitals & Mothers, PersonalFit, Tender Care, Harmony, Swing, Pump & Save, and
Maximum Comfort Vacuum are trademarks of Medela, Inc. Medela, Calma, Symphony, 2-Phase
Expression, Freestyle, and Pump In Style are registered trademarks of Medela Holding AG.
#1 Choice of Hospitals & Mothers, PersonalFit, Tender Care, Harmony, Swing, Pump & Save,
et Maximum Comfort Vacuum sont des marques de commerce de Medela, Inc. Medela, Calma,
Symphony, 2-Phase Expression, Freestyle, et Pump In Style sont des marques déposées de Medela Holding AG.
Table of Contents
4
1. Intended Use/Population - Contraindication...............................6
2. Product Description................................................................. 7-9
3.Cleaning..............................................................................10-15
3.1Before using for the first time and once a day....................10-11
3.2After each use..................................................................12-13..
3.3Motor unit cleaning..........................................................14-15
4. Preparing for pumping........................................................16-21
4.1Assembly of breastpump kit..................................................17
4.2Correctly fitting breastshields............................................18-19
4.3Powering your breastpump...............................................20-21
4.3.1 Battery operation.....................................................20-21
4.3.2 Display.........................................................................21
4.3.3 Power operation......................................................20-21
5.Breastpumping....................................................................22-25
5.1Double breastpumping..........................................................23
5.2Single breastpumping............................................................23
5.3Device operation..............................................................23-25
6.Hands-free...........................................................................26-29
6.1Hands-free setup.............................................................27-29
6.2Top strap adjustment............................................................29
7. Breastmilk Handling............................................................30-33
7.1Breastmilk storage...........................................................30-31
7.1.1 Storing breastmilk in Freestyle cooler bag.....................31
7.2Thawing breastmilk...............................................................32
7.3Warming breastmilk...............................................................33
8.Troubleshooting...................................................................34-35
9. Additional Information..............................................................36
10. Meaning of Symbols....................................................................38-39
11. Important Safety Information.....................................................40-41
12. Technical Specifications ................................................................. 42
13. AC/DC Transformer Care ................................................................ 43
14. Warranty..............................................................................44-46
Take a moment to read through this entire instruction manual before using this
product for the first time.
PLEASE SAVE THESE INSTRUCTIONS
Glossary of Terms
2-Phase Expression Technology – patented research based technology
exclusive to Medela that mimics a baby’s natural nursing rhythm.
Stimulation Phase – fast sucking/pumping rhythm to stimulate the milk
ejection reflex and to start the milk flowing.
Expression Phase – slower sucking/pumping rhythm for gentle and efficient
milk removal as quickly as possible.
Maximum Comfort Vacuum™ – highest vacuum setting where a mother still
feels comfortable during breastpumping. It is different for every mother.
The warning symbol identifies all instructions that are important to safety. Failure to
observe these instructions can lead to injury or damage to the breastpump. When
used in conjunction with the following words, the warning symbols stand for:
WARNING – Can lead to serious injury or death.
CAUTION – Can lead to minor injury.
NOTE – Can lead to material damage.
INFO – Useful or important information that is not related to safety.
Questions? www.medela.ca, [email protected] or 1-800-435-8316
5
NOTE
i
l If you have medical reasons or other needs for exclusively breastpumping and
you have not established your breastmilk supply, it is recommended that you
use the hospital grade breastpump Symphony with the Initiation/Preemie+
Program Card.
To learn more, visit www.medela.ca/symphony.
1. Intended Use / Population
Contraindication
For lactating women to express and collect milk from their breasts.
Intended patient population/user
Adolescent pediatric or adult lactating women. Many women find it convenient, or
even necessary, to use a breastpump to express and store their breastmilk once
they have returned to work, are traveling or are otherwise separated from their
baby. Women are often delighted to learn that a breastpump can be used as a
supplement to breastfeeding and that some breastpumps are designed to mimic
the suckling of a nursing baby.
Contraindications
There are no known contraindications for the Freestyle breastpump.
6
2. Product Descriptions
Freestyle 27260
Freestyle is a personal use electric breastpump with 2-Phase Expression
technology designed to get more milk in less time and to maintain an established
breastmilk supply. Freestyle is capable of single and double breastpumping.
Questions? www.medela.ca, [email protected] or 1-800-435-8316
7
Product Description
2x PersonalFit breastshield (24mm)
(for other breastshield sizes
see Section 4.2)
2x Freestyle connector assembly
(connector, membrane, back cap)
1x AC/DC transformer
4x bottles
1x rechargeable lithium
ion battery
4x solid lids
1x hands-free kit
2x strap sets
1x ice pack
1x cooler bag
8
4x clasp adaptors
1x Freestyle tubing
Freestyle
tubing port
tubing
support
belt clip
short tubing
battery
compartment
AC/DC
transformer
port
long tubing
1x motor unit
reduce
vacuum
power
indicator
expression
phase indicator
stimulation
phase
indicator
1x Freestyle
tote bag
increase
vacuum
battery indicator
memory
“on”
indicator
timer
memory
function key
let-down button
on/off button
Questions? www.medela.ca, [email protected] or 1-800-435-8316
9
3. Cleaning
3.1 Before using for the first time and once a day
Clean and disinfect the parts below. Ensure you clean and disinfect these parts at least once per day.
• Breastshield
•B
ottles and lids
• Membrane
• Connector
• Back cap
NOTE
i
l Freestyle tubing doesn’t require regular cleaning maintenance because
the media separation system prevents milk from entering the tubing. If you
live in an area with high humidity, you may find that your tubing sometimes
has condensation after use. If this is occurring, please refer to section 8
for instructions on removing condensation from your tubing. Using your
freestyle while condensation is present may cause damage to your motor.
10
Supplies Needed: • clean dish towel or soft brush
• clean sink or bowl
• drinking quality water
1
2
Wash hands thoroughly.
Disassemble the
breastpump kit into
individual parts.
3
2b
For subsequent uses,
you can use a Medela
Quick Clean Micro-Steam
bag in the microwave
in accordance with the
instructions for daily
disinfection.
Dry with a clean cloth or
leave to dry on a
clean cloth.
2a
Cover all parts with water,
bring water to a boil and boil
for 5 minutes. Allow water
to cool and gently remove
parts from water with tongs.
3a
I Allow all parts to air dry.
I Store dry parts when not in use.
I Do NOT store wet or
damp parts.
Questions? www.medela.ca, [email protected] or 1-800-435-8316
11
3. Cleaning (cont.)
3.2 After each use
Clean all parts that come in contact with your breast and breastmilk.
See image in Section 3.1.
NOTE
i
l Wash breastpump kit parts after each use.
l Disinfect cleaned breastpump kit parts once daily.
l The breastpump kit requires no maintenance.
l Take care not to damage parts of the breastpump kit during cleaning.
l If the individual components of the breastpump kit are cleaned in a dish
washer, parts may be discoloured by food pigments. This has no impact on
the function.
l Store the dry breastpump kit in a clean bag/bottle until next use.
CAUTION
l Do not store wet or damp parts as mold may develop.
12
Supplies Needed: • mild dish soap • clean dish towel or soft brush
• clean sink or bowl • drinking quality water
2
1
Disassemble the
breastpump kit into
individual parts.
2b
4
Rinse all separated parts
with cold, clear water
(approx. 20 °C) in order
to remove breastmilk
protein residue.
5
Rinse all separated parts
with cold clear water for 10 - 15 seconds.
Dry with a clean cloth or
leave to dry on a clean cloth.
I Allow all parts to air dry.
I Store dry parts when not in use.
I Do NOT store wet or damp parts.
3
Clean all parts with plenty
of warm soapy water
(approx.30 °C).
I Soak all separated parts in warm soapy water for 5 minutes.
I Clean with a clean
dish-cloth or soft brush.
Or (as an alternative
Ø
to steps 3 and 4)
I Wash all separated parts on top rack of dishwasher.
I Allow all breastpump parts to air dry in a clean area.
I Store dry parts when not in use.
Questions? www.medela.ca, [email protected] or 1-800-435-8316
13
3. Cleaning (cont.)
3.3 Motor unit cleaning
NOTE
i
l Unplug breastpump from power source.
CAUTION
l Do not store wet or damp parts as mold may develop.
l Do not immerse breastpump in water or allow breastpump to become wet.
14
Supplies Needed: • clean dish towel or soft brush
• drinking quality water
2
1
Turn off breastpump.
4
Unplug breastpump from
power source.
3
Remove tubing by pulling
straight out of tubing ports.
Do not wiggle or pull tubing
at an angle.
5
Remove tubing from
breastshield.
Cleaning the motor unit:
Wipe off with a clean, damp
cloth. Do not immerse
breastpump in water
or allow breastpump to
become wet.
Questions? www.medela.ca, [email protected] or 1-800-435-8316
15
4. Preparing for Pumping
Parts you will need for this step:
• breastpump
• breastshields
• bottles
and lids
• membranes
• connectors
• tubing
• Back caps
NOTE
i
l Use Medela original accessories only.
Warning: Using non-Medela original accessories with your Medela
breastpump represents a health risk.
l Check breastpump kit components for wear or damage before use and
replace if necessary.
l All components must be completely dry before use for proper performance
and to prevent damage to the breastpump.
CAUTION
l Wash hands thoroughly with soap and water before touching the breast and
breastpump parts.
INFO
l Carry out all the steps with care and assemble the breastpump kit correctly
for optimum performance.
16
4.1 Assembly of breastpump kit
1
2
Wash hands before
touching breastpump, kit
and breasts and avoid
touching the inside of
bottles or lids.
4
Carefully insert the light
yellow membrane into the
base of the connector.
5
Push the breastshield onto
the connector.
3
Fasten the back cap to the
connector
I Make sure that all 3 snaps (top & side) are engaged.
6
Screw bottle into connector. Insert the short tubing into
the back cap as far as it
will go.
7
Insert the long tubing into
the motor unit.
Questions? www.medela.ca, [email protected] or 1-800-435-8316
17
4. Preparing for Pumping (cont.)
Choisissez CAUTION
une téterelle PersonalFit qui convient
Choosing the right siz
parfaitement à votre taille
l While some discomfort may be felt when first using a breastpump, using a
breastpump should not cause pain.
1 Determine the size you’re
1 Voyez la taille de téterelle que vous utilisez
lIf you are unsure
about
breastshield
sizing, please contact
healthcare
nota sure,
look for the size
24mm
présentement.
Si vous
n’êtes
pas certaine,
professional or breastfeeding specialist who can help you
get
a proper fit
picture)
breastshield
(see
vérifiez la taille marquée en relief sur votre téterelle
or call Medela at 1-800-435-8316 to find a breastfeeding specialist in (voir l’illustration). La taille 24mm est livrée avec
are provided with Medela
your area.
tous les ensembles-accessoires de Medela.
2 While pumping, compare
4.2exprimant
Correctly
fitting
breastshields
2 En
votre
lait, comparez
l’ajustement de votre
below as a sizing guidelin
téterelle
images
paraissant
ce and
qui peut
Properlyaux
fitted
breastshields
will ci-dessous,
ensure comfort
efficient milk expression. To determine
you have
size,
look attaille.
the following diagram:
vous
servir deifguide
pourthe
le correct
choix de
la bonne
l T he nipple should be centered in the tunnel of the shield.
l The nipple should move freely without rubbing when the
Votre téterelle est
breastpump is turned on.
trop
;
l No part of your breast should be pulled
into ajustée
the
breastshield tunnel; only your nipple should
essayez une taille
move freely inside the tunnel.
plus grande
l You should see a gentle, rhythmic motion in
the breast with each cycle of the breastpump.
Votre
l After breastpumping, your breast should
feeltéterelle
much est
less full with no areas of hardness. trop grande;
correctement
essayez une taille
ajustée
Medela offers different sizes which are plus
available
at many
petite
Correct fit
local retailers or visit www.medela.ca.
PersonalFit breastshields
(21mm, 24mm, 27mm, 30mm & 36 mm)
21
21
18
24
27
30
36
24
Choosing the right size PersonalFit breastshield
1 Determine the size you’re currently using. If you’re
not sure, look for the size embossed on your
breastshield (see picture). 24mm breastshields
are provided with Medela breastpumps.
24mm
2 While pumping, compare your fit to the images
below as a sizing guideline.
Your breastshield
is too small;
try a larger size
Your breastshield
is too large;
try a smaller size
Correct fit
21
24
27
30
36
Questions? www.medela.ca, [email protected] or 1-800-435-8316
19
4. Preparing for Pumping (cont.)
4.3 Powering your breastpump
INFO
4.3.1 Battery operation:
If possible, do not remove the battery from the motor unit. Removing the
battery requires a charging time of up to 24 hours.
l The breastpump can be used during charging.
l The battery is charging as soon as the breastpump is connected to a power
source (even if the breastpump is not in use).
NOTE
i
l Do not use force to push the battery into the battery compartment.
l Do not use Freestyle without battery – this can cause permanent damage to
your Freestyle motor.
INFO
Summary of battery charge status.
AC/DC transformer
connected to socket
l If the breastpump has been
running for 30 minutes without any
manipulations, the Freestyle will
automatically switch off.
Battery charge status
Battery fully charged, approx.
3 hours' expression
WARNING
4.3.3 Power operation
Follow the exact order of the steps.
l Only use the AC/DC transformer
supplied with the Freestyle
breastpump.
l Make sure the voltage of the AC/DC
transformer is compatible with the
power source.
20
flashing
flashing
“bAtt”
flashing
20 min. expression time
remaining. Battery removed
from motor unit
Low battery, needs charging
Initial charge and charging
after removing the battery
(up to 24 hours charging
time)
4.3.2 Display
4.3.1 Battery operation
1
2
Open the battery
Insert the battery in the
compartment on the back in direction shown by “This
the direction of the arrow.
side down” so that the gold
contacts on the battery
touch the gold contacts in
the device.
1
Before first use, “bAtt”
appears in the display. Fully
charge the battery until
the battery indicator stops
flashing.
4.3.3 Power operation
1
2
Plug the AC/DC transformer
cord into the motor unit.
*Battery must be in
compartment.
Plug the AC/DC transformer
into the mains socket.
Questions? www.medela.ca, [email protected] or 1-800-435-8316
21
5. Breastpumping
Preparing for breastpumping: Wash hands before
touching breastpump, kit and breasts and avoid touching
the inside of bottles or lids.
CAUTION
IAlways inspect breastshields, connectors, membranes and tubing prior to
use for cleanliness and to ensure no parts are damaged/broken. If dirty, see
Section 3.2.
IContact your healthcare professional or breastfeeding specialist if you can
express only minimal or no milk or if expression is painful. See Section 9 for
more information.
IDo not try to express with vacuum that is too high and uncomfortable
(painful). The pain, along with potential breast and nipple trauma may
decrease milk output.
IMake sure tubing is not kinked or pinched while breastpumping.
IDo not hold the breastpump kit by the bottle. This can lead to blockage of
the milk ducts and engorgement.
INFO
IResearch has shown that you will breastpump more efficiently – get more
milk in less time – when breastpumping at Maximum Comfort Vacuum
during the Expression Phase.
IYou should reassess your Maximum Comfort Vacuum throughout your
breastpumping experience because it can change during the different
stages of lactation.
IDo not tilt or overfill bottles when breastpumping.
IDouble breastpumping saves time and increases the energy content of the
milk. Milk production is increased and maintained long-term.
22
5.1 Double
breastpumping
5.2 Single breastpumping
1
1
Double breastpumping:
Place the breastshield on
your breast so that your
nipple is properly centered
in the tunnel.
Single breastpumping:
Insert the unused short
tubing into the tubing
holder.
2
Hold the breastshield
onto your breast with your
thumb and index finger.
Support your breast with
the palm of your hand.
5.3 Device operation
1
2
Adjust the vacuum to
your comfort level while
breastpumping by pressing
the increase
or decrease button. Holding down
Freestyle will start in the
these buttons will adjust
Stimulation Phase, indicated vacuum more rapidly. After
on the display as shown.
2 minutes, the Stimulation
Phase will automatically
change to the Expression
Phase, indicated on the
display as shown.
3
If you “let-down” (your
milk starts to flow) sooner
than 2 minutes, you will
breastpump more efficiently
by pressing the let-down
button
at that time.
Questions? www.medela.ca, [email protected] or 1-800-435-8316
23
5. Breastpumping (cont.)
INFO
IAlways disconnect Freestyle from the power source after expression (except
if the battery is charging).
IOnly fill the bottle to the 150ml mark.
INFO
IFreestyle switches off automatically if it has been running for 30 minutes with
no interruptions.
IStep 4: Memory function key
To activate your personal setting, start the breastpump and press
.
IHow often should you breastpump? A breastpump is a replacement for
when you are separated from your baby. It is important to breastpump when
the baby would be breastfeeding. If you are exclusively breastpumping, 6 to 8
breastpumping sessions per 24 hours is recommended.
IHow long should your breastpumping session last? Breastpumping times
can vary from mother to mother, however, if you are breastpumping both
breasts simultaneously at Maximum Comfort Vacuum, your breastpumping
session should last up to 15 minutes.
IHow should your breasts feel after breastpumping? After breastpumping,
your breasts should feel soft and there should be no firm areas. Before
breastpumping, your breasts will have a firm, heavy feeling. After
breastpumping, make sure your breasts are not firm or have lumpy areas. This
could indicate that the breast is not draining all over. See Section 9 for more
information.
24
5
4
Once in the Expression
Phase, set your Maximum
Comfort Vacuum. Use
to increase the vacuum
until it is slightly
uncomfortable (never
painful) then press
to
dial it back minimally.
7
Switch off the breastpump
Press
for 3 seconds
with
.
during the expression
phase to save the individual
breastpumping program.
I The indicator on the display flashes and the breastpump emits 3 beeps.
I Finish expression as usual.
8
When your breastpumping
session is over, unplug
tubing from the back of
the breastshield(s) before
setting down the bottles.
6
Screw lid onto bottle.
I Follow the instructions in Section 7 “Breastmilk handling”.
9
Disassemble and clean per
Cleaning Instructions in
Section 3.
Questions? www.medela.ca, [email protected] or 1-800-435-8316
25
6. Hands-Free
Parts you will need for this step:
• straps
26
• clasp adaptors
6.1 Hands-free setup
1
2
Connect hands-free top
strap to hands-free bottom
strap by sliding bottom strap
into top strap clip.
4
Snap hands-free strap
assembly onto back of
each breastshield body.
Be sure that the hands-free
assembly snaps into the
breastshield body and is
secure.
5
Attach bottom clips to
bra band until secure
fit is achieved. Be sure
the nursing bra flap is
not trapped under the
breastshield.
If necessary, adjust the fit
by moving the bottom strap
clips to a different strap
setting.
3
Open your bra flap and
insert clasp into your
bra, using bra adaptors if
necessary (see page 26).
6
The strap is flexible and can
be pulled to remove and
reinsert the clip. Be sure the
round part of the clip sits on
the side of the strap with the
round indentation. After you
move the clip, repeat step 4.
Questions? www.medela.ca, [email protected] or 1-800-435-8316
27
6. Hands-Free (cont.)
Bra clasp adaptors
The hands-free straps were
designed to work with most top
flap nursing bras (see below).
Refer to the pictures below to
determinewhich bra adapter to use.
Use adaptor A
No adaptor
needed
Use adaptor B
Bra Adaptors
28
A
B
Hook & Eye
Universal
6.1 Hands-free setup (cont.)
7
Adjust length of top strap
by pulling down on the
loose end. Close clasp
when complete. Repeat
strap assembly with the
other breastshield.
6.2 Top strap adjustment
1
2
T ighten: Open clasp and
pull down on front strap until
desired length. Snap clasp
into locked position when
complete.
Loosen: Open clasp and
pull down on back part of
strap until desired length.
Snap clasp back into
locked position.
Questions? www.medela.ca, [email protected] or 1-800-435-8316
29
7. Breastmilk Handling
WARNING
IDo not thaw frozen breastmilk in a microwave or in a pan of boiling water.
IDo not microwave breastmilk. Microwaving can cause severe burns to
baby’s mouth from hot spots that develop in the milk during microwaving.
(Microwaving can also change the composition of breastmilk.)
Freshly expressed breastmilk storage guidelines
(for healthy term babies)
Room
Cooler with
Refrigerator
temperature ice packs
4–6 hours
at 19–26°C
24 hours
at 15°C
3–8 days
at 4°C
Freezer
Thawed
breastmilk
6–12
months
-18–-20°C
Use within
24 hrs
Reference: www.breastmilkguidelines.com
7.1 Breastmilk storage
(Please check with your hospital or health care professional for specific storage
instructions, if needed.)
Test prior to freezing. In rare cases stored milk may develop an off odour. Fill 1 or
2 bags and freeze for 24 hours as a test prior to storing significant quantities of milk.
1. Wash hands before touching bottles/bags and avoid touching the interior of
bottles or lids.
2. Breastpump into clean bottles. If using Pump & Save bags, always use a new
bag.
3. Label bottles or bags with the collection date if you are not using the milk immediately.
30
4. Freeze milk in small portions, 60ml to 120ml per bottle or bag. Smaller
amounts thaw more quickly.
5. When freezing breastmilk, do not fill bottles more than 3/4 full and bags more
than 150ml to allow room for liquid to expand. Cool milk prior to freezing.
Never refreeze breastmilk that has been thawed.
6. Use solid lids and seal bottles tightly if you intend to refrigerate breastmilk for
several days or freeze it.
7.1.1 Storing breastmilk in Freestyle cooler bag
INFO
IIf the ice pack is frozen solid, it will safely cool your breastmilk for up to 10
hours in a room temperature environment when the ice pack and milk are
being stored in the Freestyle cooler bag.
I
The Freestyle cooler bag with contoured ice pack will provide cooling up to 4 -150ml bottles of breastmilk for up to 10 hours in a room temperature environment.
IAs soon as you are finished breastpumping, place the breastmilk
bottle or breastmilk storage bag in the cooler bag with the ice pack
and zip close cooler bag.
ITransfer breastmilk bottles or breastmilk storage bag to the
refrigerator or freezer once you are home.
Questions? www.medela.ca, [email protected] or 1-800-435-8316
31
7. Breastmilk Handling (cont.)
7.2 Thawing breastmilk
WARNING
INever thaw or warm breastmilk in a microwave or in boiling water. High
temperatures will destroy important nutrients unique to breastmilk and can
increase risk of scalding baby.
NOTE
IDo not use hot water to thaw breastmilk as overheating breastmilk can
destroy many of the unique and beneficial properties it provides your baby.
IOnce thawed, milk can be stored in the refrigerator for up 24 hours.
IIt is not recommended that breastmilk be thawed at room temperature.
1. Thaw breastmilk using 1 of these methods:
a) Thawing with water: Place sealed bottle of frozen breastmilk in a bowl of
cool water or hold under cool running water. Once the milk is liquid, but
still chilled, dry bottle/bag and store in refrigerator until ready to use.
b) Thawing in the refrigerator: Place frozen breastmilk in refrigerator
overnight.
2. Once thawed, swirl bottle/bag to blend fat which may have separated during storage.
3. Feed thawed milk immediately or store in refrigerator for up to 24 hours.
4. If travelling or transporting breastmilk to another location, a cooler carrier
equipped with ice packs will help keep breastmilk cool until you reach your
destination.
CAUTION
IDo NOT let thawed breastmilk sit out at room temperature.
32
7.3 Warming breastmilk
WARNING
INever thaw or warm breastmilk in a microwave or in boiling water. High
temperatures will destroy important nutrients unique to breastmilk and can
increase risk of scalding baby.
NOTE
IBefore warming breastmilk – ensure that hot water tap settings do not
exceed 50°C.
IHave a thermometer you use only for measuring breastmilk temperature.
1. Breastmilk can be warmed by standing the bottle in warm water or holding under running warm water while continuously swirling the milk.
Water temperature should not exceed 50°C.
2. Warm approximately 2 minutes for each 50ml of breastmilk to achieve a temperature not exceeding 37°C.
3. To test temperature of breastmilk:
a) With thermometer: Swirl milk for a few seconds. Insert a clean thermometer into the middle of the bottle, taking care not to touch the bottom.
NOTE: Temperature of breastmilk should not exceed 37°C.
b) Without thermometer: Swirl milk for a few seconds. Hold bottle against inside of wrist. If bottle is warming your skin – then breastmilk is too hot - let cool. Bottle temperature should feel the same as your wrist temperature.
WARNING
IAlways test temperature of breastmilk before feeding to baby and ensure
it does not exceed the maximum temperature of 37°C. It is better to under
heat breastmilk than to overheat breastmilk.
Questions? www.medela.ca, [email protected] or 1-800-435-8316
33
8. Troubleshooting
Problem
Solution
Low or no
suction
Component Check
- Disassemble breastshields,
connectors, membranes, and back
lids.
- Inspect all components for chips
or cracks.
- Clean and dry all components per
Cleaning Section 3.2.
- Reassemble per Assembly Section
4.1. Make sure the components are
dry before assembling.
- Check that tubing is not kinked.
Connection Point Check
Inspect following connection
points to ensure attachment is
secure.
- Back cap snapped at all 3
connection points.
- Tubing adaptor to back cap.
- Tubing adaptor to breastpump.
- If suction is not improved,
contact Medela Customer
Service at 1-800-435-8316.
INFO
I Avoid removing the battery as this will reset the battery indicator and
requires a recharging time of up to 24 hours.
If the battery does not charge and there is no battery symbol on the display
verify that the battery is inserted properly. See Section 4.3.1.
- Unplug the AC/DC transformer from the socket.
Breastpump - Turn off the breastpump.
- Do not place the breastpump upside down. Control panel must face
becomes wet upwards.
- Store the breastpump in a warm, dry place for 24 hours.
Breastpump
does not run
or power on
34
If the AC/DC transformer Symbol flashes or you see “Err” and hear 3
beeps, contact Medela Customer Service at 1-800-435-8316.
Problem
Solution
No “letdown” or
breastmilk
expression
- A successful breastpumping session is measured by whether your
breasts are drained and not how much you pumped in volume. If
you are breastpumping your breasts and no milk is flowing, ensure
that your breasts are not drained. (For example, if you just breastfed
your baby, you probably will not have milk to express or if you don’t
generally breastfed your baby at this time of day, there may simply be
no milk to express.)
- Ensure your breastpump is assembled correctly and there is suction.
- Relax and take a 10-15 minute break if let-down is not achieved after
2 consecutive breastpumping sessions.
- Consult with your healthcare professional or breastfeeding specialist if
expression does not occur.
Condensation
or moisture
appears in
tubing
Battery
charging
“bAtt” symbol
on the display
- Shake out any droplets by swinging the tubing.
- Hang up the tubing to air-dry.
Condensation may cause cloudy spots to appear in tubing. This does
not affect the performance of your breastpump. If you want to remove
the cloudy spots; rinse tubing in cool water and repeat steps above.
“bAtt” Symbol on the Display
- If a “bAtt” symbol appears on the display, it indicates it is in initial
charge mode or the battery was removed and reinserted. Plug in and
charge for 24 hours uninterrupted.
Flashing Battery Symbol Outline and 1 Bar
- Low battery. Plug in and charge battery.
Battery Indicator Flashes with 4 Bars
- Disconnect the power cord and remove the battery for at least 10
seconds. Reinsert the battery and plug in to charge for 24 hours.
If you have not resolved the problem with your breastpump or your have further
questions, please contact Medela Customer Service at 1-800-435-8316, [email protected] or fill out the contact us form at www.medela.ca.
Questions? www.medela.ca, [email protected] or 1-800-435-8316
35
9. Additional Information
Following are some common breastfeeding related conditions. If you experience
any of these symptoms, contact a healthcare professional or breastfeeding
specialist.
9.1 Engorgement
Symptom - Breasts are hard and uncomfortable, possibly with reddened
areas.
Potential causes - Milk not draining properly from breast. Milk can drain back
into the tissue causing areas to swell and become tender.
9.2 Blocked/Plugged Ducts
Symptom - Area of breast will look reddened and may be tender to touch.
Potential causes - Milk not being drained from a specific duct. The area
becomes ‘clogged’ up and milk is then prevented from flowing.
9.3 Mastitis
Symptom - It often follows from engorgement but can just occur suddenly.
The initial symptoms are similar to flu – fatigue, headache and muscle aches,
fever and localized breast tenderness. It can be in 1 or even both breasts and
needs immediate treatment.
Potential causes - A bacterial infection in the breast tissue which is often
accompanied by cracked nipples.
36
NOTE
IA Healthcare Professional or Breastfeeding Specialist can give you guidance
in breastfeeding your baby and using a breastpump. Their guidance is
valuable in terms of the lifetime of health benefits for both you and your baby.
A listing of Lactation Professionals are available at www.medela.ca or call
Medela Customer Service at 1-800-435-8316.
Questions? www.medela.ca, [email protected] or 1-800-435-8316
37
10. Meaning of Symbols
Symbols on the device
This symbol indicates to follow instructions for use.
0123
This symbol indicates the compliance with the essential requirements
of the Council Directive 93/42/EEC of 14 June 1993 concerning medical
devices.
This symbol indicates the manufacturer.
This symbol indicates do not dispose the device together with unsorted
municipal waste (for EU only).
This symbol indicates the compliance with additional USA and Canada
safety requirements for medical electrical equipment.
This symbol indicates a type BF applied parts.
REF
This symbol indicates manufacturer's catalogue number of the battery.
SN
This symbol indicates manufacturer's serial number of the device.
IP22
This symbol indicates the protection against entrance of solid foreign
objects and against harmful effects due to the entrance of water.
This symbol indicates the date of manufacture (four digits for the year and
two digits for the month).
38
Symbols on the AC/DC transformer
This symbol indicates that the AC/DC transformer is a class II device.
This symbol indicates the compliance with China Compulsory Certifications.
This symbol indicates that the mains adapter is safety tested.
This symbol indicates that the AC/DC transformer is for indoor use only.
This symbol indicates the compliance with USA and Canada safety.
This symbol indicates the compliance with Federal Communications
Commission requirements.
This symbol indicates polarity of d.c. transformer.
N136
This symbol indicates the compliance with AUS/NZ regulatory requirements
(Regulatory compliance mark).
This CE-mark indicates the compliance with the low voltage and
electromagnetic compatibility directive.
This symbol indicates to not dispose the device together with unsorted
municipal waste (for EU only). The solid bar symbol indicates that mains
adapter is put on the market after 13 August 2005.
This symbol indicates the compliance with Japanese safety requirements.
This symbol indicates the compliance with energy efficiency requirements.
This symbol indicates alternating current.
9 VDC
This symbol indicates direct current.
Questions? www.medela.ca, [email protected] or 1-800-435-8316
39
11. Important Safety Information
READ ALL SAFETY INFORMATION AND INSTRUCTIONS BEFORE
USING THIS PRODUCT
Failure to follow these instructions/safety information can lead to danger from the
device. Subject to technical changes.
When using electrical products, especially when children are present, basic safety
precautions should always be followed.
Device
Danger of electrocution! Keep the device dry! Never immerse in water or
other liquids!
The Freestyle breastpump is not heat-resistant: keep away from radiators
and open flames.
Do not expose the motor unit to direct sunlight.
Repairs must be performed only by an authorized service agency. Do not
repair yourself! No modifications to the device are permitted.
Never use damaged device. Replace damaged or worn parts.
Electrical Use
Separation from the mains is only assured through the disconnection of
the mains adapter from wall socket outlet.
Keep the mains adapter away from heated surfaces.
Do not reach for any electrical device if it has fallen into water. Unplug
immediately.
40
The Freestyle breastpump should never be left unattended when plugged
into a power source.
Use
Use the Freestyle breastpump only for its intended use as described in this
manual.
Never operate an electrical device if it has a damaged cord or plug, if it is
not working properly, if it has been dropped or damaged, or dropped into
water.
Do not use the Freestyle breastpump while bathing or showering.
Do not use the Freestyle breastpump while sleeping or overly drowsy.
This is a single user product. Use by more than one person may present a
health risk.
Do not drive while hands-free pumping.
Supervision is necessary when the Freestyle breastpmp is used in the
vicinity of children.
Contact your lactation consultant or physician if you experience problems
or pain.
Portable and mobile radio frequency communications equipment can
affect the Freestyle breastpump.
IMPORTANT
I Plastic bottles and component parts become brittle when frozen and may break
when dropped.
I Bottles and component parts may become damaged if mishandled, e.g. dropped,
over-tightened, or knocked over.
I Take appropriate care in handling bottles and components.
I Do not use the breastmilk if bottles or components become damaged.
SAVE THIS INFORMATION
41
12. Technical Specifications
EMC / Technical description
The Freestyle breastpump needs special precautions regarding EMC
(Electromagnetic compatibility). Wireless communications equipment such as
wireless home network devices, mobile phones, cordless telephones and their base
stations, walkie-talkies can affect the electric breastpump Freestyle and should be
kept at least a distance 1.0 m away from the equipment.
Electromagnetic Compatibility (EMC, IEC 60601-1-2:2007, Table 1)
intermittend
Freestyle
Intermittent vacuum
vacuum (approx.)
-20....-270 mmHg
-3....-35 kPa
45 … 120 cpm
Freestyle
In
Out
100-240V~ 50/60 Hz
12 V
1 A / 1.5 A
93
Operation
15
93
Transport /
Storage
106
Transport /
Storage / Operation
15
Freestyle
7.2 V
Li-Ion 2250mAh
70
Freestyle
122 x 90 x 58 mm
kPa
106
+40
Operation
+5
°C
Freestyle
+60
370 g
kg
Transport /
Storage
-20
270 g
°C
WARNING
IThe electric breastpump Freestyle should not be used adjacent to or
stacked with other equipment. If adjacent or stacked use is necessary, the
electric breastpump Freestyle should be observed to verify normal operation
in the configuration in which it will be used. Electromagnetic Compatibility
(EMC, IEC 60601-1-2:2007, Table 1)
42
12. AC/DC Transformer Care
To care for your AC/DC transformer be sure to follow these storage directions.
Do not wrap cord of AC/DC transformer
around the plug body.
Do not unplug
AC/DC transformer by
pulling on the cord.
Correct!
Correct!
Traveling Outside Canada
While traveling internationally, we recommend purchasing a Universal Power
Plug Adapter (not included). Please consult with the country you are visiting
to find out what type of AC/DC transformer will work best. Freestyle’s AC/
DC tranformer is two-pronged and does not require a grounded outlet.
Freestyle has a Lithium ION Battery which may be restricted from the
country you are visiting. Please consult with the country you are visiting to
find out if there are any restrictions that pertain to travelling with Lithium
ION.
For information about traveling with your breastpump and expressed
breastmilk, visit www.catsa-acsta.gc.ca.
Questions? www.medela.ca, [email protected] or 1-800-435-8316
43
14. Warranty
WARNING
IThis is a single user product. USE BY MORE THAN ONE PERSON MAY
PRESENT A HEALTH RISK AND VOIDS THE WARRANTY.
RETAIN ORIGINAL PROOF OF PURCHASE OR BILL OF SALE FOR WARRANTY
PURPOSES.
For hygiene reasons, Medela Products are single user products; use by more than one
person voids the warranty.
Medela Canada (“Medela”), warrants to the original end user (“Customer”) that
Freestyle, Pump In Style and Swing will be free from defects in workmanship and
materials, under normal use, for 90 days (two (2) years for breastpump mechanism),
rechargeable batteries for which 2 years shall apply, Harmony which 30 days shall
apply. This is provided that any and all operating and maintenance instructions are
strictly respected, in particular in case of extreme and/or continuous applications/use
of the Product. The warranty period begins on the proved purchase date (conclusion of
purchase contract).
Products purchased from non-authorized distributors, e.g. internet market places,
auctions or other types of public sale (including but not limited to EBay/Kijiji &
Craigslist) are not covered by this warranty.
Warranty lies within original country of purchase.
Medela’s sole obligation under this express warranty shall be, at Medela’s sole option
and expense, to replace or repair the Product or part thereof (in case the product is
not available, to deliver a similar type of the Product). Medela warrants any repaired or
replaced Product or part for a period of ninety (90) days from delivery, or through the
end of the original warranty, whichever is longer.
All Products or parts that are replaced become the property of Medela. This express
warranty does neither cover consumables, nor third party products. Unauthorized
attempts to repair the Product will void this warranty.
44
Obtaining Warranty Service. To make a claim under this warranty call Medela
Customer Service (toll free) at 800-435-8316. You may also call this number for
additional information concerning this warranty.
Dated proof of original purchase from Medela, its authorized distributor or its authorized
retailer and a description of the defect will be required. Medela is not responsible
for Products or parts received without a warranty service authorization. Repaired
or replacement Products will be delivered to Customer free of charge. The repaired
product or part will be delivered as soon as reasonably possible. Medela shall not be
responsible for any damages occurring during such delivery. Medela shall, at its sole
discretion, decide on the place of performance for work under warranty. Medela shall
have the right to charge for additional costs for services under warranty if the site of the
Product is other than where the Product was originally delivered.
Warranty Exclusive. Customer’s sole remedy for breach of the warranty shall be
the express warranty. The foregoing warranty is exclusive and is in lieu of all other
warranties, terms or conditions, expressed or implied, either in fact or by operation of
law, statutory or otherwise, including warranties, terms or conditions of merchantability,
fitness for a particular purpose, satisfactory quality and non-infringement, all of which
are expressly disclaimed. Medela shall not be liable if the alleged defect or malfunction
was caused by Customer’s or any other person’s misuse, neglect, improper handling,
unauthorized attempts to open, repair or modify the Product, inadequate maintenance,
disregard of operating instructions, excessive load or stress, normal wear and tear,
incorrect voltage or any other cause beyond the range of its intended use, by accident,
fire, or other hazards, or other cause not due or attributable to Medela.
This warranty does not cover physical damage to the Product or malfunctions resulting
from the use of the Product in conjunction with any sort of ancillary or peripheral
equipment and Medela determines that there is no fault with the Product itself.
Limitation of Liability. Medela also excludes any liability, whether based in contract
or tort (including negligence), for incidental, consequential, indirect, special, or punitive
damages of any kind, or costs of procurement of substitute products by Customer,
or for the loss of revenue or profits, loss of business, loss of information or data,
or other information of financial loss arising out of or in consequence with the sale,
maintenance, use, performance, failure, or interruption of this product, even if Medela
or its distributors have been advised of the possibility of such damages, and limits its
Questions? www.medela.ca, [email protected] or 1-800-435-8316
45
14 . Warranty (cont.)
liability to replacement, repair, or refund of the purchase price paid, at Medela’s option.
This Limitation of Liability for damages will not be affected if any remedy provided
herein shall fail of its essential purpose.
Disclaimer. Should a court of jurisdiction not allow the entire exclusion or limitation of
implied warranties or the limitation of incidental or consequential damages for certain
products supplied to consumers or the limitation of liability for personal injury, such
implied warranties and such liabilities will be limited to the duration of the applicable
express warranty.
Governing Law and Place of Jurisdiction. This Limited Warranty shall be governed
by the laws of Switzerland & Canada, excluding all conflict of laws principles and
excluding the United Nations Convention on the International Sale of Goods dated 11
April 1980. The ordinary courts at the Medela registered office in Baar, Switzerland shall
be competent. Medela shall, at its sole discretion, also be entitled to take legal action
in the competent courts at the Customer’s place of business or domicile. With this
Limited Warranty, Medela grants Customer specific legal rights which do not restrict
any statutory consumer rights.
46
Medela AG
Lättichstrasse 4b
6341 Baar, Switzerland
www.medela.com
Distributed by
Medela Canada Inc.
8-4160 Sladeview Crescent
Mississauga, ON, L5L 0A1
Tel./Tél. 1.800.435.8316
Fax/Télec1.800.995.7867
[email protected]
www.medela.ca
© 2014 Medela Canada Inc. 2948372 D 0314