1
Superior Swing System
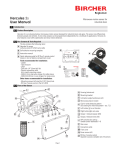
System Components
1
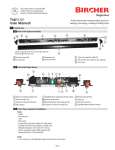
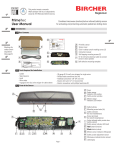
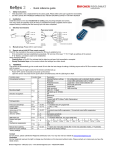
‘UniScan’ refers to the assembly within one aluminum rail. ‘US Beam’ refers to one single sensor head within the UniScan assembly.
Shown is single-panel Superior Swing System. Double-panel Superior Swing System includes 2x all items pictured (except Reflex sensor).
A
B
C
D
E
F
A
UniScan Assembly - swing side with connection cable
UniScan assembly - approach side with Y-adapter
End caps (2 pair)
Cable loop
Reflex microwave motion sensor (other options available)
User manual
B
C
D
F
E
Superior Swing System
System Components
1
‘UniScan’ refers to the assembly within one aluminum rail. ‘US Beam’ refers to one single sensor head within the UniScan assembly.
Shown is single-panel Superior Swing System. Double-panel Superior Swing System includes 2x all items pictured (except Reflex sensor).
A
B
C
D
E
F
A
UniScan Assembly - swing side with connection cable
UniScan assembly - approach side with Y-adapter
End caps (2 pair)
Cable loop
Reflex microwave motion sensor (other options available)
User manual
B
C
D
F
E
2
Layout & Cable Routing
Use the following diagram to route the Y-adapter cables.
Safety curtain²
SWING SIDE OF DOOR B
Safety curtain¹
Cable feed hole
ribbon
cable
US beam
2
Layout & Cable Routing
Cable to
door
operator
ribbon
cable
US beam
Cable loop Y-adapter
Use the following diagram to route the Y-adapter cables.
US beam
Door Panel
B A
APPROACH SIDE OF DOOR A
Safety curtain¹
US beam
Panic
hardware
(optional)
Safety curtain²
This drawing (cross section of door from above) shows factory settings (typical UniScan installation). The following conditions apply:
- Single-panel door (see layout for double-panel door on page 2)
- Center pivot left hand door
¹ Factory setting for hinge side US Beam safety curtain is 5° away from face of door
² Factory setting for leading edge side US Beam safety curtain for is 8° away from face of door
Safety curtain²
SWING SIDE OF DOOR B
Safety curtain¹
3
Mounting the Sensor
1. Position the UniScan assemblies preferably at the same height on both sides of the door.
2. Attach the aluminum rail to the top of the door (use 2 screws for ≤ 36”, 3 screws for ≥ 36”)
3. Drill a hole through the aluminum rails and door Ø 3/8” (10 mm) for the long connection cable to feed
through to the other side. The 6-pin plug fits through a 3/8” 10 mm hole. If necessary (e.g fire door)
use a smaller diameter hole- 3/16” (4.5 mm), then remove the wires from the screw terminal block,
feed the cable through the hole, and re-wire the wires to the screw terminal block.
4. Feed the cable through the hole.
5. Connect the cables to the Y-adapter. Approach side UniScan to A ; swing side Uniscan to B
6. If necessary, adjust the US beam pattern
7. Route the cable to the door operator (it may be necessary to drill a hole).
8. Attach the door loop to wall/operator housing.
9. Wire the 8-wire cable to the door operator terminals (see wiring diagram on following page).
1
2
Clip
If it is necessary to remove and remount the Y - adapter, insert the
Y-adapter into the groove at the top
of the aluminium rail (1) and secure at
the bottom using the spring clip (2).
Page 1
Cable feed hole
ribbon
cable
US beam
Cable to
door
operator
US beam
Door Panel
B A
Cable loop
ribbon
cable
US beam
US beam
Y-adapter
APPROACH SIDE OF DOOR A
Safety curtain¹
Safety curtain²
Panic
hardware
(optional)
This drawing (cross section of door from above) shows factory settings (typical UniScan installation). The following conditions apply:
- Single-panel door (see layout for double-panel door on page 2)
- Center pivot left hand door
¹ Factory setting for hinge side US Beam safety curtain is 5° away from face of door
² Factory setting for leading edge side US Beam safety curtain for is 8° away from face of door
3
Mounting the Sensor
1. Position the UniScan assemblies preferably at the same height on both sides of the door.
2. Attach the aluminum rail to the top of the door (use 2 screws for ≤ 36”, 3 screws for ≥ 36”)
3. Drill a hole through the aluminum rails and door Ø 3/8” (10 mm) for the long connection cable to feed
through to the other side. The 6-pin plug fits through a 3/8” 10 mm hole. If necessary (e.g fire door)
use a smaller diameter hole- 3/16” (4.5 mm), then remove the wires from the screw terminal block,
feed the cable through the hole, and re-wire the wires to the screw terminal block.
4. Feed the cable through the hole.
5. Connect the cables to the Y-adapter. Approach side UniScan to A ; swing side Uniscan to B
6. If necessary, adjust the US beam pattern
7. Route the cable to the door operator (it may be necessary to drill a hole).
8. Attach the door loop to wall/operator housing.
9. Wire the 8-wire cable to the door operator terminals (see wiring diagram on following page).
Page 1
1
2
Clip
If it is necessary to remove and remount the Y - adapter, insert the
Y-adapter into the groove at the top
of the aluminium rail (1) and secure at
the bottom using the spring clip (2).
4
Electrical Connection
To UniScan on swing side
of door panel
(Brown)
(White)
Short/Long
Connector
cable
break out
B
10 9 8 7 6
5 4 3 2
A
6
5
4
3
2
1
1
2
1
Test input (Yellow)
NO (Pink)
NC (Green)
Common (Grey)
(Brown)
(White)
For best possible safety, always use the
monitoring feature when available.
Important notes:
Monitoring:
orange
Monitoring* Approach side
Safety
(approach
NO (NC)
side)
COM
15 - 37 VDC/
Power
(15 - 26 VAC**)
COM
Safety
NO (NC)
(swing side)
Swing side
*Wiring for monitoring only when applicable
** AC only available if each single sensor is wired
separately
green
white
black
red
blue
brown
Alternatively, change output setting on US
beam from passive to active (C1).
Door operator
Monitoring*
- If normally closed (NC) wiring is required,
rewire the green & brown wires to terminals
2 & 9.
yellow
- Standard wiring (shown above) is normally
open (NO).
4.1
Short/Long
Connector
cable
Test input
NO
NC
Common
_ /~
+ /~
Common
NC
NO
Test input
(Yellow) Test input 6
(Pink) NO 5
(Green) NC 4
(Grey) Common 3
To UniScan on approach side
of door panel
Y-Adapter
1. If your door operator does not have a monitoring output, leave wires unconnected (make
sure wires are properly insulated).
2. If the door operator has only one monitoring
output, connect either terminal 1 (orange)
or 10 (yellow).
3. If the door operator has two separate monitoring outputs for swing and approach side, using
pliers, break off the tab marked “break out”
on the Y-adapter (see section 4.1 for location)
and connect both terminals 1 (orange) and
10 (yellow).
Connections on the Y-adapter
Breakout tab
B to swing side
5
to approach side A
Initialization (Teach-in)
After mounting the UniScan and making electrical connections, the sensors must be initialized.
Press & hold the green button on the US beams directly connected to the Y-adapter for 5 seconds (see arrows).
Both UniScans (on the approach and swing sides of the door) must be initialized.
Green button: 5 sec.
Green button: 5 sec.
US beam
US beam
Door Panel
B A
US beam
ribbon
cable
US beam
Green button: 5 sec.
For more information, please refer to UniScan user manual
ribbon
cable
US beam
Door Panel
US beam
ribbon
cable
US beam
AB
Green button: 5 sec.
Bircher Reglomat
870 Pratt Avenue N
Schaumburg, IL 60193
Phone: 847-952-3730
Toll-Free: 800-252-1272
Fax: 847-952-2005
Email: [email protected]
Web: www.bircherreglomat.com
1/14
ribbon
cable
US03 012D
US beam
c
builders h