Transcript
-
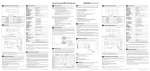
Quick reference guide
1. Safety instructions
• This document is not a replacement for the user’s guide. Please refer to the user’s guide for more details.
• DO NOT LEAVE ANY PROBLEM UNRESOLVED. NEVER SACRIFICE SAFETY FOR ANY REASON
2. Installation
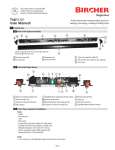
Install the sensor on the door header/wall or ceiling using mounting template and screws.
The unit is ready for operation once all wiring is completed the power is applied and the LED’s
stopped flashing, indicating that the learning cycle has been completed.
3.
Electrical Connections
4.
Manual set-up, Please refer to user manual
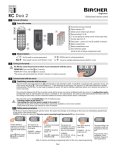
5. Remote set-up [with RC Duo remote control]
Point RC Duo (remote) to the sensor and press the “G” key to establish a link.
• If the connection has been established successfully, “G” and one of the keys “1” TO “4” light up (address of the sensor).
• If “G” flashes, connection could not be established.
When changing settings:
• Flashing keys on the RC Duo indicate that the data has not been fully transmitted or accepted.
• Steady illuminated keys on the remote indicate that settings have been stored.
6.
REMARKS:
The sensor will automatically go into a safe mode 30 min after the last change of settings, inhibiting anyone with a RC-Duo remote to tamper
with the sensor.
There are two ways to regain access for the remote controlled set-up:
• Power OFF, wait for 5 seconds and power up the sensor.
• Open the sensor and press the two push buttons simultaneously until the LED begins to flash.
Function name
Convenience functions
Mounting height
Direction recognition
Field geometry
Field size (sensitivity)
Output signal
Cross traffic
Optimizing (CTO)
Slow motion
detection (SMD)
SMD field size
Output hold open
time
Interference suppression
Manual door opening
Reset to Factory settings
*factory settings
Function Keys
1*
2
3
C+
4
5
6
1
F+4+
2*
1
2
B+
3*
4
1
F+8+
2*
D+
1 – 9 (6*)
F+2+
1 – 2 (1*)
1
F+5+
2 – 9 (2*)
1*
F+3+
2–5
6–9
F+7+
1 – 9 (1*)
F+1+
F+6+
A+
A+
1-9
1
2*
1 – 2 (2*)
9
Description
Standard/factory settings
All configurations set to standard (factory settings)
Sidewalk
Cross traffic optimization set to “medium”
Retirement home
Large field + slow motion detection on
Vestibule
Short hold open time
Supermarket
Large field
High mounting
High mounting
High (10 - 13 feet)
Standard (up to 10 feet)
Off
Backwards
Forward
Forward with MTO (Mass Traffic Optimization)
Narrow field
Wide field
1 = Smallest field, 9=Largest field
1 = NO, 2 = NC,
OFF
2=minimal cross traffic suppression , 9=maximal cross-traffic suppression
OFF
Decreasing sensitivity
Constant sensitivity
1 = Smallest SMD field, 9=Largest SMD field
1
2
3
4*
5
6
7
8
9
0.2 s
0.5 s
0.8 s
1.0 s
1.5 s
2s
2.5 s
3.0 s
4.0 s
ON
OFF
1 = Open door manually (resets after 15 min into automatic mode), 2 = Automatic
Resets all to factory settings
Contact
For any issues, please call Bircher Reglomat at 800.252.1272. You may also visit our website at www.bircherreglomat.com
Disclaimer
Bircher Reglomat reserves the right to change any information on this document without notice. Please contact us to make sure you have the
latest version.
Bircher Reglomat – 800.252.1272 – www.bircherreglomat.com – K6205-040 08/06
![catalogue_pdf [1.82] Mo - Enseirb](http://vs1.manualzilla.com/store/data/006360324_1-6d38883db81245c16ae9c413a1d8cfa1-150x150.png)