1
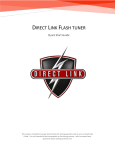
Installation and User Manual
DirectLink (Flash Tuner) Software
The DirectLink Kit will provide the tuner with the tools and necessary data to
maximize the potential of the installed upgrades. The system is designed for HarleyDavidson® and Buell® Fuel Injection equipped motorbikes.
This Guide is intended to answer basic DirectLink tuning questions and to act as a
Quick Start Guide. It is not intended to be encyclopedic on the tuning process - only to
answer basic questions about DirectLink. This Guide will give some example tables
that have been proven to work in the past, but the tuner/dealer is ultimately
responsible for the final tune on any bike.
1
1. SETUP AND INSTALLATION ......................................................................................................... 5
1.1 Setup and installation: Where to get the software ...........................................................5
1.2 Setup and installation: Install DirectLink Flash Tuner ........................................................6
1.4 Setup and installation: Insert Security key into USB..........................................................7
1.5 Setup and installation: Connect USB cable ........................................................................ 8
1.6 Setup and installation: Power up the DirectLink Flash Tuner ............................................ 9
1.7 Setup and installation: Power up to automatically install drivers ..................................... 9
1.8 Setup and installation: Update your software................................................................. 10
2. CONNECT THE DIRECTLINK HARDWARE.............................................................................. 11
2.1 Connect the DirectLink Hardware: Connect the Direct Link to your motorcycle .............. 11
2.2 Connect the DirectLink Hardware: Connect the USB cable .............................................. 12
2.3 Connect the DirectLink Hardware: Insert Security Key into USB ..................................... 12
3. STARTING YOUR DIRECTLINK (FLASH-TUNER) SOFTWARE ............................................ 13
3.1 Starting your DirectLink (Flash-Tuner) software: Insert Security Key into USB ................ 13
3.2 Starting your DirectLink (Flash-Tuner) software: Run the program ................................. 13
3.3 Starting your DirectLink (Flash-Tuner) software: Disclaimer/Language selection ........... 13
3.4 Starting your DirectLink (Flash-Tuner) software: Select the COM port. ........................... 14
3.5 COM port setting if “None” is showing and no other option is given .............................. 15
4. KEY FEATURES ............................................................................................................................. 16
4.1 Key Features: Creating a backup ..................................................................................... 16
4.2 Key Features: Loading a MAP .......................................................................................... 18
4.3 Key Features: Important Tables ...................................................................................... 20
4.3-A: VE Table ............................................................................................................................. 20
4.3-B: Spark Table ......................................................................................................................... 20
4.3-C: AFR Ratio Table.................................................................................................................. 21
4.3-D: Cranking Fuel ..................................................................................................................... 22
4.3-E: Idle Table ............................................................................................................................ 22
4.3-F: IAC Table ............................................................................................................................ 23
4.3-G: Acceleration Table .............................................................................................................. 24
4.3-H: Decel (Deceleration) Table ................................................................................................. 25
4.3-I: Closed Loop ......................................................................................................................... 26
4.3-J: Warm-up Fuel table ............................................................................................................. 27
4.4 Key Features: Additional checks ...................................................................................... 27
4.4-A:
4.4-B:
4.4-C:
4.4-D:
Knock Sensor....................................................................................................................... 27
Engine Parameters .............................................................................................................. 28
Calibration Note ................................................................................................................. 28
Throttle grip........................................................................................................................ 29
5. PROGRAM THE CALIBRATION INTO THE ECM ................................................................... 30
5.1 Program the Calibration into the ECM: Open Calibration ............................................... 30
5.2 Program the Calibration into the ECM: Check ECU Information ..................................... 31
5.3 Program the Calibration into the ECM: Select Calibration .............................................. 31
5.4 Program the Calibration into the ECM: Run .................................................................... 32
5.5 Program the Calibration into the ECM: Program ............................................................ 32
5.6 Program the Calibration into the ECM: Programming Status ......................................... 33
5.7 Program the Calibration into the ECM: Programming Failed .......................................... 33
5.8 Program the Calibration into the ECM: Programming Passed ........................................ 34
6. HOW TO SAVE THE MODIFIED CALIBRATION...................................................................... 35
6.1 How to save the modified calibration: Save as ............................................................... 35
6.2 How to save the modified calibration: Save ................................................................... 35
2
6.3 How to save the modified calibration: Calibration Information ..................................... 36
6.4 How to save the modified calibration: Click Ok .............................................................. 36
7. HOW TO CHANGE UNITS ............................................................................................................ 37
7.1 How to Change Units: Options ....................................................................................... 37
8. MONITOR REAL-TIME DATA (GAUGES/METER DISPLAY) ................................................. 38
8.1 Monitor Real-time data (Gauges/Meter display):
8.2 Monitor Real-time data (Gauges/Meter display):
8.3 Monitor Real-time data (Gauges/Meter display):
8.4 Monitor Real-time data (Gauges/Meter display):
8.5 Monitor Real-time data (Gauges/Meter display):
8.6 Monitor Real-time data (Gauges/Meter display):
Monitor Data .................................... 38
Change Channels .............................. 38
Change Visible Parameter ................. 39
Select Parameter .............................. 39
Turn Ignition to Run.......................... 40
Communicate ................................... 40
9. MONITOR REAL-TIME DATA (STRIP CHART DISPLAY/METER DISPLAY) ...................... 41
9.2 Monitor Real-time data (Strip Chart display/Meter display):
9.3 Monitor Real-time data (Strip Chart display/Meter display):
9.4 Monitor Real-time data (Strip Chart display/Meter display):
9.5 Monitor Real-time data (Strip Chart display/Meter display):
9.6 Monitor Real-time data (Strip Chart display/Meter display):
9.7 Monitor Real-time data (Strip Chart display/Meter display):
9.8 Monitor Real-time data (Strip Chart display/Meter display):
Turn Ignition to Run ........ 42
Communication ............... 42
Start Engine ..................... 42
Channel Mode ................. 43
Channel Display ............... 43
Select Parameter ............. 44
Select Display .................. 45
10. AUTO-TUNING ............................................................................................................................. 46
10.1 Auto-tuning: Open Software ........................................................................................ 46
10.2 Auto-tuning: Tuning knowledge ................................................................................... 46
10.3 Auto-tuning: Loading Maps .......................................................................................... 47
10.4 Auto-tuning: Auto-tune Data........................................................................................ 48
10.5 Auto-Tuning: Setting Up ............................................................................................... 49
10.6 Auto-tuning: Understanding VE table changes (not Auto-tuning) ................................ 49
10.7 Auto-tuning: Set up 02 Controller................................................................................. 52
10.8 Auto-tuning: Adjust Channels....................................................................................... 53
10.9 Auto-tuning: Adjust Trace ............................................................................................ 55
10.10 Auto-tuning: Auto-tuning ........................................................................................... 55
10.10.1 Simultaneous Tuning........................................................................................................... 57
10.10.2 Individual Tuning ............................................................................................................... 57
10.11 Auto-tuning: Save Map............................................................................................... 58
10.12 Auto-tuning: Program Repeated for Convenience ...................................................... 59
SUMMARY .......................................................................................................................................... 62
GLOSSARY.......................................................................................................................................... 63
DIRECTLINK BASIC TUNING GUIDE (MAGNETTI MARELLI IAW26H)......................................................... 66
3
-BasicsHow it works
The ECM is basically a calculator that sends signals to the injectors. The sensors include
the temperature of the motor (Harleys head temperature sensor), outside ambient
temperature and pressure (altitude), throttle position (TPS), engine speed (RPM) and
load (KPA or MAP, manifold absolute pressure). The newer models, (2008 and later),
also have a narrow band O2 sensor and actually run in “closed loop” when you tell it to.
The ECM combines all data gathered by the above mentioned sensors and compares it
to the “scribed” maps that have been set up at the factory and makes adjustments so
that the engine works at its best given the circumstances.
4
1. Setup and installation
1.1 Setup and installation: Where to get the software
Insert the CD-ROM from TechnoResearch Inc. into the DVD/CD-ROM drive of your
computer or download from our website (www.technoresearch.com Go to Support >
Downloads).
Or
5
1.2 Setup and installation: Install DirectLink Flash Tuner
After auto-run, press install button under the icon for DirectLink (Flash-Tuner)
1.3 Setup and installation: Run DirectLink Flash Tuner
Double-click on the DirectLink Flash-Tuner icon on your desk top to run the program.
This will install the USB security hardware key driver necessary for step 4.
6
1.4 Setup and installation: Insert Security key into USB
Insert the product security hardware key, (provided pre-programmed USB), into the USB
port of your computer. This will enable the software to run.
7
1.5 Setup and installation: Connect USB cable
Connect the USB computer cable (shown below at left) to the Vehicle Communication
Module. The module is shown below at right, with the USB port on the right side of the
metal endplate. Connect the other end to your PC’s second USB port.
NOTES:
• The supplied USB Hardware Key with this software is for use on a single vehicle only.
When the USB Hardware Key is used to program a vehicle, it will be permanently
attached to that vehicle, and cannot be used on any other for programming.
•You can use any key, empty or used, to start and use this software. Only when
‘programming’ will the software check that the key is empty and lock it to THAT ECU. If
the key has been used before, the software will check that the key will match the ECU. If
not, the software will be closed.
•NEVER plug in multiple hardware keys. For example: do not plug in a DirectLink key and
a Centurion key!
8
1.6 Setup and installation: Power up the DirectLink Flash Tuner
Connect the Vehicle Communication Cable to the DB-15 port on the other end of the
Vehicle Communication Module (shown below). Connect the other end to the
motorcycle’s data link connector. If you cannot locate your bike’s data link connector,
please consult your motorcycle user manual.
1.7 Setup and installation: Power up to automatically install drivers
Having completed Step 6, the system will now be powered up. The VCM is powered by
the battery of the motorcycle. Make sure the ignition is ON and the RUN switch is ON.
The light on the VCM should be lit. This will cause the software to search for the cable
drivers. This will prompt you to select the folder called ‘USB 2.0 Cable Drivers’. The
software will find and install the drivers.
9
1.8 Setup and installation: Update your software
After the DirectLink and/or Centurion software are installed, you must run the updater
to get the latest program versions including the calibrations and the manuals.
Click "Updater.
10
2. Connect the DirectLink Hardware
2.1 Connect the DirectLink Hardware: Connect the Direct Link to your
motorcycle
Connect the DirectLink (Flash Tuner)/Centurion Hardware and the motorcycle's data link
connector using the Data link connector cable (4 pin or 6 pin) in the kit.
Location of Data link connector:
-Touring models:
Underneath the right side cover. (2008-2012 Underneath the left side cover)
-Softail models:
Underneath the seat.
-Dyna models:
Underneath the left side cover.
-Sportster models:
Underneath the left side cover.
-VRSC:
Underneath the front side neck cover.
11
2.2 Connect the DirectLink Hardware: Connect the USB cable
Connect the DirectLink/Centurion Hardware to the computer using the USB cable in the
kit.
2.3 Connect the DirectLink Hardware: Insert Security Key into USB
Insert the USB Hardware Key into your computers USB port to use the DirectLink
software.
12
3. Starting your DirectLink (Flash-Tuner) software
3.1 Starting your DirectLink (Flash-Tuner) software: Insert Security Key
into USB
Insert the USB Hardware Key into your computer’s USB port to use the Direct Link
software.
3.2 Starting your DirectLink (Flash-Tuner) software: Run the program
Click "DirectLink Race Performance" icon on the desktop to run the software.
3.3 Starting your DirectLink (Flash-Tuner) software: Disclaimer/Language
selection
Click "Accept".
Select your language of preference.
13
This is the programming screen and where you will do a lot of your work. You should “play” with this
screen and practice opening and closing editing tables and connecting to the motorcycle. Each table you
edit will change something on the motorcycle and you will always program the ECM from this screen.
3.4 Starting your DirectLink (Flash-Tuner) software: Select the COM port.
Important: If the DirectLink (Flash Tuner) hardware (VCM) is not powered then the
correct COM Port will not appear (indicated by an illuminated LED). To rectify, press
“Cancel” and power the DirectLink (Flash Tuner) hardware by turning on the ignition
switch and making sure the engine stop/run switch is in the RUN position. Once the LED
light on DirectLink (Flash Tuner) hardware is on, select “Communication and Port
Setting” to select the correct COM Port.
14
3.5 COM port setting if “None” is showing and no other option is given
If COM port is not showing, it means that the driver for it was not correctly installed
when installing the Centurion U software. You will get this:
After you have updated or installed the correct device driver you should get a screen
like this:
15
4. Key Features
4.1 Key Features: Creating a backup
Always save the original calibration before programming the new calibration. That
way, you can restore your motorcycle back to stock.
Precautions: during the backup and programming, the ECU must be powered correctly.
Therefore, we recommend removing the LIGHT fuse and using a charger to be sure that
the voltage is correct.
Click "Back up Original Map". This will back up the original map from the ECU so that, at
a later date, you can restore the motorcycle back to stock.
Turn on the ignition switch and make sure the engine stop switch is in the RUN position.
Click "OK".
16
Name the file a special name so you don’t have any problems finding and opening the new modified file.
You should always retrieve your stock tune and save it before you make any changes. That way, you can
always go back to the stock tune in case any errors were made.
Select a location and name for your Backup Map and click on “Save”
DirectLink (Flash Tuner) will now Read and save your original bike map.
After the status bar has reached 100, check for the green PASS to ensure that all
17
operations have concluded successfully.
Do not disconnect the USB Hardware Key. This could damage the key.
4.2 Key Features: Loading a MAP
Before loading a MAP, check what MAP is in the motorcycle ECU by pressing the button
“ ECU Info ”, the Application # will tell you the correct MAP model (105, 127, etc)
Select File> Open Calibration> Modified… This will open a file selection window. Find the
MAP you wish to load and click “Load”. (The Application # mentioned above is usually in
the end of the MAP file name).
18
Once loaded, you can quickly review your Calibration Information and compare with
that of the ECU.
19
4.3 Key Features: Important Tables
(Check before first flash)
4.3-A: VE Table
4.3-B: Spark Table
20
4.3-C: AFR Ratio Table
The values in the AFR (Air-Fuel Ratio) table are calculations that the ECU uses to
determine the injector pulse width. The AFR does not actually change. This is the main
fuel table that the ECU will try to achieve. The tuning process changes the VE
(Volumetric Efficiency) tables so that the live AFR data is as close to AFR table. You can,
and should, change the VE’s on each cylinder separately. They each have different
requirements and the fuel injectors may not be matched for flow. There are (2)
methods to accomplish this—Set the AFR Ratio Table in open loop but close to your
final Target values. The other method is to set all of the values to the same constant
(13.2 -13.5). Once you have your values in place, click on the Apply button to apply your
changes, then the OK button to conclude your modification.
Note: When working on the ‘closed-loop’ models, changing the AFR value to anything
other than 14.6 disables closed-loop operation which makes VE table tuning possible.
21
4.3-D: Cranking Fuel
Make sure to check this table. The cold temperature numbers should have more fuel
than the hot temperature numbers. Double click on an mSec cell and use the up and
down arrow to adjust.
The values above a temperature of 112C may have to be adjusted up or down to get the
bike to start quickly. Click OK. See this example of a typical Cranking Fuel table:
4.3-E: Idle Table
Make sure to check this table. Double click on an RPM cell and use the up and down
arrow to adjust. Remember to let the engine get to working temperature before making
any changes. Click OK. See this example of a typical Idle table:
22
4.3-F: IAC Table
Make sure to check this table. This table may need to be adjusted while tuning to make
sure bike is idling up on startup, and when at operating temperature, the idle is stable.
Check live data and verify that the actual stepper counts are not lower than the
programmed stepper counts. The actual Steps should be the same or slightly lower than
the programmed values. Double click on a STEPS cell and use the up and down arrow to
adjust. Click OK. See this example of a typical IAC Table:
23
4.3-G: Acceleration Table
Make sure to check this table. The accel table needs to be adjusted during tuning so the
bike will have crisp response when blipping the throttle and no black smoke comes out
of the exhaust. Double click on a STEPS cell and use the up and down arrow to adjust.
Click OK.
TIP: Create a table that lists the changes in calibrations you have modified just in case
you want to go over your own work before saving
24
4.3-H: Decel (Deceleration) Table
Make sure to check this table during tuning if decel popping is occurring. This table
allows the removal of a small amount of fuel during a decrease in throttle position, or
during a decrease in manifold pressure. This fuel gets subtracted from the base pulse
width calculation.
•Larger values increase the fuel removed.
•Smaller values decrease the fuel removed.
Double click on a STEPS cell and use the up and down arrow to adjust. Click OK
TIP: Create a table that lists the changes in calibrations you have modified just in case
you want to go over your own work before saving
25
4.3-I: Closed Loop
This table can be left alone for tuning, as the AFR Table has been set so the bike will
always be in open loop and not be using the factory Oxygen sensors. Only when the AFR
table is at 14.6 will this table be active and used. There are (2) types of closed loop
systems now. The older bikes use closed loop biasing and the new bikes do not. The
new bikes you can set from 14.3 - 14.6 for closed loop. The old bikes with the bias table
have the AFR value or millivolt setting centered at 450volts. Setting this table to 680 will
yield something like 14.5-14.6 AFR Value. You can not set this mv value much higher, as
the O2 sensor will not switch properly and will drive the fuel rich. The sensor needs to
switch around a center point.
26
4.3-J: Warm-up Fuel table
Make sure to check this table. This table needs to be minimized as much as possible so
gas is not being wasted on warm-up. Double click on an AFR cell and use the up and
down arrow to adjust. Click OK. See this example of a typical Warm-up Fuel Table:
4.4 Key Features: Additional checks
(To review before first flash)
4.4-A: Knock Sensor
This should be turned on when the timing table is being adjusted and click OK to save.
27
4.4-B: Engine Parameters
The settings for Engine size and injector size should be set to match what the engine
really is. These parameters may need to be adjusted to alter the VE tables off of
maximum values. Try to leave the cubic inch values matched to the motor and move
the injector values to allow the VE tables to be in spec.
Double click on a parameter and use the arrows to adjust. Click OK to save.
4.4-C: Calibration Note
It is a good idea to detail what modifications the engine has—CAMS, pipes, air box, etc.
(It is recommended that you note the “First ECU flash” when applicable”)
28
4.4-D: Throttle grip
This table sets the maximum throttle valve opening at a specific throttle grip setting and
RPM. This table needs to be set before any tuning is done.
All of the tables have been checked and it is time to flash the ECU for the first time. We
will be flashing many times once the tuning of the VE tables and the adjustment of the
spark tables starts. The first flash has to be done to register all of the changes just
made. After this we start the tuning process.
A re-flash is always necessary for any changes to take effect.
29
5. Program the Calibration into the ECM
For all practical purposes, this describes what to do on a relatively stock motor or only slightly modified (cams, pipes, air breather
and/or heads).
5.1 Program the Calibration into the ECM: Open Calibration
After you save the original calibration (see 4.1), you can start to tune the calibration.
Click "Open calibration" icon or Go to "File" on the menu and select "Open
Calibration".
*Open the “edit table” menu and go to the “engine setting” menu and click on it.
You can set the displacement if you’ve changed that and the injector size. This is very handy because if
you change the injectors later, you can tell the computer the new size and it will compensate for larger
injectors or a big bore kit.
30
5.2 Program the Calibration into the ECM: Check ECU Information
Check the current motorcycle ECU information first by pressing ECU info (see 4.2 for
more details)
5.3 Program the Calibration into the ECM: Select Calibration
Select a starting calibration or modified calibration that most closely matches your
motorcycles current setup. (see 4.2 for more details)
Click "Load".
31
5.4 Program the Calibration into the ECM: Run
Turn on the ignition switch and make sure the engine stop switch is in the RUN position.
5.5 Program the Calibration into the ECM: Program
Go to "Communication" menu and select "Program" or just click "Program" button to
upload new calibration into the ECM.
Do not disconnect the DirectLink key. This could damage the key.
This will load a MAP into the system. The processing status is indicated on the
progress status bar:
32
5.6 Program the Calibration into the ECM: Programming Status
At the end of the programming mode, a "PASS" or "FAIL" message will be displayed.
If the programming is successful, go to 5.8.
If you have an error message, refer to 5.7.
5.7 Program the Calibration into the ECM: Programming Failed
If during the programming you get an error message, disconnect the ECM/ECU for 30
seconds, then reconnect, and begin programming again. Please also double check for
the wiring and adaptors you are using. (Note: If this message persists, remove all the
fuses and relays from the fuse box of the bike except the ECM/ECU and ignition fuses.
Reprogram the ECM/ECU and put back all the fuses.)
33
5.8 Program the Calibration into the ECM: Programming Passed
After successfully programming the ECU, turn ignition off, wait 10 seconds and turn
ignition on again. Then start and run the bike.
34
6. How to save the modified calibration
6.1 How to save the modified calibration: Save as
Click "Save icon" or go to "File" menu and select "Save As".
Always save the original calibration before programming new calibration so you can
restore your motorcycle back to stock.
6.2 How to save the modified calibration: Save
Type a new file name that you will remember. Click "Save".
*Name the file a special name so you don’t have any problems finding and opening the new modified file.
You should always retrieve your stock tune and save it before you make any changes so you can go back
to the stock tune in case any errors were made.
35
6.3 How to save the modified calibration: Calibration Information
You can edit or modify "Calibration ID" and "Calibration Note" if you want. Click "OK".
6.4 How to save the modified calibration: Click Ok
Click "OK".
36
7. How to Change Units
7.1 How to Change Units: Options
Go to "Options" menu and select "Units". Select the unit that you want to use. Click
"OK".
37
8. Monitor Real-time data (Gauges/Meter display)
8.1 Monitor Real-time data (Gauges/Meter display): Monitor Data
Monitor the Real-time data with Gauges/Meters display. Go to "View" and select
"Gauges/Meters" or just click "Gauges/ Meters" icon.
8.2 Monitor Real-time data (Gauges/Meter display): Change Channels
If you want to change the visible data, go to "Options" and select "Channels/Mode" (or
just click "Channels/Mode” icon.)
38
8.3 Monitor Real-time data (Gauges/Meter display): Change Visible
Parameter
There are five channels. Click the gray square button if you want to change the visible
parameter.
8.4 Monitor Real-time data (Gauges/Meter display): Select Parameter
Select a parameter that you want to display. Click "OK".
39
8.5 Monitor Real-time data (Gauges/Meter display): Turn Ignition to Run
Turn on the ignition switch and make sure the engine stop switch is in the RUN position.
8.6 Monitor Real-time data (Gauges/Meter display): Communicate
Go to "Communication" and select "Connect" or just click "Connect” icon.
40
9. Monitor Real-time data (Strip Chart display/Meter
display)
9.1 Monitor Real-time data (Strip Chart display/Meter display): View Data
Monitor the Real-time data with Strip Chart display. Go to "View" and select "Strip
Chart" or just click "Strip Chart” icon.
Consider adding engine (temp) to make sure you’re never running the engine hot when recording and the
motor is in the operating temp range. Starting at the top: “Thro” (TPS), “Tacho” (engine speed), and “Ext
O2 #1” (comes from the O2 sensor output), “MAP” (manifold absolute pressure or load)
For best tuning, we recommend to select the following 10 channels:
Tachometer - RPM
Throttle Pos
Engine Temp
AFR Desired
MAP Load
Knock Front
Knock Rear
Idle
Ext O2 #1
Ext O2 #2
Strip Chart icon
41
9.2 Monitor Real-time data (Strip Chart display/Meter display): Turn
Ignition to Run
Turn on the ignition switch and make sure the engine stop switch is in the RUN position.
9.3 Monitor Real-time data (Strip Chart display/Meter display):
Communication
Go to "Communication" and select "Connect"…
OR select the
Connect icon
9.4 Monitor Real-time data (Strip Chart display/Meter display): Start
Engine
Start the engine. Now you can monitor Real-time data.
42
9.5 Monitor Real-time data (Strip Chart display/Meter display): Channel
Mode
If you want to change the showing parameter, go to "Options" and select
"Channels/Mode" or just click "Channels/Mode” icon.
Channels/Mode icon
9.6 Monitor Real-time data (Strip Chart display/Meter display): Channel
Display
You can display up to sixteen channels at a time. If you want to increase or reduce the
number of channels, click the "on/off" switch.
ON: Show the selected channel.
OFF: Hide the selected channel.
43
9.7 Monitor Real-time data (Strip Chart display/Meter display): Select
Parameter
Click on the "Arrow" button if you want to change the visible parameter. Select a
parameter that you want to display.
44
9.8 Monitor Real-time data (Strip Chart display/Meter display): Select
Display
Select "Parallel display" or "Overlay display". Click "OK".
45
10. Auto-tuning
10.1 Auto-tuning: Open Software
Don’t forget to save the original map before modifying, see 3.5
10.2 Auto-tuning: Tuning knowledge
VE Tables
To fully utilize this, you need a dynamometer and Wide Band AFR probes. There are
many available AFR probes on the market compatible with our software, but we
recommend our wideband sensors. DirectLink is unique in that the software will allow
for auto-tuning for both front and rear VE tables.
There is also the manual way of tuning; whichever you decide to do it is important to
stay consistent with the technique. The AFR data that is collected will have to be
entered into the VE tables as an offset. This is the point where engine parameters and
injector sizing may need to be adjusted so the VE tables are not at their maximum limit.
This is the reason the AFR Table is set to a constant value—so that all cells are the same
and you can now offset the VE values to achieve the AFR command you have set in the
table.
46
For example: if you set the AFR to 13.2, then the VE for each cell in the VE tables needs
to be calibrated to that 13.2 value.
Each time you change VE table values, you need to press apply and press OK. Then you
will need to re-flash the ECU with the new VE values.
Spark Tables
The Spark or ignition tables need to be setup for maximum torque and efficiency. This
means no spark knock activity or “pinging”. If the spark values are changed by a large
amount, the VE table values will need to be verified. If you get a highly modified bike
then this table will need to be modified.
New AFR Table for Drivability and Gas Mileage
Once the tuning process is complete, the VE tables are calibrated, there is no spark
knock or pinging, and you have accomplished maximum efficiency for HP/TQ, then the
AFR Table needs to be changed so the bike will get decent gas mileage as well as
maximum performance.
10.3 Auto-tuning: Loading Maps
Our goal is to make the bike run the best it can all the time, have the most power, and get the best
efficiency (MPG).
Select “File”, “Open Calibration”, and then “Modified”
47
Select the map file you’d like to use and click “Load”
This will load a map into the system; you can see the relevant information in the
window below.
10.4 Auto-tuning: Auto-tune Data
To prepare to Auto-tune, select “View” and then select “Gauges or Strip Chart”
command. (See sections 8 and 9 for setup information)
48
10.5 Auto-Tuning: Setting Up
Open the V-Table: Edit-Table>Fuel Map> Front Cylinder
You will need to open both tables if you want to modify VE value simultaneously:
Edit-Table>Fuel Map> Rear Cylinder
10.6 Auto-tuning: Understanding VE table changes (not Auto-tuning)
Select Options and “Edit on Tracer”. If the check mark is OFF, the VE value can be
modified by selecting the cell. If the check mark is ON, the VE values of the cell where
the tracer is will change if you are in auto-tuning or if you press the plus (+) or minus (-)
button.
49
Highlight Cells and press the plus (+) button to make the table VE values richer.
The cells turn green:
50
Press the minus (-) button to make the table VE values leaner.
The cells turn red:
You can also view this data in a 3D form:
51
10.7 Auto-tuning: Set up 02 Controller
Select “Options>Ext. O2 Controller”
Select the O2 Sensor that you will be using. If you use the TechnoResearch supplied O2
controller, then select M-300 (PLX Device). This will enable the wide band O2 controller. If you
want to use another O2 controller, such as the Wego (Daytona TwinTech), then select that. If
you want to use the O2 of the bike (Narrow Band sensor) then select Delphi – Stock –O2 – ECU
OR “O2 external controller”. Select the proper O2 controller you are using and the proper
channel you want to use. I used the “Wego (Daytona Twin Tech)” because it comes from the
factory with the 0.0vdc = 10.0 AFR and 5.0vdc = 20AFR
52
10.8 Auto-tuning: Adjust Channels
Select “Options” and “Channels/Mode”
Select the Channels you would like to track
53
Under “Strip chart view”, you can select multiple Channels.
54
10.9 Auto-tuning: Adjust Trace
Select “Options” and “Trace Setting”
Break point and Middle Point
By selecting the TPS and RPM to middle point, the tracer will follow the next cell based
on the middle point between the two columns or rows. For example, if you have a
column for TPS at 10 and 20, the tracer will highlight the cell on column when the TPS
value is 15. Other wise, if you do not have it selected it will highlight only if the value is
20. The same applies for the RPM.
If you want to be 2 degrees before the break point, type -2 in the Break Point TPS.
Time to Stabilize
This is the time to hold the tracer in that cell before the auto-tune makes a change.
Time to Measure
This is the sampling time for the O2 value.
10.10 Auto-tuning: Auto-tuning
Select “Options” and “Auto-tune (Start/Stop)”
55
Select Connect (section 8.3). Once the vehicle communication module is connected to
the motorcycle ECU we can start Auto-tuning.
You have two options: Simultaneous Front and Rear OR individually tuning the Front
THEN the Rear. Both processes are explained below.
56
10.10.1 Simultaneous Tuning
Tuning Front and Rear Simultaneously
Select the radial button labeled “Modify Simultaneously Front and Rear VE” at the top of
the Front Cylinder VE table. To start, press the Auto-tuning OFF button to toggle it ON.
Now that is on, watch the cells changing color from white to green, changing color one
by one as the TPS value changes.
Notice that the Front and Rear cylinder values are adjusted together
10.10.2 Individual Tuning
Tuning the Front and Rear Cylinder individually
Select “Edit-Table”, “Fuel Map”, and then “Front Cylinder”
To start, press the Auto-tuning OFF button to toggle it ON. Now that is on, watch the
cells changing color from white to green, changing color one by one as the TPS value
changes.
Select “Edit-Table”, “Fuel Map”, and then “Rear Cylinder”
57
To start, press the Auto-tuning OFF button to toggle it ON. Now that is on watch the
cells changing color from white to green, changing color one by one as the TPS value
changes.
Once you have finished your Auto-tune, make sure to save your work!!!!!!!!
10.11 Auto-tuning: Save Map
Click "Save icon" or go to "File" menu and select "Save As"
*Name the file a special name so you don’t have any problems finding and opening the new modified file.
You should always retrieve your stock tune and save it before you make any changes so you can go back
to the stock tune in case any errors were made.
Always save the original calibration before programming new calibration so you can
restore your motorcycle to stock.
Type a new file name that you will remember. Click "Save"
You can edit or modify "Calibration ID" and "Calibration Note" if you want. Click "OK"
when finished.
58
10.12 Auto-tuning: Program Repeated for Convenience
Now that you have your new map set, it’s time to program the bike ECU. Go to
"Communication" menu and select "Program" or just click "Program" button to upload
the new calibration into the ECM.
Do not disconnect the DirectLink key. This could damage the key.
This will program your tune into the system. The processing status is indicated on the
progress status bar:
59
Repeated for convenience: 5.6 Programming Pass or Fail
At the end of the programming mode, a "PASS" or "FAIL" message will be displayed.
If the programming is successful, refer to 5.8. (Repeated below for convenience)
If you have an error message, refer to 5.7. (Repeated below for convenience)
60
Repeated for convenience: 5.7 Programming Failed
If during the programming you get an error message, disconnect the ECM/ECU for 30
seconds, then reconnect and begin programming again. (Note: If this message persists,
remove all the fuses and relays from the fuse box of the bike except the ECM/ECU and
ignition fuses. Reprogram the ECM/ECU and put back all the fuses.)
Repeated for convenience: 5.8 Programming Passed
After successfully programming the ECU, turn ignition off, wait 10 seconds and turn
ignition on again. Then start and run the bike.
61
Summary
All of the example tables are just that - examples. They will work, but if you have your
own tables, we encourage you to use them. It is always a good idea to make sure the
flash was accepted and the bike is performing as planned after the ECU is re-flashed.
Example: run the bike in live data mode through the gears and at cruise. Run the bike on
the dyno at a 60, 65, 70, 75mph constant speed.
The live AFR values should be real close to 14.0/14.1 as programmed. If the VE tables
were calibrated correctly then the ECU will drive to the programmed AFR value. If the
values are not close to the programmed value in the example then the tuning process
was not done properly and the VE tables will need further tuning.
You should be able to achieve a bike that has increased in HP/TQ and has much better
drivability than when you started.
If there are still questions, call TechnoResearch and they can put you in touch with a
Master Tuner to answer questions, or they can be commissioned to come to your site
for live training.
62
Glossary
ECM/ECU (Electronic control module/unit): This is the brain of the motorcycle; it makes
calculations based on inputs coming from sensors mounted all over the engine.
WOT (Wide open throttle): The maximum opening of the throttle valve.
AFR (Air fuel ratio): The relationship of parts of fuel to the parts of air. 13.0(air) to 1(fuel)
usually makes the best power, and 14.6 is considered “perfect” air fuel ratio. This would
be the AFR to get an ideal burn (theoretically). This would be at perfect atmospheric
conditions and temps, with a perfect atomization which is almost impossible.
VE (Volumetric efficiency): This is the most important part of tuning. If the computer
“knows” the volumetric efficiency, it can decide how much fuel to add to run best. It is
how you tell it to add or subtract fuel and is one of only two variables you can adjust to
get the AFR correct. The O2 sensor will aid in your adjustments.
MAP (Manifold absolute pressure): These sensors measure barometric absolute
pressure in the intake manifold. By calculating the mass of the air going into the engine,
air temperature, and the rotations per minute of the engine, the engine’s ECU can
determine the density of the air flowing into the fuel mixture. The ECU can then adjust
air flow or fuel flow.
CKP or CP (Crank position sensor): This sensor tells the ECM when to fire and inject fuel
depending on how fast the engine is running in revolutions per minute.
IAT (Intake air temperature): The ECM calculates how dense the air is from this input.
ET (Engine temperature): The ECM uses the signals from this sensor to determine if the
engine is at operating temperature, or warming up.
Fuel Pressure Regulator: A mechanical device usually operated by vacuum form intake
manifold that controls fuel pressure. It returns excess fuel from the fuel pump back to
the fuel tank.
Fuel Injectors: The fuel injectors are electric valves that open and close to deliver fuel in
spray form to the cylinder. They are controlled by the ECM to precisely deliver the
correct amount of fuel at every engine speed, or RPM, and any given load. The time of
injection is also known as the injector “pulse width” and is measured in milliseconds.
Injectors are rated by their flow rate – such as in gm/sec, l/hr or grams per second.
Electric Fuel Pump or Fuel Pump: A 12-volt high-pressure fuel pump, usually located in
the fuel tank, but it can be located outside as well. It supplies pressurized fuel to the fuel
injectors.
IAC (Idle air control): An electric valve that’s threaded to open and close as needed. This
lets air into the engine for start up, and idle operation when throttle valve is closed.
63
Closed Loop injection system: This circuit has 2 Oxygen sensors. The information on the
difference of how much is coming out of the cylinder is relayed to the ECM and then
adjusts the amount of fuel injected by shortening or lengthening the time the injectors
are open.
O2 Oxygen sensor (sniffer): Tells the ECM how much oxygen is in the exhaust mixture
so as to adjust to have the correct mixture.
RPM (Revolutions per minute): Used to measure engine speed.
TPS (Throttle position sensor): You will be dealing with percentages (0 to 100).
64
Coming SOON! The HOW TO on auto tuning Marelli:
65
DirectLink Basic Tuning Guide (Magnetti Marelli IAW26H)
This guide assumes that you have a dynamometer, you no how to operate it, and that
you understand the Magnetti Marelli fuel injection. This guide also assumes you know
how to use the DirectLink program and how to setup the Gauge Screen in DirectLink.
Step 1
Follow Harley-Davidson service Bulletin M-1105 or M-1101 and make sure the throttle
body, the TPS, cold idle and warm idle are all setup correctly. This bulletin can be found
doing a web search. This has to be done first and remember—Warm Idle adjustments
are when STEP counts are "0". Set the hot idle Throttle Blade opening to 2.5-3.5
degrees. The TPS may have to be adjusted to get the zero hot throttle blade opening to
read 2.5-3.5 degrees. Anytime you move the Throttle blade the ECU needs to be reset
by taking power away from it for 10-15 minutes. Make sure you set the idle speed
between 1000 and 1050.
Step 2
Start the bike cold and fill in the tables for TPS Opening Versus Heat Index (Engine
Temp). This needs to be done manually while monitoring the AFR values at the engine
Temp points of the Table. Then, adjust this table to achieve the correct AFR for engine
temp. Cold bike 12-12.5, hot bike should maintain desired AFR 13.5 to 14.0 or so. The
AFR values should go leaner to 13.5-14.0 as the bike warms. Do not adjust the Air Temp
Fuel Correction @ TPS closed. Make all the warm up adjustments with TPS Opening
Versus Heat Index (Engine Temp).
Step 3
You are now ready to tune the AFR Tables, remembering that the front cylinder is the
main fuel table for both cylinders and the rear is an offset from the main (front) fuel
table. You need to collect AFR data for as much of the Tables as possible. You should
not collect any data until the Step counts are “0”. It is very important to make sure that
after the AFR data collection, the Warm Idle settings for Voltage and Throttle Blade
opening are stable to where you had them set in Step 1. If they are not, one of the
components in the Magnetti Marelli Throttle Blade assembly is failing.
Step 4
Tune the ignition tables, meaning the bike under a load and listening for pinging. The
main table is ignition settings for the front and the rear cylinder. You also have to adjust
the @Idle table so the bike will idle down correctly, and you have to adjust the @Full
Load table. The @ Idle should match the Front/Rear at the hot motor closed idle setting
and the @Full Load should match the WOT ignition line.
Step 5
If the bike is hard to start, the Cranking Fuel table should be adjusted so it will start
quickly. Set the Rev limit to where you want it.
66
Step 6
Update the calibration note in the software so that the bike specs are correct and the
hot idle Voltage/TPS opening are recorded. This way you can always get back to the
stating point if things in the TB move.
67
68
69
70
71
72
73
74
75
76
77
78