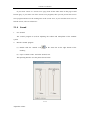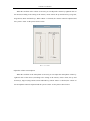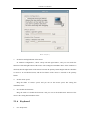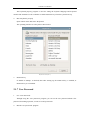
1
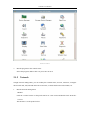
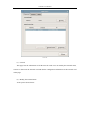
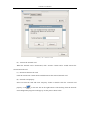
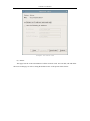
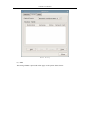
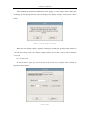
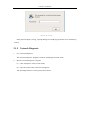
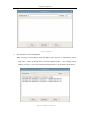
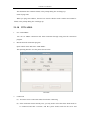
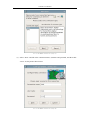
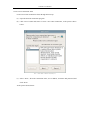
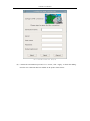
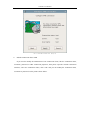
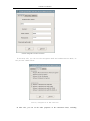
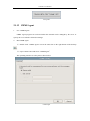
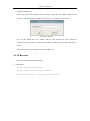
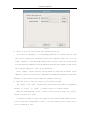
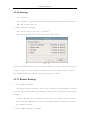
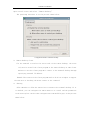
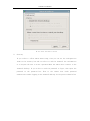
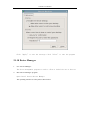
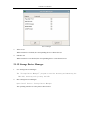
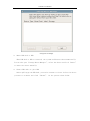
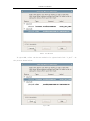
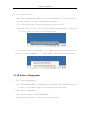
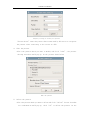
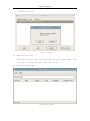
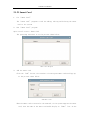
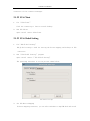
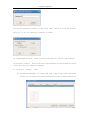
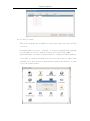
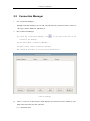
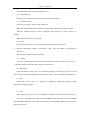
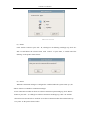
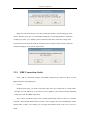
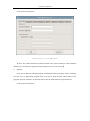
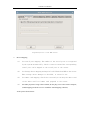
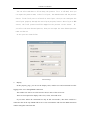
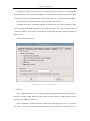
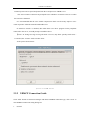
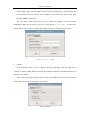
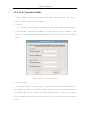
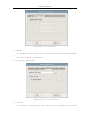
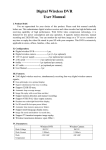
Centerm Linux Manual
Centerm Linux Manual
Fujian Centerm Information Co., LTD
Centerm Linux Manual
Index
1
2
Terminal Overview ............................................................................................................. 2
Terminal User Manual............................................................................................................... 4
2.1
Applications .................................................................................................................. 4
2.1.1
Control Center ................................................................................................... 4
2.1.2
Network ............................................................................................................. 5
2.1.3
Display ............................................................................................................ 10
2.1.4
Sound .............................................................................................................. 14
2.1.5
Mouse .............................................................................................................. 16
2.1.6
Keyboard ......................................................................................................... 17
2.1.7
User Password ................................................................................................. 18
2.1.8
Screen Lock..................................................................................................... 19
2.1.9
Network Diagnosis .......................................................................................... 20
2.1.10 VPN/ADSL ..................................................................................................... 22
2.1.11
Date/Time ........................................................................................................ 31
2.1.12 Save settings .................................................................................................... 32
2.1.13 CDMS Agent ................................................................................................... 33
2.1.14 Browser ........................................................................................................... 34
2.1.15 Service ............................................................................................................. 35
2.1.16 Start up ............................................................................................................ 37
2.1.17 Remote Desktop .............................................................................................. 37
2.1.18 Device Manager .............................................................................................. 40
2.1.19 Storage Device Manager ................................................................................. 41
2.1.20 Printer Management ........................................................................................ 44
2.1.21 Smart Card ...................................................................................................... 48
2.1.22 ICA Client ....................................................................................................... 50
2.1.23 ICA Global Setting .......................................................................................... 50
2.1.24 VMware View ................................................................................................. 51
2.1.25 Security ........................................................................................................... 51
2.2
Connection Manager ................................................................................................... 54
2.2.1
RDP Connection Guide ................................................................................... 57
2.2.2
XDMCP Connection Guide............................................................................. 64
2.2.3
ICA Connection Guide .................................................................................... 66
2.3
Instruction of System Hotkeys .................................................................................... 69
1 Terminal Overview
This terminal is a multi-functional network terminal based on embedded operation system
and supports Microsoft RDP protocol, Citrix ICA protocol and XDMCP. Through these protocols,
the terminal can connect to several different terminal servers.
Centerm Linux Manual
Main features:
1. Supports RDP, ICA and X11 protocols
2. Supports auto-connecting to server when starting up, auto logging in and auto executing
the applications
3. Realizes centralized management, centralized maintenance and centralized monitoring
4. Easy system updating and function extension
5. Effectively prevents data interception and virus attack
6. Simple, fine and humanized user interface, can be easily operated by non-professionals
Centerm Linux Manual
2 Terminal User Manual
2.1 Applications
2.1.1 Control Center
1.
Use “Control Center”
The “Control Center” program provides the interface of using the configuration programs in
the system
2.
Run the “Control Center”
Running method:
(1) Left click the “Control Center” icon
in the quick start bar on the left bottom of the
desktop;
(2) Left click the “Control Center” item in the start menu
The interface of “Control Center” is as below:
Centerm Linux Manual
Control Center
3.
Run the programs in the control center
Select the program, double click it or press enter to run it
2.1.2 Network
Trough network management, you can modify the terminal name; activate, inactivate, configure
the network card; add, edit and delete the router item, set the default router and set DNS, etc.
1.
Run the network management
Method
Click the “Control Center” in the quick start bar or “start” menu and double click “Network”
to run it.
The interface is as the picture below:
Centerm Linux Manual
Network
(1) General
This page lists the information of all the network cards. You can modify the terminal name,
activate or deactivate the network card and edit the configuration information of the network card
in this page.
(a) Modify the terminal name
As the picture shows below:
Centerm Linux Manual
Modify the terminal name
(b) Activate the network card
When the network card is deactivated, click “activate” button and it would activate the
selected network card.
(c) Deactivate the network card
Click the “Deactivate” button and it would deactivate the selected network card.
(d) Network card property
Select one network card and click “Property” button or double click the “network card
property” icon
in the task bar on the right bottom of the desktop, then the network
card configuration program would pop up. As the picture shows below:
Centerm Linux Manual
Configure the network card
(2) Router
This page lists the router information of all the network cards. You can add, edit and delete
the router in this page as well as setting the default router. As the picture shows below:
Centerm Linux Manual
Router Setting
(3) DNS
The setting of DNS is processed in this page. As the picture shows below:
Centerm Linux Manual
DNS Setting
2.1.3 Display
1.
Use “Display”
In “Display” property, you can customize the screen saver and screen resolution. The display
properties include: screen saver, screen resolution, refresh rate and color depth, etc.
2.
Run the “Display” property
Operation method:
(1) Right click on the desktop and select “display”;
(2) Click the “control center” icon in the quick start bar or the start menu to open the control
center and select “Display” in it.
The running interface is as the picture shows below:
Centerm Linux Manual
Display Settings
3.
Set the display properties
(1) Display settings
You can choose whether to use the function that automatically detecting the optimum
resolution, display mode, color depth and primary display, etc.
The “display mode” includes single display, clone, duplicate and extend;
The “color depth” includes high color and true color;
The primary display is DVI or VGA.
(2) Optimum Settings
If you check “Optimum settings”, then this program would set the resolution as the
optimum resolution of the monitor.
(3) DVI
If the users want to set the resolution by themselves, please do not check “Optimum settings”
in “Setting” tab, thus the output resolution of DVI can be set. As the picture shows below:
“Resolution” button: Set the resolution of the monitor.
“Refresh rate” button: Set the refresh rate of the monitor.
“Rotation” button: used for setting the clockwise rotation degree of display
“Detecting” button: used for detecting the suitable resolution of this display
Centerm Linux Manual
Set the resolution of DVI port
(4) VGA
If the users want to set the resolution by themselves, please do not check “Optimum settings”
in “Settings” tab, thus the output resolution of VGA can be set. As the picture shows below:
“Resolution” button: Set the resolution of the monitor.
“Refresh rate” button: Set the refresh rate of the monitor.
“Rotation” button: used for setting the clockwise rotation degree of display
“Detecting” button: used for detecting the suitable resolution of this display
Set the resolution of VGA port
Centerm Linux Manual
After finishing the parameter modification, click “Apply” or “OK” button, then a dialog box
would pop up and prompt that the system will apply new display settings. As the picture shows
below:
Hints of saving display settings
When the new display setting is applied, a dialog box would pop up and prompt whether to
save the new setting. Click “ok” and the setting would be saved; click “cancel” and it would not
be saved.
(5) Screen Saver
In “Screen Saver” page, you can select and set the screen saver program of the terminal, as
the picture shows below:
Screen Saver
Centerm Linux Manual
If you select “None” in “screen saver” page, then all the other items in this page would
become gray; if you select one of the screen saver programs, then you can preview this screen
saver program and also set the waiting time of the screen saver; if you need the screen saver to
lock the screen, select “Lock Screen”.
2.1.4 Sound
1.
Use “Sound”
The “sound” program is used for adjusting the volume and microphone of the terminal
system
2.
Run the “Sound” program
(1) Double click the “Sound” icon
in the status bar on the right bottom of the
desktop ;
(2) Open “Control Center” and select “Sound” in it.
The operating interface is as the picture shows below:
Sound
Adjust the volume
Centerm Linux Manual
When the scroll bar of the volume is focused, you can adjust the volume by right/left click of
the mouse(according to the setting of the mouse), mouse wheel, the up and down keys, Page UP,
Page Down, Home and End keys; When “Mute” is checked, the volume cannot be adjusted and
the system is mute. As the picture shows below:
Mute of Volume
Adjust the volume of microphone
When the scroll bar of the microphone is focused, you can adjust the microphone volume by
right/left click of the mouse (according to the setting of the mouse), mouse wheel, the up and
down keys, Page UP, Page Down, Home and End keys; When “Mute” is checked, the volume of
the microphone cannot be adjusted and the system is mute. As the picture shows below:
Centerm Linux Manual
Mute of Microphone
2.1.5 Mouse
1.
Use “Mouse”
The “Mouse” property program is used for switching the left and right button of the mouse
and mouse speed
2.
Run “Mouse” program
Open control center and select “Mouse”.
The operating interface is as the picture shows below:
Centerm Linux Manual
Mouse Property
3.
Set the left and right button of the mouse
In “Button Configuration”, check “Swap left and right button”, and you can switch the
function of left and right button of the mouse. The setting has immediate effect. If the checkbox is
checked, then the right button of the mouse becomes the primary button. Right click the checkbox
to restore it to not-checked status, and the left button of the mouse is restored to the primary
button.
4.
Set the mouse speed
Drag the slider of “mouse speed” and you can set the mouse speed. The setting has
immediate effect.
5.
Set “double-click timeout”
Drag the slider of “double-click timeout” and you can set the double-click timeout of the
mouse. The setting has immediate effect.
2.1.6 Keyboard
1.
Use “Keyboard”
Centerm Linux Manual
The keyboard property program is used for setting the keyboard language and keyboard
model of the terminal as well as whether to enable NumLock key when the system boots up.
2.
Run “Keyboard” property
Open control center and select “Keyboard”
The operating interface is as the picture shows below:
Keyboard Property
3.
NumLock key
If “Enable as Startup” is checked, then after starting up, the NumLock key is enabled; or
NumLock key is not enabled.
2.1.7 User Password
1.
Use “User Password”
Through using the “user password” program, you can set the user password which is the
password for starting up/restart, screen saver and system lock.
2.
Run the “user password” program
Centerm Linux Manual
Open control center and select “Password”
The operating interface is as the picture shows below:
Set user password
2.1.8 Screen Lock
1.
Use “Screen Lock”
The “screen lock” program is used for locking the screen when the terminal is not used and
ensures that the terminal would not be used by others.
2.
Run “screen lock” program
Use the hotkey Ctrl + Alt + Del to call out the screen lock program to lock the screen.
When the screen is locked, all the applications of the terminal cannot be used and you need to
input the correct unlocking password to return to the system application interface.
The operating interface is as the picture shows below:
Centerm Linux Manual
Unlock the screen
If the password input is wrong, a prompt dialog box would pop up and the screen would keep
locked.
2.1.9 Network Diagnosis
1.
Use “Network Diagnosis”
The “network diagnosis” program is used for checking the network status.
2.
Run the “network diagnosis” program
(1) Click “Diagnosis” clause in start menu;
(2) Open the control center and select “Diagnosis”
The operating interface is as the picture shows below:
Centerm Linux Manual
Network Diagnosis
3.
The destination of network diagnosis
When you ping a certain address, input this address in the text box of “Destination” and set
ping times(5 times by default and 0 represents unlimited times). For example, pin the
address 192.168.1.1, press enter and the operating interface is as the picture shows below:
Ping the address 192.168.1.1
Centerm Linux Manual
The destination box cannot be blank, or the prompt dialog box would pop up.
Limit of ping times
When you ping some address, the time box must be filled in with a number and cannot be
blank, or the prompt dialog box would pop up.
2.1.10 VPN/ADSL
1.
Use “VPN/ADSL”
You can set ADSL connection and VPN connection through using network connection
program.
2.
Run the network connection program
Open control center and select “VPN/ADSL”
The operating interface is as the picture shows below:
VPN/ADSL
3.
Connection
(a) You must create a connection clause first before connecting
(b) If the connection clauses already exist, you only need to select the clause which needs to
be connected and click “Connect”, and the system would search for the server and
Centerm Linux Manual
connect to it.
(c) After connecting successfully, an tray icon would show in the tray area on the right
bottom of the screen, as the picture shows below:
Tray icon when connected
(d) If there is error during the connecting process which leads to connection failure, then
system would show prompt and detailed information for users to query, as the picture
shows below:
Fail to connect
4.
Disconnect
There are two ways to disconnect one connection:
(a) Open the network connection program and select the connection clause which needs to
be disconnected, click “disconnect”;
(b) Right click on the tray icon and select “disconnect”
5.
Create a new connection-ADSL
Create a new ADSL connection clause through below steps:
(a) Open the network connection program
(b) Click “New” button and select to create a new ADSL connection, as the picture shows
below:
Centerm Linux Manual
Set a new ADSL connection (Step 1)
(c) Select “Next” and fill in the connection name, username and password, and then click
“Next”. As the picture shows below:
Set a new ADSL connection (Step 2)
Centerm Linux Manual
(d) Confirm the information input and if it is correct, click “Apply” to finish the adding.
Now the new connection clause has been added in ADSL connection. As the picture
shows below:
Set a new ADSL connection (Step 3)
Edit the connection clause-ADSL
If you need to modify the information of a connection clause, like the connection name,
username, password or other connection properties, then please open the network connection
interface, select ADSL connection clause, click “edit” and you can modify the connection name,
username or password. As the picture shows below:
Centerm Linux Manual
General configuration of ADSL connection
In other tab, you can set the other properties of the connection clause, including the binding
network card, disconnect/reconnect properties and whether to automatically connect upon
starting up. As the picture shows below:
Other configurations of ADSL connection
Centerm Linux Manual
Create a new connection-VPN
Create a new VPN connection clause through below steps:
(a) Open the network connection program
(b) Click “New” button and select to create a new VPN connection, as the picture shows
below:
Set a new VPN connection(Step 1)
(c) Select “Next”, fill in the connection name, server address, username and password and
click “Next”.
As the picture shows below:
Centerm Linux Manual
Set a new VPN connection (Step 2)
(d) Confirm the information input and if it is correct, click “Apply” to finish the adding.
Now the new connection has been added. As the picture shows below:
Centerm Linux Manual
Set a new VPN connection (Step 3)
6.
Edit the connection clause-VPN
If you need to modify the information of one connection clause, like the connection name,
username, password or other connection properties, then please open the network connection
interface, select one connection clause, click “edit” and you can modify the connection name,
username or password. As the picture shows below:
Centerm Linux Manual
General configuration of VPN connection
In security tab, you can set the encryption mode and authentication mode, as
the picture shows below:
Security configuration of VPN connection
In other tabs, you can set the other properties of the connection clause, including
Centerm Linux Manual
disconnect/reconnect property and whether to automatically connect upon starting up. As the
picture shows below:
Other configuration of VPN connection
2.1.11 Date/Time
1.
Use “Date/Time”
The “Date/Time” program is used for configuring the current date and time of the system.
2.
Run Date/Time program
(1) Double click the time in the status bar on the right bottom of the desktop;
(2) Open control center and select “Date/Time”
The operating interface is as the picture shows below:
Centerm Linux Manual
Date/Time
3.
Configure the current date/time of the system
You can adjust the time area, year, month and date in date adjusting bar and adjust hour,
minute and second in time adjusting bar. After clicking “ok”, the time parameters are saved;
if you click “cancel”, then the parameters would not be saved.
2.1.12 Save settings
1.
Use “save settings”
The “save settings” program can save the system settings and even if the terminal is illegally
power off, the settings can be saved.
2.
Run “Save Settings” program
(1) Use the hotkeys Shift+F2;
(2) Run “Save settings” in start menu;
(3) Open control center and select “save settings”
The operating interface is as the picture shows below:
Centerm Linux Manual
Saving Data
2.1.13 CDMS Agent
1.
Use “CDMS Agent”
CDMS Agent program can set that whether the terminal can be managed by the server or
specify the server which is allowed to manage.
2.
Run CDMS Agent
(1) Double click “CDMS Agent” icon in the status bar on the right bottom of the desktop
;
(2) Open control center and select “CDMS Agent”
The operating interface is as the picture shows below:
CDMS Agent
Centerm Linux Manual
3.
Configure CDMS server
Select “Only allows the specified server to manage”, input the server address and port and
click “ok”. The password input window would pop up. As the picture shows below:
Password Confirmation
You can only modify the server address and port after entering the correct password
(centerm123!@# by default). An error prompt window would pop up if the password input is
wrong.
This password can only be modified through CDMS server.
2.1.14 Browser
1.
The Linux has Firefox browser installed
2.
Run Firefox
(1) Run “Firefox” in start menu;
(2) Open control center and select “Firefox”
The operating interface is as the picture shows below:
Centerm Linux Manual
firefox
2.1.15 Service
1. Use “Service”
The “Service” program is used for configuring the service which needs to start
or stop when the terminal starts up or on its current status.
2. Run “Service” program
Open control center and select “Service”
The operating interface is as the picture shows below:
Centerm Linux Manual
Service
3. Start or stop the service when the terminal starts up
If you select “Automatic” in the dropping down box of a certain service, then
this service would start automatically when the terminal starts up; or if you
select “manual” in the dropping down box of the service, then this service would
not start when the terminal starts up and after entering the terminal system, users
can configure whether to start it by themselves.
Click “Apply” button and the setting would be saved and validated. Click
“Refresh” button to restore the configuration information currently saved that
whether to start those services when the terminal starts up.
4. Directly start or stop the service on the current status
The “Start” and “Stop” buttons after each service are used for configuring
whether to “start” or “Stop” a certain service on current status.
When the corresponding “start” button of one service is gray, the “Stop”
button is valid; vice versa.
If you want to start (or stop) one certain service directly under current status,
you can click the corresponding “start” (or stop) button of this service and it
can be validated at once.
Centerm Linux Manual
2.1.16 Start up
1. Use “Startup”
The “startup” program is used for setting the programs which need to be started
when the system starts up
2. Run “Startup” program
Open control center and select “Startup”
The operating interface is as the picture shows below:
Start Up
Check the programs which need to be started when the system starts up and click
“Apply” button, the new startup configuration can be validated. Click “Close”,
the program would exit and the settings would not be saved.
2.1.17 Remote Desktop
1. Use “Remote Desktop”
The remote desktop program is used for the settings of some parameters related
with the remote desktop when the terminal is used as the server side of the remote
desktop.
Include: Whether allow the remote monitoring, select remote check or control
and some security parameter settings of the terminal when the remote host connects
the terminal desktop.
2. Run “Remote Desktop” program
Centerm Linux Manual
Open control center and select “Remote Desktop”
The operating interface is as the picture shows below:
Configuration Interface of Remote Desktop
3. Remote Desktop client
For the terminal is used as the server side of the remote desktop, the users
only need to install the client program of the remote desktop on some client
machine to use this client program to connect to the terminal desktop through
specifying terminal IP address.
Remark:The version of the client program needs to be 3.3.4 or higher to support
the function of checking the mouse status of the terminal.
4. Sharing
Select whether to allow the remote host to monitor the terminal desktop. If it
is checked, you can configure the remote monitor or control and the parameters
in the security bar. Or the other configuration items would be gray. As the picture
shows below:
Centerm Linux Manual
Do not allow the remote control
5. Security
If you select to allow remote monitoring, then you can set the configuration
items in the security bar and can select to ask the terminal for confirmation
or to require the user to enter a password when the remote host connects to the
terminal desktop. If you select to need the password to login, then input the
password in the password box. That is the remote host needs password
authentication when logging in the terminal desktop. As the picture shows below:
Centerm Linux Manual
Click “Apply” to save the settings. Click “Close” to exit the program.
2.1.18 Device Manager
1.
Use “Device Manager”
The device management program is used to allow or forbid the use of devices.
2.
Run “Device Manager” program
Open Control Center->Device Manager
The operating interface is as the picture shows below:
Centerm Linux Manual
Device Manager
3.
Allow to use
When “Insmod” is checked, the corresponding device is allowed to use.
4.
Forbid to use
When “Insmod” is not checked, the corresponding device is not allowed to use
2.1.19 Storage Device Manager
1.
Use “Storage Device Manager”
The “Storage Device Manager” program is used for mounting and umounting the
USB disk, mounting and ejecting the DVD
2.
Run “Storage Device Manager”
Open Control Center-> Storage Device Manager
The operating interface is as the picture shows below:
Centerm Linux Manual
Storage Device Manager
3. Mount USB disk or DVD
When USB disk or DVD is inserted, the system would mount them automatically.
You can also open “Storage Device Manager”, select the device and click “mount”
to mount the device manually.
4. Umount USB disk or eject DVD
Before pulling up the USB disk, you need to un-mount it first. Select the device
you want to un-mount and click “Umount”. As the picture shows below:
Centerm Linux Manual
Umount the USB disk
To eject DVD, select the device needed to be ejected and click “eject”. As
the picture shows below:
Eject DVD
Centerm Linux Manual
5. Use of the tray icon
When inserting USB disk or DVD, a tray icon would appear in system notice area.
Use this tray icon to open “Storage Device Manager”:
(1) Use the left button of mouse and double click to open it
(2) Right click this icon, the tag “Open Storage Device Manager” would pop
up, left click it. As the picture shows below:
If you need to umount the USB disk or eject DVD, please left click on the icon
and select “Umount USB Disk” or “Eject DVD”. As the picture shows below:
2.1.20 Printer Management
1. Use “Printer Management”
The “Printer Management” program is used for adding, editing and deleting the
printers in the system. And you can check the printing tasks.
2. Run “Printer Management”
Open control center-> Printer Management
The operating interface is as the picture shows below:
Centerm Linux Manual
Printer Management
3. Add the printer
Click “Add” button and the interface of setting new printers would pop up.
As the picture shows below:
Add a printer
The “printer port” includes serial port and USB port. Please select the right
printer port. For the printer with serial port, you can set the properties of
the serial port. As the picture shows below:
Centerm Linux Manual
Property setting of serial port printer
“Server driver” means the printer driver name used by ICA server to recognize
the printer after connecting to the server via ICA.
4. Edit the printer
Select the printer which you want to modify and click “edit”, the printer
editing interface would pop up. As the picture shows below:
Edit the printer
5. Delete the printer
Select the printer which you want to delete and click “delete” button. A window
for confirmation would pop up, click “ok” to delete the printer. As the
Centerm Linux Manual
picture shows below:
Delete the printer
6. Check the print task:
Select the printer to check its print tasks and click “print tasks”, the
interface of checking the print tasks would pop up.
As the picture shows below:
Check the Print Tasks
Centerm Linux Manual
2.1.21 Smart Card
1. Use “Smart Card”
The “smart card” program is used for adding, editing and deleting the smart
card in the system.
2. Run “Smart Card” program
Open control center-> Smart Card
The operating interface is as the picture shows below:
Smart Card Program
3. Add the smart card
Click the “add” button, the interface of setting new smart card would pop up,
as the picture shows below:
Add Smart Card
When the smart card is inserted to the terminal, if the system supports the smart
card, then the name of the smart card would display in “Name” list. As the
Centerm Linux Manual
picture shows below:
Smart Card Name
4. Edit smart card
Select the smart card which you want to modify and click “edit” button, the
interface of editing the smart card would pop up. As the picture shows below:
Edit Smart Card
5. Delete the smart card
Select the smart card which you want to delete and click “delete” button. A
dialog box for confirmation would pop up, click “ok” to delete the smart card.
As the picture shows below:
Delete Smart Card
6. Smart card application
Currently, the smart card added through this program is applied in RDP
Centerm Linux Manual
connection of the connection manager.
2.1.22 ICA Client
1. Use “ICA Client”
Used for connecting to Citrix virtual desktop
2. Run ICA Client
Open control center->ICA Client
2.1.23 ICA Global Setting
1. Use“ICA Global Setting”
ICA global setting is used for setting the device mapping and hotkeys of ICA
connection
2. Run “ICA Global Setting” program
Open control center->”ICA Global Setting”
The operating interface is as the picture shows below:
ICA Global Settings
3. Set ICA Device Mapping
In device mapping interface, you can select whether to map USB disk and serial
Centerm Linux Manual
port. The setting would take effect when connecting at next time.
4. Set the hotkeys:
In hotkey mapping interface, you can modify the hotkeys. The setting would take
effect when connecting at next time. As the picture shows below:
Hotkeys Setting
2.1.24 VMware View
1. Use“VMware View”
Used for connecting to VMware Virtual desktop.
2. Run VMware View
Open control center->VMware View
2.1.25 Security
Go to the “control Center” and double click the “Security” icon to run the
program.
Below interface would pop up.
Centerm Linux Manual
The initial password is blank, so just click “OK” button to enter the program.
Then you’ll see its operating interface as below:
In “System Modification” frame, you can see two options “Allow” and “Forbid”.
If you select “Allow”, then you can access and configure all the programs in control
center and also the connection manager.
If you select “Forbid”, then:
(1) In connection manager, you cannot add, edit or delete the connection items,
and you can only connect the exiting connection items, as the pictures blow:
Centerm Linux Manual
(2) In control center:
Some of the programs are forbidden to access and others are still allowed
to access.
By default,when you select “Forbid” in security program,below programs
are forbidden to access: Network,cloud client,cloud server,CDMS
agent,Date/Time, ica global settings,services, startup and remote desktop.
If you want to add more programs into this protection mode or remove some
programs out of this protection mode,please inform us and then we’ll send
you a new system version.
Centerm Linux Manual
2.2 Connection Manager
1.
Use “Connection Manager”
Through connection manager, you can add, edit and delete the connection clauses. There are
these type clauses: RDP, ICA, XDCMP, etc.
2.
Run “Connection Manager”
(1) Click the “connection manager” icon
in the quick start bar on the
bottom of the desktop;
(2) Run Start Menu-> Connection Manager;
(3) Open control center->connection manager;
The operating interface is as the picture shows below:
Connection Manager
b)
There is a list box in this interface which displays the connection clauses added by users.
Each connection clause has four sub-items:
(1) Connection name
Centerm Linux Manual
The name of the connection clause added by users
(2) Connection type
The type of the connection clause added by users, includes RDP, etc.
(3) Connection Status
There are two statuses: “Direct” and “connected”
When not connected and not set as direct connection upon starting up, the status is blank;
When not connected and set as direct connection upon starting up, it shows “Direct” in
“Status”;
When connected, it shows “connected”
(4) Server
It shows the name of the server or application which users want to connect to.
c)
There are the buttons “connect”, “Disconnect”, “edit”, “add” and “delete” on the bottom of
the list box.
The functions of these buttons are as below:
(1) Connect
Select one connection clause in the list box and then click “Connect” button or press Alt + C
or double click the connection clause, thus you can connect it.
(2) Disconnect
Click “Disconnect” or press Alt + S, a “disconnect” dialog box would pop up, click “ok” and
the selected connection would be disconnected; click “cancel” and it would not be disconnected.
(3) Edit
Click “Edit” or press Alt + E, a dialog box of editing the connection would pop which
includes several property pages.
(4) Add
Click “Add” button or press Alt + A, a dialog box of adding a new connection would pop up
There are 3 connection types: RDP, ICA and XDMCP. Check the button on the left of RDP,
ICA and XDMCP and click “Next”, thus it would start the corresponding connection guide. As the
picture shows below:
Centerm Linux Manual
Add a new session
(5) Delete
Click “Delete” button or press Alt + D, a dialog box for deleting would pop up, click “ok”
and it would delete the selected item; click “cancel” or press ESC, it would cancel the
deleting. As the picture shows below:
(6) Direct
When the connection manager is configured as “enabled when the system starts up”, the
“Direct” button is available in connection manager.
If one connection item has not been set as direct connection upon starting up, click “Direct”
button or press Alt + T, a dialog box of direct connection would pop up, click “ok” and the
selected item in current list box would be set as direct connection when the terminal starts up
every time. As the picture shows below:
Centerm Linux Manual
When one connection item is set as direct connection upon the system starting up, click
“direct” button or press Alt + T, a confirmation dialog box of canceling the direct connection
would pop up, click “yes” and the system would cancel the direct connection setting of the
selected item in current list box and the connection item would not connect directly when the
terminal starting up. As the picture shows below:
2.2.1 RDP Connection Guide
Click “Add” in connection manager, select RDP connection type and click “Next” to enter
RDP connection setting dialog box.
1.
General
In this property page, you need to input the name of the new connection in “session name”
and input server IP address or server name in “Server Address”; the connection name should not
be the same with other RDP connections.
If you check “Automatic login”, then it would automatically connect to the server with the
username, password and domain name you input. You can inquiry the system administrator for the
domain name; if there is no domain, you can input the machine name of the server or leave it
blank.
Centerm Linux Manual
As the picture shows below:
General Properties of New RDP Session
【 Note: The connection name should not include some special characters. Some Windows
2000 Server versions do not support automatic login to the server for security.】
2.
Program
If you check “Run the following program automatically when connected”, then it would log
in to the server in application program mode. You need to input the path and file name of the
program. And you can choose to input the name of the file folder where the program locates.
As the picture shows below:
Centerm Linux Manual
Program Properties of New RDP Session
3.
Device Mapping
(1) Set serial port mapping. The number of the serial ports is recognized
by the system automatically. Check a certain item and the corresponding
serial port can be mapped as the serial port of the server.
(2) Set Storage device mapping and map the local USB disk and DVD to the server.
When storage device manager is disabled, it cannot be set.
(3) Set smart card mapping. Check this item and you can map the smart card
of the smart card list (smart card program) to the server.
(4) Set audio properties: bring to this terminal, do not play, leave at the remote computer,
sound mapping (needs the server to install the sound mapping software).
As the picture shows below:
Centerm Linux Manual
Device Mapping of New RDP Session
4.
Printer
In this property page, you can use RDP connection to add, edit and delete the
local printer. As the picture shows below:
Printer Setting of New RDP Session
Centerm Linux Manual
You can select whether to allow using the printer. If it is allowed, then you
can input the printer name, select local port, the manufacturer and the printer
driver. If the local port is selected as serial port, then you can configure the
serial port property through the serial port property button. After login to RDP
server, the local printer would be mapped as the printer of the server.
If
you select the user defined printer, then you can input the user defined printer
name and driver.
As the picture shows below:
Printer Settings
5.
Display
In this property page, you can set the display color, window size and connection bar after
logging to the server through RDP connection.
The window size can be set as full screen or 60% to 90% of the screen size.
There are four options for display color: 8 bit, 16 bit, 24 bit and 32 bit.
If you select “Show the connection bar only in full screen mode”, then there would be a
connection bar on the top of RDP full screen. Users can minimize and close the RDP connection
window using this connection bar.
Centerm Linux Manual
As the picture shows below:
Display Properties of New RDP Session
6.
Advance
In this property page, you can set the advance settings and keyboard layout of RDP
connection.
If “Desktop background” is checked, then it would display the desktop background set on the
server by the user after RDP successfully connects to the server. And users can modify the
desktop background. This option needs the support of the server.
If “Show window contents while dragging” is checked, then after RDP connection is
successful, it would show the window contents when users drag the window. This option needs the
server to support.
If “menu and window animation” is checked, then after RDP connection is successful, when
clicking the menu and minimizing or maximizing the window, it would display as animation. This
option needs the server to support.
The option “Themes” allows RDP connection to have the same theme settings with the server
side. And you can modify the theme settings.
Centerm Linux Manual
If “Bitmap Caching” opens, the client would open bitmap caching area on local hard disk
when connecting to the server through RDP. To enable this option would raise the performance
(especially when the network bandwidth is narrow) and reduce the occupation of the bandwidth.
In “keyboard layout” option, you can set the keyboard of the terminal.
If “Enable shortcut key for window manager” is checked, then you can use the hotkeys of the
window manager after RDP connection is successful. The hotkey Ctrl + Tab can also be used to
switch the windows. If the option is not checked, all keyboard operations would be shielded in
RDP session.
As the picture shows below:
Advance Properties of New RDP Session
7.
Options
If the connection mode is set as “Quick”, then the applications and the auto login bar in
“Normal” would be invalid. When connecting, the connection manager would prompt the user to
input the server address to connect to.
If the “Clipboard” is enabled, then after connecting to and logging in the server, you can use
the “paste”, “copy” and “clip” functions between server and terminal. For example: the text in
Centerm Linux Manual
terminal system can be copied and pasted into the word processor of RDP server.
The “auto reconnect” function can prompt the users whether to reconnect to the server when
the network is abnormal.
It is recommended that the users enable compression which can obviously improve users’
visual experience when the network bandwidth is low.
If “Attach to console” is checked, then when there is no driver program for the peripheral
connected to the server, it would prompt to install the driver.
【Note:In “change user log in or log off mode” of server, only when “quickly switch users ”
is canceled, the “console” mode can take effect.
As the picture shows below:
Options of New RDP Session
2.2.2 XDMCP Connection Guide
Click “Add” button in connection manager and choose XDMCP connection type, click “Next” to
enter XDMCP connection setting dialog box.
1.
General
Centerm Linux Manual
In this property page, you must input the name of the new connection in “Session Name” and
server IP address or server name in “Server Address”; the session name cannot be the same
with other XDMCP connections.
You can choose Xnest and Xserver for the connection program. Xserver has better
compatibility. When you use Xserver, you can use Ctrl+Alt+Fn(3 <= n <= 12) to switch to the
console and use Ctrl+Alt+F2 to switch to the terminal desktop. As the picture shows below:
General Properties of XDMCP
2.
Options
If the connection mode is set as “Rapid”, then the applications and auto login bar in
“General” would be invalid. When connecting, the connection manager would prompt the users to
input the server address.
If the connection program is Xnest, then you can set the window size to be full screen or 60%
to 90% of the screen size. As the picture shows below:
Options of XDMCP
Centerm Linux Manual
2.2.3 ICA Connection Guide
Click “Add” in connection manager and select ICA connection type, click
“Next” to enter ICA connection guide.
1. General
In “General” property page, you must input the name of the new connection in
“Session Name” and server IP address or server name in “server address”. The
connection name cannot be the same with other ICA connections. As the picture shows
below:
General Properties of New ICA Session
2. Login Scripts
In “login scripts” property page, you can set whether to automatically login.
If “Automatic Login” is checked, you must input the user name and password. For
the domain name, you can inquiry the system administrator; if there is no domain,
you can input the machine name of the server or leave it blank. As the picture shows
below:
Centerm Linux Manual
Login Scripts of New ICA Session
3. Window
In “Window” property page, users can set the system color number and window
size after logging on ICA server.
As the picture shows below:
Window Properties of New ICA Session
4. Security
In “security” property page, users can select the encryption level of ICA
Centerm Linux Manual
connection and set the firewall. As the picture shows below:
Security Properties of New ICA Session
5. Options
In “Options” property page, users can select ICA connection to do data
compression and can choose whether to open the sound. As the picture shows below:
Options of New ICA Session
Centerm Linux Manual
2.3 Instruction of System Hotkeys
The system provides hotkeys for some applications and functions.
Hotkey
Function
Ctrl+Alt+S
Restore the default configuration of the display parameters
Ctrl+Alt+Del
Lock the screen
Shift+F2
Save system settings
Ctrl+Tab (or Alt+Tab)
Switch the windows on the desktop(When switching
windows in RDP full screen window, it only supports the
hotkey Ctrl+Tab)
Ctrl+Alt+C
Call out the control center
Ctrl+Shift+F3(dual screen
Switch the display mode and the switching sequence is:
support)
VGA->DVI->TWIN->VGA