1
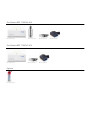
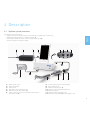
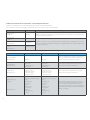
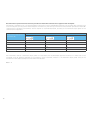
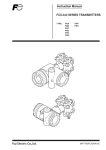
iOptima ENG Instructions for use Rx Only Printed in Switzerland REF 2100279-0000 Set iOptima REF 1700544-001 1x REF 1600926-001 1x REF 1600677-001 1x REF 1600762-001 Set iOptima REF 1700547-001 1x REF 1600926-001 Options 1x REF 1600036-006 1x REF 1600762-001 1x REF 1501938-001 1x REF 1501938-001 1 Symbols............................................................. 2 1.1 2 Description of symbols.......................................................................2 Identification and Intended use..................... 3 2.1 2.2 Identification ..........................................................................................3 Intended use ..........................................................................................3 3 Warnings & Precautions of Use .................... 4 4 Description........................................................ 5 4.1 4.2 4.3 4.4 4.5 4.6 4.7 5 6.2 6.3 7.3 7.4 7.5 7.6 9.3 9.4 9.5 Install the iOptima app .................................................................... 12 Install the iOptima system ............................................................. 12 iOptima application........................................................................... 14 6.1.1 Compatibility ........................................................................... 14 6.1.2 Notation .................................................................................... 14 Sound alerts ....................................................................................... 14 iPod and iOptima connection / disconnection conditions..... 15 6.3.1 Disconnection ......................................................................... 15 6.3.2 Connection ............................................................................... 15 6.3.3 iOptima unit switched ON.................................................... 15 Back up data....................................................................................... 16 Use of the Touch screen.................................................................. 16 7.2.1 Display onscreen keyboard ................................................ 16 Launch iOptima app ......................................................................... 16 Welcome screen and disclaimer .................................................. 17 Information ......................................................................................... 18 iOptima App update.......................................................................... 18 Operation - Restorative mode ..................... 20 8.1 8.2 Operation - Endodontics Mode.................... 26 9.1 9.2 iOptima system overview ..................................................................5 Set supplied ...........................................................................................6 Options ....................................................................................................6 Technical data .......................................................................................6 Environmental protection and information for disposal..........7 Limitation of liability............................................................................7 Electromagnetic compatibility (technical description) .............7 Getting started ............................................... 16 7.1 7.2 8 9 Interface overview......................................... 14 6.1 7 8.5 Installation ...................................................... 12 5.1 5.2 6 8.3 8.4 Enter Restorative mode .................................................................. 20 Operative screen description......................................................... 20 8.2.1 MX2 micromotor Speed & Torque..................................... 20 8.2.2 Handpiece ratio ...................................................................... 20 8.2.3 Light intensity ......................................................................... 21 8.2.4 Footpedal mode ..................................................................... 21 8.2.5 MX2 micromotor rotation direction.................................. 21 Standard Use - Operating mode (Start) ..................................... 22 Customize default operations ....................................................... 22 8.4.1 Restore (default) and delete (user-defined) operations ................................................................................ 22 8.4.2 Default Operations................................................................. 23 Create new operations (user-defined) ........................................ 24 9.6 9.7 ENG Table of contents Enter Endodontics mode ................................................................ 26 Operative screen description ........................................................ 26 9.2.1 MX2 micromotor Speed & Torque..................................... 26 9.2.2 Handpiece ratio ...................................................................... 27 9.2.3 Light intensity ......................................................................... 27 9.2.4 Footpedal mode ..................................................................... 27 9.2.5 MX2 micromotor rotation direction.................................. 28 Standard Use - Operating mode (Start) ..................................... 28 Customize settings ........................................................................... 28 9.4.1 Customize default settings (operative screen) ............. 28 9.4.2 Customize system settings................................................. 29 Add, sort or remove files ................................................................ 30 9.5.1 Add new files........................................................................... 30 9.5.2 Sort files ................................................................................... 30 9.5.3 Remove files............................................................................ 30 Restore (default) and delete (user-defined) systems............. 30 9.6.1 Default Systems..................................................................... 30 Create new Brands and Systems................................................. 32 9.7.1 Restore (custom) and delete (user-defined) brand ..... 32 10 List of errors & Troubleshooting ................ 34 10.1 Safety warning (operating)............................................................. 34 10.2 Device operating error..................................................................... 34 10.3 iOS compatibility errors (disclaimer screen)............................ 35 11 Maintenance .................................................. 36 11.1 11.2 11.3 11.4 11.5 12 Servicing.............................................................................................. 36 Information ......................................................................................... 36 Cleaning-disinfection ....................................................................... 36 Important............................................................................................. 36 Replace 4VL seal............................................................................... 37 General information and guarantee ......... 38 12.1 General information ......................................................................... 38 12.2 Notation................................................................................................ 38 12.3 Terms of guarantee .......................................................................... 38 1 1 Symbols 1.1 Description of symbols Symbol Description CE Marking with number of the notified body. Manufacturer. REF Reference number. SN Serial number. Rx Only Caution: Federal law restricts this device to sale by or on the order of a licensed healthcare practitioner. Recyclable electrical and electronic materials. Refer to the accompanying documents. Recyclable materials. CAUTION! Interference may occur in the vicinity of equipment marked with this symbol. Alternate current. Electrical security. Applied part type B. Main switch - Power OFF. Main switch - Power ON. Sound alerts. Move fully to the stop, in the direction indicated. 4-hole connection and 4 electric (4VLM). 4-hole connection (4way). 2 2.1 Identification 2.2 Intended use Electronically controlled unit for dentistry allowing operation of an MX2 micromotor with variable speed using the dental unit pedal. It is essential to connect a compatible iPod Touch® using the lightning connector provided for this purpose. The iOptima unit provides power to the iPod device as soon as the iPod is connected to it. Under normal use (power supply = 32Vdc), iOptima unit does not use any battery energy of the iPod. The iOptima unit charges the iPod battery when connected. The restorative and endodontics parameters are defined before operation using the iOptima application installed on the iPod. The iOptima application indicates the operation steps, the ratio of the handpiece, tool speed, torque value, light intensity, footpedal mode and the MX2 micromotor rotation direction. iOptima application is compatible with Apple iOS operating system. Product intended for professional use only. The iOptima system is intended for use in general dentistry, restorative dentistry and endodontics work by dentists and dental professionals in a dental office. Any use other than that for which this product is intended is unauthorized and may be dangerous. ENG 2 Identification and Intended use CAUTION The predefined torque and speed values are only intended as a guide. They must be adapted according to the IFU for the specific files used. 3 3 Warnings & Precautions of Use CAUTION This unit is not designed for use in an explosive atmosphere (anesthetic gas). CAUTION To prevent any risk of electric shock, this unit must be connected only to a power supply network provided with a protective earth. CAUTION The power plug is the device used for disconnection in case of problems, it must be easily accessible at all times. CAUTION Never connect a handpiece on a running micromotor. CAUTION The iPod Touch® must never be disconnected from the iOptima dental unit during operation! CAUTION The parameters contained in the dental procedures are given for information ONLY. Bien-Air Dental SA cannot be held liable for them. Note 1 4 NOTES 1 The predefined parameters may be subject to modification without notice. 4 Description 4.1 iOptima system overview 2 1 3 ENG The iOptima system consists of: • iOptima unit (3) with docking station for iPod Touch® and lightning connector (4); • A MX2 dental micromotor (11) and MX2 hose (9, A); • A pneumatic 4VLM connection input as speed reference (6, B); • A power supply (2) and plug cord (C). 4 C 5 6 7 A B C 10 9 8 A iOptima B 13 12 11 FIG. 1 (1) (2) (3) (4) (5) (6) Power supply cord Power Supply (C) iOptima unit iPod Touch® [not provided in set] MX2 micromotor hose output (A) 4-way connector input, air and water inlet from your pneumatic unit (B) (7) (8) (9) (10) (11) (12) (13) Power input connector (with lock) (C) Main power switch MX2 micromotor hose (A) iOptima status light (green power on) MX2 micromotor Handpiece [not provided in set] Dental unit with pedal (B) [not provided in set] 5 4.2 Set supplied 4.4 Technical data iOptima set REF 1700544-001 Dimensions L x W x H iOptima unit................................................125 x 145 x 75 mm iOptima unit (with iPod) ..........................125 x 145 x 160 mm MX2 hose ....................................................L 1.7 m MX2 micromotor (including nose).........................................Ø 21 x L 73.5 mm Power Supply ............................................130 x 75 x 45 mm Designation REF number iOptima unit (1x) 1600926-001 MX2 Micromotor (1x) 1600677-001 MX2 Micromotor hose (1x) 1600762-001 Power supply (1x) 1501938-001 3P cable system, Switzerland, length 2.00 m (1x) 1300065-001 3P cable system, Europe, length 2.50 m (1x) 1300066-001 3P cable system, US/Asia, length 2.00 m (1x) 1300067-001 iOptima set REF 1700547-001 Weight iOptima unit................................................ 0.4 kg Power Supply ............................................ 650 g MX2 micromotor....................................... 94 g Electrical and pressure data Voltage.........................................................100-240 VAC Frequency ..................................................47-63 Hz Nominal power..........................................90 W Max. input power ......................................160 W Input pneumatic pressure ....................5 bar / 72.5 psi Designation REF number iOptima unit (1x) 1600926-001 MX2 Micromotor hose (1x) 1600762-001 Power supply (1x) 1501938-001 Environmental Operating conditions 3P cable system, Switzerland, length 2.00 m (1x) 1300065-001 Temperature +10°C (50°F) to +25°C (77°F) -25°C (-13°F) to +70°C (158°F) 3P cable system, Europe, length 2.50 m (1x) 1300066-001 10% to 100% 1300067-001 Relative humidity 30% to 80% 3P cable system, US/Asia, length 2.00 m (1x) Atmospheric pressure 700 hPa to 1060 hPa 500 hPa to 1060 hPa Altitude 0 to 3'048 m (0 to 10'000 ft) - Environmental conditions 4.3 Options Designation REF number Spraynet, cleaning spray 500 ml, box of 6 cans 1600036-006 Transport and storage (max. 15 weeks) CAUTION Do not use iOptima outside the range of operating temperature. Classification Class IIa in accordance with European Directive 93/42/EEC concerning medical devices. 6 Degree of protection IP 40 (protection against insertion of objects larger than 1 mm) Memory • Restorative Storage of 10 user-defined Operations • Endodontics Storage of 10 user-defined Brands Storage of 10 user-defined Systems Storage of 8 Files per System including adjustment of speed and torque values for each file List of errors & Troubleshooting See chapter “10 List of errors & Troubleshooting” on page 34. Important: Consult the Instructions for Use of the following devices: Micromotor MX2 LED ..............................See doc. REF 2100199 Hose MX2 Grey..........................................See doc. REF 2100223 4.5 Environmental protection and information for disposal The disposal and/or recycling of materials must be performed in accordance with the legislation in force. This unit and its accessories must be recycled. Electrical and electronic equipment may contain dangerous substances which constitute health and environmental hazards. The user must return the unit to its dealer or establish direct contact with an approved body for treatment and recovery of this type of equipment (European Directive 2002/96/EC). 4.6 Limitation of liability Bien-Air Dental SA shall not be held liable for any non-compliant use of the iPod®. The conditions for and restrictions on use set by Apple must be respected (jailbreak, hardware modification, etc.). To ensure optimum operation of Bien-Air Dental iPod application, updates for the iOS must be according to validated version and the latest Bien-Air Dental iPod application updates must always be installed. 4.7 Electromagnetic compatibility (technical description) ENG Electric insulation class Class I per IEC 60601-1 (apparatus protected against electric shocks). Precautions regarding Electromagnetic Compatibility (EMC) Electro-medical equipment needs special precautions regarding EMC and needs to be installed and put into service according to the EMC information provided in this document. CAUTION Dental professionals need to be aware of potential electromagnetic interference between electronic dental devices and active implantable medical devices, and should always inquire about any devices implanted in the patient. CAUTION iOptima complies with the EMC requirements according to IEC 60601-1-2. Radio transmitting equipment, cellular phones, etc. shall not be used in close proximity to the unit since they could influence the performance of the unit. Special precautions must be taken when using strong emission sources such as High Frequency surgical equipment and similar equipment so that the HF cables are not routed on or near the unit. If in doubt, please contact a qualified technician or Bien-Air Dental SA. iOptima should not be used adjacent to or stacked with other equipment. If adjacent or stacked use is necessary, iOptima should be monitored to verify normal operation in the configuration in which it will be used. CAUTION The use of accessories, transducers and cables other than those specified, with the exception of transducers and cables sold by Bien-Air Dental SA as replacements parts for internal components, may result in increased emissions or decreased immunity of iOptima. 7 Guidance and manufacturer’s declaration - electromagnetic emissions iOptima is intended for use in the electromagnetic environment specified below. The customer or the user of iOptima should ensure that it is used in such an environment. Emissions test Compliance Electromagnetic environment - guidance RF emissions CISPR 11 Group 1 iOptima uses RF energy only for its internal function. CISPR 11 Therefore, its RF emissions are very low and are not likely to cause any interference in nearby electronic equipment. RF emissions CISPR 11 Class B Harmonic emissions IEC 61000-3-2 Compliant Voltage fluctuations/flicker emissions IEC 61000-3-3 Not applicable Immunity test IEC 60601 test level Compliance level Electrostatic discharge (ESD) ±6 kV contact ±6 kV contact IEC 61000-4-2 ±8 kV air ±8 kV air Electrical fast transient burst IEC 61000-4-4 ±2 kV for power supply lines ±1 kV for lines no input/output ±2 kV for power supply lines ±1 kV for lines no input/output Mains power quality should be that of a typical commercial or hospital environment. Shock waves IEC 61000-4-5 ±0.5 kV line to line ±1 kV line to line ±0.5 kV line to earth ±1 kV line to earth ±2 kV line to earth ±0.5 kV line to line ±1 kV line to line ±0.5 kV line to earth ±1 kV line to earth ±2 kV line to earth Mains power quality should be that of a typical commercial or hospital environment. <5% UT (>95% dip in UT) for 0.5 cycle 40% UT (60% dip in UT) for 5 cycles 70% UT (30% dip in UT) for 25 cycles <5% UT (>95% dip in UT) for 5 sec <5% UT (>95% dip in UT) for 0.5 cycle 40% UT (60% dip in UT) for 5 cycles 70% UT (30% dip in UT) for 25 cycles <5% UT (>95% dip in UT) for 5 sec Mains power quality should be that of a typical commercial or hospital environment. If the user of iOptima requires continued operation during power mains interruptions, it is recommended that iOptima be powered from an uninterruptible power supply or a battery. Voltage dips and outages IEC 61000-4-11 8 iOptima is suitable for use in all establishments including domestic establishments and those directly connected to the public low-voltage power supply network that supplies buildings used for domestic purposes. Electromagnetic environment - guidance Floors should be wood, concrete or ceramic tile. If floors are covered with synthetic material, the relative humidity should be at least 30%. Immunity test IEC 60601 test level Compliance level Electromagnetic environment - guidance Power frequency (50/60 Hz) magnetic field IEC 61000-4-8 3 A/m 3 A/m Power frequency magnetic fields should be at levels characteristic of a typical location in a typical commercial or hospital environment. Immunity test IEC 60601 test level Compliance level Conducted RF IEC 61000-4-6 3 Vrms 150 kHz to 80 MHz 3V Electromagnetic environment - guidance Portable and mobile RF communications equipment should be used no closer to any part of iOptima, including cables, than the recommended separation distance calculated from the equation applicable to the frequency of the transmitter. Recommended separation distance ENG Note : UT is the a.c. mains voltage prior to application of the test level. Essential performance: The essential performance is the maintaining of the visual lighting intensity of the LED and the maintaining of motor speed. Maximum allowed speed deviation is ± 5%. 80 MHz to 800 MHz 800 MHz to 2.5 GHz Radiated RF IEC 61000-4-3 3 V/m 80 MHz to 2,5 GHz 3 V/m where P is the maximum output power rating of the transmitter in watts (W) according to the transmitter manufacturer and d is the recommended separation distance in meters (m). Field strengths from fixed RF transmitters, as determined by an electromagnetic site surveya should be less than the compliance level in each frequency rangeb. Interference may occur in the vicinity of equipment marked with the following symbol: a. Field strengths from fixed transmitters, such as base stations for radio (cellular/cordless) telephones and land mobile radios, amateur radio, AM and FM radio broadcast and TV broadcast cannot be predicted theoretically with accuracy. To assess the electromagnetic environment due to fixed RF transmitters, an electromagnetic site survey should be considered. If the measured field strength in the location in which the iOptima is used exceeds the applicable RF compliance level above, the iOptima should be observed to verify normal operation. If abnormal performance is observed, additional measures may be necessary, such as reorienting or relocating the iOptima. b. Over the frequency range 150 kHz to 80 MHz, field strengths should be less than 3 V/m. Note 1 - 2 9 Recommended separation distances between portable and mobile RF communications equipment and the iOptima The iOptima is intended for use in an electromagnetic environment in which radiated RF disturbances are controlled. The customer or the user of the iOptima can help prevent electromagnetic interference by maintaining a minimum distance between portable and mobile RF communications equipment (transmitters) and the iOptima as recommended below, according to the maximum output power of the communications equipment. Separation distance according to frequency of transmitter [m] Rated maximum output power of transmitter [W] 150 kHz to 80 MHz 80 MHz to 800 MHz 800 MHz to 2.5 GHz 0.01 0.12 0.12 0.23 0.1 0.38 0.38 0.73 1 1.2 1.2 2.3 10 3.8 3.8 7.3 100 12 12 23 For transmitters rated at a maximum output power not listed above, the recommended separation distance d in meters (m) can be estimated using the equation applicable to the frequency of the transmitter, where P is the maximum output power rating of the transmitter in watts (W) according to the transmitter manufacturer. Note 1 - 2 10 1 At 80 MHz and 800 MHz, the higher frequency range applies. 2 These guidelines may not apply in all situations. Electromagnetic propagation is affected by absorption and reflection from structures, objects and people. ENG NOTES 11 1 FIG. 1 2 FIG. 2 1 2 3 FIG. 3 1 2 FIG. 4 5 Installation 5.1 Install the iOptima app A. Open the "App Store", tap the corresponding icon on the iPod. B. Tap Search to find the iOptima application. C. Install the iOptima application designed by Bien-Air Dental. The power plug is the device used for disconnection in case of problems, it must be easily accessible at all times. Note 1 FIG. 3 C. Connect the power supply cable (1) to the input connector (2) and turn right to lock. 5.2 Install the iOptima system CAUTION CAUTION Ensure that the power switch (3) is off «O». Before installing, please read carefully this product instruction. CAUTION Note 2 FIG. 1 A. Place the iOptima on a flat surface capable of bearing its weight. CAUTION It may be positioned on a table, on a trolley or any another surface but in no circumstances on the floor. FIG. 2 B. Connect the power cord (2) to the power supply (1) and plug to the mains. Note 3 12 CAUTION Before connecting the MX2 cable ensure that all o-rings are correctly fitted and connectors are clean of dust. FIG. 4 D. Connect the MX2 cable plug (2) to the output connector (1): • First sleeve up and carefully and firmly insert the cable plug, by guiding the connector and plug with the index pin on the connector; • Sleeve down and tighten (CW). FIG. 5 E. Connect the MX2 cable (2) to the MX2 micromotor (1), by guiding the connector and plug with the index pin on the connector and tighten (CW). 1 2 2 1 4 FIG. 5 FIG. 6 FIG. 7 ENG 1 3 2 F. Connect your handpiece to the MX2 micromotor (1). Refer to your handpiece instruction for details. CAUTION NOTES Never connect a handpiece on a running micromotor. FIG. 6 G. Connect the 4-way connector (1), air and water inlet from the unit to the iOptima socket (2): • First sleeve up and carefully and firmly insert the cable plug, by guiding the connector and plug with the index pin on the connector; • Sleeve down and tighten (CW). FIG. 7 H. Connect the interface device «iPod» (2) to the iOptima carefully sliding it along the lightning adapter (3). I. Switch on the water and power supply of the dental unit (refer to your dental unit instructions). J. Switch on «I» the iOptima. 1 The iPod must be correctly connected to a Wi-Fi network before the App Store is opened; refer to Apple's user guide for appropriate use of the iPod. 2 In order to conform to the IEC 60601-1-2 standards, take into account the different routes of the wires through the system (bend, fold, section etc) (see chapter “4.1 iOptima system overview” on page 5 and only use the power supply provided with the iOptima. In order to maintain warranty, this unit must be installed with the greatest care. Follow all the necessary instructions. Protect the unit from direct sunlight and dust. Keep the original packaging for storage and shipment. 3 The equipment is powered by your mains power supply (100240 VAC). The led (4) turns green (power on). The iOptima is ready for use. See chapter “6 Interface overview” on page 14. 13 FIG. 1 (iPod Touch®) 6 Interface overview 6.1 iOptima application The iOptima application allows to select predefined endodontics’ system operations and restorative operations. The predefined sequences and restorative operation can be modified and additional endodontics sequences and restorative operations can be created or removed. It is not possible to remove/delete the predefined operations, but it is possible to restore the default values. 6.1.1 Compatibility The iOptima application is compatible with iPod Touch®. 6.1.2 Notation In order to simplify the notation, in this manual: • interface device «iPod Touch® is referred to as «iPod»; • iOptima application is referred to as «iOptima app»; • Restorative and Endodontics modes are referred to as «Resto» and «Endo». 14 6.2 Sound alerts Sound alert Description One long beep Entering in endodontics or restorative mode ENDO mode when selecting the first File Alternate short beeps Alternate medium beeps Alternate long beeps Warning notifications MX2 micromotor REVERSE running indicator ENDO mode when the MX2 micromotor is running in reverse System failure notification ENG 6.3 iPod and iOptima connection / disconnection conditions 6.3.1 Disconnection As long as the iPod is disconnected, the iOptima system is in standby mode (MX2 micromotor stopped). It is only possible to navigate, modify and create settings with the iOptima app. It is not possible to operate. 6.3.3 iOptima unit switched ON If the iOptima app is running and the iPod plugged to the iOptima (switch ON): • The iPod will charge up (even if the app is not running); • The sleep mode is deactivated; • The MX2 micromotor can be operated with the pedal (iOptima app in operative mode). CAUTION The iPod must never be disconnected from the iOptima dental unit during operation! If the iPod is disconnected during an operation, the MX2 micromotor stops within 1second. 6.3.2 Connection The MX2 micromotor can start only when the iPod is connected and the application is in operative mode. CAUTION If the footpedal is pressed before entering in operative mode, a warning message «Please release the pedal…» will be displayed. The MX2 micromotor will not start to run until the footpedal is released and pressed again. 15 2 1 FIG. 1 FIG. 2 FIG. 3 FIG. 4 FIG. 5 7 Getting started 7.1 Back up data 7.2.1 Display onscreen keyboard Use iTunes or iCloud to automatically back up your iOptima application user-defined settings. Refer to Apple's user guide for appropriate use of the iPod, iTunes or iCloud. FIG. 5 • Tap a text field to display the onscreen keyboard; • Type characters with the onscreen keyboard (tap delete all characters). 7.2 Use of the Touch screen 7.3 Launch iOptima app The iOptima application is operated with the iPod Touch® screen with a few simple gestures: FIG. 6 A. Make sure that the sound volume on your iPod is ON and set to an appropriate level according to the ambient noise of the room: • Volume down (1) and up (2). B. Close all other applications in order not to disrupt the operation: • Double-click the home button (6) to show the multitasking display and drag the app up to close. • Click the home button again to return to the main screen. C. Deactivate all alerts. Refer to Apple's user guide for appropriate use of the iPod. D. Ensure that the latest application updates have been installed (see chapter “7.6 iOptima App update” on page 18). E. Tap the app icon (5) to launch the iOptima application. FIG. 1 • Tap to click. FIG. 2 • Slide to scroll and adjust parameters. FIG. 3 • Swipe to restore or remove parameters. Note 1 FIG. 4 • Long tap to access the drag and drop function; Note 2 • Drag 16 and drop to sort files. Note 3 to 3 4 5 2 1 6 FIG. 6 2 FIG. 7 3 6 4 7 FIG. 8 FIG. 9 ENG 5 1 7.4 Welcome screen and disclaimer A. To ensure the appropriate working of the iOptima Dental unit, make sure to only use your iOptima application with the iOS version validated by Bien-Air Dental.7 FIG. 7 Refer to the current version of your device (1). See also chapter “10.3 iOS compatibility errors (disclaimer screen)” on page 35. For more information go to the App Store © under «what’s new» of the selected application. NOTES 1 The swipe gesture is only active in the delimited area (1). 2 Long tap is active only in ENDO mode Settings screen area zone (2). 3 it. If not using your iPod, press the Sleep/Wake button (3) to lock FIG. 7 - FIG. 8 B. Tap OK (2) to acknowledge disclaimer message and access the DISCLAIMER message second screen (3). C. Make sure to have set all steps of disclaimer (3) and tap OK (4), see chapter “7.3 Launch iOptima app” on page 16 for details. The Welcome screen is displayed. FIG. 9 D. Tap RO (6) to enter the restorative mode. See chapter “8.1 Enter Restorative mode” on page 20. E. Tap EN (5) to enter the endodontics mode. See chapter “9.1 Enter Endodontics mode” on page 26 for details. F. Tap i (7) to open the Information screen. See chapter “7.5 Information” on page 18 for details. 17 2 3 4 5 8 6 7 1 FIG. 10 FIG. 11 FIG. 12 7.5 Information 7.6 iOptima App update FIG. 10 When the application is launched, it will check whether a new version is available on the App Store. If a new update is available, a message box will be displayed on Disclaimer screen to notify the user should download the application. A. Tap (1) to access Bien-Air (catalogue, new products, etc.) and iOptima (User Manual and About) information screen. FIG. 11 The information screen allows to navigate to the following pages: • Latest news (2) (opens Bien-Air website latest news page); • User manual (3) (application detects the language of the iPod and downloads the User Manual in the same language); Note 4 • Catalogue (4) (opens online catalogue (pdf file)); • Web TV (5) (opens Bien-Air web TV); • About (6) (displays About screen (8) with iOptima system and Bien-Air factory information); • Contact us (opens email application with predefined email address [email protected]). Note 5 18 FIG. 13 Note 6 Three buttons are available according to new version update category in the message box displayed: • Download: user can automatically access App Store application page. • Remind Me Later: user can delay the update and continue to work with currently installed app version (the message appears once a day). • Ignore: User can ignore the update and continue to work with currently installed app version (the message reappears only if a new version is available). ENG NOTES 4 If the User Manual is not available in the correct language, the English manual is downloaded. 5 Latest News, Catalogue, Web TV and Contact us functions are available only if the iPod is connected to a Wi-Fi network. 6 This function is active only when the iPod is connected to a wireless network. 19 10 1 2 9 8 7 3 4 6 FIG. 1 5 FIG. 2 FIG. 3 FIG. 4 FIG. 5 8 Operation - Restorative mode 8.1 Enter Restorative mode 8.2.1 MX2 micromotor Speed & Torque FIG. 1 FIG. 3 Slide to adjust the maximum speed and torque values. Tap to enter the restorative mode. Predefined restorative operations are available by default, it is possible to modify and restore them. It is possible to create and delete User-defined operations. Note 1 - 2 8.2 Operative screen description FIG. 2 The operative screen displays the selected operation type and settings: (1) Settings (access to operation types and settings) (2) Selected operation type (3) MX2 micromotor rotation mode: FORWARD and REVERSE (4) Save (customize settings) (5) Footpedal mode: PROGRESSIVE or ON/OFF mode (6) Light intensity (7) Handpiece ratio (8) Maximum MX2 micromotor torque in % (9) Maximum MX2 micromotor speed in rpm (10) Back to the previous screen Note 3 See chapter “8.3 Standard Use - Operating mode (Start)” on page 22. 20 Or tap the icons to activate the wheel scroller. FIG. 4 Slide to precisely adjust the motor speed and torque values and tap Cancel or Done to validate. FIG. 5 When the power demand of the MX2 micromotor is excessive, the operative screen displays the overheating symbol . In this case the iOptima unit automatically lowers the torque in order to avoid overheating of the MX2 micromotor. To restore 100% torque, allow the motor to idle or stop for a few seconds. 8.2.2 Handpiece ratio FIG. 6 Tap and select the handpiece ratio. CAUTION Verify that the handpiece corresponds to your selection. Note 4 1 FIG. 6 FIG. 7 FIG. 8 FIG. 9 ENG 2 8.2.3 Light intensity FIG. 7 Slide or tap the appropriate dot to set up the light intensity of the MX2 micromotor. 11 levels of adjustment are possible: • light OFF, 10%, 20%, 30%, 40%, 50%, 60%, 70%, 80%, 90% and 100% of the max light intensity value. NOTES Note 5 - 6 2 In this chapter, the restorative mode listed above is referred to as RESTO in order to simplify the notation. 8.2.4 Footpedal mode FIG. 8 Tap and select the footpedal mode: • ON/OFF (1): The speed consign is equal to the maximum speed once the footpedal is pressed; whatever the pressure on it. • Progressive (2): The speed consign value is (linear) function to the pressure on it. 1 In restorative mode, the air spray is always switched ON by the help of the electro-valve integrated in the iOptima unit. 3 All parameters can be changed and saved directly in the operative screen. 4 The operative screen always displays the selected handpiece ratio. 5 The light intensity value is set for each operation. The default value of the light intensity is 100%. Note 7 6 The operative screen always displays the selected light intensity value. 8.2.5 MX2 micromotor rotation direction 7 The operative screen always displays the selected footpedal mode. FIG. 9 Tap and select the rotation mode of the MX2 micromotor: • Forward (clockwise) • Reverse (counterclockwise). 8 In reverse mode (CCW), the symbol flashes and there is a sound alert (alternate medium beeps). Note 8 - 9 9 The operative screen always displays the selected rotation direction. 21 1 2 3 FIG. 10 FIG. 11 FIG. 12 FIG. 14 8.3 Standard Use - Operating mode (Start) 8.4 Customize default operations FIG. 10 A. Tap RO to enter the RESTO mode, the operative screen opens. FIG. 14 A. From the operative screen, tap Settings to open the Operations screen. FIG. 11 B. Tap Settings to open the Operations screen. FIG. 12 C. Tap to select an operation type. The App navigates back to the operative screen. D. Operate with the pedal to switch the micromotor ON. CAUTION If the footpedal is pressed before entering in operative mode, a warning message «Please release the pedal…» will be displayed. The MX2 micromotor will not start to run until the footpedal is released and pressed again. Note 10 See chapter “8.4 Customize default operations” on page 22, for details. FIG. 13 Note 11 - 12 • Slide to adjust the MX2 micromotor speed and torque values of the selected operation. • Adjust the handpiece ratio, light intensity, footpedal mode or rotation direction of the selected operation. • Tap Save (3) to validate the new settings. Note 13 22 FIG. 13 FIG. 15 B. Tap to customize an operation type. The Operation screen opens. FIG. 16 C. Customize the operation settings. D. Tap Cancel (2) or Save (3) to validate custom settings and tap back (1). If saved, the symbol to (factory predefined settings) changes (custom settings). E. Select an operation. The app navigates back to operative screen. 8.4.1 Restore (default) and delete (userdefined) operations FIG. 17 Swipe left to restore or delete. Note 14 - 15 2 FIG. 15 3 FIG. 16 FIG. 17 ENG 1 FIG. 18 8.4.2 Default Operations FIG. 18 CAUTION NOTES The parameters contained in the dental procedures are given for information ONLY. Bien-Air Dental cannot be held liable for them. 10 To create new operations or to customize a predefined operation tap (1) or (2), FIG. 12. Note 16 11 When the MX2 micromotor is switched ON, the speed and torque values displayed in the operative screen FIG. 13, toggle from predefined values to real time values. Once the motor stops running, the speed and torque values displayed toggle back to maximum predefined values. 12 All parameters can be directly modified in the operative screen (only when the footpedal is released). 13 Modifications are discarded when leaving the operative screen without saving. 14 Predefined RESTO operations can not be deleted. But it is possible to restore the default values if modified. Only user-defined operations can be deleted. 15 Custom and user-defined operations are represented by Default operations are represented by . . 16 The predefined parameters may be subject to modification without notice. 23 1 2 3 4 FIG. 19 FIG. 20 FIG. 21 8.5 Create new operations (user-defined) FIG. 19 A. From the operative screen, tap Settings to open the Operations screen. FIG. 20 B. Tap to create a new operation type. The Operations screen opens. Note 17 FIG. 21 C. Tap in the Operation name text field (1) to display the onscreen keyboard. FIG. 22 D. Type the new Operation name (3) and tap Done (onscreen keyboard). E. Set handpiece ration and operation settings. F. Tap Cancel or Save (2) to validate user-defined operation and tap back, FIG. 21. If saved, the new operation is displayed in the Operations screen (4) with the symbol 20. G. Select an operation. (user-defined) beside it, FIG. The app navigates back to operative screen. 24 FIG. 22 ENG NOTES 17 Maximum storage of 10 user-defined operations, if exceeded the icon disappears. 25 13 1 12 11 10 2 9 2 8 7 3 4 6 FIG. 1 5 FIG. 2 FIG. 3 FIG. 4 FIG. 5 9 Operation - Endodontics Mode 9.1 Enter Endodontics mode FIG. 1 Tap to enter the endodontics mode. Predefined endodontics systems are available by default, it is possible to modify and restore them. It is possible to create and delete User-defined endodontics brands, systems and files. 26 (10) (11) (12) (13) Figure of the file File system name File brand Back to the previous screen Note 3 9.2.1 MX2 micromotor Speed & Torque Note 1 - 2 FIG. 3 Slide to adjust the maximum speed and torque values. 9.2 Operative screen description Or tap the icons FIG. 2 The operative screen displays the selected operation brand, system type and file settings: (1) Access to brands, systems and file settings (2) File name and color designation of file according to ISO 3630-1 standard (3) MX2 micromotor rotation mode: FORWARD, AUTOREVERSE, AUTO-FORWARD (4) Save (to customize settings) (5) Footpedal mode: PROGRESSIVE or ON/OFF mode (6) Light intensity (7) Handpiece ratio (8) Maximum MX2 micromotor torque in Ncm (9) Maximum MX2 micromotor speed in rpm FIG. 4 Slide to precisely adjust the motor speed and torque values and tap Cancel or Done to validate. to activate the wheel scroller. FIG. 5 When the power demand of the MX2 micromotor is excessive, the operative screen displays the overheating symbol . In this case the iOptima unit lowers the torque automatically in order to avoid overheating of the MX2 micromotor. To restore 100% torque, allow the motor to idle or stop for a few seconds. 1 FIG. 6 FIG. 7 ENG 2 FIG. 8 9.2.2 Handpiece ratio FIG. 6 Tap and select to modify the handpiece ratio. CAUTION Verify that the handpiece corresponds to your selection. Note 4 9.2.3 Light intensity FIG. 7 Slide or tap the appropriate dot to set up the light intensity of the MX2 micromotor. 11 levels of adjustment are possible: • light OFF, 10%, 20%, 30%, 40%, 50%, 60%, 70%, 80%, 90% and 100% of the max light intensity value. Note 5 - 6 9.2.4 Footpedal mode FIG. 8 Tap and select the footpedal mode: • ON/OFF (1): the speed consign is equal to the maximum speed once the footpedal is pressed; whatever the pressure on it. • Progressive (2): The speed consign value is (linear) function to the pressure on it. NOTES 1 In endodontics mode, the air spray is always switched OFF by the help of the electro-valve integrated in the iOptima unit. 2 In this chapter, the endodontics mode listed above is referred to as ENDO in order to simplify the notation. 3 All parameters can be changed and saved directly in the operative screen. 4 The operative screen always displays the selected handpiece ratio. 5 The light intensity value is set for each operation. The default value of the light intensity is 100%. 6 The operative screen always displays the selected light intensity value. 7 The operative screen always displays the selected footpedal mode. Note 7 27 1 1 2 2 3 4 1 FIG. 9 FIG. 10 FIG. 11 9.2.5 MX2 micromotor rotation direction FIG. 9 Tap to select the rotation mode of the MX2 micromotor: • Forward (clockwise) (1) • Auto-reverse (2): the direction of rotation reverses automatically once the maximum torque set is reached (clockwise to counterclockwise). • Auto-forward (3): the direction of rotation reverses automatically once the maximum torque set is reached (clockwise to counterclockwise). In Auto-forward mode (reverse), the motor stops and reverses automatically after the time set (4): 0.5 to 3.0 seconds counterclockwise to clockwise). Note 8 - 9 FIG. 12 FIG. 13 D. Tap to select a file system. The app navigates back to the operative screen, FIG. 14. E. Operate with the pedal to switch the micromotor ON. CAUTION If the footpedal is pressed before entering in operative mode, a warning message «Please release the pedal…» will be displayed. The MX2 micromotor will not start to run until the footpedal is released and pressed again. FIG. 14 F. Tap the file figure area to jump to the next file, parameters of the file system previously selected are automatically loaded (or directly tap the required file (3)). 9.3 Standard Use - Operating mode (Start) Note 11 - 12 FIG. 10 A. Tap EN to enter the ENDO mode, the operative screen opens. 9.4 FIG. 11 B. Tap Settings to open the Brands screen, FIG. 13 Customize settings 9.4.1 Customize default settings (operative screen) FIG. 15 FIG. 12 C. Tap to choose a brand, the Systems screen opens. Note 10 See chapter “9.4 Customize settings” on page 28, for details. Note 13 A. Slide to adjust the MX2 micromotor speed and torque values of the selected file. B. Adjust the handpiece ratio, light intensity, footpedal mode or rotation direction to customize settings for the selected file system. C. Tap Save to validate the new settings. Note 14 28 2 3 1 6 FIG. 14 FIG. 15 FIG. 16 FIG. 17 5 4 FIG. 18 ENG 3 9.4.2 Customize system settings FIG. 16 A. Tap Settings to open the Brands screen. NOTES FIG. 17 B. Tap a Brand to open the Systems screen. C. Tap to customize a file system, the Settings screen opens. 8 The operative screen always displays the selected rotation direction. FIG. 18 D. Customize the file system settings: • tap any file (4) to open the File screen and modify motor speed and torque values (tap (3) to go back); • tap the icons (5) to modify the handpiece ratio, etc...; • tap in the Add new file field (6) to create a new file, make a long tap to sort the files, or swipe left to remove existing files. See chapter “9.5 Add, sort or remove files” on page 30, for details. E. Tap Cancel (1) or Save (2) to validate custom settings. If saved, the symbol to (factory predefined settings) changes (custom settings). Note 15 See chapter “9.7 Create new Brands and Systems” on page 32, for details 9 In reverse mode (CCW), the symbol flashes and there is a sound alert (alternate medium beeps). 10 To create new brands and systems or customize settings tap (1) or (2), FIG. 13. 11 When the MX2 micromotor is switched ON, the speed and torque values displayed toggle from predefined values to real time values. Once the motor stops running, the speed and torque values displayed toggle back to maximum predefined values. 12 All parameters can be directly modified in the operative screen (see chapter “9.4.1 Customize default settings (operative screen)” on page 28). 13 All parameters can be directly modified in the operative screen (only when the footpedal is released) 14 Modifications are discarded when leaving the operative screen without saving. 15 From the Systems screen it is also possible to chose a different brand and create a new system or a new brand with the symbol. 29 1 2 4 3 6 5 1 7 FIG. 19 FIG. 20 FIG. 21 FIG. 22 FIG. 23 9.5 Add, sort or remove files 9.5.3 Remove files Note 16 FIG. 25 A. Swipe left to remove existing files and tap Save or Cancel. 9.5.1 Add new files FIG. 19 A. Tap in the Add new file field to open the File screen. FIG. 20 - FIG. 21 B. Tap in the File name field (3) to display the onscreen keyboard, type the new File name (5) and tap Done (onscreen keyboard). FIG. 22 C. Tap the file figure (4) to display the Color designation screen, select a color for the new file and tap back (6) (color designation of file is according to ISO 3630-1 standard). D. Adjust the MX2 micromotor speed and torque values (7), FIG. 20. See “9.2 Operative screen description” on page 26, for details. E. Tap back (2) and Save (1), FIG. 19. 9.5.2 Sort files FIG. 23 A. Do a long tap on a file to activate the drag and drop function and display the icons (1). to drag and drop the files. B. Tap the icon FIG. 24 C. Tap Done (2) to validate. 30 9.6 Restore (default) and delete (userdefined) systems FIG. 26 Swipe left to restore or delete. Note 17 - 18 9.6.1 Default Systems FIG. 27 Dentsply Maillefer FIG. 28 FKG swiss endo CAUTION The parameters contained in the dental procedures are given for information ONLY. Bien-Air Dental cannot be held liable for them. Note 19 FIG. 24 FIG. 25 FIG. 26 FIG. 27 FIG. 28 ENG 2 NOTES 16 New files can be added, sorted or removed in default and user-defined files. 17 Predefined ENDO systems can not be deleted. But it is possible to restore the default values if modified. Only user-defined systems can be deleted. 18 Custom and user-defined systems are represented with the symbol . Default manufacturer files are represented by the symbol . 19 The predefined parameters may be subject to modification without notice. 31 1 2 3 4 5 6 FIG. 29 FIG. 30 FIG. 31 9.7 Create new Brands and Systems FIG. 29 A. Tap to add a new brand or a new system, the Settings screen opens. Note 22 - 23 Restore default brands (factory settings) FIG. 30 B. Tap in the Brand text field (1) to display the onscreen keyboard. FIG. 32 A. Swipe left on a default brand. G. Tap Save (3). FIG. 33 9.7.1 Restore (custom) and delete (userdefined) brand Note 20 - 21 FIG. 31 C. Type the new Brand name (5) or select an existing brand from the drop-down list box and tap Done (onscreen keyboard). D. Tap in System field (2), type the System name and tap Done (onscreen keyboard). E. Tap Add new files (4), refer to chapter “9.5.3 Remove files” on page 30. F. Tap the icons (6) to set the iOptima unit parameters: • Handpiece ratio • Light intensity • Footpedal mode: PROGRESSIVE or ON/OFF mode • MX2 micromotor rotation mode: FORWARD, AUTO-REVERSE, AUTO-FORWARD See chapter “9.2 Operative screen description” on page 26, for details. 32 FIG. 32 A message box opens: Restore factory brand. B. Tap Cancel or Restore to acknowledge. Delete user-defined brands FIG. 33 A. Swipe left on a user-defined brand. A message box opens: Delete user brand. B. Tap Cancel or Delete to acknowledge. ENG NOTES 20 New systems and brands can also be created directly from the system screen. 21 Maximum storage of 10 user-defined brands and 10 systems per brand, if exceeded the icon disappears. 22 Restore ALL default system settings from the Brands screen. 23 It is only possible to delete user-defined brands 33 10 List of errors & Troubleshooting 10.1 Safety warning (operating) Warning Message (emits alternate long beeps) Cause of error Action Release the pedal The pedal is pressed when starting the device. Safety Release the footpedal and press again. The motor is blocked for more than 2 seconds. Safety Release the footpedal and press again. The motor control card limits the power supplied to the motor to prevent motor overheating. Safety Avoid extended use. Stop MX2 motor 10.2 Device operating error Error Message Cause of error Action Loss of motor phase fault. The motor is not connected correctly. Check motor connection. Contact Bien-Air Dental SA. Motor power fault. The motor cable may be defective. Check motor cable. Contact Bien-Air Dental SA. Overheating of motor control card (electrical control of motor). Wait until the system cools. Contact Bien-Air Dental SA. Communication fault with motor control card: [EC100] Motor control card power supply undervoltage: [EC101] Motor control card power supply overvoltage: [EC102] Other motor control card faults: [EC120] Contact Bien-Air Dental SA. 4. Loss of motor connection ERROR 4 The motor is not connected! Please check the connection. 5. Motor cable fault ERROR 5 Motor cable fault! Please change cable. 6. Motor control overheating ERROR 6 System overheating! Please wait for it to cool. 7. System electrical fault GEN ERROR [Error code] 34 System electrical fault! Please contact Bien-Air Dental SA. Color iOS version (identifier digit change) Text version Restriction (recommendations) Green • None. • Currently installed iOS is identical to iOS verified during app validation. Currently installed iOS x.y.z text section is displayed in green color. No restrictions Orange • Last digit is different: iOS x.y.Z. • Currently installed iOS was updated for a minor change compared to iOS verified during app validation. Currently installed iOS x.y.z text section is displayed in orange color. User must be aware that the configuration he is using is slightly different from the recommended configuration. • Configuration in use is slightly different from recommended configuration. • No restrictions Red • First and/or second digit are/is different: iOS X.y.z, or iOS X.Y.z. • Currently installed iOS was updated for major or at least significant changes compared to iOS verified during app validation Currently installed iOS x.y.z text section is displayed in red color. ENG 10.3 iOS compatibility errors (disclaimer screen) • Configuration in use is significantly different from recommended configuration. CAUTION The current configuration should NOT be used! 35 1 2 FIG. 1 11 Maintenance CAUTION Only use original Bien-Air Dental maintenance products and parts or those recommended by Bien-Air Dental. Using other products or parts may cause operational failure and/or void the guarantee. 11.1 Servicing Never disassemble the device. For any modification and repair, we recommend to contact your regular supplier or Bien-Air Dental SA directly at the address indicated on the back cover. Note 1 11.2 Information The technical specifications, illustrations and dimensions contained in these instructions are given only as a guide. They may not be the subject of any claim. The manufacturer reserves the right to make technical improvements to its equipment, without amending these instructions. For all additional information, please contact Bien-Air Dental SA at the address indicated on the back cover. 36 11.3 Cleaning-disinfection • Disinfect the surfaces of the iOptima unit and footpedal by gently rubbing with a clean cloth soaked in a suitable product (i.e. Bien-Air Dental Spraynet or isopropyl alcohol for about 15 sec.) • Do not immerse in disinfectant solution. • Not designed for an ultrasonic bath. 11.4 Important For maintenance: ....................................See instructions Micromotor MX2 LED ..............................See doc. REF 2100199 Hose MX2 Grey..........................................See doc. REF 2100223 ENG 11.5 Replace 4VL seal FIG. 1 CAUTION Immediately replace any damaged or leaking O-rings and seals. Never use sharp tools! A. Switch off the water and the dental unit power supply. B. Switch OFF the iOptima unit «O». C. Unscrew and unplug the 4VL hose (1). D. Remove the damaged 4VL seal (2). E. Replace with a new 4VL seal (REF 1302403-010). NOTES 1 Bien-Air Dental SA asks the user to have its dynamic instruments checked or inspected at least once a year. Refit hose, switch ON units and water. See chapter “5.2 Install the iOptima system” on page 12 for details. 37 12 General information and guarantee 12.1 General information 12.3 Terms of guarantee The device must be used by qualified professionals in compliance with the current legal provisions concerning occupational safety, health and accident prevention measures, and these instructions for use. In accordance with such requirements, the operators: • must only use devices that are in perfect working order; in the event of irregular functioning, excessive vibration, abnormal heating or other signs that may indicate malfunction of the device, the work must be stopped immediately; in this case, contact a repair center that is approved by Bien-Air Dental SA; • must ensure that the device is used only for the purpose for which it is intended, must protect themselves, their patients and third parties from any danger, and must avoid contamination through the use of the product. Bien-Air Dental SA grants the user a guarantee covering all functional defects, material or production faults. 12.2 Notation • A, B, C, etc. Text preceded by a letter indicates a procedure to be carried out step-by-step. • Indicates a procedure result. • (1), (2), (3), etc. Text preceded by a number indicates text used in conjunction with an illustration. • OK, Save, Settings, etc. Text in bold italic font style indicates, on-screen elements such as buttons, menus, menu items, screen areas, values, fields when they are named and screen names. Tap Settings to open the Settings screen, change parameters and tap Done. The device is covered by this guarantee for: • 12 months for the hose • 12 months for the power supply • 24 months for the iOptima unit • 36 months for series MX2 LED electric micromotors from the date of invoicing. In case of justified claim, Bien-Air Dental SA or its authorized representative will fulfill the company’s obligations under this guarantee by repairing or replacing the product free of charge. Any other claims, of whatever nature, in particular in the form of a claim for damages and interest, are excluded. Bien-Air Dental SA shall not be held responsible for damage or injury and the consequences thereof, resulting from: • excessive wear and tear • improper use • non-observance of the instructions for installation, operation and maintenance • unusual chemical, electrical or electrolytic influences • poor connections, whether of the air, water or electricity supply. The guarantee does not cover flexible “fiber optic” type light conductors, or any parts made of synthetic materials. The guarantee shall become null and void if the damage and its consequences are due to improper manipulation of the product, or modifications to the product carried out by persons not authorized by Bien-Air Dental SA. Claims under the terms of the guarantee will be considered only on presentation, together with the product, of the invoice or the consignment note, on which the date of purchase, the product reference and the serial no. should be clearly indicated. 38 NOTES ................................................................................................................ ................................................................................................................ ................................................................................................................ ................................................................................................................ ................................................................................................................ ................................................................................................................ ................................................................................................................ ................................................................................................................ ................................................................................................................ ................................................................................................................ ................................................................................................................ ................................................................................................................ ................................................................................................................ ................................................................................................................ ................................................................................................................ ................................................................................................................ ................................................................................................................ ................................................................................................................ ................................................................................................................ ................................................................................................................ ................................................................................................................ ................................................................................................................ ................................................................................................................ ................................................................................................................ ................................................................................................................ ................................................................................................................ ................................................................................................................ ................................................................................................................ ................................................................................................................ ................................................................................................................ ................................................................................................................ ................................................................................................................ ................................................................................................................ ................................................................................................................ ................................................................................................................ ................................................................................................................ ................................................................................................................ ................................................................................................................ ................................................................................................................ ................................................................................................................ ................................................................................................................ ................................................................................................................ ................................................................................................................ ................................................................................................................ ................................................................................................................ ................................................................................................................ ................................................................................................................ ................................................................................................................ ................................................................................................................ ................................................................................................................ ................................................................................................................ ................................................................................................................ ................................................................................................................ ................................................................................................................ ................................................................................................................ ................................................................................................................ ................................................................................................................ ................................................................................................................ ................................................................................................................ ................................................................................................................ ................................................................................................................ ................................................................................................................ ................................................................................................................ ................................................................................................................ ................................................................................................................ ................................................................................................................ ................................................................................................................ ................................................................................................................ ................................................................................................................ ................................................................................................................ ................................................................................................................ ................................................................................................................ ................................................................................................................ ................................................................................................................ ................................................................................................................ ................................................................................................................ ................................................................................................................ ................................................................................................................ ................................................................................................................ ................................................................................................................ ................................................................................................................ ................................................................................................................ ................................................................................................................ ................................................................................................................ ENG NOTES 39 40 NOTES NOTES ................................................................................................................ ................................................................................................................ ................................................................................................................ ................................................................................................................ ................................................................................................................ ................................................................................................................ ................................................................................................................ ................................................................................................................ ................................................................................................................ ................................................................................................................ ................................................................................................................ ................................................................................................................ ................................................................................................................ ................................................................................................................ ................................................................................................................ ................................................................................................................ ................................................................................................................ ................................................................................................................ ................................................................................................................ ................................................................................................................ ................................................................................................................ ................................................................................................................ ................................................................................................................ ................................................................................................................ ................................................................................................................ ................................................................................................................ ................................................................................................................ ................................................................................................................ ................................................................................................................ ................................................................................................................ ................................................................................................................ ................................................................................................................ ................................................................................................................ ................................................................................................................ ................................................................................................................ ................................................................................................................ ................................................................................................................ ................................................................................................................ ................................................................................................................ ................................................................................................................ ................................................................................................................ ................................................................................................................ ................................................................................................................ ................................................................................................................ ................................................................................................................ ................................................................................................................ ................................................................................................................ ................................................................................................................ ................................................................................................................ ................................................................................................................ ................................................................................................................ ................................................................................................................ ................................................................................................................ ................................................................................................................ ................................................................................................................ ................................................................................................................ ................................................................................................................ ................................................................................................................ ................................................................................................................ ................................................................................................................ ................................................................................................................ ................................................................................................................ ................................................................................................................ ................................................................................................................ ................................................................................................................ ................................................................................................................ ................................................................................................................ ................................................................................................................ ................................................................................................................ ................................................................................................................ ................................................................................................................ ................................................................................................................ ................................................................................................................ ................................................................................................................ ................................................................................................................ ................................................................................................................ ................................................................................................................ ................................................................................................................ ................................................................................................................ ................................................................................................................ ................................................................................................................ ................................................................................................................ ................................................................................................................ ................................................................................................................ www.bienair.com Bien-Air Dental SA Länggasse 60 Case postale 2500 Bienne 6, Switzerland Tel. +41 (0)32 344 64 64 Fax +41 (0)32 344 64 91 [email protected] Bien-Air Deutschland GmbH Jechtinger Strasse 11 79111 Freiburg, Deutschland Tel. +49 (0)761 45 57 40 Fax +49 (0)761 47 47 28 [email protected] Bien-Air España, SA Entença, 169 Bajos 08029 Barcelona, España Tel. +34 934 25 30 40 Fax +34 934 23 98 60 [email protected] Bien-Air USA, Inc. Medical Technologies 5 Corporate Park Suite 160 Irvine, CA 92606 USA Phone 1-800-433-BIEN Phone 949-477-6050 Fax 949-477-6051 [email protected] Bien-Air France Sàrl 55-57, avenue Jean Lolive 93508 Pantin Cedex, France Tel. +33 (0)1 41 83 60 70 Fax +33 (0)1 48 96 07 40 [email protected] Bien-Air Italia s.r.l. Via Vaina 3 20122 Milano, Italia Tel. +39 (02) 58 32 12 51/52/54 Fax +39 (02) 58 32 12 53 [email protected] REF 2100279-0000 © Bien-Air Dental Bien-Air UK Limited 63, The Street Capel, Surrey RH5 5JZ, England Tel. +44 (0)1306 711 303 +44 (0)1306 712 505 Fax +44 (0)1306 711 444 [email protected] Bien-Air Asia Ltd. Nishi-Ikebukuro Daiichi-Seimei Bldg. 10F 2-40-12 Ikebukuro, Toshimaku Tokyo, 171-0014, Japan Beijing Bien-Air Medical Instrument Technology Service Co. Ltd. Room 907, The Exchange Beijing, No 118 Jian Guo Lu Yi, Chao Yang District, Beijing 100022, China 907 Tel. +86 10 6567 0651 Fax +86 10 6567 8047 [email protected] Tel. +81 (3) 5954-7661 Fax +81 (3) 5954-7660 [email protected] www.bienair.com