1
Telemetry Solutions
Kerweb
Web Interface for
Kerwin Telemetry supervisor
User Manual
Kerweb
Contents
KERWEB.................................................................................................................................................................. 1
1
GENERAL DESCRIPTION .......................................................................................................................... 4
1.1 DESCRIPTION ...............................................................................................................................................4
1.2 W EB BROWSERS ...........................................................................................................................................4
2
INSTALLATION ........................................................................................................................................... 5
2.1 INSTALLATION PACK ......................................................................................................................................5
2.2 PROCEDURE .................................................................................................................................................5
3
LOGIN .......................................................................................................................................................... 6
3.1 CONNECTION ................................................................................................................................................6
3.2 HOME PAGE ..................................................................................................................................................6
4
MAIN MENU ................................................................................................................................................. 7
4.1 GENERAL MODE / SITE MODE .........................................................................................................................7
4.2 HOME, SELECTION OF A SITE .........................................................................................................................7
4.3 SERVER TIME, PREFERENCES AND LOGOUT ....................................................................................................7
5
GENERAL PRINCIPLES OF BROWSING .................................................................................................. 9
5.1
5.1
5.2
5.3
5.4
5.5
5.6
6
DYNAMIC LISTS .............................................................................................................................................9
TRANSLATABLE OBJECT...............................................................................................................................10
TITLE PAGES...............................................................................................................................................11
NAVIGATION TREES .....................................................................................................................................11
LIST PAGES ................................................................................................................................................11
DETAIL PAGES ............................................................................................................................................13
EDIT PAGES ................................................................................................................................................13
THE MONITORING MENU ........................................................................................................................14
6.1
6.2
6.3
6.4
6.5
6.6
6.7
7
THE SYNTHESIS PAGE (AVAILABLE IN GENERAL MODE) ...................................................................................14
SITE PAGES ................................................................................................................................................14
EVENT PAGES. ............................................................................................................................................18
THE TEXT PAGES.........................................................................................................................................22
SYNOPTIC PAGES ........................................................................................................................................24
CHART PAGES ............................................................................................................................................26
THE DASHBOARD PAGE (AVAILABLE IN GENERAL MODE) .................................................................................29
THE MANAGEMENT MENU (GENERAL MODE).....................................................................................30
7.1 SITE MANAGEMENT PAGES ..........................................................................................................................30
7.2 THE SCHEDULER PAGES ..............................................................................................................................30
7.3 "ASTREINTE" (ON CALL) PAGES ....................................................................................................................34
7.4 UNITS PAGE ................................................................................................................................................42
7.5 LOGICAL LABELS PAGE ................................................................................................................................42
7.6 ANALOGUE LABEL PAGES.............................................................................................................................43
7.7 USER MANAGEMENT PAGES .........................................................................................................................45
7.8 USER RIGHTS PAGE.....................................................................................................................................46
7.9 COMMAND MANAGEMENT PAGES..................................................................................................................46
7.10 REMOTE CONFIGURATION RIGHTS PAGES ................................................................................................47
7.11 SECTOR MANAGEMENT PAGES ................................................................................................................47
7.12 W ORKGROUP MANAGEMENT PAGES ........................................................................................................48
7.13 ALARM CLASS MANAGEMENT PAGES ........................................................................................................49
7.14 PATH CLASS MANAGEMENT PAGES ..........................................................................................................49
7.15 PATH NATURE MANAGEMENT PAGES ........................................................................................................50
7.16 FILE NATURE MANAGEMENT PAGES .........................................................................................................50
7.17 COLUMN SELECTION MANAGEMENT PAGES ..............................................................................................51
7.18 EVENT FILTER MANAGEMENT PAGES ........................................................................................................53
7.19 BRIO REMOTE CONFIGURATION HISTORY PAGE.........................................................................................54
THE MANAGEMENT MENU (SITE MODE) .......................................................................................................55
7.20
7.21
2
SITE CONFIGURATION PAGES ..................................................................................................................55
SITE VARIABLES PAGES ..........................................................................................................................58
NT00360-EN-01
7.22 SITE FILE PAGES ....................................................................................................................................61
7.1 SITE EVENTS DEFINITION PAGES (XFLOW SITES) ...........................................................................................64
7.2 PERIPHERAL PAGES (XFLOW AND TELEFLO SITES) ........................................................................................64
7.3 CONSISTENCY CHECKS PAGE (DEPENDING OF CONSISTENCY CHECKS MODULE) .............................................65
7.4 SITE REMOTE CONFIGURATION PAGES (BRIO/W310 SITES) ..........................................................................66
8
THE PARAMETERS SETUP MENU (GENERAL MODE) ........................................................................69
8.1 OPTIONS PAGE ...........................................................................................................................................69
8.2 LINK CONFIGURATION PAGES .......................................................................................................................69
NT00360-EN-01
3
Kerweb
General description
Description
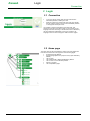
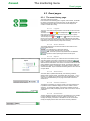
1 General description
1.1 Description
This documentation aims to provide the necessary information for basic
use of the Kerwin Web interface. It describes the steps for browsing and
simple parameters setup.
Note: This manual describes the web module of Kerwin supervision
software version 6. Some differences may occur if you are using a former
version of Kerwin software.
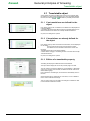
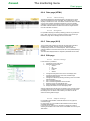
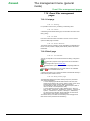
1.2 Web browsers
7.0
The operation of the Web interface is optimal
with the following Web browsers:
Internet Explorer version 7.
Internet Explorer version 8.
JavaScript must be activated. No plug-in
(flash memory, Java, etc.) is necessary.
8.0
For PDAs…
There is a degraded interface optimized for slow networks not using
scripts or images but offering only browsing. The login screen
corresponds to the /lite.htm page of the server root.
4
NT00360-EN-01
Kerweb
Installation
Installation pack
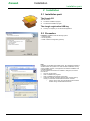
2 Installation
2.1 Installation pack
The Kerwin CD
This CD contains:
The Kerwin installation program.
The Kerweb2 installation program.
The dongle registration USB key
This key is compulsory to run the Kerweb application.
2.2 Procedure
Installation: Installation with the following options:
1. Original Profile.
2. IIS Configuration.
3. COM+ Interface Configuration (optional).
Note:
Preferably use the Microsoft IIS Web server. IIS is installed by default on
Windows Server Pro systems. For other Windows installations, IIS may
not be installed. However, it is supplied on the Windows installation CD
provided with the PC.
To check whether the IIS server is installed or, failing that, to install it
from the CD:
Go to the Control Panel
Click on Add/Remove programs
Click on Add/Remove Windows components
Check that "Internet Information Services (IIS)" is ticked, then by
clicking on Detail that "World Wide Web Service" is ticked
o
If this is not the case, insert the Windows CD and install
IIS after ticking "World Wide Web Service"
NT00360-EN-01
5
Kerweb
Login
Connection
3 Login
3.1 Connection
To log in to the site, simply enter the user name and the
associated password, matching the case.
When the check box is active at the time of the login request,
the user name is stored in memory and automatically entered
on this page at subsequent visits.
It is possible to choose a language for the home page. This
preference is stored on the user's system. It has no impact on the
language used when browsing on the site itself, which is defined by
the user preferences (dependent on the Login). However, the
language chosen on the home page is used for the error pages.
3.2 Home page
The home page can be personalized by means of the user preferences.
Each user can choose as home page one of the following pages:
Synthesis page (by default).
Synoptics page (the list of synoptics or the synoptic defined by
default).
List of curves.
List of dashboards or dashboard defined by default.
List of curves or curve defined by default.
Alarms in progress.
List of exploitation pages.
6
NT00360-EN-01
Kerweb
Main menu
General mode / Site mode
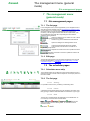
4 Main menu
1
4.1 General mode / Site mode
On opening the site, the main band displays as title the name of your
Kerwin application and, below, the menu corresponding to general mode.
These icons, preceding the title, indicate that you are in
general mode and that a filter by workgroup or by sector may be applied.
2
When a site is selected, the band displays as title the name of the site to
which you obtain access and the menu corresponding to "site" mode. 2
4.2 Home, Selection of a site
The toolbar
3 , available permanently, allows you to go back to the
home page (Home button) by automatically selecting general mode. A
drop-down list allows you to select a site and hence switch to "site" mode.
This list has options helping you choose the wanted site. Its operation is
described in the "dynamic list" section.
3
4
4.3 Server time, preferences and
logout
The toolbar
4 , available permanently, offers the
following functionalities:
4.3.1 Server time
Display of the server time corrected by the user's time zone. For optimal
operation, this time should correspond to the time of the client system.
4.3.2 Preferences
The preferences page allows users to set the parameters for display of
their profile. The administrator can also set the preferences by default, or,
if he belongs to a workgroup or uses the workgroup filter, the preferences
of those groups. When users have not set their preferences, they benefit
from the preferences of their group, or, if the latter has not been set
either, the default preferences.
.
4.3.2.1
Change of password
The preferences page allows users to change their password; it is not
possible for an administrator to change the password of another user in
this page (see user management). To make this change you must
activate the
button. This gives access to a
dialogue box allowing you to enter the password. It is compulsory to
observe the following requirements:
The password to be replaced must be specified without error.
The new password must not exceed 10 characters.
The new password cannot be blank.
To prevent any data entry error, the new password must be confirmed
identically.
NT00360-EN-01
7
1
Kerweb
Main menu
Server time, preferences and logout
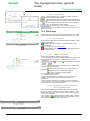
4.3.2.2
Management of user preferences
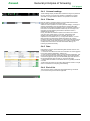
From the preferences page, the user can change the fields that will
validate the display of his profile.
For a super-user, the preferences are displayed in two columns. The lefthand column can be used to set the default preferences, which will be
applied to all the users not yet having preferences. If the super-user filters
by a workgroup or is himself restricted to a workgroup, the left-hand
column can be used to set the preferences of the workgroup, which will
be applied to all the users forming part of the workgroup and not yet
having preferences. Lastly, the super-user can select any user forming
part of his workgroup or the workgroup filtered to configure in the lefthand column the preferences of the selected user's workgroup, and in the
right-hand column the preferences of the selected user.
1
2
3
8
1 A first "regional settings" section allows you to define your date format
(French day/month, or US English month/day), your time zone, and lastly
the language in which your pages will be displayed. The user's time zone
has an impact on the alarm reception display and the server time display.
The site display option allows you either to select “User timezone”
(default value) to display the site date in the same time zone as all other
dates of the application using the configured time zone, or to select “Site
timezone” to display the data with the time zone of the corresponding
site.
2 A second section allows the user to define his preferred curve,
synoptic, dashboard, columns selection or event filter. When a curve,
synoptic or dashboard is to appear on the site without specifying its ID, it
is this preferred element that is displayed. This is the case, for example,
when one of these elements is chosen for the home page. The events
are displayed with this event filter and columns selection. These
preferences can be defined differently for the standard profile and the
profile “lite”).
3
The third section allows you to define your display preferences for the
standard display and for display on a small screen.
Home page: Allows you to define your home page. For the curve,
synoptic page and dashboard options, the preferred elements will be
displayed on the home page.
Menu: Allows the profile to be displayed with the menu or without a
menu. The absence of a menu is appropriate for light profiles,
having access only to the home page and its derivatives.
Generic lists: Here you can specify the number of lines displayed
for each screen of the list pages. It is recommended to adapt this
number to the display capacity of the entire list depending on the
size of your screen.
Number of records for files: Ditto, but concerns only the number of
records in the event of display of a file's data in HTML format (i.e. in
the Web page).
Number of records for files (xls format): Ditto, but concerns only
the number of records in the event of display of a file's data in XLS
format.
Events list: Ditto, but concerns only the number of events displayed
in the event history and events in progress pages.
Default depth of curves: Defines the predefined value of the depth
of the chart when adding a curve. This value is also replicated for
the depth of a chart upon the display of an automatic curve.
Display of serial number: Allows the serial number of the RTUs to
be displayed in the pages of list of sites or site management with its
filtering capacity.
Display of alarm level: Allows display of the alarm level in its
numeric form (level 0-255) or in conventional form (critical, minor or
indication).
Display transmitted name: Allows the transmitted name of the
variables in the page of list of variables.
NT00360-EN-01
Kerweb
General principles of browsing
Dynamic lists
4.3.3 Logout
The use of this functionality should be preferred for closing the browser,
because it closes the session and prevents another user from obtaining
access to that session without having the login codes.
5 General principles of browsing
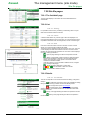
5.1 Dynamic lists
The dynamic lists replace, where applicable, the conventional lists of your
browser. Options allow you to find the element sought in the list more
easily.
5.1.1 The data entry field
The data entry field
allows you to enter the first
characters of the name sought. If one or more names correspond to this
entry, a list opens, proposing to you the corresponding options. You can
then select an element using the mouse pointer or by browsing with the
and keys. The Enter key confirms the highlighted option, while the
"Escape" key closes the options list again. If the list corresponding to the
text entered is larger than the space reserved for it, navigation buttons
allowing you to browse through it appear
. You can also
use the "Next Page" and "Previous Page" keys for this purpose. Finally,
this data entry field accepts Windows wild cards. You can therefore use
the "*" character to replace part of the name, or the "?" character to
replace a letter. The "foo" search will give all elements whose name
begins with "foo", while the "*foo" search will give all elements whose
name contains “foo".
5.1.2 Opening the list
The
button allows you to open the list: if a name is selected, it
remains present in the text field but has no influence on the list. The list is
therefore opened without filtering (equivalent to filter "*"). If the total
number of elements is large, a browse through the list will also be
proposed. The entry of characters in the text field will activate filtering
again.
5.1.3 Deletion of an element
When the field does not impose the choice of an element, the
button
is present in the component. If an element is selected, pressing this
button causes deletion of the selection. The form can therefore be sent
with a null value for the corresponding choice.
5.1.4 Access to the detailed list
When the
button is present, this indicates that a page containing a
corresponding list and containing more filtering details or possibilities is
available. Pressing this button opens this list page; the selection of a
name in this list therefore causes the same action as the selection of an
element in the initial list.
5.1.5 Width of lists
When the names of the list elements are clipped by an excessively small
list size, It is thus possible to see the full string by passing over or
selecting the element.
NT00360-EN-01
9
Kerweb
General principles of browsing
Translatable object
5.1 Translatable object
Some objects are able to be edited with more than one language. With
this feature, the object will be displayed in the user's language. Besides
the field, the buttons
or
indicates the possibility of translation.
5.1.1 If no translations are defined for the
object
If the object property has no translation, the default text is displayed and
is directly editable.
A translation language button allows opening a translation dialog-box to
define translations. This button has a tooltip “Handle translations”.
On press, the dialog-box is opened.
5.1.2 If translations are already defined for
the object
-
If the object property name has at least one translation, the text displayed
for the field is:
The text matching the current user language if it exists.
The default text if no translation exists for the current user
language.
The displayed text will not be directly editable.
A button allows changing or translating the text. This button has a tooltip
“Handle translations”.
On press, the dialog-box is opened
5.1.3 Edition of a translatable property
The dialog-box displays the default text and all translations.
The input used to display the text on the previous page is focused.
The user is able to change the default text, set translations or deactivate
some. If the checkbox is unchecked, the default text will be used for the
deactivated language.
If the checkbox is checked again, the old value is automatically reset on
the field.
When the dialog box is closed with the “Ok” button, an icon is added to
field in order to indicate that change.
This icon has a tooltip “You've made some changes to translations. Edit
to see translations that will be saved.”
10
NT00360-EN-01
Kerweb
General principles of browsing
Title pages
5.2 Title pages
A selection in one of the menus of the general mode or the site mode
causes opening of a title page which presents the architecture of the
module to be explored. This menu contains the entire module, whose
functionalities are then accessible by a single click. Its content can
very depending on user rights, the elements already parameterized or
not, or for the site mode depending on the type of RTU selected.
E.g. the "astreinte" (on call) label does not exist if the user does not have
a reading right to "astreinte".
The "weekly program" and "yearly program" labels do not exist if no daily
program has been parameterized for the selected workgroup.
The "Remote configuration" and "Remote configuration history" labels do
not exist if the selected unit is not a BRIO type unit.
5.3 Navigation trees
A navigation tree is available throughout your session. It proposes a
direct access to the functionalities corresponding to the explored menu.
Its architecture and the links it consists of therefore correspond to those
of the tree contained in the title page of this menu. The page currently
being browsed corresponds to the element in bold in the menu.
and
buttons allow its exploration, while the
buttons indicate a direct access
to the specified module. Just like the tree of title pages, its content can
vary depending on user rights, the elements already parameterized or
not, or in the case of the site mode, depending on the type of RTU
selected.
5.4 List pages
The list pages consist of a table and where applicable action buttons,
filters and routing buttons. The various elements are arranged in rows.
For each element, there is generally a hypertext link which can be used
to access its detail page.
5.4.1 Action buttons
These buttons allow an action to be performed on the elements selected
in the list. Each list element has a check box which confirms it as the
target of the action. These buttons can be deactivated depending on the
context:
No element selected; for an action which requires at least one target
element.
More than one element selected; for an action which does not
handle several elements.
Wrong type; for an action which cannot be performed with a
selection containing at least one element of an incompatible type.
Example: the Add button is generally always active, the Change button is
active for ONE element selected, the Delete button is active for at least
one element selected, and the Read variable button is deactivated if at
least one BRIO type unit is selected.
5.4.2 Title bar
The title bar indicates the total number of elements. If this number is
greater than the displayable number of list elements, then a button
appears allowing the remainder of the list to be displayed on another
page.
Alongside this button is shown the total number of elements and the
numbers of the first and last ones displayed.
This number can be viewed and parameterized in the user preferences.
This title bar can also contain information on list filtering.
NT00360-EN-01
11
Kerweb
General principles of browsing
List pages
5.4.3 Column headings
These headings display the field name and allow sorting to be performed
for some of them. The current sort operation is indicated by a square
white label. The green buttons allow this sort operation to be altered.
5.4.4 Filter bar
This bar makes it possible to display only the list elements that match
certain criteria. These filters are of three types.
Selections make it possible to choose a particular category. A change of
selection automatically opens the page with the corresponding data.
Date fields are sometimes available to search for elements included in a
time interval. A calendar is available as data entry aid. A change in the
field does not entail reloading of the data: a submission button is
available for this purpose.
Finally, text fields are available to perform a free search on a criterion
such as a name, serial number or comment. These fields accept
Windows wild cards (replacement of a character string with "*",
replacement of a character with "?"). For ergonomic reasons, on some
filters the search is performed by default according to the "criterion
included in the name" rule and there is no need to use wild cards (case of
the serial number). When data are filtered, the number of results shown
corresponds to the number of records returned after filtering. List
browsing is performed normally.
5.4.5 Data
Data appear in the form of lines describing each element of the list. The
columns can contain:
- A check box which allows the event to be included in an action triggered
by the action buttons (deactivation, reading, etc.).
- A main link which generally routes you to the element's detail page. This
link can also lead to the most appropriate page for the context (the links
of the site list page will route you to the site detail page while the links of
the site management page will route you to the site edit page).
- Characteristic information on the element which may possibly be filtered
or sorted.
- Buttons may be present on some lists, allowing direct access to a single
action on the element not requiring parameterizing.
5.4.6 End of list
This shows the number of elements returned after filtering, and allows
you to browse through the list where applicable.
12
NT00360-EN-01
Kerweb
General principles of browsing
Detail pages
5.5 Detail pages
The detail pages can display information relating to a particular element.
They also allow editing actions and triggering of the functionalities of
these elements.
5.5.1 List bar
When it is available, this bar contains a dynamic list which allows the
page to be reloaded with a new reference element without going via the
list page.
5.5.2 Title bar
The title bar contains the name of the element displayed and the edit
buttons for that element. The Add and Change buttons then open the edit
page. When the element contains other elements or information that are
too numerous to be displayed on the detail page, corresponding buttons
may also be present on this bar. They then route you to other list or detail
pages concerning these sub-elements.
Example: the title bar of the detail of a site contains buttons making
it possible to access the list pages of the site links and paths, site
events and site files.
5.5.3 Body of the page
This body, which depends on the type of object displayed, makes it
possible to display various information, perform settings and run
functionalities attached to it.
5.6 Edit pages
The edit pages allow you to change an element or create a new one.
They do not have a link list and consist basically of a form allowing the
entry of new characteristics, an Add or Change button and a Cancel
button. During editing the navigation tree is not present; your changes
must be confirmed or cancelled before navigating in Kerweb again.
NT00360-EN-01
13
Kerweb
The monitoring menu
The synthesis page (available in general mode)
6 The monitoring menu
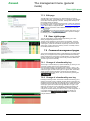
6.1 The synthesis page (available
in general mode)
The synthesis page contains four mini-lists similar to that on the list
pages:
6.1.1 Faults in progress
The table displays faults in active or acknowledged status. On each row
appears the status, criticality, label of the fault, the name of the site on
which the fault is located, and the value of the fault.
In the case of an active fault, the icon representing the status is a button
and its activation triggers acknowledgement of the fault.
At the end of the list, a link "To see more" allows you to open the
Monitoring -> Events -> Alarms page.
6.1.2 Latest events
The table displays the last ten events irrespective of their status. On each
row appears the status, criticality, label of the fault, the name of the site
on which the fault is located, and the value of the fault.
In the case of an active fault, the icon representing the status is a button
and its activation triggers acknowledgement of the fault.
At the end of the list, a link "To see more" allows you to open the
Monitoring -> Events -> Log page.
6.1.3 RTUs at fault
The table displays the list of the last ten sites to have triggered a fault
(name of the site, the sector it belongs to and the number of faults
present). On each row, three symbols can also appear. These indicate
communication in progress, deactivation or an RTU cyclical call fault.
The sector name contains a link to the "Monitoring -> Sites" page with an
active filter of RTUs at fault and activation of the filter on the sector in
question.
At the end of the list, a link "To see more" allows you to open the
"Monitoring -> Sites" page with an active filter of RTUs at fault.
6.1.4 RTUs
The table displays the list of the first ten sites in the process of
connection, then in alphabetical order. On each row may appear three
symbols warning of communication in progress, deactivation or an RTU
cyclical call fault, its name, the sector it belongs to, and two buttons
allowing the site to be called to retrieve variables for the first button and
files for the second. The presence of these buttons depends on the type
of RTU.
At the end of the list, a link "To see more" allows you to open the
Monitoring -> Sites page with activation of the filter on the sector in
question.
6.2 Site pages
6.2.1 The site page (list page available in
general mode)
The site page is a list page.
It is used for routing from the general mode to the site mode. The
selection of an RTU in this list therefore opens the site mode monitoring
menu. It has no navigation tree. It is also accessible from the list icon for
the dynamic list of sites in the main band.
14
NT00360-EN-01
Kerweb
The monitoring menu
Site pages
6.2.1.1
Sorting
It is possible to sort the list by increasing or decreasing name or to filter
the page by increasing or decreasing sector name of the site. When
sorting by sector is applied, only the sites belonging to a sector are
displayed.
6.2.1.2
Filters
It is possible to filter only the RTUs having a fault. An "[RTU(s) at fault]"
link is available at the top of the page. When this link is active, an "[All
units]" link allows you to return to the complete list. On the filter bar, a text
field type filter allows filtering by a text included in the name of the site
(*[Text]*). Another selection type filter allows the display of RTUs of a
certain type.
6.2.1.3
Data
Each row contains the following information:
An optional symbol warning that the site is currently communicating with
the server.
An optional symbol warning that the site is deactivated.
An optional symbol warning that the site is in a cyclical call fault.
The text link to the name of the RTU which routes you to the site detail
page by switching to site mode.
The type of RTU.
The phone number in the case of a modem link or the IP address of the
site in the case of a network link, or else the GSM voice number in the
case of a BRIO type unit.
An optional hypertext link to the name of the site sector which routes you
to the sector's edit page.
It is possible to configure in the user preferences an additional column:
display of the serial number.
6.2.2 The site page (detail page available in
site mode)
The detail page belongs to the site mode. It allows you to view all the
information on the selected RTU. It consists of the conventional elements
of a detail page; the title bar and its action buttons, the body of the page
with detailed information, but also three dropdown lists allowing rapid
viewing of elements of the RTU.
6.2.2.1
Action buttons
Three toolbars are present on the detail page of a site.
1
6.2.2.1.1
The edit bar
This bar corresponds to the conventional actions of adding, change,
duplication and deletion.
The Add button proposes a list of types which can be selected to
add a unit of that type.
The Change button opens the edit page.
The Duplicate button creates a new site by replication and opens
the edit page.
The Delete button opens a confirmation box requesting deletion of
the site and all data related to it.
A fourth button allows validation of the site when it is invalid or
its devalidation when it is valid.
1
2
NT00360-EN-01
2
6.2.2.1.2 Site element bar
This bar allows you to open the list pages containing information on the
site data.
The "link" button routes you to the list/detail page of link
configuration.
The "paths" button routes you to the list/detail page of variable
management.
The "event" button routes you to the events list page.
15
Kerweb
The monitoring menu
Site pages
The "files" button routes you to the list/detail page of file
management.
The "event definition" button routes you to the events definition list
page.
3
6.2.2.1.3 The site action bar
3
This bar allows certain communication operations to be performed on the
site. It is different depending on the type of RTU.
The "auto-configuration" button allows you to request an autoconfiguration of the site.
The "read configuration" button allows you to save the RTU
configuration binary file to the supervisor's disk.
The "write configuration" button allows you to rewrite in the RTU the
configuration file saved to the supervisor's disk.
The "refresh variables" button triggers a call by the data server to
the RTU and updating of the value of its variables.
The "read files" button triggers a call by the data server to the RTU
and retrieval of all the new data contained in its files.
For units of the BRIO type, there exists a link to the remote configuration
page and another link to the remote configuration history.
6.2.2.2
Information
The RTU information is grouped in six different sections.
6.2.2.2.1 General
- Type of unit:
Schneider Electric RTUs
BRIO / W310
iRIO / XLRIO … [XFLOW]
W@DE W315, W320E, W325
HERMES
MUC5 / MUC5 Double / MUC9 (TBC second generation)
TELEFLO
TL04
Other equipment (optional)
AQUAPAC (Technolog)
BARTON
COMPTEUR JAUNE (EDF, requires a special TRIMARAN V23 modem)
COMPTEUR VERT (EDF, requires a special TRIMARAN V23 modem)
DATAM (Datam-Flutec DFT80M)
PERAX (PERAX P200, P200X, P200XM, P400X)
RADCOM (RADCOM datalogger)
SOFREL (SOFREL, RTUs in SOFBUS S10, S15, S50, S500 protocol, etc.)
WIT (WIT, RTUs in TRSII, CLIP and FORCE, E@SY protocol)
- Identification: Depending on the type of unit, this is its Modbus address
or its satellite number.
- Description: Free text containing additional information on the site.
- Model: the physical model of the device. Available only for XFLOW,
TELEFLO and TL04. Retrieved by auto-configuration.
6.2.2.2.2 Location
This section contains information relating to the classification and
geographic location of the site. It contains:
- The sector: Classification allowing one filter per workgroup.
- The country, region and zone which allow a geographic classification of
the site.
- The time zone: Defines the time zone of the RTU. Combined with GMT
synchronization, this setting compensates for the time difference between
the RTU and the server in the management of event and measure dates.
- GMT synchronization activates the functionality described above. It can
be
enabled or
disabled.
6.2.2.2.3 Management
The Management tab makes it possible to identify the device in the
supervisor's organization by a group, the device class and an index, the
device level.
6.2.2.2.4 Communication/links
This section displays information relating to communication between the
server and the site. It changes depending on the type of unit, since the
communication modes differ from one to another. This section is not
present for internal or virtual sites. It contains:
- The link used.
- The date and status of the last auto-configuration action.
- The date and status of the last call.
- The IP address or the phone number depending on the type of link.
- The GSM phone number.
16
NT00360-EN-01
Kerweb
The monitoring menu
Site pages
- Information on the backup link.
6.2.2.2.5 Access
Displays, depending on the type of unit, the user name and password
required for authentication on the RTU.
6.2.2.2.6 Cyclical call and time setting
Describes the functions relating to site supervision by cyclical call. It
contains the following information.
- Activation of automatic time setting.
- Activation/status of the cyclical call: it can be " Cyclical call Ok",
"
Cyclical call not managed" or " Cyclical call fault".
- The frequency of the cyclical call and the tolerance applied to it.
- The date of the last call.
- The calculated date of the next call.
6.2.2.2.7 Miscellaneous
This section contains technical information specific to the RTU such as
the address of the event zone or the address of the Wade unit selection
word or the number of the control table for a Soffrel.
6.2.2.3
Dropdown lists
These three lists make it possible, while remaining on the main page, to
have a rapid view of the site elements. To view a list, a + button is
present to the right of the list band. At opening, it is replaced by a – to
close it again. The lists are closed at login and the opening status of the
lists is stored during the session.
6.2.2.3.1
Events
The
Events link routes you to the events list with the filter of the RTU.
The list contains the status, criticality and date of occurrence information,
label, nature and value.
6.2.2.3.2
Variables
The
Variables link routes you to the page of the list of site variables.
The list contains a button allowing display of the value curve of the path,
a link to the detail page of the path, and then type and value information.
6.2.2.3.3
Files
The
Files link routes you to the page of the list of site files.
The list contains a link to the detail page of the file, then information on
the type and date of last reading.
6.2.2.3.4 Additional information
This section includes information about referencing or management of
device and contains
A reference field.
A note field.
An attached file: This downloadable file contains information about
device. It‟s viewable if user has read write on uploading files. If the
link load a not found error page, the file was abnormally removed
from the server.
6.2.3 The site management page (edit page
available in general mode)
It belongs to the general mode management menu and will therefore be
described in: management menu (general mode) -> The site
management pages ->
The list page.
6.2.4 The site management page (edit page
available in site mode)
It belongs to the site mode management menu and will therefore be
described in: management menu (site mode) -> The site management
pages ->
The edit page.
NT00360-EN-01
17
Kerweb
The monitoring menu
Event pages.
6.3 Event pages.
6.3.1 The event history page.
The event pages are list pages.
Each consists of the following parts: a legend; action buttons; the header
bar and its sort operations; the filter bar which can be replaced by an
advanced filter and the data; the end-of-list bar which displays the
number of events after sorting.
6.3.1.1
Legend
The icons of the data showing the status and criticality of each event are
specified:
The status can be
Active,
Acknowledgement or
Deactivated. For
each event, the background colour of the row (red, orange or green)
replicates this information.
The criticality can be
critical, minor or
indication. For each event,
the font colour of the date (red, blue or grey) replicates this information.
If the "level" option has been selected in the preferences, these icons are
replaced by the numerical value (0-255) of the criticality.
6.3.1.2
Action buttons
The buttons displayed on the left-hand side are direct actions on the
events ticked in the list.
: You indicate that you have been alerted.
: You manually indicate a return to normal.
: NB: The event is permanently deleted from the database.
: Opens the window providing access to events export.
6.3.1.3
Export
The export function allows up to 10,000 events to be retrieved in Excel
and Text formats. This function is accessible by pressing the
button. A dialogue box appears. It allows you to choose the export enddates and the format wanted. The number of records that will be returned
during validation is entered after each change. This selection adds to all
the filtering in progress on the display, thus creating a filter including the
selected event filter, simple and advanced filtering and the start- and endof-export dates.
6.3.1.4
Autorefresh
The event table is updated automatically, thus reflecting creations,
deletions and changes of state. The default value (30 seconds, 1, 2 or 5
minutes or no refresh) can be saved in the client configuration file. This
value can be modified directly on the page and remains valid for the
session time.
6.3.1.5
Column selection
The display of information on events is saved in the user preferences. It
is possible to select a different display from the list: "Select a column
selection". To manage this display, a list button is available on this list.
These selections modify the display and the order of the various columns
presented.
6.3.1.6
Event filters
The filter applied to events is saved in the user preferences. It is possible
to select a different display from the list: "Select an event filter". To
manage this display, a list button is available on this list. These filters
modify the display and the order of the various columns presented.
18
NT00360-EN-01
Kerweb
The monitoring menu
Event pages.
6.3.1.7
Header
On the header are displayed the icons representing the active status and
criticality filters and the active filters of dates of occurrence and reception.
If a filter is active at the same time on a date of occurrence and a date of
reception, only the filter on the date of occurrence is mentioned on the
header. However, the filter bar always indicates whether a filter is active.
The list navigation buttons and the column names are also present. The
list can be ordered by columns of date of occurrence and date of
reception.
6.3.1.8
Filters
When the filter bar is displayed, the
button is available on
the right-hand side of the page. This advanced filter allows the
conventional filter band to be replaced by an advanced filter allowing
criteria to be chosen in nearly all the characteristics of an event. The
latter itself contains a
button which allows you to return to the filter
bar by closing the advanced filter again. The advanced filter/filter bar
status is stored throughout the session.
6.3.1.8.1
Filter bar
The filters are as follows:
Date of occurrence: A filter can be produced on events occurring before a
date, after a date or between two dates (by filling in both fields). The
dates of occurrence take into account the time zone configured for the
site.
Date of reception: A filter can be produced on events received by the
server before a date, after a date or between two dates (by filling in both
fields). The dates of reception take into account the time zone defined for
the user.
Label: Filter on the event label. The filter operates only for events
attached to a path. Events of the "astreinte" (on call) or acknowledgement
type will not appear under this filtering. It is necessary to use wild cards to
perform a search on a part of the label.
RTU: Filter on the name of the remote terminal unit initiating the event.
Events not coming from a remote terminal unit will not be displayed.
Nature and type: Two conventional selection filters: choose a nature or
type in the two available lists for filtering events.
Fault duration: A filter which allows you to select faults whose duration is
less than or greater than a specified duration. To produce such a filter
you must open the "fault duration" filter
, enter a value
and a
unit
, and, lastly, confirm the filter
.
6.3.1.8.2 Advanced filter
The advanced filter contains the same filters as the filter bar whose
operation is similar. It also contains the following filters:
Value: Four other fields are available to filter by value; in this case you
can select the filters equal to, less than, greater than and different from a
value. These filters can be combined. The value compared is the raw
value of the event, not taking into account any formatting.
Level: is an equality comparison on the "level" field of the event (0-255).
Class, Zone, Country and Region are selection fields which allow you to
filter on the classification of events. Filtering by sector or by workgroup is
still possible by means of the permanent filters of the main menu.
The "display archived events" box, independent of the filters, makes it
possible, when selected, to retrieve the events located in the event table
or in the "pastevent" table (table of archived elements). A request on
these two tables may entail slowness in the reply.
6.3.1.8.3 Comments of events.
As the comments raw is selected
seeing or editing becomes possible
in function of user‟s rights. A comment gets associated with event.
Present comments are displayed in comments raw
. A tooltip
displays text mouse-over. A window opens on click in witch you can edit
or delete this text.
NT00360-EN-01
19
Kerweb
The monitoring menu
Event pages.
This window mentions the author of text and its date of writing. Then you
can type a new text or delete existing. Replacing text with empty space
does the same as suppressing whole comment. New user and date
informations are automatically updated as “Set” button is clicked.
“Close” button allows closing window without modifying user or date.
If event as no comment and user has writing rights, the
display comment window.
icon allows to
Then you can add new text and record through « add » button.
Comments must be less then 255 characters.
Return or tab are kept in messages but:
Tabs are replaced with space while Excel export.
Tabs and returns are replaced with spaces while text-export.
6.3.1.8.4 Event reference.
When the event reference column is selected
editing a reference
becomes possible depending on the user‟s rights. The reference will be
associated with an event. Existing event references are displayed directly
in the reference column
. A tooltip with “Add a reference”
is displayed when passing the mouse over the icon
.
If an event has no reference and the user has writing rights, the
icon
allows to display the reference window. When you click on the icon a
dialog box opens where you can edit the text.
20
NT00360-EN-01
Kerweb
The monitoring menu
Event pages.
You can also modify the text. Replacing text with empty space does the
same as deleting the whole reference. Modifications are automatically
updated when the “Set” button is clicked. The “Close” button allows
closing the window without modifying any data.
A reference must be less then 255 characters.
Carriage returns or tabs are kept in messages but:
Tabs are replaced by spaces using the Excel export.
Tabs and carriage returns are replaced by spaces using the text
export.
6.3.2 The detail page of an event
This page is a detail page, it offers no functionality on the event and
displays the following characteristics:
-ID -Label –Value –Class -Description of variable -Name of variable Class of variable -RTU –Nature -Type-Criticality –Status –Level -Date of
occurrence - Date of reception -Date of acknowledgement -Date of return
to normal -Fault duration etc.
NT00360-EN-01
21
Kerweb
The monitoring menu
The text pages
6.4 The text pages
6.4.1 The list page
The list page is not a conventional list page because it allows text pages
to be organized with folders.
The first line is a link routing you to the list of alarms in progress. The
following lines present the first-level folders and pages.
A
is present before each folder.
A press on a opens the folder and reveals the folders and pages of
the following level contained in that folder. The then becomes a
which allows the folder to be closed again by hiding the open elements.
A press on the name of the folder has the same effect as pressing on
or .
A press on the root icon or on a closed or open folder
proposes organization editing. A text menu proposes creating in the
selected element a new directory or a new page, renaming the element
or deleting it. The deletion of a directory must be confirmed, because its
deletion results in deletion of all the elements contained inside. The
addition of a new page does not automatically route you to page editing.
The page created is a blank page that can be edited.
For each page the operation will be as follows:
A press on the name of the page causes opening of the detail page of
the text page.
A press on the page icon opens a menu proposing editing, renaming
or deletion of the page. The deletion of a page must be confirmed. Editing
of a page causes opening of the edit page of a text page.
6.4.2 The detail page
6.4.2.1
The connection console
The connection console allows actions to be performed on RTUs
containing elements of the text pages. Visible on the second line of the
page, it consists of:
6.4.2.1.1 The connection buttons
After selecting a site or the "all sites" option in the selection box, you can
press on Login to open a permanent connection to the site or Logout to
suspend it. During a permanent connection, the values are refreshed
continuously between the server and the RTU. Page refreshment will also
have to be set so that these retrieved values appear regularly on the
screen.
6.4.2.1.2 The LED screen
The LED screen has a diagnosis role on the connection console.
Monitors the calculation activity on the page. This indicator
flashes in one second and turns yellow when the schedule
requires an operation.
Lights when the console retrieves the data from Kerwin and
turns yellow upon receiving this data.
Lights when the console performs updating on the page and
turns yellow when the page has been updated.
22
NT00360-EN-01
Kerweb
The monitoring menu
The text pages
6.4.2.1.3
List of sites
This list allows you to monitor connection of sites for which there are
objects present on the page. It consists of a list field which allows you to
select the site on which the action will be performed and a status field
which allows you to check its execution. In the case of a multi-site page, it
is possible to choose "all sites" to monitor the connection of all the sites
on the page. When the selection field is modified, the status is updated
and a colour code allows you to monitor the status of requests on the
chosen site.
White: No request in progress, no connection.
Orange: Request in progress but connection not effective.
Yellow: Connection in progress.
6.4.2.1.4
Remote control buttons
These buttons allow the remote controls programmed on the page to be
validated or devalidated. Validation initiates connection to the remote site
and activates the remote controls. This action cannot be cancelled.
Cancellation devalidates the remote controls in progress which are not
yet in course of transmission.
6.4.2.2
Data
The available data on the variables marked on the page are presented in
the form of a table.
Each line provides information on the date of last rereading of the
variable, the name of the variable, its value and the date of the last
change of value observed.
On variables of the output or input/output type, the value is displayed in a
text field for analogue values and in a selection field for logical values.
The latter allow the value of the variable to be changed. A colour code
specifies the status of the commands.
Pale green when the setting request has occurred.
Pure green when the setting request has been acknowledged on the
server.
At this stage, the setting can be cancelled by activating the cancellation
red cross on the path or by activating the Cancel button on the console
(cancellation of all commands). By activating the "Send" button on the
variable or on the console, you go to the following stages.
Pale orange when the remote control request is sent to the server.
Pure orange when the server logs in to the site to act on the
command.
When the command is executed, the server rereads the variable. The line
colour then changes to:
Yellow if the variable has changed value following the command.
White if the value of the variable has not been changed.
The indication of change of value by the yellow colour is operational
irrespective of the type of variable (input or output).
The font colour also provides the following information for each variable:
In blue the output or input/output variables.
In black the input variables.
In red the variables having an active alarm.
In grey the variables in "locked" status.
A link is available on the name of the variable; it allows you to open a
menu which makes it possible to:
Retrieve files from the site; this command retrieves all the measure
files from the site.
Refresh variables, which amounts to requesting reading of the file of
instantaneous values.
Lock or unlock the path depending on its current locking status.
If the variable is saved in a file, it will also be possible to:
Display the history of the variable in table form.
Display a variable value curve. The number of records returned
corresponds to that entered in the preferences.
NT00360-EN-01
23
Kerweb
The monitoring menu
Synoptic pages
6.4.3 Edit page
This page allows you to enter the elements of the text page. These
elements are of two types: Variable or label. It also allows you to modify
or delete the page name.
To insert a variable, you must select a site and insert filtering on its paths.
The "*" filter will return all the site paths that will be inserted in the
"variables" field.
Once the variables have been selected in this selection list, two buttons
allow them to be saved in the page. The "Add" button results in addition
at the end of the page. The "Insert" button results in insertion of the
element(s) above the element selected in the right-hand list.
Conversely, you can select variables from the right-hand selection list
and press the "del" button to remove these variables.
The "Back" button closes the edit page again: you return to the list page.
The maximum number of variables is 200; during all these operations the
numbers of records saved, selected and remaining are shows.
To insert a description, the text should be entered in the "label" text field,
and the "Add" and "Insert" buttons operate as described above.
6.5 Synoptic pages
Synoptics are not editable on Kerweb. The accessible pages in the
synoptic module are the list page and the detail page.
6.5.1 List page
6.5.1.1
Sorting
It is possible to sort the list by increasing or decreasing name.
6.5.1.2
Filters
A text field type filter allows filtering by a text included in the name of the
synoptic (*[Text]*).
6.5.1.3
Data
Each line contains the name of the synoptic in the form of a link. This link
opens the synoptic in the same way as the "Display in a new window"
action.
6.5.2 Detail page
6.5.2.1
The connection console
The synoptics connection console is identical to the text page console.
6.5.2.2
The synoptic
The synoptic takes the form of a large background image on which are
placed various types of objects. They are either static (the information
that they represent does not change) or dynamic; in that case they
represent information related to supervision elements and offer
exploitation actions depending on their type.
6.5.2.2.1
6.5.2.2.1.1
Static objects
Labels
Single label which displays a text with its formatting options.
6.5.2.2.1.2
Images
The static image is a single icon used for graphic enhancement of the
synoptic.
24
NT00360-EN-01
Kerweb
The monitoring menu
Synoptic pages
6.5.2.2.2
Dynamic objects
These objects are attached to an exploitation element (variable, site,
chart, etc.). They are distinguished from the static objects by a grey edge
line revealed when passing over them.
6.5.2.2.2.1
Variables
Behaviour: The selection of a variable object opens a contextsensitive menu which displays information on the variable and
allows remote control when this is authorized. The information and
the remote control are identical to those of the text pages.
Display: The variables are displayed in the form of either labels or
images. For analogue values, these images are gauges (whose
height or width vary depending on the value of the path), or n-state
images (image whose content corresponds to a value state). For
logical values, the image switches over depending on whether the
value of the variable is 0 or 1.
6.5.2.2.2.2
Synoptics
Behaviour: The selection of a synoptic object or the corresponding
synoptic. Depending on the properties defined for the latter, the
presentation will take place in a new window or in the current
window.
Display. Synoptic object take the form of a label, a single image or a
button including a colour code corresponding to the presence of an
alarm on the associated view. (green without alarm, orange with
acknowledged alarm, red with alarm in progress).
6.5.2.2.2.3
Sites
Behaviour: The selection of a site object opens a context-sensitive
menu which displays information on site and a link allowing you to
go to the site detail page, display site events, initiate a request for
connection to the site in order to retrieve files or variables, or to lock
the site.
Display: The site is represented in the form of a small coloured
square corresponding to the presence of alarms associated with the
site. (green without alarm, orange with acknowledged alarm, red
with alarm in progress).
6.5.2.2.2.4
Charts
Behaviour: The selection of a graphic object opens a contextsensitive menu allowing the chart to be displayed in the form of a
curve, of default depth, or the values in the form of a table.
The chart is represented in the form of a button with the name of the
chart, a text, an image as label or an overview of the graphic, with
the zoom functionality.
The overview depends of histories, and then it is not dynamically
refreshed when the real-time values are retrieved.
6.5.2.2.2.5
Dashboards
Behaviour: The selection of a dashboard object opens a contextsensitive menu allowing the table to be displayed in xls, pdf or text
format.
The dashboard is represented in the form of a button with the name
of the table as label.
6.5.2.2.2.6
Sequences
Behaviour: The selection of a scheduler object opens a contextsensitive menu making it possible to lock the sequence or initiate
immediate execution of the action.
The scheduler object is represented in the form of a button with the
name of the sequence as label.
6.5.2.2.2.7
Text pages
Behaviour: The selection of a text page object opens the
corresponding page in the form of a new window.
The text page is represented in the form of a button with the name
of the chart, a text or an image as label.
NT00360-EN-01
25
Kerweb
The monitoring menu
Chart pages
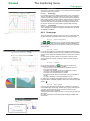
6.6 Chart pages
6.6.1 List page
6.6.1.1
Sorting
It is possible to sort the list by increasing or decreasing name.
6.6.1.2
Filters
A text field type filter allows filtering by a text included in the name of the
chart (*[Text]*).
It is also possible to select graphics from the types:
Classic
XY
Bargraph
Lines
Sectors
6.6.1.3
Data
The link set on the label opens the detail page of a chart.
The list displays the type and date of the last calculation of each graph.
6.6.1.4
Action buttons
It is possible, by selecting the corresponding boxes, to display one or
more curves directly. The curve is displayed in GIF format, over the depth
defined by default on the chart. It is also possible to display the values in
XLS or HTML format, the depth of which is that defined in the
preferences. The generic functions of adding, copying and deleting are
also available.
6.6.2 Detail page
6.6.2.1
Action buttons
Three toolbars are present on the detail page of a chart.
6.6.2.1.1 The edit bar
This bar corresponds to the conventional actions of adding, change,
duplication and deletion.
The Add button opens a window on which the name of the new
curve can be indicated.
The Change button opens the edit page.
The Duplicate button creates a new curve by copyingThe Delete button opens a confirmation box requesting deletion of
the chart and all data related to it.
26
NT00360-EN-01
Kerweb
The monitoring menu
Chart pages
Information
Information on the chart is inserted in a form allowing monitoring settings.
This form consists of two sections:
6.6.2.1.2
Data display
It is possible to choose the display format (HTML or XLS), to specify the
start and end dates for the table of values and, lastly, set the maximum
number of records to be returned. The HTML format returns a standard
page containing a table of values. Ideal for instant viewing, this table can
be used, depending on the user rights, to change the values in the file.
The XLS format offers an Excel worksheet containing the values of the
file, and it is therefore more appropriate for external data processing.
6.6.2.1.3
Chart display
The form allows you to choose the scope as a range of period end date
and, if necessary the selection of variables in the graph view. By default,
all variables are selected.
6.6.3 Chart page
The chart page shows the data in the form of a curve or histogram, with
an upper part allowing navigation and a lower part offering a legend.
6.6.3.1
Chart navigation
The
and
arrows allow you to navigate the list by shifting the data
of the curve of the data range value forward or backward depending on
the availability of file values. It is also possible to enter a new range and
specify its date.
6.6.3.2
Chart
For conventional graphics it is a GIF image representing data according
to the criteria requested. A dynamic zoom is available on the image itself.
Support pointer displays an adjustable area that corresponds to the new
display.
For other types, the chart is drawn on the browser. The zoom tool is
dynamic and does not impact the range of data on which the graph is
calculated.
6.6.3.3
Legend
For conventional graphics , the
button allows the legend to be
displayed. This legend shows for each variable:
The colour of the curve representing the variable on the chart.
The name of the variable.
The name of the site (link pointing to the detail page of a site)
The colour of the axis attached to the variable.
The name of the axis attached to the variable.
The name of the file used for the data (link pointing to the detail of
the file)
The type of operation for saving the variable in the file.
For other types, the legend is integrated graphics. It can be unfolded.
.
It displays the list of available variables. These can be removed from the
display.
6.6.3.4
Save graph.
If the chart was generate automatically from a variable or a file (instant
chart available from device page, variable page, file page, text page and
synopsis), a button allows saving this chart as a permanent chart
available from the page of charts list.
The save request open a dialog box which in only the name of chart must
be inquired.
On submit, a permanent chart will be create and display instead of the
instant chart.
NT00360-EN-01
27
Kerweb
The monitoring menu
Chart pages
6.6.4 Data page (HTML)
6.6.4.1
Table reading
The data are displayed by decreasing dates in the first column: At the
head of the table are the most recent data. Each subsequent column
displays a variable of the chart. The header contains the name of the site
of origin of the variable, its label and possibly its unit. If the variable
undergoes a conversion and has the option of saving the original data,
the header indicates whether the data come from this original value or
from the value after conversion.
6.6.4.2
Navigation
It is possible to display prior data by selecting "previous" to go back one
page. "Start" brings you back to the start of the file. "Next" moves you
forward one page. "End" redisplays the most recent data.
6.6.5 Data page (XLS)
The XLS data page operates the same as the data pages. Instead of
displaying a mere table, Kerweb proposes a download of the
corresponding Excel file. On Internet Explorer, with the MS Excel
software installed on the client terminal, this file is incorporated directly in
the page.
The information displayed and the navigation possibilities are the same.
6.6.6 Edit page
6.6.6.1
General settings
In this section it is possible to:
1. Change the name of the chart.
2. Select the chart type from:
Classic
XY
Bargraph
Lines
Sectors
3.
4.
Change the background colour of the chart display area.
Change the default scope of the chart, the data range
displayed at first opening.
5. Change the tolerance by allowing smoothing of the curve when
data are missing.
6. Set a customized time step.
7. Set a customized graduation of the time axis.
8. Display a grid on the chart display area.
9. Select the statistics calculated for each variable.
10. Display the statistics on the chart display area.
All these settings will be saved upon confirmation of the "Change" button.
A preview taking into account these changes is displayed to the right of
the settings form. The "Back" button allows you to return to the list
without confirming these changes.
6.6.6.2
Objects settings.
It is possible to add variables, thresholds and lines on the graphs of
conventional type.
For other types, it is only possible to add variables. Axes are always
calculated automatically.
In the case of XY chart type, it is necessary to specify the X-axis by
selecting the variable in the X-axis column and validate this choice by the
"Edit" button.
28
NT00360-EN-01
Kerweb
The monitoring menu
The dashboard page (available in general mode)
6.7 The dashboard page (available
in general mode)
6.7.1 List page
6.7.1.1
Sorting
It is possible to sort the list by increasing or decreasing name.
6.7.1.2
Filters
A text field type filter allows filtering by a text included in the name of the
dashboard (*[Text]*).
6.7.1.3
Data
The link set on the label opens the detail page of a dashboard.
6.7.1.4
Action buttons
These buttons allow rapid opening of one or more dashboards. Without
settings, the table(s) is displayed on the current date, in a new window
and with all the tabs.
The three buttons
,
and
open the tables in PDF, text
and Excel format respectively.
6.7.2 Detail page
The detail page offers the various settings allowing the dashboard to be
opened. There you can specify the date of calculation, initialized with the
latest calculation value, the export format, and display in window mode or
in the main page. You can also restrict export to a single tab of the
dashboard.
You can specify an end date for the dashboard, activated with a
checkbox. If you do so, the data range in the dashboard will end at this
date.
After confirmation of the form (
), depending on the format and its
compatibility with the operating system, the type of browser and the
software installed, the dashboard is displayed in the page or prompts for
a download.
If display is possible, in the new window mode the browser opens the
dashboard separately from the detail page, while in the frame mode it is
incorporated in this page. In downloading, a dialogue box prompts you to
name and save the dashboard in file form.
NT00360-EN-01
29
Kerweb
The management menu (general
mode)
Site management pages
7 The management menu
(general mode)
7.1 Site management pages
7.1.1 The list page
In the management menu, the list page allows you to navigate the list of
sites with the same methods as for the site page of the monitoring menu,
but also allows you to organize them. Moreover, the link present on the
site name routes you to the site management menu and not to its
monitoring. The two pages therefore have the same presentation, with
the management menu page also incorporating the action buttons
needed for this organization.
Opens the dialogue box for creation of a site in which
the name and type of RTU will be entered.
Creates a copy of the selected sites with identical
settings.
Opens the dialogue box allowing deletion of the
selected sites.
Unlocks the selected sites which are inhibited.
Locks the sites, and the sites thus inhibit are no
longer managed by Kerwin.
Requests connection to the site to update the values
of its variables.
Requests connection to the site to update the values of its
measure and event files.
7.1.2 Edit page
The site edit page belongs to the site mode management menu and will
therefore be described in: management menu (site mode) -> The site
configuration pages -> The edit page.
7.2 The scheduler pages
7.2.1 Scheduler menu strip
The scheduler pages are provided with a strip that can display the list of
sequences by type or the list of all the sequences. This strip is present on
the entire module.
7.2.2 The list page
7.2.2.1
Sorting
It is possible to sort the list by increasing or decreasing name.
7.2.2.2
Filters
A text field type filter allows filtering by a text included in the name of the
task (*[Text]*).A selection field allows tasks to be filtered on a given type.
7.2.2.3
Data
The link set on the label opens the detail page of a scheduler task. An
icon at the top of the line shows the task status.
Icons on the column indicating the frequency of execution of the task
make it possible to know its locking status, i.e. whether the task is
inhibited or active.
30
NT00360-EN-01
Kerweb
The management menu (general
mode)
The scheduler pages
7.2.2.4
Action buttons
Opens the dialogue box for creation of a task in which the
name and type of sequence will be entered.
Opens the dialogue box allowing deletion of the selected tasks.
Unlocks the selected tasks which are inhibited. These tasks will
be run again.
Locks the selected tasks which are active. These tasks will no
longer be run by the scheduler but remain editable.
Initiates running of the active tasks which are
selected. This running is immediate and does not take into account the
date of next running.
7.2.3 Detail page
The upper part of the detail page offers generic information on the tasks
and its optional lower part offers information related to each type of task.
7.2.3.1
Action buttons
These buttons correspond to the conventional actions of adding, change,
duplication and deletion.
The Add button opens a window on which the sequence type
should be selected.
The Change button opens the edit page.
The Delete button opens a confirmation box requesting permanent
deletion of the sequence.
7.2.3.2
Generic information
The following elements are available on the display:
- Type of sequence (Data transfer, Database maintenance, Backup, Site
management, Running a program, Run SQL query, Archiving and
Cyclical Event).
- Locking status: locked or in service
and the possibility of changing
it:
or
.
- Status:
Programmed: The action is programmed; it will take place
at the time of the next occurrence.
The action has been performed, no new occurrence is
programmed.
Immediate: The action has just been triggered
In progress: The action is being executed.
- From: The date of first occurrence.
- To: The date of last occurrence.
- Scheduling: The frequency of scheduling - may be a period or the
indication "A single time" which specifies that the action is not
programmed.
- Date of first action: Date on which the task was run for the first time.
- Date of next action: In the case of a programmed action, date on which
the next occurrence of the task will take place.
7.2.3.3
Information on Data transfer and
Site management tasks
The information dedicated to the "Data transfer" type covers the list of
files that are saved in the task and will be retrieved on calling. You can
view the name of the site to which it belongs, the file name, its type and
the date of its last retrieval.
A list navigation button is available if the list exceeds 10 files. If the user
rights so permit, the
button allows you to open the file selection form
so as to delete some of these files or add new ones.
NT00360-EN-01
31
Kerweb
The management menu (general
mode)
The scheduler pages
7.2.3.4
Information on Database
maintenance tasks
Display on what database maintenance will be performed.
7.2.3.5
Information on Backup tasks
Display on what database maintenance will be performed and the depth
of the history that will be saved.
7.2.3.6
Information on Program running
tasks
Display the command line that will be executed to run the program.
7.2.3.7
Information on Run SQL query tasks
Display the request that will be executed and the database on which it will
be run.
7.2.3.8
Information on Archiving tasks
Display the depth of the history that will be saved in number of days and
a command line to it.
7.2.3.9
Information on Cyclical Event tasks
No additional information is available for this type of task.
32
NT00360-EN-01
Kerweb
The management menu (general
mode)
The scheduler pages
7.2.4 The edit page
The edit page allows you to set the parameters for a sequence. Three
tabs are available for parameters setup:
7.2.4.1
General
In this tab, you can set the name, the locking status at creation, the date
of first occurrence and the date of last occurrence, and the maximum
number of failures before stopping the task.
7.2.4.2
Editing a Data transfer task
Editing an action of the "Data transfer" type allows you to define a site
model associated with the task (model allowing all the sites belonging to
the model to be included in the data retrieval) and to define whether
retrieval should be performed upon calling the site. File selection is
performed directly on the detail page.
7.2.4.3
Editing a Database maintenance
task
Editing an action of the "Database maintenance" type allows you to
choose on what database maintenance will be performed.
7.2.4.4
Editing a Backup task
Editing an action of the "Backup" type allows you to choose on what
database backup will be performed and to define the depth of the history
that will be saved.
7.2.4.5
Editing a Site management task
Editing an action of the "Site management" type allows you to define
whether retrieval should be performed upon calling the site. File selection
is performed directly on the detail page.
7.2.4.6
Editing a Program running task
Editing an action of the "Program running" type allows you to define the
command line that will be executed to run the program.
7.2.4.7
Editing an Run SQL query task
Editing an action of the "Run SQL query" type allows you to define the
request that will be executed and to specify the database on which it will
be run.
7.2.4.8
Editing an Archiving task
Editing an action of the "Archiving" type allows you to define the depth of
the history that will be saved in number of days and to add a command
line to it.
7.2.4.9
Editing a Cyclical Event task
The "Cyclical Event" task requires no additional parameters setup.
NT00360-EN-01
33
Kerweb
The management menu (general
mode)
"Astreinte" (on call) pages
7.3 "Astreinte" (on call) pages
7.3.1 Astreinte menu strip
The "astreinte" pages are provided with a strip that can be used to point
to the period groups or to select a different one. Other links allow access
to:
Call routes
Procedures
Programs
…of the "astreinte".
And to the Programs:
Daily
Weekly
Yearly
This strip is present on the entire module.
7.3.2 The synthesis page
The synthesis page brings together the information for all the "astreinte"
programs. Each program is presented there with its name, its priority, the
workgroup on which it is configured, and the calendar that manages it.
Each period is then described in detail with the corresponding status
(locked, in progress), the procedure associated with it, and its name.
A lock icon is displayed if the program is locked.
7.3.3 The period group monitoring page
The period group monitoring page is a list/detail page which displays both
the list and the details of the selected element.
7.3.3.1
List
The list of groups is displayed on the left-hand side of the page. Below
are listed the calendar programs which use the selected group.
The details of the group itself are displayed on the right-hand side,
presenting the following information:
7.3.3.2
Action buttons
These buttons correspond to the conventional actions of adding, change,
duplication and deletion.
The Change button opens the edit page.
The Delete button opens a confirmation box requesting permanent
deletion of the sequence.
- It is possible to change the name of the period by typing the name in the
corresponding field and confirming via the Change button:
- To add a new group it is necessary to enter the name of the period
before using the
button.
7.3.3.3
Data
The data are displayed in a table which presents the periods forming the
group and their identification colour in that group.
34
NT00360-EN-01
Kerweb
The management menu (general
mode)
"Astreinte" (on call) pages
7.3.4 The period group edit page
For practical reasons of parameters setup, the period group edit page
stores, like for the monitoring page, the list of period groups, with the
main part being used to manage the periods of the selected group.
7.3.4.1
Adding a period
If the period to be inserted in the group is not available, it is possible to
create a new one by entering in the "new period" field the name of the
period to be created and confirming the entry.
7.3.4.2
Selection of a period in a group
Selection of a period is performed simply by confirming the of the
period to insert it, or by confirming the to remove it from the group.
7.3.4.3
Choice of colour for the period in
the group
The list of periods inserted appears on the right-hand part of the page. By
pointing to the square of the period, it is possible to associate with it a
colour inside its group.
7.3.5 Programs: the daily program page
7.3.5.1
Creating a program
It is possible to create a new daily program by selecting the
key at the
top of the page. It is then possible to edit the program (editing a program)
7.3.5.2
List of programs
All the programs are displayed in a single page with their details. Each
program represents a 24-hour day. The title strip displays the name and
colour code of the program that will be used in the weekly and yearly
programs
and proposes two edit buttons which allow it to be
changed or deleted.
. The deletion of a program results in the
display of a request for confirmation when this is possible. If weekly and
yearly programs use this program, it cannot be deleted.
7.3.5.3
Editing a program
When the program is in editing mode, a data entry field appears in the
position of the title and miscellaneous menus. All the information (Delete
button, day scale, list of periods in progress) is always present. It is
therefore possible to:
Change the program name using the appropriate field:
-
Delete the program:
Change the colour code of the program by clicking on the colour
palette.
Change the default period, a period valid over the whole day without
exception, by selecting a period in the "default period" window.
Define exceptions by selecting a period on the "List of periods"
window and then plotting that period directly on the scale.
All the changes will be accepted by pressing the "Change" button. The
"Add" button creates a new program directly with the modified settings of
the old program. The "Cancel/Back" button redisplays the list without
applying the changes.
NT00360-EN-01
35
Kerweb
The management menu (general
mode)
"Astreinte" (on call) pages
7.3.6 Programs: the weekly program page
7.3.6.1
Creating a program
It is possible to create a new weekly program by selecting the
key at
the top of the page. It is then possible to edit the program (editing a
program)
7.3.6.2
List of programs
All the programs are displayed in a single page with their details. Each
program represents a 7-day week. The title strip displays the name of the
program
and proposes two edit buttons which allow it to be
changed or deleted.
. The deletion of a program results in the
display of a request for confirmation when this is possible or the number
of yearly programs using it and making it impossible to be erased.
7.3.6.3
Editing a program
When the program is in editing mode, a data entry field appears in the
position of the title and miscellaneous menus below, and on the right
hand all the days set with the period group of the program. All the
information (Delete button, list of days) is always present. It is therefore
possible to:
Change the program name using the appropriate field:
-
-
Delete the program:
.
Change the default day. It will be placed on the whole week by
selecting a day in the list and then clicking on
.
Define exceptions by selecting a day in the list and then clicking on
the day wanted for the exception.
-
Go directly into editing of a day by pressing the
button
before a day in the list.
All the changes will be accepted by pressing the "Change" button. The
"Add" button creates a new program directly with the modified settings of
the old program. The "Cancel/Back" button redisplays the list without
applying the changes.
7.3.7 Programs: the yearly program page
7.3.7.1
Creating a program
It is possible to create a new weekly program by selecting the
key at
the top of the page. It is then possible to edit the program (editing a
program)
7.3.7.2
List of programs
All the programs are displayed in a single page with their details. Each
program represents the current year. In this calendar, for each day, the
corresponding daily program is displayed. When a specific day (which is
not a default day) is carried over from one year to the next, it appears in
bold letters. It is also possible to select a different year in the form
allowing the period group to be changed
. The
title strip displays the name of the program
and proposes two
edit buttons which allow it to be changed or deleted.
. The deletion
of a program results in the display of a request for confirmation.
36
NT00360-EN-01
Kerweb
The management menu (general
mode)
"Astreinte" (on call) pages
7.3.7.3
Editing a program
When the program is in editing mode, a data entry field appears in the
position of the title, below, the edit buttons, and on the right a form
allowing advanced editing and the list of daily and weekly programs that
can be used. All the information (Delete button, calendar) is always
present. It is therefore possible to:
Change the program name using the appropriate field:
-
Change the time zone of the program.
-
Delete the program:
.
Change the default day. It will be placed on the whole year by
selecting a day in the list and then clicking on
-
Define exceptions by selecting a day or a week in the list and then
clicking on the day wanted for the exception. If this exception is to
be carried over, the "Carried over" box must be ticked beforehand. If
the exception does not start at 00.00 hours, then the start time must
be defined beforehand:
.
All the changes will be accepted by pressing the "Change" button. The
"Add" button creates a new program directly with the modified settings of
the old program. The "Cancel/Back" button redisplays the list without
applying the changes.
NT00360-EN-01
37
Kerweb
The management menu (general
mode)
"Astreinte" (on call) pages
7.3.8 "Astreinte" (on call): the "astreinte"
call routing page
7.3.8.1
List
The "astreinte" call routing page displays the list of call routes. When no
call route is selected, the right-hand part of the screen displays the
various types of call routes available for adding. If a call route is selected,
the right-hand part displays the details of the call route, with its action
buttons and its data.
7.3.8.2
Action buttons
The menu of the "astreinte" call routing page allows you to:
Add a call route: A dialogue box then opens to propose the type of
call route to be added. Its selection opens the edit page.
The Change button opens the edit page.
The Delete button opens a confirmation box requesting permanent
deletion of the call route or indicates that the call route is currently being
used by a procedure.
Allows revalidation of a call route that might be at fault
(neutralization of the call route following several failed calls)
7.3.8.3
Data
The first data block displays the general information related to the type of
call route. The name given, the type of medium ("support"), the user to
which it is attached and the typical information of the medium (fax file,
GSM phone number, etc.).
The second block displays information related to the operation of the
medium in the call procedures.
Max. call attempts: Maximum authorized number of successive
failed calls. If this number is reached, a fault is triggered on the call
route in question and the call procedure is inhibited.
Time for call transfer upon a fault: Period elapsing between the fault
on the initial call route and transfer to a backup call route.
Delay before acknowledgement: Time allotted to the call route to
acknowledge the alarms causing the call before restarting.
Max. failure of acknowledgement: Number of restarts after each
acknowledgement time overrun before inhibiting the call route and
possibly switching to a backup call route.
Delay of the alerts relay (time for call transfer upon a fault): Time for
inhibiting the call route after max. acknowledgement failures
Max. number of transmitted events: Limits on the number of events
transmitted at each call, to be defined according to the capacity of
the medium.
The third block displays the procedures that use the call route and the
programs that use these procedures. It is therefore possible to view the
programs by which the recipients are concerned.
7.3.8.4
Edit page
The edit page summarizes in a form the characteristics of a call route.
The compulsory fields are marked with an asterisk. If these fields are not
filled in, an error message appears, specifying the missing field.
The "Change" button takes into account the information entered.
The Cancel/Back button connects you to the details of the call route.
38
NT00360-EN-01
Kerweb
The management menu (general
mode)
"Astreinte" (on call) pages
7.3.9 "Astreinte" (on call): the "astreinte"
procedures page
7.3.9.1
List
The "astreinte" procedures page displays the list of procedures. If a
procedure is selected, the right-hand part displays its details, with its
action buttons and a logical diagram of the calls triggered by the
procedure when an alarm occurs.
7.3.9.2
Action buttons
The menu of the "astreinte" procedures page allows you to:
Add a procedure: Opens the edit page directly to program a new
procedure there.
The Change button opens the edit page to program the selected
procedure there.
The Delete button opens a confirmation box requesting permanent
deletion of the procedure or indicates that the procedure is currently
being used by a program.
7.3.9.3
Logical diagram
The logical diagram shows the various call routes used by the procedure.
The call starts with the call route located in the top left-hand and
continues with the call route located to its right and linked by a blue line if
the call has succeeded or else with the call route located below and
linked by a red line if the call has failed.
As an example, the email is sent, and if sending has worked, the
Expresso is called, otherwise it is an SMS message that will be sent. If
the call to Expresso failed, a fax will be sent, then a call to minitel. If the
SMS message failed after the email, the minitel will also be called.
Under the diagram, the various programs that are used by this procedure
are shown.
7.3.9.4
Edit page
The edit page replicates the logical diagram and adds to the display:
The list of available call routes.
A text field with the name of the procedure.
A refresh button and a recycle button.
The Change and Back buttons.
Insertion of a call route is performed directly by drag-and-drop from the
list of call routes. The call route will be released:
On the right of a call route (the link is traced in blue). The call route
will be linked as the following call route.
Under a call route (the link is traced in red). The call route will be
linked as standby call route.
In place of a call route: The call route will be replaced by the new
one.
On the recycle bin target (the recycle bin goes to red). The call route
will be removed from the procedure.
At any other place: The call route will not be linked to the tree and
kept for editing for the time needed to confirm or cancel editing.
The Refresh button reinitializes the tree without reloading the page or
taking into account the changes made to the name.
It is possible to move by drag-and-drop call routes or complete branches
that are already linked.
It is also possible to insert call routes or complete branches between two
call routes.
The changes are accepted upon confirmation by the
button.
The
button connects you to the detail page of the procedure.
NT00360-EN-01
39
Kerweb
The management menu (general
mode)
"Astreinte" (on call) pages
7.3.10 "Astreinte" (on call): the "astreinte"
programs page
7.3.10.1 List
The "astreinte" programs page displays the list of programs. If a program
is selected, the right-hand part displays its details, with its action buttons
and program information and the period list with their associated
procedure.
7.3.10.2 Action buttons
The menu of the "astreinte" programs page allows you to:
Add a program: Opens the edit page directly to program a new
program there.
The Change button opens the edit page to program the selected
program.
The Delete button opens a confirmation box requesting permanent
deletion of the program.
The lock/unlock buttons allow to block the alert program.
When the program is locked, if the program has no pending events, it will
be disabled, and its icon in the list will be replaced by a lock icon.
If there are events assigned to this program, a confirmation popup will be
displayed, providing 3 actions:
-
Cancel: cancels the program deactivation.
Suspend: suspend calls for the events currently assigned to the
program until its reactivation.
Reassign: remove the events from this program, to allow other
active programs to handle them.
A message indicates if the program is locked.
7.3.10.3 Data
The upper part of the table displays information related to the program.
Its name.
The calendar program on which it is based; this is the program that
defines each period with which the call procedure will be associated.
The criteria filter the events that will be managed by this program;
events that are not part of the selection will not trigger a call or will
trigger a call via another program which includes them in its criteria.
The priority: is used to define which program manages an event
which corresponds to the criteria of several programs. Programs of
lower priority which include an alarm managed by the program of
higher priority do not trigger a call.
The lower part lists each period of the timetable, indicating the associated
call procedure and whether the period is active or inhibited (in that case
the procedure is inhibited). A statement indicates if the execution of the
program is limited to the events of its workgroup.
40
NT00360-EN-01
Kerweb
The management menu (general
mode)
"Astreinte" (on call) pages
7.3.10.1 Criteria edit page
The left-hand selection list proposes all the types of criteria editable; by
selecting one of them, the display proposes a field allowing you to edit its
value.
The
button saves the criterion being edited and
redisplays the page without a type of criterion selected; it is then possible
to press the
button or edit a new criterion. All the criteria edited
will thus be accumulated.
The
button does not save the criterion, and the
detail page is displayed.
The
button redisplays the detail page, and the saved criterion
then appears on the page.
NT00360-EN-01
41
Kerweb
The management menu (general
mode)
Units page
7.4 Units page
7.4.1 List section
The list section presents all the units in alphabetical order. The selection
of a unit opens the Change section which allows editing or deletion of the
element in question. A unit can be of the analogue type (unit of the value)
or the date type (date formatting).
7.4.2 Change section
Present when a unit has been selected, it allows you to:
: Delete the unit (a link to be confirmed requests confirmation of the
action).
Change the characteristics of the unit, changes taken into account upon
confirmation by the
button.
7.4.3 Add section
Allows you to add either an analogue unit, or date formatting. The
available formats are imposed and must be selected from a list.
7.5 Logical labels page
7.5.1 List section
The list section presents all the logical labels in alphabetical order in the
form Label0 | Label1. Label0 corresponds to the value 0, while Label1
corresponds to the value 1. The selection of a pair opens the Change
section which allows editing or deletion of the element in question. Only
the user labels can be edited; the original labels used by the system
cannot be either changed or deleted.
7.5.2 Change section
Present when a pair of labels has been selected, it allows you, if the
labels are of the user type, to:
: Delete the unit (a link to be confirmed requests confirmation of the
action).
Change the characteristics of the unit, changes taken into account upon
confirmation by the
button.
The system labels do not allow editing.
7.5.3 Add section
The Add section allows you to build a new logical label available for the
application by specifying a label for the value 0 and another for the value
1 of the variable with which this label will be associated.
42
NT00360-EN-01
Kerweb
The management menu (general
mode)
Analogue label pages
7.6 Analogue label pages
7.6.1 List page
7.6.1.1
Sorting
It is possible to sort the list by increasing or decreasing name.
7.6.1.2
Filters
A text field type filter allows filtering by a text included in the name of the
label (*[Text]*).
7.6.1.3
Data
Each line contains the name of the label in the form of a link. This link
opens the detail page of the analogue label. The Label column of the
default state contains the label which is returned when the value of a
variable associated with the label is not included in one of the ranges
defined for each state of the label.
7.6.1.4
Action buttons
The generic functions of adding, copying and deleting are available from
the list. Only the labels defined by users can be deleted.
7.6.2 Detail page
7.6.2.1
The edit bar
This bar corresponds to the conventional actions of adding, change and
deletion.
The Add button opens a dialogue box allowing you to enter the
name of a new label.
The Change button opens the edit page.
- The Delete button opens a confirmation box requesting deletion of
the label.
The reports created directly by the system are not modifiable.
and
are not available in this case.
A selection box allows you to access the details of another label directly;
a button allows quick access to the list.
7.6.2.2
Body of the page
The detail page displays the various states (one per line) of the label. The
first line displays the default label. It corresponds to the value returned
when none of the criteria defined for each state corresponds to the value
of the variable. The states are sorted by increasing order of the tripping
threshold, then by increasing type of tripping in order [=], [>] and [≥].
This criterion is defined by:
A column displaying the criterion corresponding to the state in
question. Consisting of a >, ≥ or = operator and the tripping value.
A column displaying the label of the state.
A column indicating the writing value of the variable when the
corresponding state is chosen for remote setting.
The number of thresholds set for the label is shown on the page. It does
not take into account the default state.
The
button opens the edit page.
NT00360-EN-01
43
Kerweb
The management menu (general
mode)
Analogue label pages
7.6.3 Edit page
The edit page allows you to change the name of the analogue label and
the name of its default state. It also allows you to specify whether the
latter can be selected during writing and, if that is the case, the
corresponding value to be written.
It is then possible to add various thresholds, each time specifying the
tripping value, the tripping operation and the label.
The thresholds are editable in any order, but the interface repositions
them in increasing order at each backup, thus making it possible to view
the threshold mechanism.
The operations are calculated in the order ≥ then > and finally = which
obtains the highest priority.
A label defined by the following thresholds:
≥ 0 Label1
> 0 Label2
≥ 2 Label3
= 2 Label4
will take the values:
Label1 for value 0,
Label2 for value 1,
Label4 for value 2 and
Label3 for value 3.
Each state can be inscribable or not; in this case the writing value will
have to be specified. If a state appears several times in a given label, it
will not be possible to assign to it only a single writing value.
The
and
buttons allow you to save
the changes made to the label (display of details), or cancel them (back
to the list).
44
NT00360-EN-01
Kerweb
The management menu (general
mode)
User management pages
7.7 User management pages
7.7.1 The list page
The list page allows you to browse through all the users.
7.7.1.1
Sorting
It is possible to sort the list by increasing or decreasing name of the users
or workgroup. When sorting by workgroup is applied, only the users
belonging to a group are displayed.
7.7.1.2
Filters
On the filter bar, a text field type filter allows filtering by a text included in
the name of the user (*[Text]*).
7.7.1.3
Data
The table of users displays the name, its workgroup, and its read and
write keys encoding its access rights, and a comment. The keys can be
used only by a Boolean operation between their value and the key value
of each level of rights, and are therefore cannot be interpreted directly.
The comment allows you to freely fill in information on the user.
7.7.1.4
Action buttons
: Add a user: Opens a dialogue box which allows you to enter
the user name and opens the edit page.
: Delete one or more user(s): Opens a confirmation box
allowing deletion of the selected users.
: Change password: Opens a dialogue box allowing
you to change the password of the selected user. The new password
must be repeated twice.
: Customization: Directly opens the profile settings
page of the selected user.
7.7.2 Detail page
7.7.2.1
Action buttons
These buttons correspond to the conventional actions of adding, change,
duplication and deletion.
Opens a dialogue box which allows you to enter the user name and
opens the edit page.
The Change button opens the edit page.
The Delete button opens a confirmation box requesting permanent
deletion of the user.
7.7.2.2
-
NT00360-EN-01
Information on the user
User name
Workgroup to which the user belongs and which limits their visibility
on certain sectors, curves, dashboards, etc.
The read key encoding their access rights.
The write key encoding their editing rights.
The comment.
45
Kerweb
The management menu (general
mode)
User rights page
7.7.3 Edit page
The edit page is a form allowing you to edit the settings of a user by
specifying their name. It is possible to link it to a workgroup. The selection
of ALL links all the workgroups to the user, allowing them visibility on all
the Kerweb sectors and objects.
It is possible to insert read and write keys directly, knowing the rights that
this value will result in. To insert rights easily, the command management
pages offer an easy-to-configure interface.
The comment is a free field in which additional information on the user
can be indicated.
The
button confirms the information entered and returns you to
the user list page. The
button opens the dialogue
box allowing you to change the user password.
7.8 User rights page
The user rights page is a single reading page allowing you to view
directly the rights assigned to the users.
The first column displays the various Kerwin functionalities. The users
displayed in the following columns form a cross table in which the three
colours green, yellow and red indicate, respectively, that the user has a
writing right, a right to viewing in read-only mode or no visibility over the
functionality described on the row.
7.9 Command management pages
The command management page is a page displaying only a table which
allows you to change the keys to the rights of each Kerwin functionality
and to change the key to the rights of a selected user. A colour code then
displays for each line the resultant of the two keys and then determines
the user's right to the functionality.
7.9.1 Change of a functionality key
The change of a functionality key is performed directly by clicking on one
of the thirty images present on the corresponding line.
The image then changes in the following order: Yellow -> green -> red.
You can therefore establish 30 different levels of rights by combining the
read access right, the write access right or no right for each functionality.
These changes impact all the users, whose keys are calculated by
combinations of these thirty levels. They are confirmed by pressing the
button.
7.9.2 Change of a functionality user key
Pressing the "Change a user" link reveals a selection list allowing you to
select a user. When a user is selected, the thirty levels of user rights are
displayed and the functionality lines adopt the colour corresponding to the
resultant of the user rights with the functionality rights. Green for a write
access right, yellow for a read access right and red for no right. In the
same way, the user key can be changed by changing the image in the
order Yellow -> green -> red. The modifications resulting from these
changes can be seen directly from the line colour. In this configuration, it
is no longer possible to change the functionality keys directly and
confirmation of the
button saves the
changes related to the user.
46
NT00360-EN-01
Kerweb
The management menu (general
mode)
Remote configuration rights pages
7.10 Remote configuration rights
pages
The remote configuration rights page operates in the same way as the
command management page. The rights are linked to the various folders
and paths of each Brio model. Configuration will therefore be performed
by starting by choosing the Brio model concerning the allocation of rights,
then by performing parameters setup for each path in the same way as
for the Change of a functionality key. It is as though it were a
functionality.
7.11 Sector management pages
7.11.1 List page
7.11.1.1 Sorting
It is possible to sort the list by increasing or decreasing sector name.
7.11.1.2 Filters
On the filter bar, a text field type filter allows filtering by a text included in
the name of the user (*[Text]*). A selection field allows you to filter a
certain type of sector. The various sector types are:
The conventional sector with no geographic connotation.
The country.
The region.
The area.
7.11.1.3 Data
The sectors table displays the sector name and type. The last column
allows you to delete the sector located on the row. A confirmation box is
displayed when a deletion request is made.
7.11.1.4 Action buttons
Allows you to open the edit page to create a new
sector.
7.11.2 Edit page
The edit page allows you to enter the name of the sector to be changed
or added. For an addition, it will be possible to specify the type of sector.
For a change, it is not possible to change type.
NT00360-EN-01
47
Kerweb
The management menu (general
mode)
Workgroup management pages
7.12 Workgroup management
pages
7.12.1 List page
7.12.1.1 Sorting
It is possible to sort the list by increasing or decreasing workgroup name.
7.12.1.2 Data
The workgroup table displays the name of the group. The last column
allows you to delete the group located on the row. The group will not be
deleted if it is being used (association with a sector or an object). To
delete a group, you must check that the associations on each object are
deleted and that the list of sectors of the group is empty.
7.12.1.3 Action buttons
Allows you to open the edit page to create a new group.
7.12.1.4 Association buttons
Opens the association page which allows assignment
of objects to workgroups. The various types of objects that can be
associated are:
Commands from the scheduler.
Charts.
Synoptics.
Dashboards.
Exploitation pages.
Exploitation directories.
Column sets.
Event filters.
7.12.2 Edit page
It is possible to define in the edit page the name of the workgroup and the
sectors which form it. Saving is not possible if no sector has been
selected. It is possible to select several sectors.
7.12.2.1 Auto-association
The auto-association feature will automatically assign objects of type
Column sets or event filters to workgroups that will be created.
For Column sets this is normally activated for the “Default” Column set
and can be deactivated thereafter. For user defined Column sets, this
property is normally not activated and can be activated thereafter.
For Event filters this property is normally activated for the “Alarms” and
“History” event filters and can be deactivated thereafter. For user defined
filters, this property is normally not activated and can be activated
thereafter.
48
NT00360-EN-01
Kerweb
The management menu (general
mode)
Alarm class management pages
7.13 Alarm class management
pages
7.13.1 List page
7.13.1.1 Sorting
It is possible to sort the list by increasing or decreasing alarm class
name.
7.13.1.2 Data
The alarm class table displays the name of the class. The last column
allows you to delete the class located on the row. The class will not be
deleted if it is being used (in a filter criterion, for example). To delete a
class, you must therefore make sure that the filters or events are no
longer using it.
7.13.1.3 Action buttons
Allows you to open the edit page to create a new class.
7.13.2 Edit page
It is possible to define in the edit page the name of the new alarm class or
of the alarm class to be changed.
7.14 Path class management pages
7.14.1 List page
7.14.1.1 Sorting
It is possible to sort the list by increasing or decreasing path class name.
7.14.1.2 Data
The path class table displays the name of the class. The last column
allows you to delete the class located on the row. The class will not be
deleted if it is being used (in a filter criterion). To delete a class, you must
therefore make sure that the filters or variables are no longer using it.
7.14.1.3 Action buttons
Allows you to open the edit page to create a new class.
7.14.2 Edit page
It is possible to define in the edit page the name of the new path class or
of the path class to be changed.
NT00360-EN-01
49
Kerweb
The management menu (general
mode)
Path nature management pages
7.15 Path nature management
pages
7.15.1 List page
7.15.1.1 Sorting
It is possible to sort the list by increasing or decreasing path nature
name.
7.15.1.2 Data
The path nature table displays the name of the nature. The last column
allows you to delete the nature located on the row. The class will not be
deleted if it is being used (in a filter criterion, for example). To delete a
nature, you must therefore make sure that the filters or variables are no
longer using it.
7.15.1.3 Action buttons
Allows you to open the edit page to create a new nature.
7.15.2 Edit page
It is possible to define in the edit page the name of the new path nature or
of the path nature to be changed.
7.16 File nature management pages
7.16.1 List page
7.16.1.1 Sorting
It is possible to sort the list by increasing or decreasing file nature name.
7.16.1.2 Data
The file nature table displays the name of the nature. The last column
allows you to delete the nature located on the row. The class will not be
deleted if it is being used (in a filter criterion, for example). To delete a
nature, you must therefore make sure that the filters or files are no longer
using it.
7.16.1.3 Action buttons
Allows you to open the edit page to create a new nature.
7.16.2 Edit page
It is possible to define in the edit page the name of the new file nature or
of the file nature to be changed.
50
NT00360-EN-01
Kerweb
The management menu (general
mode)
Column selection management pages
7.17 Column selection
management pages
7.17.1 List page
7.17.1.1 Sorting
It is possible to sort the list by increasing or decreasing name.
7.17.1.2 Filters
A text field type filter allows filtering by a text included in the name of the
selection (*[Text]*).
7.17.1.3 Data
Each line contains the name of the selection in the form of a link. This link
opens the detail page of the selection.
7.17.1.4 Action buttons
The generic functions of adding, copying and deleting are available from
the list. It is also possible to display events directly with the column
selection ticked beforehand.
7.17.2 Detail page
7.17.2.1 The edit bar
This bar corresponds to the conventional actions of adding, change and
deletion.
The Add button opens a dialogue box allowing you to enter the
name of the new selection.
The Change button opens the edit page.
The Delete button opens a confirmation box requesting deletion of
the selection.
Some selections are created directly by the system and are not
modifiable.
and
are not available in this case.
A selection box allows you to access the details of another selection
directly; a button allows quick access to the list.
7.17.2.2 Body of the page
The detail page presents the column selection structure. On its left-hand
part, two buttons allow you to obtain access directly to to the edit page of
the selection and the events presented with the column selection. On its
right-hand part, a table presents the columns that will be displayed from
right to left on the events table.
7.17.3 Edit page
This page is presented in the same structure as the detail page. It is also
possible to modify the table located in the right-hand part.
To modify elements, you can grab a box containing the column to be
modified and drag it ( ). The released element will take up its new
position, higher ( ) or lower ( ). An element released outside of the edit
area will be deleted from the selection ( ). It is possible to restore an
element to its initial position ( ).
The newly displayed left-hand table allows you to add columns. A clicked
element will be inserted at the last position. It is also possible to grab an
NT00360-EN-01
51
Kerweb
The management menu (general
mode)
Column selection management pages
element of this list directly to insert it on a given position. An element of
this list released outside of the edit area after placing will not be inserted.
It is also possible to change the name of the selection during editing.
The “sort column” option allows you to set the order in which the event
list is sorted by occurrence time (default value) or reception time:
A selection cannot be saved with no column.
The
buttons allow you to save dragging and
renaming actions (display of details) or cancel them (back to the list).
52
NT00360-EN-01
Kerweb
The management menu (general
mode)
Event filter management pages
7.18 Event filter management
pages
7.18.1 List page
7.18.1.1 Sorting
It is possible to sort the list by increasing or decreasing name.
7.18.1.2 Filters
A text field type filter allows filtering by a text included in the name of the
filter (*[Text]*).
7.18.1.3 Data
Each line contains the name of the filter in the form of a link. This link
opens the detail page of the filter.
7.18.1.4 Action buttons
The generic functions of adding, copying and deleting are available from
the list. It is also possible to display events directly with the filter ticked
beforehand.
7.18.2 Detail page
7.18.2.1 The edit bar
This bar corresponds to the conventional actions of adding, change and
deletion.
The Add button proposes a list of types which can be selected to
add a filter.
The Change button opens the edit page.
- The Delete button opens a confirmation box requesting deletion of
the filter.
Some filters are created directly by the system and are not modifiable.
and
are not available in this case.
A selection box allows you to access the details of another filter directly; a
button allows quick access to the list.
7.18.2.2 Body of the page
The detail page displays the various criteria (one per line) of the filter.
This criterion is defined by:
A column displaying the filtered field "Astreinte" call route, Path
classes, Event classes, Site, Country, Region, Router, Sector, Area,
Astreinte status, Nature, Severity, Status, Type, Date of
acknowledgement, Date of occurrence, Date of reception, Date of
return to normal, Level, Elapsed time, Path)
A column displaying the type of filter ("Different from", "Does not
exist", "Exists", "Less than", "Greater than", "Equal to", "Less than or
equal to", "Greater than or equal to", "Belongs to", "Resembles")
An optional column indicating, where applicable, the value of the
filter (numeric, date, period or character string)
Two buttons allow you to obtain access directly to the edit page of the
filter and the events presented with this filtering.
NT00360-EN-01
53
Kerweb
The management menu (general
mode)
Brio remote configuration history page
7.18.3 Edit page
The edit page is presented in the same structure as the detail page; data
are displayed in modifiable fields. Each field is freely editable; its
modification may result in a change in the data entry interface
corresponding to its type.
The
buttons allow you to save dragging and
renaming actions (display of details) or cancel them (back to the list).
7.19 Brio remote configuration
history page
The history page displays the configuration SMS messages programmed
and sent by Kerwin to the various RTUs in decreasing order of date. It is
possible to display the oldest operations by browsing through the
pages or specifying start or end of list dates.
For greater precision, it is also possible to filter the list for a given site or
status.
The information available in the table is the information making up the
configuration table. The first two columns display the name of the RTU in
question and the SMS message, its number and its date of programming.
For each of the rows, the following columns display one or more actions
contained in the SMS message on three columns: the type of action (read
or write), the label of the path impacted by the configuration action, the
value of the write parameter, and the user initiating the action.
54
NT00360-EN-01
Kerweb
The management menu (site mode)
Site configuration pages
The management menu (site mode)
7.20 Site configuration pages
7.20.1 The Edit page
The configuration page for a site allows you to configure all the
characteristics of a site.
7.20.1.1 General
The name and description of the site are freely editable fields. The
"Number" and "Modbus address" fields must be filled in for sites of the
RTU type (there is no number for internal sites). The fields "control table"
(Sofrel), "address of the event area" and "selection word" (W@de) are
fields reserved for these types of RTUs.
7.20.1.2 Location
The location tab allows RTUs to be grouped in time and space. To do so,
sectors, area, country and region are available. The sector influences the
visibility of the site on the workgroups. The time zone allows the times of
occurrence of events to be synchronized between several RTUs located
in different time zones.
7.20.1.3 Management
The Management tab makes it possible to identify the device in the
supervisor's organization by a group, the device class and an index, the
device level. If a default class is set in the Kerwin configuration, this class
is suggested on the creation of device. The level field set a free value
between 0 and 255.
7.20.1.4 Communication/links
The communication tab can be used to set the various site access
parameters. The main link is the link used by Kerwin to obtain access to
the site during repatriation of paths or files, during auto-configuration
operations, backups or remote controls.
Depending on the type of link, the "phone" or "address" field must be
filled in.
The "HTTP access" option allows insertion in the application on the site
details or else on the synoptics, direct links to the home page of the
RTU's Web server. For this option to be operational, the HTTP port of the
RTU must also be entered.
The option "Update IP address on incoming connection" allows the RTU
to change its address on the Kerwin depending on its configuration. This
makes it possible to maintain satisfactory operation of connections in the
event of a change in the RTU's IP address.
The "Spare link" option allows you to define another link to obtain access
to the RTU in the event of a main link failure.
7.20.1.5 Access
User name and password used by Kerwin for connection to the site when
retrieving or sending data. The password should permit access to the
functionalities requested on the RTU. For some types of units not
managing the user name, only the password is taken into account.
7.20.1.6 Cyclical call and set time
This tab allows you to:
Program the site so that its time is reset upon each call by the
supervisor, by selecting "Set time".
Synchro GMT stipulates that the RTU is configured in GMT time.
The cyclical call makes it possible to monitor routine calling of the
unit to test its satisfactory operation. This frequency is expressed in
minutes, and the tolerance indicates the time slot during which the
call must be received. The next call indicates the date from which
monitoring will be actuated.
NT00360-EN-01
55
Kerweb
The management menu (site mode)
7.20.1.7 Additional information
This section includes free fields usable for referencement or management
of device.
The reference field is a text field with a maximum length of 40
characters, it doest not authorize multiline input.
The note field is a text field with a maximum length of 255
characters, multiline input is authorized here.
7.20.1.8 Attached file
In management mode, the attached file appears in a separate section, at
the bottom of the page.
This section is available only for existing sites. It is impossible to upload a
file for a site during its creation.
This section layout changes if there is an attached file or not.
A “Browse” button allows selecting a file to upload; the “Upload file”
button allows launching upload.
For access to this section, the user had to have the right “Upload file” in
write mode.
Three levels of settings allow to restrain the use of this functionality. If a
file does not satisfy those limitations, it will be rejected:
7.20.1.8.1
Kerwin settings
Specifications of the uploaded file depend on Kerwin settings. In the
configuration file, the section [file storage] contains the following
parameters:
max_file_size: the maximum size allowed for a stored
file, in Kbytes. Default value 1024 Kb (1 Mb).
max_file_storage_space: the maximum size allowed
for all the uploaded files, in Kbytes. Default value 1048576
Kb (10 Gb).
allowed_file_extensions: a list of authorized file
types, separated by commas. Default value *.xls;*.pdf.
Example:
allowed_file_extensions=*.xls;*.pdf
It is not possible to configure the uploaded files storage directory.
7.20.1.8.2
Kerweb settings
Kerweb configuration file allows to restrain the maximum http request
size. This setting will be used for the entire application :
max_http_request_size: Maximum request size,
default value 1030Kb
56
NT00360-EN-01
Kerweb
The management menu (site mode)
<location path="Default Web Site/Kerweb2">
<system.webServer>
<handlers accessPolicy="Read, Execute, Script" />
<security>
<authentication>
<anonymousAuthentication enabled="true" />
</authentication>
<requestFiltering>
<requestLimits maxAllowedContentLength="3000000000" />
</requestFiltering>
</security>
<httpLogging dontLog="false" />
</system.webServer>
</location>
Big files may be blocked directly by IIS, because it has a built-in http
request size limitation. The maximum request size may change between
the different IIS versions, but with IIS7 and higher it can be modified :
First, the request filtering service has to be activated in the
IIS services (Server manager -> Roles -> Role Services)
Then, open the configuration file :
„C:\Windows\System32\inetsrv\config\applicationHost.conf
ig‟
Search for the Kerweb site configuration section (default
<location path="Default Web Site/Kerweb2">)
A <requestFiltering> section has to be inserted in the
<security> section, as shown in the example
The maxAllowedContentLength attribute contains the
maximum http request size, in bytes. Adjust this value
according to your needs.
7.20.1.8.4
Restrictions priority and error messages
The previously described restrictions follow a strict hierarchy:
The IIS error has top priority, it will be triggered before the
others if the file does not fit. It will lead to an „Page not
found‟ error.
Then comes the Kerweb maximum http request size
error. A specific kerweb error page will be displayed in this
case.
The last filters are the Kerwin filters. If the data server
rejects a file, an error popup will appear, explaining clearly
why the file has been rejected.
For the files/requests size, it is highly recommended
to have the most permissive setting on IIS, and the
most restrictive on Kerwin. If IIS is the most
restrictive, its error will trigger immediately, without
letting Kerweb and Kerwin run their tests.
7.20.1.8.3
NT00360-EN-01
IIS settings
57
Kerweb
The management menu (site mode)
7.21 Site variables pages
7.21.1 The list/detail page
The variables page displays in the same view the list and details of the
selected variable.
7.21.2 List
7.21.2.1 Sorting
It is possible to sort the list by increasing or decreasing name or by the
date of last reading of the variable's value.
7.21.2.2 Filters
A selection filter allows only a certain type of variable to be displayed.
The types proposed depend on the type of RTU. The possible types are
counter, time counter, pulse counter, degree days, analogue input/output,
digital input/output.
7.21.2.3 Data
Each line contains the name of the variable in the form of a link. This link
allows you to select the variable and display its details. If the variable is
saved in a file, an
icon allows you to view an instantaneous chart
showing the variable's history.
The second column displays the variable type. The third column presents
the value or state of the variable. The last column indicates the date of
last reading.
7.21.3 Details
7.21.3.1 The edit bar
This bar corresponds to the conventional actions of adding, change and
deletion.
The Add button proposes a list of types available for adding
taking into account the type of RTU and the files already saved.
The Change button opens the edit page.
The Duplicate button copies the selected variable and
displays the copy.
- The Delete button opens a confirmation box requesting
deletion of the file. This deletion erases from the database all the data
belonging to the file.
and
allow locking of a variable in service or unlocking of a
disabled variable. If the variable is locked, a band indicates the
DISABLED status.
7.21.3.2 Body of the page
7.21.3.2.1
General
The General tab displays the following information:
The label transmitted by the RTU which may be different from the
variable name set on the supervisor.
The value or state of the variable, depending on whether the
variable is linked to a unit or a label.
The unit or label of the variable.
The date of last reading.
The date of last updating, indicating the last change of value.
The name of the site to which the variable belongs.
The type of variable (counter, time counter, pulse counter, degree
days, analogue input/output, digital input/output).
58
NT00360-EN-01
Kerweb
The management menu (site mode)
Site variables pages
7.21.3.2.2
Management
The Management tab makes it possible to identify the variable in the
supervisor's organization by two separate groups.
Variable nature (allowing the creation of models).
Variable class.
7.21.3.2.3
Alarms
The "astreinte" (on call) program: indicates whether the variable is
linked directly to an "astreinte" program.
Associated event severity: Specifies whether the events generated
by the changes of variable value are critical, minor, or in indication.
Associated event class: Indicates that the events generated by the
changes of variable value are defined in an alarm class.
Associated event level: Value from 0 to 255 making it possible, by
classifying the events, to optimize the "astreinte" filters and criteria.
7.21.3.2.4
Miscellaneous
Conversion/scaling: Indicates any conversion undergone by the
value between its reading on the RTU and its display on the various
screens of the supervisor (history, curves, synoptics, etc.).
Min. threshold:
Max. threshold:
OPC publishing:
Preserve original data: Indicates whether the data received by the
RTUs before conversion are fully preserved in the histories. This
option allows re-application of a conversion of original data on the
histories.
7.21.3.2.5
Associated events
Displays an excerpt of the last events generated by the changes of
value of the variable, specifying the date of reception, the nature of
the event and the tripping value.
7.21.3.2.6 Recording in files
Displays the list of the site's files in which the variable is saved,
specifying the name of the files and the date of last retrieval of the
values.
NT00360-EN-01
59
Kerweb
The management menu (site mode)
Site variables pages
7.21.4 Edit page
The edit page allows you to create or modify a variable.
A main section consisting of four tabs allows editing of the variable.
Another section consisting of two forms allows conversion management
and management of the original data before conversion.
7.21.4.1 Editing properties
7.21.4.1.1
General
The edit page allows you to create or modify a variable.
The fields to be filled in are:
The full name of the variable, the supervisor's reference.
The label transmitted, a label corresponding to the name of the
variable on the RTU.
The type of variable (counter, time counter, pulse counter, degree
days, analogue input/output, digital input/output).
The variable's number: This number must be unique for a given site.
For digital types, the digital label; for analogue types, an analogue
unit or label. The "label/unit" radio button allowing either of the lists
to be displayed.
It is possible to set the variable's parameters directly disabled at its
creation or modification and thus inhibit its alarms.
7.21.4.1.2
Management
The Management tab allows the variable to be organized within the
supervisor in two fields corresponding to the nature and class of the
variable.
7.21.4.1.3
Alarms
The Alarm tab can be used to set the rules and organization of the events
generated by the changes in value of the variable.
It is possible to attach to these events:
An "astreinte" (on call) program which corresponds to the program
that will be applied upon the occurrence of an event on this variable.
The associated event severity that can be configured with the
values "critical", "minor" or "indication".
The event class.
The event level, a value from 0 to 255 allowing events to be
organized in the form of a scale to which can be matched criticality
levels or "astreinte" criteria.
7.21.4.1.4
Miscellaneous
The thresholds allow the size of the charts display to be limited
to a range between the min. threshold and max. threshold.
Conversion/scaling opens a conversion configuration interface
detailed in the following section.
It is possible to set the peripheral belonging to the variable.
7.21.4.2 Conversion/scaling
7.21.4.2.1
Conversion settings
It is possible, by selecting
, to concatenate several conversion
formulas: scaling, slope/shift or min./max. Each operation can be placed
following another one, or as the first operation by selecting "after the
original value".
7.21.4.2.2
Original data management
The original data (before conversion) can be preserved in the files. When
the "preserve original data" option is confirmed, and starting from this
confirmation, the data are preserved both in their original value and in
their converted value. This makes it possible to re-apply to the original
values the conversion already defined or recently modified. A dialogue
box allows the conversion operation to be limited by dates.
.
60
NT00360-EN-01
Kerweb
The management menu (site mode)
Site file pages
7.22 Site file pages
7.22.1 The list/detail page
The links page displays in the same view the list and details of the
selected file.
7.22.2 List
7.22.2.1 Sorting
It is possible to sort the list by increasing or decreasing name or by the
date of last successful retrieval of the file.
7.22.2.2 Filters
A selection filter allows only a certain type of file to be displayed. The
types proposed depend on the type of RTU. For a site of the Xflow type, it
is possible to filter files of the raw configuration, events or measure type.
7.22.2.3 Data
Each line contains the name of the file in the form of a link. This link
allows you to select the file and display its details.
The second column displays the file type in the form of an icon. The next
column displays the date of last retrieval of the file. The fourth column
displays the name of the file's proprietor site. The action column displays
four icons making it possible to:
: open the page allowing the data to be exported in text file
form.
: display a chart based on data of the file. A dialog box allows
selecting the variables to integrate on the chart and the wide to
display. The submission of form opens a chart window which
contains the selected variables.
If the file is empty or not any variable is added to the file, a singles
error message is displaying.
: display the data in table form in a new page.
or
: view the status of each file in the list.
: start immediate retrieval of the file.
7.22.3 Details
7.22.3.1 The edit bar
This bar corresponds to the conventional actions of adding, change and
deletion.
The Add button proposes a list of types available for adding
taking into account the type of RTU and the files already saved.
The Change button opens the edit page.
The Delete button opens a confirmation box requesting
deletion of the file. This deletion erases from the database all the data
belonging to the file.
Opening of the page allowing the data to be exported in text file
form.
Opening of the page allowing the data to be exported in
text file form.
NT00360-EN-01
61
Kerweb
The management menu (site mode)
Site file pages
7.22.3.2 Body of the page
7.22.3.2.1
General
Displays:
the file type (Screening of call routes, Set time, Instantaneous
values, Automatic Configuration, Details, Synthesis, Events, Raw
Config, Measures, Balance, Histories, Histogram, VIRTUAL, or
State).
The name of the site to which it belongs.
The general status of the file:
unknown,
default,
deviation
or
correctly retrieved.
7.22.3.2.2
Management
The Management tab indicates whether the file has been catalogued by
file nature.
7.22.3.2.3
Communication/links
Displays:
The protocol (XModem, NapBus, default, SofBus, DatBus, TRS2,
Trimaran, ASCII, PERAX, AquaPac, Radcom, Barton, or Modbus 2).
The date of the last call attempt.
The date of the last call during which repatriation was successful.
The status of the last call.
The number of call failures out of the maximum number of call
attempts.
7.22.3.2.4
Records
Displays:
The date of the first record in the file (start of file).
The date of the last record in the file (end of file).
The number of records contained in the file.
7.22.4 Data refreshing
The data on this page are refreshed constantly and allow you to see the
connections and repatriations in progress on the files of a site.
When a file is undergoing repatriation or has been the subject of a
request not executed (without reaching the maximum number of attempts
before failure), the status icon displays the connection in progress. These
icons are updated constantly and adopt a green status (successful) or red
(failure) when the call has been closed.
If the site selected in the page is the subject of a request, a "The file is
currently being read" band is displayed. This band and the call and date
of last call status information is also updated and thus allow monitoring of
the connection and correct execution of repatriation.
7.22.5 Data export page
The data export page is displayed in the form of a form on which can be
specified:
The oldest date of the records. If this value is not entered, the range
will be limited by the number of records in the file or the maximum
number of records requested.
The most recent date. If this value is not entered, the range will be
limited by the last record in the file.
Maximum number of records. This value limits the number of lines
returned. If this value is not entered, all the records, limited by the
oldest date and most recent date values, will be returned.
Upon confirmation of the form, the file downloading page allows you to
save or view it. The file is a text type file.
62
NT00360-EN-01
Kerweb
The management menu (site mode)
Site file pages
7.22.6 Edit page
7.22.6.1 General
The edit page allows you to create or modify a file.
The fields to be filled in are:
Filename
The protocol used for retrieval of the file; the protocol depends on
the file type. (XModem, NapBus, default, SofBus, DatBus, TRS2,
Trimaran, ASCII, PERAX, AquaPac, Radcom, Barton, or Modbus 2).
Where applicable the file's nature (allows sorting on the files).
Retrieval by the scheduler allows retrieval of the file to be associated with
an already configured scheduler task. By ticking the box, the file will be
added to this task.
7.22.6.2 Path management
It is possible to add paths to the file by selecting a variable in the "Name"
field and applying an operation to it. The list of variables included in the
file is displayed in a table in which each variable can be removed from
the file by pressing the
button.
NT00360-EN-01
63
Kerweb
The management menu (site mode)
Site events definition pages (Xflow sites)
7.1 Site events definition pages
(Xflow sites)
The events definitions are available only for certain types of sites (Xflow).
The configuration pages will be visible only for sites of this type.
7.1.1 The list/detail page
The events definitions page displays the list of definitions of events
available for the selected site.
It is possible, from this page, to add, copy, delete and change event
definitions.
7.1.2 Edit page
This page allows you to set the name and description of an event
definition. The name is compulsory, while the description can be blank.
7.2 Peripheral pages (Xflow and
Teleflo sites)
The peripheral definitions are available only for certain types of sites
(Xflow/Teleflo). The configuration pages will be visible only for sites of
this type.
7.2.1 The list/detail page
The peripheral definitions page displays the list of peripherals available
for the selected site.
It is possible, from this page, to add, copy, delete and modify a
peripheral.
7.2.2 Edit page
This page allows you to set the name and description of a peripheral. The
name is compulsory, while the address can be blank.
64
NT00360-EN-01
Kerweb
The management menu (site mode)
Consistency checks page (Depending of consistency checks module)
7.3 Consistency checks page
(Depending of consistency
checks module)
The consistency checks page displays the list of variable which are
recorded at least one data file. This page is available with the consistency
check red right only if the module is activated on Kerwin.
7.3.1.1
Sorting
It is possible to sort the list by increasing or decreasing name and by
transmitted name if option is activated.
7.3.1.2
Data
The first column indicates if the variable is locked or active.
The next column displays the name of the variable.
If the option “display transmitted name” is on, the corresponding column
is displayed.
The next column display the list of data files in which the variable is
recorded.
The two following columns display the category and class of the variable.
Two variable in the « __customer.xml » configuration file allow to inhibit
the displaying of each column with “consistency_class=0” and
“consistency_category=0”.
These two properties are criterion for match between variable and
consistency checks.
The last column displays the list of consistency checks with the current
setting of categories and classes.
7.3.1.3
Action buttons
On the consistency checks column, a “set” button is available if the user
has the write rights. This button triggers the open of a dialog box to
change category or class of variable. When, one of these properties is
changed, the list of the consistency checks matching with this new
configuration is automatically updated.
The “set” button allows saving the change, the “cancel” button allows
closing dialog box unless saving change.
When a change is saved, the page is displaying again, with the new
configuration.
NT00360-EN-01
65
Kerweb
The management menu (site mode)
Site remote configuration pages (BRIO/W310 sites)
7.4 Site remote configuration
pages (BRIO/W310 sites)
BRIO (W310) remote configuration allows you to modify or read the
configuration of the RTU by SMS. The configuration page allows you to
prepare read or write requests by grouping them by SMS and initiating
sending of the SMS messages. The history page allows you to view the
actions performed over a defined period of time.
7.4.1 Site configuration page
The header of the main table allows you to select the BRIO model. The
upper part of the screen shows the BRIO configuration in the form of a
tree structure. It allows you to select a site configuration element. The
following part presents the SMS messages consisting of these various
actions and makes it possible, via their status, to manage the actions and
SMS messages.
7.4.1.1
Change of model
It is necessary to specify on which BRIO model the configuration is
based. This model must correspond to the real model of the RTU to be
configured. For a BRIO already associated with a model, the change
must be confirmed: the actions already saved and not compatible from
one model to another are deleted during the change.
7.4.1.2
Read and write actions
The tree structure corresponding to the model allows you to choose the
parameter to read or write. Modification of the field in the "Value to be
written" column makes it possible to save a write action. Confirmation of
the "Read" link in the last column makes it possible to save a parameter
reading action.
For these two actions:
The boxes located at the intersection of the parameter and the
column corresponding to the action take on an orange or yellow
background colour.
The boxes corresponding to the parent directories are also coloured,
thus making it possible to identify the actions currently requested
when the menu is folded up.
The line of the last parameter requested in read or write mode is
selected (blue coloured background).
When the parameter has a special influence on the configuration, a
request for confirmation is displayed.
The request is the subject of an SMS message or is inserted in an
SMS already prepared.
66
NT00360-EN-01
Kerweb
The management menu (site mode)
Site remote configuration pages (BRIO/W310 sites)
7.4.1.3
SMS management
Read and write requests are stored in SMS messages.
7.4.1.3.1
-
Column 1: Allows you to select SMS messages to
initiate the following actions
Refresh: Requests regeneration of the table and statuses.
The confirmed SMS messages are ready to be sent
immediately or at the time for which they are programmed.
SMS messages which are not undergoing programming are
suspended.
: The SMS messages acknowledged or in error are removed
from the table and can be found in the history.
7.4.1.3.2
-
-
Column 2: Allows you to manage the scheduling
of SMS sending
The link on the date, set to the current time, allows you to change
this date to delay sending. It is possible to request immediate
sending (in compliance with the queue), sending at a programmed
time or sending lagged by a number of minutes before the BRIO
cyclical call (allows the SMS message to be taken into account by
the BRIO as of its next cyclical call).
As of the second SMS message, an execution order link is available.
In a dialogue box you can list the SMS messages whose actions
should be taken into account before the SMS message to be
scheduled is sent.
The SMS messages are sent in order, taking into account the
following two parameters:
the time lag;
the acknowledgement of certain SMS messages to validate the
sending of others.
7.4.1.3.3
Column 3: Indicates the type of each action
inserted in the SMS message
7.4.1.3.4
Column 4: Indicates the full path of the action in
the tree structure
This takes the form of a link whose activation triggers the corresponding
line selection on the table of actions (blue coloured background).
7.4.1.3.5
7.4.1.3.6
Column 5: Specifies the requested write value
Column 6: Specifies the name of the user
initiating the action request
7.4.1.3.7
Column 7: Allows you to select actions to initiate
the following actions
The possible reorganization actions are:
Deletion of the action which is therefore excluded from the SMS
message.
Upward shift (which allows a request to be shifted to an upstream
SMS message). The first action can also be shifted upward by
creating a new SMS message.
Downward shift (which allows a request to be shifted to a
downstream SMS message). The last action can also be shifted
downward by creating a new SMS message.
The actions will in the end be performed from the bottom upward.
Allows you to confirm the sending of all SMS
messages in compliance with their programming.
NT00360-EN-01
67
Kerweb
The management menu (site mode)
Site remote configuration pages (BRIO/W310 sites)
7.4.2 Site history page
The history page displays the configuration SMS messages programmed
and sent by Kerwin to the site in decreasing order of date. It is possible to
display the oldest operations by browsing through the
pages or specifying start or end of list dates.
For greater precision, it is also possible to filter the list for a given status.
The information available in the table is the information making up the
configuration table. The first column displays the SMS message, its
number, and its programming date. For each of the rows, the following
columns display one or more actions contained in the SMS message on
three columns: the type of action (read or write), the label of the path
impacted by the configuration action, the value of the write parameter,
and the user initiating the action.
68
NT00360-EN-01
Kerweb
The parameters setup menu (general
mode)
Options page
8 The parameters setup menu
(general mode)
8.1 Options page
The options page allows you to change the name of the application. This
name appears in the menu band and in the Ariadne's thread on each
page of the Kerweb site.
8.2 Link configuration pages
Access: Parameters setup/Links
8.2.1 Definition of links
When the telephone line is used to connect to a RTU, the modem must
be configured appropriately. This configuration is performed by the
definition of a link. The link will indicate how the RTU communicates
physically. This link may be re-used to connect to all RTUs which
communicate in the same way.
Management / Sites / <selection of a site> / Configuration of the site: The
link defined on this page will be used during connections to animate a
synoptic and by default during file transfers.
"Data", "Parity" and "Stop" communication parameter values are
predefined for the Local and Hayes types; these values correspond to the
parameters of Schneider Electric RTUs communicating with KERWIN via
the telephone network (HAYES) or via the local or LAN terminal port
(LOCAL) under the Napbus and Modbus 2 protocols.
8.2.2 The list/detail page
The links page displays in the same view the list and details of the
selected link.
List:
A type filter (Hayes, local, TCP or UDP-PPP, TCP/IP or UDP/IP) is available on
the list.
Detail:
The detail page displays:
General: the type of link, the port used (for the "local", "Hayes" and
"ppp" types) and the telephone prefix (for the "Hayes" and "ppp"
types).
Port parameter (for the "local" and "Hayes" types): character
transmission format (number of data and stop bits, parity),
communication speed, etc.
Modbus timeout: Maximum response waiting time
Editing:
The editing possibilities on the links are:
Addition: When creation of a link is requested, a pop-up appears,
prompting us to enter the name and the type of link to be created.
Change.
Deletion: Protected by a request for confirmation.
NT00360-EN-01
69
Kerweb
The parameters setup menu (general
mode)
Link configuration pages
8.2.3 Edit page
Name: Link identification label (free definition)
Type: Choice from the list at creation: Hayes, Local, PPP, TCP or UDP,
TCP/IP, UDP/IP.
o
Hayes refers to a PSTN modem installed on a PC slot
(internal) or connected to one of the serial ports (external).
o
Local refers to a direct wired link with a serial port of the
PC or a serial card.
o
PPP refers to a point-to-point type connection. Connection
is delegated to the RAS system of Windows. An RAS
input must therefore have first been associated with a
KERWIN port.
o
TCP and UDP refer to communication via the IP network
(in TCP or UDP). No longer use this type of link. It is kept
for reasons of compatibility with the previous versions of
Kerwin.
o
TCP/IP refers to communication via the IP network in
TCP.
o
UDP/IP refers to communication via the IP network in
UDP.
1
1
2
3
4
5
6
2
Speed: Choice from the list, 300 / 600 / 1200 / 2400 / 4800 / 9600 /
19200 / 38400 / 57600 / 115200.
For communication with a TBC RTU, choose:
o
1200 baud if communication takes place via the telephone
network (V23 mode).
o
4800 baud if communication takes place via the RTU port.
o
The speed configured on the TBC ("Modbus slave"
section) if communication takes place via the local area
network.
3
For communication with a Phenix / Flowtel / iRio, XLRIO [Xflow] RTU,
choose:
o
19200 baud if communication takes place via the
telephone network.
o
115200 baud if communication takes place via the LAN
port.
4
Data, Parity, Stop: Character format.
o
Number of data bits: 7 or 8.
o
Parity: Odd, even or no.
o
Number of stop bits: 1 or 2.
For Schneider Electric RTUs, choose 8 data bits, no parity and 1 stop bit.
5
Initialization chain: Modem initialization command. This depends on the
brand and type of modem used. Refer to the manual for your modem.
Prefix: Prefix for access to the public telephone network when the
modem line is connected to a private automatic switching unit.
6
Modbus timeout: Value to be entered in milliseconds. Maximum
response waiting time before going to error. This value depends on the
communication speed of your RTU and the type of link.
For communication with a TBC RTU, enter 8000 ms.
For communication with a Phenix / Flowtel, iRIO, XLRIO [Xflow] RTU,
enter 2000 ms.
With each type of link are associated various parameters:
8.2.3.1
Hayes
Configuration of the telephone prefix, port characteristics and modem
initialization chain.
8.2.3.2
Local
Configuration of only the port characteristics.
70
NT00360-EN-01
Kerweb
The parameters setup menu (general
mode)
Link configuration pages
8.2.3.3
PPP
Configuration of port characteristics and possibility of adding a prefix.
8.2.3.4
TCP or UDP, TCP/IP and UDP/IP
No parameters setup other than the timeout, since the link takes place via
the Net ports.
NT00360-EN-01
71
Appendix B
72
Site map
NT00360-EN-01
Kerweb
73
Personal notes
NT00360-EN-01
Schneider Electric Industries SAS
As standards, specifications and designs change from time to time, always ask for
confirmation of the information given in this publication.
Schneider Electric
35 rue Joseph Monier
CS30323 - F
92506 Rueil Malmaison Cedex (France)
Tel : +33 (0)1 41 39 34 50
Fax : +33 (0)1 41 39 34 00
http://www.schneider-electric.com
E-mail : [email protected]
NT00360-EN-01
12/2014
Publication: Schneider Electric - Made in France
Production: Schneider Electric - Made in France
Printing: Schneider Electric - Made in France