1
CameraSecura Transmitter User Manual Release 493
BASIC OPERATION
POWERING ON THE TRANSMITTER
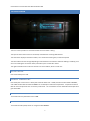
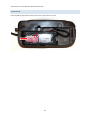
Insert two protected 18650 batteries into the Transmitter. The button top of the battery needs to touch the +
sign on the battery door interior, and flat end of the bottom needs to touch the – sign. The LED will turn red if
the batteries are charged. Use your nail or a pen to apply pressure to the on/off switch for 1 second to turn on
the Transmitter. The LED will start blinking green. After 30 seconds the LED will turn solid green and the initial
screen will appear.
POWERING OFF THE TRANSMITTER
NB: The Transmitter must be powered down before the batteries are removed to avoid damaging the OLED
screen, or corrupting the file system. If the Transmitter is on (green or blue LED), hold down the on/off switch
for 1 second to turn it off. The LED will blink orange, once it turns red the batteries can be safely removed.
Tip: Remove the batteries if the Transmitter will not be used for more than a day to prevent the batteries from
discharging.
Tip: The Transmitter has a super capacitor that take several seconds to discharge when power is removed. If
the Transmitter does not appear to work properly after quickly changing batteries, leave the battery door open
for 10 seconds and try again.
CONNECTING THE CAMERA
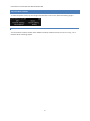
The Transmitter screws into the camera’s tripod mount via the thumb screw included in the box.
The USB cable on the left of the Transmitter plugs into the camera’s USB port. There is some extra cable inside
the transmitter, so if you need a bit more length, loosen the 3 screws on the top of the transmitter closest to
the usb cable, and gently pull.
Tip: A regular USB cable plugged into one of the USB ports of the grip can also be used if you wish to mount
the transmitter away from the camera.
6