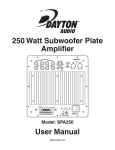
1
SC-450 System Controller
Installation and Configuration Guide
P/N: 709C004401
REV: A02
Date: July 2009
MobileAccess 8391 Old Courthouse Road, Suite 300, Vienna, VA 22182
Tel: +1(866)436-9266, +1(703)848-0200 TAC: +1(800)787-1266, Fax:
+1(703)848-0280
http://www.MobileAccess.com
Table of Contents
Preface Material ........................................................................................................................4
Policy for Warranty and Repair ............................................................................................................ 5
Preface Material
Table of Contents
Standards and Certification ................................................................................................................. 6
Additional Relevant Documents ........................................................................................................... 7
1
Introduction........................................................................................................................8
1.1 System Controller Description ...................................................................................................... 8
1.1.1 System Controller Block Diagram ........................................................................................ 8
1.1.2 Front-Panel Description ...................................................................................................... 9
1.1.3 System Controller Rear Panel Interfaces ........................................................................... 11
2
Hardware Installation Procedure ....................................................................................13
2.1 Rack Mount Installation .............................................................................................................. 13
2.2 Power Supply and Connection .................................................................................................... 14
2.2.1 Power Safety Instructions ................................................................................................. 14
2.2.2 System Controller Power Consumption.............................................................................. 14
2.2.3 MobileAccess Supplied Power Supplies ............................................................................ 14
2.2.4 Power Connection ............................................................................................................ 15
2.3 Interfaces .................................................................................................................................. 15
2.3.1 Base Unit Interface ........................................................................................................... 15
2.3.2 Radio Interface Unit (RIU) Interface ................................................................................... 16
2.3.3 Expanding the System Controller - Master/Slave Interface .................................................. 16
2.3.4 Auxiliary Dry Contact Alarm Input Interface ........................................................................ 18
2.3.5 Dry Contact Alarm Output Interface ................................................................................... 18
3
System Controller Web Interface (GUI) ..........................................................................20
3.1 Accessing the Web GUI ............................................................................................................. 20
3.2 Local Access ............................................................................................................................. 20
3.3 User Login ................................................................................................................................ 21
3.4 Main Menu ................................................................................................................................ 22
4
Monitor .............................................................................................................................24
5
Config ...............................................................................................................................25
5.1 Topology Tree ........................................................................................................................... 25
5.1.1 Fault Sourcing Using the Network Topology Tree ............................................................... 28
5.1.2 Fault Sourcing through the Device Alarms ......................................................................... 28
5.2 Device Display .......................................................................................................................... 28
5.3 Device Configuration and Alarms ................................................................................................ 28
5.3.1 Adding a New Device ....................................................................................................... 29
5.3.2 Controller Alarms and Configuration Window ..................................................................... 29
5.3.3 BTSC/BDAC Alarms and Configuration Window................................................................. 33
5.3.4 Base Unit (BU) Alarms and Configuration .......................................................................... 38
5.3.5 RHU Alarms and Configuration ......................................................................................... 42
MA SC-450 Controller System Installation and Configuration Guide
2
Preface Material
Table of Contents
5.3.6 Add-on Alarms and Configuration ...................................................................................... 48
6
Events ...............................................................................................................................53
6.1 Event Display ............................................................................................................................ 53
6.1.1 Event Format ................................................................................................................... 53
6.1.2 Sorting Events ................................................................................................................. 54
6.1.3 Filtering Displayed Events ................................................................................................ 54
7
Set-up ...............................................................................................................................56
8
Management .....................................................................................................................57
8.1.1 Username/Password Parameters ...................................................................................... 57
8.1.2 IP Address Parameters .................................................................................................... 58
8.1.3 SNMP Configuration ......................................................................................................... 59
8.1.4 Software Upgrade ............................................................................................................ 61
8.1.5 Restart/Reseting the SC-450 Controller ............................................................................. 64
9
Help...................................................................................................................................65
10 Appendix ..........................................................................................................................66
10.1 SNMP Management with 3rd Party Applications .......................................................................... 66
10.1.1 Viewing the Events table via SNMP ................................................................................... 66
10.1.2 Binding Table................................................................................................................... 67
10.1.3 List of Traps ..................................................................................................................... 67
10.1.4 List of Heartbeat Mode Device Traps ................................................................................. 71
10.2 Sprint Monitoring with Sym Wireless Modem ............................................................................... 71
10.2.1 Connect and Login to the SC-450 ..................................................................................... 71
10.2.2 Change the SC-450 IP settings. ........................................................................................ 71
10.2.3 Configure the SNMP Heartbeat Trap Settings .................................................................... 72
10.2.4 Verify Traps are being sent from the SC-450...................................................................... 73
MA SC-450 Controller System Installation and Configuration Guide
3
Preface Material
Table of Contents
Preface Material
© COPYRIGHT 2009, MOBILEACCESS NETWORKS INC. ALL RIGHTS RESERVED.
MOBILEACCESS™ IS A REGISTERED TRADEMARK OF MOBILEACCESS. THIS DOCUMENT CONTAINS OTHER TRADEMARKS, TRADE NAMES AND
SERVICE MARKS OF MOBILEACCESS AND OTHER ORGANIZATIONS, ALL OF WHICH ARE THE PROPERTY OF THEIR RESPECTIVE OWNERS.
THIS DOCUMENT CONTAINS CONFIDENTIAL AND PROPRIETARY INFORMATION OF MOBILEACCESS AND MAY NOT BE COPIED, TRANSMITTED,
STORED IN A RETRIEVAL SYSTEM OR REPRODUCED IN ANY FORMAT OR MEDIA, IN WHOLE OR IN PART, WITHOUT THE PRIOR WRITTEN CONSENT
OF MOBILEACCESS. INFORMATION CONTAINED IN THIS DOCUMENT SUPERSEDES ANY PREVIOUS MANUALS, GUIDES, SPECIFICATIONS, DATA
SHEETS OR OTHER INFORMATION THAT MAY HAVE BEEN PROVIDED OR MADE AVAILABLE TO THE USER.
THIS DOCUMENT IS PROVIDED FOR INFORMATIONAL PURPOSES ONLY, AND MOBILEACCESS DOES NOT WARRANT OR GUARANTEE THE
ACCURACY, ADEQUACY, QUALITY, VALIDITY, COMPLETENESS OR SUITABILITY FOR ANY PURPOSE OF THE INFORMATION CONTAINED IN THIS
DOCUMENT. MOBILEACCESS RESERVES THE RIGHT TO MAKE UPDATES, IMPROVEMENTS AND ENHANCEMENTS TO THIS DOCUMENT AND THE
PRODUCTS TO WHICH IT RELATES AT ANY TIME WITHOUT PRIOR NOTICE TO THE USER. MOBILEACCESS MAKES NO WARRANTIES,
EXPRESS OR IMPLIED, INCLUDING, WITHOUT LIMITATION, THOSE OF MERCHANTABILITY AND FITNESS FOR A
PARTICULAR PURPOSE, WITH RESPECT TO THIS DOCUMENT OR ANY INFORMATION CONTAINED HEREIN.
MA SC-450 Controller System Installation and Configuration Guide
4
Preface Material
Policy for Warranty and Repair
Policy for Warranty and Repair
MOBILEACCESS TESTS AND INSPECTS ALL ITS PRODUCTS TO VERIFY THEIR QUALITY AND RELIABILITY. MOBILEACCESS USES EVERY
REASONABLE PRECAUTION TO ENSURE THAT EACH UNIT MEETS THEIR DECLARED SPECIFICATIONS BEFORE SHIPMENT. CUSTOMERS SHOULD
ADVISE THEIR INCOMING INSPECTION, ASSEMBLY, AND TEST PERSONNEL ABOUT THE PRECAUTIONS REQUIRED IN HANDLING AND TESTING
OUR PRODUCTS. MANY OF THESE PRECAUTIONS CAN BE FOUND IN THIS MANUAL.
THE PRODUCTS ARE COVERED BY THE FOLLOWING WARRANTIES:
General Warranty
MOBILEACCESS WARRANTS TO THE ORIGINAL PURCHASER ALL STANDARD PRODUCTS SOLD BY MOBILEACCESS TO BE FREE OF DEFECTS IN
MATERIAL AND WORKMANSHIP FOR ONE (1) YEAR FROM DATE OF SHIPMENT FROM MOBILEACCESS. DURING THE WARRANTY PERIOD,
MOBILEACCESS WILL REPAIR OR REPLACE ANY PRODUCT THAT MOBILEACCESS PROVES TO BE DEFECTIVE. THIS WARRANTY DOES NOT
APPLY TO ANY PRODUCT THAT HAS BEEN SUBJECT TO ALTERATION, ABUSE, IMPROPER INSTALLATION OR APPLICATION, ACCIDENT,
ELECTRICAL OR ENVIRONMENTAL OVER-STRESS, NEGLIGENCE IN USE, STORAGE, TRANSPORTATION OR HANDLING.
Specific Product Warranty Instructions
ALL MOBILEACCESS PRODUCTS ARE WARRANTED AGAINST DEFECTS IN WORKMANSHIP, MATERIALS AND CONSTRUCTION, AND TO NO
FURTHER EXTENT. ANY CLAIM FOR REPAIR OR REPLACEMENT OF UNITS FOUND TO BE DEFECTIVE ON INCOMING INSPECTION BY A CUSTOMER
MUST BE MADE WITHIN 30 DAYS OF RECEIPT OF SHIPMENT, OR WITHIN 30 DAYS OF DISCOVERY OF A DEFECT WITHIN THE WARRANTY PERIOD.
THIS WARRANTY IS THE ONLY WARRANTY MADE BY MOBILEACCESS AND IS IN LIEU OF ALL OTHER WARRANTIES, EXPRESSED OR IMPLIED.
MOBILEACCESS SALES AGENTS OR REPRESENTATIVES ARE NOT AUTHORIZED TO MAKE COMMITMENTS ON WARRANTY RETURNS.
Returns
IN THE EVENT THAT IT IS NECESSARY TO RETURN ANY PRODUCT AGAINST ABOVE WARRANTY, THE FOLLOWING PROCEDURE SHALL BE
FOLLOWED:
1. RETURN AUTHORIZATION IS TO BE RECEIVED FROM MOBILEACCESS PRIOR TO RETURNING ANY UNIT. ADVISE MOBILEACCESS OF THE
MODEL, SERIAL NUMBER, AND DISCREPANCY. THE UNIT MAY THEN BE FORWARDED TO MOBILEACCESS, TRANSPORTATION PREPAID. DEVICES
RETURNED COLLECT OR WITHOUT AUTHORIZATION MAY NOT BE ACCEPTED.
2. PRIOR TO REPAIR, MOBILEACCESS WILL ADVISE THE CUSTOMER OF OUR TEST RESULTS AND ANY CHARGES FOR REPAIRING CUSTOMERCAUSED PROBLEMS OR OUT-OF-WARRANTY CONDITIONS ETC.
3. REPAIRED PRODUCTS ARE WARRANTED FOR THE BALANCE OF THE ORIGINAL WARRANTY PERIOD, OR AT LEAST 90 DAYS FROM DATE OF
SHIPMENT.
Limitations of Liabilities
MOBILEACCESS'S LIABILITY ON ANY CLAIM, OF ANY KIND, INCLUDING NEGLIGENCE FOR ANY LOSS OR DAMAGE ARISING FROM, CONNECTED
WITH, OR RESULTING FROM THE PURCHASE ORDER, CONTRACT, QUOTATION, OR FROM THE PERFORMANCE OR BREACH THEREOF, OR FROM
THE DESIGN, MANUFACTURE, SALE, DELIVERY, INSTALLATION, INSPECTION, OPERATION OR USE OF ANY EQUIPMENT COVERED BY OR
FURNISHED UNDER THIS CONTACT, SHALL IN NO CASE EXCEED THE PURCHASE PRICE OF THE DEVICE WHICH GIVES RISE TO THE CLAIM.
EXCEPT AS EXPRESSLY PROVIDED HEREIN, MOBILEACCESS MAKES NO WARRANTY, EXPRESSED OR IMPLIED, WITH
RESPECT TO ANY GOODS, PARTS AND SERVICES PROVIDED IN CONNECTION WITH THIS AGREEMENT INCLUDING, BUT
NOT LIMITED TO, THE IMPLIED WARRANTIES OF MERCHANTABILITY AND FITNESS FOR A PARTICULAR PURPOSE.
MOBILEACCESS SHALL NOT BE LIABLE FOR ANY OTHER DAMAGE INCLUDING, BUT NOT LIMITED TO, INDIRECT, SPECIAL
OR CONSEQUENTIAL DAMAGES ARISING OUT OF OR IN CONNECTION WITH FURNISHING OF GOODS, PARTS AND
SERVICE HEREUNDER, OR THE PERFORMANCE, USE OF, OR INABILITY TO USE THE GOODS, PARTS AND SERVICE.
MA SC-450 Controller System Installation and Configuration Guide
5
Preface Material
Standards and Certification
Reporting Defects
THE UNITS WERE INSPECTED BEFORE SHIPMENT AND FOUND TO BE FREE OF MECHANICAL AND ELECTRICAL DEFECTS.
EXAMINE THE UNITS FOR ANY DAMAGE THAT MAY HAVE BEEN CAUSED IN TRANSIT. IF DAMAGE IS DISCOVERED, FILE A CLAIM WITH THE
FREIGHT CARRIER IMMEDIATELY. NOTIFY MOBILEACCESS AS SOON AS POSSIBLE.
NOTE: KEEP ALL PACKING MATERIAL UNTIL YOU HAVE COMPLETED THE INSPECTION
WARNING: TO COMPLY WITH FCC RF EXPOSURE COMPLIANCE REQUIREMENTS, ANTENNAS USED FOR THIS PRODUCT MUST BE FIXED
MOUNTED ON INDOOR PERMANENT STRUCTURES, PROVIDING A SEPARATION DISTANCE OF AT LEAST 20 CM FROM ALL PERSONS DURING
NORMAL OPERATION.
WARNING: ANTENNA GAIN SHOULD NOT EXCEED 10 dBi.
WARNING: EACH INDIVIDUAL ANTENNA USED FOR THIS TRANSMITTER MUST BE INSTALLED TO PROVIDE A MINIMUM SEPARATION DISTANCE
OF 20 CM OR MORE FROM ALL PERSONS AND MUST NOT BE CO-LOCATED WITH ANY OTHER ANTENNA FOR MEETING RF EXPOSURE
REQUIREMENTS.
WARNING: THE DESIGN OF THE ANTENNA INSTALLATION NEEDS TO BE IMPLEMENTED IN SUCH A WAY SO AS TO ENSURE RF RADIATION
SAFETY LEVELS AND NON-ENVIRONMENTAL POLLUTION DURING OPERATION.
Standards and Certification
SC-450 Controllers meet the following standards and specifications:
US:
FCC 47CFR Part 15(B), UL 60950-1
Europe:
EN 301489, EN 60950-1
ISO:
ISO 9001: 2000 and ISO 13485: 2003
FCC Certification
Note: This equipment has been tested and found to comply with the limits for a Class B digital device,
pursuant to Part 15 of the FCC Rules. These limits are designed to provide reasonable protection against
harmful interference in a residential installation. This equipment generates uses and can radiate radio
frequency energy and, if not installed and used in accordance with the instructions, may cause harmful
interference to radio communications. However, there is no guarantee that interference will not occur in
a particular installation. If this equipment does cause harmful interference to radio or television
reception, which can be determined by turning the equipment off and on, the user is encouraged to try to
correct the interference by one or more of the following measures:
-
Reorient or relocate the receiving antenna.
-
Increase the separation between the equipment and receiver.
-
Connect the equipment into an outlet on a circuit different from that to which the receiver is
connected.
-
Consult with the dealer or an experienced radio/TV technician for additional assistance.
Warning!
Changes or modification to this equipment not expressly approved by MobileAccess could void the user‟s
authority to operate the equipment.
MA SC-450 Controller System Installation and Configuration Guide
6
Preface Material
Additional Relevant Documents
Additional Relevant Documents
The following documents are required if the corresponding units are included in your system
installation.
P/N
Description
709C001503
1000 Installation and Configuration Guide
709C001205
2000 Installation and Configuration Guide
709C002502
RIU Installation and Configuration Guide
709C003003
330 Installation and Configuration Guide
709C001309
410/430 Installation and Configuration Guide
MA SC-450 Controller System Installation and Configuration Guide
7
Introduction
1
System Controller Description
Introduction
1.1 System Controller Description
The System Controller (SC-450) provides a centralized point that enables management,
configuration and monitoring of MobileAccess devices in a system via a local and remotely
accessible web-GUI interface. The system controller provides the physical interface to
devices in the MobileAccess Encover 1000/2000 product families as well as an IP Ethernet
interface for LAN or Internet connectivity.
Features
Real-time monitoring, diagnostics and control of converged wireless
indoor networks
Provides End to End Monitoring from Head End equipment to Antenna
Interactive graphical display of elements that shows the device status
and configuration parameters
Scales to support large systems with up to eight additional slave SC450s or 410 controllers.
Two IP Accessible Ethernet Interfaces
Dry Contact Alarm Outputs and Inputs
Supports SNMP management and Traps
Accessbile locally and remotely via standard Web Browser
Real-time monitoring, diagnostics and control
16 Ports for element management with up to 8 of them configurable for
slave controllers
Three user access levels
Remote Software Upgradeable
Built in Help
1.1.1 System Controller Block Diagram
The System Controller provides hardware interfaces to the components of the Encover
1000/2000 system (Radio Interface Units, Base Units, 330, 1500) as seen in Figure 1.
For larger installations the system controller may function as a Master or Slave controller
(410 controllers can also be used as Slaves).
MA SC-450 Controller System Installation and Configuration Guide
8
Introduction
System Controller Description
Figure 1-1: System Controller Block Diagram
1.1.2 Front-Panel Description
Figure 1-2: System Controller Front Panel
1.1.2.1 System Controller Front Panel Interfaces
Table 1-1: System Controller Front Panel Interfaces
Interface
Description
Network
Ports
Local - 10/100/1000 Ethernet port designed for initial local setup.
Supports static and dynamic (server and client) IP address
setting.
WARNING: Do not connect the LOCAL interface to a
network when it is in the default DHCP server mode. It is
designed to operate as a direct connection between a PC and
the SC-450 and can cause problems if connected to a LAN. Use
the LAN port when interfacing with a LAN.
LAN - 10/100/1000 Ethernet port network connection use for
remote connectivity. Supports static and dynamic (client only) IP
MA SC-450 Controller System Installation and Configuration Guide
9
Introduction
System Controller Description
Interface
Description
address settings.
SRV 1 - Reserved for future use
SRV 2 - Reserved for future use
RS232
Used to connect SC-450 as a slave controller and backwards
compatible support for MCT application.
USB Port
Reserved for future use.
PCMCIA
Reserved for future use.
1.1.2.2 System Controller LED Indicators
Table 1-2: System Controller LED Indicators
LED
Description
PWR
ON green - indicates unit has power applied.
OFF – indicates unit does not have power applied.
Run
blinking green - blinks continuously indicating the controller is
initialized and running.
Solid green – indicates unit is not functioning properly.
OFF – indicates unit is not powered or is not functioning properly.
Failure
alarm
Indicates overall system status with „Major‟ or „Minor‟ type of
alarms:
Minor red – indicates system has one minor alarm type active.
Minor OFF – indicates system is not in minor alarm.
Major red – indicates system has one or more major alarm types
active.
Minor OFF – indicates system is not in major alarm.
1.1.2.3 System Controller LCD Display
The LCD Display is used to provide limited system information to the user without logging
into the web-gui. On controller restart the LCD will display a sequence of information
reflecting the restart of the controller. When the controller is operating the LCD will
sequentially display system information as follows:
The LCD display corresponds to the Major/Minor LEDs. The display differs in the
Master/Standalone controllers and in the Slave controllers. In the Master/Standalone
controller two rows (upper and lower) appear, while in the Remote controllers only the top
row appears.
LCD Upper row
Toggles between the alarm status of the unit and the LOCAL port IP Information.
MA SC-450 Controller System Installation and Configuration Guide
10
Introduction
System Controller Description
IP Information: Address and Netmask information to facilitate configuration of the users PC
to log into the controller web-GUI
Alarm Status: shows status of locally connected devices, where status is indicated by the
following messages:
LCL AUX Major (auxiliary faults are always major), or
LCL RHU/BASE/BTSC Major/Minor
Note: If multiple types of problems exist, the display toggles between the
messages.
Lower row
Shows status of up to 8 slave controllers (Ports 9-16) whose overall connectivity or alarm
status is indicated by the following letters:
E -- communication Error
N -- Normal
m -- minor alarm condition on the slave controller
M -- Major alarm condition at the slave controller
Note: A Slave controller only shows the top row of information and a master
controller shows both rows.
Following is an example of a display:
Where the message in the lower row should be interpreted as follows:
Slave #1 = Normal (OK)
Slave #2 = not configured in the system (_)
Slave #3 = communication Error
Slave #4 = not configured in the system (_)
Slave #5 = not configured in the system (_)
Slave #6 = Slave in minor alarm
Slave #7 = not configured in the system (_)
Slave #8 = Slave in major a
1.1.3 System Controller Rear Panel Interfaces
Figure 1-3: System Controller Rear Panel
Table 1-3: System Controller Rear Panel Interfaces
Interface
Description
MA SC-450 Controller System Installation and Configuration Guide
11
Introduction
System Controller Description
Interface
Description
RS485 1-8
Connections to up to eight RIUs, Base Units in any
combination.
RS485/232
9-16
Connections for up to eight additional RIUs, Base
Units or software configurable to RS-232 for Slave
controllers.
PWR
DC power input: 36 to 60VDC (48VDC typical), 0.2A
max
Diag
Reserved - Diagnostic port used in manufacturing.
Auxiliary
Alarms
Eight normally closed inputs for alarms from
auxiliary devices (section 2.3.5)
Alarm Output
Major/Minor Dry contact alarm outputs (section
2.3.5)
Internal
Modem
Modem connection for remote dial-up.
MA SC-450 Controller System Installation and Configuration Guide
12
2
Hardware Installation Procedure
This section describes the general procedure to install the System Controller for typical
MobileAccess 1000/2000 Deployments.
For further information on the 1000/2000
installation refer to the MobileAccess 1000/2000 Installation and Configuration Guide.
2.1 Rack Mount Installation
The SC-450 requires 1 Rack unit of space for its installation with both front and rear access
for the associated cable and power connections. The following figure shows the typical
locations of the MobileAccess elements in a rack mount scenario. It is best to plan the
equipment position to facilitate viewing the LED indicators and LCD display on the SC-450
and to provide easy access to the LOCAL and LAN ethernet interfaces.
.
Figure 2-1: Recommended Position of Units in the Rack
Review the following guidelines to help ensure your safety and protect the equipment from
damage during the installation.
Only trained and qualified personnel should be allowed to install or replace this
equipment.
Verify that ambient temperature of the environment does not exceed 50 C (122 F)
To maintain a low center of gravity, ensure that heavier equipment is installed near
the bottom of the rack and load the rack from the bottom to the top.
Ensure that adequate airflow and ventilation within the rack and around the installed
components so that the safety of the equipment is not compromised.
Verify that the equipment is grounded as required.
Hardware Installation Procedure
Power Supply and Connection
2.2 Power Supply and Connection
2.2.1 Power Safety Instructions
SAFETY WARNINGS
When installing or selecting power supplies:
Be sure to disconnect power source from the unit before servicing.
Calculate the required power according to the requirements of the specific installation
and then determine the configuration of the power supplies. The required DC cables
will then be determined by the selected PS configuration.
Use only UL approved power supplies
AC and DC power supply cables – use only the power cords supplied with the
units
Install external over-current protective devices for the system according to the
requirements described in the following section 2.2.2.
2.2.2 System Controller Power Consumption
It is common to use a single power supply to provide power to multiple components in the
MobileAccess Head End including controllers, RIUs and base units. When utilizing one power
supply for multiple units take care to calculate the load such that that the total wattage of
the units does not exceed the maximum rating of the power supply you are using. When
using bulk power it is recommended to use appropriate fuse protection for each component
in the system.
Unit Type
Voltage
Input
Typical Power
Consumption
Maximum
Current
Consumption
MA 410
Controller
20 to 48VDC
10W
0.5A
SC-450
Controller
36 to 60 VDC
10W
0.2A
2.2.3 MobileAccess Supplied Power Supplies
MobileAccess supplies various power supplies that can be installed on shelves in a rack or
mounted on a wall, depending on your configuration.
Table 2-1: Power Supplies
Part Number
Description
LPS-48V-40W
Local AC/DC Converter 40W
LPS-48V-66W
Local AC/DC Converter 66W
MA SC-450 Controller System Installation and Configuration Guide
14
Hardware Installation Procedure
LPS-48V-100W
Interfaces
Local AC/DC Converter 100W
2.2.4 Power Connection
Connect the DC power plug to the System Controller rear panel according to the power limits
described in the controller datasheet (48VDC typical, 36 to 60VDC, 0.2A max for an SC-450
controller).
Figure 2-2: System Controller Power Connection
2.3 Interfaces
2.3.1 Base Unit Interface
Up to 16 RIUs and base units in any combination can be connected to the System Controller
rear panel RS-485 ports. Ports 9-16 can also be software configured to support 410 or SC450 units as slave controllers to expand monitoring and management capacity.
NOTE: MA 330s can carry management traffic from one base unit at the MA 330
remote to the MA 330 main. If there is more than one base unit connected to a
MA330 remote you must use a slave controller to carry management traffic back
to the master system controller.
Base Units are connected to the RS-485 ports on the System Controller rear panel via
straight through RJ-45 to RJ-45 cables that are supplied with each base unit.
Figure 2-3. System Controller Base Unit Interface
MA SC-450 Controller System Installation and Configuration Guide
15
Hardware Installation Procedure
Interfaces
2.3.2 Radio Interface Unit (RIU) Interface
Up to 16 RIUs and base units in any combination can be connected to the System Controller
rear panel RS-485 ports. Ports 9-16 can also be software configured to support 410 or SC450 units as slave controllers to expand monitoring and management capacity.
RIUs can be connected to any RS-485 port on the controller rear panel via straight through
RJ-45 to RJ-45 cables that are supplied with each RIU.
Figure 2-4. RIU connections
2.3.3 Expanding the System Controller - Master/Slave Interface
In systems that require more ports than can be provided by a single SC-450 System
Controller, additional controllers can be connected in a Master/Slave configuration, where a
SC-450 System Controller is configured as the Master and other SC-450 or 410 controllers
are used as Slaves.
Slave controllers are connected to any of the RS485/RS232 ports 9-16 on the rear panel of
the System Controller. You must use the master System Controller‟s web-GUI to configure
each port you wish to use for a slave controller to operate slave mode vs device mode. See
section 5.3.2 for more information.
2.3.3.1 Single-Building Expanded Topology
In this topology, all the controllers are installed in a single location. The Slaves are
connected to the Master and only the Master controller is connected to the network.
To connect the Slaves to the Master controller:
Connect the 9-pin RS232 connector on the Slave front panel to one of the RJ-45 ports 916 labeled RS485/RS232 on the Master controller rear panel using the DB9 to RJ45 cable
supplied with the SC-450 or 410 controller (P/N 705005001).
MA SC-450 Controller System Installation and Configuration Guide
16
Hardware Installation Procedure
Interfaces
Figure 2-5. System Controller Master/Slave connections
2.3.3.2 Multi-Building Master/Slave Topology
Where coverage and monitoring is provided to a number of buildings via MA 330s with more
than one base unit attached a remote slave controller is installed adjacent to the 330 remote
and Base Units.
In this topology, a System Controller that will be the master controller is installed in the
system head end location. SC-450 or MA 410 controllers being used as Slaves are installed
in the remote buildings and connected to the Master controller via the com link ports of the
MA 330. The MA 330 system carries the communication signal optically between the head
end and remote locations.
The following figures show the Master and the Slave controller connections to the MA 300
units. If you are using a 330-MB-2 you will use two com ports to connect to the master
controller – one for each remote location.
Figure 2-6. Slave Controller Connections via 330
MA SC-450 Controller System Installation and Configuration Guide
17
Hardware Installation Procedure
Interfaces
2.3.4 Auxiliary Dry Contact Alarm Input Interface
The Auxiliary connector can be used to monitor up to eight auxiliary dry contact interfaces
such as fire-alarm, air-conditioning alarm, open-door alarm, etc. The interfaces are normally
closed.
The auxiliary alarm cable (Part number 7005A000101) is supplied with the System
Controller.
Connect the relevant alarms according to the connector pin-out described in the following
table or to the labeled bare wires of the auxiliary alarm cable.
The alarms can be labeled on the System Controller using the Web-GUI interface.
section 5.3.2.4 for more information.
See
Table 2-2. Auxiliary Dry Contact Alarm Cable Pin-out
Pin
Number
Auxiliary
Alarm
Pin
Number
Auxiliary
Alarm
1, 26
8
8, 9
4
2, 3
7
10, 11
3
4, 5
6
12, 13
2
6, 7
5
14, 15
1
2.3.5 Dry Contact Alarm Output Interface
The controller can provide Major and Minor output alarms. These alarms can be connected
directly to the auxiliary input of the Base Station, or to any other dry-contact application.
The dry contact output alarm cable (Part number 705004801) which has screw terminals for
these connections is supplied with the System Controller.
Note: If only one alarm is desired (major and minor combined) an external
connection of a wire jumper between pins 8 and 13 is necessary (normally
closed).
Connect the major and minor dry-contact outputs to the alarm system according to the
connector pinout below.
Figure 2-7: Dry Contact Alarm Output Cable Pin-Out
MA SC-450 Controller System Installation and Configuration Guide
18
Hardware Installation Procedure
Interfaces
Table 2-3. Dry Contact Alarm Output Pin-Out
8 – Major Error signal (normally
closed)
7 – Minor Error signal (normally open)
11 – Major COM
12 – Minor COM
15 –Major Error signal (normally
open)
13 – Minor Error signal (normally closed)
MA SC-450 Controller System Installation and Configuration Guide
19
3
System Controller Web Interface (GUI)
The System Controller has an integrated Web GUI application.
Web GUI Features and capabilities
Hierarchical display of the managed devices with status information
Automatic detection of MobileAccess Base Units, RIUs, RHUs and Add-on devices
Base Line system snapshot to alarm for devices which lose communication
Three access levels: Operator (read only), Engineer (Full access without password
management) and Admin (Full access with password management capabilities)
Enhanced Graphics to provide a more intuitive user interface.
To access the Web GUI use a windows based PC with an Ethernet port running Internet
Explorer 6.0 or later or Firefox 3.0 of later with a screen resolution of 1024x768 or higher.
3.1 Accessing the Web GUI
3.2 Local Access
For more specific information on configuring the IP Addresses of the System Controller refer
to section 8.1.2.
This section assumes the System Controller is configured with its default IP address settings.
If the System Controller‟s local IP address has been changed from the default settings it may
change the settings needed to access the controller. The LCD will periodically display the
configured IP address and subnet of the LOCAL Ethernet port.
Most PCs are configured to accept an IP address from a DHCP server and will work with the
system controller without any configuration changes.
If your computer is not configured to accept an address from a DHCP server you may need
to configure your computer‟s local Ethernet connection with a static IP address. Configure
your windows based computer‟s network connection for Static IP address connection as
follows:
1. Right-click your Windows Local Area Connections icon and choose Properties.
2. Select Internet Protocol (TCP/IP) Connection and choose Properties.
3. If desired write down the previous IP settings to assist with configuring the
computer back to its prior state.
4. Select Use the following IP Address, and set the parameters as follows:
IP Address: 10.0.0.2
Subnet mask: 255.255.255.0
Default Gateway: 10.0.0.1
Connect the System Controller LOCAL port via the supplied straight through Ethernet cable
(705900003) to a computer (i.e. laptop) as illustrated below.
System Controller Web Interface (GUI)
User Login
Figure 3-1: Ethernet Cable Connection
WARNING: Do not connect the LOCAL interface to a network when it is in
the default DHCP server mode. It is designed to operate as a direct connection
between a PC and the SC-450 and can cause problems if connected to a LAN. Use
the LAN port when interfacing with a LAN.
3.3 User Login
The System Controller‟s Web GUI has been optimized for use on IE 6.0 and Firefox 3.0 or
later with a screen resolution of 1024x768 or higher.
On your computer launch a standard internet browser and type the System Controller‟s IP
address (10.0.0.1) into the address bar.
Note: If the System Controller’s local IP address has been changed from the
default address the LCD will periodically show the configured IP address and
subnet of the LOCAL Ethernet port. To access the System Controller utilize a
different address on your PC on the same subnet as the System Controller’s
address.
The SC-450 Login Window appears:
MA SC-450 Controller System Installation and Configuration Guide
21
System Controller Web Interface (GUI)
Main Menu
Figure 3-2: Controller Log In Window
To access the Web GUI application, enter the user name and password for the desired access level
according to the following table.
Table 3-1: User Names and Access
Username
Default
Password
Access
Operator
Oper
enables the user to view the configuration and the
events display. Events acknowledge capabilities are not
available to Operator level users. Default password
Engineer
Eng
provides configuration capabilities to all options except
password control.l
Admin
ma98
Full Access
3.4 Main Menu
The main menu is used to access major functional areas on the System Controller.
Figure 3-3: Main Menu
The Main Menu Bar consists of the following tabs:
Monitor - Future Option
Config - display general device (Controller, RIU BTSC/BDAC, BU, RHU and Addon)
information, RF parameters and configuration options for the available site devices.
Events - displays and allows filtering of the events that occur on managed devices.
Set-up - Future Option
MA SC-450 Controller System Installation and Configuration Guide
22
System Controller Web Interface (GUI)
Main Menu
Management - administrative options including IP address configuration, User
Management, SNMP Configuration and Firmware Upgrade
Help - Provides the complete User Manual of the System Controller in PDF format
MA SC-450 Controller System Installation and Configuration Guide
23
Monitor
4
Main Menu
Monitor
The monitor function will be available in a future release.
MA SC-450 Controller System Installation and Configuration Guide
24
Config
5
Topology Tree
Config
The Web GUI Configuration Window is used to view and configure managed devices and
controllers. The figure below shows the Work Area display when the master controller
(CNTRL-M) is selected. It shows any slave units connected to the controller.
Figure 5-1. Web GUI Configuration window
The Config(uration) window consists of the following components:
Topology Tree - a hierarchial system view for all managed devices organized by
Controller (master and slave) and then subsequently by the port the device is connected
to on the controller.
Device Display – Used to display a graphical view of the selected device.
Device Configuration and Alarms – Used to view and modify parameters and status
of devices selected in the topology tree.
5.1 Topology Tree
The Web GUI Config(uration) window displays the Topology tree on the left-hand side.
This tree shows a hierarchical system view for all managed devices organized by Controller
(master and slave) and then subsequently by the port the device is connected to on the
controller. The tree displays both connected and disconnected network devices in the
appropriate hierarchy and colors corresponding to their overall alarm status with the name
of the device to the right. It is recommended to assign a name (up to 20 characters) to
each individual device for more accurate identification.
Connected MA Controllers, RIUs and BU devices are automatically identified and displayed as
they are discovered by the controller(s). Newly added RHUs or Add-on devices are identified
MA SC-450 Controller System Installation and Configuration Guide
25
Config
Topology Tree
only after the host BU 1-4 or BU 5-8 has been restarted with the RHU and addon connected
(either through local power cycle or through the configuration window).
Connected devices are displayed with green, red or yellow alarm status indications to the
left of the device and the name to the right. Disconnected, or future devices that have been
defined in the system base-line, are displayed in gray.
Table 5-1: Topology Tree Alarm Color Definition
Color
Indicates
Green
OK
Yellow
Minor error.
Red
Major error.
Gray
No communication to a (MobileAccess) device set
in Base-Line. If communication to a device that
was not set in Base-Line is lost, the device
disappears from the display.
MA SC-450 Controller System Installation and Configuration Guide
26
Config
Topology Tree
Figure 5-2: Topology Tree
The devices that are displayed in the tree as follows and are ordered by the RS-232/485 port
on the controller to which they are connected or accessed through:
1. CNTRL – Master or Slave Controller (CNTRL-M indicates Master System Controller). See
section 5.3.2 for more detailed configuration information.
2. RIU – Displayed under a Master or Slave Controller in the tree, Radio Interface Unit can
contain one to three BTSC or BDAC modules. See section 5.3.3 for more detailed
configuration information.
3. BDAC/BTSC – Displayed under a RIU in the tree, corresponding to BDAC or BTSC
modules in the chassis, where the suffix „L‟ (i.e. BDACL) stands for RIU Lite. See section
5.3.3 for more detailed configuration information.
MA SC-450 Controller System Installation and Configuration Guide
27
Config
Device Display
4. BASE UNIT – Displayed under a Master or Slave Controller in the tree, Base 4 or Base 8
Unit containing modules of 4 ports. See section 5.3.4 for more detailed configuration
information.
5. BU 1-4 or BU 5-8 – Displayed under a Base Unit in the tree where configuration is
handled in 4-port module granularity. See section 5.3.4 for more detailed configuration
information.
6. RHU – Remote Hub Unit, Displayed under a BU in the tree, each RHU is displayed under
the BU port module to which it is physically connected. See section 5.3.5 for more
detailed configuration information.
7. Add-on – Each add-on is displayed under the RHU to which it is physically connected.
See section 5.3.6 for more detailed configuration information.
5.1.1 Fault Sourcing Using the Network Topology Tree
The Network Topology pane shows the connected network devices in the hierarchy in which
they are connected and colors corresponding to their status. All devices should be displayed
in green (OK).
Disconnected devices that have been configured to the base-line will be colored gray
(disconnection). These, Red (major fault) and Yellow (minor fault) colored devices should
be investigated to correct the problems.
Quickly Finding the Faulty Unit
The color of each unit (except the controller) will depend on its local status and
will not depend on the status of the units bellow it.
The controller will always be colored by the severest color of any of the units
under it or due to its local inputs (OR operation).
Units name in the tree will consist of the unit type description followed by the user
free text: e.g. BTSC-“Cellular Company”
5.1.2 Fault Sourcing through the Device Alarms
The alarms for each device are available through the Alarms window area in the device
config. To display the alarms, double-click on the device in the Network Topology tree.
Alarms are displayed in the red (major fault) or yellow (minor fault) according to their
fault. Green alarms indicate an OK status.
For more detailed information on the alarms for a particular type of device refer to section
5.3.
5.2 Device Display
This section of the Config window is used to display a graphical view of the device that is
currently selected in the Topology Tree
5.3 Device Configuration and Alarms
This section covers configuration and management of MobileAccess Devices supported by
the System Controller including RIU BTSC/BDACs, Base Units, RHUs and Addons. Device
MA SC-450 Controller System Installation and Configuration Guide
28
Config
Device Configuration and Alarms
configuration windows may be accessed from the topology tree by clicking on the individual
items. This includes the configuration windows for the Master and Slave Controllers,
BTSC/BDAC, BU, RHU and Add-on units. Some system level parameters are managed from
the Management window, for more information see section 8 .
5.3.1 Adding a New Device
Each time a MobileAccess device is added to the system, the Base Line must be set again.
Note: If an RHU of MA 1200 unit is added, the host BU must be restarted. This can be done
by clicking the Restart button in the BU 1-4 or BU 5-8 configuration window, RF
Parameters tab.
To reset the Base Line
1. In the Topology Tree, double-click on the controller hosting the new device.
2. In the controller configuration window, select the MobileAccess tab and click the Base
Line button.
Figure 5-3: Base Line
5.3.2 Controller Alarms and Configuration Window
5.3.2.1 Accessing the System Controller Configuration Window
To configure the controller system double-click on the controller to be managed in the
Network Topology Tree.
MA SC-450 Controller System Installation and Configuration Guide
29
Config
Device Configuration and Alarms
Figure 5-4: Controller Alarms and Configuration Window
5.3.2.2 Slave Controller Mask
Slave controllers are supported on the Master System Controller to allow for larger system
deployments. In order to utilize Slave controllers two operations are required:
Physically connect the Slave controllers (410 or SC-450) to the Master System Controller rear
panel RS-232/485 ports 9 to 16.
Configure the corresponding Master System Controller ports 9 to 16 (to which Slave
controllers are connected) controller to support the Slave controller connections.
The Slave Mask is used to configure the System Controller ports 9-16 to support either
devices (RIUs or BUs) or slave SC-450/410 controllers. Click the Modify button to configure
the ports for slave controller operation or device (RIU/BU) operation.
MA SC-450 Controller System Installation and Configuration Guide
30
Config
Device Configuration and Alarms
Figure 5-5: Slave Mask
5.3.2.3 General Tab
Each Controller (Master and Slave) in the system has some configuration settings that can
be set by the user. This tab is used to set each controllers name for the Topology Tree,
date/time and baseline.
Figure 5-6: Controller General Tab
Table 5-2: Controller General Tab Parameters
Parameter
Description
Name
The master controller of the system should be assigned a
recognizable name that would indicate its site or location. Slave
Controllers can also be individually assigned with names that can
indicate their location. This name can be up to 20 characters.
Firmware
The Firmware build numbers.
MA SC-450 Controller System Installation and Configuration Guide
Note: This numbering is
31
Config
Device Configuration and Alarms
Version
different than the SC-450 Software Release.
Serial Number
Serial Number of the Unit.
Product
Revision
Hardware Revision of the Unit.
Controller
Type
Mode the controller is operating in. This is set individually for the
Master SC-450 and each slave controller in a system.
MA 1000 & 2000: Typical setting for controller used to monitor
MA 1000 and 2000 systems.
Legacy: Used only on 410 slave controllers which are used to
monitor Modulite systems.
Heartbeat Enabled Mode: This mode is used for Sprint Monitoring
only. Refer to Section 10.2 and 10.1.4 for more information.
Controller
Mode
Master or Slave set automatically on bootup depending on whether
a master controller is detected on the front RS-232 connection.
There can be only one Master controller in a SC-450 control system
with up to 8 slave controllers.
Date
Current Date displayed in DD/MM/YY. This should be accurately set
as events are recorded using controller date and time information.
Time
Current Time displayed in 24 hour format, HH:MM:SS. This should
be accurately set as events are recorded using controller date and
time information.
Base Line
Button
Used to set the baseline of devices (RIU BTSC/BDACs, BUs, RHUs
and Addons) connected to the controller. This should be reset
anytime a new device connected to the controller so that if the
device is removed the controller will alarm when it disappears.
5.3.2.4 Auxiliary Dry Contact Alarms Tab
Each controller supports monitoring for up to 8 normally closed dry contact auxiliary alarm
inputs (see section 2.3.4 for connection description). Auxiliary alarms from devices such as
switches for power supplies, air conditioners or door-open indicators, which are connected to
the controller can be monitored through the Web GUI.
The auxiliary alarms of each controller are displayed in the Aux Alarms tab of the controller
Config menu, when the corresponding controller is selected.
MA SC-450 Controller System Installation and Configuration Guide
32
Config
Device Configuration and Alarms
Figure 5-7: Controller Aux Alarms Tab
To enable each individual alarm and set the names click the Modify button, make desired
changes and click the OK button.
5.3.3 BTSC/BDAC Alarms and Configuration Window
5.3.3.1 Accessing the BTSC/BDAC Alarms and Configuration Window
In the Network Topology Tree, expand the RIU by clicking the + sign and then Double-click
on the BTSC/BDAC in the Network Topology tree.
Figure 5-8: BTSC/BDAC Configuration Window
5.3.3.2 BTSC/BDAC Alarms
In the BTSC/BDAC Alarms you can change the mask of the alarms such that the overall
alarm status will not account for those alarms. To change the alarm mask click the Modify
button and un-check alarms that are not relevant.
MA SC-450 Controller System Installation and Configuration Guide
33
Config
Device Configuration and Alarms
Figure 5-9: BTSC Alarms
Table 5-3: BTSC Alarms
Alarm Name
Description
Adjustment
Yellow (minor fault) – the adjustment procedure was not
successful.
DL Power
Overload
Red (major fault): BTS RF power input to the BTSC is at
least 3 dB higher than the value measured during the
adjustment procedure.
DL Input Power
Low
Red (major fault): BTS RF power input to the BTSC is at
least 15 dB lower than the value measured during the
adjustment procedure.
Service OFF
Red (major fault): Service was turned off either by the
system (in response to AGC out of limits) or by the user.
Overall status
Overall status of enabled (checked) alarms.
5.3.3.3 BTSC/BDAC Module Info Tab
This page provides general information such as software and hardware versions, band and
serial number of the BTSC module and allows assigning the module a recognizable name.
To assign the BTSC/BDAC a recognizable name (i.e. operator name), click the Modify
button and type in the name of up to 20 alphanumeric characters.
MA SC-450 Controller System Installation and Configuration Guide
34
Config
Device Configuration and Alarms
Figure 5-10: BTSC/BDAC Module Info Tab
Table 5-4: BTSC/BDAC Module Info Parameters
Parameter
Description
Name
User defined name of up to 20 characters
Type
Module Type: BTSC or BDAC
Band
Name of Frequency Band this module supports
Serial Number
Module Serial Number
Firmware
Version
Firmware Version Number
Product
Revision
Product Revision Number if Applicable
Location Index
Index of module used for SNMP (Controller/Port/Slot) –
See section 10.1.2.
5.3.3.4 BTSC/BDAC RF Parameters Tab
The BTSC/BDAC RF Parameters Tab is used to condition the BTS or BDA signal
into the system. Special care should be taking when making adjustments on this
tab as the settings impact overall system gain settings for each service.
MA SC-450 Controller System Installation and Configuration Guide
35
Config
Device Configuration and Alarms
Figure 5-11: BTSC/BDAC RF Parameters Tab
Table 5-5: BTSC/BDAC RF Parameters
Parameter
Description
DL Power Parameters
Target Max(imum)
Input Power
This value is the current maximum expected input power
level is expecting to get. For a BTSC this value can be set to
anything between +10 and +36dBm, for a BDAC this value
can bet set to anything between -16 to +10dBm. This value
is changed using the Adjust Input Power Function. Note: If
the AGC Status is set to a particular value this
parameter will display the previous setting, not the
actual input value.
Current Input
Power
This is the current composite input power measured coming
into the BTSC or BDAC from the Simplex or Duplex
connectors on the rear of the unit.
The difference between the Current Input Power Value and
the Target Max Input Power setting is the amount of
breathing room in dB‟s available for the input signal source.
If this value is the same as the Target Input Power the RHU
amplifiers in a properly adjusted system will be operating at
maximum output power. If this value is higher than the
target input power the RHU amplifiers in the system are
being overdriven and this condition should be corrected by
increasing the Target Max Input Power.
Adjust Input Power
By clicking the Adjust button you have the option of selecting
the Target Max Input Power value you desire, setting it to
the current input power level (used for initial system
commissioning when Adjusting RHU Amplifiers) or resetting
the value to default.
MA SC-450 Controller System Installation and Configuration Guide
36
Config
Device Configuration and Alarms
Adjustment
Date/Time
The Date and Time of the last adjustment of the Target
Max(imum) Input Power
Adjustment Results
The status of the last Adjustment of the Target Max Input
Power level. This value can be Factory defaults, success or
fail.
A failure condition is typically caused during an
adjustment to current input power where the current input
power is below or above the acceptable range of the
BTSC/BDAC.
Service Control
Service Control is used to enable or disable the input signal
from the back of the BTSC/BDAC into the system. To change
this setting click on the arrow to the right of the box and
change the service to on or off as appropriate.
UL Atten(uation) Control
Atten(uation) Value
This value is the amount of attenuation on the uplink path of
the signal coming out of the BTSC. It is used to reduce the
noise floor (and signal) coming out of the DAS towards the
signal source. This value defaults to 10dB however it can be
set anywhere in the range depending on a particular
scenario. In general if phones are able to originate calls
without trouble, they are not transmitting at high power
levels and the provider is happy with the noise floor they are
seeing on their BTS you want this value to be as high as
possible to reduce the overall noise going back to the BTS.
On BDA fed systems or BTS systems with long coax runs or
high attenuation on the uplink path before the DAS it is not
uncommon to reduce this value to 5 or 0dB to assist getting
the signal back to the donor site however if the donor site is
very close the BDA can push up the noise floor on the
outdoor site. On BTS fed systems it is not uncommon to set
this value to higher levels to reduce the noise floor level
received by the BTS since there is only coax loss between the
DAS and the BTS.
DL AGC (Automatic Gain Control) Control
AGC Status
ON, or a particular AGC Control Attenuation Value. This
setting is used to turn AGC ON or OFF for the input signal to
the DAS.
Note: It is STRONGLY recommended to leave this
setting at the factory default of ON as it protects the
system from overload (signals exceeding the
configured Target Max Input Power. If changing the
value to fixed value the Target Max Input Power level
is affected and this new setting WILL NOT be
reflected in the value displayed in the Target Max
Input Power field. To turn AGC off and leave the
MA SC-450 Controller System Installation and Configuration Guide
37
Config
Device Configuration and Alarms
BTSC/BDAC at its current Target Max Input Power
setting set the AGC Status fixed value to the same as
the DL AGC Control Attenuation Value.
Attenuation Value
This value is the amount of internal attenuation the
BTSC/BDAC is using to condition the input signal. It changes
when the Target Max Input Value is changed while using
the Adjust function or when the AGC Status is turned off
with a particular fixed value for this attenuation.
5.3.4 Base Unit (BU) Alarms and Configuration
5.3.4.1 Accessing the BU Alarms and Configuration Window
Double-click on a BU 1-4 or BU 5-8 in the Topology tree to access the configuration
window.
Figure 5-12: BU Alarms and Configuration Window
5.3.4.2 BU Alarms
In the BU Alarms you can change the mask of the alarms such that the overall alarm status
will not account for those alarms such as when a port is not used. To change the alarm
mask click the Modify button and un-check alarms that are not relevant.
MA SC-450 Controller System Installation and Configuration Guide
38
Config
Device Configuration and Alarms
Figure 5-13: BU Alarms
Table 5-6: BU Alarms
Alarm Name
Description
RF Overload
Red (Major fault): The input power to the unit is too high.
DL Input
Power
Red (Major fault): The input power to the unit is too low for
base unit to detect. Note: If using a RIU with valid RF
signals, verify the BU 1-4 or BU 5-8 is configured in
MA RIU Mode.
See Section 5.3.4.4 for more
information.
UL OPT Link
1-4
Yellow (Minor Fault): Optical UL input status. This will be
yellow if no RHU optical signal is detected on the UL fiber.
It will flash if the optical signal from the RHU back to the BU
is low. If there is no RHU connected to a port it is
recommended to un-check this alarm for that port. Note:
This alarm does not indicate anything about the
optical link status on the DL path from the BU to the
RHU which can be checked on the RHU.
Overall Status
Overall status of enabled alarms.
5.3.4.3 BU Module Info Tab
The Base Unit Module Info tab provides module hardware about the supported first and
second band of the module, the serial number and firmware version as well as a user
configurable name.
To change the Name click the Modify button and assign the RHU a recognizable name that
indicates the location of the RHU.
MA SC-450 Controller System Installation and Configuration Guide
39
Config
Device Configuration and Alarms
Figure 5-14: BU Module Info Tab
Table 5-7: BU Module Info Tab Parameters
Parameter
Description
Name
User defined name of up to 20 characters
Serial Number
Module Serial Number
Firmware
Version
Firmware Version Number
Product
Revision
Product Revision Number if Applicable
Location Index
Index of module used for SNMP (Controller/Port/Slot) - See
section 10.1.2.
5.3.4.4 BU RF Parameters
The BU RF Parameters tab is used to change the BU interface type to work with a RIU or
passive network of components as well as provide some additional monitoring and control
capabilities for the Base Unit.
MA SC-450 Controller System Installation and Configuration Guide
40
Config
Device Configuration and Alarms
Figure 5-15: BU RF Parameters Tab
Table 5-8: BU RF Parameters
Parameter
Description
DL Power
Interface Type
Used to set each BU 1-4 or BU 5-8 module to work with a
RIU or with a passive network of duplexers and attenuators.
It is typically necessary to change the interface type of all BU
1-4 and BU 5-8 in a system to MA RIU. The Other RF
Source setting leaves the BU expecting a RF input signal
maximum of 0dBm which is typically used when the BU is fed
with a passive network of duplexers and attenuators and will
result in poor system performance when used with a RIU.
Input Power Status
Used to give an indication of the input power level. If this
parameter reads low the DL input power alarm will be set. If
it is high the RF Overload alarm will be set.
DL AGC Control
AGC Status
Used to protect the BU from receiving too much input power
and should be modified only under special circumstances.
Atten(uation) Value
The AGC Atten value is automatically adjusted to the factory
calibrated setting when the mode of the BU is changed from
RIU to Other RF Source
UL Atten(uation) Control
Atten(uation) Value
This value is calibrated during manufacturing and should be
modified only under special circumstances. It will adjust
automatically to the factory setting for MA RIU mode or
Other RF Source Mode when that setting is changed.
Restart
MA SC-450 Controller System Installation and Configuration Guide
41
Config
Device Configuration and Alarms
Restart Button
Restarts the module – used to detect and display new RHUs
that may have been connected after last module restart.
Note: Restarting this unit is service effecting and will
interrupt RF flow through the module for 1-2 minutes.
5.3.5 RHU Alarms and Configuration
5.3.5.1 Accessing the RHU Alarms and Configuration Window
Double-click on the RHU in the Network Topology tree.
Figure 5-16: RHU Alarms and Configuration
5.3.5.2 RHU Alarms
In the RHU Alarms you can change the mask of the alarms such that the overall alarm
status will not account for those alarms such as when a port is not used. To change the
alarm mask click the Modify button and un-check alarms that are not relevant.
MA SC-450 Controller System Installation and Configuration Guide
42
Config
Device Configuration and Alarms
Figure 5-17: RHU Alarms
Table 5-9: RHU Alarms
Alarm Name
Description
DL OPT Link
Yellow (Minor fault): Indicates power of optical input to the
RHU. Typically this is only seen as green as when it is in
alarm communication cannot be established to the RHU
however there are cases where the input signal is very low
and communication can still occur. Investigate fiber run
from the BU to the RHU if this alarm is active.
Adjustment
1st/2nd band
Yellow (Minor Fault): Indicates Adjustment procedure
success/failure of 1st/2nd band
DL Output
power
1st/2nd band
Red (Major Fault): RF Power level of DL signal is Low.
Antenna
status
Yellow (Minor Fault): Indicates whether an antenna is
sensed on a particular antenna port.
Note: Antenna sense will only work on antennas with
a DC resistance of less than 1000 Ohms. It will not
work through splitters some of which will show
connected and some of which will snow not
connected. It is common to disable these alarms if it
is verified that the antenna is properly connected but
this alarm still exists.
Overall Status
Overall status of enabled alarms.
MA SC-450 Controller System Installation and Configuration Guide
43
Config
Device Configuration and Alarms
5.3.5.3 RHU Module Info Tab
The RHU Module Info tab provides module hardware about the supported first and second
band of the module, the serial number and firmware version as well as a user configurable
name which can be changed by clicking the Modify button.
To change the Name click the Modify button and assign the RHU a name (up to 20
characters) that indicates the location of the RHU.
Figure 5-18: RHU Module Info Tab
Table 5-10: RHU Module Info Tab Parameters
Parameter
Description
Name
User defined name of up to 20 characters
First Band
First Band Module Type and Frequency
Second Band
Second Band Module Type and Frequency
Serial Number
Module Serial Number
Firmware
Version
Firmware Version Number
Product
Revision
Product Revision Number if Applicable
Location Index
Index of module used for SNMP (Controller/Port/BU
Slot/BU Port) See section 10.1.2.
5.3.5.4 RHU RF Parameters Tab
The RHU RF Parameters tab is used to view the optical link status and configure overall
amplifier options for the module.
MA SC-450 Controller System Installation and Configuration Guide
44
Config
Device Configuration and Alarms
Figure 5-19: RHU RF Parameters Tab
Table 5-11: RHU RF Parameters
Parameter
Description
Optical Link
Link Status
This parameter indicates whether the RHU is receiving a
good optical signal or not. A indication of Low means the
optical receive level is too low. A Link status of normal
indicates the optical receive level is good.
Link Level
This is a raw value that is a relative indication of the optical
power received. It cannot be correlated to a specific optical
dB receive value. Typically any value above 70 is good for
system operation although if one particular RHU is
significantly lower than the others it may be good to verify
there is no dirt on the fiber or to see what may be causing it
to be different.
Ampliifier Control
First Band
Set to ON, OFF or Value Range -1 to -10. This can be set to
turn the amplifier on or off for a particular RHU or it is used
to manually reduce the output power of the amplifier by 1 to
10dB from the value it was adjusted at. In most cases this is
left ON.
Second Band
ON/OFF/Value
Set to ON, OFF or Value Range -1 to -10. This can be set to
turn the amplifier on or off for a particular RHU or it is used
to manually reduce the output power of the amplifier by 1 to
10dB from the value it was adjusted at. In most cases this is
left ON.
UL AGC Control
MA SC-450 Controller System Installation and Configuration Guide
45
Config
Device Configuration and Alarms
First Band
Set to On or Off. This can be used to turn UL AGC off for a
particular amplifier.
Second Band
Set to On or Off. This can be used to turn UL AGC off for a
particular amplifier.
Restart
Restart Button
Restarts the module – used to detect and display new Addon
that may have been connected after last module restart.
Note: Restarting this unit is service effecting and will
interrupt RF flow through the module the 1-2
minutes.
5.3.5.5 RHU First and Second Band Tab
The RHU First and Second Band tabs are used to view current amplifier performance and
make adjustments during system commissioning.
Figure 5-20: RHU First Band Tab
Table 5-12: RHU First Band Tab Parameters
Parameter
Description
Current Output
Power
This is a reading of the current output power of the RHU
amplifier. This value is typically below the maximum output
power in normal system operation and only rises to full
power during the adjustment process or when the signal
sources are at full power into the BTSC or BDAC.
Target Max Output
Power
This value is set by the factory and should not be changed by
the user. This value is used during the adjustment process to
adjust the amplifier to this output power. This value can be
compared to the Current Output Power to see the
difference between full power output and current operating
output power.
MA SC-450 Controller System Installation and Configuration Guide
46
Config
Device Configuration and Alarms
Warning: Adjusting and operating amplifiers at
levels above their rated output power will result in
damage to the amplifier. If you are unsure about how
to utilize this function please consult with a
MobileAccess Approved Installer, MobileAccess
Project Manager or MobileAccess Technical Support.
Adjust Output
Power to Target
Button
This button is ONLY used during the system
commissioning process to level the gain of all of the RHUs
across the system. Prior to using the Adjust function a CW
signal source should be input to the BTSC/BDAC, the
BTSC/BDAC should be adjusted such that the CW source
input power equals the target input power and all Base Units
should be adjusted to RIU mode. This button opens a
window that prompts the user to select the frequency of the
CW signal to perform the adjustment against.
Warning: Using this function without a proper
signal source can result in amplifier operation at
levels above their rated output power which can
damage amplifiers or degrade system performance.
If you are unsure about how to utilize this function
please consult with a MobileAccess Approved
Installer,
MobileAccess
Project
Manager
or
MobileAccess Technical Support.
Adjust Result
This indicates the outcome of the last adjustment as follows.
Success – Amplifier was successfully adjusted to the
target maximum output power
Fail Under Power– Amplifier could not adjust to the
target maximum output power for some reason.
This is typically caused by the input CW signal not
being at full power into BTSC/BDAC, cabling between
the RIU and Base Units, Base Units not being
configured to RIU mode or Fiber signal too low into
the RHU. Check RF signal path back through the
system.
DL Atten Control
This value is set automatically by the adjustment process. It
is typically not modified manually by the user.
Warning: Using this function can result in
amplifier operation at levels above their rated output
power which can damage amplifiers or degrade
system performance. If you are unsure about how to
utilize this function please consult with a
MobileAccess Approved Installer, MobileAccess
Project Manager or MobileAccess Technical Support.
MA SC-450 Controller System Installation and Configuration Guide
47
Config
Device Configuration and Alarms
Adjustment
Date/Time
The date and time last adjustment was performed.
UL Atten Value
Factory set uplink control to balance the UL performance
from each remote. This value is not modifiable by the user.
5.3.6 Add-on Alarms and Configuration
5.3.6.1 Accessing the Addon Configuration Window
Double-click on the Addon in the Network Topology tree.
Figure 5-21: Addon Window
5.3.6.2 Addon Alarms
In the Addon Alarms you can change the mask of the alarms such that the overall alarm
status will not account for those alarms. To change the alarm mask click the Modify button
and un-check alarms that are not relevant.
MA SC-450 Controller System Installation and Configuration Guide
48
Config
Device Configuration and Alarms
Figure 5-22: Addon Alarms
Table 5-13: Addon Alarms
Alarm Name
Description
Adjustment
Yellow (Minor Fault): Indicates Success or failure of the
Addon adjustment procedure.
Low Output
Power
Red (Major Fault): Power level of DL signal on antenna
ports is not detected.
5.3.6.3 Module Info Tab
The Addon Module Info tab provides module hardware information about the supported
band of the module, the serial number and firmware version as well as a user configurable
name which can be changed by clicking on the Modify Button
Figure 5-23: Addon Module Info Tab
Table 5-14: BTSC/BDAC Module Info Parameters
MA SC-450 Controller System Installation and Configuration Guide
49
Config
Device Configuration and Alarms
Parameter
Description
Name
User defined name of up to 20 characters
Type
Module Type and Frequency Band
Serial Number
Module Serial Number
Firmware
Version
Firmware Version Number
Product
Revision
Product Revision Number if Applicable
Location Index
Index of module used for SNMP (Controller/Port/BU
Slot/BU Port) - See section 10.1.2.
5.3.6.4 RF Parameters Tab
The Addon RF Parameters tab is used configure overall amplifier options for the module,
view current amplifier performance and make adjustments during system commissioning.
Figure 5-24: Addon RF Parameters Tab
Table 5-15: Addon RF Parameters
Parameter
Description
Amplifier
Control
Set to ON, OFF or Value Range -1 to -10. This can be set to
turn the amplifier on or off for a particular Addon or it is used
to manually reduce the output power of the amplifier by 1 to
10dB from the value it was adjusted at. In most cases this is
left ON.
Current Output
Power
This is a reading of the current output power of the Addon
amplifier. This value is typically below the maximum output
power in normal system operation and only rises to full
power during the adjustment process or when the signal
MA SC-450 Controller System Installation and Configuration Guide
50
Config
Device Configuration and Alarms
sources are at full power into the BTSC or BDAC.
Target Max Output
Power
This value is set by the factory and should not be changed by
the user. This value is used during the adjustment process to
adjust the amplifier to this output power. This value can be
compared to the Current Output Power to see the
difference between full power output and current operating
Warning: Adjusting and operating
amplifiers at levels above their rated output power
will result in damage to the amplifier. If you are
unsure about how to utilize this function please
consult with a MobileAccess Approved Installer,
MobileAccess Project Manager or MobileAccess
Technical Support.
output power.
Adjust Output
Power to Target
Button
This button is ONLY used during the system
commissioning process to level the gain of all of the RHUs
across the system. Prior to using the Adjust function a CW
signal source should be input to the BTSC/BDAC, the
BTSC/BDAC should be adjusted such that the CW source
input power equals the target input power and all Base Units
should be adjusted to RIU mode. This button opens a
window that prompts the user to select the frequency of the
CW signal to perform the adjustment against.
Warning: Using this function without a proper
signal source can result in amplifier operation at
levels above their rated output power which can
damage amplifiers or degrade system performance.
If you are unsure about how to utilize this function
please consult with a MobileAccess Approved
Installer,
MobileAccess
Project
Manager
or
MobileAccess Technical Support.
Adjust Result
This indicates the outcome of the last adjustment as follows.
Success – Amplifier was successfully adjusted to the
target maximum output power
Fail Under Power– Amplifier could not adjust to the
target maximum output power for some reason.
This is typically caused by the input CW signal not
being at full power into BTSC/BDAC, cabling between
the RIU and Base Units, Base Units not being
configured to RIU mode or Fiber signal too low into
the RHU. Check RF signal path back through the
system.
DL Atten Control
This value is set automatically by the adjustment process. It
is typically not modified manually by the user.
MA SC-450 Controller System Installation and Configuration Guide
51
Config
Device Configuration and Alarms
Warning: Using this function can result in
amplifier operation at levels above their rated output
power which can damage amplifiers or degrade
system performance. If you are unsure about how to
utilize this function please consult with a
MobileAccess Approved Installer, MobileAccess
Project Manager or MobileAccess Technical Support.
Adjustment
Date/Time
The date and time last adjustment was performed.
UL Atten Value
Factory set uplink control to balance the UL performance
from each remote. This value is not modifiable by the user.
MA SC-450 Controller System Installation and Configuration Guide
52
Events
6
Event Display
Events
6.1 Event Display
By default, up to 1,000 reported events can be displayed. Use the scroll bar on the right to
scroll through the displayed events.
Only events occurring on the network ports or the device are displayed: configuration
changes that are initiated by the network manager are not considered events.
The viewed events may be acknowledged and filtered according to various user defined
criteria.
To open the Event Log window
From the main View window, click the Events menu option. The Event window appears.
Figure 6-1: Event Log Window
6.1.1 Event Format
Each event consists of:
A unique sequence number
Event date and time stamp
Event description
Source – device that caused the event
Name – device name
Severity (notify, minor, major)
MA SC-450 Controller System Installation and Configuration Guide
53
Events
Event Display
6.1.2 Sorting Events
Information may be re-organized by clicking any header to sort the information according to
the selected header.
6.1.3 Filtering Displayed Events
You may filter the displayed events according to various criteria such as device source, event
level (major, minor, etc.), event date, etc.
To filter the events that are displayed:
1. In the Events window, click the Filters button.
Figure 6-2: Event Filtering Window
2. To display only events from one type of device, choose the device in Filter by Type
field: Controller, BTSC, BU, RHU, Add-on, etc.
3. To display only events from a specific severity level and up, choose the minimum level in
the Filter by Severity field. For example, choosing Notify will display all severity
levels; choosing Minor will display Minor and Major levels only.
4. To display only events initiated within a limited range of time:
Click on the blue button adjacent to the To or From fields, a calendar is
opened:
Figure 6-3: Event Filter by Date Window
Browse to display the appropriate months and click on the days to
determine the range of time for the displayed events.
You may also enter specific hours and minutes to further limit the range of
time:
MA SC-450 Controller System Installation and Configuration Guide
54
Events
Event Display
Figure 6-4: Event Filter by Time Window
MA SC-450 Controller System Installation and Configuration Guide
55
Set-up
7
Event Display
Set-up
The Set-up function will be available in a future release.
MA SC-450 Controller System Installation and Configuration Guide
56
Management
8
Event Display
Management
The Management Menu is used to manage system level parameters including the following.
Firmware – Firmware/Software Upgrade and System reset functions
Security – User Administration and password settings
SNMP – SNMP Community Strings and Trap Destinations
Syslog – Future Option
IP Settings – IP Interface Settings and test commands
8.1.1 Username/Password Parameters
The Web GUI Management application enables access at three authorization levels. Each
level is provided with a default password that can be changed through the Security menu.
Table 8-1: User Names and Access
Username
Default
Password
Access
Operator
oper
enables the user to view the configuration and the
events display. Events acknowledge capabilities are not
available to Operator level users. Default password
Engineer
eng
provides configuration capabilities to all options except
password control.l
Admin
ma98
Full Access
8.1.1.1 Accessing the User Management Window
Click on the Security option of the Management tab. The following window appears.
Figure 8-1: User Management Window
MA SC-450 Controller System Installation and Configuration Guide
57
Management
Event Display
8.1.1.2 Modifying User Passwords
1.
In the User Management window click the Modify button adjacent to the user, whose password
is to be modified.
2.
In the Enter New Password field type the new password. Type the password again in Confirm
New Password field.
3.
In the Login Password, enter the current password.
4.
Click OK.
8.1.2 IP Address Parameters
The SC-450 supports two IP interfaces:
The LOCAL interface is intended to be used as a local craft interface and does not support a
default gateway. By default it is configured as a DHCP server to provide an IP address to a
PC that is connected directly to it. It is strongly suggested to never connect this port to a
LAN and leave it open for direct connection between a PC and the SC-450 especially when
this interface in is operating in the default setting of DHCP server mode.
WARNING: Do not connect an interface configured as “Server” to a LAN.
Connecting an interface configured as DHCP server to a network can result in
problems with IP addressing on that network.
The LAN interface is intended for remote monitoring and supports a default gateway. If
desired the LAN interface can be configured to operate as a DHCP client so it can receive it‟s
IP address configuration from the LAN DHCP server.
These LOCAL and LAN interfaces must be always be configured on different subnets.
DHCP Setting parameters.
None (default on LAN interface): No DHCP service on this interface
Server (default on LOCAL interface): Interface will provide a IP address to a
computer that is connected to it.
WARNING: Do not connect an interface configured as “Server” to a
LAN. Connecting an interface configured as DHCP server to a network can
result in problems with IP addressing on that network.
Client: Interface will receive an IP address from a network with a DHCP server on it.
DHCP Setting
IP Address
Subnet Mask
Default
Gateway
LOCAL
Server
10.0.0.1
255.255.255.0
N/A
LAN
OFF
10.1.1.1
255.255.255.0
10.1.1.1
8.1.2.1 Accessing the LOCAL/LAN IP address Window
Select the Management menu and then click IP Settings on the side bar menu. The
following window appears.
MA SC-450 Controller System Installation and Configuration Guide
58
Management
Event Display
Figure 8-2: IP address Configuration Window
8.1.2.2 Modifying LOCAL/LAN IP Address Parameters
To configure a different Local/LAN IP address from default:
Click the Modify button (in the Local or LAN port area) and set the IP values as desired.
8.1.3 SNMP Configuration
The SC-450 Supports monitoring via 3rd part SNMP applications via its IP interfaces. See
section 10 for more information
8.1.3.1 Accessing the SNMP Configuration Window
Select the Management menu and then click SNMP on the side bar menu. The following
window appears.
Figure 8-3: SNMP Configuration Window
MA SC-450 Controller System Installation and Configuration Guide
59
Management
Event Display
8.1.3.2 SNMP Community String Configuration
1. To configure the SNMP Community Strings click the Modify button on the SNMP
Configuration section of the window.
Figure 8-4: SNMP Configuration Window
2. Enter the new strings and click the ok button.
8.1.3.3 SNMP Trap Destination Configuration
The SC-450 controller supports up to 10 SNMP trap destinations. To configure the SNMP Trap
Destinations click the Modify button on the SNMP Trap Destination section of the window. To add
a new destination click the Add New button. To remove an existing destination click the Remove
button next to the destination you wish to remove from the list. For more information on SNMP Traps
see section 10.1.
MA SC-450 Controller System Installation and Configuration Guide
60
Management
Event Display
Figure 8-5: Trap Desitination Window
8.1.4 Software Upgrade
The SC-450 System Controller supports web-based software upgrade which can be
performed locally or remotely via either the LOCAL or LAN Ethernet IP interfaces. The
software load is a file stored on the user‟s PC and is loaded from the PC via IP connection
into a standby memory bank on the System Controller. When the user is ready they swap
over to the standby bank to make it active.
8.1.4.1 Accessing the Software Upgrade Window
Select the Management menu and then click Firmware on the side bar menu. The
following window appears.
MA SC-450 Controller System Installation and Configuration Guide
61
Management
Event Display
Figure 8-6: Software/Firmware Management Window
The Active bank shows the currently running software version and the standby bank shows
the standby/backup software version. When loading a new version it overwrites the Standby
Bank.
8.1.4.2 Loading a new firmware version
1. Click the Browse button in the Load New Firmware Section of the window, select
the new SC-450 firmware file on your PC and click OK.
Figure 8-7: Load New Firmware Window
2. After selecting the file click the Load button to Upload the firmware to the SC-450.
MA SC-450 Controller System Installation and Configuration Guide
62
Management
Event Display
Figure 8-8: Load New Firmware Window with filename
3. A progress window appears showing the status of the Upload. The Upload time depends
significantly on the speed of the network connection. A local connection will typically
load in seconds while a remote connection can take several minutes.
Figure 8-9: Firmware Download Progress Window
8.1.4.3 Swapping to a new Software Version
After the firmware is loaded the file will appear in the Standby Bank section of the of the
window. Verify this is the version that was just loaded. To activate the new software that
was just loaded click the Swap button. The controller will restart utilizing the new software
version.
Note: Swapping software versions is not a service affecting operation for the RF
portion of the system however it will interrupt access to the Web GUI and SC-450
controller. The SC-450 controller does not need to be active for the system to
pass RF. It is used to manage and monitor the system only.
MA SC-450 Controller System Installation and Configuration Guide
63
Help
Event Display
Figure 8-10: Standby Firmware Management Window
8.1.5 Restart/Reseting the SC-450 Controller
On occasion it may be necessary to manually restart the SC-450 controller. This is not a
service affecting operation nor will it change any of the previously configured settings on the
SC-450 controller. To restart the controller Select the Management menu and then click
Firmware on the side bar menu. Click the Restart button in the Controller Restart
section of the window.
Figure 8-11: Restart System Controller Window
MA SC-450 Controller System Installation and Configuration Guide
64
Help
9
Event Display
Help
Clicking help will download a PDF copy of this manual for display on the PC. It requires a
PDF viewer for display.
MA SC-450 Controller System Installation and Configuration Guide
65
Appendix
10
SNMP Management with 3rd Party Applications
Appendix
10.1SNMP Management with 3rd Party Applications
Note: Information on configuring SNMP Community Strings and Trap
Destinations can be found in section 8.1.3.
The MobileAccess SC-450 has several MIB files that enable you to view traps sent by
the controller and to configure and monitor the managed MobileAccess system
through any third party SNMP manager (such as HP OpenView, CA Unicenter, IBM
Tivoli, Castelrock SNMPc).
Support for Three MIBs is available:
MIB-II system group parameters group (RFC-1213) – a standard
MIB supported by all SNMP managed devices.
ma_devices – describes the architecture of the managed system and
elements – provided with the System Controller Software Release.
ma_events – holds the events in the system and the definitions of the
traps – provided with the System Controller Software Release.
10.1.1
Viewing the Events table via SNMP
The controller is logging the last sent events in a table (about the last 1000 events). Each
sent trap is kept as single entry in the events table.
Use the MIB browser utility, simply select the trapsTable MIB entry and use the table view
utility (mostly part of the MIB browser).
The viewed table should hold a list of logged events (traps). Each trap entry holds the
following data items:
Event unique sequence ID (trapsSequenceID column) – a unique identifier of the logged
event (unsigned long, 32 bits).
Event time stamp (trapsTimeStamp column) – the time and date of the logged event (string
formatted time and date HH:MM:SS DD/MM/YY).
Event generic type (trapsGenericType column) – the event generic type (currently all events
are proprietary, generic type = 6).
Event specific type (trapsSpecificType column) – the event specific type (equals the trap type,
according to the list of traps as found in the ma_events.mib file).
Event source device type (trapsDeviceType column) – the device type which generated the
event (i.e. controller, BTSC, VU, RHU, AddOn).
Event source serial number (trapsDeviceSerial column) – the device serial number which
generated the event.
Event source indexes (trapsDeviceIndex, trapsDevicePortIndex, trapsDeviceConnIndex and
trapsDeviceInternalIndex columns) – the device indexes in the system (controller index,
controller port index, device slot ix and RHU/AddOn index) which generated the event. This
Index is shown on the each Device Info Tab on the Config window.
Event text description (trapsText) – a short text description of the event.
Event source device name (trapsCtrlName) – the text name of the device which generated the
event.
MA SC-450 Controller System Installation and Configuration Guide
66
Appendix
SNMP Management with 3rd Party Applications
Event severity (trapsSeverity) – the severity (Notify, Minor or Major) of the event.
10.1.2
10.1.3
Binding Table
Parameter Name
Description
1: trapSequenceID
Trap sequence ID varbind. Enables tracking missing traps.
2: trapTimeStamp
Time and Date of the current event. Format H:M:S D/M/Y
3: trapDeviceType
Type of module that generated the trap:
Controller
=
2
BTSC
=
3
Base Unit
=
4
MA RHU
=
5
Legacy RHU
=
6
MA Add On
=
7
4: trapDeviceSerial
Serial number of the device that generated the trap (up to RHU
level).
5: trapDeviceIndex
Index of the controller that generated the trap (1 – 9). Where ‘1’ is
the Master, ‘2’ is the slave connected to Master port-1, etc.
6: trapDevicePortIndex
Index of controller BU port through which the trap was routed (0-7).
7: trapDeviceConnIndex
Through which the Trap was routed: BU 0-1, RIU 0-2, Aux 1-8
8: trapDeviceInternalIndex
RHU 1 – 4 connected to the BU through which the trap was routed
(0-3)
9: trapEventText
Free text field.
10: trapCtrlSerialNum
Serial number of the controller generating the event. Internal
parameter.
11: trapCtrlLastSeqID
The last event sequence ID of the controller generating the trap.
Internal parameter.
12: trapCtrlName
Free text field: The name of the device that the event is reported on
13: trapSeverity
The alarm severity: 1-for notify
2-for minor
3-for major
List of Traps
Trap Name
Severity
Description
OID
end
controllerFirstRun
Notification
Controller first run
indication.
1
controllerPowerUp
Notification
Controller power up
indication
2
controllerModemSessionStarted
Notification
Controller modem session
started.
6
controllerModemSessionEnded
Notification
Controller modem session
ended.
7
MA SC-450 Controller System Installation and Configuration Guide
67
Appendix
SNMP Management with 3rd Party Applications
Trap Name
Severity
Description
OID
end
controllerSlaveLost
Major
Communication with slave
controller is lost.
8
controllerSlaveRecovered
Notification
Communication with slave
controller is restored.
9
legacyRhuDown
Minor
Legacy RHU down event.
10
legacyRhuUp
Notification
Legacy RHU up event.
11
auxiliaryInputNormal
Notification
Auxiliary input status
normal event.
16
auxiliaryInputAlarm
Major
Auxiliary input status fail
event.
17
btscDetected
Notification
BTSC detected.
30
btscDisconnected
Major
BTSC disconnected.
31
btscRfLow
Major
BTSC RF low indication.
33
btscRfNormal
Notification
BTSC RF normal
indication.
34
btscRfOverload
Minor
BTSC RF overload
indication.
36
btscRfNoOverload
Notification
BTSC no RF overload
indication.
37
btscRfSwOff
Major
BTSC - RF switch off
state.
38
btscRfSwOn
Notification
BTSC - RF switch on state.
39
btscWetAdjust
Notification
BTSC wet adjustment
succeeded.
40
btscDryAdjust
Notification
BTSC dry adjustment
succeeded.
41
btscAdjustFailed
Minor
BTSC adjustment failed
42
btscRestoreFacDef
Notification
BTSC restored to factory
defaults.
43
optmDetected
Notification
BU 1-4 or BU 5-8 (OPTM)
detected.
50
optmDisconnected
Major
BU 1-4 or BU 5-8 (OPTM)
disconnected.
51
optmRfLow
Major
BU 1-4 or BU 5-8 (OPTM)
RF low indication.
53
optmRfNormal
Notification
BU 1-4 or BU 5-8 (OPTM)
RF normal indication.
54
optmRfHigh
Minor
BU 1-4 or BU 5-8 (OPTM)
RF high indication.
55
MA SC-450 Controller System Installation and Configuration Guide
68
Appendix
SNMP Management with 3rd Party Applications
Severity
Description
OID
end
Notification
BU 1-4 or BU 5-8 (OPTM)
- wet adjustment
succeeded
60
optmDryAdj
Notification
BU 1-4 or BU 5-8 (OPTM)
- dry adjustment
succeeded
61
OptmAdjFail
Minor
BU 1-4 or BU 5-8 (OPTM)
- adjustment failed
62
optmRestoreFacDec
Notification
BU 1-4 or BU 5-8 (OPTM)
restored to factory
defaults
63
optmUlLock
Minor
BU 1-4 or BU 5-8 (OPTM)
FSK uplink locked.
64
optmUlUnlock
Major
BU 1-4 or BU 5-8 (OPTM)
FSK uplink unlocked.
65
optmDllock
Major
BU 1-4 or BU 5-8 (OPTM)
FSK downlink locked.
66
optmDlUnlock
Major
BU 1-4 or BU 5-8 (OPTM)
FSK downlink unlocked.
67
rhuDetected
Notification
RHU detected.
70
rhuDisconnected
Major
RHU disconnected.
71
rhuAntennaChanged
Major
RHU antenna status
changed.
73
rhuFirstBandAdjust
Notification
RHU first band adjustment
succeeded.
76
rhuFirstBandAdjustFailed
Minor
RHU first band djustment
failed.
77
rhuSecondBandAdjust
Notification
RHU second band
adjustment succeeded.
78
rhuSecondBandAdjustFailed
Minor
RHU second band
adjustment failed.
79
rhuFirstBandOff
Major
RHU first band turned off.
82
rhuFirstBandOn
Notification
RHU first band turned on.
83
rhuSecondBandOff
Major
RHU second band turned
off.
84
rhuSecondBandOn
Notification
RHU second band turned
on.
85
Major
RHU no optical level on
uplink.(Reported by
Optm)
90
Trap Name
optmWetAdj
rhuNoOpticalLevelOnUL
MA SC-450 Controller System Installation and Configuration Guide
69
Appendix
SNMP Management with 3rd Party Applications
Severity
Description
OID
end
Minor
RHU low optical level on
uplink.(Reported by
Optm)
91
Notification
RHU normal optical level
on uplink.(Reported by
Optm)
92
Major
RHU no optical level on
downlink.(Reported by
RHU)
93
Minor
RHU low optical level on
downlink.(Reported by
RHU)
94
rhuNormalOpticalLevelOnDL
Notification
RHU normal optical level
on downlink.(Reported by
RHU)
95
addonDetected
Notification
Addon detected.
100
addonDisconnected
Major
Addon disconnected.
101
addonAdjust
Notification
Addon adjustment
succeeded.
104
addonAdjustFailed
Minor
Addon adjustment failed.
105
addonBandOff
Major
Addon band turned off.
106
addonBandOn
Notification
Addon band turned on.
107
tunnlingAgentStarted
Notification
Tunneling agent start
200
tunnlingAgentEnded
Notification
Tunneling agent end
201
ctrlDialUpStarted
Notification
Controller dialup session
started
202
ctrlDialUpEnded
Notification
Controller dialup session
ended
203
Trap Name
rhuLowOpticalLevelOnUL
rhuNormalOpticalLevelOnUL
rhuNoOpticalLevelOnDL
rhuLowOpticalLevelOnDL
MA SC-450 Controller System Installation and Configuration Guide
70
Appendix
Sprint Monitoring with Sym Wireless Modem
10.1.4
List of Heartbeat Mode Device Traps
Note: These traps are only issued when a controller is configured in Heartbeat
mode. See section 10 for further information.
Trap Name
Severity
Description
Major
Occurs when the relevant
RHU/Add-on RF power drops by
more than 3 dB from its original
setting of target Pout.
Major
Monitors antenna connectivity –
taking into account antenna
mask. Alarm generated when
antenna connection is not
detected and cleared when
antenna is detected.
Major
Reported when the Repeater
input power is 15dB or or more,
below the RIU target adjustment
input power.
Over/Under
Current
Major
Generated upon connection and
disconnection of every MA
Repeater system device.
Over Temperature
Major
Generated
upon
connection
and
disconnection of every MA Repeater
system device.
RF Power
VSW
RSSI
OID
end
10.2Sprint Monitoring with Sym Wireless Modem
The following steps are used to configure a SC-450 system for use with a Sym UWMS-01
modem supplied by Sprint.
10.2.1
Connect and Login to the SC-450
See section 3.1 for information about Login.
10.2.2
1.
Change the SC-450 IP settings.
Go to the Management Tab and then IP Settings window
MA SC-450 Controller System Installation and Configuration Guide
71
Appendix
Sprint Monitoring with Sym Wireless Modem
2.
On the Lan Port settings Click Modify and change the settings as follows:
DHCP: None
IP Address: 192.168.1.2
Subnet Mask: 255.255.255.0
Default Gateway: 192.168.1.100
10.2.3
Configure the SNMP Heartbeat Trap Settings
1.
Go to the Master SC-450 Controller General Tab by double clicking on the CNTRL-M in the
Topology Tree
2.
Change the Controller Type to Heartbeat Enabled and the Configuration Tab will appear
MA SC-450 Controller System Installation and Configuration Guide
72
Appendix
Sprint Monitoring with Sym Wireless Modem
3.
In the General Tab Click the Base Line button to set the base line.
4.
In the Controller Configuration tab Change the settings as follows:
Heartbeat Interval: 20 Minutes
Maintenance Interval: Leave as it is
HB Trap Destination: 192.168.1.100 (or 10.22.25.15)
Site ID: Unique Cascade ID provided by Sprint.
Longitude: Set the site‟s Longitude location information. (ex. W+123.123456)
Latitude: Set the site‟s Latitude location information. (ex. N+123.123456)
5.
10.2.4
Repeat steps 1 through 3 for all additional slave controllers in the system.
Verify Traps are being sent from the SC-450
1.
With a straight through Ethernet cable connect the SC-450 to any one of the 8 ports on the UWMS01.
2.
Change your laptop‟s Local Area Connection setting as follows:
MA SC-450 Controller System Installation and Configuration Guide
73
Appendix
Sprint Monitoring with Sym Wireless Modem
a.
Go to Network Connections > Local Area Connection > Internet Protocol (TCP/IP)
Properties. Select “Obtain an IP address automatically.” It may take a few minutes to
obtain an IP address.
b.
Alternatively, you can select “Use the following IP address” and input the following
information:
IP Address: 192.168.1.200
Netmask: 255.255.255.0
Gateway: 192.168.1.100
3.
Connect your laptop to any one of the 8 ports on the UWMS-01 via a straight through Ethernet
cable.
4.
Open your web browser and login to the UWMS-01. (http://192.168.1.100:8888)
The default User name is sym and password is sym.
5.
On the UWMS-01 go to the Network Status page and make sure all cascade codes and IP
addresses of the MobileAccess system are registered.
6.
Setup is complete! Please check with Sprint NOC if they are getting the heartbeat.
MA SC-450 Controller System Installation and Configuration Guide
74