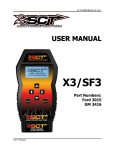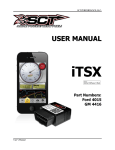
1
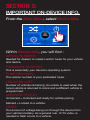
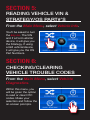
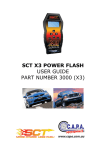
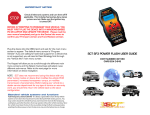
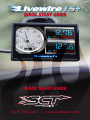
QUICK START GUIDE QUICK START GUIDE (407) 774-2447 / www.sctflash.com SECTION 1: PARTS+ CHECKLIST LIVEWIRE TS+ DEVICE MICRO USB™ CABLE LIVEWIRE TS+ WINDOW MOUNT HDMI/OBD II CABLE TOOLS NEEDED: Fuse Puller | Voltage Tester | Battery Charger | Pliers SECTION 2: PRE-INSTALL CHECKLIST BUSINESS HOURS Technical Support is available Monday – Friday between the hours of 9am and 6pm EST and can be contacted via phone at (407) 774-2447 or through live chat at www.sctflash.com. If you need to contact Tech Support, please be sure to have your device with you before initiating contact. INTERNET ACCESS In the unlikely event that technical support is needed, Internet access may be required to troubleshoot. Our Technical Support team may also need to remotely connect to your computer to fix any issues you may be having. ALLOW TIME FOR INITIAL SETUP Make sure you have at least an hour to complete the initial setup, update, and installation process. READ LIVEWIRE TS+ USER MANUAL SCT highly recommends taking a moment to read through your Livewire TS+ User’s Manual found on our website before your initial installation. There is a lot of in depth and useful information inside the manual that won’t be covered in this Quick Start Guide. This device is not legal for sale or use in California on pollution controlled vehicles. SECTION 3: IMPORTANT ON-DEVICE INFO. From the Main Menu, select Device Info. Within Device Info, you will find : SERIAL NUMBER: Needed for dealers to create custom tunes for your vehicle and device. FIRMWARE VERSION: This is essentially your device’s operating system. TUNE REVISION The version number of your preloaded tunes. UNLOCKS LEFT: Number of unlocks remaining. An unlock is used when the tuned vehicle is returned to stock and a different vehicle is programmed. MARRIED STATUS: Unmarried = Unlocked and ready for vehicle pairing. Married = Locked to a vehicle. VBATT: The amount of voltage being run through the device from your vehicle’s battery. As a general rule, 12.75 volts+ is needed to flash a tune to a vehicle. SECTION 4: UPDATING YOUR LIVEWIRE TS+ DEVICE INSTALLING THE UPDATE SOFTWARE NOTE: Make sure the Livewire is unplugged from your computer before starting this process. 1. Go to www.sctflash.com UPDATING YOUR LIVEWIRE TS+ DEVICE 1. Connect your Livewire TS+ Device to your Windows™ based PC using the provided Micro USB™ cable. Unfortunately, we do not offer support for Apple computers at this time. 2. Click “Tech Support” tab at the top of the page. 3. Click the picture of the Livewire TS+ (Part Number 5015P/5416P). 4. Click the “Download Now” button to the left of the listing that reads “Livewire TS+ Performance Ford Programmer & Monitor Device Update Software.” 5. Wait for that program to download, then double click and “Run” the SCTDeviceUpdater.exe file if it does not open automatically. 6. Follow the on-screen directions of the SCT Device Update Software Installer until it allows you to click “Finish”. 7. Follow the on-screen directions of the SCTDrivers Installer until it allows you to click “Finish”. 8. Your SCT Device Update Software and Drivers are now fully installed and ready for use. 2. Double click and open the SCT Device Update Software. 3. Click “Automatically Check for Updates”. 4. Confirm the update by pressing the “Update” button. The update will now begin. 5. Let the updater run until it says “Your device is now up to date!” 6. You may now unplug your device from your computer and load a tune to your vehicle! SECTION 5: READING VEHICLE VIN & STRATEGY/OS PART#’S From the Main Menu, select Vehicle Info. You’ll be asked to turn the key on. The VIN and if a Ford vehicle/ device, it will give you the Strategy. If using a GM vehicle/device, it will give you the OS Part Numbers. SECTION 6: CHECKING/CLEARING VEHICLE TROUBLE CODES From the Main Menu, select Vehicle Diagnostics. Within this menu, you will be given the option to read or clear DTC codes. Make your selection and follow the on-screen prompts. SECTION 7: PROGRAMMING THE VEHICLE POWERING ON THE LIVEWIRE TS+ To power up your device, using the provided HDMI to OBDII cable, connect to the vehicle’s OBDII port. The OBDII port is most commonly found within 24” of the steering column under the driver’s side dash. 1. Once connected, press the power button on the top right of the device. The device should power on. BEGIN PROGRAMMING 1. From the Main Menu, select Program Vehicle. 2. At this point, the key should be in the ignition, but in the OFF position until prompted to turn key ON. Within Program Vehicle, there are 2-3 selections depending on the state of the vehicle. • Pre-Loaded Tune Files = Preloaded SCT tunes for use on stock vehicles only. • Custom Tune = Custom Tuning Dealer files, if there are any on the device. • Return to Stock = Restore original factory file to vehicle. USING PRE-LOADED TUNE FILES Once you follow the first “Key On” prompt, the device will show you a selection of vehicles and engine sizes. Select yours here. This will take you to Adjustable Options where you will be able to adjust to different performance levels, vehicle characteristics, and options including, but not limited to, speed limiters, axle ratio and tire size. (Adjustable Options are vehicle specific. For more information on Adjustable Options, please see the Adjustable Options Explained section of this guide.) USING CUSTOM TUNES To install Custom Tunes, select Program Vehicle, and scroll down to the Custom Tunes section. If your device contains any custom tunes for your vehicle, this is where they will be listed. Once you’ve found your desired tune select it by pressing on it and follow the on-screen instructions to load the tune to your vehicle. NOTE: Custom Tunes are built by SCT’s network of Custom Tuning Dealers and any questions related to them need to be directed toward the tuning dealer. RETURNING TO STOCK With SCT devices, your stock file is stored during the initial programming. The stock file stays on the programmer until returned to stock. From Program Vehicle, select Return to Stock and follow the on-screen instructions to advance through the programming process. SECTION 8: LOADING CUSTOM TUNES Download and install the SCT Device Updater software and Drivers from : http://sctflash.com/software/SCTDeviceUpdater.exe 1. From your e-mail, save your custom tunes (.cef files) to your computer’s Desktop. 2. Open the SCT Device Updater software and click the Load Custom Tune File button. 6. 2. 3. 4. 3. Click Browse and locate your custom tunes on your Desktop. Alternatively, click Locate Custom Tunes. 4. Select the Tune you wish to load. 5. The tune you selected should move to the Available Tunes section. 6. Select the listed tune in the Available Tunes section, then click the >> button to move the selected tune to the On Device section. NOTE: To edit the name of the file as it appears on your device, you must select the file while it’s in the On Device section, type in the desired name in the box below, and click Save. 7. Once you have gotten all the tunes you’d like to program under the On Device section and they’re named to your liking, just click Program, and the Device Updater will load the tunes to your device. 7. SECTION 9: ON–DEVICE DATA LOGGING NOTE: If you can’t display a specific value from the preloaded config files, you can download livelink software for free from the SCT website 1. Connect the Livewire TS+ to the OBDII port. 4. Once you select your vehicle, default gauges will show up and you can now monitor these gauges. 3. On initial setup, you will need to move to the Configuration, icon at the bottom left and select your vehicle from a list of data log files. In the future, you can continue without going through the vehicle selection. 5. The items being monitored can be adjusted by double tapping on the item you’d like to change. Within this menu, you can change the item you’re monitoring, and the units in which it will be displaying. 2. From the Main Menu, select the Gauges/Datalog on the Livewire TS+. 6. To start or stop data logging,Tap the screen once to bring up the options and select the top left icon that says REC. 7. While monitoring, you can be pull up the Gauges/Datalog menu by tapping the screen once to. From this menu, you may start recording, select a data log file with which to log, change the gauge layout, and reset the min/max values on the monitor. SECTION 10: ADJUSTABLE OPTIONS EXPLAINED DIESEL VEHICLE SPECIFIC OPTIONS Performance The most aggressive preloaded diesel tune. Good for everyday use, racing, or economy but not recommended for any type of towing. Street Less power than Performance. Moderate gain over stock, safe for light towing, under 5,000 lbs. Towing Should be used when towing any significant load. Shifting is towing centered. Trans Only For Heavy Loads. Engine and boost left stock. Trans Only tune. Jake Brake Exhaust brake to increase engine braking while coasting. Lowers brake temps. Locked at CT Keeps the torque converter locked during deceleration to aid in engine braking. Lock In 1-2-3 Locks the torque converter in 1st, 2nd and 3rd gear. NOTE: Adjustable Options vary for each vehicle and are not available on all vehicles DIESEL & GAS VEHICLE OPTIONS: EGR Delete Removes the check engine light from deleting EGR mechanically. Axle Ratio Sets axle ratio to correct shift patterns/speedo. (Not available on all vehicles) Tire Size Sets tire size to correct shift patterns/speedo. (Not available on all vehicles) Idle Speed Sets idle speed in RPM. Traction Control On/Off setting disables traction control without using the TCS button. WOT Shift Increase or Decrease the WOT Shift points of each gear individually by MPH. Shift Pressure % change in transmission pressure during shifts. (+ = Firmer, - = Softer) GAS VEHICLE SPECIFIC OPTIONS: Tune Type Performance levels vary by the octane you select. Higher octane will provide higher performance increase. 93 octane would be the highest increase. Towing Tune Adjust the octane based tunes to focus more on towing over performance. Economy Tune Adjusts the octane based tunes to focus more on economy over performance. Rear O2s Disables the rear O2s and eliminated the CEL caused by rear O2 removal. Global Spark Add or remove timing advance to the entire RPM range. Spark by RPM Add or remove timing by RPM range. (0-2000) (2000-4000) (4000-8000) WOT Fuel Add or remove fuel at wide open throttle. (WOT) Fuel Injectors Allows you to adjust for different sized injectors. (Not available on all vehicles) GAS VEHICLE SPECIFIC OPTIONS: CMCV Deletes Updates tune to handle the CMCV/IMRC delete plates modification. Fan Control Lowers the temperature at which the fan turns on. Rev Limiter Drive Sets rev limit in RPM while in drive. Rev Limiter Neutral Sets rev limit in RPM while in neutral. Speed Limit Remove, increase, or decrease the vehicle speed limiter. (AKA Governor) (407) 774-2447 / www.sctflash.com. SCT PERFORMANCE, LLC. USER MANUAL Livewire TS Part Numbers: Ford 5015 GM 5416 User’s Manual SCT PERFORMANCE, LLC. *This product is not legal for sale or use in California on pollution controlled motor vehicles IMPORTANT NOTES It is always a good idea to turn-off any vehicle systems that may become active during the tuning process such as cooling fans, fuel pumps etc. to avoid draining the vehicle’s battery. To disable these functions, consult your vehicle’s owner’s manual and remove the fuse for each of these systems. Also be sure to turn-off the vehicle's stereo and HVAC system. Make sure the ignition key is turned OFF before you connect your device to the vehicle. Plug the device into the OBD-II port and wait for them main menu screen to appear. The default menu screen is “Program Vehicle”. If you are using the device for custom tuning, you will need to read the vehicle strategy first through the “Vehicle Info” main menu screen and send that information to your custom tuning dealer. (See Section 4.1) SCT does not recommend using this device with any other tuning module or device that modifies the vehicle PCM parameters, increases horsepower, torque or modifies transmission characteristics. Before taking your vehicle to the dealer service department for any type of service or warranty work, you should first return the vehicle back to the stock configuration. Check engine warning lights can be reset by simply unplugging the battery cables from the battery for 5-10 minutes. Diagnostic trouble codes can also be read and cleared through the “Vehicle Info” menu. IMMEDIATE CONSUMER ACTION REQUIRED! YOU MUST REGISTER YOUR LIVEWIRE TS DEVICE WITHIN 30 DAYS OF PURCHASE TO VALIDATE YOUR 1 YEAR LIMITED WARRANTY. YOU CAN REGISTER YOUR DEVICE FROM OUR HOMEPAGE AT WWW.SCTFLASH.COM User’s Manual SCT PERFORMANCE, LLC. USER'S MANUAL TABLE OF CONTENTS 1. GENERAL INFORMATION ........................................................................................................... 1.1 SCT, LLC Limited Warranty and Disclaimer of Liability ..................................................... 1.2 Device Firmware & Tune Revision Updates............................................................................. 1.3 About Your SCT Device ............................................................................................................. 2. GETTING STARTED ....................................................................................................................... 2.1 Powering On the Livewire TS .................................................................................................... 2.2 Loading Email Custom Tunes to the Livewire TS ................................................................... 2.3 Menu Navigation ......................................................................................................................... 2.4 Using the Touch Screen .............................................................................................................. 2.5 Reading Vehicle Strategy ............................................................................................................ 2.6 Reading/Clearing Vehicle DTCs ................................................................................................ 3. PROGRAMMING YOUR VEHICLE .............................................................................................. 3.1 Installing a Pre-Loaded Tune File ............................................................................................. 3.2 Installing a Custom Tune File .................................................................................................... 3.3 Returning Your Vehicle to Stock ............................................................................................... 3.4 User Adjustable Options Explained .......................................................................................... 4. USING DEVICE FEATURES ......................................................................................................... 4.1 On-Device Data Logging and Monitoring ................................................................................. 4.2 Connecting External Analog Inputs .......................................................................................... 4.3 Performance Tests ....................................................................................................................... 4.4 Device Settings ............................................................................................................................. 5. COMMON QUESTIONS ................................................................................................................. 6. CONTACTING SCT PERFORMANCE .......................................................................................... User’s Manual SCT PERFORMANCE, LLC. 1. GENERAL INFORMATION 1.1 SCT Performance, LLC Limited Warranty for Livewire TS What Does This Warranty Cover? This warranty covers any defects or malfunctions in your SCT Livewire TS product within the warranty period set forth below, subject to the following conditions and limitations. How Long Does The Coverage Last? This warranty lasts for a period of one (1) year following the date of sale by SCT of the Livewire TS product to the original SCT dealer/distributor; provided, however, the duration of this warranty will be extended to one (1) year from the date of original purchase by the consumer from the SCT dealer/distributor so long as the consumer submits the required online registration information within thirty (30) days of purchase, as provided below. All implied warranties, including warranties of merchantability and fitness for a particular purpose are limited to the warranty period set forth above. What Will SCT Do? SCT will, at its option and as its sole obligation under this warranty, replace or repair any Livewire TS product that has a defect(s) in manufacturing, material and/or workmanship provided that SCT is notified of the claim within the warranty period provided herein. SCT will not be liable for, nor will it reimburse the consumer for any fees, charges or expenses for shipping and/or handling costs associated with the return to SCT of any defective Livewire TS products sent in for replacement or repair. What Does This Warranty Not Cover? Any damage and/or other problem(s) caused by abuse, misuse, neglect, vandalism, accident, act of God (e.g., flood, fire, lightning), or other cause beyond the reasonable control of SCT is/are not covered. Also, any damage or roblem resulting from faulty or improper installation is not covered and shall be the responsibility of the installer. SCT IS NOT LIABLE FOR AND HEREBY EXCLUDES ANY AND ALL INCIDENTAL, SPECIAL OR CONSEQUENTIAL DAMAGES RELATING TO THE PRODUCTS COVERED BY THIS WARRANTY. This is the consumer’s exclusive warranty and is in lieu of all other warranties, express or implied, except as may be required by applicable law. Without limiting the generality of the foregoing, SCT shall not be liable for any breach of any other written or oral warranties given to the consumer by any third party(ies) such as those (if any) given to the consumer by dealers or distributors of the products. How Do You Get Service? In order to be eligible for service under this warranty you MUST complete the online registration information within thirty (30) days of purchase. To register your Livewire TS product, please log on to www.sctflash.com, click on “Warranty Registration” and follow the simple steps provided on the website. If you do not have internet access, or encounter difficulties with the online registration process, please contact SCT at 407.774.2447. To initiate a claim under this warranty, you can either log on to the SCT website and follow the warranty claim instructions or you can call 407.774.2447 and instructions will be provided. Can This Warranty Be Transferred? This warranty is not transferable and applies only to the consumer who originally purchased the Livewire TS product. How Does State Law Apply? This warranty gives you specific legal rights, and you may also have other rights which may vary from state to state. Pertinent state law shall control for what period of time following the sale a consumer may seek a remedy under the implied warranty of merchantability or fitness for a particular purpose. Some states do not allow the exclusion or limitation of incidental or consequential damages so the above limitation or exclusion may not apply to you. For questions regarding SCT’s products or warranties please contact SCT at 407.774.2447. User’s Manual SCT PERFORMANCE, LLC. DISCLAIMER OF LIABILITY THIS IS A HIGH PERFORMANCE PRODUCT. USE AT YOUR OWN RISK. Do not use the Livewire TS product (the “Product”) until you (the “Buyer”) have carefully read this Disclaimer of Liability (this “Disclaimer”). The installation and use of this Product indicates that you have read and understand, and accept all of the following terms of, this Disclaimer: SCT Performance, LLC (the “Seller”), shall not be responsible for the Product’s proper installation, use and service. If you choose to install and use the Product without a dealer’s assistance, you assume full responsibility for the proper installation and application of the Product. If the Product was installed and/or programmed by a dealer, the Buyer shall look solely to the dealer who installed the Product and/or programmed the vehicle with respect to any responsibility for the installation or application of the Product, the programming of the vehicle, and any service and support needed by the Buyer with respect thereto, as well as any damage that may be done to vehicle components as a result of modifications made by the dealer. The Buyer is responsible to fully understand the capability and limitations of his/her vehicle according to manufacturer specifications, warnings and instructions and agrees to hold the Seller harmless from any damage or injury resulting from failure to adhere to such specifications, warnings and/or instructions. The Buyer is also responsible to obey all applicable federal, state, and local laws, statutes, and ordinances when operating his/her vehicle, and the Buyer agrees to hold Seller harmless from any violation thereof. The Seller’s Limited Warranty for this Product is the Buyer’s exclusive warranty and is in lieu of all other warranties, express or implied, except as may be required by applicable law. Without limiting the generality of the foregoing, the Seller shall not be liable for any breach of any other written or oral warranties given to the Buyer by any third party(ies) such as those (if any) given to the Buyer by dealers or distributors of the Product. Consult your vehicle warranty before using this Product. Under no circumstances will the Seller be liable for the voidance of the Buyer’s vehicle warranty. Rather, the Buyer assumes all risk and responsibility if an automotive manufacturer and/or dealer voids the Buyer’s vehicle warranty due to use of this Product. Operate your vehicle at all times in a safe manner. Regardless of any capability, feature or function of the Seller’s Products, the Buyer understands and acknowledges that it is the Buyer’s sole responsibility to ensure that (A) the motor vehicle is operated in a safe and legal manner, (B) the motor vehicle is not driven faster than the lower of the speed limit or the speed rating of the tires on the vehicle in which the Seller’s product is installed, and (C) the maximum RPM or speed rating of the engine is not exceeded while operating the motor vehicle. In no case will the Seller be held liable, and the Buyer assumes all risk and responsibility, for any property damage, personal injury and/or death that may occur in the event the Buyer operates the vehicle in an unsafe manner, violates the law or exceeds the above mentioned limits. Please check your local, state and federal laws to determine if you are within your rights to modify your vehicle’s controller. The Seller makes no representation or warranty, express or implied, that the use of its Products will comply with local, state, or Federal emission levels, noise levels or safety standards. The Buyer assumes all responsibility for such use and compliance. The Seller recommends that the Buyer temporarily remove this product from his/her vehicle when having the vehicle serviced by a dealership or other service facility. Failure to do so may cause erroneous diagnostic readings or misdiagnosis of vehicle problems. The Seller assumes no liability for failure to do so. Without limiting the foregoing, should the Buyer decide to conduct any performance tests in connection with the use of Seller's Products (including but not limited to tests in conjunction with the performance screens of any such Products), such performance tests should (A) only be conducted by a passenger in the vehicle (to avoid distracting the driver) and on a closed course and (B) never be conducted on streets, highways or other public ways. The Buyer acknowledges that he/she is not relying on the Seller’s skill or judgment to select or furnish goods suitable for any particular purpose, and the Buyer hereby waives all remedies or liabilities, expressed or implied, arising by law or otherwise, or whether or not occasioned by the Seller’s negligence. THE BUYER HEREBY WAIVES ALL LIABILITY CLAIMS AGAINST THE SELLER OF ANY KIND OR NATURE, INCLUDING LIABILITY FOR PROPERTY DAMAGE, PERSONAL INJURY OR DEATH, TO THE FULLEST EXTENT PERMITTED BY LAW. ADDITIONALLY, BUYER ACKNOWLEDGES AND AGREES THAT SELLER IS NOT LIABLE FOR AND HEREBY EXCLUDES ANY AND ALL INDIRECT, INCIDENTAL, SPECIAL OR CONSEQUENTIAL DAMAGES RELATING TO THE PRODUCTS COVERED BY THIS DISCLAIMER. The Seller’s Limited Warranty for this Product gives you specific legal rights, and you may also have other rights which may vary from state to state. Pertinent state law shall control for what period of time following the sale a consumer may seek a remedy under the implied warranty of merchantability or fitness for a particular purpose. Some states do not allow the exclusion or limitation of incidental or consequential damages so the above limitations or exclusions may not apply to you. THIS DISCLAIMER IS A MATERIAL CONDITION OF SELLER’S WILLINGNESS TO SELL THE PRODUCT TO BUYER. IN THE EVENT THAT THE BUYER DOES NOT AGREE WITH THIS DISCLAIMER, THE BUYER MAY PROMPTLY RETURN THIS PRODUCT, IN A NEW AND UNUSED CONDITION, WITH A DATED PROOF OF PURCHASE, TO THE PLACE OF PURCHASE WITHIN FOURTEEN (14) DAYS FROM DATE OF PURCHASE FOR A FULL REFUND. User’s Manual SCT PERFORMANCE, LLC. 1.2 Device Firmware & Tune Revision Updates From time to time, you may wish to update your device to the latest version of firmware or tune revision. For step by step instructions on how to update your SCT device, visit www.SCTFLASH.com and click on the Tech Support link. Make sure you have returned your vehicle back to stock before updating your unit. NOTE: If viewing this document online you can click on the following link to download the SCT Device Updater: SCT Device Updater 1.3 About your SCT Device Available Gasoline Tunes: 93, 91, 87 octane and economy as applicable. Available Diesel Tunes: Performance, Street, Towing. Note: Not all options are available for all vehicles. Livewire TS VIN locks (marries) to a single vehicle. You cannot use the device to tune a new or different vehicle, until you have returned the original vehicle back to stock, which will unlock the device. You can only change vehicles 5 times before the unit is permanently locked. To reset the Changes or Unlock device you will need to contact SCT. Service charges do apply. Standard pre-programmed tuning files are designed for vehicles with minor performance modifications such as; cold air kits, high-flow exhaust systems, and other basic modifications. Vehicles that have aftermarket superchargers or turbochargers will require custom tuning, which can be purchased only through authorized SCT Custom Tuning Dealers. To locate a dealer near you use the dealer locator on the SCT website at www.sctflash.com. If you later add a blower, turbo or nitrous to your vehicle or add a more ‘wild’ naturally aspirated combination of parts, you will need to obtain a custom tune from an SCT dealer. The Livewire TS programmer is flexible enough so that your original investment will not be lost – it can be loaded with a custom tune from the SCT dealer. Read your vehicle’s warranty carefully before installing or using this Product. You are solely responsible for determining whether use or installation of this Product will negate or diminish any applicable warranty coverage. Under no circumstances will the Seller be liable for the voidance of all or any part of the Buyer’s vehicle warranty. Rather, the Buyer assumes all risk and responsibility if an automotive manufacturer and/or dealer voids the Buyer’s vehicle warranty in whole or in part due to use or installation of this product. The stock file is stored during initial programming. The stock file stays on the programmer until returned to stock. You should always return your vehicle back to stock before taking your vehicle in to any auto service facility or before updating your device. The Livewire TS is NOT legal for sale or use in California on pollution controlled motor vehicles User’s Manual SCT PERFORMANCE, LLC. 2. GETTING STARTED 2.1 Powering on the Livewire TS There two ways to power on the device. If you’d like to flash you vehicle, you will need to use the Vehicle instructions below. If you are looking to update or load custom tunes onto your device you will use the Computer instructions below. Using the Vehicle Locate the vehicle’s OBD Diagnostic port. This connector is usually located under the vehicles dash board on the driver’s side. The port may be covered with a cap or compartment door labeled OBD Diagnostic Port. If the connector pins are covered or the port is located behind a compartment door, remove the cap or open the compartment door. Connect the OBD connector from the Livewire TS to the vehicles OBD Diagnostic port. Using the Computer User’s Manual Install SCT Device Updater before connecting your unit via USB (Updater Download) Locate the computers USB port. This port can be found on the front or the back of the computer, if using a laptop the ports will usually be on either side of the laptop. Using the USB cable provided connect the USB end of the cable to the PC and the other to the bottom of the Livewire TS SCT PERFORMANCE, LLC. 2.2 Loading Email Custom Tunes to the Livewire TS 1. Before connecting your LWTS to your PC, go to www.sctflash.com and click on the Tech Support tab on the top of the page. Select the image of your device, download and completely install SCT Device Updater. 2. Connect your device with the USB cable provided to the back of your computer. (Allow about 30 seconds for the drivers to install) 3. Save your custom tunes from your email to your desktop. 4. Open SCT Device Updater software that you just installed, there will be a shortcut icon on your desktop. 5. Now select “Load Custom Tune File” from the Basic Operations menu followed by clicking on “Locate Custom Tunes” 6. Select the desired tune and select the slot you would like to load the file to. 7. Press “Program” when ready to transfer the custom tune to the LWTS. 8. Repeat steps 5-7 if you wish to load more than one file. 2.3 Menu Navigation Device Info Program Vehicle • Device Name • Return to Stock • Device Part # • Strategy Tunes • Serial Number • Custom Tunes • Firmware Version Gauges / Datalog • Preloaded Tuning • Configuration • Custom Tuning • Monitor • Tune Revision Diagnostics • Market • Read DTC • Unlocks Left • Clear DTC • Married Status Performance Tests • Current Flash • 0-60 PMH • Total Flashes • ¼ Mile • Support Info • Braking • Vehicle Batt Vehicle Info • Vehicle Board FW • Vin • License Notice • Strategy • Vehicle Weight Device Settings • Ambient Light Sensor • LCD Brightness Day Time • Audio • LCD Brightness Night Time • Ignition Key Check • Theme: Red / Blue / Dark • Power Save Mode User’s Manual SCT PERFORMANCE, LLC. 2.4 Using the Touch Screen The screen on the Livewire TS is pretty simple to use, simply use your index finger to scroll through the sub-menu options by pressing firmly on the screen of the LWTS. When you see the menu you would like to choose, press firmly on the icon with your finger. If you’d like to back out of a menu simply press the Exit button. While programming your vehicle, the screen will guide you and explain whether to press the Cancel button or the Select button to perform certain actions or select different items. 2.5 Reading Vehicle Strategy Ford will often times update the computer in your vehicle. The new update ID (calibration ID) that is loaded into your computer is called a strategy. Many times your SCT dealer will ask you to read your vehicles strategy for many reasons which includes creating custom tunes. 1. Once the device is powered on using the OBDII cable provided, swipe from right to left once to get to the “VEHICLE INFO” icon. 2. Press on the “VEHICLE INFO” icon; you will be prompted to turn the key to the ON position. 3. Make sure you turn the key forward to the position before firing up the vehicle. Your dashboard should be lit with indicator lights. 4. Once the Livewire TS has detected you turned the key on, it will proceed to display your VIN, COMM and ECU Strategy. 2.6 Reading/Clearing Vehicle DTCs If you are experiencing a check engine light on your dashboard, you will be able to retrieve the code and read the cause of the code using your Livewire TS. You will also have the ability to clear these codes if you have gone ahead and taken care of the problem that was causing the check engine light. 1. Once the device is powered on using the OBDII cable provided, on the bottom right of the screen press the “DIAGNOSTICS” function. 2. You will have the choice on the following screen whether to Read DTC or Clear DTC, make your selection by pressing the appropriate option. a. READ DTC: Turn key ON, the device will automatically detect it; if any codes are present they will be listed on the next screen. You will be able to read the meaning of the code by simply touching the code being displayed. To go back to the list of DTC’s present simply press the OK button. b. CLEAR DTC: Turn Key On, the device will automatically detect it; when the codes have been deleted successfully the device will let you know it. User’s Manual SCT PERFORMANCE, LLC. 3.0 Programming your vehicle 3.1 Installing a Preloaded Tune File 1. Connect the Livewire TS to your vehicle’s OBD II service port and power on the device by pressing down on the power button in the upper right hand corner of the device as you are looking at the screen. 2. Start with the unit powered on and connected to the vehicle, press the “Program Vehicle” button on the screen. 3. Next you will be prompted with a “Street Use Notice” which you must agree to and approve to begin tuning. If you approve and agree press the “Continue” button on the screen to proceed. 4. You may be prompted to “Turn Key On”. If so, please turn the ignition key to the “On” position but do not start the vehicle. 5. A screen will appear asking you to select your vehicle. Please touch the menu listing that contains your vehicle. 6. Next you will be prompted to adjust options. These options are items available from SCT to make minor adjustments to the calibration being loaded. It is not necessary to make adjustments in this area. If you wish to make an adjustment, simply press the option you would like to change and the screen will change to display the available values for that option. When you are satisfied with the values of these options or if you do not wish to change them, simply touch “Approve”. 7. You will now be prompted with a screen to review your vehicle and options (if any selected). Press “Continue”. 8. The next screen, possibly two, will differ between vehicles. You will be prompted to “Turn key Off” and/or “Turn Key On”. It’s important here to follow the prompts from the device. 9. Livewire TS will now Upload the current file that is in your vehicle, referred to as the “Stock File”, and will proceed to download the new calibration you have selected with all options applied if you have selected any. 10. After this is complete the device will display a “Download Complete” screen. You can now turn the key to the off position. For GM vehicles you may see a “Power Down ECU” screen while the vehicle completes some power down procedures. 11. You have now successfully tuned your vehicle! Which tune file do I choose? Gasoline Engine: Tunes are based on Octane, make sure you choose the correct octane rating based on the octane you are running in your vehicle. 87 Octane 91 Octane 93 Octane User’s Manual SCT PERFORMANCE, LLC. Diesel Engine: We offer a few tunes based on what you’re going to be doing with your truck. Street: Less power than Performance. Moderate gain over stock, safe for light towing, under 5k lbs. Performance: The most aggressive preloaded diesel tune. Good for everyday use, racing, economy but not recommended for any type of towing. Tow: Should be used when towing any significant load. Shifting is towing centered How do I know what the Options do? In section 3.4 there’s are a list of options, their functions and are also explained. For suggestions on using any of these options refer to a custom tuning dealer. NOTE: Adjustable Options vary for each vehicle and are not available on all vehicles 3.2 Installing a Custom Tune File 4 Start with the unit powered on and connected to the vehicle, press the “Program Vehicle” button on the screen. 5 Next you will be prompted with a “Street Use Notice” which you must agree to and approve to begin tuning. If you approve and agree press the “Continue” button on the screen to proceed. 6 You may be prompted to “Turn Key On”. If so, please turn the ignition key to the “On” position but do not start the vehicle. 7 A screen will appear asking you to select your vehicle. Please scroll down until you see the area “Available Custom Tunes” and touch the menu listing that contains the custom tune you would like to load. 8 Next you will be prompted to adjust options. These options are items available from SCT to make minor adjustments to the calibration being loaded. It is not necessary to make adjustments in this area. If you wish to make an adjustment, simply press the option you would like to change and the screen will change to display the available values for that option. When you are satisfied with the values of these options or if you do not wish to change them, simply touch “Approve”. 9 You will now be prompted with a screen to review your vehicle and options (if any selected). Press “Continue”. 10 The next screen, possibly two, will differ between vehicles. You will be prompted to “Turn key Off” and/or “Turn Key On”. It’s important here to follow the prompts from the device. 11 Livewire TS will now Upload the current file that is in your vehicle, referred to as the “Stock File”, and will proceed to download the new calibration you have selected with all options applied if you have selected any. 12 After this is complete the device will display a “Download Complete” screen. You can now turn the key to the off position. For GM vehicles you may see a “Power Down ECU” screen while the vehicle completes some power down procedures. You have now successfully tuned your vehicle! Custom tunes are built by SCT’s network of Custom tuning Dealers and any questions related to them need to be directed towards the tuning dealer. User’s Manual SCT PERFORMANCE, LLC. 3.3 Returning your Vehicle to Stock 1. Start with the unit powered on and connected to the vehicle, press the “Program Vehicle” button on the screen. 2. Next you will be prompted with a “Street Use Notice” which you must agree to and approve to begin the Return to Stock procedure. If you approve and agree press the “Return Stock” button on the screen to proceed. 3. A verification screen will now be displayed confirming your selection to return to the stock tune. Simply touch “Continue” here to confirm. 4. Depending on your device settings you may be prompted to “Turn Key On”. If so, please turn the ignition key to the “On” position but do not start the vehicle. 5. The next screen, possibly two, will differ between vehicles. You will be prompted to “Turn key Off” and/or “Turn Key On”. It’s important here to follow the prompts from the device. 6. Livewire TS will now load the original file saved from when you tuned the vehicle (“Stock File”) back into the vehicle. 7. After this is complete the device will display a “Download Complete” screen. You can now turn the key to the off position. For GM vehicles you may see a “Power Down ECU” screen while the vehicle completes some power down procedures. 8. You have now successfully returned your vehicle to Stock. 3.4 User Adjustable Options Explained User Adjustable Options are contained within the pre-loaded tuning files. You will be prompted to Adjust Options during the tuning process. The Adjust Options menu will appear and you will navigate through the options using the touch screen. To enter the option or select the option, use the approve button. To cancel the option or go back to the previous screen, press the cancel button. The user adjustable options allow you to adjust common vehicle parameters such as the list provided below. The available user adjustable options for your vehicle will appear in the on-screen list. Use the arrow up & down keys to scroll through the options list and use the select key to enter and modify any option. Once you have selected each option to change, you will be prompted to save all adjustments. Once the adjustments have been saved, you will be prompted to continue the upload process. NOTE: Adjustable Options vary for each vehicle and are not available on all vehicles DIESEL VEHICLES SPECIFIC OPTIONS: PERFORMANCE STREET TOWING TRANS ONLY JAKE BRAKE User’s Manual The most aggressive preloaded diesel tune. Good for everyday use, racing, economy but not recommended for any type of towing. Less power than Performance. Moderate gain over stock, safe for light towing, under 5k lbs. Should be used when towing any significant load. Shifting is towing centered. For Heavy Loads, Engine and Boost left stock, Trans Only tune. Exhaust brake to increase engine braking while coasting, lowers brake temps. SCT PERFORMANCE, LLC. LOCKED AT CT LOCK IN 1-2-3 AGG. TOW HAUL Keeps the torque converter locked during decel to aid in engine braking. Locks the torque converter in 1st, 2nd and 3rd gear. More aggressive shift schedule keeping the engine in its power band longer. DIESEL AND GAS SHARED OPTIONS: AXLE RATIO Set the axle ratio to correct shift patterns and speedometer. TIRE SIZE Set the tire size to correct shift patterns and speedometer. IDLE SPEED Sets Idle speed in RPM. TRACTION CONTROL - On/Off setting disables traction control without using the tcs button. WOT SHIFT Increase or Decrease the WOT Shift points of each gear individually by mph. SHIFT PRESSURE % change in transmission pressure during shifts. (+ = firmer) (- = softer) GAS VEHICLES SPECIFIC OPTIONS: TUNE TYPE Gas Vehicles preloaded tunes vary Performance levels by Octane. Premium fuel will provide the best performance increase. TOWING TUNE Adjusts the Octane based tunes to focus more on towing over performance. ECONOMY TUNE Adjusts the Octane based tunes to focus on economy over performance. REAR O2’S Disables the Rear O2s and eliminates CEL caused by rear O2 removal. GLOBAL SPARK Add or Remove Timing Advance to the entire RPM range. SPARK BY RPM Add or Remove Timing by RPM Range. (0-2000)(2000-4000)(4000-8000) WOT FUEL Add or Remove Fuel at Wide Open Throttle. (WOT) FUEL INJECTORS Allows you to adjust for different sized injectors. (Not available on all vehicles) CMCV DELETES Updates tune to handle the CMCV/IMRC delete plate’s modification. FAN CONTROL Lowers the Temperature at which the Fan turns on. REV LIMITER DRIVE Sets Rev Limit in RPM while in Drive REV LIMITER NEUTRAL Sets Rev Limit in RPM while in Neutral SPEED LIMIT Remove, Increase or Decrease the vehicle speed limiter. (Aka govenor) User’s Manual SCT PERFORMANCE, LLC. 4. USING DEVICE FEATURES 4.1 On-Device Data Logging and Monitoring This menu accesses the Monitoring and Data Logging feature. This menu is also used when collecting data from the analog input on the device. 1. With your key out of the ignition connect your device to the OBDII port and power on your Livewire TS, on the bottom left of the screen you will see GAUGES / DATALOG, press it. 2. Go ahead and turn the key to the ON position, the device will automatically detect when you have turned the key forward, it will take you the main gauge display. 3. Tap the screen once and select “Configuration”, select the appropriate Preloaded Datalog File displayed on the screen that matches your type of vehicle, press Continue. 4. You are now on the main gauge screen and are ready to configure what is being displayed. Editing a Gauge To edit a gauge you will tap twice on the gauge you would like to edit. You will be taken to the edit screen where you can choose what parameter you would like to monitor. a. Item: Here you will find a list of parameters that are preloaded on your device. You can find the Analog Inputs at the bottom of this list. b. Equation: We have preset the most common equations as a list to choose from V (this would be Voltage) LC1 SCT EGT ˚ F AEM PLX EGT ˚ F AFM1000 AEM X-WIFI EGT ˚ F G100 SensorConnection EGT ˚F Dyno Jet WBC ExhaustGasTech EGT ˚F GM 1Bar MAP LM1 GM 2Bar MAP TE 2A0 GM 3Bar MAP PLX c. Range: You will be able to set the range of the senor or pid selected. The range is automatically modified based on the parameter selected. (Excludes Analogs) d. Alert: Setting a Min and Max value will cause the device to alert you when these values have been exceeded. Indicator: You may choose the color of the alert to be displayed by your LWTS Editing Gauge Layout There are eight (8) preset gauge layouts available to choose from 1. From the Main Gauge display, single tap the screen, select “LAYOUT” that will appear on the bottom left of the screen. 2. You may scroll using your finger to the selection to choose from. 3. Tap the image of the layout you’d like to use. You will need to edit gauges once more. User’s Manual SCT PERFORMANCE, LLC. 4.2 Connecting External Analog Inputs Using the wiring specifications that came with your analog sensor, connect to the proper pins using the diagram below. NOTE: Do not connect any device to the analog input that exceeds 5 volts to the analog port or permanent damage to the adapter can occur. Example of an EGT being set up is outlined below: Configuring your EGT Kit to work with your LWTS 1. Connect the 6 PIN Firewire analog cable into the built-in firewire port on the OBDII cable. 2. Power on your LWTS, on the bottom left of your home screen you will see “Gauges/Datalog”, select it. 3. You will be prompted to turn the key to the ON position; the LWTS will automatically detect your key being turned on. 4. Select the appropriate Preloaded Datalog File displayed on the screen that matches your type of vehicle, (in this example we will use Ford Diesel 6.0L and 7.3L) Press Continue. 5. When the main gauge display comes up, Double tap on the gauge you would like to edit. a. Single Tap: Views the Menu b. Double Tap: Edits Gauges 6. Once you’ve double tapped the gauge, you will be brought to a screen where you can select the proper Item to monitor, proper equation for analogs and add a Min and Max Range. a. Item: Press and hold on the screen to scroll, all the way at the bottom where the Analogs are located, tap “Analog In 7 Red-Wire” b. Equation: Tap “SCT EGT F” c. You may now modify Min and Max Value’s 7. Select “Approve” to confirm the changes and view the EGT signal real-time. User’s Manual SCT PERFORMANCE, LLC. 4.3 Device Settings Using the Livewire TS Performance Test to measure your vehicle’s performance: The LWTS Performance Test feature allows you to measure the 0-60 MPH, ¼ Mile ET and Braking ET all in one test or individually. (You many select more than one test at a time) NOTE: Prior to using the LWTS Performance Test, you must configure your vehicle’s weight within the Vehicle Info Menu. The option to modify weight will appear only after you have successfully read Vehicle Info. 4.4 Device Settings Within the Device Settings menu, we have given the options to customize your device for exactly your needs. Below is an outline of all options and their functions. -LCD BRIGHTNESS DAY TIME: Allows you to modify the brightness of the screen. -LCD BRIGHTNESS NIGHT TIME: Allows you to modify the brightness of the screen. -THEME: You may change the appearance of the menu screens with a Blue (Default), Red or Dark Black) theme. -AMBIENT LIGHT SENSOR: This feature allows the device to adjust brightness of the screen automatically. You may turn this feature off. -AUDIO: You may turn the sound Off or On of the device, this includes the beeping noise the device makes when selecting the menus and options. -IGNITION KEY CHECK: Will allow the device to automatically identify the key being turned on automatically, you may shut this function off. It’s recommended to leave this On. -POWER SAVE MODE: You can choose from Auto or Always On. AUTO: When the device see’s you have shut off the vehicle the programmer will start a counter to automatically shut down in 5minutes. ALWAYS ON: Your device will remain on whether you shut off the vehicle or not. -STARTUP FUNCTION: When the device is turned on you can allow the device to go directly to either: MAIN MENU GAUGES / DATALOG PERFORMANCE -ONSCREEN TUTORIAL: Provides on screen assistance using your touch screen. On or Off -DEMO MODE: Simulates the functions of the programmer such as Programming and Monitoring Gauges. NOTE: Disable DEMO Mode before attempting to program your vehicle. -FACTORY RESET: This will DELETE all custom tunes and restore preloaded tunes. -SHUTDOWN: Powers down your device. User’s Manual SCT PERFORMANCE, LLC. 5. COMMON QUESTIONS When I connect the tuner to the vehicle, it doesn’t power on. - Check for blown fuses for OBDII/Cigarette Lighter. Does the tuner have to stay plugged in to keep the vehicle tune? - No. After tuning, you can disconnect the programmer. Can I stack/combine the SCT programmer with another chip or tuning module? - All Chips/Tuning Products must be removed before tuning with SCT. Can I tune more than one vehicle with this programmer? - One vehicle tuned at a time. You may return to stock and tune another vehicle up to 5 times. Can the vehicle be tuned while the engine is running? - No. This can cause severe damage to the vehicle and PCM. Should I return to stock before taking my vehicle to the dealer? - Yes. This prevents the tuner from becoming locked if the dealer updates the PCM. Can I use a lower octane fuel than the tune file lists? - No. You must use the same octane fuel that the vehicle is tuned for. Failure to use the proper octane can result in severe engine damage. I have a supercharger / nitrous oxide on my vehicle; can I use a pre-loaded tune? - No. The pre-loaded tune files within the Livewire TS are designed for minor performance modifications such as cold air kits, high flow exhaust systems and other basic modifications. For high horsepower modifications such as superchargers, nitrous oxide or turbo systems, you will need to have your vehicle tuned by an SCT Custom Tuning dealer. 6. CONTACTING SCT PERFORMANCE SCT Support Options Your first option for support is your SCT Dealer. SCT also offers several support options after you have purchased your Livewire TS. You can contact us via phone, Fax, Chat or US postal service. Phone Support – 1.866.297.6298 (Mon-Fri, 9am-7pm Eastern) Email Support : [email protected] Live On-Line Chat Support (available at www.sctflash.com) To initiate a claim under this warranty, you can call 407-774-2447 and instructions will be provided. 4150 Church Street - Suite 1024 Sanford, Florida 32771 www.SCTFLASH.com User’s Manual