1
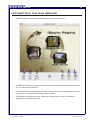
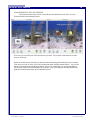
11 iDVD 2: User Manual LECTURETTE 5: FINALIZE AND BURN! Now that youve inserted all of the media that you will be using in your DVD, youll want to make sure that everything looks, sounds, and interacts in the way that you want it to. Look back to [PAGE #] and locate button #5, the Preview button, on the iDVD 2 desktop. Pressing this button will allow you to view your DVD as if you were watching it on a DVD player, complete with a simulated DVD remote control. About the remote: On a professional DVD, the menu and title buttons will take you to different locations. However, these buttons are linked to the same place in iDVD: the title screen. The four way arrows serve to navigate your menus and skip through slides in a slideshow. The fast forward, rewind, stop, and pause/play buttons work just as they would on a conventional VCR or DVD player. Take some time to make sure you are happy with the layout of your DVD. If you have problems, or would like to make changes, simply click the Preview button again, and you will re-enter the editing mode. Once you are satisfied with your DVD, locate the Burn button (labeled #6 on [page #]). DO NOT PUSH THIS BUTTON. Unless, of course you want a $5 DVD of Apples tutorial media of a fake couple having a fake vacation. Im sure you dont. You have now learned all of the possibilities of iDVD 2. With your own movies, pictures, and sound, you can create the DVD of your vacation, or portfolio, or band, or whatever you want. But before you do, we will cover a few of the technical details that have the potential of getting in the way of your DVD. File name: iDVD2_User.pmd Last modified: 05/30/02 Copyright Arizona Board of Regents, 2002 University of Arizona