1
CLEARING/UNLOADING
YOUR RIFLE
WARNING! Never assume your firearm is unloaded
to justify careless handling. Always control the direction
of the muzzle of your firearm, even if you think it is
completely unloaded. Careless handling of a firearm
may cause property damage, personal injury and/or
death.
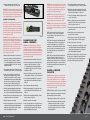
SAFETY FUNCTION CHECK
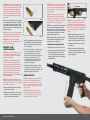
FIGURE 1
WARNING! If the firearm experiences a malfunction
during the Safety Function Check, the firearm is unsafe
and its use may cause property damage, personal
injury, and/or death. This firearm should be serviced by
an AAC authorized repair center. See the How to Obtain
Parts and Service From AAC section of the manual to
have your firearm repaired.
1. Always keep the rifle pointed in a safe direction.
1. A lways keep the firearm pointed in a safe direction.
2. Place the Safety Selector Lever in the “Safe”
position. See Figure 1. If the safety will not engage
proceed to step 3.
2. P lace the Safety Selector Lever in the “Safe”
position. If the safety will not engage proceed to
step 3.
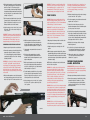
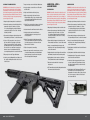
3. P ress the Magazine Release button and remove the
Magazine Box. See Figure 2.
3. P ress the Magazine Release button and remove the
Magazine Box. See Figure 2.
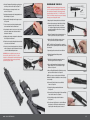
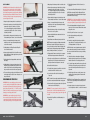
4. Lock the bolt open by pulling the Charging Handle
fully to the rear and pressing the bottom of the Bolt
Release. While depressing the bottom of the bolt
release, slide the charging handle forward until the
bolt engages the bolt catch. See Figure 3.
FIGURE 2
5. With the bolt locked open, slide the Charging Handle
fully forward.
6. V erify the Safety Selector Lever is fully in the
“Safe” position. If the Safety Selector Lever could
not be engaged in step two, place it in the “Safe”
position now.
FIGURE 3
7. Look into the ejection port and visually check the
chamber and magazine well for cartridges, ensuring
the firearm is completely unloaded.
PREVENTATIVE MAINTENANCE
CHECKS & SERVICES
FIGURE 4
1. A lways keep the rifle pointed in a safe direction.
FIGURE 5
3. R
etract the Bolt to ensure free movement between
Bolt Carrier and Gas Tube. See Figure 4.
4. Perform a Safety Function Check to ensure that
Safety Selector Lever works properly. See the
“Safety Function Check” section of this manual.
11. R
elease the pressure on the trigger with a
slow continuous motion until the trigger is fully
forward. A slight audible click should be heard,
but the hammer should not be released and
strike the firing pin. For the purposes of this
step, the rate by which to release the trigger
is defined as one fourth the normal rate by
which you release the trigger after discharging
the firearm. If the hammer is released by the
trigger and strikes the firing pin, the firearm has
malfunctioned and failed this safety function
check. Do not proceed with the check and see
the warning below for instructions.
12. Repeat steps 9 through 11 a total of five times.
The firearm must not malfunction during these
steps to pass the Safety Function Check. If the
firearm malfunctions, it has failed this safety
function check. Do not proceed with the check
and see the warning at the beggining of this
section for instructions.
SERIAL NUMBER & CALIBER
IDENTIFICATION
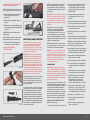
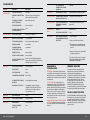
The serial number of your firearm is located on the
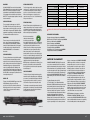
shooter’s left side of the magazine well. See Figure
7. The intended caliber of the firearm can also be
found on the shooter’s left side of the magazine
well. Always check the cartridge designation on
the barrel of the firearm to insure it matches the
cartridge designation on the lower receiver.
See Figure 8.
ith the safety selector lever in the “Safe” position
7. W
(See Figure 5) and the rifle pointed in a safe
direction, pull the trigger. The trigger should not
release the hammer and the hammer should not
strike the firing pin with an audible click. If the
hammer is released by the trigger, the firearm
has malfunctioned and failed this safety function
check. Do not proceed with the check and see the
warning above for instructions.
8. Place the safety selector lever in “Fire” position.
See Figure 6. Pull the Trigger. The trigger should
release the hammer and the hammer should
strike the firing pin with an audible snap. If the
hammer is not released by the trigger, the firearm
has malfunctioned and failed this safety function
check. Do not proceed with the check and see the
warning above for instructions.
FIGURE 7
9. Pull and hold the trigger.
FIGURE 6
AAC — BLACK RIFLE MANUAL
5. With the bolt locked open, slide the Charging
Handle fully forward. Verify the Safety Selector
Lever is fully in the “Safe” position. If the Safety
Selector Lever could not be engaged in step 2,
place it in the “Safe” position now. Look into the
ejection port and visually check the chamber and
magazine well for cartridges, ensuring the firearm
is completely unloaded. Only proceed if the rifle is
completely unloaded.
6. With the firearm completely unloaded, press the
bolt release button, allowing the bolt to fully close.
WARNING! Before discharging the firearm, make sure
the inside of the barrel is free of dirt, oil, water, or other
obstructions. Discharging an obstructed barrel may
cause property damage, personal injury and/or death.
2. Check to see that there is no excessive oil in the bore.
If there is, swab it out with a patch and the cleaning
rod. See the “Cleaning the Bore” section of this
manual. Always clean a new rifle before discharging
it for the first time.
4. Lock the bolt open by pulling the Charging Handle
fully to the rear and pressing the bottom of the Bolt
Release. While depressing the bottom of the bolt
release, slide the charging handle forward until the
bolt engages the bolt catch. See Figure 3.
10. Pull the charging handle fully rearward and
release it, allowing the bolt to fully close.
FIGURE 8
9