1
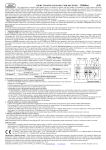
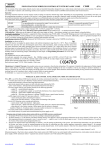
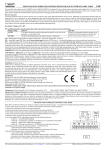
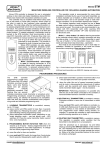
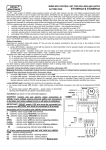
CH20HR TWENTY RELAY OUTPUT CHANNELS HOPPING CODE RECEIVER Receiver’s outputs operation modes. Activation of transmitter programmed to the receiver results in setting its channel relay output ON and illuminating channel’s LED indicator. Output relays’ SET ON timing depends on one of three operation modes described below, individually programmed to each output channel. 1. Temporary (pulse) set on mode lasting from 0.5s up to 4h. Signal output S generates two pulses on any relay set and one pulse on reset (see programming pt.2). 2. Latching on/off (bistable) mode activated by consecutive signals received from transmitter. Signal output S operates as above. 3. Temporary (pulse) set on mode lasting until reset is made by pressing the front panel LOW BATTERY CH. button (elsewhere referred to as LBC switch). For as long as output relay is set on signal output S generates pulses lasting 0,5s every 0,5s interval. Pressing the LBC switch resets relay output and stops signaling at output S. This operation mode enables designing intervention call system with call clearance made up by personnel authorized to use LBC button of the receiver. To enable this mode jumper JP4 of the receiver must be set OFF (see description of jumpers). IMPORTANT! When operating with the RP501 transmitter in radio relay mode as well as with wireless detectors CTX3H or CTX4H exclusively, used output channel/s operating mode should be set to pulse time mode (pt.1 above). Despite of that, output’s set on/off timing will match on/off timing of the transmitters. Low Battery Warning. Detected low battery in transmitter operating with CH20HR receiver is warned by blinking front panel LED marked LOW BATTERY INDIC. and, if jumper JP2 is set OFF (see jumpers description), setting on of output S. To find out the output channel with low battery transmitter, illuminated button marked LOW BATTERY CH. must be pressed and all outputs with low battery will be LED illuminated. Replacing battery sets off low battery warning. RF Link with Detector Failure Warning. CH20HR receiver features detection of radio link failures when operating with wireless detectors PTX, GNS, GBX & CTX4H. The detectors send supervisory transmission every 10 hours. If, within 24 hours period, transmission is not received from a detector, e.g. due to its technical failure, the receiver will indicate that by pulsing LOW BATTERY INDIC LED and, if jumper JP2 is off, setting on signaling output S. However, when LOW BATTERY CH button is pressed, relays and LEDs in channels with RF link failure will start pulsing as contrary to steady LED shining in the case of low battery detectors indication. Any radio transmission received from detector with RF link failure clears the failure warning. To activate RF link failure warning JP3 should be set OFF after completing installation and learning all detectors followed by forcing every detector to send a transmission. The procedure should be taken on every change in wireless detectors’ configuration with the receiver (deleting detector or moving detector to other channel). Jumper JP3 should be set ON for a while and then OFF, followed by detectors activation in order to initialize the function. Elmes Electronic 11.2014 -1- IMPORTANT! Proper functioning of low battery and RF link failure warnings require that only one wireless detector operates in one receiver’s channel. Radio Jamming Sabotage Warning. CH20HR receiver features anti-sabotage function of detecting deliberate or incidental radio frequency jamming. If RF jamming is detected, receiver output 19 is set on for as long as the jamming lasts. The function is active when JP5 is set OFF. Jumpers JP1.. JP5 description. JP1 - set ON - output S generates pulses on any output channel set on and off; set OFF - output S generates pulses on channel 1 output set on and off only; JP2 - set ON - output S signals channel set on and off – see outputs operating modes and description of JP1 above; set OFF - output S signals low battery in detector and, if JP3 is set OFF, RF link failure; JP3 - set ON - RF link supervision with wireless detectors set OFF; set OFF - RF link supervision with wireless detectors set ON; JP4 - set ON - selects standard operating mode with outputs in pulse or latched mode as in pts. 1&2 above; set OFF - receiver in call-in operating mode as described in pt.3 of outputs operating modes; JP5 - set ON - RF jamming detection function set OFF; set OFF - RF jamming detection function set ON. Installation and Outputs Settings. Receiver CH20HR operates indoors only with ambient temperature range -20 to +55°C. Installation place should be dry, possibly high and far from electromagnetic power lines, radio transmitters, metal screening and devices that may cause interference reducing operation range. Wire antenna should be let loose downwards and must not be glued to wall. Practical tests should be taken prior to firm installation of the receiver and transmitters to determine exact operation range. Factory outputs setting is NC (normally closed). Setting relay outputs to NO is made by solder joints made for each relay on pc board soldering side. Disconnecting receiver’s power supply or opening its case sets off output channel 20 indicating sabotage alarm (TAMPER ALARM). Power supplay Relay's outputs 1 CH20H Wiring diagram ..... .... Buzzer 12V 20 S 12V (750mA) _ + + _ This microprocessor controlled 20 output channels receiver is designed to operate with up to 60 transmitters in remote control, wireless alarms and access control systems. It features transmitter’s KEELOQ® code hopping verification system allowing highest level of security. The receiver provides 20 galvanic separated NC/NO relay outputs, each with front panel LED indication. Other features include transmitter’s low battery warning indication and, in operation with selected transmitters, radio communication link failure and transmitter’s case sabotage opening signaling. The receiver operates with all Elmes Electronic made 434MHz band transmitters. Each receiver channel may have pre-programmed any number of Elmes transmitters with total number operating with one CH20HR receiver not exceeding 60. Next transmitter learned will delete the first in receiver’s memory. Multi channel hand transmitters and RP501 transmitter learned to the receiver always control consecutive adjacent channels. Wireless detectors PTX50, GBX, GNS, CTX3H and CTX4H operate in two output channels of the receiver: alarm detection signaled in any channel 1...20 and sabotage detection (TAMPER) signaled in channel 20 assigned automatically. Typical application fields of CH20H receiver include: - interfacing any wired control panel with wireless Elmes made detectors and transmitters, such as CTX, GBX, PTX and RP501 as well as hand held transmitters (e.g. UMB100), further referred to as “remotes”, for system remote arming and disarming. - designing alert call-in system or wireless panic button – where personnel is equipped with remotes (e.g. AN200H or UMB100H) and can activate call-in request or activate panic alarm for help. solder joints Receiver's board PROGRAMMING PROCEDURES Programming is performed with front panel taken off and the use of programming switches PRG (small switch with PRG marked on pcb) and LBC (front panel illuminated switch marked LOW BATTERY CH.). Programming stages are indicated by red LED in middle-top section of the receiver. 1. Learning transmitter(s) (wireless detectors or key fobs) to receiver's memory (maximum 60) follow steps as below: a) Press shortly receiver's PRG switch. The PRG LED switches off and on and the first channel indication LED illuminates. b) By shortly pressing the PRG switch select the required channel for learning transmitter. c) Shortly press the LBC switch – the LED will switch off, d) Depending on type of programmed transmitter proceed with next step as follows: - hand transmitters (key fobs) – double press the transmitter’s button (as in example 1) respective to required control channels. - PTX50, GBX, GNS detectors – activate RF transmissions according to instructions in their manuals (see also example 2). - CTX3H, CTX4H wireless detectors – actuate two transmissions by double moving magnet in and out of case reed relay side or opening door/window if installed. - RP501 transmitter - set the required mode of operation in transmitter (radio link testing mode not allowed), connect all inputs to www.elmes.pl email: [email protected] ground and actuate transmission by disconnecting one of the inputs (as in example 3) respective to required control channels. e) Slow blinking LED in the receiver indicates end of the procedure. Examples: 1. Learning control button 4 (green) of four channel keyfob transmitter CH4H to output channel 8 of CH20H receiver would automatically learn the remaining keyfob control buttons 1, 2 & 3 to channels 5, 6 & 7 of the receiver. 2. Learning wireless motion detector PTX50 to output channel 3 of CH20H receiver results by motion detection signaled in channel 3 while detector’s sabotage case opening signaled in channel 20. 3. Learning transmitter RP501 inputs 1 & 2 to CH20H receiver output channels 11 & 12 respectively, output channel 12 should be selected (as in pt. 1b above) in the receiver and input 2 of the transmitter should be actuated (decoupled). As result inputs 1 & 2 of RP501 transmitter would control outputs 11 & 12 of CH20H receiver. Inputs 3 & 4 of the transmitter are not used. 2. Programming receiver’s any output channel/s momentary set on time (monostable mode). a) Press & hold receiver's PRG switch (longer than 2 and less than 8 seconds) until LED sets on. b) Shortly pressing the PRG switch select required channel for programming momentary output’s set on time. c) Shortly press the LBC switch and the LED sets off. d) Shortly press PRG switch again, the LED sets on and the count of output momentary set on time starts. When desired set on time has lapsed (up to 4 hours) press the PRG switch again. End of correctly performed procedure is indicated by blinking LED. 3. Programming receiver’s any output channel/s on/off operating mode (latched - bistable mode). a) Repeat programming steps 2a, 2b & 2c as above. b) Shortly press PRG switch three times with less than two seconds intervals. End of correctly performed procedure is indicated by blinking LED. 4. Deleting all transmitters from receiver's memory. Press receiver's PRG switch until programming LED starts blinking (longer than 8 seconds) and then release the switch. Receiver’s memory is cleared but the output channels' programmed modes of operation remain unchanged. To learn new transmitter(s) follow procedure pt. 1 above. 5. Deleting single transmitter from receiver’s memory. Except for RP501 transmitter, it is possible to delete any other single transmitter (key fob or wireless detector) from receiver’s memory under condition that the transmitter to be deleted is in our possession. This procedure requires performing steps a, b & c of learning procedure pt.1 above, with two succeeding transmissions at step 1.d to be performed in the following way: first transmission must be sent from the transmitter to be deleted and second transmission from any other transmitter (e.g. by pressing other button in multi channel hand held transmitters). Receiver’s LED blinking red will indicate programming error – in this case meaning that the transmitter is deleted. The receiver will not respond any more to signals sent from deleted transmitter. NOTE: programming errors are indicated by fast blinking PRG LED. If no programming steps are made for more than 16s, the receiver sets off programming mode. Specification - power supply 11 to 15VDC (nominal 12VDC); - current draw: 35mA plus 23mA on every relay set on, 500mA max; - 20 channel relay NC or NO outputs rated 1A/24VDC, 0,5A/125VDC - each channel output state LED indication; - open collector signaling output “S” rated 1A/60VDC max.; - super heterodyne 433,92MHz band receiver; - up to 60 code hopping transmitters (wireless detectors and key fobs) memory; - receiver’s box anti-sabotage switch (TAMPER); - strictly indoor installation; - operation within ambient temperatures: -20 to +55°C; - operating range depending on installation environment and type of used transmitter. Manufacturer’s Limited Warranty This product carries two years manufacturer’s warranty as from the date of purchase. The warranty is limited to the replacement of faulty original parts or repair defects of improper manufacture. Damage, faulty use or improper handling by the user or installer as well as any changes in product’s hardware or software caused by the user violets the warranty and all due repair costs will be charged. Elmes Electronic shall not bear liability for any personal or material damage resulting from any of its products direct, indirect or partial failure to operate properly. DECLARATION OF CONFORMITY Manufacturer: Elmes Elektronik declares under sole responsibility that product: RECEIVER CH20HR complies with essential requirements of the following directives: 1999/5/EC Telecommunication Directive (R&TTE), 2004/108/EC Electromagnetic Compatibility Directive (EMC), 2006/95/EC Low Voltage Directive (LVD), and applied harmonized standards, in particular: EN 60950-1:2006 - electric safety, EN 61000-6-1:2007 EMC - immunity, EN 61000-6-3:2007 EMC - emission, EN 301 489-1 V1.8.1 (2008-04) EMC – radio devices, EN 301 489-3 V1.4.1 (2002-08) EMC - short range devices (SRD), EN 300 220-1 V2.3.1 (2010-02) EMC – radio requirements (ERM) Manufacturer: ELMES ELEKTRONIK, ul. Avicenny 2, 54-611 Wrocław, Poland tel (+48)717845961, fax: (+48)717845963 Signature: ............................................ Director: Mirosław Bińkowski Date: 2014-11-27 IMPORTANT! The use of above symbol indicates that this product should not be treated as household waste. By ensuring this product is disposed of correctly you will protect the environment. For detailed information about recycling of this product, please contact your local authority, your household waste disposal service provider or organization the product has been purchased from. Manufacturer: ELMES ELECTRONIC, 54-611 Wroclaw, Poland, ul. Avicenny 2, tel. (+48)717845961, fax (+48)717845963 This product has been manufactured in lead free technology. Elmes Electronic 11.2014 -2- www.elmes.pl email: [email protected]