1
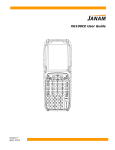
Floor Sales Pro
(Version 4.0 Standard)
User Guide
October 2005
www.FloorCoveringSoft.com
Disclaimer
To the maximum extent permitted by applicable law, InfoAppliance Inc. and its
distributors disclaim all warrantees, either express or implied, including, but not
limited to, implied warrantees of merchantability and fitness for a particular
purpose, with regard to the software product, and any accompanying hardware.
NO LIABILITY FOR CONSEQUENTIAL DAMAGES
To the maximum extent permitted by applicable law, in no event shall
InfoAppliance Inc. or its distributors be liable for any special, incidental,
indirect, or consequential damages whatsoever (including, without limitation,
damages for loss of business profits, business interruption, loss of business
information, or any other pecuniary loss) arising out of the use of or inability to
use the software product, even if InfoAppliance Inc. has been advised of the
possibility of such damages. Because some states and jurisdictions do not allow
the exclusion or limitation of liability for consequential or incidental damages, the
above limitation may not apply to you.
1
CONTENTS
1. A QUICK START .....................................................................................................3
2. WORK WITH FLOORING PROJECTS ..............................................................11
2.5.1. FLOOR TYPE BAR (ROOM, CLOSET, LANDING, HALLWAY, STAIRWAY, FREE-DRAW)
......................................................................................................................................14
2.5.2. CREATE A FLOOR AREA .........................................................................................14
2.5.3. EDIT FLOOR AREA .................................................................................................16
2.5.4. REMOVE AN AREA.................................................................................................17
2.5.5. GROUP-MOVE .......................................................................................................17
2.5.6. ZOOM IN AND OUT ................................................................................................17
2.5.7. COPY AND PASTE ..................................................................................................17
2.5.8 DOORS AND WINDOWS ...........................................................................................17
2.5.9 ACTIVATE AND DEACTIVATE AN AREA ....................................................................17
2.6.1. ROLL-CUT VIEW ....................................................................................................19
2.6.2. SEAM LAYOUT VIEW .............................................................................................19
2.6.3. ESTIMATION SUMMARY VIEW ................................................................................20
2.6.4. CROSS REFERENCE VIEWS ....................................................................................21
2.6.5. FINE-TUNE SEAMS AND REDUCE WASTE RATIO .......................................................23
2.6.6. CHANGE MATERIAL WIDTH ....................................................................................26
3. WORKING WITH OTHER DEVICES: ................................................................31
3.2.1 SYSTEM REQUIREMENTS: .......................................................................................32
3.2.2 SETTING UP A CONNECTION ON YOUR POCKET PC: ...................................................32
3.2.3 TROUBLESHOOTING: ..............................................................................................33
3.2.4 DEFINING YOUR FLOOR PLAN: ................................................................................34
3.2.5 SETTING UP A CONNECTION ON YOUR DISTO PLUS: .................................................35
3.2.6 MAKING THE CONNECTION:....................................................................................36
4. REGISTRATION OF FLOOR SALES PRO.........................................................40
5. INSTALLATION AND FUTURE UPDATES .......................................................41
6. BACKUP PROJECT FILES ON POCKET PC TO DESKTOP...........................43
7. WORK WITH FLOOR ESTIMATE PRO ON DESKTOP ..................................44
8. MICROSOFT POCKET PC 2003 SYSTEM APPLICATION..............................48
9. TROUBLE SHOOTING AND CUSTOMER SUPPORT......................................49
10. FAQ’S (FREQUENTLY ASKED QUESTIONS).................................................50
2
FloorSales Pro
User Guide
Updated March, 2005
1. A Quick Start
Get familiar with your Pocket PC
Start FloorSales Pro
Open a sample project
Get familiar with Main Tool Bar
Go to Estimation Mode
Create a new project and estimate by yourself
Takeoff a floor plan
Continue on
1.1 Get familiar with your Pocket PC
3
A Pocket PC is a handheld device that runs Microsoft Pocket PC operation system
(preferably 2003 version). Many vendors produce pocket PC hardware such as HP
(I-paq), Dell (Axim), Toshiba and a few others. Palm PDA is not by definition a
pocket PC, so FloorSales Pro will not run on it.
Microsoft Pocket PC 2003 is preloaded with a few useful applications including
Word, Excel, Contacts, Tasks and Calendar. Play with those functions to find out
how they work at your convenience.
FloorSales Pro works with Contact, Tasks and Calendar applications seamlessly
to help our users with customer management and scheduling functions, in addition
to diagram layout and floor estimation functions.
All applications (including FloorSales Pro) can be found from Start, then
Programs as shown below.
1.2. Start FloorSales Pro
Just tap FloorSales Pro icon from Start/Programs. Depending on which pocket PC
hardware model, it normally takes 5 seconds to 20 seconds to load the program
(higher models run faster). Once it is loaded, the main menu for the program
looks like this:
4
1.3. Open a sample project
Tap Open icon and select one from a list of sample project files provided with
FloorSales Pro. Tap sample1 to load it into FloorSales Pro.
5
1.4. Get familiar with Main Tool Bar
When a floor project is loaded, all functions available to manipulate it are
arranged on Main Tool Bar at the bottom of the screen (as shown below). The
Main Tool Bar contains a Tools menu and a list of small functional icons. Each
of their functions is briefly described below:
Tools, Icons
Tools
Functionality
Project file management
Floor Types Bar for floor plan take-off
Group-move (toggle on or off)
Remove a highlighted floor area
Zoom in and out floor plan
Change floor area sizes
Go to Estimation Mode
Go to Scheduling Mode
Save changes made to the current project
Bring system keyboard for input (toggle on or off)
1.5. Go to Estimation Mode
icon to get into Estimation Mode. Notice that
Continue with sample1, tap
Estimation Tool Bar now replaces the Main Tool Bar.
Estimation Tool Bar:
View material cut layout
The first view in Estimation Mode is material roll-cut view. It shows cuts on a roll
of carpet, other materials will show total material needed without a diagram. Drag
slider bar or navigate direction buttons on pocket PC to scroll the view.
6
View seam layout diagram
Tap seam layout view icon
to switch to seam layout view.
View estimation summary
7
to read detailed estimation results. The
Tap estimation summary icon
summary lists:
• Linear length of the material (sq feet)
• Square yardage
• Square footage
• Actual floor area (sq feet)
• Waste ratio (%)
• Layout direction (Æ from West to East, È from North to South).
1.6. Create a new project and estimate by yourself
sign on the top-right corner of the screen to return to Main Floor Bar. Tap
Tap
Tools on Main Tool Bar and then tap New. An entry form comes up for collecting
new project name and customer name. Select customer name from a contact list or
select Add New Contact at bottom of the list to add a new one.
8
Tip: To bring up the keyboard for input, tap
(tap it again to turn it off).
at the bottom right of the screen
1.7. Takeoff a floor plan
When a new project is started, Floor Type Bar (with a selection of Room, Landing,
Closet, Hallway, Stairway, and Freedraw) shows on top portion of the screen. Floor
Type Bar is for modeling a floor plan with different types of areas.
Floor Type Bar:
To add a single room, tap
then tap a point on the screen where the room is to
to
be placed. An entry form shows up for width and length of the room. Tap
bring up the keyboard and enter sizes, then tap “OK” button to complete the
creation.
9
Similarly areas of other floor types can be added to create a complete floor plan
takeoff. Use stylus pen to tap and drag areas around to line up or down as desired.
Tap
sign to close Floor Type Bar or toggle
icon on Main Tool Bar.
1.8. Continue on
Feel free to play with FloorSales Pro to get a feeling on how it can be used to
draw a diagram and to get it to estimate material cut and seams. Continue on to
learn more functions in coming sections.
10
2. Work with Flooring Projects
2.1. Support for floor sales process:
Floor Sales Pro is designed to support the life cycle of floor sales process. It
allows flooring professionals to:
•
•
•
•
Create customer contact information
Takeoff floor plan, calculate yardage and adjust seam layout (and be able
to print installation diagrams from a desktop counterpart of FloorSales Pro)
Schedule material order, pickup, installation date and other activities
Track all sales activities on Calendar and Task Manager.
Create
contact
information
Measure,
Quote &
Close Sales
Schedule
material &
installation
Track
activities &
Service
2.2. Create contact information
Customer or prospect contact information can be created in two ways:
(1) From inside of FloorSales Pro (at new project page, or tap Tools/New)
(2) Directly from Start/Contacts of pocket PC system.
At new project start page, select a contact from a list of contacts already created in
the system, or select Add New Contact at bottom of the list to create a new entry.
11
Other project information (such as job site address, material width) are handled by
another form. Tap Tools/Project Info on Main Tool Bar.
12
2.3. Main Tool Bar
Main Tool Bar contains all the functional icons that help with floor plan takeoff,
estimation and scheduling functions.
Icons
Tools
Functionality
Project file management
Floor Type Bar
Group-move
Remove an area
Zoom in and out floor
plan
Change an area size
Go to Estimation Mode
Go to Scheduling Mode
Save project info
Keyboard Input
Details
Start Page, New, Open, Save, Save As,
Project Info, About and Exit.
When toggled on, show a tool bar at top
section of the screen. Available floor types
are Room, Landing, Closet, Hallway,
Stairway and Freedraw.
When toggled on, the whole diagram can
be moved as one group. When off, each
area is moved individually.
Delete a highlighted area (Tap to highlight
an area)
Zooming functions can be applied several
times to reach its maximum scale in each
direction
Edit size of a highlighted area.
Freedraw type is different from other types
(Refer to next section for details).
Supports various views including roll-cut,
seam layout, estimation summary, crossreference, and directional layout. Also
allows adjustments to optimize seam and
waste ratio.
Schedule various sales activities, view
tasks and dates, track and update task
status.
Save project information or changes made
so far.
Toggle on/off system keyboard.
2.4. Project Info (Customer, Job Site and Material Width)
Tap Tools/Project Info on Main Tool Bar to enter project related information:
(1) Job site address
(2) Customer contact (to set or change)
(3) Material width used in the project (to set if different than the default)
13
2.5. Take-off a floor plan
2.5.1. Floor Type Bar (Room, Closet, Landing, Hallway,
Stairway, Free-draw)
When you start on a new project or open an existing project, the project is in
modeling mode where Floor Type Bar shows up in the upper portion of the
screen. Tap icon
to toggle it on and off.
Floor Type Bar:
Floor Type Bar allows one of the floor types to be selected: Room, Closet,
Landing, Hallway, Stairway, and Free-draw.
2.5.2. Create a floor area
Tap an icon on the Floor Type Bar then tap the screen to select a location.
If selected type is NOT Freedraw, the process is straightforward. An entry
form shows up for size information: width, length, and steps if it is a stairway.
You may also select a label from a pull-down list. The list includes common
14
room names such as Master BR, Living Room, etc. Enter the sizes and tap OK
to complete the addition.
Tip: Default sizes in these forms are for demo purposes, and they can be set
off in Settings from the program start.
Steps for Creating a Freedraw: A grid panel shows up instead of an entry
form. Follow these rules:
• Always start at upper-left corner of the modeled freedraw area
• Create corner points by tapping and dragging (just with approximate
lengths), then close the shape.
• Follow the same order, from upper-left, double tap on each edge to
bring up an entry form to enter its exact size, tap Ok button to accept it.
Continue on until all lengths match the exact or desired sizes.
• Tap ok sign on the top-right corner of the screen to complete the
creation.
• Closing has been made easier, in order to prevent weird shapes,
freedraw automatically generates straight lines.
15
2.5.3. Edit floor area
To change sizes of a floor area, tap to highlight the area then tap the edit icon
on the Main Tool Bar. An entry form shows up where sizes can be
modified and saved. For Freedraw tap the room, it will take you to the grid
16
area here double tap on any edge to adjust size or name of selected edge. The
side selected will be high lighted as shown above.
2.5.4. Remove an area
Similar to editing, tap to highlight an area then tap
Confirm or cancel when prompted for the removal.
icon to delete it.
2.5.5. Group-move
Floor areas can be moved around by tap-and-drag, lining up to form a floor
plan. When the Group Move icon
on the Main Tool Bar is on, all areas are
moved as a group: a convenient feature for the floor layout.
2.5.6. Zoom in and out
Tap zooming icon
on Main Tool Bar to zoom in/out the floor plan. It can
be applied several times to reach its maximum scale in either direction.
2.5.7. Copy and paste
Frequently, a floor plan has same sized areas (rooms or freedraw area like in
hotels and offices). Copy and Paste feature makes duplication faster. Tap and
hold on an area for 2-3 seconds until a pop-up shows up to tap Copy. To paste,
tap on any point on screen for 2-3 seconds until pop-up menu shows up to tap
Paste.
2.5.8 Doors and windows
From floor takeoff tool bar on the top of the screen, select
door
window icon tap and drag the symbol, then release on desired edge of
or
room. Once doorways or windows are attached, they may be dragged and
moved to another location. Doors and windows may also be removed by
taping on the door or window and selecting
.
2.5.9 Activate and deactivate an area
Normally floor plan is taken off with areas that are to be covered by floor
covering material. However, there are cases where some areas would be
captured for reference purposes (For example, to annotate a kitchen next to
17
carpet however the kitchen will not be covered by carpet). Tap and hold on an
area until a pop-up menu shows up; select Deactivate (so that the program will
not count it for material in estimation). A deactivated area shows in gray color.
And a deactivated area can be re-activated by reversing the above process.
2.6. Estimation
When floor plan is captured, FloorSales Pro is ready to estimate. Tap on
estimation icon
on Main Tool Bar to go into Estimation Mode.
Estimation Tool Bar:
Icons
Functions
Material roll-cut view
Seam layout view
Estimation summary
Horizontal layout (West to East)
Vertical layout (North to South)
18
Proposal Sheet
2.6.1. Roll-cut view
The first view in Estimation Mode is roll-cut view where a roll of material is
cut into pieces to cover modeled floor plan. Drag slider bar to view undisplayed part.
While in roll-cut view, tap horizontal or vertical layout icons ,
to switch
material layout direction. On the top portion, observe how estimated yardage
and waste ratio change responding to the layout direction switch.
2.6.2. Seam layout view
Tap seam layout view icon
on Estimation Tool Bar. Drag the entire floor
plan to view un-displayed portion of the diagram. Notice that group-move
icon
is by default ON in this view. It is toggled off; it has a different use
(see sections 2.6.4. and 2.6.5 for details).
19
2.6.3. Estimation summary view
Tap estimation summary icon
estimation results:
•
•
•
•
•
•
on Estimation Tool Bar to read detailed
Linear length (sq feet)
Material yardage (sq yard)
Square footage (sq feet)
Floor area (sq feet)
Waste ratio (%)
Layout direction (Æ or È)
While in this view, tap horizontal or vertical layout icons
to switch
material layout direction. Observe how estimated results change in response to
the layout direction switch.
20
2.6.4. Cross Reference Views
•
In Roll-cut View, tap to highlight a cut, then tap seam layout view
icon
to show that cut highlighted in Seam Layout View.
21
•
In Seam Layout View, tap to highlight an area, then tap roll-cut view
icon
View.
•
to show all cuts belonging to that area highlighted in Roll-cut
In Roll-cut View, double tap a cut to show that cut highlighted in an
area that contains that cut. Double tap on the area to return to the rollcut view.
22
2.6.5. Fine-tune seams and reduce waste ratio
Seams can be adjusted or avoided however this will usually increase waste
ratio. On the contrary, seams can be added to decrease waste ratio.
Seams can be fine-tuned from both Roll-cut View and Seam Layout View.
•
•
From Seam Layout View, toggle off Group-move
, tap to highlight
an area, fine-tune function icons
will show up in Estimation
Tool Bar.
From Roll-cut View, double tap a cut to show the cut in an area, finetune function icons will also show up in Estimation Tool Bar.
23
Fine-tune Commands Functionality:
Icon
Function
Switch material direction on this area
Switch seam from one side to another
Adjust number of seams allowed on the area
24
Example 1: Change material direction on a selected room only. Notice that the seam
in Room 2 is avoided and material direction on surrounding areas does not change.
Example 2: Switch seam from one side to another side of the room. Normally
switching seams in freedraw areas can effectively improve seams and waste
ratio.
25
Example 3: Add more seams to a selected room to reduce waste ratio. Notice
that waste ratio is reduced to 4.7% from 7.9%.
2.6.6. Change material width
Material width by default is 12 feet for carpet. And it can be changed to any
other size. If a material other than 12ft. default carpet is to apply to all areas of
a new project begin by changing material settings from the first room drawn.
Upon drawing the first room, while in room dimension screen, look at the
bottom of your screen, you will see the word material, tap once to access
material settings. Here you may edit, add, remove, or set default materials.
If you have already completed a project and would like to change the material,
while in draw mode (if your floor take off tools are activated) you will see this
. Tap once to enter material database. If
icon on the top of your screen
your tools are not activated tap on
icon at the bottom of your screen to
activate them.
In estimation mode, tap View to select material style view
26
2.7. Proposal Sheet
In Estimation mode, tap
icon to generate proposal work sheet: It will look like:
Quantities and prices are automatically filled in the roposal sheet according to
your material database. You may edit numbers in the Proposal sheet to
accommodate your customer. You may also set your tax rate and generate a total
price for you customer on the spot.
2.8. Schedule and track sales activities
Scheduling tasks and appointments in the program will automatically enter the
customers name and phone number in the Calendar and Task list of your device.
In Main Tool Bar, tap schedule icon
to enter Scheduling Mode. Tap the right
side pen-shaped icons to schedule corresponding sales activities. Once a task is
completed, check the box next to it.
27
Track scheduled activities:
Scheduled activities can be tracked in two ways:
Tap Start/Tasks to track current activities by activity categories (as shown below)
Tap Start/Calendar to track appointments by day, week and month.
28
2.9. Tools functions (Start Page, New, Open, Save, Save As,
Project Info, License, About, Exit)
From Main Tool Bar, tap Tools to bring up a menu that provides all project and
product management functions. Each of these functions are described below:
Menu Item
Start Page
New
Open
Save
Save As
Project
Info
License
About
Exit
Function
Go to FloorSales Pro start page
Start a new project
Open an existing project file
Save current project changes
Save as another project file
View or change information related to the project
(Customer, Job Site and Material Width)
Activate FloorSales Pro as a licensed product. A licensed
user needs to obtain a registration key from their sales
reps of InfoAppliance Inc at the time of registration.
Without registration, the program expires 15 days after
installation.
FloorSales Pro version number and copyright notice
Exit FloorSales Pro
29
2.10. Other project files functions (Rename, Delete, Copy,
Paste)
In open project view, tap and hold on a project file for 2-3 seconds until a pop-up
menu shows up with Rename, Delete, Copy and Paste commands.
2.11 Settings
At FloorSales Pro start page, tap on Settings icon to configure system default
parameters.
Parameters
Display default entity
size
Default project name
prefix
Measurement Unit
Functionality
If checked, size entry form of floor types shows
default size values (good for demo purposes).
Different company may have different project
name convention. Use this parameter as prefix to
any new project name.
Select Imperial or Metric for measurement unit
30
2.12 Measurement Unit
Some countries measurement system is based on Metric. FloorSales Pro 4.0 has
supported this. We suggest user to set up Measurement Unit before starting your
flooring projects.
The default setting of Measurement Unit is Imperial. User can change this setting
by tap Settings icon at FloorSales Pro start page, and then check the radio button
of Metric. After this change, all the new projects will be based on Metric, but all
the old projects will keep the Measurement Unit when there were created.
3. Working with other devices:
3.1 Beaming files from one device to another:
Another useful feature of pocket PC is to exchange project files between two
pocket PCs through wireless infra-ray beam. One scenario is for floor sales rep to
pass project file to an installer’s pocket PC so the installer can follow the seam
layout.
Tap Start/Programs, then select File Explore, navigate to BusinessÆFloorPlan,
tap and hold on a project file until a menu appears where you may select what to
do with your file as shown below.
31
3.2 Using a Disto Plus (laser measuring device)
3.2.1 System Requirements:
1.)
iPAQ, Pocket Pc with Bluetooth technology running Microsoft Windows
Pocket PC Edition 2003 or higher
2.)
Leica Disto Plus with Bluetooth technology (please visit our website for
additional information www.floorcoveringsoft.com or call (866)928-3326
3.2.2 Setting up a connection on your pocket pc:
To set up a Bluetooth connection go to the Start menu of your pocket pc,
tap on settings, then tap on Bluetooth and tap Turn on. The light at the top of your
device should be blinking with a blue light.
32
3.2.3 Troubleshooting:
Your device should allow you to connect to any device in range, if you
cannot establish a connection you may want to go to the Start Menu, tap on Help,
then tap on Bluetooth, tap on Bluetooth Manager then on connections. The system
will guide you through setting up a connection or device (as seen on next page).
33
3.2.4 Defining your floor plan:
34
Before measuring with the Disto Plus, you will need to define the areas
that will be measured. You do this by opening Floor Sales Pro and creating a new
project. Once you have given your project a name you will want to create the
shapes of the rooms you will measure (do not concern yourself with the right size
at this point, you will edit the size when you measure with the laser).
3.2.5 Setting up a connection on your Disto Plus:
Turn your Disto Plus on by pressing the small red button at the bottom.
Then press the Bluetooth button followed by the 2nd key. (This will enable you to
transfer data from one device to another.)
3. 2nd Function
2. Bluetooth Key
1. On/Off Key
35
3.2.6 Making the connection:
You will now connect the devices together. Go to the Tools menu on the bottom
left corner of Floor Sales Pro and tap on Start Disto Measurement.
Once a connection is established you will see one of two things. On the
top left corner of the screen it will read Disto Connected in red lettering or one of
the rooms on the floor plan will be highlighted in red. (If you do not see either of
these two things, tap on start disto again. Other devices with Bluetooth (cell
phones, pda’s, pocket pc’s, laptops, and maybe other disto’s) may be interfering
with your connection. If you are unable to connect your devices please see
Troubleshooting in 3.2.3.
Key Definition:
Timer: Allows user to end
Bluetooth connection
Menu: Allows
user to navigate
from room to
room
On/Off: Allows
user to redraw
the room in 2nd
function once it
has been edited.
Equals Sign: Allows
user to navigate
around the sides of a
room to edit them.
36
Step 1: Once connected press the Menu key to navigate through the rooms on
your floor plan. Once the room you want to edit has been highlighted press the
Enter button on your disto.
Step 2: Once you have entered the room you want to edit, press the equal sign key
to navigate around the sides of the room.
37
Step 3: Once the side you want to edit is highlighted in red, take a reading with
the disto by pressing the Dist button. To begin a measure press it once, locate the
end of the laser to ensure it is hitting a hard surface and press the Dist button to
take the reading. You will see the length of the reading on the Disto and by
pressing the Enter button you will see the same reading highlighted in yellow on
your pocket pc. To navigate to the next wall press the equals sign. The wall will
become highlighted in red and once a reading has been taken and enter has been
pressed it will be highlighted in yellow again.
38
Step 4: Once you have edited all the sides, press the On/Off key to redraw the
shape according to the new sizes. Then press the Timer button to return to the
Floor plan.
Step 5: Once you can see the Floor plan, press the menu button on the disto to
navigate through the rooms to the next room you want to edit. Once the room is
highlighted in red, press the enter button on the disto to zoom into the room. (Once
39
side should be highlighted in red) Take readings and repeat the process of editing the
sizes. Once you are done editing, you can disconnect from the disto by pressing the
timer button twice. To reconnect go to the tools menu on the pocket pc and tap start
disto measurement again.
4. Registration of Floor Sales Pro
If FloorSales Pro is purchased bundled with pocket PC hardware, it is preregistered and no need to register with InfoAppliance Inc.
If one already owns the pocket PC hardware and purchased FloorSales Pro as a
software CD or downloaded from www.FloorCoveringSoft.com web site, it is
required to register it with InfoAppliance Inc for unlimited use. Un-registered
copies will expire in 15 days after installation.
Registration Process:
(1) Before FloorSales Pro expires, tap Tools/License. The registration form
will display a Device ID (i.e., serial number) of the pocket PC hardware.
(2) Fax or email this Device ID together with your name (or company name)
and email address to InfoAppliance Inc or its sales rep. Customer will
receive a registration key by fax or email promptly. (InfoAppliance Inc.,
fax: 626-446-6140 email: [email protected])
40
(3) Tap Registration button on the registration form to enter the key obtained
from InfoAppliance. That completes the process.
5. Installation and Future Updates
If FloorSales Pro is purchased bundled with pocket PC hardware, it is preinstalled and there is no need to install.
If one already owns pocket PC hardware and purchased FloorSales Pro as a
software CD or downloaded from www.FloorCoveringSoft.com web site, it must
be installed through a desktop or laptop PC though a USB port.
Installation Process:
(1) Before installing FloorSales Pro, make sure that Microsoft ActiveSync
V3.7 is already installed. If not, please install it first with the distributed
Pocket PC system CD.
(2) On desktop PC, click on setup.exe (FloorSales Pro installer).
(3) The installer will automatically install FloorSales Pro on pocket PC.
Check for FloorSales Pro icon under Start/Programs after installation.
Update Process:
InfoAppliance will regularly notify current users of FloorSales Pro updates (new
features, improvements, bug fixes, etc.) when it becomes available from web site
41
customer download area or in CD form. Customer is encouraged to visit
www.FloorCoveringSoft.com for latest update news on FloorSales Pro and its
counterpart desktop product FloorEstimate Pro.
When installing an update (setup.exe file), follow the same Installation Process
above. During the installation, confirm it to update and overwrite the previous
version.
IMPORTANT NOTE: Before updating it, make sure to exit a running
FloorSales Pro program. Otherwise, an installation error will occur.
42
6. Backup Project Files on Pocket PC to Desktop
It is always a good practice to regularly backup project files from pocket PC to a
desktop PC.
Backup Process:
• Connect pocket PC with desktop PC, start MS ActiveSync from desktop
PC, click Explore on ActiveSync Tool Bar. A Mobile Device file explorer
will pop up.
• Navigate to Business\FloorPlan where all project files are located. Copy
whichever project files desired, then paste to a designated file folder on
desktop PC.
Tip:
One may create a folder named ppc_projects under desktop FloorEstimate Pro
project folder (C:\program files\InfoAppliance\FloorEstimatePro\projects), and
backup pocket PC project files there so it would be easier for desktop
FloorEstimate Pro to find and load a project file.
43
7. Work with Floor Estimate Pro on Desktop
•
Floor Sales Pro by itself is an independent mobile application for floor covering
estimation and project management. However, FloorSales Pro can exchange project
files with its counterpart desktop product FloorEstimate Pro. So one may leverage on
FloorEstimate Pro’s richer functions as such printing, proposal sheet generation,
scanned image file tracing, upload to FloorLink.net and many other functions.
7.1. Open Floor Sales Pro project files in FloorEstimate Pro
FloorEstimate Pro (versions 3.0 and on) will be able to open project files
generated by pocket FloorSales Pro from its backup directory on desktop.
44
However, changes made on the desktop cannot be loaded back to pocket PC
FloorSales Pro.
Step 1: Open Floor Estimate Pro, go to the Project menu and click Open
Floor Sales Pro Project
Step 2: Find the Pocket Pc directory
Step 3: Double click on the Business folder
45
Step 4: Double click on Floorplan
Step 5: Double click on the project you want to open on the desktop
Step 6: You should see the Pocket Pc created file on your desktop
46
7.2. Print, estimate, calculate cost on pocket PC project
files on FloorEstimate Pro
Once loaded into desktop FloorEstimate Pro, one can do anything allowed by
FloorEstimate Pro: printing, proposal sheet generation, multiple materials support,
and manual cut piece fine-tuning. However until this release, FloorEstimate Pro
can only read in floor plan and estimate by its own algorithm that generates
yardage number, seams and cut layout that could be different from that on pocket
PC.
One may use pocket PC as a tool to take off a floor plan, to give a quick quotation
to customer at the spot, and later transfer the files to desktop FloorEstimate Pro
for printing or further fine-tuning.
47
8. Microsoft Pocket PC 2003 System Application
FloorSales Pro works with MS pocket PC Contact, Tasks and Calendar
applications seamlessly to help users with customer management and scheduling
functions, in addition to its floor plan takeoff, seam diagram layout and estimation
functions.
8.1. Start Contacts, Calendar, Tasks
From Start menu, tap on Contacts, Calendar or Tasks. Getting familiar with these
applications will improve the proficiency of using FloorSales Pro and therefore
lift productivities.
8.2. Check battery power level
Tap Start/Settings; tap Power to view its status. Pocket PC system normally
notifies user when power level gets below 30%. To avoid losing project files,
one must charge the battery before it runs out.
48
9. Trouble Shooting and Customer Support
Resetting Pocket PC (Soft Reset):
Occasionally, pocket PC or FloorSales Pro freezes or does not behave normally.
Pushing the reset button (a small hole on the left side of HP ipaq) would solve the
problem. If it problem persists, please contact InfoAppliance Inc support.
Please contact your sales rep for technical problems at (866)928-3326 or submit
your questions online at www.floorcoveringsoft.com/support.htm
49
10. FAQ’s (Frequently asked Questions)
Software Download:
1. How to download or install (Floorsalespro) from your computer onto your
Pocket PC?
a.) Before installing Floor Sales Pro, make sure that Microsoft ActiveSync V
3.7 or higher is already installed. If not, please install it first with the
distributed Pocket PC system CD.
b.) On your desktop PC, click on setup.exe(FloorSalesPro Installer)
c.) The installer will automatically install FloorSalesPro onto your pocket PC.
Check for the FloorSalesPro icon under Start/Programs after the
installation is complete
2. How to find out if you downloaded properly? From your pocket PC, go to the
start menu/ programs, if you do not see the icon for Floor Sales Pro you did not
install properly, if you do you are ready to go.
Starting a new project:
1. How to access tools for floor plan takeoff? On the bottom left hand corner you
will see a blue cross icon, by tapping the screen once your tools will automatically
appear on the top of the screen.
2. How to change the properties of a room? Tap on the room to highlight it then
tap on the icon with a paper and green pen located on the bottom of your screen.
3. How to change the direction of a room? In estimation mode, select a room by
tapping on it then on the bottom of your screen select the icon with a circular
arrow containing a green dot in the center
4. How to change the size and label of a room after it is created? Tap on the
room you want to edit, tap your M icon on the top of your screen or on the icon
located on the bottom of your screen with a paper and green pen, your shape
information should appear where you can highlight the size and change it or scroll
from the room name to change the identity of the room (see how to change
properties for a free draw)
5. How to delete a room after it has been created? Highlight the room you would
like to delete and click the red cross icon located on the bottom of you screen, a
pop up window will prompt you to select weather you really want to delete it or
not.
6. How to change the material of the room after it is created? Tap on the room
you want to change the material for to highlight it, tap on the icon with an M, on
the top of your screen, a shape information screen will come up, on the bottom of
50
your screen you will have the option to stay in general properties, material, or
notes. Tap once on material. Here you may edit, add, remove, or use default
materials
7. How to free draw more efficiently? Without concerning yourself with sizes,
draw the basic shape you need first then go back and adjust the size of each side
beginning with the largest size and working clockwise or counterclockwise
8. How to adjust the size, label, or material of a free draw? Once you have drawn
the basic figure, begin by double tapping on the line of the largest side, the shape
information screen will show up, here you can adjust sizes or room names. To
access your material settings, tap on material on the bottom of your screen here
you may edit, add, remove, or use default materials.
9. How to not count a room without removing the shape? Tap and hold the room,
a menu will pop up, select deactivate, to restore: tap and hold the same room,
from the menu select activate.
10. How to add doors and windows to your drawing? On the top right of your
screen when your tools are activated you will see a brown door icon and a blue
window icon. Tap once on either icon then tap on the location of the room where
you want the door or window placed, it will automatically place the door or
window there, you may also drag the item anywhere you want within the room.
11. How to copy and paste? Tap and hold the room you want to copy, a pop up
screen will appear, select copy, tap and hold anywhere on the screen, a pop up
will screen will appear again, now select paste.
12. How to move the entire drawing? On the bottom of your screen you will find an
icon with a black arrow pointing up, tapping on this icon allows you to select all
contents and move them accordingly.
Material Settings:
1. How to access the materials list? First you must highlight a room by tapping on
it. On the top of your screen you will then see the materials icon represented by an
M with a circle around it, by tapping on it you can access the materials list
2. How to add a material? After you have accessed the materials list select add, a
list of existing materials will arise, select one, you may adjust the properties of the
material later.
3. How to edit a material? After you have accessed your materials list select edit,
you now have the option of editing the manufacturer, style code, style name,
material type, display color, waste margin, dimension, price, and pattern
information.
51
4. How to remove an item from your material list? After you have accessed your
materials list select remove, the program will prompt you to select weather you
really want to remove the material or not.
5. How to change material width? Access your material list, select dimension from
the menu on the bottom of your screen and highlight the size to change it using
your keyboard.
6. How to change material color? Access your material list, on the screen where
you see display color you may scroll through 124 colors, tap once to select it then
tap on (ok) to complete the change. If you have already used the color for another
material a pop up screen will inform you and ask if you want to continue
7. How to change pattern repeat? Select a room, access your material list, select a
material, tap on the edit icon, on the bottom of your screen you will see options on
what to change, select pattern, use your keyboard to input dimensions of pattern
repeat.
8. Why won’t the program calculate pattern carpets? Unfortunately since the
screen is too small, this property only applies to Floor Estimate Pro.
9. How to apply multiple materials to a project? Select a room by tapping on it,
access your materials list by tapping on the (M) icon on the top of the screen and
select a material, select a second room by tapping on it and access you materials
list and select a different material. You may repeat this process as needed.
10. How to change material assigned, to a different type of material? Select the
room you want to change the material for and access your materials list by
tapping on the (M) icon on the top of your screen and select a different material
11. How to view different materials assigned to different rooms? Once you have
assigned different materials to different rooms go to estimation mode. From the
view icon on the bottom left corner of your screen select the material you would
like to view.
Estimation and Seam Adjustment:
1. How to access the seam properties? In estimation mode select a room by
tapping on it, you now have new tools on the bottom of your screen
2. How to change seam direction? Select a room by tapping on it, access your
seam properties and click on the icon that looks like a box with arrows pointing up
52
and down located to the left of the (S) icon. This icon allows you to change the
direction of the seam
3. How to change the number of seams? Select a room by tapping on it, access
your seam properties then tap on the icon with an (s) this will give you the option of
changing the number of seams
4. How to access a proposal sheet? In drawing mode go to the bottom left tools
icon, a menu will pop up where you can select Proposal Sheet or in estimation mode,
tap on the icon with a (P). This property allows you to access your proposal sheet.
3. How to set your tax rate? From the Floor Sales Pro main menu tap on settings,
here you may enter a project name prefix and your current tax rate.
4. How to take off display entity sizes? From the Floor Sales Pro main menu, tap
on Settings, tap to display or tap to disable default entity sizes
Saving your projects?
1. How to save your project? From your tools menu on the bottom left select save
as for a new project, you will be asked to insert a project name. To resave a
project that has previously been saved select save from the menu and exit the
program.
2. How to open a saved project? From the Floor Sales Pro main menu tap on open,
here you will find a list of saved projects, select one and it will open
automatically.
3. How to delete a project? From the Floor Sales Pro main menu tap on open, tap
and hold for 1-3 seconds to
4. How to print a project from your Pocket PC? Establish a connection with
Active Sync first, download you file to your desktop, open Floor Estimate Pro or
Floor Estimate Pro (Print Version) open your file and print.
5. What is Floor Estimate Pro (Print Version)? For those of you who have not
purchased Floor Estimate Pro, there is a free version where you do not have
access to draw but you may print projects from your pocket PC. (Contact
customer service to receive information on how to get this version.)
5. How to save your information to an SD (secure digital) card? From the Floor
Sales Pro main menu select open/ select a project by taping and holding the tap
for 1 to 3 seconds or until a menu pops up. Select copy/ cancel and access your
SD file then paste.
53
Working with other programs:
Working with active sync:
1. How to synchronize with your PC? You will need to install the Active Sync
program.
2. How to install active sync? You will need the hp iPAC Pocket PC companion
CD. Insert it in your computer and it will automatically begin, once the demo has
finished click on Start Here it will then take you to a different screen where you
can select to Install Active Sync it will then take you to another screen again
where you will select Install. The installation window will pop up and you must
select open. If you select save it will not install ActiveSync. The program will
automatically install and you may then connect your pocket PC via USB cable to
synchronize your pocket PC with your desktop.
3. How to verify if you have successfully installed active sync? On your pocket
PC, from the start menu you should have a new icon called Active Sync, if you do
not see it, you must go back and reinstall the program.
4. How to access files from your pocket pc using your desktop? Once you have
installed ActiveSync all you need to do is connect your pocket PC to your desktop
using the USB cable provided with your pocket PC. When you establish a
connection your desktop will detect the connection and give you full access to all
your pocket PC files.
Working with Floor Sales Pro:
1. How to download projects to Floor Estimate Pro from Floor Sales Pro?
Connect your pocket PC with your desktop, start MS ActivSync, from your
desktop click explore on ActiveSync tool bar. A mobile device file explorer will
pop up. Navigate to Business/ Floor pan where all project files are located. Copy
whichever project files desired, then paste to a designated file folder on desktop
PC
2. How to access projects that have been downloaded? There are many ways of
accessing these files, the most efficient would be to open Floor Estimate Pro and
go to file, from the drop down menu select open, you must search where you have
saved or downloaded the files to, to access them.
Working with Blue tooth technology:
1. How does Bluetooth work? From your start menu, select help, from the help
contents select Bluetooth, an introduction and all the necessary information will
appear.
54
2. How to turn Bluetooth on/off? On the lower right corner of your device you will
see the Bluetooth icon, when you tap on it a menu will come up where you can
select from three things: Turn Bluetooth On/Off, Bluetooth Manager, and
Bluetooth Settings.
3. How to use Bluetooth to exchange files with someone? From your start menu,
select help, from the help contents select Bluetooth, go to Bluetooth settings, this
menu will give you information on all aspects of the program
Working with Disto Plus:
1. What is Disto Plus? Disto is a device that uses lasers to give accurate and precise
measurements. In addition to calculating distances, the device also calculates area,
volume, and with the integrated Bluetooth technology can transmit information to
your pocket PC
2. How to receive measurements emitted from Disto Plus? You will need to
purchase the device first which will contain a CD disk with all the necessary
components to install Plus Draw and PlusXL_12 Once you have successfully
installed these programs you will need to turn on Bluetooth on the Disto and your
Pocket PC and establish a connection. You will then need to open PlusXL. Here
you will be able to access information from the Disto on your Pocket PC.
Working with a GPS system:
1. What is a GPS system? The Global Positioning System is a constellation of
satellites that orbit the earth twice a day, transmitting precise time and position
(latitude, longitude and altitude) information. With a GPS receiver, users can
determine their location anywhere on the Earth.
2. How can I link my pocket PC to a GPS receiver? The user manual for each
GPS device will contain the necessary information on how to link the two devices
due to the fact that each device will vary.
55