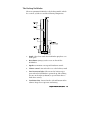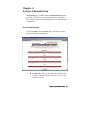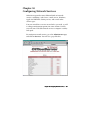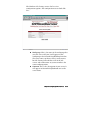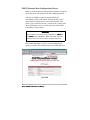
1
User Manual NetWinder™ OfficeServer Version 1.0 NetWinder™ OfficeServer User Manual Copyright 1999 Rebel.com Inc. 150 Isabella Street, Suite 1000 Ottawa, Ontario K1S 5R3 Phone: Phone 613-788-6000 Fax: Fax 613-230-8300 E-mail: [email protected] NetWinder and NetWinder OfficeServer are trademarks of Rebel.com Inc. Other trademarks or registered trademarks are the property of their respective owners. Table of Contents Preface ............................................................................................... v How to Read This Book........................................................... vi 1. Meet the OfficeServer................................................................1–1 The NetWinder Platform...................................................... 1–1 Before You Start ................................................................... 1–2 What Your NetWinder Package Contains: .......................... 1–4 The Desktop NetWinder....................................................... 1–5 The NetWinder Rackmount ................................................. 1–6 NetWinder Back Panel Connections ................................... 1–7 2. Installation & Configuration .....................................................2–1 Turning on the Power .......................................................... 2–1 Setting up a Windows 95/98 Workstation .......................... 2–2 Using the NetWinder Quick Start Disk ............................... 2–7 Connecting to the NetWinder Home Page ........................ 2–10 Switching to Administration Mode................................... 2–12 Configuring Your NetWinder for the Internet .................. 2–13 If you want to connect to the Internet via xDSL modem, cable modem or ISDN router .......................... 2–14 If you want to connect to the Internet via modem or ISDN terminal adapter ................................................... 2–15 Configuring Your NetWinder to Assign IP Addresses Automatically................................................................. 2–17 Configuring Windows, Macintosh or UNIX Workstations for Your OfficeServer Network............... 2–19 Shutting Down.................................................................... 2–21 Table of Contents i 3. User and Group Account Management................................... 3–1 User Accounts....................................................................... 3–1 Groups ................................................................................... 3–4 Viewing the User Directory.................................................. 3–7 4. Changing Your User Profile ..................................................... 4–1 General Settings.................................................................... 4–1 Backup and Restore .............................................................. 4–4 Web Page Creator.................................................................. 4–5 E-mail Settings...................................................................... 4–8 5. The InfoPlace Document Manager .......................................... 5–1 InfoPlace Features ................................................................ 5–1 6. The Discussion Forums ............................................................ 6–1 Public and Private Forums................................................... 6–1 Registering your Account..................................................... 6–2 Navigating the Discussions .................................................. 6–4 7. Searching for Documents ......................................................... 7–1 8. Virtual Hosts ............................................................................. 8–1 Virtual Web Servers.............................................................. 8–2 Virtual FTP Servers .............................................................. 8–7 9. System Administration............................................................. 9–1 System Information .............................................................. 9–1 Backing up and Restoring System Data............................... 9–3 Checking Disk Usage ............................................................ 9–4 Maintenance ......................................................................... 9–4 Date and Time....................................................................... 9–4 ii NetWinder OfficeServer User Manual 10. Configuring Network Services..............................................10–1 Web Server.......................................................................... 10–2 Web Proxy/Cache ............................................................... 10–3 SMTP (E-mail Delivery) Server ......................................... 10–7 POP-3 (E-mail Access) Server.......................................... 10–11 IMAP (Advanced E-mail Access) Server......................... 10–11 Windows File Sharing...................................................... 10–12 Apple File Sharing ........................................................... 10–15 UNIX File Sharing ............................................................ 10–15 FTP (File Transfer Protocol) Server................................. 10–16 Public/Private Discussions .............................................. 10–18 Search Engine ................................................................... 10–20 Print Server....................................................................... 10–23 DHCP (Dynamic Host Configuration) Server .................. 10–26 DNS (Domain Name Server) ............................................ 10–28 Dial on Demand................................................................ 10–28 Telnet Server .................................................................... 10–29 11. Network Settings ...................................................................11–1 Ethernet Settings ................................................................ 11–2 Firewall Settings................................................................. 11–6 Port Forwarding................................................................ 11–15 Domain Name Server (DNS) ............................................ 11–18 PPP Dialer Configuration ................................................. 11–25 File Sharing Configuration .............................................. 11–28 Table of Contents iii 12. Recovering from Emergencies ............................................. 12–1 Logging in to the Console................................................... 12–1 The nwconfig Command .................................................... 12–2 Emergency Firewall Repair................................................ 12–3 13. Technical Support ................................................................ 13–1 14. Licences and Warranties...................................................... 14–1 15. Standards Compliance ......................................................... 15–1 Federal Communications Commission (FCC) Statement ........................................................................ 15–3 16. Hardware Specifications...................................................... 16–1 Index ......................................................................................... I–16–1 iv NetWinder OfficeServer User Manual Preface This book will tell you everything you ever wanted to know about how to operate your NetWinder OfficeServer system. It comes in two formats: 1. Every NetWinder we sell includes a printed copy of the book, which is especially useful for you while you set up your NetWinder for the first time, and configure your Windows and other workstations to talk to it. 2. The NetWinder itself also has an online, HTML version of the manual. Once you have reached the OfficeServer Web-based configuration pages, you can press the Help link to view this manual. Both manuals have exactly the same information and can be used interchangeably. Preface v How to Read This Book This book is designed to give you the information you need as you need it. The NetWinder system operates in either User Mode or Administration Mode. User Mode screens are predominately blue; Administration Mode screens are burgundy. Regular users cannot access Administration Mode features without the system administration password. Sections in this manual of interest to regular users include Chapter 1: Meet the OfficerServer; the first part of Chapter 2: Installation & Configuration; Chapter 4: Changing Your User Profile; Chapter 5: InfoPlace Document Manager; Chapter 6: Discussion Forums and Chapter 7: Searching for Documents. When you first get your OfficeServer, you should start at the beginning of the book and read each chapter in order. We have organized the information to build on your knowledge from start to finish. If you find a chapter that contains something you already know, just skip it and move on. Most advanced features are discussed towards the end of the book. As long as you’re reading from front to back, you can just stop reading once you’ve set up all the NetWinder features you intend to use at first. Later on, you may want to refer to the manual for more information. We labelled the chapters based on typical user and administration tasks to make it easier to find what you’re looking for. Each page in the NetWinder web-based configuration system also has a Help link that will take you to the appropriate section of the online manual. vi NetWinder OfficeServer User Manual Chapter 1 Meet the OfficeServer Congratulations on your purchase of the NetWinder OfficeServer! In this chapter, we’ll introduce you to the NetWinder hardware, explain what all the connectors are and tell you how to make the connections required. The NetWinder Platform The Rebel.com NetWinder was designed to be a small, fast, reliable and economical computer appliance. It uses the powerful 32-bit, 275 MHz StrongARM processor and its software is based on the popular, high-availability Linux operating system. Rebel.com produces a full line of products based on the NetWinder platform, from workstations to network terminals to servers. The OfficeServer is one of our most advanced products to date, providing complex network services with an easy web-based set-up interface. Although the OfficeServer software comes installed from the factory, you need to adjust the configuration to suit your particular needs. Before we get into that, however, you will want to examine your hardware to make sure you have all the pieces that you need. Chapter 1: Meet the OfficeServer 1–1 Before You Start Call your Internet service provider (ISP) to obtain the settings required to configure your NetWinder for the Internet. These settings differ depending on the ISP and the nature of your connection. Tell your ISP that you are installing a server to act as a router and firewall for your network connection. They should then be able to supply you with the necessary details to complete your installation. Depending on the ISP and the connection, these details might include the name or IP address of their nameserver, IP address of their gateway, and even your hostname. Domain registration: Unless you have a company domain, your web address will be something like AcmeISP.com/yourcompany. If you have your own domain, your address will be something like yourcompany.com. Your ISP can help you to obtain and register a domain name. Domain names are unique to your company within a given registry. Some of the common registries are .com, .net and .org. Certain countries such as Canada, France and the United Kingdom also have country-based registries such as .ca. There is an annual fee for maintaining a domain name. Internet connection: Some NetWinder features depend on your Internet connection. If your network is permanently connected to the Internet (24 hours a day) with a fixed IP address, you will be able to: ! send and receive e-mail on demand ! log onto the Internet on demand without waiting for a dial-up connection ! host your own web site ! offer network access to staff from outside the office 1–2 NetWinder OfficeServer User Manual If you are not connected permanently or if you do not have a fixed IP address, then your ISP will have to maintain a mail server for your e-mail and will host your web site. E-mail can be sent out through the NetWinder on demand, but can only be received by logging onto the ISP’s mail server. You will be able to log onto the World Wide Web on demand. Staff will only be able to log onto the network from outside when the NetWinder is connected to the Internet. How fast your Internet connection performs is a function of how many people are logged on actively at the same time. If you expect multiple connections to be the rule, you may want to upgrade your connection to something faster to avoid frustration. Now is the time to decide whether these differences are important to your operation. If they are, you may want to change your Internet connection before you install your NetWinder. You need the following hardware and software to install and use the NetWinder OfficeServer: ! An office network or internal LAN that is compatible with 10/100 Base-T and the TCP/IP network protocol. ! At least one desktop computer on the LAN configured to use the TCP/IP protocol ! The desktop computer must have a fixed Internet protocol address (IP address) – you will find configuration information later in this guide – a dynamically configured IP address will not work ! A web browser such as Netscape Navigator 4.x or Microsoft Internet Explorer 4.x or 5.x installed on this desktop computer ! An account with an ISP (if you want to use the NetWinder to connect to the Internet and world wide web) Chapter 1: Meet the OfficeServer 1–3 What Your NetWinder Package Contains: You should have all these components: 1. NetWinder computer (desktop as shown or rackmount) 2. NetWinder vertical stand (not included with rackmount) 3. Network cable (RJ-45 to RJ-45) 4. Power cable/AC adapter 5. Shrink-wrapped package including: i. Licence agreement ii. Registration/warranty card iii. OfficeServer Quick Start Guide iv. OfficeServer Quick-Start floppy disk (3.5 in.) v. OfficeServer User Manual vi. OfficeServer Resources CD-ROM vii. Corel Print Office CD-ROM Disks 1, 2 & 3 (includes Web Designer web publishing software) Once you have all these components, you’re ready to begin installing your NetWinder. 1–4 NetWinder OfficeServer User Manual The Desktop NetWinder The most common NetWinder is the desktop model, which has a small, stylish case and the following components: 1. Stand A base that stands the NetWinder upright to save desk space. 2. Reset button (orange) used to reset or shut off the NetWinder. 3. Speaker to monitor start-up and shutdown sounds. 4. Volume control. Start off with it set at the halfway mark. 5. Two front status lights. The one on the left (or top) is green when the NetWinder is powered up and working; the one on the right (or bottom) is green when there is hard drive activity. 6. Ventilation slots. Located on the side and bottom of the cabinet. Keep clear to prevent overheating. Chapter 1: Meet the OfficeServer 1–5 The NetWinder Rackmount The NetWinder is also available in a rugged rack-mount configuration that accommodates more than one processor. It looks like this: 1. Ventilation slots. Be sure to keep these clear of obstructions; without ventilation, your NetWinder may overheat. 2. Serial Maint. Connects your NetWinder to a serial peripheral for maintenance purposes. 3. Securing screws. These lock your NetWinder modules into the rack. 4. Power switch. Turns the NetWinder on and off. See Shutting Down instructions at the end of this guide for the proper procedure. 5. Power Stat. Power status light is green when the NetWinder is powered up and working. 6. HDD. Hard drive status light is green when there is hard drive activity. 7. 10/100 Base-T. Status light is green if the Eth 1 (internal) ethernet connection is active. 8. 10 Base-T. Status light is green if the Eth 0 (external) ethernet connection is active. 1–6 NetWinder OfficeServer User Manual NetWinder Back Panel Connections 1. Ventilation slots. Be sure to keep these clear of obstructions; without ventilation, your NetWinder may overheat. 2. Power-in jack. Connects the NetWinder to the mains (AC) power with the supplied AC cord/adapter. 3. Serial port. Connects the NetWinder to the Internet via a serial modem or ISDN terminal adapter. 4. Keyboard jack. Plug your keyboard cable in here on the rare occasion when you want to access the NetWinder directly (normal access is via any desktop computer on your network). 5. Mouse jack. Plug your mouse cable in here to access the NetWinder directly (normal access is via any desktop computer on your network). Chapter 1: Meet the OfficeServer 1–7 6. 10/100 Base-T input. Connects your internal network hub (the box into which all the office computers are plugged) to the NetWinder via the supplied network cable (Eth 1). 7. 10 Base-T input. Connects your NetWinder to the Internet via xDSL modem, cable modem or ISDN router (Eth 0). NOTE: Desktop model is illustrated; rackmount connectors are similar. Ethernet status lights. There is a green light for each of the ethernet connectors. When the light for the 10baseT connection glows green, the corresponding ethernet link is established. The light for the 10/100baseT connection turns on when network activity takes place. Monitor jack. Plug your monitor in here to access the NetWinder directly (normal access is via any desktop computer on your network). Parallel port. Connects your NetWinder to a parallel peripheral such as a printer. NOTE: The back panel may not look exactly like this, depending on the model of NetWinder you receive. However, the connectors themselves will be labelled similarly and operate in the same way. 1–8 NetWinder OfficeServer User Manual Chapter 2 Installation & Configuration Turning on the Power WARNING Be sure to connect the power supply last. Your NetWinder does not have a power switch, so it will turn on as soon as you connect the power supply. Before you plug your NetWinder into the AC power, connect it to your internal network hub using the supplied network cable. Connect this cable to the port at the back of the NetWinder marked 10/100 Base-T. The NetWinder has no power switch. To start it, just connect the power cord provided to the power supply at the back of the NetWinder. Then plug the power cord into an electrical outlet. Set the volume control halfway so that you can hear the start-up tones. The status lights will flash green, and you will hear a tone from the speaker. When the system finishes booting, the hard disk activity light will stop flashing and you will hear a voice from the speaker say, "Welcome to NetWinder." Chapter 2: Installation ands Configuration 2–1 Now that you’ve examined and connected your NetWinder, you’re ready to install the system. Next, we will configure the NetWinder ethernet settings, so that you can reach it from other computers on the network. Setting up a Windows 95/98 Workstation Your NetWinder is designed to be configured entirely using the ethernet network and a web browser. However, to get started, you must first assign the NetWinder a valid address on the local network. To do that, you need another computer, already configured, from which to send the configuration messages. Since most people use Windows 95, 98, or NT workstations, we will use Windows 95 as an example. Other workstation operating systems will require similar settings, although the particular dialogue boxes will look different. Note: If you already have a network in your office, this desktop will have its own Internet protocol (IP) address. As long as the desktop is configured for TCP/IP (or if you already have a network installed), NetWinder will automatically read and/or assign all necessary IP addresses. 2–2 NetWinder OfficeServer User Manual Open the Network Control Panel The first step is to find the Windows Network Control Panel. To do this, click the Start menu, then Settings, then Control Panel. A window like the following one should appear: Click the icon called Network. You should see a box like the following one: Chapter 2: Installation ands Configuration 2–3 Clean up the Network Component List Your list of network components (devices, protocols, clients and services) may differ but this is not a concern. If you have it installed, it is very important to remove the Microsoft Dial-up Adapter, since this can confuse Windows into not using the NetWinder for Internet access. Click on the line referring to the dial-up adapter, and then click Remove. Repeat this step until all references to the dial-up adapter have disappeared. Add TCP/IP and Microsoft Networking Now, we want to add the TCP/IP protocol, if it isn’t already in place. Click Add, and then Protocol. A list of vendors and their software will appear, as follows: Highlight Microsoft on the left, and then TCP/IP on the right. Click the OK button to add the TCP/IP protocol. 2–4 NetWinder OfficeServer User Manual Following a similar technique, add the Client for Microsoft Networks and File and printer sharing for Microsoft Networks, if they have not already been added automatically. (These features will be needed later when we configure Windows File Sharing). At this point, your Network Control Panel should look very much like the one shown in the section called Open the Network Control Panel. If not, you should add and remove components as necessary until it really does match. Configure TCP/IP To ensure the correct configuration of the TCP/IP protocol, highlight the TCP/IP line in the list of network components, and click Properties. A properties dialogue box will appear. Click on the IP Address tab; choose Specify an IP Address and insert an IP address that (though used internally) will be harmless to the Internet at large should it pass beyond your firewall. We suggest that you use one of these two IP addresses: 192.168.1.x or 10.0.0.x In either case, "x" represents any number from 1 to 254. In the example below, we have chosen 192.168.1.42. Now you have a fixed IP address for your Windows workstation, which is required to configure your NetWinder. Now, go the next line and enter 255.255.255.0 for Subnet Mask. Chapter 2: Installation ands Configuration 2–5 The result should look like this: Finally, click the OK button to save your TCP/IP settings. Close and Reboot If you had to add TCP/IP settings, you need to restart the computer to activate the new settings. Click OK to close the Network Control Panel. Windows will ask you to reboot at this point and you should do so. Once the computer has rebooted, you can move on to the next section. 2–6 NetWinder OfficeServer User Manual Using the NetWinder Quick Start Disk Now you’re ready to configure the NetWinder’s own network settings, using your Windows workstation. Start up a Javacapable web browser, insert the Quick Start Floppy, and open the file setup.htm. This file is also stored in the Quick Start directory of the OfficeServer Resources CD-ROM. The set-up programme will ask you for permission to proceed. When you grant this, you will see this page: Your NetWinder uses software called Network Intelligence to choose correct network settings for itself automatically. These will appear in the Quick Start application. Edit the values if required. For almost all users, the default values in the Quick Start screen do not need to be changed at this time. Depending on your type of Internet connection (and the requirements of your ISP) you may change some of these values later when you are configuring the Internet connection. Chapter 2: Installation ands Configuration 2–7 1. IP Address. This is the address of the NetWinder. OfficeServer Quick Start automatically scans the network and assigns this address. Be sure to take note of this address; you will need it later in this process. 2. Gateway. This is the address of the server that talks to the Internet. Quick Start automatically scans the network and assigns this address. If you have a modem connection (including cable modem and ADSL), this should be the IP address of the NetWinder. However, if you have a router (such as a T1 or ISDN router) that has its own IP address, then you should use its address here. 3. Hostname. You can make this netwinder or whatever you prefer. Ultimately, however, you may have to change this to match your ISP's requirements. 4. Date. OfficeServer Quick Start sets the date based on information from your desktop computer. 5. Root Password. This is the administrator's password. You may create a new password composed of no more than 8 characters, which may be letters (upper or lower case) and/or numbers. 6. Netmask. This is an internal value set by OfficeServer Quick Start. Use the value that you inserted in the Windows TCP/IP Properties dialogue box; this should be 255.255.255.0. 7. Nameserver. The nameserver (or Domain Name Server, or DNS) is the server that translates word addresses such as [email protected] into numeric IP addresses like the one you assigned the NetWinder. If your LAN doesn't already have a nameserver, and if your ISP has not provided you with the IP address of a nameserver, then use the NetWinder's IP address. 2–8 NetWinder OfficeServer User Manual 8. Domain Name. If you have registered a domain name, insert it here. 9. Time. OfficeServer Quick Start sets the time based on information from your desktop computer. 10. Click Activate Settings. (If you do change the IP address that Quick Start has selected, the NetWinder will reconfigure its address automatically.) 11. Exit the Quick Start application by closing your browser. The NetWinder will reboot. NOTE: If you configure your Windows workstation to use your NetWinder as a gateway or DNS server, and you then change your NetWinder’s address using the Quick Start Disk, you will need to reconfigure your Windows workstation with the new settings. Return to the previous section for information on how to do this. If Quick Start Doesn’t Work If for some reason the Quick Start system doesn’t work, you can attach a keyboard and monitor to your NetWinder and configure it using the nwconfig program. See the chapter called Recovering from Emergencies for details on this technique. NOTE: You need a web browser supporting the JDK version 1.1 or higher. Netscape 4.x and Internet Explorer 4.x and 5.x all support this version of the JDK. Older browser versions will not be able to access the Quick Start disk properly. Chapter 2: Installation ands Configuration 2–9 Connecting to the NetWinder Home Page Once again, open the web browser. Type in the NetWinder IP address assigned in the section above to connect to the NetWinder configuration system. For example, if you assigned your NetWinder the IP address 192.168.1.1, then you should send your web browser to http://192.168.1.1. Congratulations! You have successfully initialized your NetWinder OfficeServer and are on the NetWinder User Home page. 2–10 NetWinder OfficeServer User Manual Passwords Whenever you are prompted for user name and password, use these temporary values: For administrator account name use httpd For password use webroot WARNING It is very important to change your password to something more secure as soon as you log in. Otherwise, anyone who reads this manual could reconfigure your NetWinder! Chapter 2: Installation ands Configuration 2–11 Switching to Administration Mode Your NetWinder’s web configuration system has two modes: User Mode, which is available to both normal users and the administrator, and Administration Mode, which is available only to the administrator and allows you to change various special configuration options. To switch from User Mode to Administration Mode, simply click the words Switch to administration mode at the bottom of the User Mode screen. You may be asked to enter your password again. After that, you’ll see this page: Note: The on-screen highlight colour for Administration Mode is burgundy, while for User Mode it is blue, to remind you at all times of your current mode of operation. 2–12 NetWinder OfficeServer User Manual Configuring Your NetWinder for the Internet Configuring your NetWinder for connection to the Internet is a simple job, but requirements vary, depending on whether you have dial-up or direct connection, how your ISP is set up and what method you are using to connect to the Internet. If you have any questions about what is required, your ISP will be able to help. If your ISP doesn't understand how a NetWinder OfficeServer works, tell the technical support person that you are installing a server with router and firewall services. The OfficeServer supports five ways of connecting to your Internet service provider (ISP): 1. xDSL modem 2. cable modem 3. ISDN router 4. ISDN Terminal Adapter (TA) 5. dial-up or permanent modem connection WARNING The PPP dialer set up (used for dial-up services or ISDN) is mutually exclusive with the Eth 0 set up. This means that you can have one or the other, not both. If you change your Internet connection and need to switch from one configuration to another, you need to go back to Network Settings (Chapter 10 in the OfficeServer User Manual) to make this change. Do not attempt to do so off-site through an Internet connection, because the configuration process will change the routing for your Internet connection, thereby cutting you off from the NetWinder. Chapter 2: Installation ands Configuration 2–13 If you want to connect to the Internet via xDSL modem, cable modem or ISDN router 1. Connect the external network ethernet cable supplied with your modem or router to the port labelled 10baseT on the NetWinder back panel and to your modem/router. 2. From the OfficeServer Administration Mode screen, click on Network to see the current network configuration. 3. Click on Change these parameters. 4. Using values supplied by your ISP, fill in the Eth0 Parameters section. 5. Click dynamic if your ISP uses dynamic host configuration protocol or DHCP (most do). Otherwise, select static. 2–14 NetWinder OfficeServer User Manual 6. Type the ISP's nameserver (DNS) and gateway (router) data in the top portion of the Network parameters page. 7. Click yes for Packet Forwarding so that everyone on your internal network has e-mail and Internet access. 8. Click Save to activate the changes. Note: For more detailed information on ethernet settings, see the OfficeServer User Manual chapter entitled Network Settings. If you want to connect to the Internet via modem or ISDN terminal adapter 1. Connect your modem's serial cable to the port marked Serial on the NetWinder back panel. Turn your modem on and make sure you are connected to a phone line. 2. From the OfficeServer Administration Mode screen, click on Network to see the current network configuration. 3. Click on PPP Dialer (in the menu at the top of the page) to view your dial-up connection. Chapter 2: Installation ands Configuration 2–15 4. Click on Edit the dialer configuration at the bottom of the page. 5. Enter your user name, password, phone number and modem speed into the form. (The default settings for Init String, flow control, local and remote IP address should be unchanged.) However, for ISDN devices, you may need to edit the Init string. You will find the correct settings in your modem manual. 6. Click dynamic if your ISP uses dynamic host configuration protocol or DHCP (most do). 7. If you only want to connect to the Internet automatically as required, click On demand. If you want to be connected all the time during certain hours, specify these in the line Up from ___ to ____. 8. Click Save to activate the changes. Note: For more detailed information on PPP Dialer settings, see the OfficeServer User Manual chapter entitled Network Settings. 2–16 NetWinder OfficeServer User Manual Configuring Your NetWinder to Assign IP Addresses Automatically We recommend that your use the NetWinder as your DHCP (dynamic host configuration protocol) server. When you do so, the NetWinder will automatically assign IP addresses to computers on your internal network: Note: If your network already has a separate DHCP server or if you prefer not to have a DHCP server, then skip this section. Chapter 2: Installation ands Configuration 2–17 1. From the OfficeServer Administration Mode screen, click on Services to see a list of services available on the OfficeServer. 2. Click on Configure for the DHCP Server. 3. Review the settings of the DHCP Server. The default Subnet Address and Netmask do not need to be changed in most cases. 4. Enter your domain name. 5. Enter the IP address of your router (gateway). This is the IP address of your NetWinder, assuming that you are using it as your Internet gateway. 6. Only change the First and Last DHCP address if you have more than the 21 users allowed by the default. 7. Click Save to return to the services list. Check that the service is shown as Running, and not Stopped. The DHCP server is now active. That is all that you need to do on the OfficeServer to configure DHCP. 2–18 NetWinder OfficeServer User Manual Configuring Windows, Macintosh or UNIX Workstations for Your OfficeServer Network Once you have activated your OfficeServer's DHCP feature, you are ready to configure the rest of the computers on the network, including the workstation used to set up the NetWinder initially. With DHCP active, the NetWinder can automatically assign a valid IP address and netmask, as well as the address of your default gateway (router), to each computer on your network. Note: Again, the following instructions use the example of a Windows system, but the principles apply to all common desktop operating systems. Perform the procedure below for each and every computer workstation on your network. 1. Go to the Windows Control Panel and click on Network. 2. Click on TCP/IP Settings. Click on the IP Address tab; choose Obtain an IP Address Automatically. 3. Now click the DNS Configuration tab. Enter the computer name under Host (this should be different for every workstation). If you have a registered domain, enter it in Domain. If you don't have a domain name, leave this field blank. 4. Set your computer’s DNS server setting to the IP address of the NetWinder OfficeServer. Chapter 2: Installation ands Configuration 2–19 The resulting DNS configuration tab should look something like this: Click OK and reboot the computer to activate the new settings. Congratulations! You have now finished configuring your NetWinder. To take full advantages of the OfficeServer features, we suggest reading the rest of this User Manual. Should you need to shut down your NetWinder for any reason, please follow the steps in the next section. 2–20 NetWinder OfficeServer User Manual Shutting Down The NetWinder, despite its appearance, is very much like a standard server computer. If you disconnect the power without shutting it down first, you run the risk of corrupting or losing the files on the hard disk drive. WARNING It is extremely important that you follow the instructions in this section when shutting down your NetWinder computer. Disconnecting the power while the NetWinder is running could cause irretrievable loss of data. Desktop Model Shutdown 1. Open a browser on any computer connected to the NetWinder network and go into Administration mode on the NetWinder main screen. Go to the System screen. Click Maintenance and then Halt. 2. In no more than a few seconds, disk activity should begin. This can be seen by watching the hard drive activity light on the front of your NetWinder. When the NetWinder makes a bloop noise, it has finished shutting down and can be safely disconnected from the power. If you experience difficulties, please refer to the chapter entitled Recovering From Emergencies or try a hard reset as follows: Chapter 2: Installation ands Configuration 2–21 Desktop Model Hard Reset If your NetWinder does not seem to be responding to the reset button, you can hard reset the NetWinder. A hard reset forces the NetWinder to reboot without first shutting down all its services. This will cause it to take longer to boot up the next time. To perform a hard reset, hold down the orange reset button for at least 6 seconds, and then release it. At that time, you can either unplug the NetWinder or allow it to restart automatically. On restarting, the NetWinder sounds a fournote chord. Once you hear this chord, it is no longer safe to disconnect the power and you must reset the system again if you still want to disconnect it. Rackmount Model Power Functions The NetWinder OfficeServer rackmount can be shut down using any computer connected to the network (as described previously in the desktop procedure). It can also be shut down using the power on/off switch on the front panel. Power-on With the unit turned off, press the power button for 0.5 seconds and then release it. Result: unit turns on. Power-down (using power switch) With the unit turned on, press the power button for 0.5 seconds and then release it to initiate the shutdown sequence. Result: the power LED will flash from GREEN to RED three times. The NetWinder will close down all programs, then turn itself off. If, after two minutes, the system is unsuccessful in closing all programs, it will automatically turn itself OFF. 2–22 NetWinder OfficeServer User Manual Power-down (using browser and power switch) 1. With the unit turned on, open the browser on any computer connected to the NetWinder and go into Administration Mode. Go to the System screen. Click Maintenance and then Halt. 2. Press the power button for 5 seconds and then release it to cut the power. Result: the system immediately shuts off. WARNING If you press the power button for more than five seconds when the NetWinder rackmount is running, it will shut down immediately regardless of software status, possibly with destructive results. If the NetWinder does not respond to soft power-down procedures, refer to the chapter in this manual entitled Recovering From Emergencies. Chapter 2: Installation ands Configuration 2–23 Chapter 3 User and Group Account Management To allow people on your network to access the NetWinder, you will need to create accounts for them. If required, you may also want to organize users with similar needs into user groups. User Accounts Each person who wants to use the NetWinder for file server access, discussion groups, InfoPlace or e-mail will need a user account. A user account allows people to identify themselves to the NetWinder. To add a user or change a user’s information, you need to visit the Users page from the NetWinder Administration page. It looks like this: Chapter 3: User and Group Account Management 3–1 Creating Users To create a new user, click Add a new user at the bottom of the Users page. You’ll see a page that looks like this: Fill in this form to create the user account. This is the information you need to provide: ! Username. This is the short name that the NetWinder system uses to keep track of the user, and which is used in his or her e-mail address. For example, a good username for Fred Fiddle might be ffiddle. That way, his e-mail address would be something like [email protected] (if your company’s network name is rebel.com). Naturally, each user on the system must have a unique username. Note: User account names are case sensitive – michael is not the same as Michael. 3–2 NetWinder OfficeServer User Manual ! Full name. In our example, that’s Fred Fiddle. The NetWinder doesn’t actually use this information for anything, so it’s marked as “(opt)” (optional). Still, it’s usually easier for you to keep track of your users if you enter the full name now. ! Phone number. This is another field that the NetWinder doesn’t use directly. If you fill this in, however, other NetWinder users will be able to find this person’s phone number when they visit the Users page. ! Comment. Fill in any additional information about the user here (their position and department, for example), if you would like to have it published in the user listing. ! Password. You know all about passwords. This is the one the user will need, along with his or her username, to gain access to the NetWinder. The password will not display as you type it. To make sure you entered it correctly, type it again on the (confirm) line. ! Disk quota. If this user will use the NetWinder to store a personal web page, e-mail, or other files, you can limit the amount of disk space he or she may use. The value is expressed in megabytes (MB or millions of bytes). If you set this value to zero, the user can use as much disk space as required until the server fills up. More frequently, the limit is set at 5 to 15 megabytes. Click the Submit button once you’ve entered all the information. Chapter 3: User and Group Account Management 3–3 Editing and Removing Users You can change an existing user’s settings or remove the user from the system in much the same way as you create a new user. From the Users page, find the user you want to edit or remove, and then click the word Edit or Remove that appears next to the user’s name. If you use Edit, you will be sent to the same screen that you saw in the Creating Users section. If you use Remove, you will first be asked to confirm the change, and then the user account will be deleted. Groups Groups are used to help users collaborate on projects or to share files without making data available to all the users on your system. A user can be a member of any number of groups, or none of them. 3–4 NetWinder OfficeServer User Manual To find the group list, go the Administrator page and then click Groups. You will see a screen like this: Chapter 3: User and Group Account Management 3–5 Creating Groups Creating a group is easy. On the Groups page, click Add a new group. You’ll see a page that looks like this: You need to fill in the following information: ! Group name. Give your group a name. This is very similar to a username, in that the NetWinder uses it to keep track of the group. It can be up to 8 characters long. ! Group members. Here, the NetWinder displays a list of the users on your system. Using the mouse, put a check mark next to the users you want to be in your new group. When you’ve finished entering your group information, click the Submit button. 3–6 NetWinder OfficeServer User Manual Editing and Removing Groups To edit a group, find the group on the Groups screen and click the word Edit next to the group name. You will see a page very much like the one used in Creating Groups. Make the necessary changes and then click Save. To remove a group, click the word Remove next to the group you want to remove. You’ll get a chance to confirm your change, and then the group will be removed. Viewing the User Directory If you are in normal user mode, as opposed to administration mode, you will see a Directory link available instead of the Users and Groups links. Clicking on Directory, you’ll see a screen like this: Chapter 3: User and Group Account Management 3–7 From here, you can see a list of all the users on the system, as well as their full names and phone numbers, if provided. In a column called Action, there are links that allow you to e-mail a particular user, or to visit that user’s personal web page, if it exists. Below that, there is a listing of all the groups on the system. You can e-mail all the users in a particular group by clicking the word Email next to the group name. 3–8 NetWinder OfficeServer User Manual Chapter 4 Changing Your User Profile If you click on User Profile from the User Home page, you are offered a submenu with several different operations you can perform on your own user account. The following sections describe each of the available operations. General Settings The General Settings screen allows you to change your personal information. The NetWinder stores some of this information (such as the password) to help in authentication, and the other fields are for optional information. Your full name, phone number and comment is displayed to other users when they visit the User Directory page. NOTE: If you are the administrative user, httpd, you cannot edit your user profile from this screen. Instead, you need to visit the User Accounts page in administration mode. Be sure to change your password to improve security! Chapter 4: Changing Your User Pro Profile 4–1 The personal information settings page looks like this: The options work as follows: ! User name. This is your NetWinder login name, such as ffiddle. It is also used as your e-mail address. You can’t change it; only the administrator can. (In fact, the administrator will need to remove and recreate your account with a different name, but the overall effect is the same.) ! Full name. This is your real-life full name, such as Fred Fiddle. 4–2 NetWinder OfficeServer User Manual ! Phone number. This is the phone number where people can reach you. You can leave it blank if you prefer. ! Comment. You can say something here. Or not. It doesn’t really matter. But it will show up when other users see you in the User Directory. ! Password. You can change your password by typing the new one here. You won’t be able to see it as you type it, so you must enter it again on the (confirm) line to make sure you got it right. ! Disk usage. This shows you how much disk space you’re using, and your maximum disk space allotment if a maximum has been assigned to you. When you have finished making your changes, click the Save button to make them permanent. Chapter 4: Changing Your User Pro Profile 4–3 Backup and Restore You can back up all of your personal NetWinder files to your Windows workstation in the form of a specially-formatted NWB (NetWinder Backup) file. To do this, click Backup and Restore from the User Profile section of the NetWinder web pages. You will be presented with a page like the one below, offering to let you back up and restore your personal files. If you click on the Backup link, you will be sent an NWB file containing all of your personal files. You can then save it on your hard disk using your web browser. If you have a lot of files, the backup file can be very large – be sure that you have enough disk space before you begin! 4–4 NetWinder OfficeServer User Manual NOTE: In Windows 95, 98, or NT, you can check for free disk space by opening the My Computer window, clicking the right mouse button on an available drive, and choosing Properties. Properties You can also restore your personal files from an earlier backup. To do this, click the word Browse in the Restore section, and find an NWB file created during a previous backup session. When you have selected that file, it will show up in the filename entry box on the web page. Click the Restore button to begin restoring the file. Web Page Creator Each user on the NetWinder can create his or her own personal home page. The address of your page works like this: If your NetWinder is called server1.rebel.com and your user account name is mike, then your home page address will be http://server1.rebel.com/~mike. Your page’s address also shows up in the NetWinder User Directory. How to set up a web site that replaces the default OfficeServer page: 1. Create your site with any tool. 2. FTP the html pages and images to the OfficeServer (as httpd)… your stuff goes in the “html” directory. 3. Make sure you overwrite or remove the file “index.html.” To get into the OfficeServer GUI after doing this, just point the browser to http://your.address/netwinder/. Chapter 4: Changing Your User Pro Profile 4–5 NetWinder’s Web Page Creator will help to get you started creating your personal web page. However, it is only a tool for starting your page. If you want a more advanced web page, you can use the web page design tool included with your OfficeServer. You will find Corel Web Designer on the Corel Print Office CD-ROM. When you click Web Page Creator from the User Profiles section of the NetWinder web page, you will see a page like this: Web Page Creator uses page templates to build a simple page for you. To get started, click Create/Edit Page under Home Page on the main Web Page Creator screen. After filling in some simple information for your web page, click Save and your home page will be created. You can then browse over to your home page and see how it looks. 4–6 NetWinder OfficeServer User Manual If you decide to edit the HTML directly or with a commercial web design tool, you can place the new pages in a directory called public_html under your NetWinder home directory. To do this, use the NetWinder FTP, Windows Network Neighborhood, or Apple File Sharing (AppleTalk) services. Note: Some web design tools have a Publish feature that can upload files automatically to the web server. If you use such a tool, you need to configure it to use the FTP server, not HTTP. For example, to publish web pages to the OfficeServer from Corel Web Designer, follow these steps: 1. Create HTML pages 2. Select Upload to Web from the File Menu 3. Fill the appropriate information in the dialogue box (you can upload the entire site or just the page you are currently working on): Root folder: /home/httpd/html Server: enter the IP address of your NetWinder Port: keep the default value of 21, unless you are an advanced user Username: NetWinder login name Password: Your password 4. Click on the Start button to begin the file transfer. That's it! Chapter 4: Changing Your User Pro Profile 4–7 E-mail Settings If your administrator has enabled the NetWinder SMTP (E-mail Delivery) Server, then you can send and receive e-mail using your NetWinder account. Your e-mail address is built as follows: Let’s say your NetWinder is called chicken.rebel.com. If your username is smithv, then your e-mail address is [email protected] and other users can send you e-mail at that address. To be able to read your e-mail after it is received on the NetWinder, you need to use the NetWinder POP-3 or IMAP server. To configure these, you simply set up your e-mail reader program so that the POP-3 (or IMAP) server address is, in our example, chicken.rebel.com and your account name is smithv. NOTE: Refer to your e-mail client program’s documentation for more information on how to configure these settings. 4–8 NetWinder OfficeServer User Manual You can also control the delivery of your e-mail in several ways using the E-mail Settings screen, which is under the User Profile menu on the NetWinder web page. The e-mail settings page looks like this: There are two major sections to the e-mail settings, which we will discuss in the following sections. Chapter 4: Changing Your User Pro Profile 4–9 E-mail Forwarding You can request that your NetWinder automatically forward your incoming mail to a different e-mail address or a set of addresses. These can be other users on the NetWinder, or other users on other NetWinders, or other users outside your company. To add a forwarding address, click on the words Add a forwarding address under the E-mail forwarding title. Then enter the address you want to use, and click the Okay button. NOTE: E-mail will only be delivered to your NetWinder mailbox if you have no forwarding addresses defined. 4–10 NetWinder OfficeServer User Manual E-mail Filtering E-mail filtering allows you to process incoming mail in a particular way depending on who it is from, who it is addressed to, or what is in the subject line. For example, you can automatically send a reply saying that you are on vacation, or you can ignore messages with the word “Advertisement” in the subject line. To add a filtering rule, click on the words Add a filter. A page like the following will appear: It has the following options: ! Header field. This is the part of the message header that you want to match. It is either From, To, Cc (Carbon Copy), or Subject. Other header lines will be ignored when evaluating this rule. Chapter 4: Changing Your User Pro Profile 4–11 ! Contains. This is the text that the header line must contain. For example, you can make a rule that matches certain types of e-mail advertisements by choosing Subject as the header field, and Adv: as the Contains text. You can also insert wildcards such as * or ? to refine your parameters, just as you do on a web search engine. ! Policy. The policy decides what you want to do with a matching message. Discard silently simply throws the message away without telling anyone; this is good if you get a lot of unwanted advertisements, or e-mail from a particular person you want to ignore. Discard and Respond throws the message away, but informs the person who sent the message, so that they will know to contact you another way in case the message is important. Receive and Respond allows you to receive the message, but also send back an automated reply. This is useful if you want to tell people when you’re on vacation, for example. ! Message. If you use Discard and Respond or Receive and Respond, the NetWinder will send a notice back to the sender when it receives a message. You can choose what kind of notice you want to send back by selecting it here. WARNING Options that discard your e-mail can be very dangerous. Discard silently is especially problematic, since no one will be informed that the message was lost. When adding rules that discard e-mail, it is important to test your rules carefully to make sure that they work as you wish. When you have finished editing the rule, click the Save button to make it permanent. 4–12 NetWinder OfficeServer User Manual User-Defined Messages Using Discard and Respond or Receive and Respond e-mail filtering rules triggers NetWinder to send notices back to the sender when it receives a message. You can edit the list of available return notices by clicking Edit the user-defined messages from the E-mail settings page. You will see a page like this: The name of the message appears in the left-hand column; this is the name you select when creating a filtering rule. You can fill in the actual content of the returned message in the entry boxes on the right. When you have finished entering the message contents, click the Save button to make the changes permanent. Chapter 4: Changing Your User Pro Profile 4–13 Chapter 5 The InfoPlace Document Manager InfoPlace is a web-based group collaboration system. It allows you to place documents easily on your OfficeServer so that other people at your company can get a straightforward view of all the available documents. InfoPlace is quite easy to use and has extensive online documentation, so we won’t discuss it very much here. To get to the InfoPlace Document Manager, use your web browser to find the NetWinder User Home page, and click on InfoPlace. To read the online InfoPlace documentation, you should click the Question Mark (?) icon. On the InfoPlace welcome screen, the question mark is in the middle of the screen; for the rest of the session, it is usually found in the upper-left corner of the page. InfoPlace Features ! Indexes a wide variety of document types, such as HTML pages, spreadsheets, word processor files, presentations, text files, images and binary files ! Sorts documents into categories and subcategories. ! Searches by title, author, contents or other properties. Chapter 5: The InfoPlace Document Ma Manager nager 5–1 Chapter 6 The Discussion Forums The NetWinder allows you to create discussion forums, which are online areas in which users can post messages either for everyone or to share with their particular workgroup. Public and Private Forums When you click Discussions from the User Home page, you will see a screen offering two options: ! Public discussion forums. These are discussion groups open to anyone and everyone who has access to the NetWinder, which normally means everyone at your company. If your NetWinder’s web server is open to the Internet (see Firewall Settings), even people outside your company can see and participate in discussions. ! Private discussion forums. These discussion areas have restricted readership; only users with accounts on your NetWinder can access them. See the section called User Accounts in the chapter User and Group Account Management for information on setting up user accounts. If you have administrative access on the NetWinder, you can create public and private discussion groups as described in the chapter called Configuring Network Services. Chapter 6: The Discussion Forums 6–1 Registering your Account Each person who wants to post in a public discussion forum needs to register a special “discussions” account. This can be done automatically by clicking the Register button that appears at the top of the discussions page. If you are using a private discussion forum, your NetWinder account is automatically used for your discussion account; you do not need to register a discussion account in that case. NOTE: If you are logged into your NetWinder using the administrator account, httpd, you should not register a discussions account. You should shut down your web browser and restart it, logging in using a standard user account first. The administrator has special privileges to move and delete messages from the forums, but isn’t expected to post messages without using a “normal” user account. The user registration page contains the following fields, which you need to fill in: ! Username. This is the short name or alias by which you will identify yourself in the discussions. It is often the same as your NetWinder login name, although it doesn’t have to be. ! Full name. Enter your real, full name here. 6–2 NetWinder OfficeServer User Manual ! Password and Verify Password. You can choose a separate password especially for the discussion forums. It is probably easiest for you if you choose the same password as your main NetWinder login password, but that isn’t necessary. Since you can’t see the password as you type it in these fields, you must enter it twice to ensure you’ve done it correctly. ! E-mail. This is your full, preferred e-mail address. ! Homepage. This is the web address of your home page, if you have one. It’s optional, but it will help other people find you if they become interested in one of your postings. ! Occupation and Hobbies. You can provide this optional personal information to help other forum members better understand your point of view. When you have finished entering all the above information, click the Submit button and your account will be created. You can then proceed to post messages in your favourite discussion forums. Chapter 6: The Discussion Forums 6–3 Navigating the Discussions The Forum List Clicking on either Public discussion forums or Private discussion forums brings up a page offering a list of available discussion areas (including all the public ones, or the private ones that you have access to, depending on which area you chose to enter). Until your organization establishes its own forums, you will only see the NetWinder forum listed. Choose a forum, then click on its name to view the list of threads. Working with Threads After choosing a forum, you will be presented with a list of current discussion topics (“threads”). You can click on the name of a thread to read the relevant messages. If you are the first person to use this forum, the thread list may be empty. If you wish, you can return to the list of forums again by clicking the word Forums at the top of the page. Whether any threads exist or not, there will be a button at the bottom of the page called New Thread. Click on it now, then proceed to the next section to post your first discussion group message. Posting a Message The message posting screen contains several sets of options: ! Username and Password (Private discussions only). You must register a special user account before you can participate in the discussion forums. Read the earlier section, Registering your Account, for more information on how to do this. 6–4 NetWinder OfficeServer User Manual Once your account has been registered, enter the username and password in the spaces provided. If you have already posted a message during this session, these may already be filled in for you. ! Subject. This is a one-line identification for your message. The subject line in a discussion group is more important than the subject line in a private e-mail message. Usually, every message regarding the same topic in a discussion group will keep the same subject line. That’s how discussions are sorted, and how people decide whether or not to read your message. If you want your discussion to be read by the right people, you should be sure to use an informative subject line. ! Posting. This is the area in which you type your message. ! E-mail all replies. If you check this box, people answering your message will be asked to e-mail you privately, in addition to posting public messages to the discussion group. If you’ve never used the discussion areas before, try typing in a test message right now; you should use a subject line like Test Message so that people will know it’s a test, and can easily skip over it if they want. Don’t check the E-mail all replies box for now. When you’re finished entering your message, click the Submit button to save it. Proof-read carefully! You can’t change your message once it has been posted. Chapter 6: The Discussion Forums 6–5 Chapter 7 Searching for Documents The OfficeServer offers a search function for all documents published on the NetWinder, including documents that come with the machine, such as the Apache web server documentation and the online version of this manual. As the administrator and users create their own NetWinder web pages, the body of searchable information will increase. The OfficeServer web search engine will scan all these local documents to help you find information. Click Search in the web configuration to display the search function: Chapter 7: Searching for Documents 7–1 Enter the keywords related to your search topic in the line labelled Search, and then press the Search button. A new page will appear, listing all the local documents that match your search. NOTE: The Search feature does not normally search the entire Internet for information; it only searches files and documents stored on your NetWinder. The system administrator can choose what does or does not get indexed by the search engine. 7–2 NetWinder OfficeServer User Manual Chapter 8 Virtual Hosts Your NetWinder allows you to create Virtual Hosts, which you can think of as servers inside of a server. You can assign your NetWinder more than one Internet address. For example, two virtual servers addressed server1.rebel.com and server2.rebel.com may coexist on the same NetWinder but direct users to different information on that server. To the user, the two “virtual” servers look totally different. This is similar to a company having one telephone number but many different voice mail boxes. A virtual web server works in much the same way. If someone asks for sales.rebel.com, they might see the sales home page; if they ask for support.rebel.com, they might see the technical support page. But really, it’s all running on the same physical server. On a NetWinder, virtual servers provide another useful feature: a different user maintains each virtual host. So someone in the sales department can update sales.rebel.com, while someone in technical support can keep track of support.rebel.com. Chapter 8: Virtual Hosts 8–1 Virtual Web Servers A web server is the most common kind of virtual host. If you click Virtual Web on the Hosts administration page, you will see this page: 8–2 NetWinder OfficeServer User Manual Let’s assume you don’t have any virtual web servers yet. In that case, you will want to click on Add a new host. You’ll see a page that looks like this: You need to fill in each of the following configuration options: ! Owner’s username. This is the user who will be in charge of this virtual server. Obviously, you need to create the user account before you can assign it to a web server. Once you’ve created the virtual web server, the owner will be able to control this web server from the normal User web configuration page. Chapter 8: Virtual Hosts 8–3 ! Server IP. This is the IP address given to a virtual server. If you are using the traditional IP-based hosting, then each host will need its own IP address. If you use the newer name-based hosting (Caution: not supported by all browsers) then you only need one additional IP address which will be shared by all your name-based virtual hosts. All IP addresses must be valid Internet addresses obtained from your ISP if you want the site to be reachable from the Internet. For strictly internal virtual sites, you can make up an address provided it is on the same network as the rest of your internal hosts. ! Server name. This is the Internet domain name for the server. Usually, when people go to a web site, they prefer to use a real name rather than an IP address. A possible virtual server name might be sales.rebel.com. Note: you need to set up this name in the domain name system (DNS); in some cases, this can be done by editing options on the DNS Configuration page. ! Admin e-mail. This is the e-mail address of the virtual server’s administrator. Usually this address isn’t a real person, but instead is an e-mail alias like [email protected]. To create a NetWinder e-mail alias, see the section on the SMTP (E-mail Delivery) Server in the Configuring Network Services chapter. Note: if the web server has errors, they will be e-mailed to the administrator. You should make certain that this is a valid e-mail address. 8–4 NetWinder OfficeServer User Manual ! CGI execution. CGI is the Internet common gateway interface. It allows the web server to run a special program (which you provide) to generate web pages, instead of always serving static (unchanging) pages. For example, the NetWinder uses CGI to automatically generate the tables and forms you see in the NetWinder web-based configuration system. CGI is an advanced topic that is discussed in many places on the Internet, but writing CGI scripts is beyond the scope of this manual. If you won’t be using CGI scripts on this virtual web server, you should disable CGI execution. ! Server-side includes. Also known as SSI, Serverside includes are an alternative to CGI that allow the web server to generate partly static, partly dynamic HTML content. As with CGI, SSI is an advanced topic that is beyond the scope of this manual. To allow the server to use SSI, choose either NoExec or Full for this option. NoExec allows all SSI features except those that execute external programs. Full adds the ability to execute external programs in a similar way to CGI. Chapter 8: Virtual Hosts 8–5 ! Host type. It isn’t absolutely necessary in all cases to give each virtual server its own unique IP address. If only HTTP/1.1-compliant web browsers (including Netscape 4.x or Internet Explorer 4.x and 5.x) will be used to access your virtual server, you can use a Name-based host that shares the same IP address as your main NetWinder web server. It still needs a unique Server name, though. We recommend that you avoid Name-based servers, however, and use IP-based servers whenever possible. This is to support people with older or uncommon browsers that don’t support HTTP/1.1; Name-based virtual hosts don’t work with those browsers. If you don’t have many IP addresses available to use for virtual servers, you may be forced to use namebased virtual servers. ! DNS. The NetWinder knows how to automatically link the virtual host name to its IP address in its Domain Name Server (DNS). If the NetWinder will be the DNS server for your virtual domain, you should set this option to Primary. If, on the other hand, you want a different server to be the DNS for your virtual host, you should set this option to Off and notify the administrator of the external DNS server. When you have finished entering all the data, click the Save button to initialize your virtual web server. 8–6 NetWinder OfficeServer User Manual Virtual FTP Servers If you don’t need an FTP server, you can safely skip this section. FTP is the Internet file transfer protocol. It is much older than the web, but it is still commonly used to store and transfer large files (such as programs, graphic files and so on). Because FTP is a simpler protocol than HTTP (the web), you need to provide only two options to configure a virtual FTP server. When you choose to create a new FTP server, the configuration page looks like this: Chapter 8: Virtual Hosts 8–7 You need to provide the following information: ! IP Address. This must be the valid IP address given to you by your ISP for your virtual server, for example, 192.168.1.113. Read the section called Domain Name Server (DNS) in the Network Settings to find out how to associate a name with this IP address, if necessary. ! Owner. This is the user account that will be in charge of the virtual FTP server. The owner controls which files will appear on the FTP server, and where. He is also the only user (other than anonymous) who can log in to the virtual FTP server. When you have finished entering this information, click the Save button to initialize your virtual FTP server. 8–8 NetWinder OfficeServer User Manual Chapter 9 System Administration The System page, available from the Administration menu, provides several sets of statistical information, and allows you to back up and restore NetWinder files to and from your workstation. System Information If you click Info from the System page, you will see tables with the following information: ! System Info. This lists the duration that the server has been running without a reboot, as well as the software version. Chapter 9: System Administration 9–1 ! RAM. This table shows the memory used compared to the total available memory on the NetWinder. Under heavy use, it is normal for this number to approach 100%. The NetWinder will maximize its memory usage and store less-often-used data in the swap space. ! Swap. This table shows the amount of swap space (virtual memory) used compared to the total available swap space on the NetWinder. This number should stay relatively small. If it reaches 100%, some services will stop because there is nowhere to store the running program data. It is normal for your NetWinder to begin using swap space before memory is completely full; this is because it recognizes services that are seldom used, and places them in swap ahead of time to allow quicker response times later. ! Load. This is a measure of your NetWinder’s overall level of activity. A value of 0.00 means that the NetWinder is idle; a value of 1.00 means that the NetWinder is working as hard as it can; values greater than 1.00 mean that NetWinder has slowed down its services to distribute its central processing unit (CPU) capacity between all the different jobs it is doing simultaneously. If the load is consistently much greater than 1.00 and your NetWinder response time is too slow, you may need to add another NetWinder to the network. ! Connections. This list shows how many users are connected to your server. It also shows how many TCP connections and UDP connections exist. ! Printer. This lists any jobs in the print queues. See the section called Print Server under Configuring Network Services to find out how to configure the print queues. 9–2 NetWinder OfficeServer User Manual Backing up and Restoring System Data When you click Backup & Restore from the System administration page, you will be offered a screen that allows you to back up and restore NetWinder system files using your web browser. When you request a backup, your NetWinder will send you an NWB (NetWinder Backup) file containing all the files you request, stored in a special format. You can later restore these files using the System Restore option farther down the page. The different types of backups are: ! Full system backup. This combines the three options below. It can be as small as 15 megabytes or very large, depending on how many files are stored on the NetWinder. The full system backup is the easiest way to back up all your files at once. ! Home directories. This backs up only the personal files belonging to your NetWinder users. You should do this often (ideally, once a day), in case users delete or damage their files by accident. The size varies depending on how much disk space your users use. It can be as little as 2 megabytes or as much as several gigabytes. NOTE: NOTE This does not include each user’s e-mail box, which must be backed up separately. ! Configuration files. This only backs up the NetWinder configuration settings. It is important to do this before making any major configuration changes, so that you can restore them if you make a mistake. It’s a good idea to keep old versions as well; the file is usually less than 3 megabytes. Chapter 9: System Administration 9–3 ! User mail spools. This backs up e-mail belonging to your users. It varies in size depending on how much e-mail your users receive, and how much they leave sitting on the NetWinder for long periods of time. Checking Disk Usage On this page, you can see the following information: ! Per-user disk usage. This tells you how much space each user is using on the NetWinder disk. ! Per-user disk quota. This is the maximum amount of disk space each user is allowed to use, unless there is no quota, in which case it will read “unlimited.” ! Overall disk usage. This shows the amount of disk space available on each part of your disk, compared to the amount used in total. All of your user files are stored in the / partition. Maintenance When you click Maintenance, you will be given the opportunity to update your OfficeServer. In this section you are also offered a chance to reboot or to halt. For each of these tasks you are presented with a confirmation screen. Date and Time This page gives you the opportunity to make adjustments to the system clock. The clock can be set in one of three ways: 1. By choosing a location or time zone. 2. By logging onto a time server which you specify. 3. By manually entering the date and time. 9–4 NetWinder OfficeServer User Manual Chapter 10 Configuring Network Services OfficeServer provides many different kinds of network services, including a web server, e-mail servers, Windows, Apple and UNIX file sharing servers, and several other service types. You can switch these services on and off as you wish, as well as change configuration options for some of them. Usually, you will want to disable unused services to improve security and speed. To configure network services, go to the Administrator page and click on Services. You will see a page like this: Chapter 10: Configuring Network Services 10–1 The Status column contains either the word Running or Stopped. If the word is underlined (i.e., it is a hypertext link), then you can change whether the service is enabled by clicking on the word. For example, to activate a service that is currently stopped, click on the word Stopped. You will be asked to confirm the change, and then the service will be started. You can stop the service again by clicking on the word Running. Note: some services, such as the web server, cannot be stopped. In the following sections, we will explain more about each type of network service available on your NetWinder OfficeServer. Web Server The web server is the program that allows you to connect to the NetWinder using a browser such as Netscape or Internet Explorer. Your NetWinder uses the Apache program as its web server. Because you need the web server to be running to configure your NetWinder, there is no way to stop this service. The web server also has no configuration options of its own, although you can set up a virtual web server as described in the section called Virtual Web Servers. 10–2 NetWinder OfficeServer User Manual Web Proxy/Cache The web proxy/cache server is actually a part of the Web Server, but it acts like a separate entity, so you can configure it separately. A proxy server is a program that accepts connections on one port, and immediately forwards them to another server on another port. Proxy servers are frequently used to forward specific services through firewalls, or to allow access to services using special protocols that your client software doesn’t understand. A cache server is a special kind of proxy server that sometimes decides not to forward the request on to the target server. If it has recently fulfilled the same request, the result is cached on the proxy server’s local hard drive so it can be retrieved more quickly in the future. Your NetWinder can act as a simple proxy server, or as a proxy/cache server, depending on its configuration options. To use the NetWinder as a proxy or cache server, you need to configure your web browser (usually Netscape or Internet Explorer) to point at your NetWinder, port 80. You can usually do this in your browser’s Options or Preferences window, under the keyword Proxy or Security. Chapter 10: Configuring Network Services 10–3 When you click the Configure button next to Web Proxy/Cache on the NetWinder’s Services screen, you will see this page: It contains the following options. In most cases, you are safe to leave the default settings for these options. ! Allow connect on ports. Allow browsers to connect on ports other than 80 (HTTP). Usually you will want to include 443 (HTTPS), 563 (SNEWS), and 8080 (alternative HTTP). ! Cache default expiration. This is the default amount of time to keep a document in the cache if the document’s owner hasn’t specified this value. If a document is requested again within this time limit, it will be retrieved from the cache instead of from the original server This value is in hours. 10–4 NetWinder OfficeServer User Manual ! Cache directory length. This is the number of characters in cache storage directory names, usually 2. ! Cache directory levels. This is the number of ‘levels’ in the cache storage directories, usually 4. ! Force completion to cache. If a web browser cancels a request in progress, the NetWinder can attempt to finish retrieving the document from the original server to be stored in the cache. For example, if Cache force completion is 90, then the NetWinder will finish retrieving the document if it has already retrieved 90% or more of the file. ! Cache garbage collection interval. Your NetWinder will delete entries from the cache periodically to keep the cache directory at a reasonable size. This takes place every GC interval hours, usually 1 hour. ! Cache last modified factor. If a retrieved document doesn’t specify an expiry time, but does include a last-modified time (which is the most common situation), the NetWinder will set the expiry time to Last-modified-factor * time-since-lastmodification. ! Cache maximum expiration. This is the longest possible time, in hours, that your NetWinder will keep a document in its cache without doublechecking that it hasn’t been changed on the original server. ! Cache root. This is the directory in which to store files for the web cache. It is almost always /var/cache. Chapter 10: Configuring Network Services 10–5 ! Cache size (KB). This is the maximum size, in megabytes, of the web cache. If the cache grows larger than this, your NetWinder will start throwing out old entries, so they will need to be retrieved from their original server if they are requested again. ! No cache. This is a list of keywords or hosts that will not be cached by the server. If you have web servers on your local network, you should enter their names here, because it doesn’t gain you anything to cache them. You gain the most benefit from caching files from the Internet, so that you don’t have to download them over and over again. ! Proxy default domain. If a user requests a file from a hostname without a domain qualifier (e.g. server1 instead of server1.rebel.com), then the NetWinder will append Proxy domain to the name to make it complete. In this case, for example, Proxy domain should be set to rebel.com. ! Proxy receive buffer size. This changes the block size for communicating with remote servers. Usually it is set to 2048. ! Allow proxy requests. If this is set to Off, your NetWinder will not act as a cache or a proxy server. ! Proxy via. If this is set to On, your NetWinder will include a Via: header with each request to a remote server, mentioning that the request has passed through a proxy server. For increased privacy, you can choose Off here. Click the Save button when you’ve finished filling in the above values. 10–6 NetWinder OfficeServer User Manual SMTP (E-mail Delivery) Server SMTP is the simple mail transfer protocol. Every computer on the Internet uses SMTP to deliver e-mail to its destination. Note: Your entire internal network is configured at boot time to use mail and should not need adjustments. SMTP relies on the nameserver knowing which clients will be sending mail. Each client must have a DNS entry so that its name can be resolved. If you receive messages such as “relaying denied” when trying to send mail via the OfficeServer, this is likely the problem. If you disable the NetWinder’s SMTP server, it won’t be able to receive or deliver mail for any of your users. If you use the e-mail features of your NetWinder, you will need to make sure SMTP service is enabled. Chapter 10: Configuring Network Services 10–7 The SMTP server also has two configuration options: the User Alias List and the Denied Domains list. To get the SMTP configuration screen, click the word Configure on the SMTP server line. The configuration screen for SMTP looks like this: ! SMTP User Aliases. An alias allows you to redirect user mail from a name into a particular user account or set of user accounts. For example, you might want to redirect mail to [email protected] to [email protected] (assuming your NetWinder is called rebel.com, and ffiddle is a user on your NetWinder). To do this, you need to create an alias from sales to ffiddle. Click on Add a new alias, and answer the two prompts with sales and ffiddle respectively. 10–8 NetWinder OfficeServer User Manual If you want, you can redirect one address to more than one person, and create simple mailing lists. For example, you might want to redirect the address [email protected] to include [email protected], [email protected], and [email protected]. To do that, click Add a new alias. Answer the first prompt by typing smartpeople. The second prompt asks you for destination addresses. Here, type einstein newton [email protected] and press the Save button. You can edit existing aliases in a similar way. For example, if you realize that Mickey Mouse isn’t smart after all, you can remove him from the smartpeople alias by clicking the word Edit next to smart-people in the alias list. Edit the list of destinations, changing it to just einstein newton, and press OK. When you no longer need a particular e-mail alias, you can easily remove it by clicking the Remove button next to its name. Chapter 10: Configuring Network Services 10–9 ! SMTP Denied Domains. If you regularly get unsolicited commercial e-mail (“spam”) from particular servers or users, you can refuse to allow them to send mail to your users. To deny mail from a particular e-mail domain, click Deny an additional domain and enter the appropriate domain name when prompted. For example, you can refuse all mail from junk.org by entering junk.org at the prompt. Similarly, you can deny mail from [email protected] by entering it here. WARNING Most spam disguises its source address so that its original sender cannot be identified. Sometimes, the fake source address is actually a valid address belonging to someone else. Denying e-mail from the fake address will not actually eliminate your spam problems, and might accidentally cause you to refuse valid e-mail. 10–10 NetWinder OfficeServer User Manual POP-3 (E-mail Access) Server POP-3 stands for the post office protocol, revision 3. It is the most common way for e-mail reader programs (such as Outlook, Pegasus, Eudora or Netscape) to retrieve their e-mail from a server. Since your NetWinder can act as an e-mail server, it provides the POP-3 protocol. POP-3 is a very simple service and needs no configuration options. If you want to allow e-mail readers to access their mail via POP-3, be certain to enable the POP-3 server on the network services screen. Newer, more advanced e-mail readers can also use the IMAP protocol to access mail. If you enable POP-3, you may also want to enable the IMAP service. IMAP (Advanced E-mail Access) Server IMAP stands for the Internet Mail Access Protocol. Like POP-3, it allows e-mail reader programs to retrieve their e-mail from the server. Unlike POP-3, IMAP also provides support for keeping your mail in several folders on the server, so you can organize it more easily. If you want to allow e-mail readers to access their mail with IMAP, you should enable the IMAP service on your NetWinder. In that case, you will usually want to enable the POP-3 service as well. Chapter 10: Configuring Network Services 10–11 Windows File Sharing The Windows file sharing service is sometimes also known as Samba, SMB, or Microsoft LAN Manager. If you enable Windows file sharing on your NetWinder, you will be able to see the NetWinder in the Network Neighborhood window on your Windows workstations. This allows you to easily access programs, documents, web pages, and other files that you store on the NetWinder. The NetWinder’s Windows file sharing service provides most of the same features as file sharing in Windows NT. If you don’t want to store files on the NetWinder using the Network Neighborhood, you should disable the Windows file sharing service. To choose exactly which NetWinder folders will be shared, see the section called File Sharing Configuration under Network Settings. WARNING Windows file sharing only works correctly if your NetWinder login name matches the login name you give to Windows when you start your workstation. 10–12 NetWinder OfficeServer User Manual The Windows file sharing service also has a few configuration options. The configuration screen looks like this: ! Workgroup. This is the name of the workgroup that your file server will join. It will appear in this workgroup in the Network Neighborhood window. The exact name you choose doesn’t really matter, but file sharing will work best if all of the file servers and workstations on your network use the same workgroup name. ! Comment. This is the description of your server. It will appear in Network Neighborhood next to the server name. Chapter 10: Configuring Network Services 10–13 ! Password Encryption. If this option is turned on, Windows will encrypt user passwords when it connects to a computer using Network Neighborhood. Some older versions of Windows didn’t understand password encryption; if you experience connection problems, try setting this option to No. Usually, it is much better to use Yes. ! WINS Server. One of the computers in each workgroup must be chosen to keep track of the names in the Network Neighborhood. This computer is called the WINS server. Usually, this should be a server computer (such as a NetWinder or Windows NT server) rather than a Windows 95/98 or Macintosh workstation, since servers fail less often and will keep more reliable information. If you want your NetWinder to be the WINS server, choose Yes here. If you want, you can then add your NetWinder’s address to the list of WINS servers in your Windows 95/98 network control panel. WARNING Do not choose Yes on an existing Windows network or the computers will compete for control and mass confusion will result. ! Domain Master Browser. This advanced option allows your OfficeServer to collate lists of Windows workstations that are in the same group but on different TCP/IP subnets. Most people will chose No here. Press the Save button when you have finished making configuration changes. 10–14 NetWinder OfficeServer User Manual Apple File Sharing The Apple file sharing service allows your NetWinder to act as a file server for Apple Macintosh computers in the same way the Windows file sharing allows you to share files with Windows computers. You can even share the same files between Windows and Macintosh machines, if you enable both servers at the same time. If there are no Apple Macintosh computers on your network, you should stop the NetWinder Apple file sharing service. To choose exactly which NetWinder folders will be shared, see the section called File Sharing Configuration under Network Settings. UNIX File Sharing The UNIX file sharing service allows your NetWinder to act as a file server for other UNIX computers using the NFS (Network File System) protocol. WARNING Although very popular, the NFS protocol is generally considered insecure. You should think twice before enabling this service. If you don’t have any UNIX or Linux computers on your network, there is no need to enable UNIX File Sharing. To choose exactly which NetWinder folders will be shared, see the section called File Sharing Configuration under Network Settings. Chapter 10: Configuring Network Services 10–15 FTP (File Transfer Protocol) Server FTP is the earliest Internet File Transfer Protocol. It is still commonly used by UNIX systems or other computers that don’t support more advanced file sharing schemes. If you enable the FTP server, all registered users will be able to retrieve any file on the NetWinder using FTP. Users will also be able to create new files and modify existing files inside their personal home directories. If you click the word Configure next to the FTP service, you will see this screen: 10–16 NetWinder OfficeServer User Manual The following configuration options are available: ! Allow anonymous access. If this option is set to Yes, anyone will be allowed to connect to your NetWinder using FTP, even non-registered users. However, these anonymous users will have severely restricted rights, and will only be allowed to access files in a special public directory. Many file repositories on the Internet are published using anonymous FTP. With this option, you can choose to create your own. ! Administrator’s email address. This is the address to which failure messages will be sent; a notification will also be given to FTP site users that they can report problems to the administrator address. ! Maximum failed logins. If a user tries to log in and fails too many times during a single session, the session will be terminated. This option defines the maximum number of login attempts. Chapter 10: Configuring Network Services 10–17 Public/Private Discussions This allows you to configure the settings for the discussion areas, which are based on a program called wwwthreads. Since the discussion areas are part of the web server, you can’t disable them without disabling the web server. And of course, you can’t disable the web server because you need it in order to configure the NetWinder. If you click on the word Configure next to Public Discussions, you will see the following page. The configuration page for Private Discussions is very similar, except that no Edit Users option is available. 10–18 NetWinder OfficeServer User Manual You have the following configuration options: ! Create Forum. This allows you to add a new discussion forum, in which users can post messages. ! Edit Posts. As the administrator, you are allowed to remove or modify any messages that someone posts on a forum, to remove obscenity for example. ! Edit Forum Properties. You can change various features of your forums with this option. ! Delete Forum. This will let you wipe out an entire forum and all of its messages, once it has exhausted its usefulness. ! Edit Users. You can change the list of users who are allowed to access the public discussion server. Chapter 10: Configuring Network Services 10–19 Search Engine The Search button, found on the main NetWinder page, allows you to search for keywords through all of the web pages on the NetWinder. The search database updates itself every morning at 4:00 a.m. As with several other NetWinder services, the search engine feature is part of the Web Server, and so it cannot be disabled. However, it provides several configuration options. If you click the word Configure next to Search Engine, you will see the following page: 10–20 NetWinder OfficeServer User Manual The options are as follows: ! Index URLs. This is the top-level web page, or set of pages, from which indexing begins. The default values are probably correct for most users. If you want to add your own documents you can add additional directories here, separated by spaces. ! Index user directories. You can decide whether each user’s home page will be included in the web search. When you create a new user, his pages will be indexed by default. ! Limit URLs To. This is a list of patterns that constitute “indexable” URLs. Normally, this is the magic value ${start_url}, which means that only pages found inside any of the locations given in Index URLs will be included in the index. For example, if one of your web documents links to an external web server (say www.linux.com), the search engine won’t index the external web server unless you include its URL in the Limit URLs To field. For example, to allow links to www.linux.com, try changing the field to: ${start_url} www.linux.com. ! Exclude URLs. Here, you can list pages that you definitely don’t want to index. The default value, /cgi-bin/ .cgi, means that your NetWinder won’t index CGI pages (which are dynamically generated, self-changing web pages). If you have other pages that you don’t want in the index, add them to this list. Chapter 10: Configuring Network Services 10–21 ! Maintainer email. This is the e-mail address that the search engine uses to identify itself if it tries to index files on someone else’s web server. For example, if you index files on www.microsoft.com, the NetWinder will send the Maintainer address to www.microsoft.com so Microsoft will know who’s indexing its server. NOTE: It is considered impolite to index other people’s web servers using your NetWinder, unless you have explicit permission to do so. There are plenty of Internet search engines available already; you should use those instead. Indexing web sites also uses a large chunk of your Internet connection and should be avoided unless absolutely necessary. If you do decide to index someone else’s server, be certain to fill in the Maintainer field on this page so that the server’s owner can contact you in case of problems. When finished making changes, click the Save button to continue. 10–22 NetWinder OfficeServer User Manual Print Server Your NetWinder includes a printer-compatible parallel port connector, which accepts virtually all parallel printers. Other computers on your network can then print to the NetWinder’s printer using either the UNIX lpr protocol, Windows Network Neighborhood or Macintosh Apple Talk. Workstations encode data for the printer using one of two techniques: ! Direct mode. This is the most common mode for Windows workstations. In direct mode, you install a driver on your PC that exactly matches your printer (e.g. an HP Deskjet 680C) and attach it to the network print queue called direct on your NetWinder. The NetWinder will pass the printer data along unchanged. ! PostScript mode. Alternatively, your NetWinder can accept data in the industry-standard PostScript format, and automatically convert it to match your printer. This method is almost always used on UNIX systems and often used on Macintosh computers. Chapter 10: Configuring Network Services 10–23 If you plan to only use Direct mode, you do not need to configure the NetWinder’s print server; it will work automatically. If, however, you want to use PostScript mode, you will need to tell the NetWinder which kind of printer you have so that it can convert the data into the right format automatically. From the Services page, click the word Configure on the Print Server line. You’ll see a page like this: 10–24 NetWinder OfficeServer User Manual It has the following options: ! Driver. This is the NetWinder printer driver you want to use to convert PostScript data into your printer’s native format. If the driver is set to None, your NetWinder’s PostScript mode will not work correctly. ! Resolution. Non-PostScript printers normally need the NetWinder to feed them bitmapped graphics. From the list box, choose the highest resolution that your printer can support. ! Paper size. Fill in the paper size you will use with this printer. This is either Letter, Legal or A4. If you set this option to None, the size can be specified manually in the Extra GS options field. ! Extra GS options. Your NetWinder uses a program called Ghostscript (GS) to convert PostScript data into data for your printer. If you are already familiar with Ghostscript, you can set some advanced options here. NOTE: The resolution settings should be adequate for most printers. However, some older printers need unusual resolution settings. In that case, you should set Resolution to None and add something like -r144x144 to the Extra GS options. options Click the Save button when you have entered all the information. This will create a network print queue called postscript on your NetWinder. When you send PostScript data to that queue, it will automatically be converted to a format compatible with your printer. Regardless of whether you enable PostScript mode, the network queue called direct will always be available to send data directly to your printer without any conversion. Chapter 10: Configuring Network Services 10–25 DHCP (Dynamic Host Configuration) Server DHCP is the Dynamic Host Configuration Protocol, originally created by Microsoft, based on the older BOOTP protocol. You can use DHCP to configure automatically the networking settings of Windows, Macintosh and several other kinds of workstations on your local network. This allows you to control everyone’s settings from a single place on the NetWinder server. It also keeps each workstation’s networking settings simple. WARNING If you already have a DHCP server on your network, it is critical that you do not enable the NetWinder’s DHCP server! Both servers will both try to service each client, and mass confusion could result. The NetWinder DHCP server has several configuration options available. The configuration screen looks like this: 10–26 NetWinder OfficeServer User Manual The configuration options are as follows: ! Subnet Address. This is the address of the local ethernet network, where your NetWinder and all of your workstations reside. Usually the last number in the address is zero (for example, 192.168.1.0), which means that all of the computers on your local network share the first three numbers (192.168.1) and identify themselves by the fourth (1 to 254). The subnet address should be the same as the one you entered in Ethernet Settings for the Eth1 Parameters. ! Netmask. This should be the same as the one you entered in Eth1 Parameters. As with the subnet address, the last number is usually zero, which means that computers on your local network identify themselves using the fourth number in the address. ! Domain Name. This the name of your network, for example, rebel.com. Computer names on your network have the domain name appended to form their complete Internet address. For example, if your computer is called server1, its full name would be server1.rebel.com. ! Router Address. This is the address of the default gateway for all your workstations. Since your NetWinder can act as a gateway, this value is very often the address of your NetWinder. Other times, it is the address of a dedicated router device. ! First DHCP Address. This is the first available address on your local network for dynamic assignment. For example, if this number is 192.168.1.10, then the first PC to request its address from DHCP will be assigned 192.168.1.10. The next will be 192.168.1.11, and so on. Chapter 10: Configuring Network Services 10–27 ! Last DHCP Address. This is the last address on your local network available for DHCP. Addresses higher than this one will never be automatically assigned to computers using DHCP. NOTE: By default, these settings will be chosen automatically to match your network. You should avoid changing them unless you have a good reason. Press the Save button to save your DHCP settings. NOTE: You also need to start the DHCP service from the Services screen. DNS (Domain Name Server) The DNS, or Domain Name Server, is the program that converts Internet host names (such as www.rebel.com) into IP addresses (such as 192.168.42.12). Your NetWinder can act as a DNS if you wish. If you would rather get your DNS service from a different machine, you can disable the NetWinder’s DNS service. If you click the word Configure next to the DNS line, you will be taken to the DNS configuration page, which is described later, in the chapter on Network Settings. Dial on Demand Dial-on-Demand service lets your NetWinder use an external modem to call your Internet service provider (ISP) automatically when someone on your network tries to access the Internet. You can configure this feature as part of the PPP Dialer Configuration, which we describe in the chapter on Network Settings. 10–28 NetWinder OfficeServer User Manual Telnet Server Telnet was one of the very first services to enter widespread use back in the earliest days of the Internet. It is still very useful even today. If you enable the Telnet server on your NetWinder, you will be able to use a Telnet client program on your workstation to access the NetWinder’s command prompt remotely. Since your NetWinder includes a full version of the Linux operating system, you can use the command prompt to perform various advanced operations. For example, using the command prompt you can install new types of servers, customize the NetWinder’s configuration files in special ways, or upgrade your NetWinder software. With the Telnet server enabled, you will be able to do all of these things without leaving your own workstation. However, because it confers the ability to control your NetWinder completely from a remote location, it may pose a security risk. Telnet requests from the Internet are blocked by the default Firewall Settings. If you want to permit Telnet requests from the Internet, you need to enable incoming TCP connections on port 23. WARNING Telnet is an advanced procedure that can damage your NetWinder beyond your ability to restore it, therefore requiring the computer to be returned for servicing. Chapter 10: Configuring Network Services 10–29 Chapter 11 Network Settings The OfficeServer allows you to configure various settings for connecting to the network, and connecting to the NetWinder. Together, these options are called the Network Settings. You can reach the main Network Settings web page by clicking Network from the Administration page. The ethernet settings determine how the NetWinder connects to its local ethernet network. If you have a cable or DSL modem or an external router to the Internet, you will also use ethernet settings to configure Internet access. Firewall settings restrict access to your NetWinder from certain sites on the Internet. If your NetWinder is acting as a router, you can also block certain sites from reaching others through the router. If your NetWinder is acting as a router, you can also use Port forwarding settings to redirect requests from one server to another. The DNS server is responsible for converting Internet domain names, like www.rebel.com, into IP addresses, like 192.168.42.43. You can set up your own name-to-address mappings in the DNS configuration. Your NetWinder has a serial port to which you can attach an external modem used to connect to the Internet through any standard Internet service provider. To do this, use the PPP dialer configuration screen. To share your NetWinder’s files with Windows, Macintosh, and UNIX computers, you will need to use the file sharing configuration panel. Chapter 11: Network Settings 11–1 Ethernet Settings Your NetWinder has two ethernet interfaces: a 10/100 Mbit ethernet, called eth1, for communicating with local workstations, and a second 10 Mbit ethernet, called eth0, for optionally communicating with a cable/xDSL modem or an external router. The ethernet configuration page looks like this: 11–2 NetWinder OfficeServer User Manual If you click on Change these parameters, you will then see the following page: It consists of three parts: Network Parameters, Eth1 Parameters, and Eth0 Parameters. The Network Parameters section allows you to change the following options for the entire NetWinder: ! Hostname. This is the base name of your NetWinder. For example, if your NetWinder is called netwinder.rebel.com, you would enter netwinder here. ! Domain name. This is the domain name of your NetWinder. If your NetWinder is called netwinder.rebel.com, you would enter rebel.com here. Chapter 11: Network Settings 11–3 ! Gateway address. If you are using a cable/xDSL modem or external router, you can tell your NetWinder to direct all of its Internet traffic through the router, which will be your default gateway. You need to enter the IP address (e.g. 192.168.42.1) of your router here, if you have one. Otherwise, fill in the address of the NetWinder itself. ! DNS Nameserver(s). A DNS nameserver is responsible for converting Internet domain names, such as www.rebel.com, into IP addresses, such as 192.168.42.43. The NetWinder includes a DNS server, but if you already have one or more, you can tell your NetWinder to use that one (or those ones) instead. Enter one or more IP addresses here, separated by spaces. To use your NetWinder’s internal DNS server, enter 127.0.0.1 (a ‘magic’ number that means “use the local host”) here. NOTE: If you enter more than one DNS server, your NetWinder will down. That always use the first server unless the first server is down means if the first server can’t find an address and reports “no such hostname, “ the NetWinder will not ask the second or additional servers for more information. ! Packet forwarding. If this is set to Yes, your NetWinder will act as a router (also known as a gateway) and allow other workstations on your network to access the Internet via your NetWinder. Of course, this is only useful if you have configured the NetWinder to be able to access the Internet either by setting the Gateway address on this page, or by configuring the PPP dialer. To prevent other computers on your network from accessing the Internet via your NetWinder, or if your NetWinder cannot reach the Internet, you should set this option to No. 11–4 NetWinder OfficeServer User Manual The Eth0 and Eth1 Parameters sections allow you to change the following options for each ethernet device: ! Configuration mode. This is either static, dynamic, or inactive. In static configuration mode, you must provide the IP address and netmask (see following) for the device by entering them below. In dynamic mode, your NetWinder will request its address and netmask from an external DHCP server on your (or your ISP’s) network, and you need not provide the addresses using this screen. An inactive interface is disabled altogether. NOTE: The Eth1 (10/100 Mbit) interface cannot be set to dynamic, dynamic because your NetWinder is a server and therefore requires a consistent address. For more information on the NetWinder’s DHCP server, see the section called DHCP (Dynamic Host Configuration) Server. ! IP address. If this interface is configured in static mode, you need to provide an IP address for your NetWinder to use on this interface. A NetWinder is not allowed to use the same IP address on both eth0 and eth1. A sample value for this field is 192.168.1.12. If this interface is configured in dynamic mode, you do not need to provide an IP address. Note: Be careful when changing this value on the Eth1 (10/100 Mbit) device. You are using the ethernet interface to configure your NetWinder. If you make a mistake here, you will be locked out and unable to repair the problem without using a keyboard and monitor directly on the NetWinder. Chapter 11: Network Settings 11–5 ! Netmask. If this interface is configured in static mode, you need to provide the netmask. Normally, every computer on a single ethernet network will use the same netmask. The netmask is often 255.255.255.0 or 255.255.0.0. If this interface is configured in dynamic mode, you do not need to provide a netmask. When you have finished making changes, press the Submit button to make them permanent. Firewall Settings The term firewall comes from automobile mechanics; cars include something called a firewall to prevent fires and explosions in the engine from easily reaching the inside of the car, where they can hurt people. In the same way, a network firewall prevents computers on the Internet (where virtual fires, explosions and breakdowns are common) from reaching computers on your local network, where they can do damage. Your NetWinder uses the advanced Linux kernel for its firewall features. The Linux firewall is very powerful, and has a wide variety of options that allow you to restrict outsiders from getting in or insiders from getting out. You can limit people’s access based on their computer’s address, or based on particular services (such as e-mail or the web). 11–6 NetWinder OfficeServer User Manual WARNING Because the Linux firewall is so powerful, it can be difficult and confusing to configure. You can also easily lock out your workstation from the web-based configuration; if you do that, you will need to attach a keyboard and monitor to your NetWinder to repair the problem. See the chapter called Recovering from Emergencies if this happens. Because of these problems, you should avoid changing your NetWinder’s firewall unless you have a good reason. The default settings are sufficiently secure for most sites. When you click Firewall from the Network configuration page, you will see a page that looks like this: Chapter 11: Network Settings 11–7 Before we actually make any firewall settings, let’s look at some background information. The Three Firewall Chains The Linux firewall included in your NetWinder uses a threestage process to decide whether or not a network packet will be allowed to pass through the firewall. Each of these stages is called a “chain.” The three firewall chains are as follows: ! Input firewall. When any packet first arrives at your NetWinder, it passes through the Input firewall. By restricting connections at this level, you can prevent users from accessing particular services on your NetWinder, or throw away packets that are clearly “spoofed“ (such as 192.168.x.x packets coming from the Internet). Usually, if you want to block a connection, the Input firewall is the place to do it, because it throws the connection away before it has a chance to reach any other parts of the NetWinder. Requests generated from the NetWinder itself do not pass through the Input firewall; however, they do pass through the Output firewall. On the other hand, responses to the NetWinder’s requests will pass through the Input firewall on the way back, which is usually enough to block them. ! Forward firewall. When the NetWinder is acting as a router (that is, you have said Yes to Packet Forwarding in the Ethernet Settings), you can choose who is allowed to route through your NetWinder using the Forward firewall. 11–8 NetWinder OfficeServer User Manual For example, you can say that users on the local network are allowed to use your NetWinder to reach the web server port on remote Internet sites, but no other services; or, you can block access to certain sites altogether. The Forward firewall also allows you to configure a feature called IP Masquerading (also known as NAT, or Network Address Translation) for particular sites. For example, you can specify that all hosts on your local network can access the Internet through your NetWinder, but that they will all appear to have the NetWinder’s IP address. This allows you to share a single modem connection between all the computers on your network, for example. It also increases security. This feature is enabled by default on the NetWinder OfficeServer. Usually, the forwarding rules are fairly simple: you want to enable masquerading for local sites, and not for outside sites. To block individual connections, you’ll usually use the Input firewall. If your NetWinder is not acting as a router, the Forward firewall is not used. ! Output firewall. Before the NetWinder sends out any network packets, no matter where they came from, it checks them against the Output firewall. This can be used to block messages from your NetWinder from going to undesired places, or to prevent NetWinder from contacting certain other hosts on the Internet by accident. The Output firewall chain is usually left empty, because almost all firewall work can be easily done with the Input and Forward firewalls. Chapter 11: Network Settings 11–9 Standard Firewall Policies The next thing to learn about firewalls is the three primary and two secondary policies that you can apply when forming firewall rules. Each firewall chain consists of a sequence of rules, evaluated from top to bottom, that match different kinds of network packets. Each rule has a policy that specifies how the firewall should treat a packet that matches this rule. If none of the rules matches a particular packet, the default policy will be applied instead. Primary Policies There are three policies that can be applied in any of the three chains (input, output and forwarding): 1. Accept. This policy specifies that the chain should immediately accept a packet, and continue on its way. In the case of the Forward firewall, it will be sent through the Output firewall and along to its final destination. 2. Reject. This means that the packet should be returned to the sender with an error message. Usually, when you want to block a connection, you will use the Reject policy. 3. Deny. This means that the packet should be quietly discarded and no further action should be taken. If a packet matches a Deny rule, your NetWinder will act as if the packet simply didn’t exist. Eventually, the requesting computer will give up with a “host not responding” or timeout message. Most people consider using the Deny policy rude. However, if you deny all types of connections except the ones you really want, your NetWinder will look almost completely invisible to the Internet, which may discourage people from trying to break in. On the other hand, this can be very confusing to technicians who are legitimately trying to resolve network problems. Unless you have a good reason, you should avoid using the Deny policy. 11–10 NetWinder OfficeServer User Manual Secondary Policies (Forwarding) 4. Redirect. This allows you to redirect incoming requests to another host on or off your network. This is almost never used. 5. Masquerading (Masq). This type of policy can only be applied in the Forward firewall. When a forwarded packet matches a Masq rule, your NetWinder will perform a ‘magical’ operation that relabels the connection as if it were originating at the NetWinder. As far as the remote side is concerned, the NetWinder is making a request. When the response comes back, it will be automatically relabelled again, so that the original requester isn’t aware that anything special has happened. This is useful for three reasons: ! Your ISP. Most Internet service providers (ISPs) only provide a single IP address when you make a modem connection. This is because, almost always, a modem connection is made by a single computer which only needs one address. However, with masquerading, you can use this single address for every computer on your local network, so that each computer can access the Internet through the same modem connection at the same time. Because your NetWinder does its magic, you don’t need any special support from your ISP. ! Address preservation. If you want (and often if you pay extra), your ISP can provide you with multiple addresses: one for each computer on your network. Before masquerading was invented, this was the usual way to obtain IP addresses for your local workstations. Chapter 11: Network Settings 11–11 However, that technique caused trouble: usually, the addresses that you obtained were owned by your particular ISP, so switching from one ISP to another was a painful experience. Also, there are only a limited number of IP addresses on the Internet, so it can be difficult to find enough addresses in a single set for your entire organization. Masquerading allows you to use whatever addresses you want on your local network, without negotiating with your ISP. Your ISP assigns your NetWinder only one address, which the NetWinder discovers automatically when the modem connects. ! Security. Perhaps the most important benefit of masquerading is the increased security it provides your network. On most networks, general-purpose workstations are not carefully monitored for security factors, so they are often the main focus of outside attacks. Routers and firewalls, however, are usually carefully designed and configured so that they are secure. If you use masquerading, outsiders will never see the addresses of your local workstations; they only see the address of the NetWinder itself. If masquerading is configured correctly, an outsider will first need to break into your NetWinder before even beginning to attack other computers on your network. As with the other Forward firewall rules, masquerading doesn’t work unless you have enabled Packet forwarding under Ethernet Settings. 11–12 NetWinder OfficeServer User Manual Creating Firewall Rules WARNING If you are not an advanced user, we suggest leaving the firewall settings as they are. The default settings ensure sufficient security. By creating firewall rules, you have the ability to block access from your own computer to the web-based configuration. If you do that, the only way to recover is to attach a keyboard and monitor to your NetWinder, and fix it from the console. If you click the words Add a new rule under any of the three firewall chains, you’ll see a screen that looks like this: Chapter 11: Network Settings 11–13 The options are as follows: ! Policy. This defines how a packet will be handled if it matches this rule. We described the different policies above, in the sections called Standard Firewall Policies and The Masquerading Policy. ! Source IP address. If a packet does not come from this address, it will not match the rule. Leave this blank if you want to match packets from any address. ! Source netmask. The source IP address can refer to an entire IP subnetwork. For example, if the source address is 192.168.42.0 and the subnet is 255.255.255.0, then the rule will match packets from any computer on the 192.168.42.x network. If you leave the source IP address blank, you should leave this entry blank as well. If you supply the source IP address and leave the netmask blank, only the exact address that you specify will be matched; not a whole network of addresses. ! Source ports. If a packet does not come from this range of ports, it will not match the rule. You can specify either a single port number (e.g. 80) or a range (e.g. 1:1024). If you leave this blank, any port number will match. If you specify the port number you must use either TCP or UDP in the Protocol field below. ! Destination address/netmask/ports. These work like the Source address, netmask, and ports, except they match the packet’s target instead of its source. ! Protocol. This is one of TCP, UDP, ICMP, IGMP, GGP, PUP, IDP, Raw or All. 11–14 NetWinder OfficeServer User Manual ! Interface. You can use this to specify that only packets arriving (or, for the Output firewall, departing) on a particular network interface will match. This is often more reliable than specifying only the source or destination address. For example, you can choose to allow forwarding from eth1 to eth0, rather than entering subnet addresses. Click the Submit button when you have finished entering the above information. After you finish making changes, you can choose to make them permanent. A screen summarizing your changes will appear and ask you to confirm them. This is your last chance to abort the changes, which may accidentally cause your workstation to be blocked from the NetWinder. Once you confirm the changes, the new firewall rules will be activated. Port Forwarding Port forwarding allows you to redirect incoming connections to another server or to a different port on the NetWinder. This effect is similar to the creation of virtual services, as we described in the chapter called Virtual Hosts. However, the servers you create with port forwarding do not need to reside on the NetWinder. Instead, you can provide them with another server, such as an NT server, and make them appear to reside on the NetWinder. Chapter 11: Network Settings 11–15 If you click Port Forwarding from the Network configuration page, you will see a screen that looks like this: If you then click Add a new rule, you will see this page: 11–16 NetWinder OfficeServer User Manual You need to provide the following information to create a forwarding entry: ! Protocol. This is either TCP or UDP, and specifies the type of service that you will be forwarding. ! Local IP address. This is the address from which the NetWinder will be forwarding requests. For example, if this value is 192.168.42.12, and someone tries to make a connection to 192.168.42.12, the request will be forwarded to the remote address. ! Local port. This is the port number from which the NetWinder will be forwarding requests. ! Remote IP address. This is the address to which the NetWinder will forward requests. For example, if this value is 192.168.43.15, and someone tries to make a connection to the Local address, the request will be forwarded to 192.168.43.15 instead. ! Remote port. This is the port number to which the NetWinder will be forwarding requests. For some services to work correctly (especially FTP, Windows file sharing and RealAudio), this must be exactly the same number as the Local port. With other services, this number doesn’t matter. Of course, this value must always match the port that the remote service is really running on. When you have finished filling in the above information, press the Submit button to create the forwarding entry. WARNING Port 80 is used to access the web configuration system. Do not forward port 80 of the local host or you may lose the ability to administer or access the NetWinder. Chapter 11: Network Settings 11–17 Domain Name Server (DNS) The Internet DNS service is responsible for converting Internet domain names (such as www.rebel.com) to IP addresses (such as 192.168.42.13). Less often, the DNS is also asked to convert in the other direction - IP addresses to domain names. Your NetWinder provides a DNS so you can publish your own name-to-address mappings. If you already have a DNS server on your network, the NetWinder can be configured to use that instead -- see the Ethernet Settings section. You should only use the NetWinder’s built-in DNS if you don’t already have a DNS on your network. If you will not be using your NetWinder’s DNS, you can safely skip the rest of this section. If you click DNS manager from the Network settings screen, you will see a page that looks like this: 11–18 NetWinder OfficeServer User Manual This is the list of domain names that your NetWinder’s DNS server is currently publishing. The exact process of choosing, registering and publishing domain names is quite complicated, and is beyond the scope of this manual; in fact, entire books have been written on the subject. If you need to publish your own domain names, you should either obtain one of those books, or ask your Internet service provider (ISP) for help. To publish a new domain on your NetWinder’s DNS server, click on Add a new domain. You will see this page: There are two kinds of domains that a DNS server can handle: forward domains and reverse domains. Forward domains have regular names, such as rebel.com; their job is to convert Internet domain names, such as www.rebel.com, into IP addresses. Chapter 11: Network Settings 11–19 Reverse domains do the opposite – they convert IP addresses into domain names. They have unusual names, which are a series of numbers followed by the letters .in-addr.arpa. NOTE: Simply adding a domain on your NetWinder will not make it available to the world. You need to register your domain with the appropriate authorities. If you don’t know how to do this, you should ask your Internet service provider for help. Forward DNS Domains If you create or edit a forward DNS domain, you will see a screen that looks like this: 11–20 NetWinder OfficeServer User Manual A table of values appears. Each line in the table has three parts: ! Name. This is the name that we are publishing. If it ends in a dot (.), it is a complete domain name by itself; otherwise (and much more commonly) it will have this domain’s name appended to it. If you are currently editing the rebel.com domain, then the name server1 will be published as server1.rebel.com. ! Record type. This is the type of name that we are publishing. There are four common types: Address (A), Nameserver (NS), Mail exchanger (MX), and Pointer (PTR). These are discussed later. ! Value. This is the value that the name will point to. Its content depends on the record type: in an A record, the value is an IP address; otherwise, it is another domain name. A forward DNS map will normally contain several A records, one or two NS records, and one or two MX records. However, you can have any number of any of these records. A forward map will never contain a PTR record. Chapter 11: Network Settings 11–21 You can add entries to your DNS map by clicking Add a new record, or edit existing entries by clicking the word Edit next to the appropriate entry. A page like this will appear: A records provide the main purpose of DNS: to convert domain names to IP addresses. They work as you might expect; in the DNS map for rebel.com, server1 A 192.168.42.13 means that server1.rebel.com has the address 192.168.42.13. 11–22 NetWinder OfficeServer User Manual On the other hand, the NS records provide additional information that help the DNS system run smoothly. Normally, the Name field of an NS line is blank; since it has the domain name (e.g. rebel.com) appended automatically, it matches the whole domain, not any particular host. The Value field specifies the domain name of a master name server for this domain. By checking the NS entries in a domain, a program querying the DNS map can determine if a particular domain name server is authoritative — that is, whether it is the master for the domain. Finally, MX entries specify mail exchangers for the domain. This is how mail programs know, for example, that mail for [email protected] should be handled by a computer called server1.rebel.com. As with NS entries, the Name field is blank, and the Value field is a domain name. So, MX server1.rebel.com. means that server1.rebel.com is a mail exchanger for rebel.com. Notice the trailing dot; this is to prevent the name server from appending rebel.com to the name a second time. Chapter 11: Network Settings 11–23 Reverse DNS Domains Reverse DNS domains work in much the same way as forward DNS domains, except that their purpose is to convert IP addresses to domain names, instead of the other way around. The table for reverse DNS maps follows the same format as for forward maps, except this time only two record types should be used: Nameserver (NS), and Pointer (PTR). As with forward maps, the NS entry specifies the name of a domain name server that is authoritative for the domain. Usually, your own DNS will be at least one of these. A PTR record actually does the work of mapping an IP address to a name. The Name field consists of the last part of the IP address, while the Value field is the hostname itself. Since the domain we are defining is an .in-addr.arpa domain, we certainly don’t want the target names to have the current domain appended; thus, we always provide the full domain name, and follow it with a dot. For example, in the 42.168.192.in-addr.arpa domain, the entry 12 PTR server1.rebel.com. means that 192.168.42.12 has the name server1.rebel.com. You can add entries to your DNS map by clicking Add a new record, or edit existing entries by clicking the word Edit next to the appropriate entry. 11–24 NetWinder OfficeServer User Manual PPP Dialer Configuration Your NetWinder’s PPP dialer allows you to connect to the Internet using a modem. If you have enabled Packet forwarding as described in the Ethernet Settings section, other computers on your network can use the NetWinder as a default gateway, and access the Internet through the shared modem device. When you click on PPP dialer from the Network configuration page, you will see a page that looks like this: Chapter 11: Network Settings 11–25 If you click on the words Edit the dialer configuration, you will then see the following page: The options are as follows: ! Init string. This is the command to send to the modem to initialize it. Unless you have problems, the default of ATZ is probably correct. ! User name. This is the login name for your Internet account and is provided by your Internet service provider. ! Password. This is the password to your Internet account and is provided by your ISP. ! Phone number. This is the phone number of your ISP’s modem pool. 11–26 NetWinder OfficeServer User Manual ! Port speed. This is the speed at which to talk to the modem. Note: this is unrelated to the actual modem speed, which is determined automatically. It is almost always best to choose 115200 here, unless you experience problems connecting. ! Flow control. If the NetWinder is sending data too quickly to the modem, the modem needs to stop it somehow. There are two techniques for this. You should almost always use Hardware flow control, which is faster and more reliable. ! Local IP address. This is the address assigned to your NetWinder by your ISP. Usually, you will turn on Dynamic IP support below, and this address will be determined automatically. ! Remote IP address. This is the address of your ISP’s server. Usually, you will turn on Dynamic IP support below, and this address will be determined automatically. ! Dynamic IP support. If this is set to Yes, your NetWinder will request the Local IP address and Remote IP address options from the ISP when it connects. This is almost always the correct thing to do. If you experience problems, you can try entering the values manually and switching this setting to No. ! Dial mode. This determines when the NetWinder will try to connect to the Internet. You have two options: On Demand, which will cause your NetWinder to connect to the Internet whenever someone on your network tries to access the outside world, or Up from...to, which asks the NetWinder to keep the network connection running full time during certain hours of the day. When you have finished changing the dialer settings, click the Save button to make your changes permanent. Chapter 11: Network Settings 11–27 File Sharing Configuration Depending on the exact hardware model you receive, your NetWinder includes several gigabytes (GB or billions of bytes) of available disk space, which you can use for documents, web pages or other kinds of files. There are five services to get files onto your NetWinder: ! FTP. The Internet file transfer protocol is a simple method of copying files from one computer to another. To use this, you will need an FTP client program. You also need to enable the FTP server as described in the section FTP (File Transfer Protocol) Server of the chapter Configuring Network Services. ! E-mail. If you enable your NetWinder’s e-mail server, as described in the section SMTP (E-mail Delivery) Server of the chapter Configuring Network Services, you can use some of your disk space to store your users’ e-mail. ! Windows file sharing. If you enable the Windows File Sharing service described in the Configuring Network Services chapter, your NetWinder will allow you to drag and drop files using Windows 95/98/NT’s Network Neighborhood. Below, we will explain how to publish folders in the Network Neighborhood. ! Macintosh file sharing. If you enable the Apple File Sharing service, your NetWinder will allow you to drag and drop files from the Mac Finder. Below, we will explain how to publish folders that can be seen from a Macintosh. ! UNIX file sharing. If you have UNIX or Linux computers, they can access the NetWinder’s files using the NFS (Network File System) protocol. Below, we will explain how to publish files that can be seen from a UNIX system. 11–28 NetWinder OfficeServer User Manual If you click on Share manager from the Network administration screen, you will see this page: This lists the directories that are being shared with Windows, Macintosh, and UNIX computers, respectively. Chapter 11: Network Settings 11–29 If you click the word Edit next to a share, or click on the words Add a new share, you will see a page like this: The options available are as follows: ! Share name. This is the name of the shared directory as it will appear in Windows Network Neighborhood or Mac Finder. When exporting only to UNIX this name is not required. ! Path to share. This is the NetWinder directory from which you wish to export. Typical names are /usr/doc or /home/ffiddle. ! Export to Windows? If you say Yes here, the directory will show up in the Windows Network Neighborhood. 11–30 NetWinder OfficeServer User Manual ! Export to Macintosh? If you say Yes here, the directory will show up in the Mac Finder, under the Apple menu in Chooser when AppleTalk is selected. ! Export to UNIX? If you say Yes here, the directory will be available to UNIX hosts. ! Access control. If you say Everyone, all computers on your network will be allowed to access the files; in that case, you should be careful to configure your Firewall Settings so that people outside your network cannot access your server. If you specify Only the listed groups, then only the user groups you specify will be allowed to access the server. See the section called Groups for details about creating user groups. ! Additional NFS options. This line is for tweaking NFS options, for those administrators familiar with NFS. Common options are no_root_squash, ro (read-only), and rw (read-write). When you have finished entering the information, click the Save button to create or finish modifying the share. Chapter 11: Network Settings 11–31 Chapter 12 Recovering from Emergencies Your NetWinder is designed to be a very stable and reliable standalone device. However, because you configure it using a web browser, there is a possibility that you might mistakenly change an option that makes the NetWinder inaccessible to your browser. In that case, you will be locked out and you will not be able to revert to the original configuration. You have an emergency. We solve this problem by making it possible to attach a keyboard and monitor to the NetWinder so that you can adjust its network settings without using the network. Backup NetWinder OfficeServer software is also supplied on the Resources CD-ROM supplied with your NetWinder. Logging in to the Console WARNING If your NetWinder is already powered up, you should power it down before attaching a keyboard and monitor. Otherwise, you could damage your NetWinder hardware. When you attach a keyboard (use one with a standard PS/2 connection) and SVGA monitor to your NetWinder and turn on the power, you will see many messages go by on the screen. This is the Linux operating system starting up and is normal. If the network settings have become severely corrupted, some parts of the boot-up process may take a very long time to complete. They are looking for hosts on the network, and will eventually give up and let the boot process continue. Be patient. Chapter 12: Recovering from Emer Emergencies 12–1 When the boot process is complete, the NetWinder displays a screen with a login: prompt. Log in using your root administrator account. Type the word root, and when asked for the password, enter that as well. The default password for root is what you set during the Quick Start procedure. If you did not specify a password during Quick Start, it will be rebel. You should change this password as soon as you log in; you can do this by typing passwd followed by the Enter key. Then simply follow the prompts. Once logged in, you will receive a prompt ending with the number sign (#). That tells you that you’re the administrator. The nwconfig Command To reconfigure the NetWinder’s network settings, you need to use the nwconfig command. Type nwconfig at the number sign prompt and press enter. nwconfig will appear and give you detailed help on the information you need to provide. When finished, press the F10 key to save and exit. Finally, press the orange reset button on the top of your NetWinder twice quickly to reboot it with the new settings. You should now be able to access the web-based configuration system with your web browser once again. 12–2 NetWinder OfficeServer User Manual Emergency Firewall Repair If you corrupt the firewall settings, you can disable the firewall, reboot your NetWinder and repair the settings. To disable the firewall, you need to run the following command from the number sign prompt: chkconfig firewall off press the orange reset button on the top of your NetWinder twice quickly to reboot without the firewall. You should then be able to access the web-based configuration system and correct the firewall settings permanently. Chapter 12: Recovering from Emer Emergencies 12–3 Chapter 13 Technical Support The goal of Rebel.com Inc. is to provide you, our NetWinder customer, access to the tools and information that will help you address your technical issues, either on your own or with the assistance of our technical support specialists. For situations that require the assistance of our technical support staff, users can choose the support option that best suits their needs. Online Support Through online support, you can access technical information about your NetWinder product. From the NetWinder support pages, you can also access our discussion groups to post questions or to obtain suggestions and advice from other users. You will also find a link to our NetWinder Developer’s site as well as links to many other important sites. FAQ Database Our Frequently Asked Questions (FAQ) database is located at http://www.rebel.com/services/nw_faq.htm. This database contains a wide variety of frequently asked questions that provide information about most known issues and their solutions. FTP Site You can download software and operating system updates from the NetWinder FTP site. Our support specialists will guide you to the correct location for file downloading. Chapter 13: Technical Support 13–1 Telephone Support 1-800-661-1612 Rebel.com provides telephone support Monday through Friday from 8:30 AM to 5 PM EST excluding companyobserved holidays. Software support for initial system set-up is covered under your warranty, which is 90 days for software and 1 year for hardware. The 90-day free support period starts on shipping date. After this period you are encouraged to sign up for our annual maintenance agreement program. All trouble will be logged by our Rebel.com Technical Support Services Group. Call 1-800-661-1612 and ask for NetWinder Division. You will be asked for the model and serial number of your NetWinder, as well as a contact name and number, and a brief description of the problem. Your call will be logged, tracked and assigned promptly. Developer Support If you have purchased a NetWinder and need fairly technical assistance, we welcome you to http://www.netwinder.org, which is the focal point of Linux development on the NetWinder products. 13–2 NetWinder OfficeServer User Manual Chapter 14 Licences and Warranties The NetWinder OfficeServer includes software developed by Rebel.com inc. as well as by several third parties. For the full licensing conditions associated with the OfficeServer software, please see the licensing agreement you received packaged with the NetWinder computer. The GNU General Public Licence (www.gnu.org) Version 2, June 1991 Copyright (C) 1989, 1991 Free Software Foundation, Inc. 59 Temple Place, Suite 330, Boston, MA 02111-1307 US The XFree86 Licence (www.xfree86.org) Copyright (C) 1994, 1995, 1996 The XFree86 Project, Inc. All Rights Reserved. Copyright (C) 1996 X Consortium Copyright (C) 1993 The Regents of the University of California. ll rights reserved. Copyright (c) 1996 NVIDIA, Corp. All rights reserved. The BSD Licence (www.bsd.org) Copyright (c) The Regents of the University of California. All rights reserved. The Apache Licence (www.apache.org) Copyright (c) 1995-1998 The Apache Group. All rights reserved. Copyright 1992, 1993, 1994 Henry Spencer Copyright (c) 1992, 1993 The Regents of the University of California. All rights reserved. Chapter 14: Licences and Warranties 14–1 Chapter 15 Standards Compliance Class A NetWinder: Declaration of conformity NetWinder[tm]-A Rebel.com Inc., Suite 1000, 150 Isabella St. , Ottawa, Ontario, Canada K1S 1V7 declares that the product Model Number: NetWinder-A Part Number: NW-XXX-YY-ZZZ-QQ XXA; XX is either 16, 32 or 64, A code is for hard drive YY is either TC, WS, DM, JC, VC, LC, or therefore ZZZ is either NA or INT QQ is software code Product Options: All conforms to the following Product Specifications: Safety: Safety IEC 950:1991 + A1, A2, A3/EN60950:1992 + A1, A2, A3 UL 1950, 3 edition, CSA C22.2 # 950 NRTL/C EMC: CISPR 22:1995/EN 55022:1995 - Class A EN50082-1:1992 - Generic Immunity IEC 801-2:1984 - 4 KV CD, 8 KV AD IEC 801-3:1984 - 3V/m IEC 801-4:1988 - 0.5 KV Signal Lines, 1 KV Power Lines FCC Title 47 CIR, Part 15 Class A ICES-003 Class A, Issue 2 AS/N/S 3548:1992 Class A Supplementary Information: The product herewith complies with the requirements of the following Directives and carries the CE marking accordingly. * the EMC Directive 89/336/EEC (including 93/68/EEC) * the Low Voltage Directive 73/23/EEC (including 93/68/EEC) 1. The Product was tested in a typical configuration with Hardware Rebel.com NetWinder peripherals. 2. This Device complies with Part 15 of the FCC Rules. Operation is subject to the following two conditions: (1) this device may not cause harmful interference, and (2) this device must accept any interference received, including interference that may cause undesired operation. Chapter 15: Standards Compliance 15–1 Class B NetWinder: Declaration of conformity NetWinder[tm] Rebel.com Inc., Suite 1000, 150 Isabella St. , Ottawa, Ontario, Canada K1S 1V7 declares that the product Model Number: NetWinder Part Number: NW-XXX-YY-ZZZ-QQ XXA; XX is either 16, 32 or 64, A code is for hard drive YY is either TC, WS, DM, JC, VC, LC, or therefore ZZZ is either NA or INT QQ is software code Product Options: All conforms to the following Product Specifications: Safety: IEC 950:1991 + A1, A2, A3/EN60950:1992 + A1, A2, A3 UL 1950, 3 edition, CSA C22.2 # 950 NRTL/C EMC: 22:1995/EN 55022:1995 - Class B EN50081-1:1992 - Generic Interfere 1992 Class B EN50082-1:1992 - Generic Immunity IEC 801-2:1984 - 4 KV CD, 8 KV AD IEC 801-3:1984 - 3V/m IEC 801-4:1988 - 0.5 KV Signal Lines, 1 KV Power Lines FCC Title 47 CIR, Part 15 Class B ICES-003 Class B, Issue 2 AS/N/S 3548:1992 Class B Supplementary Information: The product herewith complies with the requirements of the following Directives and carries the CE marking accordingly. the EMC Directive 89/336/EEC (including 93/68/EEC) the Low Voltage Directive 73/23/EEC (including 93/68/EEC) 1. The Product was tested in a typical configuration with Hardware Canada Computing NetWinder peripherals. 2. This Device complies with Part 15 of the FCC Rules. Operation is subject to the following two conditions: (1) this device may not cause harmful interference, and (2) this device must accept any interference received, including interference that may cause undesired operation. 15–2 NetWinder OfficeServer User Manual Federal Communications Commission (FCC) Statement Class A NetWinder This Federal Communications Commission (FCC) statement applies to you if you have model number NetWinder[tm]-A. NetWinder[tm]-A Federal Communications Commission (FCC) Statement NOTE: This equipment has been tested and found to comply with the limits for a Class A digital device, pursuant to Part 15 of the FCC Rules. These limits are designed to provide reasonable protection against harmful interference when the equipment is operated in a commercial environment. This equipment generates, uses, and can radiate radio frequency energy and, if not installed and used in accordance with the instructions manual, may cause harmful interference to radio communications. Operation of this equipment in a residential area is likely to cause harmful interference, in which case the user will be required to correct the interference at his own expense. This device complies with Part 15 of the FCC Rules. Operation is subject to the following two conditions: (1) this device may not cause harmful interference, and (2) this device must accept any interference received, including interference that may cause undesired operation. NetWinder-A Responsible party: Rebel.com Inc., 150 Isabella St., Suite 1000 Ottawa, Ontario, Canada K1S 1V7 Chapter 15: Standards Compliance 15–3 European Community Compliance Statement This product has been tested and found to comply with the limits for Class A Information Technology Equipment according to CISPR 22/European Standard EN 55022. The limits for Class A equipment were derived for typical residential environments to provide reasonable protection against interference with licensed communication devices. WARNING This is a Class A product. In a domestic environment, this product may cause radio interference, in which case the user may be required to take adequate measures. Industry Canada Compliance Statement This Class A digital apparatus meets the requirements of the Canadian Interference-Causing Equipments Regulations. Avis de comformité à la règlementation d’industrie Canada Cet appareil numérique de la classe A respecte toutes les exigences du Règlement sur le matériel brouilleur du Canada. Australian Electromagnet Compatibility (EMC) Regulations This is a Class A product. In a domestic environment, this product may cause radio interference, in which case the user may be required to take adequate measures. 15–4 NetWinder OfficeServer User Manual Class B NetWinder This Federal Communications Commission (FCC) Statement applies to you if you have model number NetWinder[tm]. NetWinder[tm] Federal Communications Commission (FCC) Statement NOTE: This equipment has been tested and found to comply with the limits for a Class B digital device, pursuant to Part 15 of the FCC Rules. These limits are designed to provide reasonable protection against harmful interference in a residential installation. This equipment generates, uses, and can radiate radio frequency energy and, if not installed and used in accordance with the instructions, may cause harmful interference to radio communications. However, there is no guarantee that interference will not occur in a particular installation. If this equipment does cause harmful interference to radio or television reception, which can be determined by turning the equipment off and on, the user is encouraged to try to correct the interface by one or more of the following measures: Reorient or relocate the receiving antenna. Increase the separation between the equipment and the receiver. Connect the equipment into an outlet on a circuit different from that to which the receiver is connected. Consult the dealer or an experienced radio/TV technician for help. This device complies with Part 15 of the FCC Rules. Operation is subject to the following two conditions: (1) this device may not cause harmful interference, and (2) this device must accept any interference received, including interference that may cause undesired operation. NetWinder Responsible party: Rebel.com Inc, 150 Isabella St. Suite 1000 Ottawa, Ontario, Canada K1S 1V7 Chapter 15: Standards Compliance 15–5 European Community Compliance Statement This product has been tested and found to comply with the limits for Class B Information Technology Equipment according to CISPR 22/European Standard EN 55022. The limits for Class B equipment were derived for typical residential environments to provide reasonable protection against interference with licensed communication devices. Industry Canada Compliance Statement This Class B digital apparatus meets the requirements of the Canadian Interference-Causing Equipment Regulations. Avis de comformité à la règlementation d’industrie Canada Cet appareil numérique de la classe B respecte toutes les exigences du Règlement sur le matériel brouilleur du Canada. 15–6 NetWinder OfficeServer User Manual Chapter 16 Hardware Specifications Processor: ! StrongARM (SA110) ! 275 MHz ! 250 Mips Flash Memory: ! 1 MB Flash RAM Hard Drive: ! 4, 6 or 10 GB IDE ! 2.5 inch form factor Memory: ! 32, 64 or 128 MB Connectivity: ! One 10 Base-T ethernet ! One 10/100 Base-T ethernet ! Serial port ! IrDA port (for future use) External Options: ! EPP/ECP parallel port for external CD-ROM, Iomega Zip Drive, or Imation SuperDisk[tm] Chapter 16: Hardware Specifications 16–1 Video: ! VGA, SVGA, XVGA ! 640 x 480 true color (24-bit) ! 800 x 600 true color (24-bit) ! 1024 x 768 high color (16-bit) ! 2 MB video RAM Power Supply: ! North America: external DC adapter 110 VAC @ 60 Hz to 12 VDC @ 1.5 A ! Europe: external DC Adapter 110-250 VAC @ 47 - 63 Hz to 9 VDC @ 2 A Note: Rackmount version uses 3.5" hard drive, and has no IRDA interface. 16–2 NetWinder OfficeServer User Manual Index 10 Base-T ......................... 1–8 Dial-on-Demand .......... 10–28 10/100 Base-T.................. 1–8 direct mode.................. 10–23 Administration Mode ... 2–12 discussion areas .......... 10–18 alias................................ 10–8 discussion forums .......... 6–1, 6–3, 6–4 anonymous access....... 10–17 Apache........................... 10–2 Apple file sharing ....... 10–15 back panel........................ 1–8 backup ............. 4–4, 9–1, 9–3 block a connection ........ 11–8 BOOTP......................... 10–26 cable modem ................. 11–2 cache .............................. 10–3 CGI ................................... 8–5 chain .............................. 11–8 Client for Microsoft Networks ...................... 2–5 disk quota ................ 3–3, 9–4 disk usage ................ 4–3, 9–4 DNS.................. 10–28, 11–18 configuration................ 8–4 domain name................. 11–3 Domain Name Server .. 10–28 dynamic ......................... 11–5 e-mail access ....................... 10–11 address ......................... 4–8 delivery ...................... 10–7 filtering....................... 4–11 command prompt........ 10–29 emergency...................... 12–1 common gateway interface ....................... 8–5 eth0 ................................ 11–2 components ..................... 1–4 configure TCP/IP ............. 2–5 connectors ............... 1–1, 1–8 creating users........... 3–2, 3–4 eth1 ................................ 11–2 ethernet.......................... 11–2 indicators ..................... 1–8 lights............................. 1–6 default gateway ........... 10–27 File and printer sharing for Microsoft Networks ..... 2–5 DHCP ........................... 10–26 file sharing................... 11–28 Chapter 16: Hardware Specifications 16–1 firewall........................... 11–6 formats ................................. v local network .......... 1–8, 2–2, 10–6, 10–26, 10–27, 10–28, 11–6, 11–9, 11–11, 11–12 forum............................ 10–19 locking screws ................. 1–6 forum list ......................... 6–4 Mac Finder................... 11–28 forward incoming mail............................. 4–10 Macintosh .................... 10–15 firewall chain ................ 11–8 FTP....................... 4–7, 10–16 gateway .......................... 11–4 Ghostscript................... 10–25 hard reset ....................... 2–22 mail ................................ 10–7 exchangers................ 11–23 spools ........................... 9–4 master name server ..... 11–23 hostname........................ 11–3 Microsoft Dial-up Adapter......................... 2–4 HTML version...................... v modem ......................... 11–25 HTTP/1.1 ......................... 8–6 monitor .......................... 12–1 IMAP ............................ 10–11 mouse............................... 1–7 index ............................ 10–21 NetWinder Home Page.. 2–10 InfoPlace .................. 3–1, 5–1 Network Control Panel............. 2–3, 2–5, 2–6 installation & configuration................ 2–1 Internet configuration.............. 2–13 connection ....... 1–8, 10–22 keyboard ................ 1–7, 12–1 LAN manager............... 10–12 Linux.............................. 12–1 Linux operating system... 1–1 load .................................. 9–2 I–16–2 I–16–2 NetWinder OfficeServer User Manual Network Intelligence....... 2–7 Network Neighbourhood ...... 10–12, 11–28 NFS .............................. 11–28 NWB file .......................... 4–4 nwconfig ........................ 12–2 On Demand.................. 11–27 packet forwarding ......... 11–4 password..... 2–11, 2–12, 3–3, 4–1, 4–3, 6–3, 6–4, 6–5, 10–14, 11–26, 12–2 personal home page ........ 4–5 policies ........................ 11–10 POP-3 ........................... 10–11 port forwarding ........... 11–15 search engine.......... 7–1, 7–2, 10–20, 10–21, 10–22 security ........................ 11–12 serial input ...................... 1–6 servers............................ 10–1 server-side includes ........ 8–5 PostScript mode .......... 10–23 setting up a Windows 95/98 workstation .................. 2–2 power . 2–1, 15–1, 15–2, 16–2 shutting down ............... 2–21 power functions ............ 2–22 SMB.............................. 10–12 power switch ................... 2–1 SMTP ............................. 10–7 power-down ........ 2–22, 2–23 sound ............................... 1–5 power-on................ 1–6, 2–22 spam............................. 10–10 PPP dialer .................... 11–25 spoofed .......................... 11–8 printer .......................... 10–23 SSI .................................... 8–5 proxy.............................. 10–3 stand ................................ 1–5 publish a new domain ..................... 11–19 static............................... 11–5 Quick Start Disk ...... 2–7, 2–9 Quick Start Floppy.......... 2–7 RAM................................. 9–2 register ............................. 6–2 reset button........... 1–5, 2–22, 12–2, 12–3 restore .............. 4–4, 4–5, 9–3 router ........................... 10–27 Samba .......................... 10–12 status lights...... 1–5, 1–6, 2–1 StrongARM processor ..... 1–1 Subject ............................. 6–5 swap................................. 9–2 system .............................. 9–1 TCP/IP protocol............... 2–4 Telnet........................... 10–29 threads ............................. 6–4 UNIX ............................ 10–16 search........................... 10–20 Chapter 16: Hardware Specifications 16–3 user account ........... 3–1, 3–2, 3–4, 4–1, 4–5, 6–2, 6–4, 8–3, 8–8, 10–8 user directory................... 3–7 user profile....... 4–1, 4–4, 4–9 Users page....... 3–1, 3–2, 3–3, 3–4 ventilation........ 1–5, 1–6, 1–7 virtual hosts ......... 8–1, 11–15 volume control ................ 1–5 Web Page Creator..... 4–5, 4–6 web server....... 4–7, 6–1, 7–1, 8–1, 8–2, 8–3, 8–4, 8–5, 8–6, 10–1, 10–2, 10–18, 10–21, 10–22, 11–9 Windows File Sharing .......... 2–5, 10–12, 11–28 WINS server................. 10–14 wwwthreads ................ 10–18 I–16–4 I–16–4 NetWinder OfficeServer User Manual