1
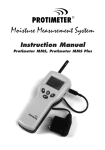
GE
Measurement & Control
Surveymaster®
Protimeter Dual-Function Moisture Meter
Surveymaster
%WME
DRY
ProƟmeter
g
Instruction Manual
INS5365 Rev. A
June 2013
1 Safety Considerations
Caution note for the WME pins - The Pin Moisture
measurement pins are extremely sharp and the instrument
should be handled with due care. The pins should be covered
with the cap provided with the unit when the function is not in
use.
Calibration of unit - The accuracy specifications of the
product are valid for one year after the date of calibration,
and the product requires recalibration after this period.
Only operate the measuring instrument properly, for its
intended purpose and within the parameters specified in
the technical data. Readings from moisture meters are not
definitive but are used to help a professional make informed
judgment to the material’s moisture condition. Conductive
material such as salts, carbon and metal can give false positive
readings.
2 Pin (WME) Mode Operation
In Measure mode, the Surveymaster uses electrical conductance
principles to measure the moisture level of the material between
two electrodes. The instrument has integral pin electrodes that
may be firmly pressed onto surfaces, or it may be used with
various auxiliary moisture probes, including Heavy Duty Pin
Probe, Deep Wall Probes, a Hammer Electrode (optional) or an
EIFS probe (optional).
Remove the needle cap from the top of the Surveymaster and
press
to switch it on.
Protimeter Surveymaster
Page 1
2 Pin (WME) Mode Operation (cont.)
Check which operational mode the instrument is in by looking at
the letters in digital display %WME indicates the Surveymaster
is in Measure mode, REL))) indicates the meter is in Search
mode. If the instrument is in Search mode, press
to switch
to Measure mode. %WME will appear in the display.Push the
pins firmly onto the surface of the material at the required point
of measurement.Read the moisture level value from the display
and note the moisture condition of the material from the color
coded LED scale.
Note: Measurements taken in wood are actual % moisture
content values, whereas readings taken in material other
than wood are % Wood Moisture Equivalent (%WME)
values - see Pin Mode Interpretation for more details.
3 Using Auxiliary Moisture Probes in Pin
(%WME) Mode
The Surveymaster is supplied with a Heavy Duty Moisture
Probe and lead for taking measurements at points that cannot be
reached easily with the integral electrode pins. To use, connect
the Moisture Probe jack plug to the socket on the right side of
the instrument and push the Probe pins onto the surface at the
chosen point of measurement.
A pair of Deep Wall Probes can also be used for taking readings
at depth in walls and floors. To use, drill two clearance holes of
diameter 6mm (1/4'') roughly 40mm (1 1/2'') apart to the
required depth. Connect the Deep Wall Probes to the instrument
and push the two probe rods into the clearance holes. Hold them
firmly against the base of the holes and take the reading.
The Protimeter Hammer Electrode can also be used to make
measurements deep into hard and softwoods.
Page 2
Protimeter Surveymaster
3 Using Auxiliary Moisture Probes in Pin
(%WME) Mode (cont.)
Note: Deep Wall Probes may be used to investigate high
readings that may have been obtained in Search mode.
Deep Wall Probes may be used to determine the moisture
profile through a structure by increasing the depth of the
clearance holes incrementally.
4 Pin (%WME) Mode Interpretation
Measure mode readings are precise and specific to the area of
contact between the electrode tips. Actual percent moisture
content (%mc) values are measured in wood products. Wood
Moisture Equivalent (WME) values are measured in materials
other than wood.
The WME measurement is the theoretical %mc value that would
be attained by a piece of wood in moisture equilibrium with the
material under investigation at the point of measurement. As the
critical %mc levels of wood are known, WME values may be
used directly to establish if the material is in a dry, borderline or
damp condition as indicated by the color coded LED scale.
5 Instrument Calibration Check
A calibration check device (Calcheck) is supplied with the
instrument for checking the Measure mode calibration. Hold the
Calcheck across the electrode pins as shown. A correctly
calibrated Surveymaster will read 18.2 ±1.0. Contact your
supplier if the instrument is reading incorrectly.
Protimeter Surveymaster
Page 3
6 Search Mode (REL)
When used in Search mode (REL), the Surveymaster is a
moisture detector. Search mode readings give, in relative terms,
the moisture condition up to 3/4” beneath the surface of
materials. This mode of operation is ideal for making rapid
surveys of solid walls and floors and to pinpoint areas of
concern that may justify a more extensive investigation. The
Search mode may also be used as an alternative to the Measure
mode when it is impractical or undesirable to push electrode
pins into surfaces. Consider, for example, taking moisture
readings behind ceramic tiles in shower cubicles or in walls
covered by quality wallpapers where pinholes would not be
acceptable. Surface moisture (such as condensation on an
otherwise dry wall) has little effect on Search mode readings.
Conductors (other than water) within the material may cause
high Search mode readings. Make sure the flat surface on the
back of the meter is in full contact with the material to be tested.
It is recommended that users place the meter onto different areas
to measure and do not slide the meter across surfaces.
Note: Sliding the meter can cause premature wear to the back of
the meter.
7 Reference Mode
In both Pin and Search mode, GE's patent pending Reference
Mode can be used. Measure the material until the meter’s
reading is stable then press
for 2 seconds. This will store the
reading until the mode changes of the meter turns off. Now all
reading taken after will be displayed as normal, but below you
will see a second reading that shows you if the material is
measured above or below the original reading. Reference mode
can be useful when trying to establish what materials are above
or below a point of reference or dry standard. See page 6 for
further information.
Page 4
Protimeter Surveymaster
8 Operating Surveymaster
Switch On:
Press the
ON/OFF button.
The unit turns on, with the LCD displaying all the segments and
sweeping the LED bar graph.
Mode Change:
Press
mode button to change to the REL (Search) mode
from WME (Pin), and vice versa.
WME (pin)
Protimeter Surveymaster
REL (Search)
Page 5
Measurements:
In both modes, the numeric measurement and color LED will be
shown as well as the “DRY” (green) or “AT RISK” (yellow) or
“WET” (red), based on the measurement shown.
7-16.9 DRY (Green), 17-19.9 AT RISK (Yellow), 20-99.9 WET (Red)
7-16.9 DRY (Green), 17-19.9 AT RISK (Yellow), 20-99.9 WET (Red)
Page 6
Protimeter Surveymaster
Reference Mode of Measurement:
Note: For application information, see the section “Using the
Pin (WME) Mode.”
In either mode, take the first measurement which needs to be
taken as reference. While the first reading is displayed on the
screen, press and hold the
button for 2 seconds to enter the
Reference Mode. The display will be similar to the one shown
on the next page.
To return to the normal measurement mode, press
again.
Settings:
Press and hold the
button and switch on the unit by
pressing
. Hold both the buttons until the Surveymaster
displays the version.
Release both buttons while it shows the version number. The
unit enters Settings Mode.
Protimeter Surveymaster
Page 7
DRY, AT RISK and WET Settings:
The first screen to appear in Settings is the DRY, AT RISK and
WET setting screen.
This screen sets whether the indication on the display needs to
be switched ON or OFF. When it is ON, the moisture condition
will be displayed on the screen. When it is OFF, no indication is
displayed on screen.
Use the
button to turn ON/OFF the settings
If the unit detects no key press for 2 seconds in the Setting
screen, it moves to the next setting.
Pressing the
button, after you have entered the desired
setting, will save the setting and move the screen to the next
setting.
Page 8
Protimeter Surveymaster
Buzzer ON/OFF Settings:
Once the DRY, AT RISK and WET settings are entered, the next
setting turns the Buzzer ON or OFF.
To change the settings, press the
button.
If the unit detects no key press for 2 seconds in the Setting
screen, it moves to the next setting.
Pressing the
button, after you have entered the desired
setting, will save the setting and move the screen to the next
setting.
Protimeter Surveymaster
Page 9
Backlight Settings:
Once the Buzzer settings are entered, the next setting turns the
Backlight ON or OFF.
To change the settings, press the
button.
If the unit detects no key press for 2 seconds in the Setting
screen, it moves to the next setting.
Pressing the
button, after you have entered the desired
setting, will save the setting and move the screen to the next
setting.
Page 10
Protimeter Surveymaster
Auto Off Time Settings:
When Auto Off is set, the unit will shut down automatically at a
specified time between 1 and 6 minutes, if there is no key press
detected within the set time.
For example, if the Auto Off time is set as 1, then the unit will
automatically shut down after a minute when no key is pressed.
The duration will change based on the set time of 1- 6 minutes.
If the auto off time is set to be "0", then the unit will not
automatically turn off. A user must manually turn it off by
pressing and holding the
button for 5 sec.
Turn off time can be set by pressing the
saved by pressing
button, and can be
.
After you save this setting, the unit will exit to the measurement
screen.
Protimeter Surveymaster
Page 11
Battery Low Indication:
Whenever the battery is low, there will appear a battery low
indication symbol on the screen (bottom right). This indicates
that the battery is low and should be replaced soon. The unit will
continue to perform in battery condition within the specified
accuracy, and turns off when the battery reaches the limit.
Holding / Freezing the Reading:
While measuring, if the reading needs to be frozen for any
observation, press
during measurement. A text "HOLD"
will be displayed on the screen.
Page 12
Protimeter Surveymaster
9 Battery Replacement
A 550mAh battery will last continuously for more than 20 hours
for a Surveymaster in operation. A Battery Low indication on
the screen indicates that the battery needs to be changed in a
short time.
Remove the screw assembled to fix the battery lid on the back
side of the unit
Slide the battery lid downwards applying a little pressure with
the thumb to open the battery compartment.
Remove the battery, and replace. Care must be taken to ensure
that the polarity is correct as below. Place the battery inside the
compartment.
Protimeter Surveymaster
Page 13
10 Technical Specifications
Operating Conditions:
Operating temperature range: 0°C to 50°C
Humidity: 0 to 90% RH, non-condensing
Measurement Specifications:
Moisture measurement:
For integrated and remote pin probes:
Strong and reliable integrated pins, with a cap to protect
Pin measurement range (% MC in wood/%WME) 7.9 to 99% (readings over 30% are relative)
Non-Invasive moisture measurement:
Measurement depth - up to 3/4" (19mm) deep,
70 to 999, no effect on reading by surface moisture
11 Physical Specifications
Power:
9V- Alkaline 550mAh,
Battery low indication on LCD
Size:
19cm x 6.5cm x 5cm (7.5" x 2.5" x 2")
Gross Weight (without battery)
~240g
Maximum Needle Depth
For WME pins: 0.4" (10mm)
Buzzer
Audible buzzer for key tone and measurement indication,
user configurable
Regulatory Compliance
CE, RoHS, ETL
Page 14
Protimeter Surveymaster
USA
1100 Technology Park Drive
Billerica, MA 01821-4111
Tel: 1-800-833-9438
Web: http://www.ge-mcs.com/en/moisture-and-humidity/
moisture-meters.html
Ireland
Sensing House
Shannon Free Zone East
Shannon, Co. Clare
Tel: +353 61 470200