1
Our Focus - Your Peace of Mind
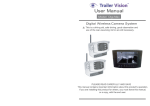
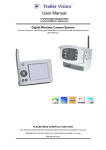
Digi-Max2
Digital Wireless Camera System
Installation and User Manual
PLEASE READ CAREFULLY AND SAVE
This manual contains important information about this
product’s operation. If you are installing this product for others,
you must leave this manual, or a copy, with the end user.
Version 1.0
CONTENTS
INTRODUCTION .............................................................................. 2
KEY FEATURES ....................................................................... 2
IMPORTANT SAFETY PRECAUTIONS ................................... 2
INSTALLING THE CAMERA ........................................................... 5
With fixed power source ............................................................ 5
Using the trigger cable............................................................... 5
With battery pack (not included in the package) ........................ 5
INSTALLING THE MONITOR .......................................................... 6
GETTING TO KNOW THE CAMERA .............................................. 7
GETTING TO KNOW THE MONITOR ........................................... ..8
CONFIGURING THE MONITOR ..................................................... 10
Scan frequency ........................................................................ 10
Camera setting (CAM 1 – 4) .................................................... 10
Pairing camera(s) ..................................................................... 11
Brightness ................................................................................ 12
Monitor and Camera Version ................................................... 12
Factory Reset ........................................................................... 12
Setting SCAN Mode ................................................................. 13
Setting QUAD Display .............................................................. 13
TROUBLE SHOOTING ................................................................... 15
ABOUT DIGITAL WIRELESS TECHNOLOGY .............................. 16
PRODUCT SPECIFICATION........................................................... 17
1
INTRODUCTION
KEY FEATURES:
Digital Wireless Camera System, enabling up to 200m of secure video
transmission
Wireless Monitor with 7” LCD screen, video display from reversing etc. camera
up to VGA@25FPS (single camera); or QVGA@20fps (multiple cameras)
Supports up to 4 cameras, with revesing-camera set to CH1 (triggered)
Wireless monitor support CH auto-switch functions, with a trigger cable
connected between the monitor and the reversing light circuit; whenever
reverse gear is selected the monitor will auto-switch to CH1 for rear view and
switch back to previously displayed CH when reverse gear is disengaged
Camera operates between 12V~48V, and the Monitor operates at 6V~48V.
The system can be installed to any type of vehicle.
Individual Camera Brightness Setting is available/selected via the monitor
Video from each camera can be display by the monitor in normal mode or
mirror mode (the “M” sign will be displayed when in mirror mode).
Monitor supports IR remote control for remote/easy operation.
IMPORTANT SAFETY PRECAUTIONS
Damage caused by non-compliance with this User Manual will void the
warranty. We will not assume any liability for damages to items, or persons caused by
improper handling, or non-compliance with the safety notices! Any warranty claim
will be null and void in such cases.
1. Do not drop, puncture or disassemble the camera, or monitor; otherwise
the warranty will be voided.
2. Avoid all contact with water, and dry hands before using the monitor.
3. Never tug on the power cords.
4. Do not expose the monitor to high temperature, or leave it in direct sunlight.
Doing so may damage the monitor, or cause temporary malfunction.
5. Use the monitor with care; only light pressure is needed to operate the buttons.
6. For your own safety, avoid using the camera, or power off when there is a
storm, or lightning.
7. Remove the monitor power adapter during long periods between use.
8. Use only the accessories and power adapters supplied by the manufacturer.
9. To meet the regulations pertaining to parental responsibility, keep the devices
out of the reach of infants.
10. Ensure that power cables, do not get crushed or damaged by sharp edges.
2
Products with CE Marking comply with
EMC Directive (2004/108/EC); Low
Voltage Directive (73/23/EEC);
R&TTE(1999/5/EC); ROHS Directive
FCC Compliance Statement: This
device complies with Part 15 of the
FCC rules. Operation is subjected to
the following two conditions: (1)
this device may not cause harmful interference,
and (2) this device must accept any interference
received, including interference that may cause
undesired operation.
(2011/65/EU) issued by the Commission of the
European Community. Compliance with these
directives implies conformity to the following
European Norms:
EMC: EN 301 489
LVD: EN 60950
Radio: EN 300 328
FCC/CE WARNING
This equipment has been tested and found to comply with limits for a Class B digital device, pursuant to Part 15 of
the FCC rules and ETSI(EN) 300328. These limits are designed to provide reasonable protection against
harmful interference in residential installations. This equipment generates, uses, and can radiate radio frequency
energy, and if not installed and used in accordance with the instructions, may cause harmful interference to radio
communications. However, there is no guarantee that interference will not occur in a particular installation. If this
equipment does interference to radio or television equipment reception, which can be determined by turning the
equipment off and on, the user is encouraged to try to correct the interference by one or more of the following
measures: -Reorient or relocate the receiving antenna.-Move the equipment away from the receiver.-Plug the
equipment into an outlet on a circuit different from that to which the receiver is connected.-Consult the dealer or an
experienced radio/television technician for additional suggestions. You are cautioned that any change or
modifications to the equipment not expressly approved by the party responsible for compliance could void your
authority to operate such equipment.
DISPOSAL
If the camera system no longer functions or can no longer be repaired, it must be disposed of
according to the valid statutory regulations. Disposal of spent batteries/accumulators: You are
required by law (Battery Ordinance) to return all spent batteries and accumulators. Disposing of
spent batteries/accumulators with common household waste is prohibited!
Batteries/accumulators that contain hazardous substances are marked with the symbols on the side. These
symbols indicate that it is prohibited to dispose of these batteries/accumulators in the household waste. The
abbreviations for the respective heavy metals are: Cd=cadmium, Hg=mercury, Pb=lead. You can return spent
batteries and accumulators that can no longer be charged to the designated collection points in your community,
outlets or wherever batteries or accumulators are sold. Following these instructions will allow you to fulfill the
legal requirements and contribute to the protection of our environment!
3
INSTALLING THE CAMERA
With a fixed power source:
1. For reversing, choose a location at the rear of the vehicle/trailer, ideally in
the middle and as high up as possible (to give the best view).
2. Screw the camera mounting bracket to the desired location. Attach the
camera to the bracket, making sure the camera & bracket are secure.
3. Connect the power cable with 'U' shaped terminals to the power source
(12V to 48V).Connect the red cable to the positive supply and the black
cable to the negative supply.
Note: If you are not sure which is the positive or negative supply, please try connecting one
way and then try the other way, if the camera doesn’t work. Connecting the camera the 'wrong
way' will not damage the camera, it just won't operate while connected the wrong way.
4. Start the vehicle engine/switch on the lights etc. to power the camera. The
camera power indicator will be illuminated when the camera is powered.
Note: If automatic display of the rear camera is required, for a multi-camera system, the CH1
camera should be utilised for reversing and the trigger connection connected to the monitor
(see below).
5. Turn on the monitor. The screen should display the image transmitted
from the camera automatically. If it doesn’t, please refer to the Pairing
Camera(s) section to pair the camera with the monitor.
4
Using the trigger cable:
Utilising the trigger cable enables the Channel 1 camera to be
automatically displayed when reverse gear etc. is engaged.
1. Connect the trigger cable ring-shaped connectors to the fuse/
electrical circuit of the reversing lights.
2. Connect the other end of the trigger cable to the monitor.
3. Turn on the monitor and select reverse gear (with ignition turned on).
4. The screen should display the image of the vehicle rear view
automatically. If it doesn’t, please refer to the 'Pairing Camera(s)' section, to
pair the camera to the monitor.
Note: If [NO SIGNAL] is displayed on the monitor, at any time while
reversing, immediately stop the vehicle, until the image is displayed, or it
is safe to continue.
With battery pack (available separately):
1. Attach the camera to the battery.
2. Fix the camera and the battery to the vehicle.
3. Press the power button, on the battery pack, to power the camera.
5
INSTALLING THE MONITOR
1.
2.
3.
4.
5.
Screw the antenna to the cconnector at the top of the monitor.
Secure the windscreen mount to the rear of the monitor (a dashboard mount is
also available, not included).
Secure the suction mount to the windscreen, ideally resting the base of the
monitor on the vehicle dashboard.
Adjust the windscreen mount arm to achieve the desired viewing angle (the arm
is extremely stiff, but does adjust).
Connect the cigarette adaptor to the DC power jack of the LCD monitor.
IMPORTANT: ONLY use the adaptor provided in the package.
7.
8.
Plug the power unit into the cigarette power source, turn on the ignition and
press the Power button to turn on the monitor.
Position the antenna in an upright orientation to achieve the best reception.
6
GETTING TO KNOW THE CAMERA
1.
2.
3.
4.
5.
6.
7.
8.
9.
Camera Lens
Pairing Button
Mounting Bracket
IR LEDs
Light Sensor
Antenna
Power cord
Pairing LED Indicator
Power LED Indicator
7
GETTING TO KNOW THE MONITOR
Antenna
Pairing
Power Button
Indicator
Power
Indicator
Trigger Cable
Power
Adaptor
Monitor Function Buttons
Buttons
5
Function
1
2
4
3
6
7
Remote Controller
1
(Menu Mode) [Cursor Up] /
(QUAD View Mode) [Hot key CH1]
2
(Menu Mode) [Cursor Right] /
(QUAD View Mode) [Hot key CH2]
3
(Menu Mode) [Cursor DOWN] /
(QUAD View Mode) [Hot key CH3]
4
4
(Menu Mode) [Cursor Left] /
(QUAD View Mode) [Hot key CH4]
6
5
(Menu Mode) [Menu / Enter Button]
6
(SCAN Mode) [SCAN Button]
7
(QUAD Mode) [QUAD Button]
8
5
7
1
2
3
Monitor Display Icons
Signal Indicator
Channel Indicator
Status Indicator
Signal Indicator shows signal strength as below:
Signal Level
Indicator
VGA Frame Rate
Perfect
5~10 fps
Good
3~5 fps
Fair
2~4 fps
Low
0~1 fps
Zero
0 fps
Channel Indicator displays the current/active
camera. Status Indicator ('No Signal') appears if the
monitor does not receive a signal from the camera.
9
QVGA Frame Rate
15~30 fps
12~20 fps
8~15 fps
0~4 fps
0 fps
CONFIGURING THE MONITOR
Press the Power button to switch the monitor ON. Press and hold to switch
the monitor OFF .
Press
Use
the
(MENU button) to enter/exit the Main menu.
(Left / Right / Up / Down) buttons to navigate through menu
items and change the settings.
Scan frequency
Setup the time interval for the camera channels to be displayed in Scan
mode (3, 8 or 12 seconds).
1. Press
(MENU button) and to choose the SCAN function
to choose the scan frequency. You can configure the system to
2. Press
perform scanning every 3 seconds / 8 seconds / 15 seconds.
Camera setting (CAM 1 – 4)
Turn ON/OFF the specified camera or set to Mirror to mirror the camera image. If
the camera is set OFF, the camera image won’t show on the monitor even it is
supplied with power.
(MENU button) and
to choose CAM 1.
1. Press
to turn ON/OFF CAMERA 1 or MIRROR the camera image.
2. Press
3. Repeat step 1 to 2 for cameras 2 ~ 4.
Note: If the camera(s) is installed upside down, please configure the camera to
'MIRROR' to acquire the normal screen image.
10
Pairing camera(s)
Complete the Pairing process if an additional/new camera is utilised, or if the monitor
doesn’t display a camera; use this process to pair the camera with the monitor.
IMPORTANT:
1. To complete the Pairing process, ensure the camera is powered (reverse gear
.may need to be selected).
2. Complete the Pairing process ONLY when a camera cannot be displayed,
or when an extra/new camera(s) is utilised.
3. Before pairing the camera, make sure that the camera power cable is
connected to a power source.
4. Only assign one camera to one channel. Channel memory will be overwritten
if another camera is assigned to the same channel.
Example: To pair a new camera to channel 3, please follow the steps below:
1. Press
(MENU button) to highlight channel 3 in the 'Pair CAM' function
and start the pairing process.
2. System will count down within 60 seconds, system message as shown:
3. Within the 60-second count down, press the Pair Button on the camera
power cable.
11
4. Once pairing is completed, the monitor will display the camera image.
5.
Press the menu key again to save the pairing action and return to the
main menu.
Brightness
Set up the brightness of the cameras for different environments (inside/
outside etc); each camera can be configured individually.
1. Press
(MENU button) and
2. Press
3. Use
(MENU button) to enter the sub menu
to choose the monitor or camera 1~4, and press
to choose the Brightness function
to adjust the
brightness.
4. Choose EXIT and press
(MENU button) to return to the main menu.
Monitor and Camera Version
Use this feature to check the monitor and camera version number when it is
necessary.
To check the monitor and camera version number, press
(MENU button)
and
to display the monitor and camera version.
Factory Reset
Restore the monitor to the factory default
settings.
1. Press
(MENU button) and
to choose the Factory option.
12
2. Press
(MENU button) to restore the default settings as below.
Scan
3S
CAM1
ON
CAM2
CAM3
ON
ON
CAM4
ON
Pair CAM
1234
Brightness
Monitor
08
CAM1
08
CAM2
08
CAM3
08
CAM4
08
Setting SCAN Mode
Press the SCAN button to enter the SCAN mode and display camera
channels automatically.
(Left / Right) to turn all available
channels ON.
2. Use
(SCAN button) to enter SCAN Mode.
3. The camera images will be displayed periodly in scan mode. Unavailable
channels will be displayed as a blank screen.
1. Press
(MENU button) and use
To exit SCAN display, please press
to the specified channel.
(Left / Right / Up / Down) to go
Setting QUAD Display
Press the QUAD button to enter the QUAD mode and display all the camera
images on the monitor.
(Left / Right) to turn all available
channels ON.
2. Use (QUAD button) to enter QUAD Mode.
3. All camera images will be display on the monitor at the same time. Unavailable
channels will be displayed as a blank screen.
1. Press
(MENU button) and use
(Left / Right / Up / Down) to go
To leave QUAD display, please
press to the specified channel.
13
IMPORTANT:
1. This function is for multi camera use/display. Before setting QUAD display,
make sure that all cameras are paired to assigned channels. Please refer to
the Pair CAM section for Pairing instructions.
QUAD display will be restored to single camera display when a direction
button (Left / Right / Up / Down) is pressed.
2. TURN ON all available channels PRIOR to entering QUAD mode.
Note: In QUAD display, the Camera Pairing function is not available.
14
TROUBLE SHOOTING
This section offers some helpful information to overcome most of the problems
you may encounter. We hope this section can help you to enjoy a pleasant
setup.
Problem
Possible Causes
Solution
System Message
shows “NO Signal” on
monitor screen
Low signal or unstable
signal
No power supply to
corresponding
camera(s)
Check lighting circuit &
power is available at the
camera. Check camera
wiring, making sure the
polarities are correctly
connected.
Channel/Monitor is not
paired with camera
To complete Pairing,
select reverse, hand brake
ON, press the camera
pairing button. See
[Advanced Operation –
Pairing Camera] section as
a guide.
Antenna directional
limitation
Adjust camera antenna and
monitor position.
Strong radio signal near by
away
Position WiFi router etc.
from the camera and/or
monitor.
Press [OK] button, go to
menu; enable the
channel(s). See [Advance
Operation – Setting Auto/
Manual Scan Sequence] for
detail.
Camera image is
missing during manual
scan
Scan channel(s) been
set OFF
Dim / over bright image
on monitor screen
Monitor brightness
incorrectly adjusted.
Press [OK] button, go to
menu, enter [System
Setup]; adjust [Brightness].
See [Advance Operation –
System Setup] for detail.
Image Frozen and
receiver function buttons
do not respond
System crash
Use a pin etc to press
[Reset Switch] to restore
the system.
For further technical support please email:
[email protected]
15
ABOUT DIGITAL WIRELESS TECHNOLOGY
This section offers some helpful information to solve most of the problems
you may encounter.
About 2.4GHz Digital Wireless Signal
This innovative digital wireless solution integrates advance Frequency Hopping Spread
spectrum (FHSS) technology. This technology greatly/completely reduces the interference
from other devices using the same radio frequency (2.4GHz), e.g. WiFi, Bluetooth, Zigbee,
cordless phone...etc. You now can enjoy high quality wireless images without flickering
or 'noise'. However, weaker signal (lag or still image) can be observed from time to time,
depending on the environment where the system is installed. The system is compliant
with FCC part 15.247,ETSI(EN)300 328, audio / video signals transmitted 150m or further,
line of sight. However, line of sight installation is not usual, or required for good system
operation. Factors affecting transmission include microwave ovens, or other high
frequency electromagnetic waves. Reinforced concrete walls, large scale metal products
and objects should, ideally, not be located near to the camera or the monitor. Water also
creates a signal obstacle, as it absorbs the signal, so should be avoided. People etc.
passing through the tranmission area may also cause unstable signal quality. However,
in 'normal use' as a reversing, or interior camera, the system should offer excellent
performance and provide a clear and interference free image/view.
How to improve the wireless signal quality?
If possible, remove any obstacles between camera and monitor that might reflect/absorb
the signal. If the wireless signal strength is low try to position the camera in a location that
is above/below the vehicle chassis etc, rather than behind it. Additional 'Extension' aerials
are also available.
Why Image Compression?
In order to provide a secure and interference free signal, this digital wireless system
utilises a 2Mb frequency-hopping bandwidth. Different from traditional 2.4GHz analogue
wireless systems, the digital wireless signal is compressed and then transmitted as Motion
JPEG (MJPEG) format. By digitising and compressing the raw analogue data, the
bandwidth is used more efficiently and securely.
16
PRODUCT SPECIFICATION
Camera
Image Sensor
Optical
Night Vision
Tranceiver
Power Source
Waterproof
Monitor
LCD Panel
Transceiver
Type:
Resolution:
Lens Type:
Lens Focal Length:
View Angle:
1/4” CMOS
640*480
Glass
2.5MM
Horizontal:87°±2°; Vertical:62°±2°
Total IR LED:
LED Angle:
LED Wave Length:
EDS Activate LUX:
Identified Range:
Frequency:
Modulation:
Transmission Power:
Antenna Gain:
Communication distance:
Power Supply:
Current Consumption:
IPxx
10 PCS
120°
850nm
1-8LUX
5-8m
2.402-2.480GHZ
GFSK
14±2DBm
3dBi Ant
200M
DC 12-24V
IR ON:220mA; IR OFF:150mA
IP66
Size
Resolution
Luminance:
Back Light
Frequency:
Modulation :
Sensitivity
7.0
480*234
200cd/
LED
2.405-2.480GHZ
GFSK
-82DBm
NTSC/PAL
MPEG-4
640*480
1Vp-p/75ohm
12-25 FPS
130°
140°
TV Format
Video
LCD View Angle
Interface
Compression
Resolution
Video Output Level
Frame Rate
Up /Down:
Left/Right:
DC IN
17
12-24V