1
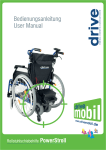
Safety Procedures Contents 1. Introduction 2. Safety Procedures 3. Parts Description 4. Installation Instructions 5. Disassembly and Transportation 6. Battery Charging and Care 7. Operating the U-Drive 8. Inspection and Maintenance 9. Troubleshooting Ensure the U-Drive is installed as far to the front of the wheelchair frame as is possible. When connecting / disconnecting the battery from the U-Drive or the charger make sure both the power to the charger and U-Drive joystick are switched off. Ensure the U-Drive is secured in transit. It is also recommended that the battery is disconnected. Ensure that the battery is charged only with the battery charger supplied with the UDrive. Using another battery charger may cause damage or injury. 10. Specification 11. Warranty Introduction The U-Drive system is designed to attach to a user propelled wheelchair to turn it in to a U-Drive. The U-Drive system can either be removed or put in to neutral to allow the user to propel the wheelchair manually. Whilst the U-Drive has been EMC tested, it may be susceptible to certain types of electromagnetic waves. Avoid close proximity to mobile phones, commercial broadcast towers and emergency services’ radios. Other household appliances are not known to pose any such risk. If involuntary movement occurs, switch off the U-Drive and report this to your dealer. The U-Drive system is designed to work in conjunction with specific wheelchairs. The list of wheelchairs your model will fit is available from Drive Medical. The U-Drive should not be used when it is snowing or during heavy rain. This may cause damage to the U-Drive. The U-Drive should not be exposed to damp conditions or direct sunlight. The U-Drive is controlled by the wheelchair user independently. Ensure the strap is hooked on to the left hand wheelchair push handle and is taught to prevent the U-Drive from dropping when driving over pot holes, etc. The U-Drive uses a 24V 12ah battery pack, which uses 2x 12V 12ah sealed lead acid batteries (supplied). Before Driving The U-Drive is manufactured by Drive Medical Ltd and is CE marked. Drive Medical Ltd is an ISO 9001 and ISO 13485 certified Medical Device Manufacturer. U-Drive IFU The user needs to be familiar with the use and operation of this U-Drive before driving. Ride on the pavement and pedestrian areas only. Never ride on motorways or dual carriageways. Only use roads to cross to other side of the pavement. Page 1 Issued 10/11 Be aware of traffic when crossing or using roads. Use extreme caution when driving your UDrive in busy areas such as shopping malls. Do not drive the U-Drive under the influence drink or drugs, or when you are tired. Be careful when using the U-Drive in low light. It has not been designed for use at night. Before using the U-Drive in busy or hazardous environments, familiarise yourself with the operation of the U-Drive. Practice in an open and safe area which is free from hazards and other people. Use a low speed for your initial practice. Always remain in the wheelchair seat whilst using the U-Drive. Do not stand on the footplate. Do not drive on roads with large drops or potholes. Whilst Driving Do not use your U-Drive on surfaces that are muddy, gravelly, bumpy, narrow, snowed over, icy; or on towpaths near to canals which are not guarded. Do not use your U-Drive outside when it is raining, snowing, misty or windy. Do not make erratic turnings on your UDrive. The U-Drive is not suitable for carrying passengers. Do not use the U-Drive to carry heavy goods. Do not use a mobile phone or other wireless communication devices whilst driving. Always stop somewhere suitable and switch off the U-Drive before using the phone. Do not set in freewheel mode when driving, especially on a gradient. Ensure that the UDrive’s automatic brakes are applied before use. Bear in mind driving motions such as accelerating, stopping, turning, reversing, and the effect of gradients. Slow down when driving on gradients. Always lean forward when climbing a steep gradient. Do not travel on gradients exceeding those stated in the specification. Most access ramps are 5º which is a suitable incline for the U-Drive. U-Drive IFU When climbing an incline, try to keep your U-Drive moving. If you must stop, start up again slowly, and then accelerate cautiously. When driving down an incline, do so slowly and in the forward direction only. If your UDrive starts to move faster than you anticipated or desired, allow the chair to come to a complete stop by releasing the joystick. Push the joystick slightly forward and continue travelling slowly down the incline. When climbing an incline, do not zigzag or drive at an angle up the face of the incline. Always drive your wheelchair straight up the incline. This greatly reduces the possibility of a tip or a fall. Page 2 Do not exceed the weight limit of the UDrive. Issued 10/11 Parts Description Photo 1 5 4 2 1. 1 3 6 Joystick Bracket (Includes 2 silver clamps and 1 black joystick receiver) Photo 2 2. Joystick Control 3. U-Drive Wheelchair Bracket 4. U-Drive Unit 5. Battery Pack 6. Measuring Bar 7. Charger (not shown) Installation Instructions Note: Installation should be completed by a Drive Medical Specialist Dealer. Photo 3 1. Joystick Installation Using a hex key, undo the sections of the clamp. Attach the two silver sections around the armrest tubing, ensuring the section with the tapped holes is inwards. (Photo 1). Position the black joystick receiver against the outside silver clamp. Turn until the tubing of the receiver is horizontal. Reattach the screws using the hex key. (Photo 2). Loosen the knob on the side of the tubing and slide the tubing attached to the joystick inside the receiver tubing. Position the joystick as required by the user and secure by retightening the knob, as shown in the photo 3. U-Drive IFU Page 3 Issued 10/11 2. Bracket Installation 3. U-Drive Unit Installation Position the U-Drive unit behind the wheelchair and ensure that the motors are in the DRIVE position. Operate the lever marked “Press or Pull” and push down the yellow handle on the other lever to retract the round pegs on the horizontal bar on the front of the unit (as shown below). Install both brackets at the front of the horizontal tube of the wheelchair frame, ensuring the white nylon part is pointing towards the rear of the chair (as shown by the photo above). When installing the brackets: a. Ensure the white nylon section of the brackets are inside the wheelchair frame and point towards the rear of the frame b. Ensure the brackets do not interfere with the front castor wheels. Test this by swivelling the castor forks and checking all parts are clear of the brackets. Pull back the wheelchair and position so that the mounting bar slides in to the brackets on the wheelchair frame (as shown below). c. Ensure that the brackets are positioned exactly opposite each other so the UDrive mounting bar is straight and easy to push in to the bracket. If required, use the measuring bar to check the brackets are correctly positioned before securing on the tubing. U-Drive IFU Page 4 Issued 10/11 Operate the lever marked “Press or Pull” (as shown below). The yellow handle will automatically rise and the unit should now be locked in position. 4. Battery Pack Installation Plug the lead from the joystick in to the UDrive as shown below. If required, secure the joystick cable to the wheelchair using cable ties. To install, slot the battery pack in to the receiver on the U-Drive and the pack will automatically lock in to place. Disassembly and Transportation The disassembly procedure is essentially the assembly procedure in reverse. 1. Loop the strap over the push handle and adjust so that it is taught, as shown below. (The strap is used to prevent the U-Drive from dropping in to pot holes, etc) Remove the battery pack by lifting the pack up by the handle whilst pressing the grey button marked PRESS. 2. Unloop the strap from the push handle. 3. Pull out the joystick connector from the U-Drive. 4. Operate the PUSH or PULL lever and press the yellow handle down. 5. Push the wheelchair away from the UDrive. The wheelchair can now be folded. The U-Drive can be lifted using the handle at the front and the chassis at the rear. U-Drive IFU Page 5 Issued 10/11 Notes: 6. The charger’s LED will illuminate orange to indicate the batteries are charging. The charging duration is about 8 hours. To ensure optimum performance a 12-hour charge is recommended. 7. The orange LED will turn green when charging is complete. 8. Turn off the charger, disconnect the power cord and the round plug from the battery pack. The battery supplied with the U-Drive is classified as safe for air travel by compliance with IATA special provision A67. The battery pack has a handle to make it easy to carry. Battery Charging and Care The U-Drive can either be charged through the joystick (if the battery pack is installed) or the battery pack (if this is removed). Follow the procedure below to charge using the joystick: 1. Switch the U-Drive off. 2. Plug the charger’s power cord into the mains. 3. Plug the charger’s round connector in to the socket located underneath the front of the joystick unit. 4. Switch on the plug socket. 5. The charger’s LED will illuminate orange to indicate the batteries are charging. The charging duration is about 8 hours. To ensure optimum performance a 12-hour charge is recommended. 6. The orange LED will turn green when charging is complete. 7. Turn off the charger, disconnect the power cord and the round plug from the joystick unit. Follow the procedure below to charge using the battery pack: 1. Switch the U-Drive off. 2. Remove the battery pack from the U-Drive as described previously. 3. Plug the charger’s power cord into the mains. 4. Plug the charger’s round connector in to the socket located by the handle of the battery pack. 5. Switch on the plug socket. U-Drive IFU Page 6 Suggestion 1. Do not disconnect the charger cord if charging is not completed. The battery life will be seriously shortened or decayed if the battery is repeatedly used without being fully charged. Therefore be sure to charge the battery fully every time. 2. Always complete the charging until the LED light turns green. NEVER stop charging before it is complete. 3. When fully charged, the battery charger will still trickle charge the battery to ensure optimum range. 4. If you do not use your powerpack for a long time, it should be charged at least every week to keep the battery in a fully usable condition. 5. The ambient temperature will affect charging time. Charging time will be longer in the winter. 6. After charging, do not leave the charger socket plugged in to the battery pack or joystick, as this will cause a power drain on the battery pack and temporarily reduce its range. 7. The batteries carry a twelve-month manufacturer's warranty. This warranty only covers issues relating to manufacturing faults, and not faults relating to failure to recharge the batteries as instructed above. Issued 10/11 Attention: Please follow the rules below to avoid accidents while charging. 1. Only use the supplied charger, and recharge the battery to its full capacity every time. You may damage the battery if you use a charger which is not to the correct specification. 2. Never disassemble or modify the charger. 3. Please charge in a well-ventilated space where there is no direct exposure to the sunlight. Do not charge in surroundings where it is humid, raining or dewy. 4. Do not charge in temperatures less than -10°C or higher than +50°C as the charger may not work well & batteries may become damaged. Warning 1. Keep away from flammable objects while charging as this may lead to fire or battery explosion. 2. Do not smoke while charging as the battery may release hydrogen gas. Always charge your battery in a well-ventilated space. 3. Never connect or disconnect the plug or cord with wet hands whilst charging. Do not connect or disconnect the plug or cord when they are wet, it may lead to electric shock. The LED will also illuminate GREEN if the charger is switched on but not connected to the batteries. Batteries Do not expose the battery pack to temperatures below -10º or above 50ºC when charging or storing. The batteries are maintenance free and there is no need to inspect the battery liquid or refill with water. You are required to charge the batteries on a regular basis. Even if the powerpack is not used, it should be charged at least once a week. The battery supplied with the U-Drive is classified as safe for air travel by compliance with IATA special provision A67. Charging the Batteries Using the charger supplied, the charging duration is about 8 hours. However, to ensure optimum performance we recommend a 12-hour charge. We also recommend that the batteries are not charged for more than 24 hours. Charger The charger supplied has an LED which changes colour depending on its status: If the LED is lit ORANGE then the charger is switched on and charging If the LED is lit GREEN then the charger is switched on and has finished the bulk of its charging and the batteries can be used. However, we recommend that you leave the charger charging for a couple of hours after the green LED has lit. This will maintain and probably increase the capacity of your batteries. U-Drive IFU Page 7 Issued 10/11 Operating the U-Drive 3. Increase Speed / Profile. Press this button to increase the maximum speed of the wheelchair. Battery Gauge 4. Decrease Speed / Profile. Press this button to decrease the maximum speed of the wheelchair. On / Off Button Horn Speed / Profile Indicator Increase Speed / Profile Decrease Speed / Profile Joystick Control Panel (see previous diagram) 5. Speed / Profile Indicator. This shows the maximum speed of the wheelchair. The more LEDs are lit, the faster the maximum speed. The wheelchair can be configured to use drive profiles. However, this is not included by default. For more information about drive profiles, contact your dealer. If the speed indicator ripples, this means the wheelchair is locked. To unlock / lock the wheelchair: Switch the wheelchair on Charger and Programmer socket Joystick Control Panel shown above Hold down the on/off button for 1 second (lock only) Deflect the joystick forwards until the control system bleeps HOW TO OPERATE THE U-DRIVE 1. Joystick. The primary function of the joystick is to control the speed and direction of the wheelchair. The further you push the joystick from the centre position the faster the wheelchair will move. When you release the joystick the brakes are automatically applied. Deflect the joystick backwards until the control system bleeps 2. On / Off button. The on/off button applies power to the control system electronics, which in turn supply power to the wheelchair’s motors. Do not use the on/off button to stop the wheelchair unless there is an emergency. (If you do, you may shorten the life of the wheelchair drive components). The battery gauge shows you that the wheelchair is switched on. It also indicates the operating status of the wheelchair. 6. Horn. Press this button to sound the horn. The horn will stop when you release the button. U-Drive IFU Page 8 Release the joystick. There will be a long bleep and the wheelchair will be unlocked / locked. 7. Battery Gauge. This shows the battery power level of the wheelchair. The more LEDs that are lit, the more power is left in the battery. The LEDs will be lit constantly when the wheelchair is operating normally. Issued 10/11 If the LEDs on the battery gauge are stepping up (i.e. the number of LEDs lit quickly increases then resets to 1), the battery charger is connected and the wheelchair drive inhibited. 6 Bar If the battery gauge is flashing slowly then the wheelchair is operating normally, but the batteries need recharging as soon as possible. If the battery gauge LEDs are flashing rapidly this indicates a fault with the wheelchair. If you have a problem with your wheelchair consult the table below. If the problem persists after you have followed the advice herein then restarted the wheelchair, contact your dealer. 1 Bar 2 Bar 3 Bar 4 Bar 5 Bar U-Drive IFU The battery needs charging or there is a bad connection to the battery. Check the connections to the battery. If the connections are good, try charging the battery. The left hand motor has a bad connection. Check the connections to the left hand motor. The left hand motor has a short circuit to a battery connection. Contact your service agent. The right hand motor has a bad connection. Check the connections to the right hand motor. 7 Bar 8 Bar 9 Bar 10 Bar 10 Bar + Speed The wheelchair is being prevented from driving by an external signal. The exact cause will depend on the type of wheelchair you have, one possibility is the battery charger is connected. A joystick fault is indicated. Make sure that the joystick is in the centre position before switching on the control system. A control system fault is indicated. Make sure that all connections are secure. The parking brakes have a bad connection. Check the parking brake and motor connections. Make sure the control system connections are secure. An excessive voltage has been applied to the control system. This is usually caused by a poor battery connection. Check the battery connections. This is where the Speed Indicator and 10 bars are lit. A communication fault is indicated. Make sure that joystick cable is securely connected and not damaged. The right hand motor has a short circuit to a battery connection. Contact your service agent. Page 9 Issued 10/11 Extendable Control Bracket Your Drive U-Drive is equipped with an extendable controller bracket. To extend or retract the bracket, first slacken the knob located by the armrest and then reposition the joystick as required, Retighten the knob to secure. levers are put back in to Drive mode, after the wheelchair or U-Drive has been pushed. Please see the photo below. Braking Electromagnetic braking: Release the joystick and the electromagnetic brakes will automatically operate and the U-Drive will stop. At first this can be a strange sensation which is why we recommend an initial practice session with the U-Drive as described in the Safety Notice. WARNING! Putting the motors in to freewheel mode also disengages the brakes. When on a gradient never switch the U-Drive in to freewheel mode as the electromagnetic brakes will not be applied. This may result in injury. The motors can be put in to freewheel mode to allow the wheelchair or U-Drive to be pushed. To put the U-Drive in to freewheel mode, turn the red lever as shown in the photo overleaf. Repeat for the other red lever. Ensure that the U-Drive IFU Page 10 Issued 10/11 Inspection and Maintenance The wheelchair fitted with U-Drive should be inspected, serviced and maintained in line with manufacturer recommendations. Failure to do so could result in damage and/or injury. d. The U-Drive should be cleaned periodically, especially if you tend to drive on sand, gravel or other adverse environments. Use a soft, wrung dry cloth to keep your UDrive clean and dust free. Use a damp cloth and mild detergent to clean the U-Drive. a. Weekly Checking Check the following items weekly or before driving. If you find anything abnormal contact your Drive Medical Dealer for further inspection or advice. Motor. Check for any abnormal noise and electromagnetic brakes work correctly. Warning Do not use a hose pipe or splash water directly on to the U-Drive. Do not use petrol, solvents or vaporising solutions as these may damage body panels. Do not use wax Ensure the charger is unplugged and the U-Drive switched off before cleaning the U-Drive. Freewheel Lever. Ensure they works correctly. Horn. Check the horn sounds when button pressed. Tyres. Check tyre tread depth and for any signs of damage such as cracking. e. Locking Mechanism. Ensure the docking mechanism operates correctly and locks the UDrive securely in place. b. Service Record To ensure your U-Drive is correctly serviced take it to your Drive Medical dealer for regular service. We recommend that U-Drives are serviced at least annually, and your dealer may charge a fee for this. A copy of the service record is at the back of this handbook. Even if the U-Drive has not been used, it should still be serviced annually. c. Cleaning Batteries and Tyres For information on the batteries, please read Battery Charging section. Storage Ensure the U-Drive is stored with the seat set in the forward position, the U-Drive switched off and charger disconnected. Ideally the joystick controller should also be unplugged to prevent battery drain. Store the U-Drive in environments which are free from direct sunlight and water or moisture. f. Moving About 1. Switch off the U-Drive and dismount from the U-Drive. 2. Lift the U-Drive by the chassis only. 3. For your safety ask for help if required. You will need two or more people when moving or lifting the U-Drive as a whole. Never lift the U-Drive by the body panels, as this can cause injury or damage. Tyre condition will be affected by how you drive the U-Drive and what terrain it is driven on. U-Drive IFU Page 11 Issued 10/11 Troubleshooting Specification Problem: Limited range or low power showing Causes: Remedy: Insufficient charge Ensure batteries are charged for in batteries at least 12 hours. Weak batteries Replace batteries if error persists. PowerStroll Size: 88 (L) x 40 (W) x 39cm(H) 34.6”(L) x 15.7”(W) x 15.3”(H) Battery Weight: 8.8kg (19lb) Base Weight: 21.7kg (48lb) Total Weight: 30.5kg (67lb) Controller: PG Drives VR2 Rear Wheel: 22.5cm dia x 10cm (9” x 4”) Anti-tip Wheel: 10cm (4”) Battery: 12V 12ah x 2 Charger: 1.8A 24V Motor: 200W 4700RPM Cruising Range: 6 miles (10km) Weight Capacity: 115kg (18 stone) Climbing Angle: 6º Problem: Batteries not charging Causes: Remedy: No mains power Try another mains socket Loose connections Check all connections Blown fuse Check fuse in charger and plug Charger fault Contact dealer. Problem: U-Drive will not drive Causes: Remedy: Freewheel levers Ensure freewheel levers are in disengaged DRIVE position Low battery power Recharge batteries Charger plugg ed in Remove charger and restart Circuit breaker Reset circuit breaker Joystick held whilst Release joystick and do not hold; U-Drive is switched restart U-Drive on Problem: Only one wheel turns Causes: Remedy: Only one freewheel Ensure both freewheel levers are lever engaged in DRIVE position Problem: Excessive motor noise Causes: Remedy: Freewheel levers Ensure both freewheel levers are not fully engaged in DRIVE position Problem: Battery gauge flashes Symptoms: Remedy: The U-Drive has Ensure the joystick is released diagnosed a fault and switch the U-Drive off and on. Recharge batteries if error persists. Refer to fault diagnosis guide U-Drive IFU Page 12 Manufacturer Details Drive Medical Ltd, Ainley’s Industrial Estate, Elland, GB HX5 9JP. www.drivemedical.co.uk Issued 10/11 Warranty To improve the safety and lifespan of your UDrive, it is recommended that you have it serviced on a regular basis. Recommended Service Schedules for U-Drives are available to service agents. There is a comprehensive twelve-month warranty from the date on which your new UDrive is delivered. The warranty covers the UDrive for replacement parts during this period. For more detail, please see the warranty conditions below: 1. 2. 3. Any work or replacement part installation must be carried out by an authorised Drive Medical dealer / service agent. To apply the warranty should your U-Drive require attention please contact the outlet from which you purchased the U-Drive. Should any part of the U-Drive require repair or full or part replacement, as a result of a manufacturing or material defect within the warranty period, parts will be supplied free of charge. 5. 6. 8. The expected service life of the U-Drive is 6 years in a single user environment if the device is used and maintained in line with Drive recommendations. In multi-user environments (such as communal housing) service life may be reduced. 9. Under normal circumstances, no responsibility will be accepted where the U-Drive has required assistance as a direct result of: a. the U-Drive part not having been maintained in accordance with the manufacturers recommendations c. the U-Drive or part having been damaged due to neglect, accident or improper use Any repaired or replaced parts will be covered by the balance of the warranty period on the U-Drive. d. the U-Drive or part having been altered from the manufacturer’s specification or repairs having been attempted before the dealer is notified Parts replaced after the original warranty has expired will be covered by a threemonth warranty. Consumable items supplied will not generally be covered during the normal warranty period unless such items require repair or replacement clearly as a direct result of a manufacturing or material defect. Such items include (among others): upholstery and tyres. U-Drive IFU The above warranty conditions apply to a brand new U-Drives. Ex-demonstration UDrives supplied directly by Drive Medical carry a six-month warranty period. If you are unsure whether your U-Drive is covered contact your dealer. b. failure to use the manufacturer’s specified parts Note: The guarantee is not transferable. 4. 7. Page 13 In the event of your U-Drive requiring attention, please contact your service agent / dealer and give all relevant details so they can act quickly. The manufacturer reserves the right to alter without notice any weights, measurements or other technical data shown in this manual. All figures, measurements and capacities shown in this manual are approximate and do not constitute specifications. Issued 10/11 APPENDIX : SERVICE RECORD 1 2 3 4 5 6 YEAR 1 2 3 4 5 6 YEAR Service Dates Service Dates Controller Locking Mechanism On/off switch Functions correctly Joystick Electrics Braking Connections condition Recharge point Test run Batteries Forwards Levels Reverse Connections stop Discharge test Left turn Wheels & Tyres Right turn Wear Slope test Pressure Over obstacles Motors List Items repaired Wiring Noise Connections Brake Brushes U-Drive IFU Page 14 Issued 10/11 ………………………………………………………..………………………….…………………………….…………………………….... U-Drive IFU WARRANTY REGISTRATION Please detach from the line (left) and type or print to fill out the form, and send to: UK: Drive Medical Ltd, Ainley's Industrial Estate, Elland, UK HX5 9JP USA:Drive Medical, 99 Seaview Boulevard, Port Washington, NY 11050 Serial #: .......................................................... Date Purchased ……….… / ……….… /……….… Owner Name .....................………………………………………………………………………………………………………………. Address .................……………………….…………………………………………………………………………………………………. City ………………………………………………… Zip or Postcode ………………………………………... Additional Required Owner Information Please indicate your understanding of your powered product by completing the following information ………………My dealer has instructed me on how to operate my U-Drive. I have read and fully understand: ……………… Owner’s Handbook, especially the sections on operating instructions, safety guidelines, maintenance and battery charging instructions. ………………. U-Drive Warranty Battery Instructions – only sealed lead acid or gel cell type batteries should be used. Batteries must also be sealed, deep cycle and maintenance free or battery will hinder vehicle performance and void the warranty. Signature ………………………………………………..Dealer Name……………………………………………………………….. Telephone ………………………………………………Dealer Phone…………………………………………………………….… Email ……………………………………………………………………………………………………………………………………………………. Comments:…………………………………………………………………………………………………………………………………............. ………………………………………………………………………………………………………………………………………………………………… ………………………………………………………………………………………………………………………………………………………………… ………………………………………………………………………………………………………………………………………………………………… Page 15 Issued 10/11