1
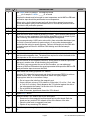
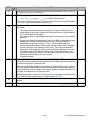
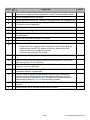
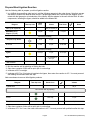
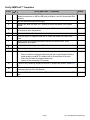
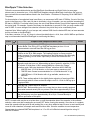
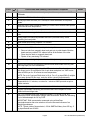
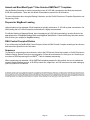
Procedure & Checklist 20 kb Template Preparation Using BluePippin™ Size-Selection System Before You Begin To perform this procedure, you must have the PacBio® DNA Template Prep Kit 2.0 (3 kb to 10 kb) and have reviewed the User Bulletin - Guidelines for Preparing 20 kb SMRTbell™ Templates. This procedure can be used to prepare size-selected libraries from 5 μg of sheared and concentrated DNA using the BluePippin Size-Selection system. If preparing larger amounts of DNA, scale all the reaction volumes proportionally (e.g., if the input amount of DNA is double the amount set forth in this procedure, then double all the reaction volumes listed in the tables). If a BluePippin Size-Selection system is not available, see the Procedure & Checklist - 20 kb Template Preparation Using AMPure® PB Beads. Note that size selection using the AMPure PB beads does not completely remove all short SMRTbell templates. As a result, the average subread lengths may be shorter. Consistent and efficient recovery of your sample is critical to successful SMRTbell™ template preparation. If using this protocol for the first time, we strongly recommend that you process a control sample first. Using the DNA shearing methods and subsequent AMPure PB bead purification steps described below, you should recover approximately 50%-80% of your input DNA (by mass). Typical yields, from pre-purified DNA (where smaller fragments are already eliminated as a result of the shearing process) are between 80-100%. Insert Size Target Insert Size Range 10 kb to 20 kb 15 kb to 20 kb (size-selected using BluePippin system) Sheared and Concentrated DNA Amount Ligation DNA Damage Repair 5 μg Blunt Required Fragment and Concentrate DNA Before shearing your DNA sample, be sure to have assessed the quality and purified the sample according to the User Bulletin - Guidelines for Preparing 20 kb SMRTbell™ Templates. Note that prior to shearing, gentle mixing is recommended. This recommendation will hold for larger insert sizes, however, for 20 kb libraries no damage has been observed as a result of vortexing. Use a Covaris® g-TUBE® device to shear your DNA sample. The most up-to-date guidance on how to use the g- TUBE device, along with recommended centrifuges and centrifugation speeds, can be found in the g-TUBE device user manual available for download from the Covaris website. Also, be sure to review the recommendations listed in the User Bulletin - Guidelines for Preparing 20 kb SMRTbell™ Templates. Depending upon the quality of your sample, approximately 20% to 50% sample loss is to be expected as a result of the shearing and concentration process. Therefore, be sure to have sufficient amounts of starting DNA in order to have at least 5 μg of sheared and concentrated DNA (140 ng/μL) for the Damage Repair reaction. Page 1 PN 100-286-000-02 (10/05/2013) STEP 1 Concentrate DNA Notes Add 0.45X volume of AMPure® PB magnetic beads. _____ μL of sample X 0.45X = _____ μL of beads Note that the beads must be brought to room temperature and all AMPure PB bead purification steps should be performed at room temperature. Before using, mix the bead reagent well until the solution appears homogenous. Pipette the reagent slowly since the bead mixture is viscous and precise volumes are critical to the purification process. 2 Mix the bead/DNA solution thoroughly. 3 Quickly spin down the tube (for 1 second) to collect the beads. 4 Allow the DNA to bind to beads by shaking in a VWR® vortex mixer at 2000 rpm for 10 minutes at room temperature. Note that the bead/DNA mixing is critical to yield. After vortexing, the bead/DNA mixture should appear homogenous. We recommend using a VWR vortex mixer with a foam microtube attachment (see the Guide’s Overview section for part numbers). If using other instrumentation, ensure that the mixing is equally vigorous. Failure to thoroughly mix the DNA with the bead reagent will result in inefficient DNA binding and reduced sample recoveries. 5 Spin down the tube (for 1 second) to collect beads. 6 Place the tube in a magnetic bead rack until the beads collect to the side of the tube and the solution appears clear. The actual time required to collect the beads to the side depends on the volume of beads added. 7 With the tube still on the magnetic bead rack, slowly pipette off cleared supernatant and save in another tube. Avoid disturbing the bead pellet. If the DNA is not recovered at the end of this Procedure, you can add equal volumes of AMPure PB beads to the saved supernatant and repeat the AMPure PB bead purification steps to recover the DNA. 8 Wash beads with freshly prepared 70% ethanol. Note that 70% ethanol is hygroscopic and should be prepared FRESH to achieve optimal results. Also, 70% ethanol should be stored in a tightly capped polypropylene tube for no more than 3 days. – Do not remove the tube from the magnetic rack. – Use a sufficient volume of 70% ethanol to fill the tube (1.5 mL for 1.5 mL tube or 2 mL for 2 mL tube). Slowly dispense the 70% ethanol against the side of the tube opposite the beads. Let the tube sit for 30 seconds. – Do not disturb the bead pellet. – After 30 seconds, pipette and discard the 70% ethanol. 9 10 Repeat step 8 above. Remove residual 70% ethanol and dry the bead pellet. – Remove tube from magnetic bead rack and spin to pellet beads. Both the beads and any residual 70% ethanol will be at the bottom of the tube. – Place the tube back on magnetic bead rack. – Pipette off any remaining 70% ethanol. 11 Check for any remaining droplets in the tube. If droplets are present, repeat step 10. Page 2 PN 100-286-000-02 (10/05/2013) STEP Concentrate DNA Notes 12 Remove the tube from the magnetic bead rack and allow beads to air-dry (with the tube caps open) for 30 to 60 seconds. 13 Calculate appropriate volume of Elution Buffer. _____ ng X 0.5 / (____ng/μL) = _____ μL of Elution Buffer needed The minimum DNA concentration required to proceed to the next step (End-Repair) is 140 ng/μL with preferred mass of at least 5 μg. 14 Add the Pacific Biosciences® Elution Buffer volume (calculated in step 13 above) to your beads. – Thoroughly resuspend beads by vortexing for 1 minute at 2000 rpm. If the beads appear over-dried or cracked, let the Elution Buffer sit on the beads for 2 to 3 minutes then vortex again. – Spin the tube down to pellet beads, then place the tube back on the magnetic bead rack. – Perform concentration measurements. Verify your DNA concentration using a Nanodrop® or Qubit® quantitation platform. If the DNA concentration is estimated to be equal to or below 12 ng/μL, a Qubit system reading is required. When performing a Qubit system reading, ensure that your sample is within the range of the Qubit kit you are using. For proper concentration calculations, incorporate the dilution factor (used when diluting your sample) to be within range of the Qubit kit and the dilution factor when diluting your sample with the working solution. The latter part of this dilution factor can be calculated automatically by the Qubit system. – Discard the beads. 15 Perform qualitative and quantitative analysis using a Bioanalyzer® instrument. Note that the Bioanalyzer instrument has different kits in its offering and the appropriate kit, based on insert size, should be used. Dilute the samples appropriately before loading on the Bioanalyzer chip so that the DNA concentration loaded falls well within the detectable minimum and maximum range of the assay. Refer to Agilent Technologies’ guides for specific information on the range of the specific kit you might be using. Note that typical yield, at this point of the process (i.e. post-shearing and after one 0.45X AMPure PB bead purification), is approximately 50%-80%. 16 The sheared DNA can be stored for up to 24 hours at 4ºC or at -20ºC for longer duration. 17 Actual recovery per μL and total available sample material: __________________ Page 3 PN 100-286-000-02 (10/05/2013) Repair DNA Damage Use the following table to repair any DNA damage. If preparing larger amounts of DNA, scale the reaction volumes accordingly (i.e., for 10 μg of DNA scale the total volume to 100 μL). Do not exceed 100 ng/μL of DNA in the final reaction. 1. In a LoBind microcentrifuge tube, add the following reagents: Reagent Sheared DNA Tube Cap Color Stock Conc. Volume Final Conc. __ μL for 5.0 μg DNA Damage Repair Buffer 10 X 5.0 μL 1X NAD+ 100 X 0.5 μL 1X ATP high 10 mM 5.0 μL 1 mM dNTP 10 mM 0.5 μL 0.1 mM DNA Damage Repair Mix 2.0 μL H2O Notes __ μL to adjust to 50.0* μL 50.0 μL Total Volume *To determine the correct amount of H2O to add, use your actual DNA amount noted in the Notes column. 2. Mix the reaction well by pipetting or flicking the tube. 3. Spin down contents of tube with a quick spin in a microfuge. 4. Incubate at 37ºC for 20 minutes, then return the reaction to 4ºC for 1 to 5 minutes. Repair Ends Use the following table to prepare your reaction then purify the DNA. Reagent DNA (Damage Repaired) End Repair Mix Tube Cap Color Stock Conc. 20 X Total Volume Volume Final Conc. 50 μL 2.5 μL 1X 52.5 μL Notes 1. Mix the reaction well by pipetting or flicking the tube. 2. Spin down contents of tube with a quick spin in a microfuge. 3. Incubate at 25ºC for 5 minutes, return the reaction to 4ºC. Page 4 PN 100-286-000-02 (10/05/2013) STEP Purify DNA 1 Add 0.45X volume of AMPure PB beads to the End-Repair reaction. (For detailed instructions on AMPure PB bead purification, see the Concentrate DNA section). 2 Mix the bead/DNA solution thoroughly. 3 Quickly spin down the tube (for 1 second) to collect the beads. Do not pellet beads. 4 Allow the DNA to bind to beads by shaking in a VWR vortex mixer at 2000 rpm for 10 minutes at room temperature. 5 Spin down the tube (for 1 second) to collect beads. 6 Place the tube in a magnetic bead rack to collect the beads to the side of the tube. 7 Slowly pipette off cleared supernatant and save (in another tube). Avoid disturbing the bead pellet. 8 Wash beads with freshly prepared 70% ethanol. 9 Repeat step 8 above. 10 Notes Remove residual 70% ethanol and dry the bead pellet. – Remove tube from magnetic bead rack and spin to pellet beads. Both the beads and any residual 70% ethanol will be at the bottom of the tube. – Place the tube back on magnetic bead rack. – Pipette off any remaining 70% ethanol. 11 Check for any remaining droplets in the tube. If droplets are present, repeat step 10. 12 Remove the tube from the magnetic bead rack and allow beads to air-dry (with tube caps open) for 30 to 60 seconds. 13 Elute the DNA off the beads in 30 μL Elution Buffer. Mix until homogenous, then vortex for 1 minute at 2000 rpm. 14 Optional: Verify your DNA amount and concentration using a Nanodrop or Qubit quantitation platform, as appropriate. 15 Optional: Perform qualitative and quantitative analysis using a Bioanalyzer instrument with the DNA 12000 Kit. Note that typical yield at this point of the process (following End-Repair and one 0.45X AMPure PB bead purification) is approximately between 80-100% of the total starting material. 16 The End-Repaired DNA can be stored overnight at 4ºC or at -20ºC for longer duration. 17 Actual recovery per μL and total available sample material: __________________ Page 5 PN 100-286-000-02 (10/05/2013) Prepare Blunt Ligation Reaction Use the following table to prepare your blunt ligation reaction: 1. In a LoBind microcentrifuge tube (on ice), add the following reagents in the order shown. Note that you can add water to achieve the desired DNA volume. If preparing a Master Mix, ensure that the adapter is NOT mixed with the ligase prior to introduction of the inserts. Add the adapter to the well with the DNA. All other components, including the ligase, should be added to the Master Mix. Reagent DNA (End Repaired) Tube Cap Color Stock Conc. Volume Annealed Blunt Adapter (20 μM) Final Conc. Notes 29.0 μL to 30.0 μL 20 μM 1.0 μL 0.5 μM Mix before proceeding Template Prep Buffer 10 X 4.0 μL 1X ATP low 1 mM 2.0 μL 0.05 mM Mix before proceeding Ligase 30 U/μL 1.0 μL 0.75 U/μL H2O __ μL to adjust to 40.0 μL Total Volume 40.0 μL 2. 3. 4. 5. Mix the reaction well by pipetting or flicking the tube. Spin down contents of tube with a quick spin in a microfuge. Incubate at 25ºC overnight. Incubate at 65ºC for 10 minutes to inactivate the ligase, then return the reaction to 4ºC. You must proceed with adding exonuclease after this step. Add exonuclease to remove failed ligation products. Reagent Tube Cap Color Stock Conc. Ligated DNA Volume 40 μL Mix reaction well by pipetting ExoIII 100.0 U/μL 1.0 μL ExoVII 10.0 U/μL 1.0 μL Total Volume 42 μL 1. Spin down contents of tube with a quick spin in a microfuge. 2. Incubate at 37ºC for 1 hour, then return the reaction to 4ºC. You must proceed with purification after this step. Page 6 PN 100-286-000-02 (10/05/2013) Purify SMRTbell™ Templates STEP Purify SMRTbell™ Templates 1 Add 0.45X volume of AMPure PB beads to the exonuclease-treated reaction. (For detailed instructions on AMPure PB bead purification, see the Concentrate DNA section). 2 Mix the bead/DNA solution thoroughly. 3 Quickly spin down the tube (for 1 second) to collect the beads. Do not pellet beads. 4 Allow the DNA to bind to beads by shaking in a VWR vortex mixer at 2000 rpm for 10 minutes at room temperature. 5 Spin down the tube (for 1 second) to collect beads. 6 Place the tube in a magnetic bead rack to collect the beads to the side of the tube. 7 Slowly pipette off cleared supernatant and save (in another tube). Avoid disturbing the bead pellet. 8 Wash beads with freshly prepared 70% ethanol. 9 Repeat step 8 above. 10 Notes Remove residual 70% ethanol and dry the bead pellet. – Remove tube from magnetic bead rack and spin to pellet beads. Both the beads and any residual 70% ethanol will be at the bottom of the tube. – Place the tube back on magnetic bead rack. – Pipette off any remaining 70% ethanol. 11 Check for any remaining droplets in the tube. If droplets are present, repeat step 10. 12 Remove the tube from the magnetic bead rack and allow beads to air-dry (with tube caps open) for 30 to 60 seconds. 13 Elute the DNA off the beads in 31 μL of Elution Buffer. Vortex for 1 minute at 2000 rpm. Page 7 PN 100-286-000-02 (10/05/2013) BluePippin™ Size Selection Follow the recommendations below and the BluePippin User Manual and Quick Guide (to www.sagescience.com) to size-select your ~20 kb SMRTbell templates using the BluePippin instructions. Be sure you have reviewed the recommendations listed in the User Bulletin - Guidelines for Preparing 20 kb SMRTbell™ Templates. For size selection of an optimized large insert library, we recommend a BP start of 7000 bp. If most of the fragments in the library are >15kb, and you plan to size select >4 μg of template, you may consider increasing the BP start to 10000 bp. For shorter inserts, use a size cut-off well below the size of most of the fragments to obtain the typical yield. For example, if peak of the library size distribution is around 10-12kb, you may consider a BP start of 4000. If a more stringent size selection is desired, the yield is likely to be considerably lower. Important Note: When loading 2 μg or less per well, subtract 3000 from the desired BP start, as lower amounts tend to run faster on the BluePippin. If the library contains <0.5 μg, or if there is a broad size distribution to <4 kb, then a 0.40X AMPure purification step is recommended instead of BluePippin to avoid losing the library. STEP Prepare DNA Samples for Each Lane Notes 1 If necessary, dilute up to 5 μg SMRTbell template into a final volume of 30 μL Elution Buffer. Run 500 ng to 5 μg SMRTbell templates per lane. It’s not recommended to start with less than 500 ng per lane. 2 Bring the Loading Solution to room temperature, then add 10 μL of the Loading Solution to the 30 μL DNA sample. The Loading Solution is viscous so pipet slowly to ensure it is completely transferred into the DNA sample. Mix thoroughly by gently pipetting; do not vortex. Spin briefly to collect the contents at the bottom. 3 Follow the manufacturer’s recommendations to set up a run protocol, calibrate the optics, and start your run. When setting up the run protocol, select the “0.75% DF marker S1 high-pass 4-10kb” cassette definition, choose the “Range” selection mode, and enter the desired “BPstart” value from 4000-10000 bp: – 4000 BP start: 10-12 kb libraries, or for lower mass or maximum yield – 7000 BP start: General recommendation for >12 kb libraries with >2 μg – 10000 BPstart: >15 kb libraries with >4 μg available, maximum size selection NOTE: These settings adjust for the slightly faster migration of lower input DNA amounts and achieve a lower molecular weight cut-off of ~10 kb for 500 ng up to 5 μg input DNA. 4 Enter BP end = 50000 bp for all samples. IMPORTANT: Before starting your run, be sure that you have correctly assigned the marker lane and saved your run protocol. Run time is approximately 2 hours. 5 Promptly collect eluate into a 1.5 or 2.0 mL LoBind microcentrifuge tube. Note that volumes may vary from approximately 40 to 60 μL. Proceed directly to AMPure purification at this point. NOTE: Unused wells may be run at a later time, up until the expiration date of the cassette. In the software selection, make sure that unused wells are turned OFF before running the cassette. Once the run is complete, reseal the cassette with tape with 96-well sealing film or any other adhesive tape. Be sure to seal carefully and cover all buffer chambers, all sample wells and all elution wells. Store the cassette at room temperature. Concentrate size-selected SMRTbell templates in a 1.5 or 2.0 mL LoBind microcentrifuge tube using 1X AMPure PB beads. Page 8 PN 100-286-000-02 (10/05/2013) STEP Concentrate and Quantify Size-Selected Templates 1 Measure volume of eluate and overlay sample with an equal volume of AMPure PB beads. 2 Mix the bead/DNA solution thoroughly. 3 Quickly spin down the tube (for 1 second) to collect the beads. Do not pellet beads. 4 Allow the DNA to bind to beads by shaking in a VWR vortex mixer at 2000 rpm for 10 minutes at room temperature. 5 Spin down the tube (for 1 second) to collect beads. 6 Place the tube in a magnetic bead rack to collect the beads to the side of the tube. 7 Slowly pipette off cleared supernatant and save (in another tube). Avoid disturbing the bead pellet. 8 Wash beads with freshly prepared 70% ethanol. 9 Repeat step 8 above. 10 Notes Remove residual 70% ethanol and dry the bead pellet. – Remove tube from magnetic bead rack and spin to pellet beads. Both the beads and any residual 70% ethanol will be at the bottom of the tube. – Place the tube back on magnetic bead rack. – Pipette off any remaining 70% ethanol. 11 Check for any remaining droplets in the tube. If droplets are present, repeat step 10. 12 Remove the tube from the magnetic bead rack and allow beads to air-dry (with tube caps open) for 30 to 60 seconds. 13 Elute DNA from beads by pipetting 10 μL EB onto beads. Close the tube and tap with finger to mix. Do not pipet to mix or spin down and place in a VWR vortex mixer at 2000 rpm for 10 minutes at room temperature. NOTE: For up to 5 μg input DNA, elute in 10 μL. For > 5 μg input DNA (if multiple lanes were pooled for this step), scale the elution volume proportionately. 14 Spin briefly to collect the contents at the bottom of the tube. Let stand at room temperature for 1-2 minutes, or vortex for 1 minute at 2000 rpm and re-spin to collect contents. 15 Return sample to magnetic rack and let stand until beads are well-separated. 16 Transfer supernatant containing size-selected SMRTbell template to a new LoBind microcentrifuge tube. 17 Use 1 μL of purified SMRTbell template to make a 1:5 dilution in EB, and measure the DNA concentration using a Qubit fluorometer. Retain the remaining 4 μL of diluted sample for QC by FIGE. IMPORTANT: DNA concentration measured using a NanoDrop spectrophotometer after size-selection will not be accurate because of an interfering substance. NOTE: Typical yields of size-selected, ~20 kb SMRTbell library from 500 ng - 5 μg input material are 20-40%. Page 9 PN 100-286-000-02 (10/05/2013) Anneal and Bind BluePippin™ Size-Selected SMRTbell™ Templates Use the Binding Calculator to anneal sequencing primer at 0.833 nM concentration and bind polymerase at 0.500 nM concentration. These are the default concentrations required for 20 kb libraries. For more information about using the Binding Calculator, see the Pacific Biosciences Template Preparation and Sequencing Guide. Prepare for MagBead Loading Optimal loading of size-selected ~20 kb templates is typically achieved at ~0.125 nM on-plate concentration. An initial loading test of 0.100 nM on-plate concentrations is highly recommended. For efficient binding to Magnetic Beads, bound complexes (at 0.500 nM concentration) must be diluted in the appropriate ratio of MagBead Binding Buffer and MagBead Wash Buffer. Follow the Binding Calculator instructions to dilute your sample for MagBead binding. DNA Control Complex Dilution If you will be using the PacBio DNA Control Complex, dilute the DNA Control Complex according to the volumes and instructions specified in the Calculator. Sequence To prepare for sequencing on the instrument, refer to the RS Remote Online Help system or Pacific Biosciences Software Getting Started Guide for more information. Follow the touchscreen UI to start your run. Note that you must have a DNA Sequencing Kit and SMRT® Cells for standard sequencing. When sequencing size-selected ~20 kb SMRTbell templates prepared by this method, be sure to indicate the magnetic bead collection protocol, a 20,000 bp insert size, stage start, and 180 minute movies when setting up your run protocol in RS Remote. For Research Use Only. Not for use in diagnostic procedures. © Copyright 2013, Pacific Biosciences of California, Inc. All rights reserved. Information in this document is subject to change without notice. Pacific Biosciences assumes no responsibility for any errors or omissions in this document. Certain notices, terms, conditions and/or use restrictions may pertain to your use of Pacific Biosciences products and/or third party products. Please refer to the applicable Pacific Biosciences Terms and Conditions of Sale and to the applicable license terms at http://www.pacificbiosciences.com/licenses.html. Pacific Biosciences, the Pacific Biosciences logo, PacBio, SMRT and SMRTbell are trademarks of Pacific Biosciences in the United States and/or certain other countries. All other trademarks are the sole property of their respective owners. Page 10 PN 100-286-000-02 (10/05/2013)