1
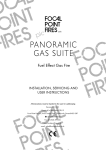
FIRE TABLES O WNER ’ S M ANUAL WARNING: For Outdoor Use Only. When an appliance is for connection to a fixed piping system, the installation must conform with local codes, or in the absence of local codes, with the National Fuel Gas Code, ANSI Z223.1/NFPA 54, International Fuel Gas Code, Natural Gas and Propane Installation Code, CSA B149.1, or Propane Storage and Handling Code, B149.2, as applicable. WARNING Do not store or use gasoline or other flammable vapors and liquids in the vicinity of this or any other appliance. An LP-cylinder not connected for use shall not be stored in the vicinity of this or any other appliance. DANGER If you smell gas: 1. Shut off gas to the appliance. WARNING Improper installation, adjustment, alteration, service or maintenance can cause injury or property damage. Read the installation, operating and maintenance instructions thoroughly before installing or servicing this equipment. This appliance is designed as an “attended appliance”. Adults must be present when the unit is operating. DO NOT leave this unit burning when unattended. If this product is left burning unattended it may cause damage or serious injury. 2. Extinguish any open flame. 3. If odor continues, keep away from the appliance and immediately call your gas supplier or fire department. INSTALLER & CONSUMER These instructions MUST be retained with this appliance. DANGER CARBON MONOXIDE HAZARD This appliance can produce carbon monoxide which has no odor. Using it in an enclosed space can kill you. Never use this appliance in an enclosed space such as a camper, tent, car or home. Report # 527-O-01-5 ANSI Z21.97-2012/CSA 2.41-2012 “Outdoor Decorative Gas Appliances.” CGA 2.17-M91 (R2009) “Gas-Fired Appliances for Use at High Altitudes.” 2014 Firetainment, Inc. 4/14 Rev 1 Owners’s Manual For info call: 1 . 888 . 769 . 3444 Page 2 Cover – Important Safety Information.…………………………………………………………………………………………..…….1 Table of Contents…….…………………..………………………………………………………………………………………………2 Important Safety Information Clearances to Combustibles………………………………………………….…………………………...………………...2 Installation & Preparation Guidelines……………………………...………...…………….……………………............3-4 Installation Information Connecting the Gas to the Fire table……….………………………….………………………...……………………….5-7 Instructions Operating Instructions……………………………………………………………………………………………….………...8 Lighting Instructions……………………………………………….………………………………….………….……………8 Operating Information…………………………………………….………………………...……………………………..9-10 Care & Maintenance………………………………………………………..…………………………………………………………..11 Warranty Information……………………………………………………...………………………………………………………..11-12 Trouble Shooting Guide………………………………………………………………………………………………………………..13 Installation / Granite Handling……………………………………………………………………………………………………..14-15 IMPORTANT SAFETY INFORMATION READ THESE INSTRUCTIONS COMPLETELY BEFORE INSTALLING THIS OUTDOOR FIRE TABLE. If not installed and used correctly per these instructions, this product can cause serious injury. CAUTION: INSTALLATION, MODIFICATION AND REPAIR MUST BE DONE BY A QUALIFIED, PROFESSIONAL INSTALLER. Be sure you understand all safety precautions and warnings contained in this manual. FOR OUTDOOR USE ONLY. THIS UNIT MUST BE INSTALLED AT LEAST 60” FROM CENTER OF BURNER TO ANY COMBUSTIBLE WALLS OR MATERIAL. CHECK STATE AND LOCAL CODES TO DETERMINE IF THE OUTDOOR FIRE TABLE IS PERMITTED IN YOUR LOCALITY BEFORE INSTALLATION. WARNING: CARBON MONOXIDE POISONING MAY LEAD TO DEATH. DO NOT MODIFY THIS OUTDOOR FIRE TABLE OR ITS CONTROLS, EXCEPT AS PROVIDED FOR IN THIS MANUAL. Any other change may be dangerous. Improper installation or use of your outdoor fire table can cause serious injury or death from fire, burns, explosions or carbon monoxide poisoning. When shutting the unit down—be sure to TURN THE CONTROL VALVE FULLY OFF. MINIMUM CLEARANCE TO COMBUSTIBLES Clearance of 60” on all surrounding sides and 72” above the table. 72” CLEARANCE 60” CLEARANCE Clearances to Combustible Construction: Sidewalls: 60” from center of unit (Figure 1) 60” CLEARANCE Flooring: 0” – Can be installed on deck, slab, floor, etc. (FIGURE 1) Ceiling: 72” from the top of unit (Figure 1) KEEP BOTTOM OF FIRE TABLE VENT OPENINGS CLEAR AT ALL TIMES. Owner’s Manual For info call: 1 . 888 . 769 . 3444 Page 3 IMPORTANT SAFETY INFORMATION INSTALLATION AND PREPARATION SAFETY GUIDELINES The fire table is for outdoor use only. DO NOT install or use this fire table inside a building, garage, or any other enclosed area including recreational vehicles and/or boats. This unit must be installed in such a manner that proper air ventilation is maintained without obstruction at all times and during all weather conditions. Before installing this fire table, check “Minimum Clearance to Combustibles” on page 2. MINIMUM CLEARANCES must be maintained when you install this fire table. THERE MUST BE AT LEAST 60” from the center of the burner to any combustible sidewall and 72” from any overhang. Ensure that the fire table installed in such a manner that the vent opening at the base of unit remains obstacle-free at all times and during all weather conditions. DO NOT USE IF GAS PRESSURE IS LOWER THAN THE MINIMUM REQUIREMENT OR EXCEEDS THE MAXIMUM. FOR NATURAL GAS: The minimum inlet gas supply pressure for purposes of input adjustment is 3.5 inches water column and maximum inlet gas supply pressure is 10.5 inches water column. FOR PROPANE: The minimum inlet gas supply pressure for purposes of input adjustment is 8 inches water column and the maximum inlet gas supply pressure is 11 inches water column. A standard 20 lb. portable propane tank can be connected to the table. DO NOT INSTALL THIS UNIT IF MINIMUM PRESSURE IS NOT AVAILABLE OR IF MAXIMUM PRESSURE IS EXCEEDED. Gas piping system must be sized to provide minimum inlet pressure at the maximum flow rate (BTU/hr). Undue pressure loss will occur if the pipe is too small or the run is too long. For use with a fixed-fuel piping system and equipped with an appliance gas pressure regulator, the required manifold pressure in inches water column. The fire table and its main gas valve must be disconnected from the gas supply piping system during any pressure testing of that system at test pressures in excess of ½ psig. This is accomplished by closing the gas supply line valve, as required by NFPA 54, section 5-54. GAS SUPPLY PLUMBING REQUIREMENTS: Apply only joint compounds that are resistant to all gasses on all male pipe fittings. Make sure to tighten every joint securely. Do not use pipe joint compound to connect flare fittings. The fire table must be isolated from the gas supply piping system by closing its equipment shut-off valve during any pressure testing of the gas supply piping system at test pressures equal to or less than ½ psig. For installations at elevations above 2,000 ft., contact your local dealer or gas supplier before installing as input ratings should be reduced approximately 4% for each 1,000 ft. above sea level. Refer to the National Fuel Gas Code. Contact the factory for the required orifice. INSTALLER NOTE: This unit should be installed so that it can be removed at a later date for service. SAFETY NOTE: An external on/off valve in the gas line is required for safety when your fire table is not in use. It also provides for convenient maintenance and repair. Owner’s Manual For info call: 1 . 888 . 769 . 3444 Page 4 IMPORTANT SAFETY INFORMATION Cont. INSTALLATION AND PREPARATION SAFETY GUIDELINES The LP-gas supply cylinder to be used must have the following guidelines: Constructed and marked in accordance with the U.S.D.O.T. Specifications for LP-Gas Cylinders or the Standard for Cylinders, Spheres and Tubes for Transportation of Dangerous Goods and Commision, CAN/CSA-B339, as applicable. Max Cylinder Size: 20 lbs. (9kg) Capacity: 4.7 Gallons (17.8 Liters) Provided with a listed overfilling-prevention device. Provided with a cylinder-connection device compatible with the connection for the fire table. Recommended Supply Pressures: Gas Inlet Pressure Manifold Pressure (inches water column) (inches water column) Natural Gas 7.0 5.5 Liquid Propane 11.0 10.5 HIGH ALTITUDE: This appliance is approved for installation up to 4,500 feet (1,372 meters) without any adjustment. Owner’s Manual For info call: 1 . 888 . 769 . 3444 Page 5 INSTALLATION INFORMATION CONNECTING THE GAS TO THE FIRE TABLE BEFORE PROCEEDING, CAREFULLY READ ALL OF THE IMPORTANT SAFETY INFORMATION CONTAINED IN THIS OWNER’S MANUAL, INCLUDING: Pre-Installation and fire table Preparation Safety Guidelines (pages 3 & 4). Minimum Clearance to Combustibles (page 2). All portable propane tank safety information should be followed while handling any propane storage tank (guidelines provided by propane tank manufacturer). BEFORE INSTALLATION, BE SURE THE PROPANE TANK IS TURNED OFF. To connect to the propane gas tank, attach the stainless steel hose (with regulator) and tighten down the connector. Follow all instructions and safety warnings supplied with the propane tank as well as make sure that the propane hoses are connected to the burner pan. Turn on the gas to the burner system and test for leaks with soapy water solution. (Never use an open flame for testing). If a leak is found, tighten the connector until no leaks are detected. The stainless steel hose should be inspected before each use of the fire table. The hose assembly must be replaced prior to the fire table being put into operation if there is evidence of excessive abrasion or wear, or if the hose is damaged. The replacement hose shall be that specified by the manufacturer. The burner assembly must be replaced prior to the fire table being put into operation if it is evident that the burner is damaged. The replacement burner shall be that specified by the manufacturer. Properly locate the gas hose out of pathways where people may trip over it or in areas where the hose may be subject to accidental damage. Carefully inspect the burner for shipping damage. If any parts are missing or damaged, call your representative. Do not attempt to install the fire table unless all parts are in good condition. Empty all delivered bags of fire glass into the burner pan after installation. Due to high temperatures, the fire table must be located out of traffic areas and away from any combustibles. Fire glass is should be filled to the lip in the burner pan for proper operation (see “Clearance from Combustibles” on page 2) Owner’s Manual LP GAS CONNECTION INFORMATION Page 6 INSTALLERS OF ANY FIRETAINMENT PRODUCTS MUST BE LICENSED, CERTIFIED, AND FAMILIAR WITH ALL LOCAL CODE REQUIREMENTS. ALL TABLES COME PRE-ASSEMBLED FOR LP APPLICATIONS (BELOW). PLEASE REVIEW THE INFORMATION ON THE NEXT PAGE TO CONVERT YOUR FIRETAINMENT TABLE TO BURN NATURAL GAS. LP—PROPANE ASSEMBLY INSTRUCTIONS WARNING: Confirm “Gas In” is towards the control valve or shutoff valve. Installing backwards will result in a severe gas leak and risk of explosion. WARNING: A pan MUST be used on LP systems and configured in a way to minimize fuel settling below the pan. Failure to do so may result in personal injury or explosion. 1. Ensure gas to the fire pit location is shutoff. 2. Remove parts from the packaging material and inspect for any signs of damage or corrosion. 3. If re-assembling a burner assembly strictly follow the assembly setup instructions below. 4. Call manufacturer for clarification as needed. 5. Apply pipe dope or gas rated tape to all threaded connections. 6. Perform a leak test on all fittings and back pressure checks for LP with media installed. LP AIR-MIXER ORIFICE LP GAS SUPPLY PRESSURE: (Gas pressure and type should be checked prior to use or installation) Air Intake MINIMUM = 8.0” W.C. MAXIMUM = 11.0” W.C. Gas In Gas Out LP BURNER ASSEMBLY SETUP - PENTA 12” BURNER > - NIPPLE > BURNER CONFIGURATION - BURNER PAN > - COUPLER > - LP ORIFICE > - 90 DEGREE ELBOW > - 24” SS NON-WHISTLING CONNECTOR > - MIXING VALVE > - LP REGULATOR W/ 36” SS BRAIDED HOSE CONNECTION TO LP TANK Owner’s Manual NATURAL GAS CONNECTION INFORMATION Page 7 ANY MODIFICATIONS OR INSTALLERS OF ANY FIRETAINMENT PRODUCTS MUST BE LICENSED, CERTIFIED, AND FAMILIAR WITH ALL LOCAL CODE REQUIREMENTS. ALL TABLES COME PRE-ASSEMBLED FOR LP APPLICATIONS. PLEASE REVIEW THE INFORMATION ON THIS PAGE TO CONVERT YOUR FIRETAINMENT TABLE TO BURN NATURAL GAS. NATURAL GAS—ASSEMBLY INSTRUCTIONS WARNING: Confirm “Gas In” is towards the control valve or shutoff valve. Installing backwards will result in a severe gas leak and risk of explosion. WARNING: A pan MUST be used on NG systems and configured in a way to minimize fuel settling below the pan. Failure to do so may result in personal injury or explosion. 1. Ensure gas to the fire pit location is shutoff. 2. Remove parts from the packaging material and inspect for any signs of damage or corrosion. 3. If re-assembling a burner assembly strictly follow the assembly setup instructions below. 4. Call manufacturer for clarification as needed. 5. Apply pipe dope or gas rated tape to all threaded connections. 6. Perform a leak test on all fittings and back pressure checks for NG with media installed. ANY MODIFICATIONS OR INSTALLERS OF ANY FIRETAINMENT PRODUCTS MUST BE LICENSED, CERTIFIED, AND FAMILIAR WITH ANY/ALL LOCAL CODE REQUIREMENTS. NG ORIFICE NATURAL GAS SUPPLY PRESSURE: (Gas pressure and type should be checked prior to use or installation by a certified service technician; All pressure reducing valves are to be provided by your local gas company to ensure all local gas codes requirements are being followed) MINIMUM = 3.5” W.C. MAXIMUM = 10.5” W.C. NG BURNER ASSEMBLY SETUP - PENTA 12” BURNER > BURNER CONFIGURATION - BURNER PAN > - NG ORIFICE (Threads into Penta burner> - 1/2” CLOSE NIPPLE> - 90 DEGREE ELBOW > - 1/2” MIP x 1/2” FL Brass Fitting> - 24” SS NON-WHISTLING CONNECTOR > - 1/2” FL x 3/8” FIP Brass Elbow> - MANUAL SHUTOFF VALVE > - CERTIFIED SERVICE TECHNICIAN TO PIPE FROM SHUTOFF VALVE TO SUPPLY LINE> Owner’s Manual For info call: 1 . 888 . 769 . 3444 Page 8 OPERATING INSTRUCTIONS We recommend that before you install your fire table you familiarize yourself with the control valve layout. This will help you be more confident when operating your fire table when fully installed (see figures below for typical control positions). WARNING: IF YOU DO NOT FOLLOW THESE INSTRUCTIONS EXACTLY, A FIRE OR EXPLOSION MAY RESULT CAUSING PROPERTY DAMAGE, PERSONAL INJURY OR LOSS OF LIFE. BEFORE LIGHTING smell all around the fire table area for gas. Be sure to smell next to the floor because some gas is heavier than air and will settle on the floor. IF YOU SMELL GAS FOLLOW THE INSTRUCTIONS ON PAGE 1. Use only your hand to push in or turn the gas control knob. Never use tools. If the knob will not push in or turn by hand. DO NOT try to repair it. Call a qualified, professional service technician. Force or attempted repair may result in fire or explosion. DO NOT use this fire table if any part has been under water. Immediately call a qualified, professional service technician to inspect the fire table and to replace any part of the control system and any gas control that has been under water. LIGHTING INSTRUCTIONS Turning on the fire table: Push in the manual gas control knob slightly and turn counter-clockwise to the “ON” position. Wait 5 minutes for gas to clear out. Place a burning match to the surface of the fire glass that covers the burner. Do not hold the match by hand. Turn your propane tank valve to the “ON” position After the match is burning and in position, push in the manual gas control knob slightly, and slowly turn the knob counter-clockwise to the “ON” position. Shutting off the fire table: Push in the manual gas control knob slightly and turn clockwise to the “OFF” position. After the flame has gone out wait at least 5 additional minutes for the gas to clear out. After the fire table has completely shut off and is cool turn your propane tank to the “OFF” position to ensure no propane is leaking while not in use. CAUTION: DO NOT turn the main gas valve knob to the “ON” position FOR 45 SECONDS after shutting the unit off. Owner’s Manual For info call: 1 . 888 . 769 . 3444 Page 9 OPERATING INFORMATION Young children MUST be supervised when in the vicinity of this fire table. DO NOT sit or place any part of your body or any combustible materials on the fire table while in use. Children and adults should be alerted to the hazard of high surface temperatures and should, when in use, stay away to avoid burns or clothing ignition. Every time you use your fire table make sure that the area around the table is clear of flammable items such as gasoline, yard debris, wood, etc. WARNING: HOT WHILE IN OPERATION AND FOLLOWING OPERATION. Children must be carefully supervised when in the vicinity of this appliance. Serious injury may occur. DO NOT throw trash, paper, or other flammable materials onto your fire table. DO NOT leave in operation when unattended. DO NOT operate this fire table in the rain. SOLID FUEL MUST NOT BE BURNED in the fire table or enclosure where your fire table is installed. DO NOT continue using if you smell unusual odors or have headaches, nausea or are dizzy. DO NOT store any combustible materials, gasoline, and any other flammable vapors/liquids around the area of your fire table. Provide adequate clearance for servicing and operation. DO NOT place clothing or any flammable material on or near your fire table while in use. Matches, paper, garbage, or any other material must not be thrown on top of the glass, burner, or into the flame. DO NOT block the airflow through the vent openings located at the bottom of fire table. DO NOT use your fire table if any part of it has been under water. Immediately call a qualified service technician to inspect the set and to replace any part of the control system and any gas control that has been under water. Installation and repair should be done by a qualified service person. The fire table should be inspected before use or at least annually by a qualified service person. More frequent cleaning may be required as necessary. It is imperative that the control compartment, burners and circulating air passageways of the fire table be kept clean. Any guard or protective device removed for servicing the fire table must be replaced prior to operating. Periodically make a visual check of the burner’s flames. DO NOT operate the fire table in windy conditions. This can cause injury or granite top to fissure. DO NOT ALLOW THE GRANITE TOP TO GET HOT DURING OPERATION! This can result in cracking the granite which is not covered under the factory warranty. If the granite gets hot reduce the heat exposure as slow as possible to avoid the granite cooling too quickly and cracking CAUTION: be sure to not touch the underside of the burner pan after use when shutting off the propane tank. Wait until the table has cooled completely before shutting off propane. DO NOT lift the glass wind guard after use. Clamps may become loose after use, make sure ALL glass clamps are secure after each use of the glass wind guard. BE CAREFUL not to scratch the bottom of the burner pan with the lazy Susan mount legs, this is not covered under the Firetainment warranty. Warranty does not cover scratches or rust caused by scratches. DO NOT clean any of the table’s surfaces with abrasive materials, this will potentially scratch a finished surface and IS NOT covered under any warranty. Owner’s Manual For info call: 1 . 888 . 769 . 3444 Page 10 ADDITIONAL WARNINGS MUST have a 1/2” clearance from the bottom of the base to the floor for ventilation. DO NOT reach under burner pan while hot to disconnect or turn off gas connection until the table has completely cooled. DO NOT remove glass wind guard until it has completely cooled. Check to be sure fittings haven’t loosened after the cooling process. DO NOT lift the glass wind guard until hardware has been checked. Clamps may become loose after use, make sure ALL glass clamps are secure after each use of the glass wind guard. DO NOT touch glass filler while table is in use or hot. Allow time to cool down before handling the glass filler. DO NOT operate the fire table in windy conditions. This can cause injury or granite top to fissure. DO NOT ALLOW THE GRANITE TOP TO GET HOT DURING OPERATION! This can result in cracking the granite which is not covered under the factory warranty. If the granite gets hot reduce the heat exposure as slow as possible to avoid the granite cooling too quickly and cracking. DO NOT sit or stand on granite top. MUST read and follow instructions in cooking and accessory manual before cooking on the fire table. Owner’s Manual For info call: 1 . 888 . 769 . 3444 Page 11 CARE & MAINTENANCE Stone Table Tops: Natural stone tabletops are sealed when they leave our factory. For optimum protection, tops should be resealed every 6-12 months. It takes just a few minutes to distribute an even coat of stone sealer and then wipe the tabletop dry. Airborne dust and dirt can easily be removed with plain water. For more thorough cleaning, use a pH neutral cleaner such as Simple Green, a water based biodegradable cleaner available in most supermarkets. Avoid ammonia-based cleaners, which can break down the sealant. Cold Climates: Always seal the tabletop before each winter. We recommend that tabletops be covered with a suitable outdoor cover. Make a tent with the cover so that it is not touching any part of the table top- this will promote airflow and allow moisture to escape. It is possible that snow sitting on a tabletop for an extended period of time could cause moisture to penetrate the sealer. Natural stone is porous, and if moisture were to enter the stone and freeze, the stone may crack. Firetainment Inc. advises that the table owner complete a bi-annual (Every 6 months) inspection, by means of a certified gas service technician, of the appliance to be sure all components are in working order. Begin by removing the access panel on the front of the appliance, lift up and out from within the two holes located on the access panel. Set the access panel off to the side in a safe place while the inspection/cleaning is taking place. Once the access door has been removed, remove the valve knob from the valve assembly, then remove the jam nut securing the valve to the inner wall of the base enclosure. Once the valve has been removed from the enclosure, the burner pan will then be free to remove from the base enclosure for the inspection/cleaning. Remove all of the fire glass from the burner pan to fully expose the burner for the cleaning. Once all of the fire glass has been removed you want to clean around the Penta Burner to be sure all gas orifices on the burner are free from debri. Once the burner has been cleaned with a damp cloth, replace the burner back into the tabletop and reconnect it to the enclosure. Once the burner pan is reconnected to the enclosure, refill the pan with the fire glass removed in the prior step. After adding the fire glass back to the pan, begin the lighting process to be sure the unit is functioning properly. Check each threaded connection with soap and water to be sure there are no gas leaks leading to a potential fire hazard. All of the above should be completed by a certified gas service technimcian to be sure all proper safety measures have taken place. If you have any questions on how to clean your unit, please feel free to contact Firetainment Inc. at 1.888.769.3444. WARRANTY INFORMATION *All warranties apply to the original owner only and begin at the date of purchase. Proof of purchase is claims. required with all BASE The Firetainment base comes with a twenty (20) year structural warranty when properly maintained in ordinary home use. Firetainment will, at factory option, repair or replace any base that has failed structurally during normal use and regular maintenance. POWDER COAT FINISH Firetainment offers a seven (7) year warranty against blistering or peeling of the base finish under normal use and proper maintenance. Firetainment will, at factory option, refinish or replace your base if the above occurs within a seven year period from the date of purchase. Occasional rust seepage from crevices and hidden unfinished surfaces inherent in some designs is considered a care and maintenance function and is not considered a finish failure. To retain the warranty regular care and maintenance is required. Extra care and maintenance is required in coastal areas. TABLE TOPS Granite is a natural material and colors/characteristics will vary. Natural stone may have chips, pits or surface fissure. Granite is extremely durable and once positioned onto the base only consequential (accidental) damage or misuse can damage the granite. Misuse of the table includes, but not limited to: sitting or standing on the table top or operating under windy conditions which can blow the flame onto the granite which can cause the granite to crack. It is recommended to use a tempered glass wind guard under windy conditions; however, this is not a full proof deterrent. It is recommended to periodically check the granite near the burner pan to be sure it is not getting too hot. If you notice the granite is getting hot then slowly turn the flame down. Owner’s Manual For info call: 1 . 888 . 769 . 3444 Page 12 Warranty Information (Continued) COMPONENT PARTS Outdoor fire pit burners, valves, and structural defects of pan: Firetainment extends a five (5) year warranty on all burner components under normal use and proper maintenance. Firetainment will, at factory option, repair or replace any outdoor fire pit burner found to be defective during this warranty period. Regular maintenance must be exercised as set forth in the owner's manual. ITEMS NOT COVERED UNDER WARRANTY (RESIDENTIAL AND COMMERCIAL) This warranty does not apply to any damage caused by shipping, accidents, fading, staining, natural weathering, misuse, alterations or repairs. No other person is authorized to assume liability on behalf of Firetainment, and in no event shall Firetainment be liable for any contributory or subsequent damage related to the merchandise purchased from Firetainment. Any failure caused by unreasonable use or abuse. Rust seepage or bleeding from crevices or hidden, non-finished surfaces inherent in some base de-signs. Rusting and/or oxidation of frames resulting from exposed metals that have been scratched, chipped or not maintained as outlined in the care and maintenance instructions. Natural fading, color variations, veining, crazing or hairlines, patinas or fillers necessary and inherent to certain types of natural stone. Normal fading of frame finish. Accidental damage (including fire, wind or other acts of God). Permanent stains caused by lotions, oils or other substances. Hard-water deposits or calcium build-up due to minerals found in regional water supplies. Table tops installed and/or used with other manufacturer's table bases, or incorrect installation of the base to the table top. Regular maintenance must be exercised as set forth in the care instructions. RETURN OF TABLE OR ACCESSORIES Only items considered “stock items’ are subject to return. All other items are considered Special Order items and are not returnable. No products may be returned without a Firetainment return goods authorization issued prior to the return. Return goods authorizations are valid for thirty (30) days only. All returns are subject to inspection before being approved for credit – products must be in salable condition to be considered for return or replacement. A 30% restocking charge will apply to all returns. Prior authorization from the factory or factory representative is required. You must be the original purchaser and be able to provide proof of purchase when you make a claim. To submit a warranty claim contact the dealer where you purchased your table. If you are not sure how to contact the dealer contact our warranty department at [email protected] Except as expressly provided herein, Firetainment makes no warranties, whether express or implied including, but not limited to, warranties of merchantability and fitness for a particular purpose. Firetainment’s limited warranty claims may only be processed directly through Firetainment by the dealer who made the sale of the merchandise. TROUBLE SHOOTING GUIDE Page 13 PROBLEM POSSIBLE CAUSE SOLUTION NOTES Propane tank does not fill Propane tank was not purged properly Take it to an authorized propane The purging process requires that station and re-purge the propane all air is removed from the propane tank tank prior to the first fill The OPD float valve on the pro- Without the burner, attach the The OPD float valve is a safety pane tank has been activated, regulator to the propane tank, turn device which is activated when the closing the valve and not allowing the control valve on for a few sec- propane tank has been filled too the tank to fill. onds to reset the OPD float valve quickly Set screw on the side of the pro- Use a flat blade screwdriver to tighten the set screw Smelling propane pane tank valve assembly is not tight Flame problems: NO flame Intermittent flame Low flame Control valve is not completely shut off To shut it off, push in the control knob and completely turn it to the right The far right position on the control valve is in the lowest setting, not in the OFF position Fitting has come loose. See checking for leaks below. Call a certified service technician if leak is found. The tank was not purged properly, it contains a mixture of air and propane. The result is intermittent flame, or flame extinguishes in a short period of time. Burn off remaining propane and repurge the tank The purging process requires that ALL air is removed from the propane tank prior to the first fill to ensure maximum efficiency. See authorized propane dealer. In cooler temperatures, the liquid propane does not convert quickly enough to a gas therefore causing it to “freeze” the outside of the propane tank Turn down the flame slightly to where the control valve is not wide open The regulator was not properly attached to the propane tank Disconnect the regulator and reconnect it properly to the propane tank Flame setting too low Turn control know to the left for a higher flame setting CHECKING FOR POSSIBLE LEAKS 1. Remove the table top burner from the base. 2. Make sure the regulator is hooked up to the propane tank with the control valve turned OFF. 3. Turn the propane tank ON. Wait a few seconds and smell for possible leaks where the regulator hose is attached to the control valve or where the regulator is attached to the propane tank. 4. Use soapy water and apply to these areas to verify the leak source. 5. If there are leaks detected call a certified service technician for repair. Fire Table Installation / Granite Handling Instructions Page 14 Remove the assembled base and all of the other components/accessories from the base box that was shipped on a pallet. Make sure all components are within the box needed for the table assembly. Then position the granite crate in a manner in which it is close to where the table will be assembled, this is due to the weight of the granite and the handling instructions referenced below. Understand the location the table will be assembled in to prevent any potential issues when transporting it. Please keep in mind the location of the control knob for easy operation as well as the area around the table. You also want to have enough room for chairs or walk space around the fire table. Once the area has been measured and all clearances (refer to Owner’s Manual) have been taken into consideration, set the base in the desired location and begin our simple assembly process. Remove the granite top from the crate and place it on the base. Make sure the cutout portion of the granite is centered over the base. Please follow the below granite handling instructions to be sure nothing is damaged during the installation. Granite handling instructions MUST be followed. GRANITE HANDLING INSTRUCTIONS 1. When handling granite, steel-toed shoes are highly recommended. 2. Unless no other options exist, do not carry the granite through the house. Always go around the home to the installation site. (Showrooms do not apply) 3. Always carry the granite vertical, NEVER carry it horizontally. Although the granite will be installed horizontally as a top, it will be supported underneath by the base. Granite is a natural material and without the underneath support, will put immense stress on the weak points. This can cause the top to crack, or more likely, break apart while carrying. This can result in property damage and serious injury. 4. When moving the granite from the crate to the installation location, plan ahead for resting points. If you set the granite down on a concrete, stone or other hard surface without protection, it can chip the edge of the granite. Setting granite down on a wood floor can scratch or dent the floor. Best practice is to place a pair of 12" 2X4s in strategic places to set the top down. You will also need a pair placed near the table base location to rest the top on before rotating it to a flat position, and onto the table base. 5. The granite top should be evenly centered on the base (use a measuring tape if necessary). Fire Table Installation / Granite Handling Instructions Cont. Page 15 BURNER PAN AND CONTROL VALVE INSTALLATION 1. Remove the burner pan and valve assembly from its box (All burners are setup for propane when they leave our facility; please refer to the Owner’s Manual for natural gas conversion instructions). Make sure the knob is turned all the way to the right. Take the control knob off the control valve and unscrew the silver nut (Take note of the flat spot on the controller shaft that the knob mounts to). Place these off to the side. 2. Hold the pan above the hole in the table top and carefully lower the valve and hose assembly down through the hole as you place the pan into the granite opening. 3. Reach into the base through the door opening, take the control end of the valve and slide it through the round opening just above and to the left of the door. Take the small nut that was removed in the previous step and screw onto the threads. Be sure to have the flat part on the control shaft facing down to ensure that the knob is facing the right direction when installed. 4. Place the propane tank into the tank foot (black plastic propane cradle) and slide it into the base thru the door opening. Connect the propane line to the tank. Once the propane tank is connected, charge the lines with propane and check for any leaks within the connections. 5. Pour the fire glass into the pan in the middle of the table after it has been confirmed there are no leaks. The glass should be level across the pan and should completely cover the penta burner. 6. Make sure the black valve knob is turned off (all the way to the right) and turn on the tank. Last, replace the door and the table is ready to light. Make sure to turn off both the control valve and propane tank when the table is not in use. Notes: Owner’s Manual 888 . 769 . 3444 Firetainment.com [email protected]


![Eko 2030 Installation instructions [EN] A:XL09 Installation](http://vs1.manualzilla.com/store/data/005791571_1-4177cf65afac91638228769661e5ee6f-150x150.png)