1
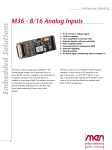
Wing Watch Lite
Battery Monitoring System
User Manual
February 2009
Check the contents:
The Wing Watch-Lite is packed in soft, protective material inside a carton box.
There are 5 sets in each packaging.
Every package should contain the following items:
1. one piece of Wing Watch-Lite Battery Monitoring System Controller
2. one pair of 19” rack mount brackets for the system controller
3. one piece of communication cable (RJ-11 plug on each end)
4. one BMM-12* battery probe
5. user manual (one manual per box)
Please refer to the follow diagram to check the box contents.
*BMM:Battery Management Module
1
5
3
2
4
1. Introduction
Wing Watch-Lite is designed for telecom power battery
backup systems, which typically involve 48VDC battery
strings.
Because of the high power and energy storage requirements,
these systems use large numbers of battery blocks from 32
up to 192 blocks and these systems require very detailed
recording and even more comprehensive alarm functions.
Wing Watch-Lite is designed mainly for small system backup
batteries monitoring purpose.
In general, systems installed inside street cabinet or BTS
(mobile base stations) are the expected applications. These
usually use one or two strings of 4x12 volt battery blocks.
The basic need is to be able to generate alarms when one of
the following situations occurs:
-under or over voltage condition
-battery temperature out of tolerance
-unbalanced battery block voltage
2. Technical Features
Wing Watch controller
Monitoring Input:
1 or 2 pieces of BMM-12 (each BMM has 4 cell voltage monitoring
channels with RJ-11 jack (same port in parallel)
Alarm output : 3 dry contacts
Relay 1 - block voltages unbalanced
(Deviated more than preset percentage from average block voltage)
Relay 2 – Block and/or string voltage over- or under
an absolute preset voltage
Relay 3 – the temperature detected by the on-board sensor inside
the BMM battery probe is over the preset temperature threshold
Power input: 220VAC -DC12V AC/DC power supply or DC36-70V,
25mA for 1 BMM-12 probe and 32mA for 2 BMM-12 probes
Communications options: LAN or RS-232/RS485 for
connecting to remote computer
Display: 2 x 20-character LCD display white back light with screen saver
LED indicators:
DC in
Run
Alarm
Key Pressed
BMM Com
BMM Com failed
(DC present)
(CPU running)
(system has alarm(s))
(blink on pressing)
(BMM data in/out)
(lights up if controller cannot communicate to
BMM)
Keypad: 6 keys for menu control
Software options:
RS-232/485 or LAN option available for the
Wing Watch-Lite Controller
Wing Watch remote monitoring software available for monitoring via
LAN/intranet to 3000 sites or more.
3. System Connection
3
Alarm
dry
contact outputs
+
48VDC
Voltage Unbalance
Over
or
Under
Voltage
12VDC
TCP/IP LAN
(Not used
Option
unless
Not used unless
specified)
ordered
Over Temperature
BMM-12 Battery probes
Blue
Brown
Red
Black
Grey
-
Install the pair of 19” rack mount brackets:
Unscrew six screws on both sides of the Wing Watch-Lite controller :
Then install the mounting brackets onto both sides of the controller. Please
refer to the diagrams above. After that the controller can be mounted in a
19” rack as below:
Connect the system as shown in the beginning of section 3.
Connect the probes, one BMM-12 probe for each four blocks of
12V battery.
The color of the wire is marked on the BMM-12 probe.
Use strong and heat resistant double-sided tape to fix the probe
on one of the battery (recommended for measuring the surface
temperature of at least one battery.
You can connect one additional probe by an interconnecting RJ11 cable.
The current version supports only 2 probes. This cable is the
same as the long one between the controller and the first BMM12 (address 1). After that the system can be powered up.
Section 5 describes the keypad operations for the entire menu
on the LCD display.
4. Wing Watch-Lite controller LCD panel operations
The following shows the six keys on the LCD panel:
After power up, a system status display screen appears and
waits for further command. If the screen appears blank, press
key. The system status display shows data of the first BMM12 probe which consists of the average block voltage (average
of 4x12V block), the string voltage (total of 4x12V blocks) and
the on-board temperature sensor value.
Use the
key to go to: view data of the second probe (if
installed).
The user can go through the different commands by pressing
the
key. Use the
key to move to the desired field. Use the
key to modify the value. It is also used to mute the audible
alarm. Press
until cursor does not blink anymore. Changes
will be saved/exit. Press
key to see the battery data from
any menu. Similar: press
to see active alarm records from
any menu.
A description of the different operations on the LCD display is
given from the next page.
Power up screen – system status
display
BMM-12 battery probe voltages
Set maximum number of probes and the percentages of voltage
deviation which is allowed between the blocks
(Repeat this key to position cursor)
(Repeat this key to position whitout a blinking cursor before going
towards the next menu)
Repeat menu for:
•
•
•
•
•
•
•
•
Set block/cells Over-voltage (OV) per string and per block
Low voltage (LV) alarm threshold per sting and per block
Set block and string low voltage alarm threshold
Temperature
Number of BMM’s
Deviation percentages
Power on/off battery probes & set the number of blocks to be monitored
by the BMM-12 power on/off the BMM-12
View alarm history use Modify key to scroll through the alarms (see
below
View Firmware version
ALARM
View alarm history. Use Select key to scroll to the list. Press Modify key to
show the list. Use Modify key to enter the next record. Press Select for
previous record.
End of Manual