1
14
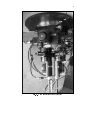
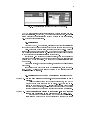
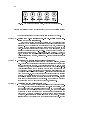
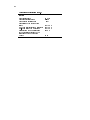
Fig. 9. The motor numbers and units, which they are controlling.
given in the tables at the end of this manual (APPENDIX 1: Position values)
The next actions assume that handpaddle is in active ("ON") state.
ACTION 5 - Setting the Ch1-3 microscope (M1-3 in Fig.6) prism for the centering of Ch1 (the target) star.
Set the handpaddle motor "5" and position "1". The deviating prism
will reect to the microscope small region around the optical axis of the
telescope. Set the biggest (8mm) aperture: Motor "3", Position "1".
Looking to the microscope ocular the target star must be seen in the
eld. If aperture perimeter is not enough or to much illuminated, adjust
it using the potentiometer CL1-3 (Fig.6). Move image of the star to the
approximate center of this | all-microscope-eld aperture. Change to
1.6mm aperture (the usual working aperture for observations with 1.65m
Mol_etai telescope): Motor "3", Position "2". Center the target star in this
aperture too.
ACTION 6 - Checking Ch3 if there is good (clean) background.
Set Ch1-3 microscope prism to see the Ch3 eld: Motor "5", Position
"2". Looking to the microscope ocular one must investigate whether there
is no obvious star in the eld. The aperture there must be 1.6mm, as it
was left for Ch1, because apertures in this disc are made in twine-pairs.
Aperture illumination can be adjusted with the same handle as for the
Ch1 aperture - CL1-3. If there is some obvious star, it is possible to move
Ch3 slightly to the neighboring position - rotating the special deviation
knob ("D" in Fig.6). But this background checking is only the starting
measure. The nal checking must be done at the observations | moving
the telescope slightly around the region and looking to the data, whether
there is no obvious changes in Ch3 readings. Do not forget to withdraw
the prism from the Ch3 light path: Motor "5", Position "0".
ACTION 7 - Centering the comparison star in Ch2.
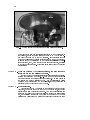
This channel has no motorized prism in front of the aperture microscope M2. It has the special handle M2P in Fig.6 in the housing, which
may be used to set beam-deviation prism "IN" and "OUT" manually. For
the centering of Ch2 star this prism must be "IN", and the Ch2 aperture
wheel must be set to the biggest 8mm aperture for the beginning: on the
handpaddle - Motor "4", Position "1". If there was no mistake performing
"Action 4", the selected comparison star must be in the eld. Aperture
illumination may be adjusted with the potentiometer CL2 (Fig.6) After