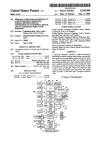
1
Technisches Büro für Digitalelektronik Elektronischer Apparatebau Messgeräte für Umweltschutz Wir bauen seit 1970 Präzisions-Sammler für Staub, Gas und Regen. DIGITEL Sequential High Volume Aerosol Sampler DHA-80 in field housing DHA-80 in mounting rack 19” DHA-80 in box housing DHA-80 in air-floated field housing Manual Version HT0.25 October 2012 DIGITEL Elektronik AG Alte Gasse 18 CH-8604 Hegnau Tel.: +41 (44) 908 20 30 DIGITEL Elektronik GmbH Illstrasse 30 A-6706 Bürs Tel.: +43 (5552) 67850 www.digitel-ag.com [email protected] Table of contents Copyright © 1995 – 2012 by DIGITEL Elektronik AG alte Gasse 18 CH-8604 Hegnau tel./fax 0041 (44) 908 20 30/31 e-mail: [email protected] Operation instructions, manuals and software are protected by copyright. All rights reserved. Reproduction, copying, translating, converting in any electronic medium or in any machine-readable form in whole or in part is not permitted. An exception applies to preparation of back-up copy of software for own use, as far as it is technically possible and recommended by us. Breaching handling binds to paying damages. Warranty Claims against the Digitel Elektronik AG or Digitel Elektronik GmbH in relation to the hardware and/or software products described in this manual are governed exclusively by provisions of the Warranty terms. Excessive claims are excluded, particularly Digitel assumes no warranty for correctness of this manual. Amendments are reserved, while they may be made without any previous notice any time. The current version is available on our homepage www.digitel-ag.com at docu/download. Trade marks Without being listed separately, throughout this manual, registered trademarks and trade names are referred to, in particular, those of Microsoft Corporation. Text processed with Word 7.0, Microsoft 2 DIGITEL Elektronik AG Alte Gasse 18 CH-8604 Hegnau Tel.: +41 (44) 908 20 30 DIGITEL Elektronik GmbH Illstrasse 30 A-6706 Bürs Tel.: +43 (5552) 67850 www.digitel-ag.com [email protected] Table of contents 1 1 2 3 3.1 3.2 3.3 3.4 3.5 3.6 4 4.1 4.2 4.3 4.4 4.4.1 4.4.2 4.5 4.5.1 4.5.2 4.5.3 4.5.4 4.5.5 4.5.6 4.6 4.6.1 4.6.2 4.6.3 4.6.4 4.6.5 5 5.1 5.2 5.3 5.3.1 5.3.2 5.4 5.4.1 5.4.2 5.4.3 5.4.4 6 6.1 6.1.1 6.1.2 6.2 6.2.1 6.2.2 6.2.3 6.2.4 6.2.5 6.3 6.4 6.4.1 6.4.2 6.4.3 6.4.4 6.5 6.6 7 7.1 7.1.1 7.1.2 7.1.3 7.1.4 7.1.5 7.1.6 Table of contents Table of contents.................................................. 3 Table of figures ..................................................... 3 Introduction .......................................................... 4 Safety instructions ................................................ 4 Proper use ............................................................ 4 Target group ......................................................... 4 Abbreviations ....................................................... 4 Typographic conventions ..................................... 5 Contact consulting ............................................... 5 System description ............................................... 6 System overview .................................................. 6 Connections ......................................................... 6 Operating mode ................................................... 6 Assembly.............................................................. 7 Transport .............................................................. 7 Field installation.................................................... 7 Consumables ....................................................... 7 Filter paper ........................................................... 7 Thermo-printer paper ........................................... 7 Sealing rings ......................................................... 7 Fuses.................................................................... 7 Mains cable .......................................................... 7 Grease for sampling heads (impactors) ................ 8 Maintenance......................................................... 8 Cleaning ............................................................... 8 Exchange of sealing rings ..................................... 8 Tightness test ....................................................... 8 Visual inspection of homogeneous deposit .......... 8 Acoustic inspection of blower .............................. 8 Operation and Programming ................................ 9 Operation modes .................................................. 9 Filter Preparation .................................................. 9 Setting of operation status ................................... 9 Start operation or restart sampling instrument ..... 9 Instrument filter exchange and inspection ............ 9 Controls.............................................................. 10 Touchscreen....................................................... 10 Knob for Hand Change of Filters ........................ 10 Main Switch........................................................ 10 Status LEDs........................................................ 10 Function Description .......................................... 11 Status Messages ................................................ 11 "Last filter in service" .......................................... 11 Remote control ................................................... 11 Failure indication messages ............................... 11 AC Power supply failure ..................................... 11 Overloading without Filter Changing ................... 11 Overloading with Filter Changing ........................ 12 Changer Jammed ............................................... 12 Cartridge Changer Jammed ............................... 12 Status change .................................................... 13 Flow calibration .................................................. 14 General information ............................................ 14 Calculation ......................................................... 14 Error estimates ................................................... 15 Performing calibration ........................................ 16 Meaning of abbreviations: .................................. 19 Determination of standard & operation volumes . 20 Programming ...................................................... 21 Home display ..................................................... 21 Operation panel "status display” ........................ 21 Operation panel "Turbine" .................................. 21 Operation panel "Filter changer" ........................ 21 Operation panel "Flow meter" ............................ 21 Operation "Ambient pressure / temperature recording" .......................................................... 22 Operation panel "Options" ................................. 22 7.1.7 7.1.8 7.1.9 7.2 7.2.1 7.2.2 7.2.3 7.2.4 7.2.5 8 8.1 8.2 9 9.1 10 10.1 10.2 10.2.1 10.2.2 10.2.3 10.3 10.4 11 11.1 11.2 11.3 11.3.1 12 12.1 12.1.1 12.1.2 12.1.3 12.2 12.2.1 12.2.2 13 14 14.1 14.2 14.3 15 16 16.1.1 16.2 16.3 17 2 Panel "Status resp. error notification messages" 22 Operation Panel "Date/Time" ............................. 22 Operation Panel "Menu"..................................... 22 Main Menu ......................................................... 23 Change Program Status ..................................... 23 Change Configuration ........................................ 25 Read out internal memory .................................. 34 Show software version ....................................... 35 Show working hours........................................... 35 Sampling probe PM10 and PM2,5 ..................... 36 Separation performance ..................................... 36 Operation/maintenance ...................................... 37 Application examples ......................................... 38 Wind-controlled sampling .................................. 38 Communication .................................................. 39 D-Sub-9 Pin allocation (terminal interface) ......... 39 Digitel protocol ................................................... 39 List of control commands................................... 39 Interface format .................................................. 39 Control commands description .......................... 39 Bayern-Hessen protocol .................................... 41 AK-Protocol ....................................................... 42 Data recording with USB-drive ........................... 44 Storing of data on the USB-drive ....................... 44 Removal of USB-drive ........................................ 44 Structure of the data files on the USB-drive ....... 44 File name............................................................ 44 Remote DHA-80 via Ethernet ............................. 46 FTP-server ......................................................... 46 Dial-up ............................................................... 46 Breaking off connection ..................................... 46 Contents of the FTP - server index ..................... 46 HTTP - Server .................................................... 46 Dial-up ............................................................... 46 Remote control via HTTP ................................... 46 Technical data .................................................... 47 Dimension drawings ........................................... 49 DHA-80 in field housing...................................... 49 DHA-80 in air floated field housing ..................... 50 DHA-80 in 19”-housing ...................................... 51 connections:....................................................... 52 Appendix ............................................................ 53 Pressure / temperature correction table ............. 53 Menu: ................................................................. 55 EC-Declaration of conformity ............................. 57 INDEX ................................................................ 58 Table of figures Figure 1: DHA-80 block diagram .............................................. 6 figure 2 filter preparation .......................................................... 9 Figure 3: Front panel with control elements ........................... 10 Figure 4: DPM10/30/00 ........................................................... 36 Figure 5: DPM10/30/00 impaction performance ....................... 36 Figure 6: DPM2.5/30/00 impaction performance....................... 37 Figure 7: Dimension drawing field housing DHA-80................... 49 Figure 8: Dimension drawing air floated field housing DHA-8050 Figure 9: Dimension drawing DHA-80 mounting rack 19" ...... 51 Figure 10: connections DHA-80 ............................................. 52 Figure 11: Pressure and temperature correction table ........... 54 3 DIGITEL Elektronik AG Alte Gasse 18 CH-8604 Hegnau Tel.: +41 (44) 908 20 30 DIGITEL Elektronik GmbH Illstrasse 30 A-6706 Bürs Tel.: +43 (5552) 67850 www.digitel-ag.com [email protected] Introduction 3 Introduction This user manual contains complete information concerning operation, assembly and putting Digitel High Volume Samplers DHA-80 under operation. Read safety instructions carefully before putting the instrument under operation. 3.1 Safety instructions Adhere to the following safety instructions, assembly instructions (Chapter 3.3) and maintenance instruction (Chapter 3.5). Failure to adhere to these instructions or improper installation and instrument operation may imperil your safety or result in damage of the instrument and neighbouring equipment. The dust particle sampler electric connection should be performed according to provisions of DIN VDE 0100 and its applicable special provisions. In particular, the principles should be followed as listed below: -box earthing; -preparation of protective insulated, waterproof power supply; -equipment of the mains connection with FI switch with I(DN) <= 30 mA. In case of lack of expertise, the installation is required to proceed by a professional electrician. In order to ensure protection for over-voltage due to atmospheric discharge, follow DIN VDE 0100 part 443. If the field instrument is connected to a remote measurement booth via a communication line, e.g. for status inquiries or for remote control, the communication line shielding and earthing of the line shield has to be abided. -When using roof bushings, the steps have to be followed as listed below: set up an electric connection to the air-sampling inlet tube from the roof bushing earthing terminal, in order to lead away possible atmospheric discharges. -If not, discharges can occur via a wind mast, as well as lightning hit into the container power supply overhead lines. For protection, there should be considered a lightning arrester or a protective shielding according to DIN VDE 0100 section 18 or part 443. -Before assembly or disassembly of the instrument's components, the instrument should be permanently isolated from the power supply. -Prevent penetration of liquids into the instrument. -Please observe keeping the prescribed power supply voltage value. -Observe correct fusing (10 A) of the power supply. Before switching the instrument on, make sure all connectors are plugged in a correct manner. -Except for interventions explicitly provided in the manual, never try to repair the instrument on your own. Otherwise, you are exposed to get into contact with parts under the mains voltage. All repairs may only be carried out by expert staff. -Only genuine Digitel inlets are allowed to be connected to the connector for inlet heating. Upon applying unauthorised inlets, burns may occur upon touching an inlet due to its overheating. -Replacement of defective fuses in the instrument can be carried out only by trained experts. Only fuse types authorised by Digitel are allowed to be applied (information directly from Digitel or call a competent local branch-office). -The instrument should be isolated from the mains and handed over to a service engineer in following cases: -if a mains cable or a plug is worn or damaged; -if the instrument, despite following the stated operation instructions, does not work properly. Only use those controls referred to in the manual, as improper instrument operation may cause damages; -if the instrument fell down or the case is damaged; -if the instrument shows conspicuous deviations from normal operation. -Ensure the instrument to be permanently closed during unattended sampling period. -If you need any assistance, please do not hesitate to contact us. We would be pleased to advise you. 3.2 Proper use -The instrument is designed for industrial use. -The instrument is manufactured in compliance with applicable state-of-the-art and safety/technical standards. Nevertheless, the use of the instrument can still endanger the instrument itself or other valuable things. -The instrument meets the EMC requirements (electromagnetic compatibility) directives and harmonised European standards. Any variation of the system may affect EMC behaviour. It is an A-class equipment. This equipment may induce highfrequency interference in a residential area. In this case, the operator must take appropriate measures. 3.3 Target group -All designing, programming, installing works, initiation, operation and maintenance in relation to the sampling system must only be carried out by trained staff (e.g. electricians, electrical engineers). -Designing and programming staff must be familiar with safety concepts of automation technology. -Operators have to be instructed on handling the instrument and know the operation instructions. -The staff in charge of installation, initiation and maintenance should have professional background to be authorised to intervene in automation systems. 3.4 Abbreviations CM Correction factor for air flow through the filter (related to an average air pressure and an average air temperature in the measurement tube during the sampling period) Cs Correction factor for air flow on the measurement tube related to the set standard conditions (standard air pressure and standard air temperature) Correction factor for air flow on an inlet (related to an average air pressure before and after sampling and to an average temperature on the measurement tube - 3 K during sampling period. Calculation of this correction factor is based on simplified assumptions, whereby smaller deviations from the actual correction factor on the air inlet can occur Air volume transported through the filter during the sampling period (related to an average air pressure and to the average air temperature in the measurement tube during the sampling period) Air volume transported through the filter during the sampling period (related to the set standard conditions) Air volume transported through the inlet during the sampling period (related to the average air pressure before and after sampling and to the average air temperature in the measurement tube - 3 K during the sampling period of time. Calculation of this volume is based on a simplified assumption, whereby small deviations from the current transported volume can occur at the air inlet Non-calibrated air pressure measured by the measurement system CA VM Vs VA p (uncal) 4 DIGITEL Elektronik AG Alte Gasse 18 CH-8604 Hegnau Tel.: +41 (44) 908 20 30 DIGITEL Elektronik GmbH Illstrasse 30 A-6706 Bürs Tel.: +43 (5552) 67850 www.digitel-ag.com [email protected] Introduction pM paM Actual air pressure in the measurement system Average air pressure in the measurement system during the sampling period Standard air pressure (the air pressure to which output of values for cs and Vs have to be related) Current air temperature on the measurement system Average air temperature in the measurement system during the sampling period Standard air temperature (the air temperature to which output of values for cs and Vs have to be related) Current air pressure at the air inlet (operation pressure) Average air pressure at the air inlet during the sampling period (average operating pressure) Current temperature at the air inlet (operation temperature) Average temperature at the air inlet during the sampling period (average operation temperature) Air pressure/temperature High Volume Sampler ps TM TaM Ts PA PaA TA TaA p/T HVS 3.5 Typographic conventions Text parts in Courier New without a framework show a thermoprinter, a serial interface or USB output Example: Fr 05.09.03 Work 3.6 11:02:47 Contact consulting In case of any questions concerning the Digitel High Volume sampler DHA-80 please contact the responsible of the Digitel representation office or apply directly to one of Digitel branchoffices. Postal addresses, phone and fax numbers as well as email are shown on the cover page. 5 DIGITEL Elektronik AG Alte Gasse 18 CH-8604 Hegnau Tel.: +41 (44) 908 20 30 DIGITEL Elektronik GmbH Illstrasse 30 A-6706 Bürs Tel.: +43 (5552) 67850 www.digitel-ag.com [email protected] System description 4 4.1 4.2 System description System overview Digitel High Volume Samplers DHA-80 and DHA-80 in 19”housing are parts of systems to sample dust and aerosol particles for later assessment and analysis. The sampler operation range in standard execution is 100 to 1000 l/ resp. 6 to 60 m³/h. The system’s usual designation is "High Volume Sampler". Various types of samplers are available from different applications. Generally, they differ by the number of processed filters and by the type of logging failure indication and status messages as well as by the type of remote control via various interface protocols. A survey of available types is shown in 7.2.2.3.3 Host-Interface. Connections The standard execution of DHA-80 has an option for a serial interface (RS-232C) next to the power-supply connector (3-pole instrument plug according to IEC 320). A connection to a PC can be made via a commercially available zero-mode cable (crossed cable). For cable lengths and installation requirements, please, adhere to the general specifications RS-232C. Description of the connectors see chapter 15 4.3 Operating mode The below-stated figure no. 1 illustrates the mode of operation. Airborne-dust particles in the sampled air are separated onto 150 mm diameter filters. The filter diameter in the flow is 140 mm. Sequent gravimetric and analytical analysis could be conducted depending upon the pollutants of interest. Filter material and structure selection (deep filters, porous filters, glass fibres, silica fibres, pulp, Teflon, porosity....) will depend on the analysis purpose. The filter conditioning is important in order to achieve reproducible results. DHA-80 has a storage of 15 filters stretched in filterholders. The filters are changed automatically to the flow position at the preset time. A flow meter controls the selected air flow rate. This value should be calibrated first at the beginning of a measurement session, using a gasmeter or a secondary standard, e.g. an additional flow meter. During air sampling, the blower flow rate is dynamically controlled, so that this value is kept at good reproducibility and at long-term stability despite the deposited filter flow resistance and the sampled ambient air pressure/temperature variation. An integrated microprocessor unit controls the filter changes at the exact preset time and collects all relevant data and events. Hereby the air quantity flowing through the filter is defined with high accuracy. All mechanical components of the changing automatics as well as the units needed for measurement as sampling probe, pipeline, flow chamber and filter holder are coated with highly corrosion-resistant and extremely smooth "Ematal". For total suspended particulates (TSP) sampling, there are two differently designed sampling probes available: -a cylinder probe (EMPA/UBA probe); and -a probe of "open ring slot" according to VDI as described in GMBI 1983 regarding non-fractionated dust sampling. Sampling probes PM10/PM2.5 are designed as single-stage impactors. They are intended for operational/volume flow of 30 m³ resp. 500 l per hour. Sampling probes PM1 are designed as double-stage impactors. They are designed for operational volume flow of 30 m³ resp. 500 l per hour. Various remote-control interfaces are built in for operation in automated measurement networks. The high-volume samplers Digitel DHA-80 are described in the VDI directive No. VDI 2463, sheet 11. Figure 1: DHA-80 block diagram 1 2 3 3a 3b 3c 4 5 5a 5b 5c 6 Inlet Separator chamber Current filter Filter stock used filter Exchange electronics Microprocessor control Flow meter Flow sensor Flow control Frequency converter Blower 6 DIGITEL Elektronik AG Alte Gasse 18 CH-8604 Hegnau Tel.: +41 (44) 908 20 30 DIGITEL Elektronik GmbH Illstrasse 30 A-6706 Bürs Tel.: +43 (5552) 67850 www.digitel-ag.com [email protected] System description 7 8 9 10 11 12 13 Noice damper Pressure & temperature measurement unit Printer interface RS-232C Interface USB interface Wind data interface touchscreen The air is sampled via a sampling probe (1), using a sampling tube, vertically from the top to the bottom through the filter (3) placed in the flowing chamber (2). With DHA-80 the changing of filters is done automatically. After the filter, the transported air quantity is measured using a flow meter with a floater (5). Its double photo-sensor (5a) optically senses the floater position. In connection with the control electronics (5b, 5c), the capacity of the pump (6) is adapted to the rpm control, so that the air quantity keeps the set-point value. Air pressure and temperature are measured upstream the flow meter and continuously averaged by the controller. A real-time protocol states sampling volumes yielding from the sampling time and controlled volume flow as the core information. The air is released from the instrument with reduced noise through a noise baffle (7). 4.4 Assembly 4.4.1 Transport 4.5 4.5.1 In general, the instrument should be transported in vertical position. Digitel DHA-80 is provided with two handles (sunk on each side of the case) and two rollers. The instrument can be slipped or pulled by tilting it slightly backwards on a smooth compacted ground (e.g. asphalt, concrete) on the rollers using the grips. Unless rolling is possible using the integrated rollers, the instrument can be lifted and carried using both the handles. The instrument must not be lifted by using the open instrument door as a handle. 4.4.2 at running up the blower is avoided by a soft run-up. For electric connection of the aerosol sampler see 3.1 "Safety instructions". Digitel DHA-80 in 19”-housing should be installed in an instrument rack, so that an intermediate space of 17 cm is left between the sampler upper edge and the rack upper edge. The delivered fixing beam should be screwed on the rack upper edge. Its muffs connect the intermediate tube leading to the sampler with the tube leading from the roof of the container, forming a connection to the sampling probe. The sampled air sample leaves the sampler via a tube sleeve (diameter 42/38 mm, length = 25 mm) at its rear wall. To transport an air sample from the container interior to the open air, the appropriate hose can be connected. WARNING In any case, the instrument should be installed or built in, in such a way that the instrument can be continuously disconnected from the mains easily by pulling out the supply cable at any time. The main switch on the front wall does not assure complete instrument electrical isolation! Digitel DHA-80 is equipped with a protection class IP54 field case. For this reason it is immediately suitable for direct open-air installation under European standard weather conditions. To avoid collection of rainwater or ice on the instrument front door upper edge, a rain drip rail (optional) should be installed. In the field, the instrument should be placed in such a way that penetration of surface water in case of heavy rain or snow melting into the instrument from the ground upwards is prevented. The sampler has to be secured against tilting. In mobile applications, an extension of sufficient stiffness of one metre long instrument-feet is advisable. For this purpose, e.g. two rectangular tubes can be screwed on the short feet of the instrument. If stationary operation is planned, the sampler should be installed higher on a concry base (e.g. width = 600 mm x depth = 300 mm). The door opening should not face the weather side and the sampler feet should be screwed using two angle sections with a base. If sampling is discontinued for a long term during winter operation, a case heater (optional) should be installed to prevent icing of the automatics. Digitel High Volume Samplers should be connected to the mains of 1 x 230 V/50 Hz (at least 3 x 1.0 mm2, 10 A, 250 V). The maximum input current is 7 A without a probe heater (max. 160 W) and case heater (approx. 60 W). The increased input power Filter paper Round filter of 150 mm diameter Selection of filter material and filter structure (deep filters, porous filters, glass fibres, quartz fibres, pulp, Teflon, porosity...) depends on the aim of examination. 4.5.2 Thermo-printer paper Thermo-rolls size: 57 x 25 x 10 mm 4.5.3 Sealing rings Sealing rings with a special finish and various sizes are used for sealing at various places in the instrument. If the instrument‘s tightness is not satisfactory any more or the surface of sealing rings shows small cracks or other damages, they should be replaced. Sealing ring sets can be ordered from Digitel. 4.5.4 Field installation Consumables Fuses WARNING: Fuse replacement can only be performed by an authorised specialist. Before opening the instrument, it should be off power. Further, it is necessary to assure that only the fuse types authorised by Digitel are used. In case of necessity, please, contact Digitel or a responsible local representation branch-office directly. In the supply unit, two fuses can be replaced: Main heating: Schurter type FSD 5 x 20; 1.2 AT, rated voltage 250 V; Controller supply unit: Schurter type FSD 5 x 20; 100 mAT, rated voltage 250 V; 4.5.5 Mains cable WARNING: Only use mains cable supplied by our company or an equivalent mains or extension cable complying with applicable standards. When using the rolled extension cable, make sure that the cable is completely unwound from the cable reel. Mind: cable reels without a thermo-fuse have a risk of fire because of strong heating of the wound-up cable! Use a Euro-instrument cable with SCHUKO-plug at least 3 x 1.0 mm², 10 A only. 7 DIGITEL Elektronik AG Alte Gasse 18 CH-8604 Hegnau Tel.: +41 (44) 908 20 30 DIGITEL Elektronik GmbH Illstrasse 30 A-6706 Bürs Tel.: +43 (5552) 67850 www.digitel-ag.com [email protected] System description 4.5.6 Grease for sampling heads (impactors) Examples for greases that can be used: BAYSILON paste, highvacuum grease, medium-viscous (35 g tube) and silicon highvacuum grease medium Merck 100 g, CAS Nb. 107922. 4.6 Maintenance Digitel High Volume Samplers need minimum maintenance. However, depending on the degree of air pollution and climatic load upon installation site, inspection of the sampler associated with cleaning is necessary. In particular, the following activities shall be performed: 4.6.1 Cleaning High-volume samplers must be cleaned on regular basis. Cleaning intervals strongly depend on particulars of installation site and they have to be determined by the operator. They may range from one month up to a year. During cleaning, the instrument should be off power. To clean the instrument, a dry cloth should be used. At heavy contamination, the cloth should be wetted with a commercial window cleaning agent. Make sure that the instrument is dried up before putting under operation again. Avoid using solving and scrubbing cleaning products! The flow meter glass tube has to be visually inspected. In case of a broken filter or negligent sampler operation without a filter inserted, contamination can also occur. In case of any doubt, the tube has to be removed and cleaned. Due to its difficult accessibility, the upper part of the funnelshaped flow chamber located before the filter, can only be cleaned in combination with possible changer apparatus service works. As this section of air-sample path shows a much larger inner diameter, as a rule, it is less affected by deposits. The air inlet tube interior has to be inspected for wall deposits and in case of doubt, cleaned, using a cloth. As a cleaning liquid, we recommend water and/or spirits. TSP sampling probes ("open ring-slot" according to VDE or "EMPA/UBA" - cylindrical probes) have to be checked for dust deposits and cleaned, if possible. Normally cleaning with the use of a wet cloth is sufficient. Probes PM10, PM 2.5 and PM1 To avoid effects of released separated rough dust particles, the cannon surface of the impactor plate has to be permanently covered with a thin fat layer. It has to be renewed periodically. Thereby the life cycle depends upon the proportion of rough dust in the sampled exterior air. It is recommended to clean the impactor plate after 14 sampling days, by the time the average total dust volume (TSP) on the installation side is approx. 70 to 80 g/m³. With lower TSP, the cleaning interval can be longer. The cleaning interval can be reduced by rotating of the moveable impactor plate resting on the heating holder by about 15° (approx. 2 cm). Acceleration nozzles then point at the "clean" areas between rough dust deposit settled in a circular form of the previous sampling operation. The impactor plate can be removed simply after opening the probe upper part. It has to be cleaned with a clean cloth and its cannon surface has to be greased. A 5 cm long band of grease should be equally spread on the area, using a spatula. To relieve this maintenance in the field, the impactor plate can be replaced by another plate prepared in the laboratory. Acceleration nozzles, probe casing liners, as well as liner behind the impactor plate with the above-mentioned TSP condition have to be cleaned after 30 flowing days. In case of longer sampling in foggy environment it is recommendable to inspect the impactor plate for water condensate. 4.6.2 Exchange of sealing rings The transition areas between the above-stated path separate section of the air probes are equipped with sealing rings. Special attention has to be paid to the sealing ring of 43 x 3 mm at the sampler air inlet muffle, as well as to the glass measurement tube's sealing rings (50.4 x 3.53 mm). These sealing rings have to be checked and possibly replaced after 2 to 3 years of operation. The sealing ring of 150 x 3 mm at the bottom flange of upper part of the flowing chamber should be inspected by a Digitel service engineer and possibly replaced after 2 to 3 years of operation. Sealing rings (150 x 3 mm) at the filter holder bottom part have to be equipped with an anti-friction layer. They have to be regularly checked when a new filter is inserted and rubbed, using a dry cloth. When this layer is worn out or in case of increasing sticking tendency, it should be renewed. We recommend to replace these sealing rings annually. 4.6.3 Tightness test Checking of volume-flow calibration Blower charge and the required convertor frequency indicated for a particular flow rate and filter type have to be noted at the beginning of instrument operation. Sudden insufficient blower capacity under the same conditions is caused by leakage in the air-sample path (after the filter). Another very simple option for testing the sampler tightness consists in closing the sampler at the air inlet muffle with air inlet tube removed or, as the case may be, by inserting an airimpenetrable cardboard instead of the filter paper to the filter holder and switching the blower on. In both cases, the flow meter floater must not be lifted from its resting position at the bottom of the measurement tube. Hereby the blower must be run up to its maximum capacity in order to reach the overload condition. Checking of the volume flow simultaneously represents a check of tightness. These procedures have to be taken about every two months. The second flow meter of the same type as in the sampler used to check the volume flow in the sampler itself and has to be installed onto the sampler sampling probe as "transfer standard". With a new round filter paper inserted, positions of floaters are compared by switching the blower on. With deviations of the set point originally calibrated on the flow meter of the sampler, checking of tightness should be performed. There are specified flow meters with calibrated glass tubes available at Digitel (calibration unit). 4.6.4 Visual inspection of homogeneous deposit Upon removing dusty filter papers or during weighing, filters have to be subject to visual inspection for homogeneous deposits. Drop-like spots in the filter centre, as a rule, indicate inoperable probe heating, or/and a defective air inlet muffle sealing ring. Bright spots on the filter paper rim are attributable to defective sealing of the flowing chamber upper part with the filter holder upper surface (service works are definitely required!). 4.6.5 Acoustic inspection of blower The applied blower has the average MTBF (average time between failures) of 36 000 hours. It is maintenance-free. However, for instruments under operation for longer than two years, an occasional acoustic inspection of the blower by an open room blower is recommended to prevent a possible blower blocking. Special attention has to be paid to excessive, unusual noises generated by the blower (scrubbing, screeching). 8 DIGITEL Elektronik AG Alte Gasse 18 CH-8604 Hegnau Tel.: +41 (44) 908 20 30 DIGITEL Elektronik GmbH Illstrasse 30 A-6706 Bürs Tel.: +43 (5552) 67850 www.digitel-ag.com [email protected] Operation and Programming 5 5.1 Operation and Programming Operation modes HVS can be operated in two operation modes: Autonomous operation: The integrated microprocessor control performs fully automated sampling based on the status times set. Logging is performed on the printer, on the PC USB drive or on the RS232C interface. Remote operation: The HVS control is performed via the RS232C or Ethernet interface. Logging is optionally performed on the printer or similarly on the RS232C interface or on the integrated USB drive. In this operation mode, time control is carried out by the host computer. The programmed status times are not considered in the HVS. 5.2 Filter Preparation Reliable and reproducible measurement results can only be achieved by using filters that are carefully conditioned before and after sampling. Filters are pre-weighed and provided with a date. In order to enable a checking during the operation by which a correct assignment of filters is possible, the filters are inserted into the filter holder marked according to respective dates. The spring collar is removed from the filter holder (using pliers) while a Teflon ring is laid on a clean surface by using forceps. New filters are removed from the filter magazine by using forceps and laid into the filter holder. Then the Teflon ring should be laid again (using forceps) on the ring and the spring collar is set using pliers. Now the filter holder is ready for transport to the sampler. During the filter transport, no impurities should get onto the filter (therefore refer to standard EN 12341). The deposited filter is removed from the filter holder, using forceps, and inserted into a simply folded parchment envelope. Warning! Possible labelling of a filter holder is only permitted on its front, using a marker. Any inscription on the filter holder on the upper or bottom sides, as well as sticking labels (on the filter holder entire surface) might cause problems with filter exchange and is prohibited! Please mind that no sealing ring (on the filter holder and in the flowing chamber) gets in touch with inscriptions. The solvents, applied in various markers or pens, destroy the applied sealing rings! Moreover, paint residuals may result in bonding the sealing rings! figure 2 filter preparation 5.3 5.3.1 Setting of operation status Start operation or restart sampling instrument Main switch in the position "On"; To perform setting of required status times ("Work”, "Pause”); To perform settings of required general operation parameters (filter change at overloading, stop time at power breakdown, logging of status and failure indication messages, logging mode); Setting pressure and temperature compensation, selection of values to be logged as well as pressure sensor calibration (required, only if no semi-automated calibration of the instrument has been carried out!); If necessary print applied settings; To insert the first filter holder manually into the changer magazine;To slide upwards up to the stop and to hold empty collection tray with the right hand; 10a With a firmly held empty collection tray, press the key "Manual change" for approx. two seconds, then put the switch "Changer off" to the position "on". Then the inserted filter holder is automatically transported to the flowing position; 10b Alternatively: using the black knob by rotating with the left hand, the changer fork can be moved from the flowing position below the magazine and back. Herewith, while the fork is under the filter holder magazine, the inserted filter holder should drop from the magazine onto the fork; Insert further filter holders with filters (observe the date sequence) to the filter magazine. The switch "Changer off" has to be put into the position "on" (unless already performed under point 10a)); The switch "Blower off" in the position "on"; Possible new start time to program and to restart the program or to program flow through the "prestart filter". So the sampler is programmed and sampling will start at the start time set 5.3.2 Instrument filter exchange and inspection Blower running 1. The filter magazine has to be replenished with new s in the simplest way under operation, but no more than 15 filter holders should be in the magazine, otherwise the capacity of the collection tray might be exceeded! Deposited filters can be removed from the collection tray during operation without switching the instrument off. 2. At the beginning, the instrument has to be inspected more frequently. It is necessary to make the checks as listed below: The display has to indicate the time in minutes elapsed since the beginning of the current filter program up to the current time. Mind: always Central European Time! The previous day filter holder has to rest at the top of the collection tray. The next day filter holder is in a circular recess of the upper changer plate in the waiting position to be changed; The floater of flow meter has to be in its set-point position. When indicating "Last filter in service", the magazine has to be charged with new filter holders so that the changing program can continue without interruption. Read the instrument operation duration from the counter concerning the operation hours and enter the reading together with the current time (always CET) in the logbook. Printer protocol feasibility (optional) has to be checked. 9 DIGITEL Elektronik AG Alte Gasse 18 CH-8604 Hegnau Tel.: +41 (44) 908 20 30 DIGITEL Elektronik GmbH Illstrasse 30 A-6706 Bürs Tel.: +43 (5552) 67850 www.digitel-ag.com [email protected] Operation and Programming 5.4 Controls Controls are ordered in a sequence according to their functional relevance on the front panel. Knob for hand change of filters Touchscreen Main Switch Status-LEDs Figure 3: Front panel with control elements 5.4.1 Touchscreen filter changer has to be deactivated manually via the menu. (see chapter 7.1) The operation of the DHA-80 will be carried out via the touchscreen. The status of the program as well as all status and error messages/notifications will be displayed. The navigation at the touchscreen is just a question of touching the particular zones. All pale blue operation zones are zones with a function. By touching the pale blue zones they will turn into dark blue. In case of errors resp. malfunctions, the corresponding operation zones will be displayed in red. These red operation zones can be activated as well. By touching them they will turn into dark blue. 5.4.2 Knob for Hand Change of Filters 5.4.3 Main Switch The device is switched off via the main switch 5.4.4 Status LEDs Feeder: the status display lights up as soon as the supply voltage is connected. Supply on The status display lights up as soon as the main switch is set on "on" (resp. "1") and there is no error at the power supply. The knob for the filter changer mechanics allows an operation of the changer mechanics by hand. Before using the switch the 10 DIGITEL Elektronik AG Alte Gasse 18 CH-8604 Hegnau Tel.: +41 (44) 908 20 30 DIGITEL Elektronik GmbH Illstrasse 30 A-6706 Bürs Tel.: +43 (5552) 67850 www.digitel-ag.com [email protected] Function Description 6 Function Description 6.1 Status Messages Please read the following text for description concerning the status messages which may appear during HVS control and how they are displayed and logged. The logging (showed below) corresponds to the logging made by an optionally connectable printer. If no special protocol is programmed for the RS-232C interface, in addition to that, the log data will be put out parallel in the same format on the RS-232C interface. The type of logging of the various special protocols can be found in the annex of this manual. 6.1.1 "Last filter in service" If the last filter is inserted (the filter container is empty), the following will appear: Fr 05.09.03 11:05:28 Last filter in service The status message is cancelled as soon as the new filters are inserted in the container or the program switched to the status "End of program". If during the running working period no additional filters are inserted, after the elapsing working period, the following message will be displayed: Sa 06.09.03 Pause Ensure that by this automatic new start of the program, the point of exchange can be changed. This occurs when the control was in the pause status for a longer time than was pre-set. 6.1.2 Remote control If the remote control (analogue remote control via remote control connector or remote control via serial interface) is activated, it is logged as follows: Fr 05.09.03 extern 11:05:28 The status message is deleted as soon as remote control is deactivated. 6.2 Failure indication messages The following is a description concerning the HVS control failures and how are they displayed and logged. The messages provided in the following protocols correspond to those of the optionally connectable printer. If there is no special protocol programmed for the RS-232C interface, in addition to that, the log data will be put out parallel in the same format on the RS232C interface. The type of logging in various special protocols can be found in the annex of this manual. 11:05:28 6.2.1 AC Power supply failure Sa 06.09.03 11:05:28 End of program After a power breakdown, the start and the end of the power supply is displayed as follows: Fr 05.09.03 Blower off Power cut from : Fr 05.09.03 10:56:23 until : Fr 05.09.03 11:02:45 11:05:30 Collecttime[min]: 1012,46 # Blower on/off : 1 paM [mbar]: 929 TaM [°C]: 20,0 If invalid characters (special characters) occur in the date or in the time, or the date resp. the time indicates an invalid value, it suggests that the back-up battery is empty. By a power supply breakdown, the clock module cannot preserve its data! In this case, the back-up battery should be recharged (switch HVS on for several hours) or check the battery and the controller for damages. After the display of the time of breakdown, the actual status of control will be displayed (working, pause...): cM : 1,053 cs( 15/1013) : 0,949 cA( 17/ 996) : 0,972 VM [m³]: 539,268 Vs( 15/1013)[m³]: 492,990 VA( 17/ 996)[m³]: 497,842 at 512 l/min --------------------------- Fr 05.09.03 Work The status message is cancelled if new filters are inserted into the container (automated restarting with filter exchange) or the program is restarted manually. The program remains in the pause status until new filters are inserted and the pause period is elapsed. Then the program will start automatically a new processing cycle. Sa 06.09.03 12:05:28 Start of program Sa 06.09.03 Work 6.2.2 Overloading without Filter Changing If a blower overload status is detected, the blower is automatically switched off and the overload message is displayed: Fr 05.09.03 Overload 12:05:28 11:02:47 11:04:12 If the program setting also allows an indication of blower load, switching off the blower is also shown on the display: Sa 06.09.03 12:05:28 Filter change Fr 05.09.03 Blower off 11:04:15 11 DIGITEL Elektronik AG Alte Gasse 18 CH-8604 Hegnau Tel.: +41 (44) 908 20 30 DIGITEL Elektronik GmbH Illstrasse 30 A-6706 Bürs Tel.: +43 (5552) 67850 www.digitel-ag.com [email protected] Function Description In this status, upon the first occurrence of overloading, the control remains for several seconds. Upon next occurrence of the same filter overloading, the status "Blower off" remains for approx. 15 minutes. Then the blower is switched on again. Fr 05.09.03 Blower on Overloading with Filter Changing If an overloading status of the blower is detected, the blower is switched off automatically and an overload message displayed: Fr 05.09.03 Overload 11:04:12 If the program setting also enables to display the blower load, "Blower off” is displayed: Fr 05.09.03 Blower off 11:04:15 At the first occurrence of overloading the control remains in this status for several seconds. Upon the next occurrence of overloading with the same filter, the blower is switched off for about 15 minutes. Then the blower is switched on again. The whole process is repeated three times. Fr 05.09.03 Blower on 11:08:42 If in case of overloading, the inserted filter is the last one, the control switches the blower off or logs in case of overloading and waits until the working period elapses. After the working period elapsed, the control will switch into the pause status. The switching of the status and the program ending are displayed. The program stays in this status until being restarted. Sa 06.09.03 11:04:28 Pause End of program If overloading occurs also with a newly inserted filter, the control will try three times to switch the blower off and on. If the overloading is not removed this way, a filter changing is newly carried out (inclusive all logs as described above). The failure indication message is cancelled after a new filter is inserted, the program is restarted or if a power breakdown occurs. 6.2.4 Changer Jammed If the exchange mechanism is jammed (filter exchange cannot be carried out), the control tries on its own to remove the blockage, using the running-up motor of the periodic changer in connection with a flexible clutch to effect proper filter transport. If the filter exchange is impossible, despite multiple trials, the control remains in the failure indication status "changer locked" with the changer motor switched off. The following failure indication message is displayed: Fr 05.09.03 11:05:28 Changer jammed 11:05:28 There are four successive attempts to insert a filter during the pre-selected working period. After the fourth occurrence of overloading during a working period, a filter exchange is started. Mind that the minutes display is not reset! Fr 05.09.03 Blower off Fr 05.09.03 Blower on 11:05:28 There are three successive attempts to insert the filter during the pre-selected working period. After the third occurrence of overloading, the blower will be turned off for 2 hours. Afterwards the blower starts again and a new occurrence of overloading will be handled in the same manner as described above. The display shows a failure indication message consisting of four lines. The failure indication message is cancelled, if a new filter is inserted, the program is restarted or a power breakdown occurs. 6.2.3 seconds (the switch-on point is slightly delayed). The newly exchanged filter is flown as long as the working period set for the filter originally processed is achieved. 11:08:23 Depending upon the program setting, various additional information concerning inserted filters will be displayed, such as: In this case, please, the filters placed in the filter container must be checked. The inserted filters can be changed manually, when the filter changing automation is switched off and the filter is exchanged using a handwheel or a manual starting. Then, in any case, the filter exchange automation has to be switched on again. If the exchange mechanism is not in the final position (filter changed) after switching the automation on, it will get to the final position automatically. If the filter exchange automation is switched off during normal operation, this failure indication message is always shown on the display. 6.2.5 Collecttime[min]: 1012,46 # Blower on/off : 1 paM [mbar]: 929 TaM [°C]: 20,0 cM : 1,053 cs( 15/1013) : 0,949 cA( 17/ 996) : 0,972 VM [m³]: 539,268 Vs( 15/1013)[m³]: 492,990 VA( 17/ 996)[m³]: 497,842 bei 512 l/min --------------------------- Cartridge Changer Jammed If the mechanics of the cartridge changer are blocked (no cartridge change can be made) the control tries to lift the blockade by turning on the motor periodically in combination with the elastic coupling, so that the cartridges can be transported normally again. If the change cannot be done successfully after a number of tries, the control stopps with turned-off motor in the failure state "cartridge changer jammed". The following failure report is given out: Fr 08.05.09 11:05:28 Cartridge changer jammed Fr 05.09.03 11:08:28 Filter change Now the blower is switched on again and, if the programming allows so, the message "Blower on" is displayed after several 12 DIGITEL Elektronik AG Alte Gasse 18 CH-8604 Hegnau Tel.: +41 (44) 908 20 30 DIGITEL Elektronik GmbH Illstrasse 30 A-6706 Bürs Tel.: +43 (5552) 67850 www.digitel-ag.com [email protected] Function Description 6.3 Status change Fr 05.09.03 12:01:23 Motor load : 65 % Status changing by the HVS control occurs, if the timer achieves the pre-set value. The logging, showed below, corresponds to the logging of the optionally connectable printer. If there is no special protocol programmed for the RS-232C interface, additionally, the log data will be put out parallel in the same format on the RS-232C interface. The type of logging can be found in various special protocols in the annex of this manual. Arbitrary status Start time The HVS control stays in this operation status, until the pre-set start time is reached. Hereby, the start time can be determined for the period of sampling time (if e.g. sampling of daily samples has to be started at midnight). The following logging will be displayed: Fr 05.09.03 Wait If the control was previously in the working status and the blower was switched on, the automatic switching-off of the blower and the determined values are logged (only if the programming enables so, too): 11:04:15 Collecttime[min]: 1012,46 # Blower on/off : 1 paM [mbar]: 929 TaM [°C]: 20,0 cM : 1,053 cs( 15/1013) : 0,949 cA( 17/ 996) : 0,972 VM [m³]: 539,268 Vs( 15/1013)[m³]: 492,990 VA( 17/ 996)[m³]: 497,842 at 512 l/min --------------------------- Work Pause When the pre-set working time is achieved, the HVS control switches the program status to the pause and the blower will be switched off: 12:00:00 When the programming activates to display the blower status message and time information, the following log is displayed: Sa 06.09.03 Blower off 12:00:05 Collecttime[min]: 1012,46 # Blower on/off : 1 paM [mbar]: 929 TaM [°C]: 20,0 cM : 1,053 cs( 15/1013) : 0,949 cA( 17/ 996) : 0,972 VM [m³]: 539,268 Vs( 15/1013)[m³]: 492,990 VA( 17/ 996)[m³]: 497,842 at 512 l/min --------------------------Now the HVS control is waiting until the set pause time is reached. Pause Work When the set pause time is reached and the program is not completed yet (there are still some filters left in the container), the HVS control switches the program status to work, filter will be exchanged and the blower will be switched on: After reaching the starting time, the program is started up automatically. No filter exchange is carried out. The program starts the sampling period using the just inserted filter. Waiting for starting time Work: When the pre-set starting point is achieved, the HVS control switches the program status to work, switching the blower on: 12:00:03 When the programming allows to display the blower status message, the following is displayed within several seconds after the blower running up: Fr 05.09.03 Blower on The blower load display is made by measured values slightly averaged delayed. When the pre-set working time is reached, the program switch status will turn from work to pause. Sa 06.09.03 Pause In the entry menu for the starting time, it can be selected whether a starting time is to be determined or the program starting is to proceed immediately. Fr 05.09.03 Work Fr 05.09.03 18:04:43 Motor load [%]: 68 11:03:13 The starting point is determined at the menu point "Starting date/time"). Fr 05.09.03 Blower off If the blower load, during operation, is changed by an adjustable value (in percentage), the current blower load is displayed again Sa 06.09.03 Work 12:00:07 Sa 06.09.03 12:00:10 Filter change When the program activates to display the blower status message, the following is displayed within several seconds after blower run-up: Sa 06.09.03 Blower on 12:00:15 After approx. 1 minute, the current blower load is displayed (this programming allows it as well): 12:00:10 Sa 06.09.03 12:01:23 Motor load [%]: 67 After approx. 1 minute, the current blower load is displayed (if the program allows it, as well): In the working status, the basis display shows the related time information. 13 DIGITEL Elektronik AG Alte Gasse 18 CH-8604 Hegnau Tel.: +41 (44) 908 20 30 DIGITEL Elektronik GmbH Illstrasse 30 A-6706 Bürs Tel.: +43 (5552) 67850 www.digitel-ag.com [email protected] Function Description 6.4 6.4.1 Flow calibration General information In order to measure and to control volume flow, the flow meter accuracy class 2.5 (tolerance +/-2.5 % from the measurement range value) is used with the Digitel High Volume Sampler as a measurement value sensor. To increase accuracy of the transported volume flow, it is possible to perform semiautomated calibration using an external calibrated flow meter as described in chapter 6.3. It is explicitly pointed out that no marks (e.g. own calibration marks as marker marks, labels...) may be applied on the flowmeter measurement tube. It might result in erroneous functionality or failures that can be hardly detected during calibration! The values on the glass tube can be considered as rough benchmarks only. In order to be able to determine accurate flow values, it is necessary to determine the floater position in the divisions etched on the measurement tube. Accurate flow in liter/min. can be determined from this floater position, using the calibration table (chapter 12.1). 6.4.2 Calculation The following calculations are performed for a calibrated flow rate of 500 l / min at the inlet. From Software Version Hxx.25 may also be calibrated to a different flow rate. Ratio of flow values of two gases is indirectly proportional to ratio of square roots of their densities. - the flow meter principle: Q2 Q1 Q1: Q2: 1: 2: 1 2 pStation flowmeter = pStation – pfall at filter (will be meassured automatically during calibration) pStation integrated flowmeter: average air pressure at the installation site minus pressure fall at filter at volume flow of 500 l/min. Which means: the air pressure of measuring system if the air pressure at the inlet is the same pressure as at the station. TStation integrated flowmeter: average temperature at the installation site plus 3K temperature increase at filter at volume flow of 500 l/min. Which means: the temperature of the measuring system if the temperature at the inlet is the same temperature as at the station. from the general gas equation Q1 Because ρ ~ p/T , the operation volume flow gives Qloc (at the place of installed flow meter) from the volume flow value Qscale read from the glass scale as: Qloc QScale (pref Tloc) (Tref ploc) QScale: volume flow read on scale pref: 1 013 mbar (pressure at which the scale was calibrated) Tref: 15°C or 288 K (temperature at which the scale was calibrated) ploc: operation pressure on the flow meter Tloc: temperature on the flow meter or QScale Qloc (Tref ploc) (pref Tloc) For operation volume flow of 500 l/min under station conditions the following conditions will be on the integrated flowmeter: TStation flowmeter = TStation + 3K (approximate value) it follows: Qloc buil - in flowmeter (Station) pStation TStation 3K QRef TStation pStation - pfall at filter pStation TStation build - in flowmeter QRef TStation pStation build - in flowmeter QRef: Air inlet volume flow of 500 l/min. under station conditions. Qloc indoor Station: volume flow in the integrated flowmeter for air inlet volume flow of 500 l/min. under station conditions. pStation: average air pressure at the installation site TStation: average temperature at the installation site At the station conditions at the integrated flowmeter and from equation (3) and (4) follows: QScala build - in flowmeter QRef known flow value, reference status searched flow value in operation status known density, reference status density of measured gas in operation status p1 p2 Q2 T1 T2 pStation TStation Tref TStation build - in flowmeter pref pStation build - in flowmeter QScala integrated flowmeter: Shown volume flow at integrated flowmeter under station conditions at inlet for air inlet volume flow of 500 l/min. This value is automatically taken over by the control software as a set flow. At these settings the volume flow at the inlet is QRef (500 l/min) if the station conditions are given. The volume flow for different conditions during calibration follows from equation (2) and (5): QCal build - in flowmeter QScala build - in flowmeter pref Tbuild - in flowmeter Tref pbuild - in flowmeter QCal integrated flowmeter: actual set volume flow (actual conditions) at the integrated flowmeter for volume flow of 500 l/min at the inlet under station conditions. pintegrated flowmeter: actual pressure in the integrated flowmeter during calibration Tintegrated flowmeter: actual temperature in the integrated flowmeter during calibration or 14 DIGITEL Elektronik AG Alte Gasse 18 CH-8604 Hegnau Tel.: +41 (44) 908 20 30 DIGITEL Elektronik GmbH Illstrasse 30 A-6706 Bürs Tel.: +43 (5552) 67850 www.digitel-ag.com [email protected] Function Description QCal build - in flowmeter QRef pStation TStation Tbuild - in flowmeter TStation build - in flowmeter pbuild - in flowmeter pStation build - in flowmeter From the general gas equation and from the equation (7) follows the volume flow on calibrated flowmeter: QCal Ref QRef (8) pStation Tcal. flowmeter TStation pcal. flowmeter pbuild - in flowmeter TStation build - in flowmeter Tbuild - in flowmeter pStation build - in flowmeter QCal Ref: flow on calibrated flowmeter (under actual conditions), so that reaching the operation volume flow of 500 l/min (at the inlet) under station conditions. Pcal. flowmeter: actual air pressure in the calibrated flowmeter (during calibration is the same pressure at the separator) Tcal. flowmeter: actual air temperature in the calibrated flowmeter (during calibration is the same temperature at the separator) according to EN 12341; the UMEG report No. 6-08/00), the reproducible setting accuracy represents +/-0.45 %. Flow calculation error due to the sensor error The following example clarifies the effect of an internal sensor error: QN QScale TN (pref pm) (Tref Tm) pN QN: average flow on standard conditions Qscale: the flow set on the flowmeter pN: standard pressure (1 013 mbar) TN: standard temperature (288 K) pref: 1 013 mbar (the pressure at which the scale was calibrated) Tref: 288 K (the temperature at which the scale was calibrated) p m: average pressure on the integrated flowmeter during sampling period Tm: average temperature on the integrated flowmeter during sampling period From the equation (3) and the equation (8) follows the flow to be set on calibrated flowmeter (under actual conditions), thus reaching the operation volume flow of 500 l/min (at the inlet) under station conditions. The maximum error of QN caused by an error of Tm and pm measurements is at maximum +/-1.66 % throughout the entire temperature range of application. As a rule, the error is significantly smaller, as the error of pressure measurement at the standard operation temperature range is considerably smaller. Anyway, to this the uncertainty of flow determination of +/0.45 % has also to be added. Example: (9) QScale = 520 l/min, pm = 960 mbar, Tm = 295 K pStation QScale Cal Ref QRef TStation pbuild - in flowmeter TStation build - in flowmeter Tcal. flowmeter Tref Tbuild - in flowmeter pStation build - in flowmeter pcal. flowmeter pref QScale cal Ref: flow to be set on calibrated flowmeter, so that reaching the operation volume flow of 500 l/min (at the inlet) under station conditions. 6.4.3 Error estimates A frequent question emerges how errors in temperature or pressure measurements or deviation from assumption applied to the determination of the operation volume affect the calculated standard resp. operation volumes. The order of magnitude of these errors is illustrated below using several examples. Further, there are also stated affects of deviations of actual station conditions during the sampling period how the entered station conditions affect upon calibration of the instrument. Accuracy of internal sensors The pressure measurement in an integrated flowmeter is performed with an accuracy of +/-2 % from an indicated value within the entire temperature range of application. The temperature measurement in the integrated flowmeter is performed with an accuracy of +/-0.75 % from the indicated value in K within the entire temperature range of application. Flow settings accuracy on calibrated flowmeter According to the UMEG test report examination in which also the accuracy of the flowmeter flow settings are examined (test of Digitel High Volume Sampler DHA-80 with a PM10 inlet from which the standard flow is calculated: QN = 500.17 l/min. if now the measurement of pm transmitted a value higher by 10 mbar (approximately 1.05 % error), it yields an actual standard flow of QN = 497.56 l/min. So the standard flow was entered approx. 0.52 % too high. The result were similar, if the temperature was erroneous: Let us assume the measured temperature was approx. at 2 K (about 0.67 % higher), then it implies actual standard flow of QN = 50l.88 l/min. The standard flow was also entered about 0.34 % lower. Error estimates for calibration We have based our considerations upon the fact that values required for calibration are given with higher accuracy (current pressure and current temperature on a calibrated flowmeter are better than +/-0.5 %). Assuming that the total error of calibration remains below +/-1 % (+/-0.5 % due to pressure and temperature values and +/-0.45 % due to the accuracy of the setting of the floater in the calibrated flowmeter). The flow value calculated for controlling depends only upon internal measurement magnitudes of Tm and pm. Herewith, to this value, the above-calculated maximum error of +/-1.66 % applies for this value. Because of the fact that at the moment of calibration the pressure sensor is also automatically calibrated, the error generated by pressure sensor leads in direction of a release limit of the internal analogue/digital convertor. Other considerable error sources (e.g. temperature drift of supply and reference voltages) are not relevant at the present time. Herewith the maximum error is reduced to +/-0.58 %. It should be noted that the uncertainty of flow setting of +/-0.45 % should be added to this value, whereas the maximum total error of automatically calculated flow yields to +/-1.03 %. 15 DIGITEL Elektronik AG Alte Gasse 18 CH-8604 Hegnau Tel.: +41 (44) 908 20 30 DIGITEL Elektronik GmbH Illstrasse 30 A-6706 Bürs Tel.: +43 (5552) 67850 www.digitel-ag.com [email protected] Function Description The accuracy of pressure and temperature value for station conditions do not result in absolute accuracy of calculated operation and standard volume values! Particularly the average actual operation volumes determined over a year do not correspond to required operation volumes of 500 litres/min., if the average yearly pressure and temperature values do not correspond to the entered station conditions. Example: PStation: average air pressure at the installation site TStation: average temperature at the installation site QStation: average operation volume flow at the installation site (500 l/min.) PStation = 990 mbar, Tstation = 282 K, when calibration was performed under these station conditions and the average temperature over a year is deviated by 1 K upwards, general gas equation Q1 QStationnew QStation p1 p2 Q2 T1 T2 TStationnew TStation yields: = 501.77 l/min. It was transported approx. 0.35 % more in yearly average. This deviation of the required flow, however, impairs the inlet separation degree only to a small extent. 6.4.4 Performing calibration 6.4.4.1 Preliminary notes Semi-automatic flow calibration only is possible using one of calibrated Digitel flowmeters designed for this purpose. If you wish to relate calibration to an other transfer standard, please contact Digitel directly or a local branch-office in order to get suitable calibration instructions. The same applies to a calibration for an operation volume flow different from 500 l/min. Calibration for the operation volume flow of 500 l/min. at station conditions (estimated average air pressure and average temperature at the installation site during an expected sampling period) is done with regard to Digitel inlets (PM10; PM2.5) having their "cut point" of 10 m or 2.5 m always at this flow rate. At the same time, the comparison of sampling results of as many stations as possible is made simpler. All calibrated flowmeters delivered by Digitel have a calibration marking (prevailing a red mark) for 500 l/min. at 15°C and 1 013 mbar. For the performing of forthcoming calculations, the following parameters have to be entered: poutdoor: current pressure at calibrated flowmeter Toutdoor: current temperature at calibrated flowmeter pStation: estimated average air pressure at the installation site during expected sampling period TStation: estimated average temperature at the installation site during expected sampling period; position of the calibration mark on the calibrated flowmeter in mm; position of the floater in the calibrated flowmeter before re-calibration; position of the floater in the integrated flowmeter after re-calibration. The values for pStation and TStation can only be estimated. As a rule the average annual values of air pressure and air temperature at the installation site are applied (presumed that the instrument will operate at the installation site for a period of at least one year). These values can only be taken from neighbouring meteorological stations. If no meteorological data are available, it is possible to refer to offices of local weather services. As a rule, required data can be determined with satisfactory. 6.4.4.2 Preparation for calibration Prepare a calibrated flowmeter with a matching coupling adapter. Prepare a filter holder with an inserted new filter. The same filter material has to be used as the material used for the subsequent sampling. Note the position of the calibration point on the calibrated flowmeter (as a rule, a red mark). The position reading is performed in mm (printed scale division). Determine the data for pStation and TStation (yearly average values for pressure and temperature at the installation site). Determine the data for Pouter and touter (current pressure and current temperature at the calibrated flowmeter; if the calibrated flowmeter is fitted in the measurement cabinet directly on DHA80, the inner temperature of the measurement cabinet has to be applied; if the calibrated flowmeter is operated in open air, the current outer temperature has to be determined). Set the switch probe, heating to the lowest degree. If the sampler is just processing a program, follow the instructions shown under item 7. Otherwise skip to item 9. Remove the already deposited filters from the filter magazine below the changer level (just check the sequence of filter holders, if the filters are not numbered). Remove all the filters that are not sampled yet from the filter magazine. (here check the sequence of filter holders as well). The filter holders, processed and located presently in the flowing chamber, shall be changed during calibration. Therefore it is not required to remove this filter holder manually from the flowing position! Further, all data determined at the beginning of calibration are automatically logged to the currently active filter (printer, USB drive, interface). It is not required to finish the program before starting calibration! Now calibration can be performed. 6.4.4.3 Start calibration Start calibration as following > menu -> change program status > Start calibration. By starting the calibration a possible running sampling program could be interrupted. The current filter data will be logged. After data logging exchange for the interrupted sampling cycle following display will appear: The following values are automatically determined during calibration: pindoor: pressure in the integrated flowmeter during calibration Tindoor: temperature in the integrated flowmeter during calibration 16 DIGITEL Elektronik AG Alte Gasse 18 CH-8604 Hegnau Tel.: +41 (44) 908 20 30 DIGITEL Elektronik GmbH Illstrasse 30 A-6706 Bürs Tel.: +43 (5552) 67850 www.digitel-ag.com [email protected] Function Description Here you can set the flow rate in [l/min] at the inlet enter during the sampling period. The calibration is performed to this desired flow rate. After setting the flow rate, the display indicates a requirement to insert a filter holder with a new filter into the filter holder magazine: Further on, the calibrated flow meter has to be set ( fitting should be preferably carried out between the air inlet on DHA-80 and inlet). Check if the filter holder is in the flowing position. The empty calibration filter resting in the filter magazine will be exchanged automatically. Now when applicable, you can remove a changed filter holder from the filter collection tray and re-insert it in the filter magazine after calibration and continue the sampling program. Subsequently you select the manufacturer of the internal measuring tube: TECFLUID: 420 – 600 l/min TECFLUID: 100 – 1000 l/min TECFLUID: 150 – 1500 l/min other flow meter: flow meter from other manufacturer KDE/MOBREY : 100 – 1000 l/min After the selection of the measuring tubes the display will show you an overview of the entered flow meters: Primarily select tne manufacturer of the reference measuring tube: TECFLUID: 420 – 600 l/min TECFLUID: 100 – 1000 l/min TECFLUID: 150 – 1500 l/min other flow meter: flow meter from other manufacturer KDE/MOBREY : 100 – 1000 l/min Please enter the annual average values of the air pressure and air temperature at the installation site. Warning: The temperature has to be entered in degrees Kelvin! If a KDE/MOBREY reference tube is connected, the position of the calibration point has to be indicated. Please indicate the position of the calibration point on the calibrated flow meter. The measuring tube has been furnished with a scale division in mm from 0 to 270 units. 17 DIGITEL Elektronik AG Alte Gasse 18 CH-8604 Hegnau Tel.: +41 (44) 908 20 30 DIGITEL Elektronik GmbH Illstrasse 30 A-6706 Bürs Tel.: +43 (5552) 67850 www.digitel-ag.com [email protected] Function Description Please put in the current conditions at the calibrated flow meter: For TECFLUID reference measuring tube ONLY: Please indicate the scale division at the displayed flow rate on the calibrated flow meter: After the values have been entered the blower will run up. If the floater is at a stable position in the calibrated flowmeter, please read the current floater position from the calibrated flowmeter in mm and enter the determined value: Then the display shows the data of the scale value to which the floater has to be set at the calibrated flow meter - by moving the photo-diode fork on the integrated flow meter- so that the instrument is calibrated for the specified station conditions: After the entering of the value please wait for approx. 15 seconds. During this period the temperature and pressure in the integrated measurement system will be determined: After having carried out the setting, please confirm the process at the control system by touching the operation panel "next”. This will be followed by a request to read out and to enter the current floater position in the integrated flow meter: 18 DIGITEL Elektronik AG Alte Gasse 18 CH-8604 Hegnau Tel.: +41 (44) 908 20 30 DIGITEL Elektronik GmbH Illstrasse 30 A-6706 Bürs Tel.: +43 (5552) 67850 www.digitel-ag.com [email protected] Function Description Di 19.03.02 08:38:15 Filter change Di 19.03.02 Blower on After entering this value (serving for checking only), all entered and internally calculated values are logged (printer, USB-drive, RS232). This protocol also transmits the propotional variation of the set flow. The display indicates either passed calibration confirmation "calibration successfully carried out” or the failure indication message: "calibration not possible” The failure indication message is transmitted, if the entered floater position of the integrated flowmeter deviates too much from the calculated set point. This happens, when leakage occurred in the instrument. If so, please contact the Digitel company or its local representation office urgently. Now, insert the filter holders for the next sampling program in the filter magazine (as the first filter holder, e.g. such filter holder that flown just before calibration, then in sequence, filter holders in designated sequence). By entering key "0", you will leave the calibration menu and the inserted calibration filter is exchanged. Enter the start time for the next filter that is not fully deposited yet. Start the program for the filter that is already half-deposited (previously having been automatically changed). This filter will be processed until the start time the next filter is reached! After having evaluated this filter, it should be checked that the sampling time is composed of the pre-calibration time and the time during the filter was processed in the pre-start filter program. Both the values have to be added manually! Herewith the instrument is reset into original sampling condition, and the selected program is processed. Unless a new sampling program is to be started after calibration, the calibration filter holder has to be exchanged manually from the flowing position: switch automatic "changer off" and enter the button "Manual change" for a short period of time (1 to 2 seconds). Then switch the automatic "changer off" on again. Now the filter holder which is present in the flowing chamber, is automatically changed. 6.4.4.4 Logging of calibration At the end of calibration, the entered and internally calculated data are logged on the printer USB drive or serial interface (if available and activated). As an example, we provide here logging on the printer: Di 19.03.02 08:36:43 calibration started Di 19.03.02 Work 08:38:31 Di 19.03.02 08:40:43 calibration for 500 l/min at av. station conditions flow meters interior TECFLUID 420-600 refer. KDE/MOBREY p(act) outdoor [hPa]: 950 T(act) outdoor [K]: 295 pM (500 l/min) [hPa]: 911 TM (500 l/min) [K]: 297 p(average) [hPa]: 1011 T(average) [K]: 286 p(stand) [hPa]: 1013 T(stand) [K]: 273 pos. cal. point [mm]:129,0 offset cal. Mark [mm]: -0,4 cal. pos(station)[mm]:129,9 pos. swimmer [mm]:130,0 pos. int.(input) [mm]:131,0 pos. int.(target)[mm]:137,4 offset int. Scale[mm]: -6,4 offset filter [mm]: -7,1 Q scale outd. [l/min]:500,8 Q amb. act. [l/min]:523,4 Q scale indoor[l/min]:513,6 Q stand [l/min]:476,3 change [%]: 0,1 Di 19.03.02 Blower off 08:43:17 Di 19.03.02 08:43:17 end of calibration 6.5 Meaning of abbreviations: p(act)outdoor [mbar]: T(act) outdoor [K]: pM (500 l/min) [mbar]: TM (500 l/min) [K]: p(average) [mbar]: T(average) [K]: p(standard) [mbar]: T(standard) [K]: pos. Cal. Point [mm]: Offset cal. Mark [mm]: cal. pos(Station) [mm]: Pos. swimmer [mm]: 08:37:53 pos. int.(Input) [mm]: pos. int.(target) [mm]: Current pressure on the calibrated flowmeter Current temperature on the calibrated flowmeter Current pressure on the integrated flowmeter Current temperature on the integrated flowmeter Average yearly pressure at the installation site (station condition) Average yearly temperature at the installation site (station condition) Standard air pressure Standard air temperature calibration point position on calibrated flowmeter Difference between calibration position and calibration table 500 l/min position Position of the floater calibrated for average station conditions on the installation site in calibrated flowmeter Floater position on calibrated flowmeter before calibration Floater calibrated position in the integrated flowmeter Floater set-point position after 19 DIGITEL Elektronik AG Alte Gasse 18 CH-8604 Hegnau Tel.: +41 (44) 908 20 30 DIGITEL Elektronik GmbH Illstrasse 30 A-6706 Bürs Tel.: +43 (5552) 67850 www.digitel-ag.com [email protected] Function Description calibration in the integrated flowmeter Offset int. scale[mm]: Difference between integrated flowmeter scale and calibration table (at Q amb. act.) Offset filter [mm]:– Offset Difference between calibrated filter [mm] flowmeter and integrated flowmeter on the basis of the filter resistance (depends on lower pressure in integrated flowmeter). Pos. int. (target) [mm] = cal. pos.(Station) [mm] – Offset cal. point [mm] Q scale outd. [l/min]: Flow rate on the calibrated flowmeter after calibration related to station conditions Q amb. act. [l/min]: Current Flow rate on the calibrated flow rate on the calibrated flowmeter after calibration related flowmeter after calibration at to station conditions current conditions Q scale indoor [l/min ]: Set flow rate on the integrated flowmeter after calibration (this value should also automatically be taken over as an operation flow rate into control) Q standard [l/min]: Flow rate after calibration related to standard conditions change [%]: ((Actual value – Target value) / Target value) * 100 Actual value ... Pos. Floater The flow rate variation of the Target value ... Pos. (Station) previous calibration (positive values indicate an decrease, negative values indicate a increase in the flow rate due to re-calibration) 6.6 Determination of standard & operation volumes Considering the pressure and temperature values determined during the sampling period on the integrated flowmeter, the values for VStandard (= Vs) or Vmeas.system (= VM) or in following for Vamb. (= VA) are calculated from the equation (7) (Chapter 6.3.2) as listed below: The equation (3) yields: Qm QScale indoor (pref Tm) (Tref pm) Qm : average flow rate on the flowmeter during a sampling period QScale indoor: a set flow rate (e.g. automatically determined by calibration) p m: average pressure on the integrated flowmeter during a sampling period Tm: average temperature on the integrated flowmeter during a sampling period Vm Qm tS Vm : ts: transported volume at the flowmeter sampling time cM : correction factor for flow rate on the flowmeter while from the general gas equation Q1 x (p1 / T1) = Q2 x (p2 / T2) and the equation (3) it follows: Qs QScale indoor Qs: pN: TN: TN (pref pm) (Tref Tm) pN average flow rate at standard conditions standard pressure standard temperature Vs Qs tS Vs: transported standard volume on the flowmeter resp. cs TN (pref pm) (Tref Tm) pN cs: correction factor for the standard flow rate on the flowmeter For transported operation volume determination on the sampling head, not all required measurement values are available for the control at the moment. Nevertheless the following calculation can serve a good approximation: Air pressure determination (operation pressure) on the sampling head is performed by pressure measurement before and after sampling with the blower switched off on the integrated flowmeter and by calculating the average of both measurements . Moreover, it is supposed that air passing through the filter is warmed up approximately by 3 K. As a result of that, the temperature decreased by 3 K on the integrated flowmeter is taken as the average temperature on the air inlet (operation temperature). Consequently according to the equation (11), the operation volume on the air inlet under determined conditions can be derived: QA QScale indoor QA: PA: TA: TA (pref pm) (Tref Tm) pA average flow rate at operation statuss on the air inlet operation pressure (determined indirectly) operation temperature (estimated) Further, it implies: (15) VA QA tS VA: ts: transported operation volume on the air inlet sampling time or resp. cA cM (pref Tm) (Tref pm) cA: TA (pref pm) (Tref Tm) pA correction factor for operation flow rate at the air inlet. 20 DIGITEL Elektronik AG Alte Gasse 18 CH-8604 Hegnau Tel.: +41 (44) 908 20 30 DIGITEL Elektronik GmbH Illstrasse 30 A-6706 Bürs Tel.: +43 (5552) 67850 www.digitel-ag.com [email protected] Programming 7 Programming The programming will be carried out via the touchscreen on the front panel. The device will carry out a self test as soon as it is connected to the mains. As a confirmation that the self test is done successfully the basic indication, "home display", will appear. If this does not happen, please inform the Digitel service engineer. 7.1 7.1.2 Operation panel "Turbine" Here you can view the status of the turbineIf the turbine is on, the current capacity of the turbine can be viewed. By touching the panel the menu of the turbine starts: Home display 7.1.3 The screen is divided in multiple panels. All the functions of the device can be programmed or current settings can be recalled via the operation panels. Operation panel "Filter changer" Here you can view the status of the filter changer. If a filter change is going on at the moment of viewing, the panel will be turned into yellow. If there is an overload or if there are any other errors at the filter changer the operation panel will be displayed in red. By touching the operation panel the filter changer menu is started. In this menu the filter change can be carried out manually. Any error messages are displayed as well in this menu: At all selection and parameter panels you will find help texts in the corresponding sub menus. These help texts will be displayed as soon as you touch the information icon (graphical symbol). Example help text: Start automatic filter change: Independent of the program status a filter change can be started manually. ATTENTION: filter data will only be released at automatical filter change! 7.1.1 Operation panel "status display” Here you can view the current program status. In the program status WORK and PAUSE you will find the adjusted and the already expired status times additionally displayed. By touching the operation panel you will get immediately to the program status menu. There you can start and finish the program, adjust status times or start calibration. Filter change by hand: By touching this panel the filter change motor will be switched on. By leaving the panel the motor will be switched off again. 7.1.4 Operation panel "Flow meter" Here you can view the current temperature, current pressure, as well as the current flow rate of the internal flow meter. By touching the panel the pressure/temperature menu will be started. 21 DIGITEL Elektronik AG Alte Gasse 18 CH-8604 Hegnau Tel.: +41 (44) 908 20 30 DIGITEL Elektronik GmbH Illstrasse 30 A-6706 Bürs Tel.: +43 (5552) 67850 www.digitel-ag.com [email protected] Programming 7.1.5 Operation "Ambient pressure / temperature recording" operation panel turns into red and the error message will be displayed. Here you can see the current temperature, the current pressure as well as the current flow rate at the inlet. ATTENTION: If there is no ambient pressure/temperature module connected and the setting "ambient pressure/temperature recording" is de-activated, the operation panel will turn into yellow. In this case, the ambient temperature will be estimated (temperature at flow meter –3K) as well as the ambient pressure by averaging (Average value of: pressure in measuring system before sampling and pressure in measuring system after sampling ) will be calculated. By touching the panel a menu with more detailed status information concerning ambient pressure/temperature module will be started. If more than one status message will be displayed these are shown at two second intervals. One after another. By touching the red operation panel a second menu will startand show you all current errors and status messages. Example: Feature: Q scale outdoor [l / min]: If a reference flow meter is connected onto the inlet it shows the Q scale outside. So any time a quick check of the flow rate can be performed. 7.1.6 Operation panel "Options" Here you can see the panel for connected options. In this example the option "Filter store room climatisation" is connected. By touching the panel another menu will be started and show you more status information regarding the connected module. 7.1.7 7.1.8 Operation Panel "Date/Time" Here the date and time of the instrument is shown. When touching the panel in this mode, the date and time values can be entered. 7.1.9 Operation Panel "Menu" If this panel is chosen, the main menu is started. The settings can be changed and internal memory can be read out. Panel "Status resp. error notification messages" If the device runs free of errors, the operation panel is green and will show you the identification number of the device. Touching the panel won’t show you anything. In case of error the 22 DIGITEL Elektronik AG Alte Gasse 18 CH-8604 Hegnau Tel.: +41 (44) 908 20 30 DIGITEL Elektronik GmbH Illstrasse 30 A-6706 Bürs Tel.: +43 (5552) 67850 www.digitel-ag.com [email protected] Programming 7.2 Main Menu To get into programming mode, the field "Menu" has to be chosen when on home display. Then the Main Menu is displayed: The program can be started immediately or at a certain point in time. The following menu is shown to enter the starting time: The submenus can be started here. The Main Menu can be reached chosing "Home" or "back". 7.2.1 Change Program Status Depending on the program status, on the first line of this menu the options "Start Program" or "End Program" appear. The second and third lines "Change Status Times" and "Start Calibration" always appear: Now the designated date and time for program start can be entered. After chosing "Enter" the start time is transferred and main menu appears. Protocol: Mo 04.05.09 10:30:00 Wait for start time An additional menu item appears, if programming mode is chosen after the program start: prestart filter. If this is activated, the blower turns on and the inserted filter stays in the air flow until the starting time is reached. Then, filter data is given out and the filter is changed. 7.2.1.3 Start Program with cartridge changer Only available with option cartridge changer In this menu the mode of cartridge change can be chosen: 7.2.1.1 Stop Program In this menu, the actual program can be stopped at any time. All filter and cartridge data is saved given out. 7.2.1.2 Start Program Here the starting time is entered. 23 DIGITEL Elektronik AG Alte Gasse 18 CH-8604 Hegnau Tel.: +41 (44) 908 20 30 DIGITEL Elektronik GmbH Illstrasse 30 A-6706 Bürs Tel.: +43 (5552) 67850 www.digitel-ag.com [email protected] Programming 7.2.1.3.1 Cartridge change simultaneous with filter change If the cartridge change is chosen to be simultaneous with the filter change, the program can either start immediately or the time for program start can be entered (see 7.2.1.2 Start Program). 7.2.1.3.2 Programming of cartridge changing times Attention: Changing times for the cartridge changer can be entered independently from filter changing times and WORK and WAIT status. As there are many possible combinations, control can only check the feasibility of the times entered in a few cases. Filter and cartridge are arranged in a line in the air flow channel, so the sampling on cartridge only is possible in WORK state. For this reason the cartridge chaning cycle should correspond to the filter changing cycle (WORK+WAIT) or be a multiple of it. Please note for program start and program end: Starting and ending of the program are determined either by the starting cartridge or the entered starting time. The program ends either when the last filter or the last cartridge has been in service. Important: before starting the program, WORK and WAIT times have to be entered. The end of the program is then determined by the last filter. If all the entered data is correct the following message appears: "Kartuschenwechsel erfolgreich programmiert!" 7.2.1.4 Status times 7.2.1.4.1 Filter change In this submenu the times for work and wait state have to be entered. The work time is the time in minutes one filter stays in the air flow (blower on). The wait time is the time in minutes that is passed after the work periode before a new filter is changed in and work periode is starting again. The menu for cartridge changing programming can be started as following: Chosing the "back" field, the submenu can be left without any change of the saved times. The entered times are read in minutes and can be used from 0 to 59999 minutes. First the starting time of the whole routine has to be entered, then the sampling times for each cartridge follow. The software automatically suggests the end time of the previous cartridge as starting time for the next one. If all the starting times correspond to end times of the previous cartridges, one cartridge after another is changed into the air flow. The program ends when the end time of the last cartridge is reached. The sampling time of three cartriges can also be programmed independently, then the forth cartridge is changed in in the empty times. (Anzeige: "Kartusche 4 als Leerkartusche): 7.2.1.4.2 Cartridge change If the option Cartridge changer is activated, an additional field "cartridge changing times" appears. The times for cartridge change are usually entered at program start. The same menus as in "7.2.1.3.2 Programming of cartridge changing times" appear. 7.2.1.5 Calibration In this menu the current program can be stopped and a calibration can be started at all times. All filter and cartridge data are saved and given out. For calibration see "6.4.4 Performing calibration". 24 DIGITEL Elektronik AG Alte Gasse 18 CH-8604 Hegnau Tel.: +41 (44) 908 20 30 DIGITEL Elektronik GmbH Illstrasse 30 A-6706 Bürs Tel.: +43 (5552) 67850 www.digitel-ag.com [email protected] Programming 7.2.2 Change Configuration 7.2.2.2.1 General Settings In the following table the settings are explained. 7.2.2.1 Insert Date / Time An easy way to enter a correct time is to enter a time that is some seconds away and to confirm it with the "enter" button when the entered time is reached. 7.2.2.2 Change Parameters Menu item Designation Filter Change at Shall we exchange the filter in case of Overload overloading and shall the remaining "Work” period be collected for a new filter or shall we wait for the working period end with blower switched-off? "on”: With filter exchange upon overloading "off”: Without filter exchange upon overloading Turbine on 2h Shall the blower switched-on after 2h after an after overload overloading? "on”: Restart after 2h after an overloading "off”: Wait the remaining "Work" period with blower switched-off Pwr fail stop Shall the time be held after a power breakdown in the "Work” status? "on”: The status period ("Wait”, "Work” or "Pause”) is held during power breakdown. It suggests that any filter (independent of a power black out) is deposited with the set "Work” time. Additionally it implies that any power breakdown shifts the next filter change time point by the period of power breakdown, so that the filter exchange time point cannot be defined any more. "off”: After a power breakdown finishes, a power breakdown period is added to the corresponding status time (("Wait”, "Work” or "Pause”). In this way the set cycle of filter exchange (e.g. filter changes always at midnight) is kept in any case. However in case of power breakdown, the inserted filter is not deposited with full "Work” time. 4 day sequence Shall the program of four-day samples be activated? "on": The filter is deposited for 24 hours every 4th, 8th, 12th, 16th, 24th and 28th day of 25 DIGITEL Elektronik AG Alte Gasse 18 CH-8604 Hegnau Tel.: +41 (44) 908 20 30 DIGITEL Elektronik GmbH Illstrasse 30 A-6706 Bürs Tel.: +43 (5552) 67850 www.digitel-ag.com [email protected] Programming Menu item Output turbine capacity Turbine capacitya from90% Turbine output threshold Filter change before pause Start-up park position Decimal marker=dot 7.2.2.2.2 Designation a month. The pre-set status times are invalid in this setting. "off": Program control is performed by preset status times. Shall the blower load be logged (on printer, interface, USB drive)? "on": In addition to status messages "Blower on and "Blower off", the current blower load is logged. See lines 5 and 6, too. "off": No blower load is logged. Shall log the blower load be logged at values >=90 %, only? "on": Logging of blower load is only performed at the values >=90 % (hereby the line 4 should be set on). "off": Logging of blower load is performed independent of its value (hereby the line 4 should be set on). How frequently shall the blower load be transmitted? Here the percentage rate can be pre-set, deciding at which variation of blower load the output is to be transmitted (the line 4 should be set on "on"). If a lower value (e.g. 1 %) is preset, there is a risk that the blower load will be be transmitted too frequently, as any variation of conditions on the filter (e.g. moisture, temperature etc.) should be controlled. Presetting of a higher value reduces the frequency of messages concerning the blower load. Shall the filter change proceed before pause period? "on": Filter change will proceed at the start of pause period. "off": Filter change will proceed at the end of pause period. Shall the filterholder be put into park position before wait times? "on": the filterholder is put into park position. "on": no park position Dezimaltrennzeichen: "off": On USB drive, printer and touchscreen the decimal separator is a comma. "on": On USB drive, printer and touchscreen the decimal separator is a dot. pressure/temperature settings The details of the pressure and temperature submenu can be seen in detail in the below table. Menu item Correction Factor Measuring System Designation Shall a correction factor be transmitted for a pre-set flow? "on": After elapsing the "Work” period, the correction factor for pre-set flow or the entire measurement volumes is logged (printer, interface, USB drive). "off": No correction factor logging . Correction Shall the correction factor related to standard Factor status be transmitted for pre-set flow? Standard "on": After elapsing of the "Work” period, Parameters the correction factor related to standard status for pre-set flow or total volumes is logged (printer, interface, USB drive). "off": No standard correction factor logging . Volume in Shall the measured volume value be logged? measuring "on": After the "Work” period elapsing, system (m³) the volumes actually transported at the measured environmental conditions are logged (USB, printer, interface). "off": No volume measured value logging. Standard Shall the value of standard volume be Volume (m³) logged? "on": After the "Work” period elapsing, the standard volumes (volumes at the pre-set standard statuss) are logged (printer, interface, USB drive), corresponding to the volumes actually transported (at the determined environment conditions). "off": No standard volume values logging . Average output Shall the average pressure and average p/T temperature be logged during sampling? "on": After the "Work” period elapsing, average pressure and average temperature during sampling are logged. "off": No average pressure and average temperature logging . Standard Here the standard temperature can be Temperature entered, to which standard correction factor (°C) or standard volume calculation is related. Standard Here the standard pressure can be entered Pressure (mbar) to which standard correction factor or standard volume calculation is related. Flow rate Here the flow can be entered, which is set in the flow-metering system. This value is required to calculate the measured volume or the standard volume value. Pressure Here the pressure measurement can be calibration calibrated. The measured value without correction is displayed. The correction factor is calculated by entering the current environmental pressure considered in all 26 DIGITEL Elektronik AG Alte Gasse 18 CH-8604 Hegnau Tel.: +41 (44) 908 20 30 DIGITEL Elektronik GmbH Illstrasse 30 A-6706 Bürs Tel.: +43 (5552) 67850 www.digitel-ag.com [email protected] Programming Menu item 7.2.2.2.3 Designation other calculations. Warning: During the input, the blower should be switched off. If semi-automated flow calibration is performed (see 6.4.4 Performing calibration), calibration of the pressure sensor is automatically performed, too. Configure Options In the following chapters, the different options are explained in more detail. Menu item Inlet heating Heating controlled by ambient temperature Heating amplifier Heating capacity 7.2.2.2.3.2 Designation "on": Inlet heating is turned on, more options are available. "off": Inlet heating is turned off. "on": The power of the inlet heating is controlled by ambient temperature, For this, an outside temperature / pressure module has to be installed. "off": The inlet heating is driven by a constant power which can be chosen in this menu. This setting is only available when the inlet heating is controlled by ambient temperature. "on": the heating is controlled in a way that the power is 100% at outside temperatures under –10°C and 0% at over 10°C. "off": "on": the heating is controlled in a way that the power is 100% at outside temperatures under –20°C and 0% at over 20°C. This setting is only available if the inlet heating is not controlled by ambient temperature. The heating is operated with the set power of heating. Ambient pressure / temperature measurement In the following table, the options for ambient pressure and temperature measurement are explained in more detail. 7.2.2.2.3.1 Inlet heating The heating of the inlet can be controlled depending on outside temperature if an ambient pressure/temperature module is connected. 27 DIGITEL Elektronik AG Alte Gasse 18 CH-8604 Hegnau Tel.: +41 (44) 908 20 30 DIGITEL Elektronik GmbH Illstrasse 30 A-6706 Bürs Tel.: +43 (5552) 67850 www.digitel-ag.com [email protected] Programming ambient pressure / temperature measurement Correction Factor air inlet Operation Volume (m³) Average value ambient pressure / temperature 7.2.2.2.3.3 Shall ambient pressure and temperature be measured? "on": The current pressure and temperature at the inlet is measured. Attention: For this setting an ambient pressure/temperature module must be installed. "off": no pressure and temperature measurement. Attention: the ambient temperature is estimated (temperature at flowmeter –3K), the pressure is calculated (average of pressure in measurement sstem before and after sampling) This is why the info fields are then shown yellow. Shall the operation correction factor related to the air inlet conditions be transmitted for the pre-set flow? "on": After the "Work” period elapsing, the correction factor related to conditions on the air inlet for the pre-set flow or for total volumes is logged (printer, interface, USB drive). "off": No operation correction factor logging. Shall the value of operation volume be logged? "on": After the "Work” period elapsing, operation volume is logged (printer, interface, USB drive). "off": No operation volume logging. Shall the average value of ambient pressure / temperature be logged? "on": After the "Work” period elapsing, the mean value of ambient pressure / temperature is logged (printer, interface, USB drive). "off": No value of ambient pressure / temperature logging. Cartridge Changer Continuous measurement Cartridge changing times 7.2.2.2.3.4 "on": Cartridge changer is turned on. "off": No cartridge changer installed or no change necessary. This menu appears only if the cartridge changer is turned on and the change of cartridges is set simultaneously with the change of filters. "on": the change of cartridges is simultaneously with the filters until the filter magazine is empty or the program is stopped manually. "off": after one cycle (all 4 cartridges were in the air flow) the program is ended. nach einem Programmdurchlauf (alle 4 Here the cartridge changing times are shown and can be adjusted. Attention: Normally the cartridge changing times are entered when programming starting times. Changes made during working times change the cycle of the progam. Filter Storage Temperature Control Cartridge Changer In the following table the options for the cartridge changer are explained in more detail. The cartridge changer is an option and not included in standard instruments. In the following table, the options for filter storage temperature control are explained in more detail. The filter storage temperature control is an option and not integrated in standard instruments. 28 DIGITEL Elektronik AG Alte Gasse 18 CH-8604 Hegnau Tel.: +41 (44) 908 20 30 DIGITEL Elektronik GmbH Illstrasse 30 A-6706 Bürs Tel.: +43 (5552) 67850 www.digitel-ag.com [email protected] Programming Climate control "on": the temperature filter storage is constantly held under the set temperature "aus": no climatisation of the filter storage Set temp. Filter Here the maximum temperature of the filter room storage room is set. The climatisation holds the temperatur under this value. [°C] logging "on": The temperature of the filter storage room is logged in a separate file. The output interval also defines the averaging time of the logged temperature. "off": No logging of temperature of the filter storage room Interval release The output interval defines the time between the outputs of filter storage room temperatures. The temperature is averaged over this time. Enter in minutes. Additional "on": minimal, maximal and mean values of protocol the filter storage room temperature are given out. The averaging is made between the filter changes. This data is logged in a file. "off": no logging of filter storage temperature Special settings In this submenu specific data for temperatur control can be entered. This menu is protected by a PIN code, as the settings must not be changed by the user. 7.2.2.2.3.5 Wind Sensor In the following table, the options for the wind sensor are explained in more detail. The wind sensor is an option and not integrated in standard instruments. Menu item WXT510 data Designation "on": A WXT510 wind sensor is plugged at the wind port. Additional to the wind data, humidity, rain and temperature are measured and logged. "off": No WXT510 sensor is plugged. The wind measurement is done by print Wind-03 Wind Shall wind data measurement be performed? measurement "on": The wind data measurement is activated. Warning: This function can only be set if a corresponding measurement module is installed. "off": No wind data measurement Wind controlled Shall sampling period be wind controlled? "on": The sampler operation will be controlled by wind measurement. The sampler will run if the wind speed exceeds the limit values and wind direction is in the defined operating direction (+- half of operating angle) (provided that the sampler is in "WORK"- status). If one of the conditions is not fulfilled resp. the "work" period is elapsed, the blower will be switched off again. To prevent a frequent on- and off switching, the blower will be switched on for about 2 minutes after switching on (independent of the informations resulting from the measurements of the wind data). An exeption of this 2 minutes interval forms the achievement of the end of the "work" period. In this case the blower will be switched off immediately. "off": No wind controlled operation of the sampler Wind data Shall measured wind data be logged? "on": Measured and averaged wind data will be stored after a 5 sec. interval. Logging interval is independent of operating state. "off": No wind datal logging. Gill-Sensor Is a Gill wind sensor plugged? "on": A Gill wind sensor is plugged on serial port RS232. The serial port is used and cannot be used for control and data logging. "off" No Gill wind sensor is plugged. The wind measurement is done by print Wind-03. Stop time at Shall the sampling time be stopped when the turbine off blower is turned off? "on": Work time only counts when the blower is turned on by the wind control. "off": work time counts independently from wind control. Die Workzeit wird Output interval Here, the wind data logging interval (in minutes) can be entered, to which wind 29 DIGITEL Elektronik AG Alte Gasse 18 CH-8604 Hegnau Tel.: +41 (44) 908 20 30 DIGITEL Elektronik GmbH Illstrasse 30 A-6706 Bürs Tel.: +43 (5552) 67850 www.digitel-ag.com [email protected] Programming measurement mode is related. The logged wind data will be averaged over the dermined time. no." field. If the Bayern-Hessen protocol is applied, the first three characters have to be numerical or blank. Then, an ID with max. 27 characters can be defined. When wind control is turned on more settings are available. Menu item Speed threshold Designation Here, the limited wind speed in m/s can be entered, to which wind controlled operating mode is related. The sampler will run if the wind speed exceed the threshold and wind direction is in the defined operating direction (+- half of operating angle). Here is defined how the operating angle is related to the wind direction. If the average value of the measured wind direction value lies within the range of the angle that is covered by the preferential wind direction + - half of the operation angle, the blower will be activated. Here is defined which wind direction is the preferential one. Mind that the wind direction is aligned to the north correctly. The prefential wind direction shows the direction from which the wind blows if the HVS should be activated. The input will follow in degrees. Here is defined how long the measured wind data should be averaged before they are utilised for control of the HVS. The input will follow in degrees. This averaging time don’t affect averaging of wind data logging. Operating angle Operating direction Averaging time 7.2.2.2.5 Default (factory setting) All adjustable parameters are reset to the factory settings. 7.2.2.2.6 Sensor calibration The accuracy of the pressure sensor is +/- 50Pa. The temperature sensor has an accuracy of +/- 1 °C. This value can be improved even further by additional sensor calibration. This happens in the below listened menus by entering the current pressure or temperature values using a reference meter. interior heating 7.2.2.2.3.6 In the following table, the options for the indoor heating are explained in more detail. This heating is an option and not integrated in standard instruments. Interior heating Heating capacity 7.2.2.2.4 "on": Heating is on, further settings are displayed. "off": Heating is turned off. The heating is operated with the set power. Change instrument ID When you log the instrument identification upon every sampling time transmission, you have to activate the instrument identification: Warning: The first 3 characters of the instrument identification are transmitted in the Bayern-Hessen protocol in "series Pressure Calibration: During pressure calibration the blower must be turned off because the pressure sensor at the flowmeter as well as the external pressure sensor are calibrated simultaneously. Internal temperature calibration: The internal temperature calibration can be performed as follows: start program without any filter holder and run the 30 DIGITEL Elektronik AG Alte Gasse 18 CH-8604 Hegnau Tel.: +41 (44) 908 20 30 DIGITEL Elektronik GmbH Illstrasse 30 A-6706 Bürs Tel.: +43 (5552) 67850 www.digitel-ag.com [email protected] Programming blower for a few minutes to acclimate the the temperature sensor at the flow meter to room temperature. Then measure the temperature at the flow chamber with the reference meter and enter this temperature in the internal temperature calibration. 7.2.2.3.1.1 USB drive info Ambient temperature calibration: The ambient temperature calibration is very simple. Place the reference instrument next to to the ambient sensor and enter this temperature at the ambient temperature calibration. Calibration delete: The calibration of the individual sensors can be deletet at any time. 7.2.2.3 Configure recording In this menu, recording instruments can be configured. In the following chapters, there is a more detailed description of those menus and their submenus. The size of the memory is displayed in MB. The saved files are listed below showing their sizes. Log file: filter data, status records Climate control file: temperature of filter storage and clima status Wind file: wind data 7.2.2.3.1.2 Disconnect USB drive When this menu is chosen, a message appears: "USB drive can now be disconnected". This is used to plug out the drive savely. 7.2.2.3.1.3 7.2.2.3.1 Start Firmware Update When this button is used, the firmware update menu is started. This menu only appears if the file "DI_IMAGE.BIN"(new firmware) is on the USB drive. To avoid unintended over writing of firmware, the option has to be confirmed. After the confirmation, the new firmware is read from the USB drive and the control is newly programmed. This procedure may take several minutes. After successful firmware update the control is restared. USB drive 7.2.2.3.1.4 Start Bootloader Update When this button is used, the bootloader update menu is started. This menu only appears if the file "DI_ROM.BIN"(new bootloader) is on the USB drive. To avoid unintended over writing of bootloader, the option has to be confirmed. After the confirmation, the new bootloader is read from the USB drive and the control is newly programmed. This procedure may take several minutes. After successful bootloader update the control is restared. 7.2.2.3.1.5 Filter data, status messages and wind data are stored in the internal flash module of the control. Filter data, status messages or failure messages are stored in the logfile. The wind data in the wind file. With the plugged-in USB drive the recorded data are stored simultaneously on the internal memory as well as on the the USB drive. That is the reason why the USB drive can be removed any time. (Attention: please consider the mode removal USB ! See 13.2 Removal USB drive) Update Languages When this button is used, the language update menu is started. This menu only appears if the file "DI_TEXTE.TXT" (new text files, additional languages) is on the USB drive. The new texts can now be copied from the USB drive. After successful overwriting the new texts are displayed on the screen. 7.2.2.3.2 Ethernet Here the IP-address, gateway and subnet mask can be entered. The user name and password for the ethernet connection can be set in this menu as well. After the removal of the USB-drive the control only stores the data records on the internal memory. By plugging-in the USBdrive anew the user is asked if all the recorded data should be stored on the USB-drive since this one has been unplugged. 31 DIGITEL Elektronik AG Alte Gasse 18 CH-8604 Hegnau Tel.: +41 (44) 908 20 30 DIGITEL Elektronik GmbH Illstrasse 30 A-6706 Bürs Tel.: +43 (5552) 67850 www.digitel-ag.com [email protected] Programming When you set the "Bayern-Hessen protocol on", the display changes to the Bayern-Hessen protocol sub-menu setting: For details see10.3 Bayern-Hessen protocol. Input of the IP – Adress: The values are confirmed using the "enter" button.l ATTENTION: The new IP-address only is entered into the system after a restart! When chosing "cancel", the menu can be left without any change of values. 7.2.2.3.3 Host-Interface Now you can select the required protocol format for the host interface: DIGITEL–Protocol ASCII protocol. When this protocol is activated, all filter data, failure and status messages are given out on the serial port. For details see 10.2 Digitel protocol. AK-Protocol Here you define that the AK protocol will be used for communication with the host system. For details see 10.4 AKProtocol. Bayern-Hessen Protocol 32 DIGITEL Elektronik AG Alte Gasse 18 CH-8604 Hegnau Tel.: +41 (44) 908 20 30 DIGITEL Elektronik GmbH Illstrasse 30 A-6706 Bürs Tel.: +43 (5552) 67850 www.digitel-ag.com [email protected] Programming T avg. amb.: Bayern-Hessen Protocol B Setting the "Bay-Hes-P. B on", determines that a BayernHessen protocol special extension is applied (2 400 Baud, varied occupation of operation-status bit, see the annex). Service Setting "Service on", determines that a special input is inquired and that, at any status inquiry, the input status is determined on the host computer. avg. cM/VM:. avg. cs/Vs: Output mode Here you define which values are to be shown in the protocol. blower load: act. collecttime: Press. meas.: Temp. meas.: act. corr. meas.: act. corr. std.: act. corr. amb.: collecttime: p avg.: Temp avg.: p avg. amb.: act. blower load elapsed collect time for the actual filter actual pressure in measurement system actual temperature in measurement system Actual correction factor for pre-set flow through measurement system related to measured environmental conditions in measurement system. Actual correction for pre-set flow through measurement system related to standard conditions. Actual correction factor for pre-set flow through measurement system related to estimated conditions on the air inlet (air pressure average value before and after sampling on the sampling head and flowmeter average temperature - 3K). Elapsed collect time of the last completed filter. This value will be shown only one time or until "C" command is received (dependent of the parameter "repeated print"). If no "C" command is received the value will be shown until completion of the actual filter. Average pressure conditions in the measurement system of the last completed filter during the sampling period. This value will be shown only one time or until "C" command is received (dependent of the parameter "repeated print"). If no "C" command is received the value will be shown until completion of the actual filter. Average temperature conditions in the measurement system of the last completed filter during the sampling period. This value will be shown only one time or until "C" command is received (dependent of the parameter "repeated print"). If no "C" command is received the value will be shown until completion of the actual filter. Average pressure conditions on the air inlet avg. cA/VA: of the last completed filter during the sampling period (air pressure average value before and after sampling on the sampling head). This value will be shown only one time after filter change (otherwise value "0”) or until "C" command is received (dependent of the parameter "repeated print"). If no "C" command is received the value will be shown until completion of the actual filter. Average temperature conditions on the air inlet of the last completed filter during the sampling period This value will be shown only one time (otherwise value "0”) or until "C" command is received (dependent of the parameter "repeated print"). If no "C" command is received the value will be shown until completion of the actual filter. Average correction factor for pre-set flow or volumes actually transported through measurement system of the last completed filter related to measured environmental conditions in completion of the actual filter Average correction factor for pre-set flow or volumes actually transported through measurement system of the last completed filter related to standard conditions. This value will be shown only one time or until "C" command is received (dependent of the parameter "repeated print"). If no "C" command is received the value will be shown until completion of the actual filter. Average correction factor for pre-set flow or volumes actually transported through measurement system of the last completed filter related to estimated conditions on the air inlet (air pressure average value before and after sampling on the sampling head and flow-meter average temperature - 3K). This value will be shown only one time or until "C" command is received (dependent of the parameter "repeated print"). If no "C" command is received the value will be shown until completion of the actual filter. Repeated print Here you define if some values will be shown in the protocol only one time or until "C" command is received. If no "C" command is received the value will be shown until completion of the actual filter. Identification Here you set the identification (measurement instrument or measured value identification address). It is supposed that the set identification corresponds to the first measured value to be transmitted. The following measured values are provided with the next higher identification address (see the above-shown chart). Ensure that the instrument address for HVS is set as "310". If no identification has been entered, "310" is similarly accepted for identification of the first measured value. Valid input range: from 000 to 994 Baud Rate Depending on the chosen protocol, there are presettings for Baud rate: - DIGITEL-Protocol: 2400 Baud - AK- Protocol: 9600 Baud - Bayern Hessen Protocol: 1200 Baud - Bayern Hessen Protocol B: 2400 Baud 33 DIGITEL Elektronik AG Alte Gasse 18 CH-8604 Hegnau Tel.: +41 (44) 908 20 30 DIGITEL Elektronik GmbH Illstrasse 30 A-6706 Bürs Tel.: +43 (5552) 67850 www.digitel-ag.com [email protected] Programming First, the following menu appears: Baud rate can be set manually for DIGITEL-protocols. This rate only is valid for this protocol and will be set back at the next change of protocol. Valid settings: 1200, 2400, 4800, 9600, 19200, 38400, 57600, 115200 Remote control If you operate the instrument using an external controller and you lose connection to this controller, you have to communicate with the HVS controller that has to be re-switched into the autonomous operation status. For that there is an applicable menu point which is only visible if the remote control is activated. If "Remote Off" is chosen, the control changes to autonomous mode. 7.2.2.3.4 Thermo printer Here the file to be displayed can be chosen. After having chosen a protocol, the following actions can be taken: Thermo Printer Short protocol Only failure Shall there be a protocol on the thermo printer? "on": there is a protocol "off": there is no protocol Shall the protocol be in a short form? "on": short form "off": normal protocol Shall only failure reports be logged? "on": Only failure reports are printed. (overload, changer jammed, last filter, program start, program stop) "off": all status and failure reports are printed. Number of printed status reports depends on other settings. 7.2.3.1 Show protocol 7.2.2.4 Print settings Current program settings are printed to plugged, activated ports. 7.2.2.5 Change languague All available languagues are shown in English independently of the chosen languague. After a languague has been chosen, all displays and prints are in this languague. 7.2.3 In this menu the last status reports are shown in chronological order on the display. Using previous and next buttons, previous and next entries are shown. In the first line of every entry, the number can be seen. If on the first entry "previous" is chosen, the last entry appears, if on the last entry "next" is chosen, the first entry appears. For longer entries, the scrolling button can be used to see all the information. Read out internal memory Filter data, status reports and data from optional instruments are logged in the internal flash memory. Filter data, status and failure reports are saved in logfiles, data from options is saved in separate data files. Up to 10000 entries can be made per file. Those entries can be shown on the display, printed on the thermo printer or on the USB drive. 34 DIGITEL Elektronik AG Alte Gasse 18 CH-8604 Hegnau Tel.: +41 (44) 908 20 30 DIGITEL Elektronik GmbH Illstrasse 30 A-6706 Bürs Tel.: +43 (5552) 67850 www.digitel-ag.com [email protected] Programming 7.2.3.2 Save protocol on USB drive 7.2.4 Show software version In this menu the installed software version is shown: In this menu, the protocol can be passed onto the USB drive. All entries in the chosen file are saved. 7.2.5 7.2.3.3 Delete protocol Show working hours To avoid unintended deleting of memory, the following question appears: In this menu working hours of the instrument and the blower are shown. After the confirmation, the memory for the chosen file is deleted completely! 35 DIGITEL Elektronik AG Alte Gasse 18 CH-8604 Hegnau Tel.: +41 (44) 908 20 30 DIGITEL Elektronik GmbH Illstrasse 30 A-6706 Bürs Tel.: +43 (5552) 67850 www.digitel-ag.com [email protected] Sampling probe PM10 and PM2,5 8 Sampling probe PM10 and PM2,5 Figure 4: DPM10/30/00 General information The sampling probe Digitel DPM10/30 or DPM2.5/30 is designed as a single-stage impactor. The median point Dp50 ("cut point") of the probe separation plot is of an aerodynamic particle of 10 m or 2.5 m diameter. A flow rate of 500 l/min. (30 cubic metres per hour) is achieved. In order to keep the probe weight low, it is made of aluminium. All surfaces are treated with a proven finishing process "Ematal". Ematal surfaces have shown no variation effects on the dust substances subject to analysis so far. The impactor plate can be taken out of the sampling probe when cleaning of the sampling probe is required. To avoid surface icing of the baffler at low temperatures, the sampling head can be heated (thereby the high-volume sampler Digitel DHA-80 should be equipped with an option "Special heating"). The PM10 air inlet tube fulfils the conditions of equivalence of the EN directive 12341. 8.1 Separation performance DPM 10/30/xx Impaction of DPM 10/30/00 at 15°C, 1013 hPa 18.00 16.00 d50 [µm] 14.00 12.00 10.00 8.00 6.00 4.00 10 15 20 25 30 35 40 45 50 55 60 Flow rate [m3/h] Figure 5: DPM10/30/00 impaction performance 36 DIGITEL Elektronik AG Alte Gasse 18 CH-8604 Hegnau Tel.: +41 (44) 908 20 30 DIGITEL Elektronik GmbH Illstrasse 30 A-6706 Bürs Tel.: +43 (5552) 67850 www.digitel-ag.com [email protected] Sampling probe PM10 and PM2,5 DPM 2,5/30/xx Impaction of DPM 2,5/30/00 at 15°C, 1013 hPa 5.00 4.50 d50 [µm] 4.00 3.50 3.00 2.50 2.00 1.50 10 15 20 25 30 35 40 45 50 55 60 Flow rate [m3/h] Figure 6: DPM2.5/30/00 impaction performance 8.2 Operation/maintenance To avoid the release effects of separated rough particles the baffler of the impactor plate has to be permanently covered with a thin grease layer. It has to be renewed periodically. The cleaning period depends on the proportion of rough dust in the ambient air sampled. It is recommended to clean the impactor plate every 14 sampling days, when the average total dust contents (TSP) at the installation site is approx. 70 to 80 g/m³. With a lower TSP, the cleaning interval may be longer. An option to extend the cleaning interval results from the moveable impactor plate fitted on the heater holder by rotation of approx. 15° (about 2 cm). The acceleration nozzles point at the still "clean" areas between circularly deposited rough dust layers of the previous sampling operation. The impactor plate can be simply removed by opening the probe upper part. It has to be cleaned, using a clean cloth, and the baffler area has to be greased regularly. About a 5 cm long band of grease should be equally spread on the area, using a spatula. To facilitate this maintenance, the impactor plate can be replaced by a substitute plate prepared in the laboratory. The acceleration nozzles, the liners of the probe casing, as well as a liner behind the impactor plate have to be cleaned under above-mentioned TSP conditions, after 30 sampling days. At a time of longer sampling in foggy environment, it is advised to check the impactor plate for water condensation. 37 DIGITEL Elektronik AG Alte Gasse 18 CH-8604 Hegnau Tel.: +41 (44) 908 20 30 DIGITEL Elektronik GmbH Illstrasse 30 A-6706 Bürs Tel.: +43 (5552) 67850 www.digitel-ag.com [email protected] Application examples 9 9.1 Application examples Main wind direction Wind-controlled sampling Wind-controlled sampling for the determination of dust substances, using the Digitel DHA-80. With usual imission monitoring, measurement data are determined area wide in relation to the installation site. These measurement data are evaluated in relation to the conceptional formulation (immediate values related to the installation site, hourly, daily and yearly average values etc.). An additional allocation of the recorded data and a potential source is not possible in the majority of cases. Upon special conceptional formulation authorities frequently put particular demands upon imission measurement in order to allow accurate statements on the measured dust compounds origin. This could only be achieved with a very dense and stable measurement network. Via wind-controlled sampling, using two Digitel High Volume Samplers which are installed in ambit of a special polluter on local conditions, it is also possible to take the weather conditions in consideration. So it is easier to meet requirements that force the probe to be representative of the total lot. (Accreditation Law) Herewith a considerable improvement of statement and reproducibility is achieved for the recorded data. Moreover, this measurement method also allows precise prediction of imission burden on installation sites where no measurements are carried out. In addition to that, separate measurement values can be dedicated to a certain polluter. Using the described measurement arrangement, the following requirements are met: independent installation from the emission source; only air from the required direction is sampled; logging of measurement cycles; more exact, more specific and more sensitive statements on samples. Additional considerable benefits of wind-controlled imission monitoring: considerable less filter material has to be evaluated; minimum capacity for installation and instruments; simple and reliable handling; price-friendly upon acquisition and operation. Device M1 Emitter Device M2 As illustrated above, aerosol samplers have been installed along with meters for wind velocity and wind direction. The control takes the data into account transmitted by the wind meter. The air is only sampled if wind arrives at a certain rate from a pre-set direction. The instrument M1 is installed in the main wind direction before the polluter. The north of the wind meter is directed towards the polluter. The instrument M2 is installed in the main wind direction downstream the polluter. The north of the wind meter points away from the polluter. The appropriate distances A1 and A2 to the polluter determine opening angles W1 and W2. The complexity for installation of wind-controlled aerosol samplers is limited, as the wind-metering instrument is plugged directly to the Digitel High Volume Sampler. The aerosol sampler supplies control and heating power required by the wind meter and is internally equipped with an arrester. For this just one power connection required. The dust microprocessor control of the sampler processes data transmitted by the wind meter and controls correspondingly to the blower parameter. The required opening angle for the wind direction may be within 10° and 160°, the limit for the wind velocity response can be set in 0.5 m/s steps within the range of 0.5 m/s and 5 m/s. Additionally, the period of time to the average out the measured wind direction and velocity can be set in two minutes steps from 2 minutes up to 32 minutes. The averaged data of the wind-direction and wind-velocity are performed according to the Austrian standard ÖNORM 9490 part 2. The reached status and failure indication messages are logged in an integrated printer and in an additional serial interface (RS232C). 38 DIGITEL Elektronik AG Alte Gasse 18 CH-8604 Hegnau Tel.: +41 (44) 908 20 30 DIGITEL Elektronik GmbH Illstrasse 30 A-6706 Bürs Tel.: +43 (5552) 67850 www.digitel-ag.com [email protected] Communication 10 Communication 10.1 D-Sub-9 Pin allocation (terminal interface) Pin allocation: Pin No. 2 3 5 7 8 9 Signal Receive Data (RxD) Transmit Data (TxD) Ground (GND) Request to send (RTS) Clear to send (CTS) +12V (Res.) 10.2 Digitel protocol 10.2.1 List of control commands Hvs-rmtoff hvs-status hvs-f hvs-work hvs-wait hvs-pause hvs-einst CR LF HVS-RMTON Host: #HVS-RMTON The command switches the HVS into remote control mode. In this mode, the control status of the HVS can be controlled by the host. Response from HVS: EXTERN To connect the Digitel HVS with a PC (9-pole connector D-Sub), a "crossed" cable (zero modem) is required. Control command hvs-rmton Response by HVS: Response character 1 Response character 2 ... Response character N - 1 Response character N Designation Remote control on (this command is valid, only if remote control is off) Remote control off (this command is valid, only if remote control is on) Status inquiry; status response is permanently transmitted, independently of whether remote control is on or off Filter changing in progress; this command is valid, only if remote control is on Changer in the "Work” operation status; this command is valid, only if remote control is on Changer in the "Wait” operation status; this command is valid, only if remote control is on Changer in the "Pause” operation status; this command is valid, only if remote control is on Output current settings of the instrument 10.2.2 Interface format Format: 1 startbit, 8 databits, 1 stopbit, no parity Baud rate: 2 400 Handshake: RTS, CTS 10.2.3 Control commands description Remote control The first character of the control command is always a start character (#). The following command has to end up with a control character CR and LF (Carriage return and Line feed). Response of HVS always starts with a start character (!) followed by a response and final CR, LF. When HVS receives an unknown command, it responds with HVS-NACK! The control characters can be written as capital or small letters. Host: # (start character) control character 1 control character 2 ... control character N - 1 control character N CR LF HVS-RMTOFF Host: #HVS-RMTOFF The command switches the HVS to the normal operation mode. Response from HVS: INTERN HVS-STATUS Host: #HVS-STATUS The command causes the HVS a transmission of a status message. Response from HVS (depending on operation status): Status: Th 14.05.09 14:23:54 Work Blower on Motor load: 67% Collecttime[min]: 126,43 # Blower on/off : 1 paM [mbar]: 929 TaM [°C]: 20,0 cM : 1,053 cs( 15/1013) : 0,949 cA( 17/ 996) : 0,972 VM [m³]: 539,268 Vs( 15/1013)[m³]: 492,990 VA( 17/ 996)[m³]: 497,842 at 512 l/min --------------------------Moreover, failure messages are additionally transmitted, if so. The range of the transmitted status information corresponds to the one specified on the printer for output. It should be noted that each line has to end up with CR, LF. The length of the response string is not defined! HVS-F Host: #HVS-F The command switches the HVS into the pause status for 7 seconds. After the time elapsing, it is automatically switched to Work and the filter exchange is carried out. The range of transmitted response corresponds to the one specified in the printer for output. Response from HVS: Sa 09.05.09 12:00:03 Blower off Collecttime[min]: 1399,96 # Blower on/off : 1 39 DIGITEL Elektronik AG Alte Gasse 18 CH-8604 Hegnau Tel.: +41 (44) 908 20 30 DIGITEL Elektronik GmbH Illstrasse 30 A-6706 Bürs Tel.: +43 (5552) 67850 www.digitel-ag.com [email protected] Communication paM [mbar]: 929 TaM [°C]: 20,0 PaA [mbar]: 969 TaA [°C]: 17,2 cM : 1,053 cs( 15/1013) : 0,949 cA( 17/ 996) : 0,972 VM [m³]: 539,268 Vs( 15/1013)[m³]: 492,990 VA( 17/ 996)[m³]: 497,842 at 512 l/min --------------------------Sa 09.05.09 Filter change 12:00:10 Sa 09.05.09 Blower on 12:00:15 Sa 09.05.09 Blower off 12:00:03 Collecttime[min]: 1399,96 # Blower on/off : 1 paM [mbar]: 929 TaM [°C]: 20,0 cM : 1,053 cs( 15/1013) : 0,949 cA( 17/ 996) : 0,972 VM [m³]: 539,268 Vs( 15/1013)[m³]: 492,990 VA( 17/ 996)[m³]: 497,842 at 512 l/min --------------------------Sa 09.05.09 Filter change 12:00:10 or Sa 09.05.09 Blower off Sa 09.05.09 12:00:12 Last filter in service 12:00:03 Sa 09.05.09 Blower on Collecttime[min]: 1399,96 # Blower on/off : 1 paM [mbar]: 929 TaM [°C]: 20,0 PaA [mbar]: 969 TaA [°C]: 17,2 cM : 1,053 cs( 15/1013) : 0,949 cA( 17/ 996) : 0,972 VM [m³]: 539,268 Vs( 15/1013)[m³]: 492,990 VA( 17/ 996)[m³]: 497,842 at 512 l/min --------------------------- or Sa 09.05.09 12:00:12 Last filter in service Sa 09.05.09 12:00:12 End of program If the program is completed Sa 09.05.09 12:00:12 Changer jammed Sa 09.05.09 12:00:10 Filter change Sa 09.05.09 12:00:12 Last filter in service Sa 09.05.09 Blower on 12:00:15 If the changer is jammed HVS-WORK Host: #HVS-WORK 12:00:15 The command brings the HVS to the "Work” operation status. If the HVS was previously in the "Pause” operation status, the filter exchange is triggered automatically! The range of transmitted response corresponds to the one specified in the printer for output. "Response” from HVS: if the program is completed Sa 09.05.09 12:00:03 Blower off Collecttime[min]: 1399,96 # Blower on/off : 1 paM [mbar]: 929 TaM [°C]: 20,0 cM : 1,053 cs( 15/1013) : 0,949 cA( 17/ 996) : 0,972 VM [m³]: 539,268 Vs( 15/1013)[m³]: 492,990 VA( 17/ 996)[m³]: 497,842 at 512 l/min --------------------------- Sa 09.05.09 WORK, ext 12:00:12 or if the HVS was previously in the "Pause” operation status and the changer was jammed: Sa 09.05.09 WORK, ext 12:00:12 Sa 09.05.09 12:00:12 Changer jammed Sa 09.05.09 Filter change 12:00:10 or if the HVS was previously in the "Pause” operation status and the last filter was inserted: Sa 09.05.09 Blower on 12:00:15 Sa 09.05.09 WORK, ext 12:00:12 Sa 09.05.09 12:00:16 or 40 DIGITEL Elektronik AG Alte Gasse 18 CH-8604 Hegnau Tel.: +41 (44) 908 20 30 DIGITEL Elektronik GmbH Illstrasse 30 A-6706 Bürs Tel.: +43 (5552) 67850 www.digitel-ag.com [email protected] Communication Filter change Sa 09.05.09 12:00:17 Last filter in service or Sa 09.05.09 WORK, ext 12:00:12 Sa 09.05.09 12:00:16 Last filter in service Sa 09.05.09 12:00:17 End of program if the program was completed. HVS-WAIT Host: #HVS-WAIT The command brings the HVS to "Wait” operation status. The range of the transmitted response corresponds to the one specified in the printer for output. Response from HVS: Sa 09.05.09 WAIT, ext 12:00:12 HVS-PAUSE Host: #HVS-PAUSE The command brings HVS to the "Pause” operation status. The range of transmitted response corresponds to the one specified in the printer for output. Response from HVS: Sa 09.05.09 PAUSE, ext HVS-EINST Host: #HVS-EINST The command causes the HVS to transmit current settings. Response from HVS: Current settings are transmitted to the terminal interface instead of to the printer. ESE – Ser. No. Chg.filter at overload Repeat after 2h Stop time at pwr. fail send failure msg. only blower capacity blower cap. >=90% Blower pwr. sens.[%] : # Blower on/off 4 day sequence Bayern-Hessen-Prot. Bayern-Hessen-Prot. B Bayern-Hessen-Address: curr. blower capacity on on on on on on on on on on on on on on on on on on off On On On On on On On on 8 1013 995 993 22,8 500 off off 9999 10.3 Bayern-Hessen protocol 12:00:12 We 13.05.09 version: Unicate no. curr. collecttime Press. meas. Temp. meas. Press. Amb. Temp. Amb. act. corr. meas. act. corr. stand. act. corr. amb. collecttime p avg. temp. avg. p avg. amb. T avg. amb. avg. cM/VM avg. cs/Vs avg. cA/VA repeated printout printer short messages Press./Temp. Corr. cs cm ca vs[m³] vm va tvg. press./temp. temp. stand. [°C] press. stand.[mbar] press. (ref)[mbar] Press. meas. [mbar] temp. meas. [°C]: flow through [l/min] Wind meas. cartridge chang. pin-code timeout [s] 11:42:17 H00.38 00000009 B438 00100281 on off off off on off 2 on off on on 310 on Interface format Format: 1 start bit, 8 data bits, 1 stop bit, no parity Baud rate: 1 200 (2 400 Baud in the Bayern-Hessen protocol B version) Handshake: semi duplex operation, polling method Checksum: (Block Check Character) XOR of all characters inclusive STX and ETX with start value 0 Bayern-Hessen protocol Subset for Digitel HVS Data inquiry structure Field No. 1 2 3 4 4 Start position 0 1 3 4 5 End position 0 2 3 4 5 Content Description <STX> DA <ETX> <BCC1> <BCC2> Start of Text End of Text High-Nibble BCC Low-Nibble BCC Data transmission structure Field No. 1 2 3 Start position 0 1 3 End position 0 2 5 Content Description <STX> MD nn<> 4 6 9 nnn<> Start of Text Protocol ID Number of measurement instruments (01) Measurement 41 DIGITEL Elektronik AG Alte Gasse 18 CH-8604 Hegnau Tel.: +41 (44) 908 20 30 DIGITEL Elektronik GmbH Illstrasse 30 A-6706 Bürs Tel.: +43 (5552) 67850 www.digitel-ag.com [email protected] Communication Field No. Start position End position Content 5 10 18 6 7 19 22 21 24 ±nnnn±e e<> hh<> hh<> 8 25 35 9 10 11 36 37 38 36 37 38 hhh<>hh hhhh<> <ETX> <BCC1> <BCC2> Description 10.4 AK-Protocol instrument ID Measurement value (blower load) Operation status Failure indication status Serial No. of measurement instrument (000 000000) End of Text High-Nibble BCC Low-Nibble BCC Implemented control commands Operation status in Bayern-Hessen protocol (1 200 Baud): Bit 0: Remote control on Bit 1: Maintenance Bit 2: End of program Bit 3: --Bit 4: Blower off Bit 5: Work Bit 6: Pause Bit 7: Filter exchange Failure indication status: Bit 0: Changer jammed Bit 1: Overload Bit 2: Magazine empty If more than one measurement value is transmitted, the fields 4 to 8 are repeated as frequently as the number of measurement values is defined. Warning: The first three characters of the instrument ID are transmitted in the Bayern-Hessen protocol in the block "Seriennummer" (serial No.). If the Bayern-Hessen protocol is applied, the first three characters have to be either numerical resp.blank characters. Bay. Hessen control telegram for Digitel HVS Control command structure Field No. 1 2 3 4 5 6 7 Start position 0 1 3 6 7 8 9 End position 0 2 5 6 7 8 9 Content Description <STX> ST 310 x <ETX> <BCC1> <BCC2> Start of Text Instrument address Control command End of Text High-Nibble BCC Low-Nibble BCC Control command: "E" Remote control on "W" Wait "B" Work "P" Pause "F" Filter exchange "A" Remote control off "C" initialisation of cM, cA, cs, VM, Vs, VA sampling time, filter-change flag; in the Bayern-Hessen protocol modes 3 and 4, the sampling time cM, cA, cs, VM, Vs, VA and filter-change flag values are transmitted until the control command "C" is received. Herewith it is ensured that the receiver receives the data. Control command AREG EREG Description Ask Register Command – actually implemented Enter Register Command – actually not implemented Set Function xx Command – actually not implemented Ask Storage Command – actually not implemented Set Storage Command – actually not implemented SFxx ASTO SSTO Interface format Format: 1 start bit, 8 data bits, 1 stop bit, no parity Baud rate: 9600 Handshake: --Control command structure General transmission format The first character of a command is always a start character (STX). After that the next digits/figures will follow: station number (ASCII), "AREG", a blank, a two-digit channel number (ASCII), a blank, a one-3- digit program register code (ASCII). The string is closed by a final character (ETX). The answer of the HVS has following format: the first character is always a start-character (STX). After that the next digits/figures are as follows: station number (ASCII), "AREG", a blank, a digit status (ASCII), a blank, a one 3-digit program register code (ASCII); length is not defined! The string is closed by a final character (ETX). Up to three figures could follow. The HVS sends a "CR" and "LF". ATTENTION: Station number for HVS: "4" Channel number for HVS: "K0" Request: STX 4 A R E G Respond: STX 4 A Data R E G ETX K 0 0 CR PRC PRC PRC ETX PRC LF Respond data format: actual blower load: 000-100 till 3 digits [%] act. Temp., avg. Temp. in measurement system: ±25,3 till 5 digits [°C] act. pressure, avg. pressure in measurement system: 1006 till 4 digits [mbar] Elapsed collecttime for the actual filter, Elapsed collecttime for the last completed filter: 12317,17 till 8 digits [minutes] cM, cs, cA: 00001,034 till 9 digits VM, Vs, VA: 12067,345 till 9 digits [m³] Description of Program Register Code: PRC 0 1 2 3 4 5 6 7 10 11 20 Description Actual blower load1 Actual temperature conditions in measurement system1 Actual pressure conditions in measurement system1 Elapsed collecttime of the actual filter1 act. cM1 act. cs1 act. VM1 act. Vs1 Operation status 2 Failure indication status 3 Elapsed collecttime of the last completed filter4 42 DIGITEL Elektronik AG Alte Gasse 18 CH-8604 Hegnau Tel.: +41 (44) 908 20 30 DIGITEL Elektronik GmbH Illstrasse 30 A-6706 Bürs Tel.: +43 (5552) 67850 www.digitel-ag.com [email protected] Communication 21 22 23 24 25 26 30 31 40 41 42 43 Average temperature conditions in measurement system during sampling periode4 Average pressure conditions in measurement system during sampling periode4 cM of the last completed filter4 cs of the last completed filter4 VM of the last completed filter4 Vs of the last completed filter4 act. cA1 act. VA1 Average temperature conditions on the air inlet of the last completed filter during the sampling period (this is an estimated condition: flow-meter average temperature 3K). Average pressure conditions on the air inlet of the last completed filter during the sampling period (air pressure average value before and after sampling on the sampling head) 4 cA of the last completed filter4 VA of the last completed filter4 1 Values for PRC: 0 till 2 are actual values. It averages that this are the last measured values. Values for PRC: 3 till 7, 30, 31 are actually computed values. Operation status: State xxx0 xxx1 xxx2 xx0x xx1x x0xx x1xx 0xxx 1xxx Description Work Wait Pause Blower off Blower on No filter change Filter changed Remote off Remote on Failure indication status: State xx0 xx1 x0x x1x 0xx 1xx Description Changer OK Changer jammed No blower overload Blower overload Filter magazine filled Filter magazine empty Values for PRC: 20 till 26, 40 till 43 are values for the last completed filter. 43 DIGITEL Elektronik AG Alte Gasse 18 CH-8604 Hegnau Tel.: +41 (44) 908 20 30 DIGITEL Elektronik GmbH Illstrasse 30 A-6706 Bürs Tel.: +43 (5552) 67850 www.digitel-ag.com [email protected] Data recording with USB-drive 11 Data recording with USB-drive Filter data, status messages and wind data are stored in the internal flash module of the control. Filter data, status messages or failure messages are stored in the log file. The wind data in the wind file. Up to 10,000 entries are recorded per file. 11.1 Storing of data on the USBdrive With the plugged-in USB drive the recorded data are stored simultaneously on the internal memory as well as on the USB drive. That is the reason why the USB drive can be removed any time. (Attention: please consider the mode removal USB ! See 13.2 Removal USB drive) After the removal of the USB-drive the control only stores the data records on the internal memory. Now the USB-drive can be removed without data loss. After the removal of the USB drive for a few seconds the message "USB drive removed" appears. 11.3 Structure of the data files on the USB-drive 11.3.1 File name If there is already a file with the same name, a menu appears: The storage of the recorded data will be affected in following files. HVSDAT.DAT ... Digitel Log file Filter data, cartridge data and status messages WIND.DAT ... Digitel wind file Wind data HVSKLIMA.DAT ... Digitel filter storage temperature file Filter storage temperature 11.3.1.1 Overwrite data: the new file is written over the old file Attach data: the new data is attached to the existing file 11.2 Removal of USB-drive The USB-drive can be removed any time by compliance with following instructions. To get into the program "Mode removal USB" on the display the basic menu has to be visual. The data in the file HVSDAT.DAT are saved in a table. As separators between the columns, the Tab character (HT, 09H) is applied. The line break is activated using CR, LF. For example, after formatting on the HVS, the file looks as follows: Event Date/ time pA [mbar] TA estimated [°C] Vs (15°C / VA (512 1013 l/min) [m³] mbar); (512 l/min) [m³] VM (512 l/min) [m³] Column: Event Date/time Collecttime If the USB-Logo is chosen, the display changes to USB dialogue: Log file HVSDAT.DAT paM TaM pA Sampling time (min.) cM paM TaM [°C] [mbar] cs (15°C / cA 1013 mbar) Description status information (Blower on, Work etc.) year, month, day, hour, minute, second inserted filter sampling time in minutes average air pressure during sampling time in mbar at measurement tube average air temperature during sampling time in °C at measurement tube average value before and after sampling of air pressure in hPa at 44 DIGITEL Elektronik AG Alte Gasse 18 CH-8604 Hegnau Tel.: +41 (44) 908 20 30 DIGITEL Elektronik GmbH Illstrasse 30 A-6706 Bürs Tel.: +43 (5552) 67850 www.digitel-ag.com [email protected] Data recording with USB-drive TA CM cs (15°C/1013 mbar) cA VM Vs (15°C/1013 mbar) VA 11.3.1.2 inlet average air temperature during sampling time in °C at inlet flow rate correction factor on the measurement tube for average pressure and temperature conditions during the sampling time flow rate correction factor related to entered standard conditions air flow correction factor on inlet transported air volume in cubic metres (related to determined measurement values on the measurement tube) air volume that would have been transported in standard conditions; temperature (15°C) and pressure (1 013 mbar) depends on setting "standard temperature" and "standard pressure" during the formatting procedure. air volume to be transported during the sampling time through an inlet Wind file WIND.DAT The data file WIND.DAT is set only when wind measurement is activated. Data in the file WIND.DAT are saved in a table. As separators between the columns, the Tab character (HT, 09H) is applied. The line break is activated with the use of CR, LF. After formatting on HVS, the file looks as follows: Date/time Wind direction (grade) Column Date/time Wind direction Wind velocity (m/s) Blast (m/s) Wind velocity (m/s) Blast (m/s) description Year, month, day, hour, minute, second Average wind direction Average wind velocity Maximum wind velocity during time of averaging 11.3.1.3 Filter storage-Temperature File HVSKLIMA.DAT The data file HVSKLIMA.DAT is set only when protocol of filter storage temperature is activated (climate module activated). Data in the file HVSKLIMA.DAT are saved in a table. As separators between the columns, the Tab character (HT, 09H) is applied. The line break is activated with the use of CR, LF. After formatting on HVS, the file looks as follows: Date/time Column: Date/time Filter storage temperature Cooling Filter storage temperature [°C] cooling Description year, month, day, hour, minute, second In °C Status of cooling: on, off, defrost 45 DIGITEL Elektronik AG Alte Gasse 18 CH-8604 Hegnau Tel.: +41 (44) 908 20 30 DIGITEL Elektronik GmbH Illstrasse 30 A-6706 Bürs Tel.: +43 (5552) 67850 www.digitel-ag.com [email protected] Remote DHA-80 via Ethernet 12 Remote DHA-80 via Ethernet The control system of the High Volume sampler DHA-80 includes a FTP - and a HTTP- server. The FTP - server enables a parameterization of the High Volume sampler by transferring the INI - file. For the status check the FTP - server provides a status-, error- and data-file. Via the HTTP- server an easy remote control and a status request of the High Volume sampler are possible. The contents of the hvsdat.dat – file can be deleted by means of transmission of the file "del_dat.txt" with contents "delete". 12.2 HTTP - Server The HTTP - server issues a website with all current measuring values and enables via pushbuttons an easy remote control of the High Volume sampler. 12.1 FTP-server 12.2.1 Dial-up 12.1.1 Dial-up The internet communication can only be established by a user name and a password. The internet connection can only be effected by means of a user name and password. User name: (Default):root Password (Default):password User name (Default):root Password (Default):password These default-values are set up factory-made. Attention: 12.2.2 Remote control via HTTP Before transmission of the control system file please set IP-address (see 7.2.2.3.2 Ethernet). 12.2.2.1 12.1.2 Breaking off connection You can update the contents of the website by clicking on the pushbutton "Status". The FTP – client can break off the connection and start a new one any time. 12.1.3 Contents of the FTP - server index 12.2.2.2 Status change Protocol - file - "hvsdat.dat" The protocol - file contains all filter data, status messages, settings which were set up for the logging. Example: If the remote control is active, you can change the program status by clicking on the appropriate pushbutton.. Work ... the program changes into the work - status. At the change from the Pause status into a filter change takes place.. Wait ... The program changes into the Wait - status. At the status "Wait" the blower is turned off and a sampling will not be executed. A change into the status "Work" takes place without a filter change. We 13.05.09 10:47:25 device id: DEVICE 1 filter data: col.-time[min]: 0,02 pmM [hPa]: 942 TmM [°C]: 24,6 kM( 25/ 942) : 1,054 ks( 15/1013) : 0,948 ka( 22/ 940) : 1,046 VM( 25/ 942)[l] : 0,879 Vs( 15/1013)[l] : 0,790 Va( 22/ 940)[l] : 0,871 at Q Scale i.: 500,00 l/min We 13.05.09 Work Activate remote control You can activate the remote control by clicking on the pushbutton "remote control". The program status first changes if you transmit more commands. 12.2.2.3 12.1.3.1 Status request Pause ... the program changes into the Pause - status. If you change from Pause into another status, a filter change always takes place. If the magazine is empty, there can’t be activated any other status than Pause! Filter change ... You can execute a filter change any time if the magazine is filled. 12.2.2.4 Turn off remote control If you turn off the remote control, the control system changes into the status before the activating of the remote control. 10:47:25 46 DIGITEL Elektronik AG Alte Gasse 18 CH-8604 Hegnau Tel.: +41 (44) 908 20 30 DIGITEL Elektronik GmbH Illstrasse 30 A-6706 Bürs Tel.: +43 (5552) 67850 www.digitel-ag.com [email protected] Technical data 13 Technical data Type Power supply air floated field housing 230 V +6/-10 %; 50 Hz; max. 1700 VA 10 A 3 x 1.0 mm², 10 A, 250 V Category II (standard power) 5 to 40°C; 10 to 90 % RH or -20 to 40°C; 10 to 95 % RH with interior heating, maximum operation altitude of 2000 m above the sea level* 420 till 600 l/min box housing 230 V +6/-10 %; 50 Hz; max. 1700 VA 10 A 3 x 1.0 mm², 10 A, 250 V Category II (standard power) 5 to 40°C; 10 to 90 % RH maximum operation altitude of 2000 m above the sea level* 19" housing 230 V +6/-10 %; 50 Hz; max. 1700 VA 10 A 3 x 1.0 mm², 10 A, 250 V Category II (standard power) 5 to 40°C; 10 to 90 % RH maximum operation altitude of 2000 m above the sea level* Flow rate (standard) field housing 230 V +6/-10 %; 50 Hz; max. 1700 VA 10 A 3 x 1.0 mm², 10 A, 250 V Category II (standard power) 5 to 40°C; 10 to 90 % RH or -20 to 40°C; 10 to 95 % RH with interior heating, maximum operation altitude of 2000 m above the sea level* 420 till 600 l/min 420 till 600 l/min 420 till 600 l/min Flow rate (optional) 100 till 1 000 l/min 100 till 1 000 l/min 100 till 1 000 l/min 100 till 1 000 l/min "Volume flow" Control accuracy Suction unit, average durability Reproducible accuracy settings (according to UMEG report No. 6-08/00) Accuracy of logged standard and measured volumes Time programs < 5 % of FSS < 5 % of FSS < 5 % of FSS < 5 % of FSS 36 000 h 36 000 h 36 000 h 36 000 h +- 0.45% +- 0.45% +- 0.45% +- 0.45% <+/- 2% <+/- 2% <+/- 2% <+/- 2% Work, Pause (0 to 59999 minutes each); start time adjustable using date and time 1 300, 600, 250 mm 60 kg IP54 15 round filters of d = 150 mm (flowing area of d = 140 mm); filter material depends on the aim of analysis max. 130 mbar (+/- 4 seconds daily) DIGITEL, Bayern-Hessen protocol, customerspecific 30 V; 50 Hz; 60 VA max. - Work, Pause (0 to 59999 minutes each); start time adjustable using date and time 1 300, 600, 290 mm 68 kg IP54 15 round filters of d = 150 mm (flowing area of d = 140 mm); filter material depends on the aim of analysis max. 130 mbar (+/- 4 seconds daily) DIGITEL, Bayern-Hessen protocol, customerspecific 30 V; 50 Hz; 60 VA max. Work, Pause (0 to 59999 minutes each); start time adjustable using date and time 1 260, 528, 250 mm 43 kg IP50 15 round filters of d = 150 mm (flowing area of d = 140 mm); filter material depends on the aim of analysis max. 130 mbar (+/- 4 seconds daily) DIGITEL, Bayern-Hessen protocol, customerspecific 30 V; 50 Hz; 60 VA max. - Work, Pause (0 to 59999 minutes each); start time adjustable using date and time 960, 483, 500 mm 45 kg IP50 15 round filters of d = 150 mm (flowing area of d = 140 mm); filter material depends on the aim of analysis max. 130 mbar (+/- 4 seconds daily) DIGITEL, Bayern-Hessen protocol, customerspecific 30 V; 50 Hz; 60 VA max. - Fuse Connecting cable Installation Application range Outer dimensions (H x W x D) Weight Protection class Filters Vacuum at 1,000 l/min. Automatic filter exchange Changer failure Identification Manual filter exchange Empty magazine identification Overloading switch-off Operation-hour counter Motor-load indication Multi-language logging internal data memory Battery-backed clock module USB interface Ethernet interface RS232 interface Interface protocols Inlet heating Filter storage room climatisation 47 DIGITEL Elektronik AG Alte Gasse 18 CH-8604 Hegnau Tel.: +41 (44) 908 20 30 DIGITEL Elektronik GmbH Illstrasse 30 A-6706 Bürs Tel.: +43 (5552) 67850 www.digitel-ag.com [email protected] Technical data Options Type Inlet field housing TSP, PM10, PM2.5, PM1 optionally with integrated heating + excess temperature protection air floated field housing TSP, PM10, PM2.5, PM1 optionally with integrated heating + excess temperature protection Ambient pressure and temperature sensor PAH cartridge holder PAH 4 channel cartridge changer Log printer External weather data logging * Special execution for operation altitudes above 2000 m upon request box housing TSP, PM10, PM2.5, PM1 optionally with integrated heating + excess temperature protection 19" housing TSP, PM10, PM2.5, PM1 optionally with integrated heating + excess temperature protection - - 48 DIGITEL Elektronik AG Alte Gasse 18 CH-8604 Hegnau Tel.: +41 (44) 908 20 30 DIGITEL Elektronik GmbH Illstrasse 30 A-6706 Bürs Tel.: +43 (5552) 67850 www.digitel-ag.com [email protected] Dimension drawings 14 Dimension drawings 14.1 DHA-80 in field housing Figure 7: Dimension drawing field housing DHA-80 49 DIGITEL Elektronik AG Alte Gasse 18 CH-8604 Hegnau Tel.: +41 (44) 908 20 30 DIGITEL Elektronik GmbH Illstrasse 30 A-6706 Bürs Tel.: +43 (5552) 67850 www.digitel-ag.com [email protected] Dimension drawings 14.2 DHA-80 in air floated field housing Figure 8: Dimension drawing air floated field housing DHA-80 50 DIGITEL Elektronik AG Alte Gasse 18 CH-8604 Hegnau Tel.: +41 (44) 908 20 30 DIGITEL Elektronik GmbH Illstrasse 30 A-6706 Bürs Tel.: +43 (5552) 67850 www.digitel-ag.com [email protected] Dimension drawings 14.3 DHA-80 in 19”-housing Figure 9: Dimension drawing DHA-80 mounting rack 19" 51 DIGITEL Elektronik AG Alte Gasse 18 CH-8604 Hegnau Tel.: +41 (44) 908 20 30 DIGITEL Elektronik GmbH Illstrasse 30 A-6706 Bürs Tel.: +43 (5552) 67850 www.digitel-ag.com [email protected] connections: 15 connections: REMOTE/RS485 Connector for external sensor e.g: 10: connections DHA-80 Figure Wind sensor humidity sensor USB Reserve Reserve for future purpose PC RS232 Interface to connect sampler with PC 230V/ 50-60Hz electric supply, fuse 10A ETHERNET network interface 24VAC / 2A reserve for additional heating GROUNDING for external devices/sensors 52 DIGITEL Elektronik AG Alte Gasse 18 CH-8604 Hegnau Tel.: +41 (44) 908 20 30 DIGITEL Elektronik GmbH Illstrasse 30 A-6706 Bürs Tel.: +43 (5552) 67850 www.digitel-ag.com [email protected] Appendix 16 Appendix 16.1.1 Pressure / temperature correction table Pressure correction for gases at turbulent operation Calculation of correction factor for measurement instrument applying pressure differing from an original one c= Ps = hPa operation pressure in Pe = calibration pressure in hPa (indicated on the measurement tube) 1.013 Ps 1.013 Pe c: correction factor to be multiplied with the reading of the flow meter at calibration pressure Pe and operation pressure Ps Correction plot applied, if the measurement instrument is calibrated at 1 013 bar absolute, and now applied for another pressure. correction factor c Operation pressure in hPa 53 DIGITEL Elektronik AG Alte Gasse 18 CH-8604 Hegnau Tel.: +41 (44) 908 20 30 DIGITEL Elektronik GmbH Illstrasse 30 A-6706 Bürs Tel.: +43 (5552) 67850 www.digitel-ag.com [email protected] Appendix Temperature correction for gases at turbulent operation Calculation of correction factor for a measurement instrument applying another temperature than the original temperature: c= 273 te 273 ts Ts = operation temperature inC Te = calibration temperature inC (indicated on the measurement tube) c: correction factor to be multiplied with the showed value of the flow meter at a calibration temperature Te and an operation temperature Ts. If Te = 20 °C, the below plot directly gives the correction factor c Correction plot applied, if the measurement instrument is calibrated at 20°C absolute, and now applied for a different value of temperature. correction factor c Temperature in °C ts Figure 11: Pressure and temperature correction table 54 DIGITEL Elektronik AG Alte Gasse 18 CH-8604 Hegnau Tel.: +41 (44) 908 20 30 DIGITEL Elektronik GmbH Illstrasse 30 A-6706 Bürs Tel.: +43 (5552) 67850 www.digitel-ag.com [email protected] Appendix 16.2 Menu: 55 DIGITEL Elektronik AG Alte Gasse 18 CH-8604 Hegnau Tel.: +41 (44) 908 20 30 DIGITEL Elektronik GmbH Illstrasse 30 A-6706 Bürs Tel.: +43 (5552) 67850 www.digitel-ag.com [email protected] Appendix 56 DIGITEL Elektronik AG Alte Gasse 18 CH-8604 Hegnau Tel.: +41 (44) 908 20 30 DIGITEL Elektronik GmbH Illstrasse 30 A-6706 Bürs Tel.: +43 (5552) 67850 www.digitel-ag.com [email protected] Appendix 16.3 EC-Declaration of conformity 16.3.1.1.1.1 in terms of the EC directives -Machines 89/392/EWG modified by 91/368/EEC and 93/44/EEC, Appendix IIA -Electromagnetic compatibility 89/336/EEC modified by 93/31/EEC -Low potential voltage 73/23/EEC The machine: Manufacturer: DIGITEL AG, Switzerland Type: DHA-80 has been developed, construed and manufactured in accordance with the above mentioned EC directives, in sole responsibility of DIGITEL AG, Switzerland and DIGITEL GmbH, Austria Following tests and test procedures were applied: -Emitted interference: requirement according to Cenelec EN 61326-1: 1997/A1: 1988 -Test conducted radio emission according to Cenelec EN 55022: 1998 CISPR16-1 -Test electric field strength according to Cenelec EN 55022: 1998 CISPR16-2 -Test overtone currents according to Cenelec EN 61000-3-2: 1995/A1: 1998/A2: 1998 -Test flicker according to Cenelec EN 61000-3-3: 1995 -Interference resistance: requirement according to Cenelec EN 61326-1:1997/A1: 1988 -Test Cenelec EN 61000-4-2: 1995/A1:1998 -Test Cenelec EN 61000-4-3: 1996/A1:1998 -Test Cenelec EN 61000-4-4: 1995 -Test Cenelec EN 61000-4-5: 1995 -Test Cenelec EN 61000-4-6: 1995 -Test Cenelec EN 61000-4-11: 1994 Following reports can be requested from DIGITEL GmbH: Inspection report VDI Inspection report concerning the development of the noise level LAI report UMEG inspection report 57 DIGITEL Elektronik AG Alte Gasse 18 CH-8604 Hegnau Tel.: +41 (44) 908 20 30 DIGITEL Elektronik GmbH Illstrasse 30 A-6706 Bürs Tel.: +43 (5552) 67850 www.digitel-ag.com [email protected] INDEX 17 INDEX AK-protocol 37 AK-Protocol 48 Application examples 44 Assembly 8 Bayern-Hessen protocol 47 Bayern-Hessen Protocol B 38 Bayern-Hessen-protocol 37 Blower 9 Blower off 45, 46 Blower on 46 CA 5 calibration 29 Calibration table 59 changer 13 Changer jammed 13 Cleaning 9 CM 5 Communication 45 Connections 7 Consumables 8 Control commands description 45 Cs 5 date/time 29 DHA-80 7 Digitel DHA-80 8 Digitel inlets 18 Digitel protocol 45 Dimension drawings 55 DPM10/30 42 EC-Declaration of conformity 63 EN 12341 15 Failure indication messages 12 Field installation 8 filter change 7 Filter change 46 filter exchange 15 Filter paper 8 Filter Preparation 15 Filters 15 Flow calibration 15 flow meter 15 Function description 12 Fuses 8 Grease 9 HVS 6 impactor 42 Interface format 45 Last filter in service 12 List of control commands 45 Mains cable 8 maintenance 43 Maintenance 9 Operating mode 7 Operation modes 15 p (uncal 5 p/T\ 6 PA)\ 6 PaA 6 paM 6 Pause 13, 14 pM 6 Programming 24 ps 6 Remote control 12 Safety instructions 5 sampling probe 42 Sealing rings 8 Setting of operation status 15 start program 27 Status change 14 status times 28 stop program 27 SW-Version 41 System description 7 TaM 6 terminal interface 45 Thermo-printer paper 8 Tightness test 9 TM 6 Transport 8 Ts 6 VA 5 VDI 2463 7 VM 5 Vs 5 Wait 14 Work 14 58 DIGITEL Elektronik AG Alte Gasse 18 CH-8604 Hegnau Tel.: +41 (44) 908 20 30 DIGITEL Elektronik GmbH Illstrasse 30 A-6706 Bürs Tel.: +43 (5552) 67850 www.digitel-ag.com [email protected]