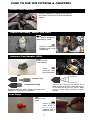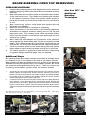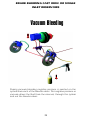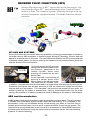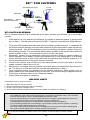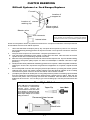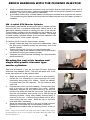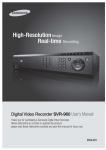
1
The Worlds Best Tool For Bleeding Clutches, Brakes... and More USERS MANUAL See inside for: General Instructions RFI, Pressure & Vacuum Bleeding Quick Flush & Ccross Bleed Pulse Generator Cylinder Flush Clutch Bleeding ABS Brakes Bench Bleeding Helpful Hints Troubleshooting One Tool- Every Known Method of Bleeding! See Quick Start pages 11-13 040101-A TABLE OF CONTENTS PAGE # Warranty Information ---------------------------------------------------------------------------------- 2 Phoenix Injector Features ---------------------------------------------------------------------------- 3 10-Pak Module ------------------------------------------------------------------------------------------ 5 Smart-Pak Module ------------------------------------------------------------------------------------- 6 How To Use Fittings and Adapters ---------------------------------------------------------------- 7 Basic Function and Setup --------------------------------------------------------------------------- 9 Modular Adapters ------------------------------------------------------------------------------------ 10 Quick Start; Prepare the Phoenix Injector ----------------------------------------------------- 11 Quick Start; Basic Techniques for Bleeding and Flush ------------------------------------ 12 Brake System Bleeding and Flushing ---------------------------------------------------------- 14 Brake Bleeding Introduction ----------------------------------------------------------------------- 15 Brake Bleed Open Top Reservoirs -------------------------------------------------------------- 16 Brake Bleed Cast Iron or Screw Cap Reservoirs ------------------------------------------- 20 Brake and Clutch Special Applications --------------------------------------------------------- 22 Brake Fluid Testing ---------------------------------------------------------------------------------- 23 Reverse Fluid Injection ----------------------------------------------------------------------------- 24 Reverse Fluid Injection for Clutches ------------------------------------------------------------ 26 Pulse Generator -------------------------------------------------------------------------------------- 28 Quick Flush and Cross Bleed --------------------------------------------------------------------- 29 Cylinder Flush ----------------------------------------------------------------------------------------- 30 Bench Bleeding with the Phoenix Injector ----------------------------------------------------- 31 Troubleshooting -------------------------------------------------------------------------------------- 36 Special Instructions: Cleaning & Re-lubricating ---------------------------------------------- 38 Exploded Views --------------------------------------------------------------------------------------- 40 Frequently Asked Questions ---------------------------------------------------------------------- 44 CAUTION: TO AVOID PERSONAL INJURY AND/OR VEHICLE DAMAGE Some precautions are specified in this manual and should be noted to avoid personal injury or vehicle damage. It is not possible for these cautions to cover all conceivable ways in which service or testing might be done, or all possible consequences of each way, nor could PHOENIX SYSTEMS possibly know or investigate all such ways. It is therefore the responsibility of anyone using this manual, or any PHOENIX SYSTEMS product, to satisfy themselves thoroughly that neither personal safety nor vehicle safety will be jeopardized by the service methods selected. Any such injury or damage is entirely the users responsibility. This device is not to be used in any manner on the human body. LIMITED WARRANTY Phoenix Systems, LLC, an Arizona Limited Liability Company warrants its products (the "Products") as follows: 1. Limited Warranty. Manufacturer warrants that the Products sold hereunder will be free from defects in material and workmanship for a period from the date of purchase as shown below for each product. If the Products do not conform to this Limited Warranty during the warranty period , Buyer shall notify Manufacturer in writing of the claimed defects and demonstrate to Manufacturer satisfaction that said defects are covered by this Limited Warranty. If the defects are properly reported to Manufacturer within the warranty period, and the defects are of such type and nature as to be covered by this warranty, Manufacturer shall, at its own expense, furnish, replacement Products or, at Manufacturer's option, replacement parts for the defective Products. Shipping and installation of the replacement Products or replacement parts shall be at Buyer's expense. V-12/V-20/Brake Fluid Tester/Adapters,tube and fittings 1 Year Maxi-Ject/Maxi-Ject Pro/Power-Ject 2 Years 2. Other Limits. THE FOREGOING IS IN LIEU OF ALL OTHER WARRANTIES, EXPRESS OR IMPLIED, INCLUDING BUT NOT LIMITED TO THE IMPLIED WARRANTIES OF MERCHANTABILITY AND FITNESS FOR A PARTICULAR PURPOSE. Manufacturer does not warrant against damages or defects arising out of improper or abnormal use or handling of the Products; against defects or damages arising from improper installation (where installation is by persons other than Manufacturer), against defects in products or components not manufactured by Manufacturer, or against damages resulting from such non-Manufacturer made products or components. Manufacturer passes on to Buyer the warranty it received (if any) from the maker thereof of such non-Manufacturer made products or components. This warranty also does not apply to Products upon which repairs have been effected or attempted by persons other than pursuant to written authorization by Manufacturer. 3. Exclusive Obligation. THIS WARRANTY IS EXCLUSIVE. The sole and exclusive obligation of Manufacturer shall be to repair or replace the defective Products in the manner and for the period provided above. Manufacturer shall not have any other obligation with respect to the Products or any part thereof, whether based on contract, tort, strict liability or otherwise. Under no circumstances, whether based on this Limited Warranty or otherwise, shall Manufacturer be liable for incidental, special, or consequential damages. 4. Other Statements. Manufacturer's employees or representatives' ORAL OR OTHER WRITTEN STATEMENTS DO NOT CONSTITUTE WARRANTIES, shall not be relied upon by Buyer, and are not a part of the contract for sale or this limited warranty. 5. Entire Obligation. This Limited Warranty states the entire obligation of Manufacturer with respect to the Products. If any part of this Limited Warranty is determined to be void or illegal, the remainder shall remain in full force and effect PHOENIX SYSTEMS reserves the right to substitute alternate component parts of equal utility for those shown © Copyright 1995-2001 by PHOENIX SYSTEMS LLC All rights reserved. This volume may not be reproduced in whole or in part in any form without the written permission from the publisher. 2 WHAT IS THE PHOENIX INJECTOR Each Phoenix Injector is a sophisticated hand pump capable of directly pumping liquids (brake fluid) and air at pressures from -20 Hg vacuum to 150 psi*. Suction side Graduated Cylinder Dosage Control Injection side PATENTED Handle *Spring Adjustment Simply squeeze the handle to inject fluid. When the handle is released, fluid automatically refills the cylinder. * Depends on Model Maxi-Ject Pro shown Ö Ö Ö Ö Ö Problem Solver - Never again spend hours attempting to get a firm clutch or brake pedal. Save Time. Make Money - One technician can bleed difficult systems in as little as 5 minutes. Quick & Portable - Does not require electricity or compressed air, so you can use it in the field. Flexible- Uses all known bleeding methods including: RFI, Pressure and vacuum Easy to use - Simple modular design allows even the weekend mechanic to bleed like the Pros. 3 PHOENIX INJECTOR FEATURES 2 4 7 4 3 2 5 (internal) 6 Rebuild kits are available for each Injector. See Catalog or Manual exploded views for description and part number beginning at page 40.. 3 8 7 5 8 6 1 (i( POWER-ject maxi-ject pro 2 7 4 2 3 3 5 4 6 8 6 5 7 v-20 injector 8 v-12 injector LEGEND 1. Return Spring Adjustment Nut- Maxi-Ject Series Only 2. Dosage Adjustment 3. Inlet Hose Barb 4. Cylinder or Barrel 5. Injector Nut or End Cap and Injection Tip 6. Handle 7. Body 8. Return Spring ADJUSTMENTS To adjust return spring tension tighten or loosen #1 (Return Spring Adjustment Nut). Leave handle in relaxed position while adjusting. To adjust dosage rotate #2 (Dosage Adjustment) to desired position. Notice graduations on cylinder or barrel. ACCESSORY MODULES Each of our Injectors is packaged with an inlet and outlet hose assembly and an accessory module. The 10-Pak Module, which only comes with the V-12, contains the basic equipment required to perform RFI, pressure and vacuum bleeding or flush. Bottle caps are included which attach to 90% of all brake fluid containers. The Smart-Pak Module is the most popular; it contains the same basic equipment plus high-tech rotating couplers, Bottle-Pak, and additional adapters to attach to all known bleeder valves. See the following pages for an overview of of the 10-Pak and Smart-Pak Module. 4 10-PAK MODULE The 10-Pak features the basic equipment required to perform RFI, pressure and vacuum bleeding/flush. The 10-Pak was created by streamlining the Smart-Pak module to include only the fittings and adapters most commonly used. The 10-Pak is an economy package that will still allow the technician full use of Phoenix Injector features. The unique modular coupler design allows easy conversion between RFI, Pressure and Vacuum techniques. Bottle Caps (7, 8)- Bottle caps are provided with a Luer lock quick coupler, bottle vent and pickup tube that will attach to most brake fluid containers. Luer Lock Quick Couplers w/Adapters (2, 3)- Luer-Lock couplers are provided to quickly attach to adapters and fluid containers. Simply insert and with a twisting motion lock couplers together. Universal Port Adapter (5)- . The Universal Port Adapter (UPA) is included to bench bleed master or slave cylinders and pressure bleed or flush the hydraulic system. Taper Tips (4)- Taper Tips provide access to clutch slave units that do not have a conventional bleeder valves. Adapters- Bleeder Adapters (1,2,3,6) are provided to connect to external bleeder valves from 1/8 to ¼ sizes. Simply purchase a new bottle of brake fluid, remove the cap and install the appropriate 10-Pak cap in its place. The bottle provides the fluid source for the Injector when performing RFI or pressure bleeding. When vacuum bleeding attach the Phoenix Injector outlet to the bottle to capture the fluid removed from system. Description of use Adapter 1. 2. 3. 4. 5. 6. 7. 8. 1/8 x .150 Adapter 90 Quick adapter assembly Quick adapter assembly Taper Tip Adapter (3) Universal Port Adapter 3/16 x 4mm Adapter 28mm Bottle cap 33mm Bottle assembly Use for1/8 bleeder valves or 1/8 ports Quick couple assembly with 3/16 x 4mm Adapter 90 Quick couple assembly use for 3/16 or 1/4bleeder valvesNew clutch slave or special injection applications (UPA) Use for bench and pressure bleeding. Straight adapter for custom application 28mm bottle cap for small neck brake fluid bottles (See chart) 33mm bottle cap for brake fluid bottles (See chart) CAP CHART 10-PAK 8 MANUFACTURER 6 7 SIZE CAPS 28mm 33 mm 5 4 12oz CASTROL 1qt 12oz QUAKERSTATE 1qt QUAKER SUPREME DOT5 12oz 12oz PYROIL Your Injector comes with inlet and outlet hose assemblies. 1qt 3 12oz STP 1qt 2 1 12oz PRESTONE 1qt 28MM CAP 12oz 33MM CAP ALBANY 1qt 12oz COASTAL UNILUBE 1qt *12oz CARQUEST BRAKE FLUID BRAKE FLUID 12oz NAPA DOT 3, 4, Super Heavy & Silicone! 1 qt 1gal WAGNER- Premium, Premium Plus DOT 3,4 & Lockheed DOT 4 NEW BOTTLE OF BRAKE FLUID *1 qt 1 gal ASSEMBLED UNIT *12oz *1 qt 1 gal CHEM WAY 12oz Johnsen’s Silicone DOT 5 12oz * Not an exact fit, but cap will sufficiently secure to bottle. 5 SMART-PAK MODULE The Smart-Pak is designed with special assemblies for ABS applications to assist in bleeding and system flush. Adapters are included that will attach the Phoenix Injector to all known bleeder valves. High-tech rotating quick couplers are used to provide easy connection to adapters and fluid sources. Systems are fully portable, featuring bottle holder, magnetic securing device and belt attachment. Bottle-Pak (1) - The Bottle-Pak utilizes clear graduated fluid container equipped with Luer Lock rotating quick couplers. The Bottle-Pak is equipped with a bottle holder and magnetic securing device. The two quick couplers in the Bottle-Pak allow the use of fluid recirculation to fill the Phoenix Injector with fluid without any fluid loss. Luer Lock Quick Couplers w/Adapters (5, 6)- Luer-Lock couplers are provided to quickly attach to adapters and fluid containers. Simply insert and with a twisting motion lock couplers together. Capture Assembly (14) - To assist ABS service a new Capture Assembly is provided which allows the technician to perform a pressure or pedal flush prior to RFI. A check valve in the assembly allows fluid flow in one direction only which prevents the drawing of air while pressure or pedal flushing the system. This assembly is also used to attach the bleeder valve to a capture container. Bottle Caps (15,16)- Bottle caps are provided with a Luer-lock quick coupler, bottle vent and pickup tube that will attach to most brake fluid containers. Universal Port Adapter (9)- . The Universal Port Adapter (UPA) is included to bench bleed master or slave cylinders and pressure bleed or flush the hydraulic system. Adapters · Bleeder Adapters (3,4,5,6,10,11,12,) are provided to connect to all external bleeder valves. Extra adapters are provided for custom applications. · Luer plugs (8) will prevent fluid leakage from Luer assemblies when not in use. · Taper Adapter (13) will attach bleeder adapters to hose sizes from 3/16 to 7/16 I.D. · Taper Tips (7) provide access to clutch slave units that do not have a conventional bleeder valves. · Tubing connectors (2) are provided for special applications. SMART-PAK 15 16 13 12 11 14 10 9 8 1 7 6 2 3 4 Your Injector comes with filter and inlet and outlet hose assemblies. 5 Same fitting, #5 has Luer pre-installed Adapter 1. 2. 3. 4. 5. 6. 7 8. 9. 10. 11. 12. 13. 14. 15. 16. Bottle-Pak Tube Connectors 1/8 x .150 Adapter 90 3/16 x 4mm Adapter 90 Quick adapter assembly Quick adapter assembly Taper Tip Adapter (4) Luer Male/female Plug Universal Port Adapter 3/16 x 4mm Adapter 3/16 x .150 Adapter 3/16 x 3/16 Adapter Taper Adapter Capture assembly 28mm Botlle cap 33mm Bottle assembly Description of use Bottle-Pak assembly w/ quick couplers, magnet & holder Tubing connectors supplied to customize application Use for1/8 bleeder valves or 1/8 ports Universal, can be reversed for 1/8 or 3/16 valves Quick couple assembly with 3/16 x 4mm Adapter 90 Quick couple assembly use for 3/16 or 1/4 bleeder valves New clutch slave or special injection applications Install in luer female fittings to plug and prevent leakage (UPA) Use for bench and pressure bleeding Straight adapter for custom application Straight adapter for custom application Straight adapter for custom application Taper Adapter adapts 3/16 tube end to 7/16 ID tube Pedal Flush and Capture assy. w/checkvalve & quick couplers 28mm bottle cap for small neck brake fluid bottles 33mm bottle cap and quick coupler 6 HOW TO USE THE FITTINGS & ADAPTERS Bleeder Valve Adapters Bleeder Adapters (3,4,5,6,10,11,12,) are provided to connect to all external bleeder valves Capture Assembly- SMART-PAK ONLY #14-Capture Assembly (attached to bottle) Used for pressure bleeding and cross bleed/flush. Universal Port Adapter (UPA) #9-Universal Port Adapter Used for pressure and bench bleeding. UPA Injection Tip Assembled Fitting Remove end nut and screw Universal port Adapter to Injection Tip threads. The V-12 has a special UPA adapter with a larger internal thread which allows the UPA to be screwed directly onto the cylinder. Make sure the UPA is tightly secured to prevent leakage. Luer Plugs #8-Red luer plugs Used to plug Luer ends to p r e v e n t leakage. Will fit bottle or tube. 7 HOW TO USE THE FITTINGS & ADAPTERS Taper Adapter# 1 3 - Ta p e r Adapter Used to adapt Injector to hoses from 3/16 to 7/16 ID. Taper End This end of the Taper Adapter can be installed directly into adapter #6. The Taper End can then be inserted into hose sizes from 3/16 to 7/16. This is excellent for pressure bleeding systems with remote reservoirs. Taper Tip Adapter#7-Taper Tip adapters Primarily used to bleed new style clutch systems. Option 1 Option 2 Taper Adapter V-12 Barrel End Cap Assembled Fitting V-12- To Install on barrel, simply screw adapter into End Cap. The Taper Tip can be attached to the injector tip or connected via Luer hose assembly at either the pressure or vacuum side. Inlet Filter- NEW! Inlet Filter with quick coupler. The arrow shows the direction of flow. The black coupler attaches to the bottle or bleeder adapter for vacuum bleeding. Attaches to inlet hose coupler and is used to filter inlet fluid 8 BASIC FUNCTION & SETUP Injection and Vacuum Ports Direction of flow Injection Vacuum Determine the Injection and Vacuum sides of your Injector. For RFI or Pressure techniques attach the Injection side of your Injector to the hydraulic system. For Vacuum uses attach the Vacuum side to the hydraulic system. How To Connect Quick Couplers Luer Male Luer Female Luer Lock Couplings Your Injector is equipped with Luer Lock couplers tested from vacuum to 125 psi. Luer Lock- Simply insert and twist a coupling about 1/2 turn to lock or unlock mechanism. How To Connect Tube Magnet/ Belt clip Prevent bottle from tipping Nylon cord Bottle Route the tubing through the magnet/ belt clip as shown. This will keep the bottle vertical when the tubing is pulled. Failure to route tubing in this method can cause the bottle to tip, exposing pickup tube to air. Bottle Connections Each bottle is equipped with a black and white coupler or ring to identify proper connections The white coupler or ring is only used for fluid recirculation. During recirculation the other coupler is also attached. See page 11, Step 3. The black coupler or ring is used to to draw fluid for RFI and pressure uses. It is also used to capture fluid for vacuum or other uses. 9 Failure to attach coupler correctly may cause fluid to leak out Black coupler MODULAR ADAPTERS All Injectors are designed for modular versatility. Adapters can be used at either the Injection or Vacuum connections of the Injector. In addition, the bottle can be hydraulically connected to either side. A wide range of Luer attachments are available, such as the taper tip for new clutch systems without a bleeder valve. 1. RFI or Pressure Techniques Injection Male Vacuum Male Luer Female Luer female To Hydraulic System Connect to Black coupler The Injection and Vacuum couplers attached to the Injector are the male half of the coupler. Since the adapter assemblies and Bottle-Paks are equipped with the female half, they can be alternated. The Injector in the diagram is connected for RFI, Pressure bleeding or Cross Bleed. 2. Vacuum Application Injection Male Vacuum Male Luer Female The Smart-Pak is equipped with dual male and female plugs and caps to prevent leakage from bottle or couplers when not in use. Connect to Black coupler Luer Female From Hydraulic System The Injector in this diagram is connected for Vacuum bleeding or flushing by simply reversing the connections. 10 QUICK START Prepare the Phoenix Injector Step 1. Fill the Bottle 1. Fill bottle with 12oz of new approved brake fluid. 2. Never remove fluid below Minimum mark or injector may draw air. Minimum Fluid Mark Do not overtighten the Luer connections. They may be difficult to disassemble. Step 2. Remove and Measure Fluid 1. 2. 3. 4. Fill reservoir to proper level and submerge vacuum coupler into reservoir. Squeeze injector handle to pump fluid from master reservoir into designated container. (Use a separate bottle for used fluid.) Measure the fluid removed. This will help determine the maximum injection amount during RFI. Measure the fluid removed by counting the number of strokes. (Remember each Injector barrel is graduated.) Discard old fluid in approved manner. Remove old fluid from Injector and lines. Inject 3 full strokes of new fluid through Injector to purge system. Step 3. Prime the Injector 1. 2. 3. 4. Connect to Black coupler Connect to White coupler Attach the Vacuum side coupler to the black bottle coupler and the Injector side coupler to the white coupler. Depress handle to recirculate fluid back to container until the air in injector and lines is replaced with fluid. Inspect for steady stream of fluid returning to container without air bubbles. Use slow steady strokes so as not to aerate or agitate fluid. Remove Injector coupler from white recirculation coupler at bottle and attach the desired adapter. If injector becomes sluggish it will be necessary to re-lubricate the piston lube ring. Remove injector barrel and submerge piston assembly into clean brake fluid and reassemble. If a bubble is trapped in the Injector barrel it may be necessary to tip barrel upward and tap end of barrel causing bubble to rise to nozzle where it can be injected out. WARNING!! WEAR EYE PROTECTION Unless otherwise directed use slow steady strokes when injecting or drawing fluid into or from a hydraulic system. Use only new approved fluids. Never reuse fluids when bleeding or flushing any hydraulic system 11 QUICK START Basic Techniques for 1. RFI See Page 11 for proper priming of Injector prior to RFI. Remember to allow caliper or wheel piston to burp prior to closing bleeder valve.See page 44 For more information- See pages 24-26 RFI is performed when fluid is injected into the system low points, the slave bleeder valves. The RFI System takes advantage of the Laws of Physics: air rises in fluid. The slave cylinders, lines and master cylinder are bled by pushing the air up through the master cylinder reservoir. Use same procedure on brakes and clutches. See manual RFI for Brakes Master Reservoir 1. Injector 2. WARNING!! WEAR EYE PROTECTION Adapter Slave 3. Black Fluid Source Bleeder valve 4. 5. 6. Trapped air Remove reservoir cap and open the slave bleeder. For brakes start at the wheel furthest from the master cylinder. (Refer to OEM sequence) Lightly squeeze Injector handle prior to attachment to fill void between adapter and bleeder valve...then attach adapter. Gently depress the Injector handle 3-10 times (depending on fluid capacity). For brakes Inject 50% more fluid in the first wheel. Remove adapter allowing a small amount of fluid to drip causing caliper to burp any trapped air ...then close bleeder For brakes, repeat procedure following proper sequence for remaining wheels. Test the system and repeat the procedure if necessary. For vehicles with master cylinder angled upward, it may be necessary to raise the rear of the vehicle, to level master cylinder, to prevent air from being trapped in end of master cylinder. 2. Pressure Bleed and Flush Pressure bleeding is performed when the Injector is outfitted with the proper adapters and fluid is injected from the master cylinder through the lines and out the slave bleeder valve into a capture container. From fliuid source See p.6 to locate the capture assembly supplied in the Smart-Pak. Use this assembly to capture used fluid in an old container when pressure or vacuum bleeding. 1. 2. Seal at reservoir base 3. For more information- See pages 18-19 4. Install Universal Port Adapter (UPA) to injector. Insert adapter into master cylinder reservoir creating a seal independently at each opening at the base of reservoir (If this is not practical remove brake line from master cylinder and install adapter fitting over brake line.) Open bleeder valves in order and inject fluid from the master reservoir, out the bleeder valve and into a capture container. Repeat procedure at each opening. Remember to open respective bleeder valve associated with master cylinder chamber. Capture container Black side of checkvalve must be attached to bottle. For some applications a combination of bleeding techniques provides the best system bleed. Unless otherwise directed use slow steady strokes when injecting or drawing fluid into or from a hydraulic system. 12 QUICK START Bleed and Flush 3. Vacuum Bleed or Flush By simply reversing the modular adapters and connections the Injector can be used as a vacuum bleeder. When the handle is depressed fluid will be drawn out of the bleeder valve and injected into bottle. For more informationSee page 20,21. Reservoir Injector Brake Fluid Black coupler Fluid/Air Capture bottle The Injector draws fluid from the hydraulic system and injects it into a capture container. 1. 2. 3. 4. Remove Injector vacuum side coupler from bottle. Remove the quick coupling and adapter assembly from the Injection side of the Injector and attach to vacuum side. Attach Injection side coupler to the black bottle coupler. Depress the handle to draw fluid out of bleeder valve and inject into bottle. 4. Bench Bleed 1. 2. 3. 4. 5. 6. Follow instructions in section Prepare the Phoenix Injector. Gently place master cylinder in a vise. Remove the plug from the cylinder outlet and place the injector with Universal Port Adapter into outlet. Inject fluid until no air bubbles can be seen in front reservoir. Replace plug into cylinder outlet. Repeat procedure to bleed rear section of master cylinder. Install cylinder to fire wall and remove plugs and loosely connect brake lines. Allow fittings to drip, then tighten fittings. Test Brakes. In most cases this is all the bleeding necessary. If further bleeding is necessary, refer to manual RFI for Brakes, page 23. 13 For more information- See pages 31-35 BRAKE SYSTEM BLEEDING AND FLUSHING Difference Between Bleed and Flush It is important to understand the difference between brake system bleeding and flushing. Brake system bleeding is the process of removing air from the brake system. If a sufficient amount of air is present in a hydraulic system, the brake pedal may feel spongy or not work at all. Air is compressible, fluid is not. The air will compress prior to the force being applied to the hydraulic components. That is why pumping the brake pedal improves its response. It is important to remove as much air as possible. The ultimate goal of brake bleeding is to remove all the air. The Phoenix Injector is your best weapon at achieving a firm pedal and removing the maximum amount of air. Contamination Brake system flushing is the process of removing old brake fluid and contaminants from the brake system. Contamination is simply defined as any substance present in a system that is not designed to be present. There are two types of contamination, Normal and Abnormal. Normal contamination of brake fluid includes many substances that are found in the normal break down of brake fluid such as: dissolved metals, oxidation of rubber and plastics, moisture, dirt and air. Abnormal contamination of brake fluid includes other automotive fluids like power steering fluid, transmission fluid and oil. In the case of Abnormal contamination, it is recommended to completely flush the hydraulic system and replace all rubber components that have come into contact with the contamination fluid. Petroleum based automotive fluids are not compatible with the type of rubber used in brake systems. The most common petroleum rubber materials are made from Viton® or Nitrile®. The most common brake system rubber materials are made from EPDM , EPR and some SBR. Rubber designed for brake fluid will swell when it comes in contact with petroleum based fluids. The Proper Flush A Gravity Flush is where the brake bleeder valves are opened and old fluid gravity bleeds out the system and new brake fluid is added. A simple Gravity Flush will not remove contaminants that collect in the brake system. In order to get a proper flush, a sufficient amount of brake fluid must be flushed through a system with enough force to remove contaminants. Some manufacturers recommend as much as 1 quart of brake fluid to be flushed through each wheel. Pedal Flushing is still a common method of flushing the brake system. There are several concerns with pedal flushing because the master cylinder piston is stroked beyond its normal wear stroke. This can tear cup seals and generate other problems. Vacuum Flushing is to be used only as a last resort. Some manufacturers do not recommend vacuum flushing at all. Brake systems are designed for pressure, not vacuum. It is often difficult to get a sufficient flush because of leakage around the bleeder valve threads. Even if you seal the threads from leakage the amount of vacuum force is limited. Pressure Flushing uses sufficient force, as much as 40 psi, to force contaminants out of the brake system. It is the preferred flushing method. The Phoenix Injector can be used to perform Pressure, Vacuum or Cross flushing. Under no circumstance is RFI to be used as a flushing technique. The most effective flushing methods are Pressure Flushing combined with Cross Flushing (where applicable). See pages 16 and 29 for more information. It is always important to use enough brake fluid to thoroughly flush the system. Strip Dip® provides a good indicator to determine if a sufficient flush was performed. After flushing the brake system, take the vehicle for a drive, then retest the brake fluid using a fresh strip. If the FASCAR rating is above 20, the brake system should be flushed again. Phoenix Systems provides the diagnosis and the cure. 14 BRAKE BLEEDING INTRODUCTION The World’s Simplest, Fastest and Most Efficient Way To Bleed Clutch and Brake Systems...Even ABS ! AIR RISES IN FLUID RFI Reverse Injection or RFIÔ injects fluid at the low points, the slave bleeder valves. RFI takes advantage of the “Law of Physics”: air rises in flluid. The complete system is bled by forcing the air up and out the master cylinder reservoir. The brake fluid then fills the reservoir. One person. One Tool. Ten minutes. Our patented Vacuum technology eliminates difficult bleeding. Never again spend hours attempting to get a firm clutch or brake pedal! The Phoenix Injector™ is suited for multiple uses including RFI, vacuum bleeding, pressure bleeding, bench bleeding... and more. It doesn’t require electricity or compressed air, allowing even the “weekend mechanic” to bleed like the pro’s. Even the toughest of brakes and clutches, such as those found on Ford Rangers, Jeeps, or GM trucks, can be effortlessly bled in minutes with the Phoenix Injector. During vacuum bleeding negative pressure is exerted on the system from each of the bleeder valves. This negative pressure or vacuum draws the fluid from the reservoir, through the system and out the bleeder valves. Pressure During pressure bleeding the fluid in the reservoir is pressurized. The pressurized fluid is allowed to pass through the master cylinder to the bleeder valves. When the bleeder valves are opened the pressurized fluid and air will be forced out the bleeder valve. Bench The goal of bench bleeding is to remove all of the air from the component prior to its installation. A combination of RFI™ and Pressure bleeding is often used. The Phoenix Injector™ is unparalled in bench bleeding any master cylinder. WWW.PHXSYSS.COM 15 BRAKE BLEEDING OPEN TOP RESERVOIRS Bleeding the brake system is most commonly associated with changing a hydraulic component such as a caliper. It is very important for proper system operation that both a bleed and flush are performed. If only a bleed is done the old fluid in the system will continue to cause internal corrosion to the hydraulic components and lower the boiling point of the brake fluid. If the boiling point gets low enough and the brake fluid boils it will cause a condition called brake fade. This is where the brake fluid becomes a gas. When the fluid becomes a gas it compresses which causes the brake pedal to go to the floor causing the driver to lose some or all braking. This is why regular flushing of the system is necessary. Corrosion What most technicians have found is that not one bleeding method works on all vehicles. Because of this, the use of any one of the four methods or a combination of them may be necessary to achieve a firm pedal. This is where the Phoenix Injector excels. Because the Phoenix Injector can provide both positive and negative pressures it is a pressure and vacuum bleeder, while at the same time allowing the technician to take advantage of the Reverse Fluid Injection (RFI) technique. All this in one easy to use tool. Phoenix Systems has had extensive research conducted on the process of brake bleeding and has incorporated the results of this research into procedures which ensure the best possible job is done in the shortest time possible. The following section outlines the proper use of the Phoenix Injector when performing hydraulic brake service. Because of the many different brake system configurations in use today there is no one way to bleed all systems. The following procedures will apply to the majority of the vehicles in use today. Open Top Reservoirs Vehicles are grouped into one of two categories based on the design of the hydraulic system. The first group of vehicles can be identified as those having open top plastic reservoirs. The design of the master cylinder on these vehicles allows for the system to be pressure bled very easily using the Phoenix Injector. Best Bleed and Flush The first step in bleeding these vehicles after the reservoir is drained is to install a brake pedal depressor so that the brake pedal is depressed approximately 1 inch.This step is one of the results of the research that Phoenix Systems has done. What we discovered is that regardless of which type of pressure bleeder you use the low pressure area of the primary and secondary pistons is not effected unless the brake pedal is depressed. If the brake pedal is not depressed the fluid path is from the reservoir through the vent port and then to the wheels. This leaves a large volume of old fluid in the system. The added step of depressing the brake pedal moves the primary cup seals past the vent ports. This changes the fluid path. The fluid now flows from the reservoir through the replenishing port, over the primary cup seal and then to the wheels.This step ensures all the old fluid is removed from the master cylinder. (See the following page for illustration) 16 Primary cup seal moved forward CLEAR MODEL OF GM QUICK TAKE-UP MASTER RESERVOIR TO WHEELS VENT PORT LOW PRESSURE AREA FL UID DIRTY FLUID PATH PRIMARY CUP SEAL The low pressure area of the primary and secondary pistons is not effected unless the brake pedal is depressed. If the brake pedal is not depressed the fluid path is from the reservoir through the vent port and then to the wheels. This leaves a large volume of old fluid in the system. RESERVOIR TO WHEELS REPLENISHING PORT LOW PRESSURE AREA FL UID PATH PRIMARY CUP SEAL MOVED FORWARD CLEAN FLUID The added step of depressing the brake pedal moves the primary cup seals past the vent ports. This changes the fluid path. The fluid now flows from the reservoir through the replenishing port, over the primary cup seal and then to the wheels.This step ensures all the old fluid is removed from the master cylinder. 17 BRAKE BLEEDING OPEN TOP RESERVOIRS Pressure Bleeding During pressure bleeding the fluid in the reservoir is pressurized.The pressurized fluid is allowed to pass through the master cylinder to the bleeder valves. When the bleeder valves are opened, the pressurized fluid and air will be forced out the bleeder valves. ***NOTE*** Adapters are available that will allow the Phoenix Injector to pressure bleed almost any master cylinder. One available adapter is called the Universal Cap Adapter (UCA). Bladder Inflates To Seal Almost Any Reservoir This is a cut-away view of a screw cap master cylinder reservoir. Notice how the bladder expands to seal the opening. Fluid passes through the center opening. 18 BRAKE BLEEDING OPEN TOP RESERVOIRS PRESSURE BLEEDING 1. 2. 3. 4. 5. 6. 7. 8. Install brake pedal depressor and prepare the tool for pressure bleeding. Begin by draining the old fluid from the master cylinder reservoir. Next ,attach the vacuum side coupler to the black bottle coupler of the new fluid source. Then attach the injection side coupler to the capture container. Stroke the injector handle slowly to pump the old fluid out of the pickup hose until only new fluid is in tool. Now, remove the injector outlet hose and replace with the Universal Port Adaptor. Refill the new fluid source container if necessary. Open the bleeder on the first wheel in the bleeding sequence and attach the capture container making sure to use the one way check valve. The one way check valve only allows fluid to travel from the bleeder to the capture tank preventing air from entering the system. Next, insert the UPA adapter into the section of the reservoir that supplies the wheel being bled. Stroke the injector handle slowly. This creates pressure in the system and forces the old fluid and air out of the open bleeder into the capture container. Close the bleeder screw of the wheel being bled and repeat these steps at each remaining wheel until all air is removed. Fill master cylinder to proper level and test drive. Depending on system design additional steps may be required. Also See RFI for Additional Bleeding Techniques Additional Steps On systems where the master cylinder is mounted at an angle there is a chance for air to be trapped in the end of the master cylinder. Most master cylinders are designed so the outlets of the pressure chambers are at the highest point in the master cylinder. But there are a number of designs where this is not so. There is no way to tell by looking at the master cylinder where the outlet is located. 1. 2. To prevent air from being trapped raise the rear of the vehicle until the master cylinder is nearly level. Extreme caution should be used not to raise the vehicle too high and put it in unsafe condition or possibly damage the vehicle. With the vehicle in this position bleed the master cylinder outlets starting with the secondary side first. Crack the line loose and then use the Phoenix Injector to apply pressure to the system. Close the fitting as you complete the stroke. Repeat this process until no air is seen. Now perform the same steps on the primary portion of the master cylinder. Once the master has been bled then the vehicle can be raised normally and the steps outlined for pressure bleeding used. Attach capture container Attach UPA For difficult systems use a combination of pressure and RFI bleeding. See instruction for RFI bleeding. Level master cylinder Crack line & apply pressure. 19 Insert UPA into reservoir. BRAKE BLEEDING CAST IRON OR SINGLE INLET RESERVOIRS Vacuum Bleeding During vacuum bleeding negative pressure is exerted on the system from each of the bleeder valves. This negative pressure or vacuum draws the fluid from the reservoir, through the system and out the bleeder valves. 20 BRAKE BLEEDING CAST IRON OR SINGLE INLET RESERVOIRS The second group of vehicles are those that have either single inlet reservoirs or cast iron body master cylinders with the reservoir as part of the casting. To pressure bleed single inlet reservoirs the Universal Cap Adapter is required. If the vehicle being bled falls into this category and the UCA is not available use Vacuum or RFI bleeding. Cast iron reservoir By simply reversing the modular connections the Injector can be used to vacuum bleed or flush. To perform vacuum bleeding, like pressure bleeding, make sure the master cylinder is full before bleeding the system. If the reservoir is not full, fill it before continuing. Drain and clean the reservoir where possible . Take note of the amount of fluid that was removed. You will use this to avoid draining too much fluid from the reservoir during the bleed process. Single inlet reservoirs Also See RFI for Additional Bleeding Techniques VACUUM BLEEDING 1. 2. 3. 4. 5. 6. 7. Fill to the full level with new brake fluid. Raise the vehicle to a suitable work height. Starting with the first wheel in the bleed sequence open the bleeder screw. If the bleeder screw is loose fitting then remove it and apply a film of silicone lubricant to the threads. This helps form a seal. Fluid will Where possible leave the bleeder wrench on the appear bleeder before attaching the bleeder adapter. foamy This makes closing the bleeder easier after the process is complete. Attach the vacuum side of the tool to the bleeder using the appropriate adapter. Attach the injection side of the tool to an empty capture container and slowly stroke the handle to create a vacuum in the system. Depending on the bleeder screw fit it is normal to see some air in the fluid flow even if none is in the system. The better the seal you form with the silcone lube the less air you will see. Bleed the wheel until little or no air is seen coming from the system and the fluid is clean. Repeat the process at the remaining wheels. Monitor the fluid level in the reservoir so as not to remove too much fluid and introduce air. If necessary refill the reservoir during the process. Once complete, test the pedal and if firm test drive the vehicle after completing job. Bleed screw Air drawn past threads Fluid from system Caution - never drive a vehicle with an unsafe brake pedal. For difficult systems use a combination of vacuum and RFI bleeding. See instruction for RFI bleeding. 21 Maxi-Ject Pro vacuum bleeding the caliper on 4WAL ABS system. Fluid is deposited into capture container. BRAKE/CLUTCH BLEEDING: SPECIAL APPLICATIONS The steps that have been outlined cover the majority of the vehicles in use today. If the vehicle's bleed process involves additional steps such as bleeding the modulator, add those to the steps given. Where the procedures call for pressure bleeding substitute the Phoenix Injector's pressure bleeding or vacuum bleeding depending on the type of system. Additional steps may be required depending on system design Vehicles With Remote Reservoirs Remote reservoir Remove line here and insert taper adapter The Taper Adapter can be installed directly into adapter #6 (see p. 6, 8). The Taper End can then be inserted into hose sizes from 3/16 to 7/16. This is excellent for pressure bleeding systems with remote reservoirs. This technique will work for brake or clutch systems. It is also widely used for pressure bleeding the rear brakes on motorcycles. Taper End Vehicles Without Accessible Reservoirs Some master cylinder reservoir outlets are not accessible through the cap. If vacuum or RFI bleeding is not an option, the following procedures can be used. If the master cylinder is being replaced, remove brake lines from master cylinder and install adapter fitting over brake line and follow previously described procedure. For some lines the Universal Port Adapter (UPA) will be required. 1. Remove lines from master cylinder; 2. Install Injector large bleeder valve adapter (#6). 3. Attach adapter to brake line. 4. Open bleeder valves in successive order and attach capture container. 5. Inject fluid out the bleeder valve. 6. Repeat procedure at each brake line; remember to open respective bleeder valve associated with hydraulic circuit. If the reservoir is removed during cleaning the UPA adapter can be inserted directly into the exposed port(s) to pressure flush system. 22 BRAKE FLUID TESTING New FASCAR Technology FASCAR, which stands for Fluid Analysis by Stimulation of Contamination Alpha Reactions, is a simple visual test to determine the contamination level of your brake fluid. To test, immerse the new Strip Dip® into vehicles brake fluid for 1 second and within 30 -120 seconds the reaction zone will change colors depending on the contaminant level in the brake fluid. Use the FASCAR color scale to compare the reaction zone color to determine the FASCAR rating. How Does FASCAR Work? Brake fluid is formulated with corrosion inhibitors to protect the hydraulic system. The wearing of brake fluid is accompanied by the accumulation of complex alpha (or first) contamination indicators. FASCAR accurately measures these alpha contaminants. Strip Dip is designed to interact with these alpha contaminants to determine the overall level of brake fluid contamination. The resulting color of the test strip is an easy, visually accurate method to prove the need for a brake system flush. FASCAR will also measure the residual contamination left by an inefficient system flush. What Does a High FASCAR rating mean? The FASCAR Rating scale from 0 to 100 gives the technician a way to determine the approximate age of the brake fluid and determine whether the brake fluid needs to be changed . Age is important because we know that brake fluid wears over time. Some vehicle manufacturers recommend changing the fluid every one to two years, while others have no recommendation at all. You can know for sure by using the Strip Dip®. The FASCAR rating will vary with brake fluid age, vehicle mileage and environmental conditions. FASCAR ratings of 50/75 or more indicate the brake fluids ability to fight corrosion has been compromised. For U.S. manufactuted vehicles with FASCAR ratings above 75 or imports above 50, we recommend a brake system flush. What Happens When Brake Fluids Ability to Protect is Impaired? If you wait until your brake fluid fails a moisture test, it may already be too late! After brake fluid corrosion inhibitors are severely depleted, corrosion of the internal components begin. Corrosion can pit the metal bores of the master cylinder, slave cylinders and ABS components. This means that pistons cannot move freely, seals can be damaged and cylinders can develop internal or external leaks. A thorough brake fluid flushand-fill seem like cheap insurance. FASCAR Addresses Brake System Maintenance The Strip Dip®, using FASCAR technology, focuses on the maintenance issues of brake fluid. The FASCAR rating system provides you with an accurate method to suggest or recommend a brake system flush. Brake fluid will yield a FASCAR rating of *50/75 or above when its ability to protect the hydraulic system has been compromised. This provides the technician with an accurate tool to sell a brake system flush NOW and prevent a more costly repair in the future. The Phoenix Systems FASCAR test system is the simple solution to prove when brake system flush is required. 23 Corroded Isolation Valve Reaction Zone REVERSE FLUID INJECTION (RFI) RFI™ Reverse Fluid Injection or RFI injects fluid at the low points, the slave bleeder valves. RFI takes advantage of the laws of Physics: air rises in fluid. The complete system is bled by forcing the air up and out the master cylinder reservoir. The brake fluid then fills the reservoir. S RISE AIR UID L F IN RFI AND ABS SYSTEMS Some technicians are concerned about the possibility of pushing contaminates up stream to the brake valving, ABS modulator or master cylinder during RFI bleeding. Phoenix has had extensive research done in this area. The main difference between the RFI process and that of pushing caliper pistons (in without opening the bleeders) is the pressures being produced and the amount of fluid movement. On the left we see the RFI process taking place while being able to see the pressure generated at the 10 PSI master cylinder. When used properly the pressures are well below 10psi. On the right side is the process of 90 PSI pushing a caliper piston back without opening the bleeder screw. The pressures can exceed 70psi. In addition, 10 times more fluid is forced back in a single stroke than with the Phoenix injector. Pressures this high as well as large amounts of fluid can disturb the sludge and corrosion that has built up in the system. The disturbed old fluid from the wheels can then enter the master cylinder as the piston is pushed back, carrying contaminates back into the brake valving, abs modulator or master cylinder that could do damage to the seals or internal parts. ABS and Accumulators In ABS systems that use Accumulators, special precautions must be taken. The accumulator is isolated from the braking system except under anti-lock braking. If air is trapped in the accumulator it may not be detected during normal driving, but when an anti-lock stop is initiated and the accumulator circuit is active, trapped air will be forced into the system. The result will be a spongy pedal after an anti-lock stop. It is necessary to follow OEM instructions for bleeding the accumulator using the Injector where instructions call for two man bleeding, pressure or vacuum bleeding. 24 REVERSE FLUID INJECTION (RFI) RFI BLEEDING RFI is a process where fluid is introduced at each wheel under low pressure and fed back up to the master cylinder. 1. To perform RFI bleeding, first drain and clean the master cylinder reservoir. If necessary, fill the reservoir before draining so an accurate measure of fluid can be taken. Note the amount of fluid removed. This will be necessary to avoid overfilling the master cylinder during the RFI bleeding process. For vehicles with tilted master cylinders raise the rear of the vehicle to allow the master cylinder to sit higher at the primary end (firewall) than at the secondary end. This will allow the air to exit the vent ports. 2. Remember, caution is to be used when raising the vehicle to avoid an unsafe condition or vehicle damage. If the master cylinder cannot be positioned in this manner get it to at least a point where the body is level. If this cannot be accomplished then combine RFI with pressure or vacuum bleeding to get the best results. 3. First follow directions for Priming the Injector and lines. Once the master cylinder has been positioned begin the bleeding process at the first wheel in the bleeding sequence. 4. Connect the injection side of the tool to the wheel bleeder and the vacuum side to the fluid supply container making sure it is full. 5. With the tool connected, open the bleeder screw and then slowly stroke the handle. Continue this at the wheel giving 3 to 4 strokes. 6. Once complete, remove the adapter from the bleeder and let the wheel cylinder burp or gravity bleed. Close the bleeder. 7. Repeat this process at each of the wheels remembering to watch the amount of fluid being used. If the procedure is repeated it may be necessary to drain the reservoir. At the end of each wheel bleed remember to allow the caliper or wheel cylinder to gravity bleed. 8. Once complete check and adjust the master cylinder fluid level and test the pedal. If firm, test drive. Caution - never drive a vehicle with an unsafe pedal. Maxi-Ject Pro using RFI at caliper to bleed Kelsey-Hates 4WAL ABS brakes. Helpful Hints #2 #4 #1 #3 Front If fluid will not inject in reverse manner: 1. Make sure reservoir cap is removed. 2. Remove the bleeder valve and inspect for blockage. 3. Check for check valve in bleeder valve. 4. Master cylinder may have faulty check valve. Make sure pedal is not hanging. 5. Check for hydraulic system malfunction. Remember some ABS components allow very slow fluid movement. Typical bleeding sequence Trapped air For vehicles with master cylinder angled upward, it may be necessary to raise the rear of the vehicle, to level master cylinder, to prevent air from being trapped in end of master cylinder. 25 RFI FOR CLUTCHES AIR RISES IN FLUID FLUID SOURCE MASTER FLUID DIRECTION WARNING!! WEAR EYE PROTECTION SLAVE The Maxi-Ject Pro using RFI to bleed the clutch on a late model GMC truck. BLEEDER VALVE RFI CLUTCH BLEEDING RFI is a process where fluid is introduced at the slave cylinder and fed back up to the master cylinder. * If the reservoir is very small like Ford Ranger, it is helpful to allow the system to gravity bleed prior to Step 1. This will reduce the amount of RFI required, to prevent over filling reservoir. 1. To perform RFI bleeding first drain and clean the master cylinder reservoir. If necessary fill the reservoir before draining so an accurate measure of fluid can be taken. Note the amount of fluid removed. This will be necessary to avoid overfilling the master cylinder during the RFI bleeding process. For vehicles with tilted master cylinders raise the vehicle to allow the master cylinder to level. This will allow the air to exit the vent ports. Remember, caution is to be used when raising the vehicle to avoid an unsafe condition or vehicle damage. If the master cylinder cannot positioned in this manner get it to at at least a point where the body is level. If this cannot be accomplished see Difficult Systems p. 27 First follow directions for Priming the Injector and lines. Connect the injection side of the tool to the slave bleeder and the input end to the fluid supply container making sure it is full. With the tool connected, open the bleeder screw and stroke the handle until the reservoir is full. The amount of fluid that could be injected was determined in Step 1. Once complete remove the adapter from the bleeder and let the slave cylinder burp or gravity bleed until a solid stream of fluid is achieved. This will allow any air trapped at the top of the slave or bleeder valve to exit. Close the bleeder. Check pedal and repeat if necessary. 2. 3. 4. 5. 6. 7. HELPFUL HINTS If fluid will not inject in reverse manner: 1. 2. 3. 4. Make sure reservoir cap is removed. Remove the bleeder valve and inspect for blockage. Check for check valve in bleeder valve. Clutch master cylinder may have faulty check valve. Make sure pedal is not hanging. Any one component of the clutch system can be bled independently. Some Mazda or other vehicles are equipped with a check ball in the bleeder valve. The check ball must be removed prior to RFI and reinstalled after system in bled. Due to the small volume of the clutch master reservoir it is helpful to gravity bleed the clutch first. Some clutches may require (2) RFI procedures to remove trapped air. Increasing injection pressure on clutch systems will assist removal of trapped air. If you are having trouble with a Ford Ranger, unbolt master cylinder and turn upward. If replacing the master cylinder bleed system prior to mounting. Use of short rapid strokes (Pulse Generator Technique) is most effective for difficult bleeding jobs. Your Injector has an adjustment to change the stroke of the piston. It may also be necessary to raise the front of the vehicle, to improve angle of master cylinder. 26 CLUTCH BLEEDING Difficult Systems i.e. Ford Ranger/Explorer Fire wall Location of trapped air Location of retaining clip Notice angle of master cylinder Bleeder valve Line connector Remember when installing a new master cylinder the clutch system can be bled prior to bolting the master cylinder to the fire wall. Tip the master cylinder upward. Internal slave Some clutch systems can be very difficult to bleed due to component orientation. These procedures should bleed even the most difficult systems. 1. 2. a) b) c) 3. 4. Use Pulse Generator technique (See p. 28). Use quick short injections (2-3ml- 2 to 4 times per second) alternating with aggressive full injection strokes. You may have to drain the reservoir and repeat. This procedure requires two technicians. Complete procedure #1 first. One technician will depress clutch pedal 1/2 way down and hold. This will close the master cylinder check valve not allowing any fluid movement. With the clutch pedal depressed a second technician will squeeze the Injector handle building pressure in the system. (May require one hand to hold adapter to bleeder valve due to high pressure.) Slowly release clutch pedal while maintaining pressure in the system. When the pedal is released, opening the check valve, a pressure surge will force trapped air out of system. Repeat several times. If the clutch pedal is not firm after using the previous procedures, try loosing the master cylinder retaining bolts and tip the master cylinder upward. This will allow all trapped air to be easily removed from system. The front end of the vehicle can be raised to assist. (Complete procedures #1 and #2 prior to using this procedure) There is a retaining clip accessible from the passenger compartment which holds master cylinder piston in place. With this clip removed the piston can be quickly removed and reinstalled. Fluid will leak out and the air bubble will be forced out. It is not easy to get to the retaining clip. Use this procedure as a last resort. New Style Clutch Some GM and Ford applications do not utilize a conventional bleeder valve. Loosen the recessed bleed screw and insert taper adapter in bleed hole and inject. If bleed hole is inaccessible attach taper adapter to Luer male fitting and insert. Taper Tip Luer Male Recessed bleed screw Bleed hole Slave 27 PULSE GENERATOR A unique feature which separates Phoenix Injectors from other hydraulic bleeders is the ability to generate pulses within a system. A technique developed by Phoenix Systems, uses the Injector to create pulsations which generate a force within the system which acts to overcome the surface tension of the trapped air. This Pulse Generation helps to force trapped air out of a system. This technique is a Phoenix Systems exclusive. Its like tapping on a caliper, slave, master or line, at the same time. 1. 2. 3. Adjust stroke setting to 2-3 ml to limit the maximum stroke. (As an option you can set the Injector at its full dosage and manually short stroke the Injector.) Use quick short injections. Inject 2-3 ml of fluid approximately two to four times per second. Inject a total of 10-15 short strokes. These quick short injections create the pulsations which reduce the surface tension of the trapped air. Inspect reservoir fluid level and empty as needed. Finish bleeding with a full injection stroke. STEP 1 STEP 2 STEP 3 The Pulse Generator technique was performed on a clear master cylinder model so trapped air could be easily seen. The small bubbles in Step 1 were left after conventional bleeding methods had been performed. The Pulse Generator Technique was performed and the bubbles were quickly dislodged and forced out the master reservoir in Steps 1-2-3. The effectiveness of this procedure is clearly demonstrated in the technical video. 28 QUICK FLUSH AND CROSS BLEED Use this Quick Flush method on front/rear split or diagonal systems to remove contaminated fluid and sediment from wheel pistons and interconnecting lines. Use Cross Bleed as an excellent bleeding method when calipers or cylinders are replaced. When performing Quick Flush or Cross Bleed use a brake pedal depressor to hold the brake pedal approximately 1 down to prevent the return of fluid and contamination to the master cylinder. Simply open a wheel piston bleeder valve and attach a capture container to collect old fluid. Then inject new brake fluid into opposing wheel cylinder bleeder valve. The newly injected fluid will remove contaminated fluid and sediment from wheel pistons, interconnecting lines and be deposited into the capture container. Cross Bleed/Quick Flush 1. 2 3. 4. 5. Install brake pedal depressor to hold brake pedal ½ to 1-½ down . Open bleeder valve at desired wheel piston and attach Injector. Open opposing bleeder valve and attach and secure capture container. Using slow steady strokes, inject fluid from one wheel piston through other until contaminated fluid is removed. After Quick Flush follow instructions RFI for Bleeding Brakes, only inject 2-6 strokes at each wheel to remove any remaining trapped air. (The same procedure can be utilized on front or rear wheel pistons.) Complete the bleed and flush of the system using which ever method best fits the system being serviced. Phoenix Injectors utilize pulsations to aid in system flushing. It is important to remember if contamination is severe, wheel pistons are being damaged and should be replaced or rebuilt. Front/Rear Split System (Most rear wheel drive vehicles) Install brake pedal depressor Open opposing bleeder valve, attach and secure capture container. When installing new calipers use Cross Bleed first to remove most of the air and finish with RFI. Open bleeder valve and inject fluid. (SMART-PAK ONLY) Diagonal Split System (Most front wheel drive vehicles) Open bleeder valve and inject fluid. In many Diagonal split systems each wheel has a line which attaches independently to the master cylinder. Use Pressure or Vacuum flushing for these systems. Install brake pedal depressor Open opposing bleeder valve, attach and secure capture container. 29 CYLINDER FLUSH FLUSHING DEBRIS FROM CALIPERS & WHEEL CYLINDERS Fill the Injector with new approved brake fluid. Front Wheels1. Locate flexible brake hose that attaches to the calipers and the metal brake line at the chassis. Remove the flexible line from the metal line on the chassis. Place the open end of the flexible line in a capture container to collect old fluid. 2. Loosen the bleeder valve on the caliper and attach the Injector as previously described. 3. Aggressively inject new brake fluid for 6 to 8 strokes. This will effectively flush old fluid and debris out the flexible line and into the capture container. 4. Tighten the bleeder valve, remove the Injector apparatus and reattach the flexible line. 5. Follow the same procedure for the other front wheel. When done flushing, bleed the entire system using the method of your choice as directed in this manual. Rear Wheels1. Locate the flexible brake hose or hoses. Your vehicle may have a flexible hose at each wheel that attaches to each rear caliper and then attaches to a metal brake line on the chassis. If the vehicle does not have two, then it will have one flexible line that attaches to the rear axle and then to a metal line on the chassis. If the vehicle has two lines, the procedure is identical to the front brake caliper flushing procedure. If the vehicle has one flexible line, remove it from the metal line where it attaches on the chassis and place it into a capture container. 2. Loosen either rear caliper bleed valve and attach the Injector as described earlier in this manual. 3. Aggressively inject fluid 6 to 8 strokes for disc type brakes, and 4 strokes for drum style brakes. 4. Tighten the bleeder valve, remove the Injector apparatus and reattach the flexible line. 5. Follow the same procedure on the other rear cylinder. When finished flushing, bleed the entire system using the method of your choice as directed in this manual. WARNING!! WEAR EYE PROTECTION Metal line Connection Flexible hose Caliper Flexible hose Flexible hose Bleeder valve Rotor Injector Check Valve Capture Container 30 BENCH BLEEDING WITH THE PHOENIX INJECTOR Bench Bleeding RFI Pressure The goal of bench bleeding is to remove all of the air from the component prior to its installation. The master cylinder is usually placed in a vice and a combination of RFI and Pressure bleeding is usually used. The Phoenix Injector is unparalled in bench bleeding any master cylinder, especially 2 and 4 outlet quick-takeup master cylinders used by Ford, GM, Chrysler and some imports. 31 BENCH BLEEDING WITH THE PHOENIX INJECTOR One of the most effective uses of the tool is in bench bleeding master cylinders. Even the most difficult master cylinder can be bench bled in minutes. We will cover the bench bleeding of the following styles of master cylinders: 1. 2. 3. 4. Standard 2 & 4 outlet master cylinders Conventional cast iron tandem master cylinder and the single inlet plastic reservoir type The GM 2 & 4 outlet quick take up master cylinder The Ford quick take up master cylinder The goal of bench bleeding the master cylinder is to remove all of the air in the shortest time possible. The Phoenix Injector is unparalled in accomplishing this goal. STANDARD 2 OUTLET MASTER CYLINDER Universal Port Adapter 1. 2. 3. 4. 5 6. Follow instructions in section Prepare the Phoenix Injector(page 11). Gently place master cylinder in a vise. Remove the plug from the cylinder outlet and place the injector with Universal Port Adapter into outlet. Inject fluid until no air bubbles can be seen in front reservoir. Replace plug into cylinder outlet. Repeat procedure to bleed rear section of master cylinder. Install cylinder to fire wall and remove plugs and loosely connect brake lines. Allow fittings to drip, then tighten fittings. Test Brakes. In most cases this is all the bleeding necessary. If further bleeding is necessary, refer to RFI for Brakes, pages 23-25. STANDARD 4 OUTLET MASTER CYLINDER 1. 2. 3. 4. 5. 6. 7. Follow instructions in section Prepare the Phoenix Injector (page 11). Gently place master cylinder in a vise and remove both plugs that come with the new cylinder from front section outlets #1 &2. Place the injector with Universal Port Adapter into lower outlet #1. Push gently injecting fluid until it drips out upper outlet #2. Remove and place plug into lower outlet #1. Place the injector adapter nozzle into outlet #2 and inject fluid until stream of fluid fills front reservoir without air bubbles. Reinstall plug in outlet #2 and repeat procedure for rear section of master cylinder. Install cylinder to fire wall. Remove front bottom plug and loosely connect brake line, allow fitting to drip, then tighten. Remove plug from front upper outlet #2 fitting and loosely connect brake line, allow fitting to drip, then tighten. Repeat procedure for rear connections. Test Brakes. In most cases this is all the bleeding necessary. If further bleeding is necessary, refer to RFI for Brakes. WARNING!! WEAR EYE PROTECTION 32 BENCH BLEEDING WITH THE PHOENIX INJECTOR GM QTU Master Cylinder 1. 2. 3. 4. 5. 6. To bleed the GM quick take up 2 or 4 outlet master cylinder begin by mounting the master cylinder in a vise so that the m/c body is level. Install the master cylinder bleeding kit (NOT INCLUDED IN SMART-PAK) in each of the outlets of the master cylinder. On the 4 outlet master cylinder install plugs in the lower outlets. Route the secondary bleeder kit hose back into the secondary reservoir. Fill reservoir half full with new brake fluid. Attach universal port adapter to injection side of gun. Vacuum or input side of gun routed to new fluid container. Push m/c piston in approximatly 1 inch with appropriate tool to expose low pressure chamber to both vent and replenishing ports. With the tool set up for pressure bleeding, pressure bleed the secondary portion of the master cylinder. Use 4 to 6 full steady strokes or until no air is seen in the bleeder kit hose. For bleeding the primary side of the m/c move m/c body to an angled position in the vise (reservoir top level). Prepare tool for RFI bleeding. Attach the output of the tool to the primary bleeder kit adapter. Leave the piston in its rest position while using slow steady strokes bleed the primary side of the master cylinder. Because of the size of the low pressure chamber this will take approximately 12 to 15 strokes to remove all of the air. Watch the primary reservoir for any signs of air as the process is completed. Place in vise Install bleed kit 4 outlet- Install plugs An optional method is available which utilizes the UPA to bleed the primary side: The UPA can be inserted directly against the primary outlet to form a seal as demonstrated for Standard 2 outlet Master Cylinder. Use 12 to 15 strokes to remove all of the air. Watch the primary reservoir for any signs of air as the process is completed. This method can get a little messy in the following steps. Install UPA Depress piston 1 inch RFI Primary side Tilt reservoir 33 Pressure bleed secondary side BENCH BLEEDING WITH THE PHOENIX INJECTOR 7. 8. When complete disconnect connector from tool output and let hose gravity bleed until a solid stream of fluid is seen. Position the bleeder hose into the primary reservoir to prevent draining. The m/c is now ready for installation. It should be noted many of these master cylinders are mounted at an angle on the vehicle. The procedures given earlier should be used on these vehicles once the master cylinder is installed. GM 4 outlet QTU Master Cylinder When dealing with the GM 4 outlet quick take up master cylinder that has the built in pressure differential switch there is an alternative bleeding method to raising the rear of the vehicle. These master cylinders can be identified by the presence of a hex plug located at the end of the master cylinder. The design of these master cylinders allows air to become trapped in the secondary portion of the master cylinder. To remove the air from this style master cylinder 1. Simply loosen the plug until fluid flow is established. With the plug loose Pressure bleed the secondary end of the master cylinder. 2. Tighten the plug as you end your last bleed stroke. The primary side of the master cylinder can be bled at the line without leveling the master cylinder. 3. Complete the bleed process following the recommended bleed procedure. Hex plug Bleeding the cast style tandem and single inlet plastic reservoir type master cylinders. Use this procedure if you do not have Phoenix Systems Universal Cap Adapter (UCA). The UCA will allow 90% of all screw cap reservoirs to be pressure bled. Begin by mounting the m/c in a vise in a level position. Install the m/c bleeding kit (not included) into both secondary and primary m/c outlets. Route the bleeder kit hoses back into the reservoir. Fill the reservoir with new fluid. 2. Prepare the tool for vacuum bleeding. Connect the input end of the tool to the secondary m/c outlet. Before beginning, depress the m/c piston about ½ so that the primary cup seals are past the vent ports. This will ensure that the low pressure area of the m/c is filled during the bleeding process. Using slow steady strokes apply a vacuum to the m/c. Continue this process until no air is seen exiting the m/c outlet. Keep an eye on the fluid level and refill if necessary. 3. Once the secondary portion of the m/c is bled route the bleeder kit hose back into the secondary reservoir. Repeat this procedure with the primary portion of the m/ c. Note - if m/c is mounted at an angle then follow appropriate steps for bleeding the rest of the system. See Brake Bleeding With The Phoenix Injector. Place in vise 1. 34 Install bleed kit and fill reservoir Depress piston & Vacuum bleed BENCH BLEEDING WITH THE PHOENIX INJECTOR Bleeding the Ford QTU Master Cylinder Use this procedure if you do not have Phoenix Systems Universal Cap Adapter (UCA). The UCA will allow 90 % of all screw cap reservoirs to be pressure bled. 1. 2. 3. 4. 5. Plug the lower outlets of the m/c. Begin by mounting the m/c in a vise in a level position. Install the m/c bleeding kit into both secondary and primary m/c outlets. Route the bleeder kit hoses back into the reservoir. Fill the reservoir with new fluid. Prepare the tool for vacuum bleeding. Connect the vacuum side of the tool to the secondary m/ c outlet. Before beginning depress the m/c piston about ½ so that the primary cup seals are past the vent ports. This will ensure that the low pressure area of the m/c is filled during the bleeding process. Using slow steady strokes apply a vacuum to the m/c. Continue this process until no air is seen exiting the m/c outlet. Keep an eye on the fluid level and refill if necessary. Once the secondary portion of the m/c is bled route the bleeder kit hose back into the secondary reservoir. For bleeding the primary side of the m/c, move m/c body to an angled position in the vise (reservoir top level). Now prepare tool for RFI bleeding. Attach the injection side of the tool to the primary bleeder kit adapter. Leave the piston in its rest position while using slow steady strokes bleed the primary side of the master cylinder. Because of the size of the low pressure chamber this will take approximately 12 to 15 strokes to remove all of the air. Watch the primary reservoir for any signs of air as the process is completed. For those systems not covered use the techniques outlined to accomplish similar results. 35 Place in vise Depress piston & vacuum bleed Tilt master cylinder Use RFI on Primary side TROUBLESHOOTING PROBLEM POSSIBLE CAUSE RECOMMENDED SOLUTION SPONGY PEDAL AERATED FLUID Utilize new fluid- Minimize exposure to air. Do not use INJECTOR to fill container. Use slow, steady injection strokes. Do not agitate fluid. When fluid is drawn into barrel it is momentarily placed under a slight vacuum. Depending on the type of brake fluid, minute gas bubbles may appear while under lower pressure. These micro bubbles should be reduced when placed under pressure. This is normal, but take care not to aerate fluid with repeated fluid transfer. Make sure quick disconnects are secured and not leaking. AIR TRAPPED IN HYDRAULIC SYSTEM Use a combination of RFI, pressure or vacuum bleeding techniques. For vehicles with master cylinder angled upward, it may be necessary to raise the rear of the vehicle, to level master cylinder, to prevent air from being trapped in end of master cylinder. DIFFICULTY INJECTING FLUID BOTTLE LEAKS INSUFFICIENT RFI Repeat RFI bleeding procedure. UNIQUE SYSTEM REQUIREMENTS Review manufacturer s recommended bleeding procedure. There may be a specific task that must be completed prior to using any method. LOSS OF COMPONENT INTEGRITY Inspect hydraulic system components. Repair as necessary. BLEEDER VALVE CLOSED Open bleeder valve. (It does not work like a zerk fitting.) MASTER CYLINDER PISTON NOT RETRACTED If the master cylinder piston is not fully retracted, a check valve will prevent the return of fluid to the reservoir. Check for hanging pedal or master cylinder failure. BLEEDER VALVE CHECK VALVE Some import applications (Mazda) use check valves in the bleeder valve. These must be temporarily replaced with conventional bleeders to use RFI. DAMAGED OR PLUGGED LINE OR FITTING Replace or repair as necessary RESERVOIR CAP INSTALLED Reservoir cap must be removed prior to RFI. ANTI-LOCK ACCESSORIES OR UNIQUE VALVING It is normal to experience extreme resistance in some anti-lock brake systems, like 4WAL anti-lock systems. Fluid is injected very slowly which may give the appearance that no fluid is injected. BOTTLE VENT IS OBSTRUCTED Inspect vent in cap for obstruction. COUPLERS ATTACHED INCORRECTLY See Manual and attach per instruction 36 TROUBLESHOOTING PROBLEM POSSIBLE CAUSE RECOMMENDED SOLUTION INJECTOR LEAKING DEFORMED OR DAMAGED BARREL Contact manufacturer for possible replacement. QUICK DISCONNECT SEAL FAILURE Make sure quick disconnect is fully inserted and locked. Do not over tighten. TUBING LEAK Inspect tubing for small holes or tears. Repair as necessary. INJECTOR FAILURE CHECK VALVE FAILURE See Special Instructions to make sure check valves are operating properly. May need to be cleaned. AIR BUBBLE TRAPPED IN INJECTOR INSUFFICIENT PURGE OF INJECTOR Hold Injector with the barrel pointing upward, tap end of barrel forcing bubble into nozzle where it can be injected out. CAUTION: DO NOT USE THE PHOENIX INJECTOR WITH PETROLEUM BASED FLUID LIKE GASOLINE, TRANSMISSION FLUID OR OIL, UNLESS THE INJECTOR IS EQUIPPED WITH PETROLEUM O-RING. PETROLEUM BASED FLUIDS WILL CAUSE BRAKE FLUID O-RINGS TO SWELL. VOLUME CONVERSION TABLE When you know 1cc (cubic centimeter) Fluid ounces Fluid ounces Liter Quarts Liters Quart Pint Multiply by 1 30 0.03 1000 0.95 0.47 32 16 37 To Find 1ml (millileter) ml or cc Liters ml or cc Liters Pints Ounces Ounces SPECIAL INSTRUCTIONS Universal Cleaning Instructions For Brake Fluid Uses (Compatible fluid types) 1. Pump clean brake fluid through the Injector until all traces of contaminates are removed. 2. Flush Injector again with clean fluid. For Alternating Non-Compatible Fluid Types 1. Pump and remove old fluid from Injector, lines and container . 2. Utilizing Denatured Alcohol flush Injector, lines, container and adapters until all traces of old fluid are removed. 3. Pump alcohol from Injector and lines until fluid is replaced by air. 4. Flush traces of alcohol from Injector system using new fluid. * Tubing and Injector seals are not rated for extended contact with solvents. Do not allow contact over 5 minutes. V-12 - Only disassemble Injector in the event of check valve failure. 1. Pump clean brake fluid through the Injector until all traces of contaminates are removed. 2. Flush Injector again with clean fluid. (Acetone or alcohol can be used to clean Injector of brake fluid. Do not allow contact over 5 minutes.) 3. The check valves are not designed to be serviced on the V-12 Injector. V-20 1. Repeat V-12steps 1 and 2. 2. The inlet valve (12,13) can be checked by unscrewing the rear inlet hose barb (14). 3. Rinse valve assembly and check there is no grit inside spigot. Replace valve and spring and screw back onto rear of Injector. 4. The outlet valve (5,6) can not be removed from barrel. Rinse valve and spring and replace cap and nozzle onto gun. Maxi-Pro Adapter (19) must be turned 90 deg. MAXIJECT-PRO before it can be removed or damage will occur. 1. Repeat V-12 steps 1 and 2. 2. The inlet valve (2,3) can be checked by unscrewing cylinder cage (15) and piston cap (1) counterclockwise exposing the spring, valve and seal ring. (It will be necessary to prevent pushrod from turning while removing piston cap.) 3. Rinse valve assembly and check that there is no grit inside assembly. Replace valve and spring and reinstall. Do not cross-thread cylinder cage to adapter. 4. The outlet valve (8,9) can be checked by unscrewing the front nozzle nut (12). Rinse valve and spring and replace cap and nozzle onto gun. Reinstall in reverse manner. POWER-JECT 1. Repeat V-12 steps 1 and 2. 2. The inlet valve (12) can be checked by unscrewing inlet fitting (13). 3. Rinse valve assembly and check that there is no grit inside assembly. Replace valve and spring and reinstall. Do not cross-thread inlet fitting (13) to piston. 4. The outlet valve (19) can be checked by unscrewing the front barrel cap (16). Remove injection attachment (22) and rinse valve and spring and replace cap and injection attachment onto gun. 38 SPECIAL INSTRUCTIONS Relubricating V-12 If Injector becomes sluggish it is necessary to relubricate the piston The V-12 Injector has the addition of a felt washer (12) that lubricates the barrel after each dose. 1. 2. 3. 4. Remove cylinder/barrel (2) from body (nozzle and cap may be attached). Squeeze handle to expose piston O-ring (11) and felt washer (12). Dip piston in clean brake fluid to soak the felt washer with the fluid. Replace barrel and pump a few times to lubricate the barrel. V-20 The V-20 Injector has the addition of a felt washer (9) that lubricates the barrel after each dose. 1. 2. 3. 4. Remove cylinder/barrel (7) from body (nozzle and cap may be attached). Squeeze handle to expose piston O-ring (8) and felt washer (9). Dip piston in clean brake fluid to soak the felt washer with the fluid. Replace barrel and pump a few times to lubricate the barrel. MAXIJECT-PRO 1. 2. 3. 4. Remove cylinder assembly by screwing cylinder cage (15) counterclockwise -it may be necessary to use pliers/wrench. (It is not necessary to remove cage lock-nut-13) Squeeze handle to expose piston washers (4) . Dip piston in clean brake fluid to soak with the fluid. Replace barrel and pump a few times to lubricate the cylinder. POWER-JECT 1. 2. 3. 4. Remove cylinder/barrel assembly by unscrewing barrel (15) counterclockwise. Squeeze handle to expose piston O-ring (4). Dip piston in clean brake fluid to soak with the fluid. Replace cylinder/barrel assembly and pump injector a few times to lubricate the cylinder. Inspection for all Injectors (V-20 example) Inlet Check Valve 1. Remove tube from inlet connection (14) from a fluid filled Injector cylinder (7). 2. Plug or cover Injector nozzle outlet (3). 3. Squeeze handle and inspect inlet for fluid or air leaking back out inlet connection (14) through inlet check valve assembly (12,13). Only a slight amount of air leakage is okay. Outlet Check valve 1. Remove tube from inlet connection (14) from an empty Injector cylinder (7). 2. Plug or cover Injector inlet connection (14). 3. Place Injector outlet nozzle (3) in fluid source. 4. Squeeze handle and release, NO fluid should be drawn into cylinder (7), if Injector draws fluid or air in through the outlet check valve assembly (5,6) into cylinder, unit requires cleaning or rebuild. 39 V-12EXPLODED VIEW REPAIR KIT INSTRUCTIONS Tools required-slotted screw driver 1. Remove End Cap (1) and unscrew cylinder (2) as an assembly from the handle. 2. Using a small screw driver carefully pry out inlet valve retainer (6) being careful not to damage the inside of piston rod. 3. Turn Piston (10) upside down and gently tap to remove Inlet Valve (8) and Spring (7). 4. Insert new inlet check valve assembly containing parts (6,7,8,9) into Piston (10) until it snaps into place. 5. Squeeze handle to improve access to the Piston O-ring (11) and Piston Felt Washer (12). Remove and replace. 6. Lubricate the Piston O-ring (11) and Piston Felt Washer (12) with brake fluid prior to assembly. 7. Install new cylinder assembly containing parts (2,3,4,5). 8. Reinstall End Cap (1) to Cylinder Assembly. 9. Test Injector for proper operation. 10. Take right arm and bend at elbow and gently pat yourself on the back, your done! The V-12 is assembled with seals compatible with DOT 3, 4 & 5 fluids. For extended use with gasoline, transmission fluids, solvents & other petroleum fluids, install the petroleum seal included with the kit. PART 1. 2.* 3.* 4.* 5.* 6. 7.* 8.* 9.* 10. 11.* 12.* 13. 14. 15. 16. 17. 18. DESCRIPTION End cap Cylinder/barrel Outlet check valve spring Outlet check valve Outlet check valve retainer Intlet check valve retainer Inlet check valve spring Inlet check valve Inlet check valve cage Piston rod EPR O-ring Piston felt washer Handle spring Finger bar 12.5 ml selector Rear handle Finger bar handle cover Rear handle cover * Included in rebuild kit 40 V-20 EXPLODED VIEW 8 11 10 9 14 13 12 17 16 15 7 1 Center Tab 2 3 5 6 19 17 REPAIR KIT INSTRUCTIONS Tools required 7-inch cable tie and pliers. 1. Unscrew inlet assembly housing (14) and set aside. 2. Unscrew cylinder/ barrel (7) and set aside. 3. Tie handles (19) together using cable tie. 4. Press out pivot pin (18) from handle (19) using pliers, remove pivot pin (18) and set aside. 5. Pull bottom of handle (19) while squeezing top of handle (19) and piston (10) will release. 6. Remove and replace piston O-ring (8) piston felt washer (9) and rear piston o-ring (11) with new from repair kit . 7. Pull bottom of handle (19) until ½ inch of center tab is showing in body (15). Insert piston (10) and align center tab with slot in piston (10). 8. Close handle (19) toward body (15) until holes align at bottom. Reinsert pivot pin (18) until click is heard. 9. Cut cable tie. 10. Remove inlet check valve spring (12) and inlet check valve (13) from inlet assembly housing (14). Replace with new from repair kit . Note: closed end of inlet check valve spring (12) is placed onto long end of check valve (13) (refer to exploded view). Insert inlet check valve assembly into inlet assembly housing (14) . 11. Reinstall completed assembly through rear of injector body (15) and onto end of piston (10). 12. Remove front end cap (1) from cylinder/barrel (7) and set aside. 13. Reinstall new cylinder/ barrel (7) into body (15) and reinstall front-end cap (1) onto new cylinder/ barrel (7). 14. To test injector pressure, place index finger tightly over outlet of cylinder/ barrel (7) and squeeze handle to check for pressure. To test vacuum, place thumb tightly over inlet, rear of inlet assembly housing (14) and squeeze handle. Should feel vacuum. 41 18 PART 1. 2. 3. 4. 5.* 6.* 7.* 8.* 9.* 10. 11.* 12.* 13.* 14. 15. 16. 17. 18. 19. DESCRIPTION Front end cap Luer adapter Injection attachment Deleted Outlet check valve spring Outlet check valve Cylinder/barrel Piston O-ring Piston felt washer Piston Rear piston oring Inlet check valve spring Inlet check valve Inlet assembly housing Body Dose selector Handle spring Pivot pin Handle * Included in rebuild kit POWER-JECT EXPLODED VIEW 13 12 10 11 9 6 5 4 7 8 18 16 15 14 3 17 22 21 20 19 1 REPAIR KIT INSTRUCTIONS No Tools required 1. Unscrew barrel cap (16). Remove injection attachment (22) and injection attachment O-ring (21) and set aside. 2. Remove outlet check (19) and spring outlet check (20). 3. Reinstall new ball outlet check (19), spring 2 outlet check (20) and injection attachment O-ring (21) from repair kit into mouth of barrel (15) spring side out. 4. Reinstall injection attachment (22) and barrel cap (16) onto mouth of barrel (15). 5. Unscrew barrel (15) and remove. Turn adjustment nut (3) to completely expose piston rod (5). 6. Replace large O-ring (4) with new from repair kit . 7. While holding piston rod (5) unscrew inlet fitting (13) until resistance is felt. Unscrew adjustment nut (3) completely and remove. 8. Unscrew inlet fitting (13) and remove. 9. Remove and replace inlet O-ring (10) inlet spring (11) and inlet check ball (12) from inlet fitting (13). 10. Remove piston rod (5) from main body. Place piston rod (5) on table, slide main body down onto piston rod (5) exposing #1 piston rod O-ring (6), piston rod U-cup (7), #2 piston rod O-ring (8) . Remove and replace with new parts from repair kit. Replace piston rod U-cup (7). Remember piston rod U-cup (7) is between piston rod O-rings (6,8) and cup is down toward table. 11. Slide all three down into main body. 12. Slide main spring (9) down over piston rod (5). Pushing piston rod O-rings (6,8) and piston rod U-cap (7) into and seating in main body. 13. Hold down on main spring (9) and screw on inlet fitting (13), being careful not to loosen inlet spring (11) and inlet check ball (12), tighten securely. 14. Reinstall adjustment nut (3). Reinstall barrel (15). 42 * Included in rebuild kit MAXIJECT-PRO EXPLODED VIEW 4a 1 2 5 6 4b 3 10 12 7 8 9 22 23 15 11 13 14 18 17 Adapter (19) must be turned 90 deg. before it can be removed or damage will occur. 27 28 21 24 25 19 REPAIR KIT INSTRUCTIONS Tools required-slotted screw driver or coin and pliers 1. Unscrew cylinder cage (15) as an assembly from the handle. 2. Hold body of push rod (6) firmly without damaging surface and using large flat blade screw driver, unscrew piston cap (1). 3. Remove piston washers (4), piston spacing washer (5), check valve (3) and spring (2). 4. To install new piston components, insert check valve assembly (2,3) into the internal threaded end of push rod (6). Ensure that the spring is pointing outward. 5. Align piston washers (4) with piston spacing washer (5) inbetween and fit over the piston cap (1). Place them in the palm of your hand and carefully merge the push rod (6) onto the end of the piston cap (1) and tighten by turning the push rod until it stops. 6. With a coin or wide flat screw driver snug the piston cap tight. Do not overtighten as the piston washers may distort. 7. Remove nozzle nut (12) and remove nozzle seal ring (9) and replace with new seal. 8. Remove delivery cage lock nut (13) and remove delivery cage (14) from the cylinder (18). Remove cylinder seal ring (17) from the delivery cage(14). Replace cylinder seal ring. 9. Insert delivery cage (14) with new seal ring (17) into the cylinder (18) at the 2.5 ml end. 10. Reinsert delivery cage cylinder assembly into cylinder cage (15) and reinstall delivery cage lock nut (13) finger tight. 11. Insert new outlet check valve and spring (7&8), spring pointing outward, into the end of delivery cage (14). Install injection attachment assembly (10) onto the delivery cage (14) and tighten nozzle nut (12) 12. Squeeze injector handle and install cylinder cage assembly (15) over piston into handle until threads meet. Carefully align cylinder cage an adapter (19) and tighten. 13. To test injector pressure, place index finger tightly over outlet of injection attachment (10) and squeeze handle to check for pressure. To test vacuum, place thumb tightly over inlet, rear of push rod (6) and squeeze injector. Should feel vacuum. 43 20 26 PART DESCRIPTION 1. 2.* 3.* 4.* 5. 6. 7.* Piston cap Inlet check valve spring Inlet check valve and seal ring Piston washer (set of 2) Piston spacing washer Piston Push rod Outlet check valve and seal ring Outlet check valve spring Nozzle seal ring Injection attachment Luer adapter nut Nozzle nut Delivery cage lock nut Delivery cage Cylinder/barrel cage Deleted Cylinder seal ring Cylinder/barrel Adapter Lever Lever pad (set of 2) Handle Dose adjuster screw and nut Return spring Return spring adjuster Return spring adjuster screw Lever screw Handle clamp screw 8.* 9.* 10. 11. 12. 13. 14. 15. 16. 17.* 18.* 19. 20. 21.* 22. 23. 24.* 25. 26. 27. 28. * Included in rebuild kit FREQUENTLY ASKED QUESTIONS TERMS RFI (Reverse Fluid Injection) - Injecting brake fluid at the slave cylinder and forcing air up and out through the master cylinder reservoir. Pulse Generator - Freeing air bubbles, trapped within the system, by reducing their surface tension through short, rapid strokes of the injector's handle. Bleeding - The process by which trapped air is purged from a hydraulic system. Flushing - The means by which contaminates are removed from the hydraulic system and replaced with new fluid. Burping - Process of removing air trapped in the top of a caliper or cylinder by removing adapter from bleed screw and allowing trapped air to escape before closing bleed screw. Contaminants/Contamination - Anything that corrupts or compromises the integrity of the hydraulic system and renders it unfit for its intended use. We use the term as it is applied to brake fluid. Examples of contamination are: air, H2O, solids from component wear, sludge, engine oil, power steering or transmission fluid. QUESTIONS: 1. I have a pressure (or a vacuum) bleeder, why do I need a Phoenix Injector ? You might want to keep your vacuum or pressure bleeder to use for flushing the hydraulic system. Flushing the brake system requires pumping large amounts of fluid, as much as 2 quarts, to completely remove contaminants. While the Phoenix Injector is primarily designed as a bleeding tool, it can perform both pressure and vacuum flushing capabilities. Hand fatigue may result from using the Phoenix Injector to pump the large amounts of fluid required for proper system flush. The pneumatic Power-Ject is more suited for vacuum or pressure flushing because it eliminates hand fatigue. The Phoenix Injector is the only tool in the world capable of performing every known bleeding or flushing method including: pressure, vacuum and RFI (Reverse Fluid Injection) and more. No tool produces a hard pedal quicker, for both brake and clutch system, than the Phoenix Injector. The bottom line- the Phoenix Injector will allow an undercar technician to beat the flat rate schedule, and the shop manager to more productively and profitably use both his people and his service bays. Please Note - GM has issued specific information telling its service technicians NOT to use vacuum bleeders! Quoting from a 1994 GM Service Bulletin which covers "Bleed Procedures, Kelsey-Hayes EBC4 4WAL ABS", (Used on current model GM van and light pickups) "IMPORTANT NOTES: DO NOT use gravity or vacuum bleeding for this system; DO NOT pump the brake pedal as fluid cavitation may occur; DO NOT drive the vehicle until brake pedal feel is firm. 2. Why do you make so many different Phoenix Injector models? We created multiple models so that different users, with different needs, could apply the technology and advantages of the Phoenix Injector in a manner which - from a cost standpoint - works best for them. 3. What is the difference between "Maxi-Ject Pro" and the "V-12"? The Maxi-Ject Pro, made of steel and die cast aluminum, is designed for heavy-duty shop use. It is our most versatile tool with a 15 ml stroke which effectively delivers more fluid each stroke. 44 FREQUENTLY ASKED QUESTIONS It features spring force return adjustment and a two year warranty. The lever action handle of the Maxi-Ject Pro makes bench and pressure bleeding a one hand operation. The V-12 is made of glass-reinforced Zytel® nylon, delivers a 10 ml stroke, and is designed for medium duty use. It features a one year warranty. 4. Will Reverse Fluid Injection (RFI) cause damage to my ABS system? NO! The most common risk of damage to the ABS system occurs when rapidly collapsing brake calipers using large channel or clamping pliers, without creating a pressure relief conduit and blocking flow to the master cylinder. If the return path to the master cylinder is not blocked through the use of a line-lock or brake pedal, a massive high pressure surge through the brake system may occur which can dislodge contaminants and push them up into ABS valving. NOTE: Phoenix Systems does NOT RECOMMEND REVERSE FLUSHING hydraulic brake systems under any circumstances! The Phoenix Injector will not harm ABS systems because of the way the tool is designed. The problem with rapid collapse of the caliper is the amount of fluid injected upward in the system and the pressure the collapse generates. Each Phoenix Injector has a small stroke, 10-20 ml and between each injection there is a "compose time". A single 10-ml stroke will deliver 12 times less fluid then the caliper and the pressure generated during proper RFI is less then 10 psi. The "compose time" between each stroke allows heavy contamination to remain at the low points. ABS experts evaluated the Phoenix Injector and RFI and this is what they said: "The Phoenix Injector generates less than 10 psi during the RFI process. Our testing has shown that this amount of pressure has no chance of forcing contaminates upstream to other brake components. This combined with the fact that the process would be used after the system has been flushed, virtually eliminates any threat." Bill Williams, President WISAT Please note we used the terms "bleed*" and "flush*". These terms are NOT interchangeable. Consult the TERMS section so that no confusion remains as to when to perform which function. 5. Okay, your injector will bleed ABS, but do I need special clips? NO! RFI utilizes fluid paths in which enhanced braking mechanisms offer almost no resistance. Metering valves, proportioning valves, and anti-lock valving is designed to manipulate braking pressure, while providing minimal resistance to fluid as it returns to the master cylinder following the release of braking pressure. 6. Do I need a scan tool to bleed ABS? MAYBE! If the OEM bleeding instructions say to use a scan tool, you should use a scan tool. RFI does allow fluid to travel paths that traditional pressure or vacuum technique can not. Some technicians report successful bleeding of ABS systems without the use of a scan tool. It is important to remember that some ABS systems have a portion of the system that is isolated from the normal braking system. During an ABS stop (or specific system test) these isolated system are engaged. The OEM instructions must be followed to bleed or flush isolated parts of the system. 45 FREQUENTLY ASKED QUESTIONS 7. Does the less expensive injector do everything the "Pro" model will do? YES! However, certain "luxuries" are not available in less expensive models like: adjustable spring force, lever action, metal construction and ease of use. 8. Can I use DOT 3, 4 and 5 fluids with your injector? YES! All injectors are factory equipped for DOT 3, 4 and 5 brake fluids . 9. Will your injectors handle other kinds of fluids like power steering or ATF? YES! The V-12 and V-20 can be converted for use with any automotive fluid by simply flushing with denatured alcohol and changing two O-rings (included with the kit) for the V-20 and one O-ring for the V-12. NOTE: A petrol-based seal kit is available for the Maxi-Ject Pro, P/N #MAXPRO-PET. 10. Do you have repair kits? YES! They are priced between $13.00 and $30.00 and contain all wear components. 11. Should I buy a repair kit now (with a new tool)? NO! The seals and/or O-rings should last two years with normal use and care. The most common cause for rebuild is seal exposure to other fluids like gasoline and oil. 12. I just used your injector and it won't pump anymore! Some early versions of Injectors contained a stainless steel filter, located within a black and white Luer fitting found at the end of the 4-foot inlet hose where it connects to the bottle. It is common for the filter to become clogged with contamination. The filter's purpose is to protect seals and "o-rings" within the injector. Remove the Luer fitting from the hose and back flush the filter. Reinstall the Luer fitting in the hose. Your injector should now be operational. Newer Injector models contain an external filter that is semi-transparent so trapped contaminates can be seen. It is also easy to service. See the Trouble Shooting section in Users Manual for more information. 13. What else will the Phoenix Injector do? The Phoenix Injector will bleed air from any accessible hydraulic system, so it can be used to service the following: A. Motorcycles - clutch, brake, bleed fork tubes B. Trailers - bleed electro-hydraulic brake system C. Lift trucks - clutch, brake, steering, and lift systems D. *Aircraft - brakes and servo-systems E. Tractors - clutch, brake, steering, articulated attachments F. Medium & Heavy duty trucks - brakes, clutch, steering, articulated attachments. G. *Mobile air conditioning - charge "cold" compressor with 134 cleaning oil. * requires special seals 14. I bled the system and my pedal is still spongy. What can/did I do? 46 FREQUENTLY ASKED QUESTIONS A. B. C. D. Did you "burp" the caliper or wheel cylinders? Is the fluid aerated (saturated with air bubbles)? Did you open the ABS modulator bleeder valves? See the Trouble Shooting section in Users Manual. 15. How long will it take for the tool to pay for itself? We ship a lot of tools UPS Red because technicians have vehicles stuck in their shops. In most cases the technician can solve the bleeding problem in minutes using the Phoenix Injector. One technician called and said, "I just did in five minutes what I couldn't do in five hours" after using the Phoenix Injector to bleed a Ford Ranger clutch. Do the math. If that technician spent those five hours at $55/hr, he could have generated $275 income for his shop. A qualified technician cannot be without a Phoenix Injector. We have a question for you, how much do comebacks cost? 16. What is Phoenix Systems position on flushing brake fluid? Phoenix Systems recommends flushing and replacing brake fluid at least every two years or 24,000 miles of normal motor vehicle use. Age is important because we know that brake fluid wears over time. Phoenix Systems developed a brake fluid test strip, Strip DIp, utilizing a new technology for testing brake fluid called FASCAR. The "wearing" of brake fluid is accompanied by the accumulation of complex "alpha" (or first) contamination indicators. FASCAR accurately measures these alpha contaminants. Strip Dip is designed to interact with these alpha contaminants to determine the overall level of brake fluid contamination. The resulting color of the test strip is an easy, visually accurate method to prove the need for a brake system flush. FASCAR will also measure the residual contamination left by an inefficient system flush. Some vehicle manufacturers recommend changing the fluid every one to two years, while others have no recommendation at all. You can know for sure by using the Strip Dip. 47 No technician should be without a Phoenix Injector RFISYSTEM SYSTEM ATATWORK THETHERFI WORK AIR AND AIR ANDFLUID FLUID INJECTED INJECTED INTO RESERVOIR CLUTCH CLUTCH MASTER FLUID FLUID SOURCE FLUID DIRECTION BBLEEDER L E E D E R VALVE CLUTCH CLUTCH SLAVE INJECTOR INJEC * is RFI is performed * RFI performed withwith new, clean fluid. The RFI system utilizes a basic physics law: air rises in fluid. RFI is just one of the bleeding techniques that can be performed with the Phoenix Injector Toll Free 888-749-7977 www.phxsyss.com