1
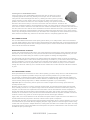
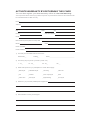
OWNER’S MANUAL
Outlaw Series
TABLE OF CONTENTS
Inflation.............................................................................................................. 2-3
Mounting Frames.............................................................................................. 3
Valves................................................................................................................ 3-4
BAT Thwart System........................................................................................... 4
Maintenance and Cleaning................................................................................ 4
Boat Tube Repair.............................................................................................. 4-5
Transport........................................................................................................... 5
Storage.............................................................................................................. 5
Limited Warranty............................................................................................... 6
Welcome to the family of NRS boat owners. We take great pride in building high-performance
inflatables that provide many years of enjoyment. Give us a call at 800.635.5202, or drop us a
line at [email protected] if we can help in any way. We love talking about boats!
INFLATION
Inflating Rafts:
To properly inflate your NRS Outlaw raft, valves need to be in the closed position. Push the valve stem in and
turn it clockwise so that the stem pops up, sealing the valve. To inflate the perimeter tube chambers, choose
a chamber to inflate first. Fill the chamber with air until it takes shape, filled out but not firm. Your goal is to get
equal pressure on both sides of the baffles that separate the chambers.
Important Tip: We highly recommend that you purchase a pressure gauge; maintaining optimum pressure in
your boat’s chambers is essential to its best performance and longevity.
Work your way around the boat, turning each valve stem clockwise to seal the valve before filling each
chamber evenly. Then go around the boat again, using a hand pump to fill each chamber to full pressure. If
you have a pressure gauge, check to make sure the pressure in the chambers does not exceed 2.5 pounds
per square inch (psi). If you do not have a gauge, check the pressure by pressing down with your thumb. The
fabric should depress slightly. If there’s no “give”, it’s probably overinflated. After the perimeter chambers are
full, inflate the thwarts to 2.5 psi.
Start by inflating the drop-stitch floor insert on your Outlaw to 8-10 psi. It can be inflated to 15 psi if needed for
performance.
Inflating Catarafts:
Outlaw cataraft tubes have three chambers. To properly inflate the tubes, begin with the center chamber,
filling it until it takes shape; inflate the two end chambers to a maximum of 2.5 psi each. Then, top-off the
center chamber to 2.5 psi.
Inflating IKs:
To properly inflate your Outlaw IK, inflate both main tubes until they take shape. Then, top them off to 2.5 psi.
Because of the small tube size, slight overinflation is acceptable to increase performance. Inflate the dropstitch floor insert on your Outlaw IK to an initial pressure of 8-10 psi. It can be inflated up to 15 psi if needed
for performance. Last, inflate the thwart(s) to full shape.
2
800.635.5202 | nrs.com
Monitoring Inflation Pressures:
As temperatures and altitude change, the air pressure inside your boat will also change. You may need to
make adjustments to the pressure in the chambers throughout the day. Transporting an inflated boat on a
hot day or when gaining altitude can lead to overinflation; check the pressure regularly. Cold air and water
temperatures will cause a reduction in air pressure. Always bring a hand pump along for adjusting air
pressure as needed. Later in the day, as the air temperature outside warms up, the pressure inside the boat
will increase. As this happens, you’ll need to release a small amount of air from each chamber. Check the air
pressure regularly throughout the day and adjust accordingly.
All NRS inflatables are built to withstand substantially higher pressures than we recommend. However,
overinflation puts strain on the seams and shortens the life of your boat. An overinflated boat is also in danger
of explosive decompression (blowing apart at the seams!). The NRS warranty (see page 6) does not cover
damage caused by explosive decompression.
MOUNTING FRAMES
Raft Frames:
Carefully follow the frame assembly instructions. After the frame is assembled, place it on the raft so that it
rests on the top wear patch material. When the frame is positioned where you want it (generally in the center,
except in the case of stern frames), use NRS Heavy Duty Straps to cinch each corner to a D-ring on the raft.
Place straps on each side of the raft at opposite angles to keep the frame straight and centered.
Cataraft Frames:
Where you mount the frame along the flat area on your cataraft tubes depends somewhat on the type of
boating you’re doing and the performance characteristics you’re looking for. Additionally, the NRS frame
system allows you to easily move frame pieces along the side rails to fine-tune your set up.
Experimenting with frame positioning will help you find what works best for your style of boating. Start by
centering the side rails on the flat area of your tubes. For most boating it works well to place the oar mounts
near the center of the frame, and to distribute weight fairly evenly along the frame. For more extreme boating
conditions, some rowers prefer to position the rowing station and/or cargo toward the front of the tubes,
weighting the bow to help avoid flipping over backward in big waves. Proper weight distribution and rower
position will increase performance and prevent the boat from “nosing in” or riding bow-high.
Place a frame side rail on one tube and strap the outside D-rings to the side rail, cinching them until just tight.
Next, strap the inside D-rings to the lower rail. Adjust the tension of the straps to center the top side rail on the
top of the tube. Align the other tube across from the first and repeat these steps.
It’s always important to cinch down a frame with straps at opposite angles so the opposing tensions keep the
frame securely in place. This is particularly important on cataraft tubes because the frame supplies all the
structure and rigidity for the boat.
VALVES
Inflate/Deflate Valves:
All current NRS rafts, catarafts and IKs feature Leafield C7 inflate/deflate valves. To open the valve, first
remove the valve cap. Then press down on the spring-loaded valve stem and turn it counterclockwise. The
valve stem will now be locked down in the open position, allowing air to move freely in and out through the
valve. To close the valve, push down on the valve stem and turn clockwise. The stem will pop back up,
sealing the valve shut. In the closed position, you can still pump air into the chamber, but when you remove
the pump, the valve will not allow air to escape. When you’re done, screw the plastic valve cap back on to
keep water and dirt out of the inner valve.
Important Tip: When deflating your fully inflated boat do not fully open only one chamber. This puts
excessive strain on the internal baffles and can lead to baffle rupture. Either work together with someone to
release the pressure in the chambers simultaneously, or release small amounts out of each chamber until
high pressure is relieved and individual valves can be fully opened safely.
800.635.5202 | nrs.com
3
Cleaning the C7 Inflate/Deflate Valves:
If the inner parts of your inflate/deflate valves become dirty, the seal may not shut
completely against the valve body, allowing air to escape. You can clean the inner
valve parts to restore the airtight seal. First, try cleaning the valve in place by locking
it open and using a cotton swab to remove any grime or debris. If this doesn’t fix the
problem, then remove the valve for a more complete cleaning. Your repair kit contains an
aluminum valve wrench that you can use to remove the valve from the boat. Threads on the
valves are: clockwise to tighten, counterclockwise to loosen. The outer half of the valve unscrews from the
inner half. It’s easier to loosen the outer half when the chamber is inflated. When you remove the outer half of
the valve, take care not to lose the inner half inside the chamber. With the outer half in your hand, push down
and turn the valve stem counterclockwise. This lifts the rubber seal off the valve base. Use a cotton swab to
remove any dirt and grime that has built up on the rubber seal. Hand tighten the outer half back into the valve
base. Inflate the chamber fully, and then use the valve wrench to completely tighten the valve.
BAT THWART SYSTEM
Our innovative Batten Attachment Thwart (BAT) system allows you to easily install or remove the thwarts in
your raft. Simply align the slot on the end of the thwart between the attachment slots on the raft chambers and
slide the batten through all three slots, locking the thwart in place. Thwarts will be easier to install and remove
when both raft and thwart are deflated.
MAINTENANCE AND CLEANING
Proper care and maintenance will improve your boat’s appearance and longevity. Clean and inspect the boat
after each use. We recommend you coat your boat with 303 Protectant (available through NRS or your local
dealer) every few months during the season to protect against UV damage and degradation.
You should take care to keep moisture from getting inside the air chambers. Water can enter the chambers
during in-the-field repairs or if the valves are left open during wet weather. If you find that moisture and mildew
have accumulated in your boat’s air chambers, the chambers must be aired out. Remove the valve of the
affected chamber. Pour out any liquid water, then run the hose of an electric air pump or vacuum exhaust
through the valve hole. Allow dry air to circulate into the chamber and out the valve hole until all the moisture
is gone.
OUTLAW MATERIAL REPAIR
Boat repair adhesives and cleaners are toxic. When repairing your boat, always work in a well-ventilated area
and use a good respirator if possible. Always use proper chemical protection for your skin and eyes.
You will need: our Outlaw patch material, medium-grit wet/dry sandpaper and contact adhesive suitable for
Outlaw material (we recommend Clifton Urethane Adhesive, available through NRS or your local dealer) and
solvent cleaner (methyl ethyl ketone, or MEK, available through NRS or your local dealer).
Important Tip: For best results, perform repairs out of direct sunlight and avoid doing repairs when the
humidity exceeds 70%.
Measure and cut a patch to cover the area that requires repair. The patch should be bigger than the repair
area, extending an extra 2” or so past the edge of the tear or abrasion. Round the corners of the patch. Lay
the patch over the area to be repaired and trace the outline onto the boat material. Use the sandpaper to
buff the area inside the traced outline and the backside of the patch. Only scratch off the shiny finish of the
material; do not sand down to the point where the internal fabric threads are exposed. Use MEK to clean the
surfaces to remove any grease or oils and to prep the surfaces for best glue adhesion.
Apply a thin, even coat of adhesive to both the back of the patch and the repair area on the boat. Wait 3 to 5
minutes before bonding the patch to the boat, to allow solvent vapors to evaporate.
Carefully align the patch and press both surfaces together. Remember, this is a contact adhesive, so once the
two surfaces touch you’ll have difficulty realigning the patch. Apply pressure to the entire glued surface using
a roller. Roll over the patch in multiple directions, working from the inside to the outside of the patch. This step
is important because it forces air bubbles out and helps the two pieces of material bond. Use a lint-free towel
and MEK to wipe up excess glue.
4
800.635.5202 | nrs.com
Allow the repair to cure for as long as possible. In an emergency, you could inflate the boat after only an hour
or so, but this will put stress on the patch, possibly requiring the repair to be re-done later. If you must inflate
the boat quickly after the repair, try to limit the air pressure in the patched chamber. Ideally, you should allow
the glue to cure for 8-12 hours and full cure can take up to 24 hours, depending on conditions.
Many difficult repairs are best performed by a professional repair center. Please call or email NRS Customer
Service for more information about repair centers in your area. Our phone number is 800.635.5202 and our
email address is [email protected]. You can also see a list of authorized NRS repair facilities on our website
at www.nrs.com.
TRANSPORT
If you are transporting your boat inflated, remember to slightly deflate the chambers. Temperature and
altitude changes affect the air pressure in the boat, especially in direct sunlight. Whether transporting your
boat inflated or deflated, make sure to inspect the load for any objects or surfaces that could rub, abrade or
puncture the boat’s fabric. Remember that sand or other debris left in the boat could cause wear on the fabric
during transport. Putting your deflated boat in a boat bag for transport will help prevent wear and damage
from other gear.
STORAGE
If possible, let your boat dry thoroughly before deflating it. Do not use a vacuum or deflator to suck all the air
out of the chambers unless absolutely necessary. The ideal storage position is unfolded in a cool, dry location,
with a small amount of air left in the chambers. If space is limited, store the boat loosely rolled, with the valves
open, in a protective bag or cover. Keep the boat off dirt or concrete floors. Rodents have been known to
burrow into stored boats, so take precautions to prevent this.
CAUTION
Safety Warning
Paddlesports can be dangerous and physically demanding. Participating in paddlesports may cause serious
injury or death. Follow these safety standards when using this product:
• Get paddlesports instruction and First Aid training. Carry First Aid and rescue equipment.
• Always wear a Coast Guard Approved life jacket. Dress for cold water and weather as appropriate to
guard against hypothermia.
• Check your equipment prior to each use for signs of wear or failure. Do not impair entry or exit.
• Never paddle alone. Scout unfamiliar waters. Portage where appropriate. Do not exceed your paddling
ability.
• Do not paddle in high water or flood conditions.
• Read owner’s information booklet prior to using this product.
The user of this product acknowledges both an understanding and an assumption of the risk involved in
paddlesports.
800.635.5202 | nrs.com
5
LIMITED WARRANTY
NRS Outlaw inflatables are guaranteed to the original owner of the boat to be free from defects in workmanship
and materials for three years from the date of purchase under normal recreational use. If, after inspection, we
find that the boat failed due to a covered defect, it will be repaired or replaced at our option without charge.
No product lasts forever and we do not guarantee against wear, tear, improper care, abuse, or neglect. Any
structural change automatically voids this limited warranty. Except expressly set forth herein, NRS disclaims all
warranties, express or implied, including but not limited to, the implied warranties of merchantability and fitness
for a particular purpose.
EXCLUSIONS FROM LIMITED WARRANTY: Deterioration of a boat increases dramatically when water is
allowed to stand in the tubes. Since this condition can be remedied only by the owner’s care, any problems
attributed to water left in the tubes are excluded from this limited warranty. As noted in this manual, explosive
decompression tears are also excluded from this limited warranty. Boats shipped outside the USA may incur
additional restrictions.
EXCEPT TO THE EXTENT PROHIBITED BY LAW, IN NO EVENT SHALL NRS BE LIABLE FOR ANY
INCIDENTAL OR CONSEQUENTIAL DAMAGES.
6
800.635.5202 | nrs.com
ACTIVATE WARRANTY BY RETURNING THIS CARD
You can also register your boat warranty online at: nrs.com/warranty.
Your responses will be used only by NRS to improve our products and services. All information will
be confidential and for NRS use only.
Name
Address
City
State
Phone
Zip
Date of Purchase
Email
Boat Serial # (see ID plate on boat) WSI
Model
Color
Name of Dealer
Dealer Address
1) How will your new NRS boat be used most?
Whitewater__
Fishing__
Other_________________________________
2) How many days a year do you boat? (check one)
1 - 10__ 10 - 20__
20 - 30__
30+__
3) What water sports do you participate in? Check all that apply.
_WW kayak
_inflatable kayak
_canoeing
_water ski
_raft
_cataraft
_sit-on-top kayak
_SUP
_scuba dive
_sea kayak
_kayak fishing
_rec kayak
4) Where do you purchase paddlesports equipment?
5) We would like to hear your thoughts.
48206 Ver. 1
2009 S Main Street
Moscow, ID 83843
Place
Stamp
Here