1
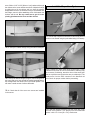
Use the glue-gun tip to re-melt the glue bead, causing it to
penetrate into the joint and form into a fillet. The gun tip will
also slightly melt the foam, allowing the glue to fuse with it
somewhat, forming a very strong joint.
BUILDING INSTRUCTIONS
Assemble the Airframe
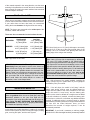
CENTER
A=A
STRING
A
A
B
B
B=B
90 degrees
A=A
A
A
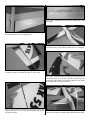
❏ 1. Slide the horizontal stabilizer into the slot at the rear of
the fuselage. Check the alignment using the sketch above
as a reference. Use a common pin to secure a length of
string to the front center of the fuselage. Adjust the position
of the stab in the stab slot until the length of string is equal
on both ends of the stab. Be careful not to flex the fuselage
as you make measurements.
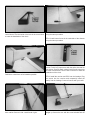
❏ 3. Slide the wing into the cutout in the fuselage. Make sure
the wing is centered and square in the fuselage, and parallel
with the stabilizer when viewed from the front. Again, be careful
not to flex the fuselage as you make your measurements.
❏
2. When you are satisfied with the alignment of the
stabilizer, glue it in place with low-temperature hot-melt glue.
❏ 4. When you are satisfied with the alignment of the wing,
glue it in place with hot-melt glue.
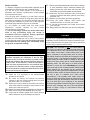
When gluing EPP parts together with hot-melt glue, you
can use this technique to create a very strong bond if the
parts form an angle between them.
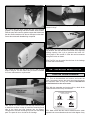
❏ 5. Use hot-melt glue to secure four hinges in the precut
slots in each aileron. Do not worry about a little excess glue
squeezing out onto the hinge pivots—it is easily removed
with a hobby knife after the glue hardens.
Run a small bead in the corner between the two parts.
7