Download EasySlide™ and RollerSlide™ Transfer Devices Competency
Transcript
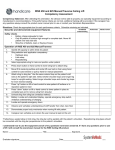
 EasySlide™ and RollerSlide™
Transfer Devices
Competency Assessment
Competency Statement: After attending this orientation, the clinician will be able to properly use specialty
equipment according to manufacturer’s recommendations. If the performance criteria are not met,
additional training will be provided. If the caregiver has any questions always consult the product owner
manual prior to use or contact your Handicare Representative.
Objective: Caregiver will be able to choose the correct transfer device and demonstrate competency by
safely transferring the patient from stretcher to bed or bed to stretcher.
Directions: Check the appropriate box for each performance criteria. Schedule retraining as indicated.
ALWAYS EXPLAIN PROCEDURE TO RESIDENT OR PATIENT BEFORE AND
DURING TASK.
1. Transferring a patient from stretcher to bed or bed to stretcher is a twoperson task unless otherwise stated in your facility policy and procedure for
transfer devices. If the patient is overweight or has tubes or drains an
additional caregiver may be required to protect the tubes and lines.
2. When transferring a patient from bed to stretcher or stretcher to bed make
certain that the head of the bed and stretcher are in a flat position and the
receiving surface is slightly lower than the transferring surface. The height of
the bed and stretcher should be at a safe working height and must allow the
caregiver to transfer the patient without bending over the surface.
3. Make sure that the bed wheel locks and stretcher wheel locks are engaged.
4. Place a draw sheet underneath the patient to assist in log-rolling the patient
onto the transfer device (RollerSlide™ or EasySlide™).
5. Log-roll the patient toward the caregiver and away from the surface that you
intend to transfer the patient (Receiving Surface).
6. Place the RollerSlide™ or EasySlide™under the patient about 4-6 inches
and roll the patient flat onto the edge of the RollerSlide™ or EasySlide™.
7. Place the patient’s arms on their chest to prepare for transfer
8. The nurse on the side of the receiving surface should lift slightly and pull at
the same time that the nurse on the side of the transferring surface (closest
to the patient) lifts slightly and guides the patient onto the intended surface.
9. It is important at all times to protect the patient’s head and neck as well as
assure that the patient’s feet transfer freely. If you are transferring larger
patients it may require three caregivers to safely transfer the patient.
10. Once the patient is transferred raise the side-rails and head of bed or
stretcher as needed.
Verbalized
understanding
Performed
Needs
review
I understand how to use the equipment and all of my questions have been answered. If I have any
questions prior to use of the transfer device I will consult the owner/user manual for the
RollerSlide™ or EasySlide™ Transfer Device (Roller-board).
Name: ________________________ Title__________________Signature____________________
Evaluator Signature: _______________________________Date:___________________________
3/26/13 TurnTable™ Transfer Device
Competency Assessment
Competency Statement: After attending this orientation, the clinician will be able to properly use specialty
equipment according to manufacturer’s recommendations. If the performance criteria are not met,
additional training will be provided. If the caregiver has any questions always consult the product owner
manual prior to use or contact your Handicare Representative.
Objective: Caregiver will be able to choose the correct pivot transfer device and demonstrate competency
by safely transferring the patient from a seated position between wheelchair and bed, toilet or chair. For
increase security, the turntable can be used with a FlexiBelt/EasyBelt
Directions: Check the appropriate box for each performance criteria. Schedule retraining as indicated.
ALWAYS EXPLAIN PROCEDURE TO RESIDENT OR PATIENT BEFORE AND
DURING TASK.
1. To transfer using the TurnTable, the patient must be able to:
a. Support weight while standing
b. Stand up and maintain balance with support
c. Understand instructions
2. Functional inspection:
a. Check the condition and function of the product regularly
b. Check to insure that the product is not worn, damaged or bleached.
c. If there are signs of wear the product should be discarded
3. Transferring a patient using the TurnTable from a seated position between
wheelchair and bed, toilet or chair can be performed by one person unless
otherwise stated in your facility policy and procedure for transfer devices. If
the patient is overweight or has tubes or drains an additional caregiver may
be required to protect the tubes and lines.
4. Place the TurnTable on the floor beside the patient. Secure the TurnTable in
place before raising the patient, by placing the ball of your foot on the
TurnTable and your heel on the floor.
5. Steer the TurnTable by pushing with the front of your foot and breaking with
the heel.
6. When the patient is in position to sit down, secure the TurnTable in place
before raising the patient, by placing the ball of your foot on the TurnTable
and your heel on the floor.
7. When transferring to the toilet, place wheelchair close to the toilet, so as to
minimize the transfer distance.
8. Pull the patient’s pants up/down when the patient has risen slightly from the
seat. Preferably, two caregivers should assist with this task.
9. For added security use a FlexiBelt/EasyBelt
10. Care of product; clean surface using facility approved disinfectant
Verbalized
understanding
Performed
Needs
review
I understand how to use the equipment and all of my questions have been answered. If I have any
questions prior to use of the transfer device I will consult the owner/user manual for the
TurnTable™.
Name: ________________________ Title__________________ Signature____________________
Evaluator Signature:_______________________________Date:___________________________
3/26/13
RoWalker 400 Ambulation Aid
Competency Assessment
Competency Statement: After attending this orientation, the clinician will be able to properly use specialty
equipment according to manufacturer’s recommendations. If the performance criteria are not met, additional
training will be provided. If the caregiver has any questions always consult the product owner manual prior to
use or contact your Handicare Representative.
Directions: Check the appropriate box for each performance criteria. Schedule retraining as indicated.
ALWAYS EXPLAIN PROCEDURE TO RESIDENT OR PATIENT BEFORE AND
DURING TASK.
Verbalized
understanding
Performed
Needs review
Describe and demonstrate equipment features
Safety checks
Patient weight being appropriate for product limits
Patient meets phyiscal and cognitive guidelines
•
•
Patient physical and cognitive guidelines
1. The RoWalker is used for rehabilitation through progessive mobility as well
as promoting early mobilization specifically for cardio-thoracic and abdominal
post surgical patients.
2. Patient able to support weight and maintain balance while standing and has
appropriate upper body strength to actively paticipate in standing position.
3. Patient is aware of surrounding and able to follow directions.
4. Patient is not combative or agitated
Operation of RoWalker Ambulation Aid (400 lbs max.)
1. Place ReTurnBelt around patient’s waist with lower portion of belt supporting
buttocks. Adjust belt to fit snug around patient and clip buckle. Make sure the
handles on the ReTurnBelt are aligned on the side so the caregiver can grasp
if necessary, to guide and aid in stability.
2. Position RoWalker at bed or chair, as close to the patient as possible. Adjust
the base width by using the foot pedal at the front to position around chairs and
other obstacles as needed.
3. Locate and lock front wheels and assist patient to standing position. Patient
should not use the RoWalker to pull themself to a standng postiion.
4. Open and adjust seat swing pads prior to patient standing . Assist patient to
step forward into RoWalker and grasp handles of RoWalker. Close seat swing
pads once patient is standing, for safety and sitting if necessary. Caregivers
should support as needed using the handles on the ReTurnBelt.
5. Locate the lever on the right of the handlebar and the two locking handles on
both sides of the RoWalker. Adjust height of arm rests once patient is
standing, by using the lever on the handlebar. Lock the arm rests in place by
using the two locking handles.
6. Unlock front brakes once patient is secure and is ready to walk or stand.
Locate the lever above the back wheels and press down to lock steering into a
straight direction.
7. Place oxygen tank in holder if needed. Place IV pumps and any drainage bags
on front support bars.
8. Observe and verbalize understanding of seated transfer from chair and bed.
9. Demonstrate proper body mechanics when moving RoWalker with patient.
Explain significance of ergonomic design
10. Caregiver verbalizes knowledge of where RoWalker product owner manuals
are kept
I understand how to use the equipment and all of my questions have been answered. If I have any questions prior
to use of transfer device I will consult the owner/user manual for the RoWalker Ambulation Aid.
Name: ________________________ Title_______________Signature____________________
Evaluator Signature: _______________________________Date:_________ 3/26/13
Digital Scale
Competency Assessment
Competency Statement: After attending this orientation, the clinician will be able to properly use specialty
equipment with digital scale according to manufacturer’s recommendations. If the performance criteria are not
met, additional training will be required. If the caregiver has any questions always consult the product owner
manual prior to use or contact your Handicare Representative.
Directions: Check the appropriate box for each performance criteria. Schedule retraining as indicated.
Describe and demonstrate equipment features
Verbalized
understanding
Performed
Needs review
Safety checks
•
•
•
Make sure that scale is attached securely to
Sling spreader bar
Follow safety checks for EVA 450 or 600
Ensure the sling is free from defects
Operation of Digital Scale System
1. Scale system attached and secure.
2. Caregiver identifycontrol buttons for zero, weigh and
kg/lb.
3. Attach empty sling to sling spreader scale system
bar securely
• the
Highback
4. Ensure
scale issling
hanging vertically and is free to
pivot• at both
Limbthe
strap
top and bottom connection points.
• the
Repositioning
5. Ensure
scale system is free and clear of any
obstructions.
6. Press the “Zero” button to set the system to zero. “0”
will pan across the screen for a couple seconds.
Display will then read “0.0”
7. Press “Kg/Lb” button to choose display modes.
8. Remove the sling and position patient.
9. Position the patient into the sling and reattach the
sling to the Sling spreader bar scale system ensuring
the scale is hanging vertically and is free to pivot.
10. Carefully lift the patient. When the motion has
stabilized, press the “Weigh” button to display the
weight data. Do not touch the patient or sling during
this step.
11. Carefully lower patient when weighing process is
complete.
I understand how to use the digital scale and all of my questions have been answered. If I have any
questions prior to use I will consult the owner/user manual for the digital scale product.
Name: ________________________ Title_______Signature______________________________
Evaluator Signature:__________________________Date:___________
3/27/13
RISE 450 and 625 Manual/Traverse Ceiling Lift
Competency Assessment
Competency Statement: After attending this orientation, the clinician will be able to properly use specialty equipment according to
manufacturer’s recommendations. If the performance criteria are not met, additional training will be provided. If the caregiver has
any questions always consult the product owner manual prior to use or contact your Handicare Representative.
Directions: Check the appropriate box for each performance criteria. Schedule retraining as indicated.
Describe and demonstrate equipment features
Verbalized
understanding
Performed
Needs review
Safety checks
•
Battery charge adequate for task
•
Only lift patient off surface high enough to complete task. Never lift
patient over bed side rails
•
Sling free of defects, tears or fraying of loops
Operation of RISE 450 and 625 Manual/Traverse
1.
2.
3.
Identify lift capacity is within limits for patient
Sling selection and application competency
•
Highback sling
•
Limb strap
•
Repositioning
Select appropriate sling for task and position under patient
4.
Press down button on hand control to lower sling bar to attach sling
5.
11.
Move lift to receiving surface and center lift over bed or chair using hand
control for auto traverse or pull by hand for manual placement
Attach sling to sling bar* Use the same colored loop on the patient’s left
side as the patient’s right side. Select shorter shoulder loops and longer leg
loops for upright seating. Select longer shoulder loops and shorter leg loops
for more reclined seating.
Press “up” button on lift or hand control to raise patient off surface or to
reposition patient in bed
Press “down” button on lift or hand control to lower patient in place to
complete task and to remove sling from sling bar
Unhook sling from sling bar (verbalize method)
Battery: Locate and understand display, operate emergency stop switch,
verbalize understanding of charging
Locate and operate emergency down
12.
Observe and verbalize understanding of Lift/Transfer from chair, bed, floor
13.
Demonstrate proper body mechanics when moving lift with patient
14.
Caregiver can verbalize as to where the user manual is kept on the unit
6.
7.
8.
9.
10.
*If attaching a seated sling or limb sling, the sling bar will be parallel with the patient’s shoulders. Repositioning sling types should
be connected with the sling bar perpendicular to the patient’s shoulders.
I understand how to use the equipment and all of my questions have been answered. If I have any questions prior to use
of lift I will consult the owner/user manual for the RISE Ceiling lift product.
Name: ________________________________ Title________________________ Signature_____________________________
Evaluator signature:______________________________________Date___________________
3/26/13
ReTurn 7500 Stand Aid
Competency Assessment
Competency Statement: After attending this orientation, the clinician will be able to properly use specialty
equipment according to manufacturer’s recommendations. If the performance criteria are not met, additional
training will be provided. If the caregiver has any questions always consult the product owner manual prior to
use or contact your Handicare Representative.
Directions: Check the appropriate box for each performance criteria. Schedule retraining as indicated.
ALWAYS EXPLAIN PROCEDURE TO RESIDENT OR
PATIENT BEFORE AND DURING TASK.
Verbalized
understanding
Performed
Needs
review
Describe and demonstrate equipment features
Safety checks
• Person weight being appropriate for product limits
• Shin bolster centered and feet on foot plate
• Patient meets phyiscal and cognitive guidelines
• The caregiver must always apply counter pressure when
the patient is standing up, sitting down and during the
actual transfer. Only use on flat surfaces.
Patient physical and cognitive guidelines
1. Patient able to weightbear to actively paticipate in
standing position
2. Patient is aware of surrounding and able to follow
directions.
3. Patient is not combative or agitated
Operation of ReTurn 7500 Stand Aid (330 lbs max.)
1. Position ReTurn 7500 at bed or chair with foot plate
directly in front of patient.
2. Adjust shin bolster just below knee to allow the patient’s
knees to bend
3. Place ReTurn Belt around patient’s waist with lower
portin of belt supporting buttocks. Adjust belt to fit snug
around patient and clip buckle.
4. Instruct patient to grasp ReTurn 7500 bar directly in front
and pull themself up to a standing position. Adjust safety
strap around vertical bar and clip buckle. Tension in
strap should prevent excessive side to side movement.
5. Patient now can be moved safely a short distance from
bed to chair, chair to chair or chair to toilet.
6. ReTurn 7500 can also be used to test strength and
mobility of patient at bedside
7. The ReTurn 7500 should only be used to transfer
patients short distances. Use caution when transfer
requires a move through door thresholds.
8. Observe and verbalize understanding of transfer from
chair, bed, commode/toilet
9. Demonstrate proper body mechanics when moving
ReTurn 7500 with patient.
10. Caregiver verbalizes knowledge of where ReTurn 7500
product owner manuals are kept
I understand how to use the equipment and all of my questions have been answered. If I have any questions prior
to use of transfer device I will consult the owner/user manual for the ReTurn 7500 Stand Aid.
Name: ________________________ Title__________________ Signature____________________
Evaluator Signature: _____________________________Date:_________
3/27/13
Rena 600 Sit-to-Stand Lift
Competency Assessment
Competency Statement: After attending this orientation, the clinician will be able to properly use specialty
equipment according to manufacturer’s recommendations. If the performance criteria are not met, additional
training will be provided. If the caregiver has any questions always consult the product owner manual prior to
use or contact your Handicare Representative.
Directions: Check the appropriate box for each performance criteria. Schedule retraining as indicated.
ALWAYS EXPLAIN PROCEDURE TO RESIDENT OR
PATIENT BEFORE AND DURING TASK.
Verbalized
understanding
Performed
Needs
review
Describe and demonstrate equipment features
Safety checks
• Patients MUST have the ability to bear weight
• Person weight being lifted appropriate for lift limits
• Shin bolster centered and shin strap secure
• Sling free of defects, tears or fraying of loops
• Lift will not operate when plugged into wall for charging
Operation of Rena 600 Stand Assist Lift (600lbs max.)
1. Select appropriate sling and place around patient
2. Position Rena stand assist lift at bed or chair using leg
spreader button as needed
Sling Attachment: Attach sling to sling bar. Use the same
colored loop on the patient’s left side as the patient’s right
side. Demonstrate use and rationale for slide bar when
connecting StandUP Sling. Note: Certain garments may cause
sling to slide up back.
3. Ensure wheels are UNLOCKED (Explain rationale)
4. Press “up” button on lift hand control to lift patient. Only
lift patient high enough to accomplish transfer or in a
comfortable position for patient. (If lift does not work
check that “Red” power button below battery is in the out
position by pushing in and turning clockwise)
5. Move lift to receiving surface and center patient
6. Press “down” button on lift hand control
7. Unhook sling from sling bar (verbalize method)
8. Battery: Locate and remove, operate red on off switch,
verbalize understanding of charging
9. Locate and operate (2) locations for emergency down
10. Observe and verbalize understanding of Lift/Transfer
from chair, bed, commode/toilet
11. Demonstrate proper body mechanics when moving lift
with patient. Do not move lift by boom/sling attachments
hooks
12. Caregiver verbalizes knowledge of where lift/sling
product owner manuals are kept
I understand how to use the equipment and all of my questions have been answered. If I have any
questions prior to use of lift I will consult the user manual for the Rena 600 Sit-to-Stand Lift.
Name: ________________________ Title__________________Signature____________________
Evaluator Signature: _______________________________Date:_____________________ 3/26/13
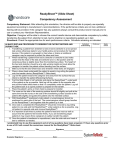
ReadySheet™ (Slide Sheet)
Competency Assessment
Competency Statement: After attending this orientation, the clinician will be able to properly use specialty
equipment according to manufacturer’s recommendations. If the performance criteria are not met, additional
training will be provided. If the caregiver has any questions always consult the product owner manual prior to
use or contact your Handicare Representative.
Objective: Caregiver will be able to choose the correct transfer device and demonstrate competency by safely
transferring the patient from stretcher to bed, bed to stretcher or repositioning patient up in bed.
Directions: Check the appropriate box for each performance criteria. Schedule retraining as indicated.
Verbalized
Performed
Needs
ALWAYS EXPLAIN PROCEDURE TO RESIDENT OR PATIENT BEFORE AND
understanding
review
DURING TASK.
1. Transferring a patient from stretcher to bed or bed to stretcher is a two-person
task unless otherwise stated in your facility policy and procedure for transfer
devices. If the patient is overweight or has tubes or drains an additional
caregiver may be required to protect the tubes and lines.
2. When transferring a patient from bed to stretcher or stretcher to bed make
certain that the head of the bed and stretcher are in a flat position and the
receiving surface is slightly lower than the transferring surface. The height of
the bed and stretcher should be at a safe working height and must allow the
caregiver to transfer the patient without bending over the surface.
3. Make sure that the bed wheel locks and stretcher wheel locks are engaged.
4. Place a draw sheet underneath the patient to assist in log-rolling the patient
onto the transfer device (ReadySheet™ Slide sheet).
5. Log-roll the patient toward the caregiver and away from the surface that you
intend to transfer the patient (Receiving Surface).
6. Fold the Slide Sheet in half vertically and place the ReadySheet™ underneath
of the patient as far as possible. Next log roll the patient to the opposite side
and pull the folded slide sheet so that it is completely under the patient. Log roll
the patient back to a supine position to prepare for the transfer.
7. Place the patient’s arms on their chest to prepare for transfer
8. The nurse on the side of the receiving surface should lift slightly and pull at the
same time that the nurse on the side of the transferring surface (closest to the
patient) lifts slightly and guides the patient onto the intended surface.
9. With ReadySheet™ positioned under patient a nurse/caregiver should be
positioned on each side of the bed. The nurse/caregiver should grasp handles
on the ReadySheet™ and together slide the patient up in bed.
10. Once task is completed the ReadySheet™ should be removed by log rolling
patient to one side and fold ReadySheet™ under patient as far as possible. Log
roll patient to opposite side and remove ReadySheet™.
11. It is important at all times to protect the patient’s head and neck as well as
assure that the patient’s feet transfer freely. If you are transferring larger
patients it may require three caregivers to safely transfer the patient.
12. Once the patient is transferred or repositioned, raise the side-rails and head of
bed or stretcher as needed.
I understand how to use the equipment and all of my questions have been answered. If I have any questions prior
to use of lift I will consult the owner/user manual for the ReadySheet™ Slide sheet.
Name: ________________________ Title__________________Signature____________________
Evaluator Signature: _______________________________Date:___________________________
3/27/13
QuickMove Stand Aid
Competency Assessment
Competency Statement: After attending this orientation, the clinician will be able to properly use specialty
equipment according to manufacturer’s recommendations. If the performance criteria are not met, additional
training will be provided. If the caregiver has any questions always consult the product owner manual prior to
use or contact your Handicare Representative.
Directions: Check the appropriate box for each performance criteria. Schedule retraining as indicated.
ALWAYS EXPLAIN PROCEDURE TO RESIDENT OR
PATIENT BEFORE AND DURING TASK.
Verbalized
understanding
Performed
Needs
review
Describe and demonstrate equipment features
Safety checks
•
•
•
Patient weight being appropriate for product limits
Shin bolster centered and feet on foot plate
Patient meets phyiscal and cognitive guidelines
Patient physical and cognitive guidelines
1. Patient able to weightbear and has appropriate upper
body strength to actively paticipate in standing position
2. Patient is aware of surrounding and able to follow
directions.
3. Patient is not combative or agitated
Operation of QuickMove Stand Aid (374 lbs max.)
1. Position QuickMove at bed or chair using leg spreader
open and close base prior to placing patient’s feet on
foot plate.
2. Adjust shin bolster just below knee to allow the patient’s
knees to bend
3. Open and adjust seat swing pads to allow patient to
stand and close seat swing pads for safety and sitting
when necessary
4. Adjust tilt handle bar mechanism to assist patient to
stand and return to sitting position
5. Lock and unlock casters. Following adjustment of shin
bolsters, lock rear casters prior to standing patient
6. Unlock casters once patient is secure and caregiver is
ready to move patient.
7. When moving patient on QuickMove through door
thresholds back over all raised barriers
8. Observe and verbalize understanding of transfer from
chair, bed, commode/toilet
9. Demonstrate proper body mechanics when moving
QuickMove with patient. Explain significance of
ergonomic design
10. Caregiver verbalizes knowledge of where QuickMove
product owner manuals are kept
I understand how to use the equipment and all of my questions have been answered. If I have any questions prior
to use of transfer device I will consult the owner/user manual for the QuickMove Stand Aid.
Name: ________________________ Title_______________Signature___________________________________
Evaluator
Signature: _________________________________Date:______________
3/27/13
OneWaySlide™ Sliding Mat
Clinical Guidelines for Use
Competency Statement: After attending this orientation, the clinician will be able to properly use specialty
equipment according to manufacturer’s recommendations. If the performance criteria are not met, additional
training will be provided. If the caregiver has any questions always consult the product owner manual prior to
use or contact your Handicare Representative.
Objective: Caregiver will be able to choose the correct devices and demonstrate competency by using correct
procedure to safely reposition a patient up in chair or wheelchair.
Directions: Check the appropriate box for each performance criteria. Schedule retraining as indicated.
ALWAYS EXPLAIN PROCEDURE TO RESIDENT OR PATIENT BEFORE AND DURING
TASK.
1. Product description
a. The OneWaySlide™ is used to improve the sitting positions of a patient in a
chair or wheelchair
b. The OneWaySlide™ is an ultra-low friction device that allows sliding to reposition
up in a chair or wheelchair and inhibits sliding in the opposite direction that
causes uncomfortable and unsafe body posture.
c. The OneWaySlide™ comes in two sizes and supports a maximum weight of
330 lbs. and 440
d. See product manual for cleaning instructions
2. Functional inspection:
a. Always check assistive device after laundering and regularly to insure that the
product is not worn, damaged or bleached.
b. Pull on handles to assure they can withstand a heavy load and if there are signs
of wear the product should be discarded
3. Placement of OneWaySlide™
a. The OneWaySlide™ should be left under the patient at all times when seated in
a chair or wheelchair.
b. Fasten the OneWaySlide™ to the back of the wheelchair or chair using the tie
straps.
c. The OneWaySlide™ label should be facing up with the arrow pointing toward the
back of the chair.
d. There are three sets of loop straps on each side of the OneWaySlide™. The
lowest set of loops should be low where the seat meets the back rest. This will
provide the caregiver with enough loops to reposition the patient several times
without repositioning the OneWaySlide™
4. Repositioning patient up in Chair or Wheelchair
To reposition a patient up in a chair or wheelchair who has slide down over time and
is now in an uncomfortable unsafe posture please follow these steps:
a. Place a SystemRoMedic FootStool™ or device under the patient’s feet to elevate
thighs and eliminate friction points.
b. Stand behind chair or wheelchair and grasp the lowest sets of loops on both
sides of the OneWaySlide™ while bending your knees to maintain proper body
alignment.
c. Pull up on loops and patient will effortlessly slide up in the chair and the one-way
material of the OneWaySlide™ will retard movement down.
d. If the patient is heavy and places the caregiver at risk if manually repositioned
then an Eva floor lift or equivalent can be used by placing loops in spreader bar
one on each side. The lift can be raised and the patient will be repositioned up in
the chair or wheelchair. The FootStool™ can remain under the patient’s feet.
Verbalized
understanding
Performed
Needs
review
I understand how to use the equipment and all of my questions have been answered. If I have any questions prior to
use of the transfer device I will consult the owner/user manual for the OneWaySlide™.
Name: ________________________ Title_______________ Signature____________________
Evaluator Signature: _______________________________Date:______________
3/26/13
MultiLift Mobile Lift
Competency Assessment
Competency Statement: After attending this orientation, the clinician will be able to properly use specialty
equipment according to manufacturer’s recommendations. If the performance criteria are not met, additional
training will be provided. If the caregiver has any questions always consult the product owner manual prior to
use or contact your Handicare Representative.
Directions: Check the appropriate box for each performance criteria. Schedule retraining as indicated.
Describe and demonstrate equipment features
Verbalized
understanding
Performed
Needs review
Safety checks
•
•
•
•
•
Battery: Locate and remove, operate red on/off switch, verbalize
understanding of charging system (3 quick short beeps indicate
recharging necessary).
Mast and boom secure, all nuts and bolts secure
Only operate motor driven MultiLift on flat surface
Locate and operate emergency down
Sling free of defects, tears or fraying of loops
Operation of MultiLift 550
1. Identify lift capacity is within limits for patient (550lb max)
2. The lift controls are available in remote and on the lifting mast of the unit
3. MutiLift is motor driven patient lift controlled by a steering handle. The
rear wheel can turn meaning that the lift can be moved sideways or
rotate on its own axis and be placed where exactly required.
4. The Lifting Mast can telescope up and down to provide various lifting
height options and the lifting strap can lower or raise independently.
(Demonstate)
5. Demonstrate lift controls using info control panel and remote controls.
Drive lift forward and backward, side to side and operate the mast up
and down.
6. Brake locking can be activated with the brake pawl on the rear wheel.
Never release by hand and always unlock wheels when lifting.
7. Position lift legs under bed or around chair using leg spreader button as
needed
8. Select appropriate sling and position under patient and attach same
color straps on each side starting with the leg straps (See sling selection
guidelines)
9. Press “Up” button to retract sling strap and raise patient in sling only
high enough to clear surface. For additional lifting height you may use
the controls to raise the mast. Move lift to receiving surface and center
patient.
10. Press “down” button on lift or hand control to lower lifting strap
11. Unhook sling from sling bar (verbalize method)
12. Observe and verbalize understanding of Lift/Transfer from chair, bed,
floor
13. Caregiver can verbalize as to where the user manual is kept on the unit
I understand how to use the equipment and all of my questions have been answered. If I have any
questions prior to use of lift I will consult the owner/user manual for the MultiLift 550 floor lift product.
Name: ________________________ Title__________________Signature____________________
Evaluator Signature: _______________________________Date:___________________________ 3/26/13
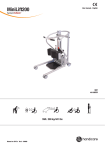
MiniLift 200 Stand Assist Lift
Competency Assessment
Competency Statement: After attending this orientation, the clinician will be able to properly use specialty
equipment according to manufacturer’s recommendations. If the performance criteria are not met, additional
training will be provided. If the caregiver has any questions always consult the product owner manual prior to
use or contact your Handicare Representative.
Directions: Check the appropriate box for each performance criteria. Schedule retraining as indicated.
ALWAYS EXPLAIN PROCEDURE TO RESIDENT OR
PATIENT BEFORE AND DURING TASK.
Verbalized
understanding
Performed
Needs
review
Describe and demonstrate equipment features
Safety checks
•
•
•
Person weight being lifted appropriate for lift limits
Shin bolster centered and shin strap secure
Sling free of defects, tears or fraying of loops
Operation of Mini 200 Stand Assist Lift (440lbs max.)
1. Select appropriate sling and place around patient
2. Position lift at bed or chair using leg spreader button as
needed
3. Extend sling bar toward patient prior to attaching sling.
Once sling is attached take up any slack by retracting
sling bar away from patient.
Sling Attachment: Attach sling to sling bar. Use the same
colored loop on the patient’s left side as the patient’s right
side. Demonstrate use and rationale for slide bar when
connecting Thorax Sling
4. Ensure wheels are UNLOCKED (Explain rationale)
5. Press “up” button on lift hand control to lift patient.
6. Move lift to receiving surface and center patient
7. Press “down” button on lift hand control
8. Unhook sling from sling bar (verbalize method)
9. Battery: Locate and remove, operate red on off switch,
verbalize understanding of charging
10. Locate and operate emergency down
11. Observe and verbalize understanding of Lift/Transfer
from chair, bed, commode/toilet
12. Demonstrate proper body mechanics when moving lift
with patient. Explain significance of ergonomic design
13. Verbalize understanding of unique standing posture as it
relates to lift design
14. Caregiver verbalizes knowledge of where lift/sling
product owner manuals are kept
I understand how to use the equipment and all of my questions have been answered. If I have any
questions prior to use of lift I will consult the owner/user manual for the Mini 200 Stand Assist Lift.
Name: ________________________ Title__________________Signature____________________
Evaluator Signature: _______________________________Date:___________________________ 3/25/13 FlexiGrip™ Sit-Stand Manual Aid
Clinical Guidelines for Use
Competency Statement: After attending this orientation, the clinician will be able to properly use specialty
equipment according to manufacturer’s recommendations. If the performance criteria are not met,
additional training will be provided. If the caregiver has any questions always consult the product owner
manual prior to use or contact your Handicare Representative.
Objective: Caregiver will be able to choose the correct transfer assistive device and demonstrate
competency by instructing the patient on safely transferring from a seated position between wheelchair
and bed, commode or chair. For transfer where a gap must be bridged an EasyGlide transfer board should
be used
Directions: Check the appropriate box for each performance criteria. Schedule retraining as indicated.
Verbalized
Performed
Needs
ALWAYS EXPLAIN PROCEDURE TO RESIDENT OR PATIENT BEFORE AND
understanding
review
DURING TASK.
1. Product description
a. FlexiGrip is used as a helpful grip that facilitates more active raising of
the patient from a recumbent to a seated position
b. FlexiGrip is used to provide leverage to transfer and reposition
c. The FlexiGrip supports a maximum weight of 330 lbs.
d. See product manual for cleaning instructions
2. Functional inspection:
a. Always check assistive device after laundering and regularly to insure
that the product is not worn, damaged or bleached.
b. Pull on handles to assure they can withstand a heavy load and if there
are signs of wear the product should be discarded
3. Placement of Flexigrip
a. Fasten the FlexiGrip by drawing the straps through the loops to cinch to
a stable strong structure on the bed such as frame, mattress pan or
other secure place that can withstand the maximum weight and pull
force.
b. Caution: Never cinch FlexiGrip to a part on the bed that moves
4. Transferring a patient
a. Using the FlexiGrip from a seated position between wheelchair and bed,
toilet or chair can be performed by the patient or individual with minimal
or no assistance from the caregiver. The FlexiGrip should be attached to
the opposite side of the transfer point to provide leverage for the patient.
b. Example: If a patient is transferring from a wheelchair to a bed then
position the bed slightly lower than the wheelchair. Place the bed with
the head of bed in a seated position. Use an EasyGlide or other type of
slide board to bridge the gap. The FlexiGrip should be secure to the
opposite side of the bed to the frame. Hand the loop ladder to the
patient/individual. The FlexiGrip can be used as leverage for the transfer.
5. Sitting up in bed or on side of bed
a. The FlexiGrip can be used to sit up in bed for repositioning or to move to
the side of the bed to facilitate egress from the bed. This can be
accomplished by securing the FlexiGrip to the frame at the foot of the
bed. The patient/individual can use the loops as a ladder to pull them to
a seated position or swing their legs to sit at the side of the bed.
I understand how to use the equipment and all of my questions have been answered. If I have any questions
prior to use of the transfer device I will consult the owner/user manual for the FlexiGrip™.
Name: ________________________ Title__________________ Signature____________________
Evaluator Signature: _______________________________Date:___________________________
3/26/13
EVA 450 and 600 Mobile Lift
Competency Assessment
Competency Statement: After attending this orientation, the clinician will be able to properly use specialty
equipment according to manufacturer’s recommendations. If the performance criteria are not met, additional
training will be provided. If the caregiver has any questions always consult the product owner manual prior to
use or contact your Handicare Representative.
Directions: Check the appropriate box for each performance criteria. Schedule retraining as indicated.
Describe and demonstrate equipment features
Performed
Verbalized
understanding
Needs review
Safety checks
•
•
•
Mast and boom secure
All nuts and bolts secure
Sling free of defects, tears or fraying of loops
Operation of EVA 450 and 600 Mobile Lift
1.
2.
3.
Identify lift capacity is within limits for patient
Position lift around bed or chair using leg spreader button as
needed
Sling selection and application competency
• Highback Sling
• Limb Sling
• Repostiioning
4. Select appropriate sling and position under patient
5.
Attach sling to sling bar* Use the same colored loop on the
patient’s left side as the patient’s right side. Select shorter
shoulder loops and longer leg loops for upright seating. Select
longer shoulder loops and shorter leg loops for more reclined
seating.
6.
7.
8.
9.
10.
11.
Ensure wheels are UNLOCKED (Explain rationale)
Press “up” button on lift or hand control
Move lift to receiving surface and center patient
Press “down” button on lift or hand control
Unhook sling from sling bar (verbalize method)
Battery: Locate and remove, operate red on/off switch, verbalize
understanding of charging
12. Locate and operate emergency down
13. Observe and verbalize understanding of Lift/Transfer from chair,
bed, floor
14. Demonstrate proper body mechanics when moving lift with
patient
15. Caregiver can verbalize as to where the user manual is kept on
the unit
*If attaching a seated sling or limb sling, the sling bar will be parallel with the patient’s shoulders. Repositioning sling
types should be connected with the sling bar perpendicular to the patient’s shoulders.
I understand how to use the equipment and all of my questions have been answered. If I have any
questions prior to use of lift I will consult the owner/user manual for the EVA floor lift product.
Name: ________________________ Title_____________ Signature_______________________________
Evaluator Signature: _____________________________Date:_____________
3/27/13
EasyGlide™ Slide Board
Clinical Guidelines for Sling Application
Competency Statement: After attending this orientation, the clinician will be able to properly use specialty equipment
according to manufacturer’s recommendations. If the performance criteria are not met, additional training will be provided. If the
caregiver has any questions always consult the product owner manual prior to use or contact your Handicare Representative.
Objective: Caregiver will be able to demonstrate competency by using correct procedure to safely apply a sling using the
EasyGlide™ Ovals.
Directions: Check the appropriate box for each performance criteria. Schedule retraining as indicated.
ALWAYS EXPLAIN PROCEDURE TO RESIDENT OR PATIENT
1.
2.
3.
Verbalized
understanding
Performed
Needs
review
Product description
a. The EasyGlide™ is a thin flexible slide board used to bridge gaps when transferring
from bed to wheelchair, bed to gurney or location that has a gap to bridge. Using a
pair of EasyGlide™ can is effective in reducing the strain while applying slings for
patients of any size and in any position.
Functional inspection:
a. Carefully bend the EasyGlide™ to check strength and durability
Placement of EasyGlide™ for sling application
a. The EasyGlide™ can be used to apply slings in a supine or seated position. By using
two EasyGlides™ a channel is created to slide the sling between to eliminate friction
and facilitate sling placement. When apply a sling for someone in a supine position
who is on a floor such as linoleum or tile you will require only one EasyGlide™.
Seated Sling Application
When applying a sling on someone in a chair, wheelchair, car seat or any other seated
position please follow the following steps.
a. Place two EasyGlides™sliding boards together and hold handle. Insert the pair of
EasyGlides™ in the small of the back of the patient.
b. Rotate the EasyGlide™ sliding boards toward the head of the patient until they are
aligned with the spine.
c. Insert the lifting sling between the EasyGlide™ sliding boards and pull on both sides
of the lifting sling until the bottom of the back of the sling reaches the tailbone of the
patient.
d. Remove the EasyGlide™ sliding boards and apply the leg straps.
Recumbent Sling Application
When apply a sling to someone in a recumbent position in a bed or who has fallen on the
floor please follow the following steps.
a. Insert a pair of EasyGlide™ sliding boards perpendicular to the spine of the in the
small of the back of the patient.
b. Rotate the EasyGlide™ sliding boards toward the head of the patient until they are
aligned with the spine.
c. Insert the sling between the EasyGlide™ sliding boards and pull on both sides of the
lifting sling until the bottom of the back of the sling reaches the tail bone of the
patient.
d. Remove the EasyGlide™ sliding boards.
Positioning Sheet Application
a. Use the steps above for a Recumbent Sling Application
b. Use the steps above for a Recumbent Sling Application
c. Insert the folded positioning sheet between the EasyGlide™ sliding boards and pull
on both sides of the lifting sling until the bottom of the back of the sling reaches the
tail bone of the patient.
d. Fold out the positioning sheet by pulling both sides of the sheet under the legs of the
patient until the bottom of the sheet reaches the end of the bed and remove the
EasyGlide™ sliding boards.
I understand how to use the equipment and all of my questions have been answered. If I have any questions prior to use of
the transfer device I will consult the owner/user manual for the EasyGlide™ Sling Application.
Name: _______________________________________ Title________________________Signature_______________________________________
Evaluator Signature: ____________________________________________Date:__________________
3/26/13


