1
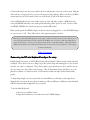
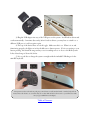
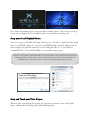
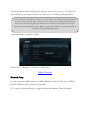
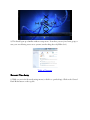
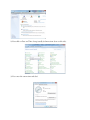
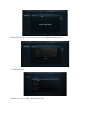
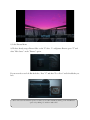
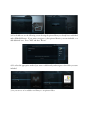
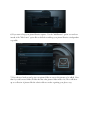
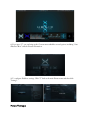
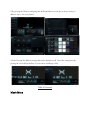
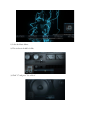
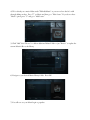
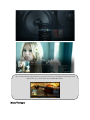
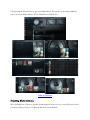
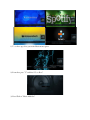
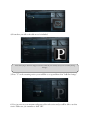
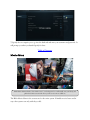
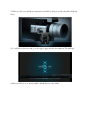
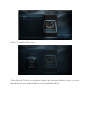
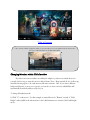
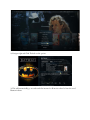
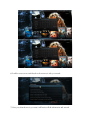
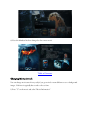
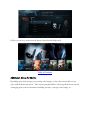
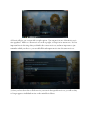
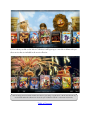
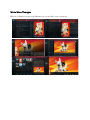
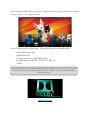
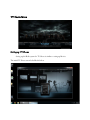
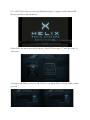
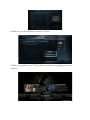
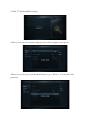
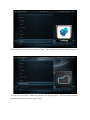
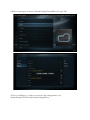
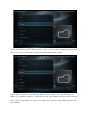
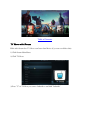
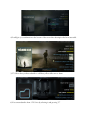
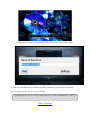
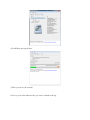
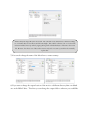
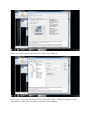
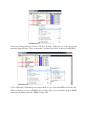
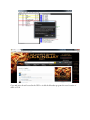
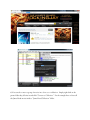
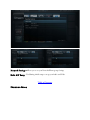
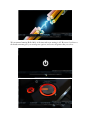
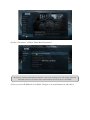
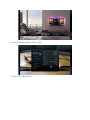
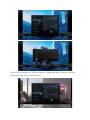
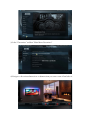
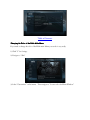
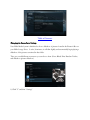
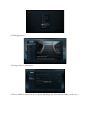
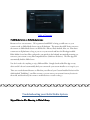
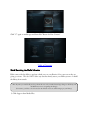
End User Manual Helix Media Systems are recognized as leaders in integration and are renown for being the most advanced media systems available on the market. We are what the industry has been waiting for almost a decade to achieve. As technology changes and media is becoming more diverse and fractured, the companies pushing the same technology they represented for years have fallen behind. Innovation comes most often comes from new players not from big box companies. At Helix we are not only revolutionizing what the other companies have done in the past, but are constantly pushing the envelope of what is possible. Enter the Helix Media System Please take a few minutes to read through our table of contents, end user manual and setup procedures. For questions or comments, contact your custom installer professional first before contacting Helix. Helix only sells its products through custom installer professionals. Helix Media System Installer Table of Contents 1. Unboxing and Connecting the Helix Media System (Should be already performed by Customer Plugging in and connecting the Helix Media System Installer Professional) Connecting the RF mini keyboard/touchpad for setup 2. Basic Controls with the RF Mini Keyboard/Touchpad 3. Initial Bootup (Should be already performed by Customer Installer Professional) Audio/Video Setup Audio Playback Device Selection Audio Output and Pass-through Setup Network Setup Date and Time Setup 4. The Helix Main Menu Weather Setup Pictures Setup Picture Viewtypes Music Setup Music Extra Features Music Viewtypes Streaming Music Movies Setup Changing Metadata Changing Artwork (Fan art) Additional Menus for Movies Box Sets and Collection Management Movie Viewtypes Cinema Mode TV Shows Setup Setup TV Show Folder Structure Additional Menus for TV Shows TV Show Viewtypes App Menu YouTube Streaming Video Apps (Genesis, IceFilms, 1 Channel, etc) iStream (Setup Example) Setup Premium Version Subscription Using iStream Movies TV Shows Content Ripping with Helix Helix Auto-rip Manual Rip Ripping TV Show Discs Support Menu Remote Support Video Manager Media files File Manager Manual Metadata Parental Controls Network Settings Helix A/V Setup Shutdown Menu 5. Advanced Customization - (Must by done by Custom Installer Professional) Custom Libraries Disabling Menu Options Changing the Master Code Locking Helix Menu's Disabling Viewtype Changing (Enabling Kiosk Mode) Changing the Helix Menu Color Importing Media using File Manager from USB Flash Drives or External Hard Drives Customizing the Helix Screen Saver 6. Plex Media Server on Helix 7. Troubleshooting Your Helix Ripped Movies Not Showing in Library Hard Resetting the Metadata Library (does not delete data) 8. Warranty and Replacement Policy Unboxing and Connecting Your Helix Media System Plugging in and connecting your Helix Media System 1) After unboxing, locate the power cable in the box and plug into a the rear of the system. Plug the other end into a surge protector to protect it from power surge damage. Please note that your Helix system may have an on/off switch on the rear of the device as well as the button in front. 2) Your Helix Media System comes with a variety of video and audio outputs. All Helix devices come with HDMI and many come with optical and analog audio options as well. For best results use HDMI. HDMI is the only device that can transmit HD Audio. Helix systems prefer the HDMI 1 input on whatever they are plugged into, or the PC HDMI input on your receiver or TV. They will work on other inputs but prefer to be first. *Please keep in mind that Helix systems can only output 1 audio and 1 video stream at a time. This means you cannot run independent audio and video streams from the Helix units. For that you will need additional zone players (Link Systems). You may need to utilize a matrix switch to run multiple displays. Although hundreds of Helix systems have been used with matrix switches with no issues at all, we cannot guarantee or offer support for matrix switch issues. Table of Contents Connecting the RF mini keyboard/touchpad for setup Included with each system is a RF USB keyboard with touchpad or full size wireless keyboard with touchpad. These devices can are to help you get the system setup and running prior to any control interface you want to configured. These devices make a great alternative for use as well if someone does not want to use this with a control system. They do have limited range and if they are to be placed in a cabinet or a distant location, a USB extension cable can improve their functionality greatly. To keep things simple. we have written this user manual like you will only use the input device shipped with our system, however keep in mind you will most likely use a different control method with the important keys mapped the way you prefer. To use the Mini Keyboard: 1) Power on your Helix system. 2) Open the back battery cover and retrieve the USB RF Adapter. 3) Plug the USB adapter into any of the USB ports on the system. It will load its drivers and work automatically. Sometimes (but rarely) after it loads its drivers, you may have to switch it to a different USB port so it self-recognizes again. 4) The top of the devices have an on/off toggle. Make sure this is on. When it is on and functioning properly, the lights on its face should react to button presses. If it is not reacting to your button pressing, first check the range and try to use it standing next to or close to the Helix system. It has a listed range of about 20-30 feet. 5) It is a good idea to charge the system overnight with the included USB charger for the mini RF keyboard. *Our systems can also work with any 3rd party control device as well (standard wired or wireless keyboards & mouse, blue-tooth devices, etc. (note that they do not have built in blue-tooth receiver so you will need to make sure you get a USB blue-tooth adapter). Table of Contents Basic Controls for the RF Mini Keyboard/Touchpad *If using a control interface, you will want to make sure you at least map the bolded keys to control interface. For instance, with our Control 4 driver, the "C" button is commonly mapped to Control 4's "Guide" button. Most Useful Keys in Bold: Key Action in Menu During Video Playback C Context menu Playlist F Fast Forward I Info L Next subtitle M Player controls (OSD) Player controls (OSD) O Displays CPU/Video info Displays CPU/Video info P Q Play Queue R S Rewind Settings Menu T W Info Toggle subtitles on and off Marked as watched / unwatched X Stop Z Zoom/aspect ratio Space Pause/Play ↵ Enter Select Player Controls ← Backspace Up one Menu Back to main menu ← → Move Left Right ↑ Up ↓ Down . period , comma ' quote Tab ⇆ PrintSrc - minus + plus = equals \ backslash Skip forward Skip backward Step back 30seconds Forward 30seconds Forward 10mins OR next chapter Step back 10 mins OR prev chapter Step forward 30 seconds Step backward 30 seconds Step backwards 7 seconds Full screen mode Screenshot Volume down Volume up Volume up Toggle windowed mode Full screen mode Screenshot Volume down Volume up Volume up Toggle windowed mode Step forward 10min OR Next chapter Step backward 10min OR Previous chapter [ left bracket ] right bracket CTRL+END Shutdown Helix DEL Delete file [numbers] then Return Esc ⇧ Shift + LETTER Remove from playlist (Playlist editor only) Jump to that time in playback. Ex: 1234 + return will jump to 12 minutes and 34 seconds in movie. Previous menu Jump to that letter in Library Exit full screen Table of Contents Entering "Master Mode" for Unlimited Access/Setup Contact your customer installer to get the Master Code for unlimited access or setup. Table of Contents Initial Bootup of your Helix System (This should have been completed by your Custom Installer Professional) Audio/Video Setup 1) Navigate to the Helix Support Menu Option and the Helix A/V Setup Option. Now, Follow the guided tutorial to setup your audio and video options. This is where you can get your screen to exactly fit the TV and make sure the correct audio device is being used. Setup your Sound Playback Device: There are two parts to the Helix A/V Setup. Both very easy. The first is to pick what audio output device to use (HDMI, optical, etc). If you are using HDMI which is preferred, Helix Systems are smart enough to recognize the exact device you are sending the audio to. So it should show "Yamaha RX-V677 or Denon AVR-X4000, etc. in the audio output options. *We have it set by default to bitstream the audio so your audio devices are doing the hard decoding work (this is the highest quality of audio possible). Do not be surprised when the user reports the sound coming from their Helix system is far better than their very expensive audiophile equipment they purchased. Setup and Tweak your Video Output When the video setup dialogue box appears, the only option you need to select is the Display button. Altering the other settings may void the Helix warranty. 1) Click Display Option 2) Click the bottom line that says "Custom Aspect Ratio" and use the sliders to get the perfect fit for your screen (61 and 61 is a good starting point for most HDTV's). Once you have the perfect fit click next and finish and you are done! Audio Output Device and Pass-through Selection Lastly, you must select within your Helix media software the correct Audio type for it to output and how many speakers you want it to send audio to. 1) Click "S" and go into settings: 2) Click System 3) Click Audio Output 4) Cycle through the Audio Output options until you arrive at the correct one. Note that some options will give you an option at the bottom of the screen to "Enable a pass-through device". * If you are having trouble figuring out which one is correct. Have a movie playing in the background while you do this. If the wrong audio output is selected. The video may appear very choppy and unwatchable. If this occurs, let the video keep playing then follow the above settings and cycle through the audio output settings and the pass-through device settings. When you get the right combination, the video will speed up to normal speed and the sound will begin playing! 5) Select the number of speakers you have. 6) Press "Esc" or "Backspace" to back out to main menu. Table of Contents Network Setup For your convenience, Helix operates on a hidden Windows 7 network. This gives you all the benefits of Windows with very little of it downsides. 1) To setup your network Navigate to support and then the submenu "Network Settings" 2) This should open up a familiar windows setup screen. From here you can join a home group or start your own allowing access across systems (another thing that only Helix does!). Table of Contents Date and Time Setup 1) While you are in the Network settings menu (or click it to open back up). Click on the Control Panel Home button on the top left. 2) Next click on Date and Time Setup (usually 3rd menu item down on left side). 3) Now enter the current time and date! Table of Contents The Helix Main Menu Weather Menu Helix Media Systems are equipped with "Conditional Weather" Background images. Meaning that the background image for Weather your Helix Media System will change as the weather outside changes. So if it were snowing, the picture below would be the same landscape picture but with snow all over! 1) To setup weather click on the weather menu option: 2) As you can see no weather data is displayed. Press the directional arrows () until the general weather menu appears (it's usually the arrow twice). * The reason it might be a different direction than is because depending upon your "viewtype " or what layout you have it on depends on what actions each directional arrows do. 3) Navigate to "Settings" 4) Once in Settings click on settings again. 5) This will open up your location. You can have multiple locations you can set (once setup, these locations can be scrolled through on your main weather screen by using the directional arrows). 6) Enter the zip code or city for the location you would like information on. 7) Confirm location. 8) Make sure to press "OK" (don't just back out) 9) Enjoy your weather report! *Note that within the first settings screens that are various options you can select also, included extended weather report (10 day), weekend weather report, or hour by hour. Table of Contents Pictures Menu 1) Select Pictures Menu 2) We have already setup a Picture folder on the "E" drive. To add picture libraries, press "C" and select "Edit Source" on the "Pictures" option. If your screen does not look like the below. Press "C" and then "Go to Root" and it should take you here. *If for some reason the "Pictures option is not there, we can add it manually by clicking on the "Add Pictures" option or by clicking "C" and then "Add Source" 3) You should now see the following screen showing the picture library we already have established under E\Media\Pictures. If you want to navigate to other picture libraries you want included, or to add additional ones. Press "Add" and then "Browse" 4) No select the appropriate method you want to add them by and navigate to the folder you want included. 5) As you can see we've added a new library to our picture folder. 6) If you want to keep your picture libraries separate. Use the "Add Pictures" option over and over instead of the "Edit Source" option like we did below and keep your picture libraries as independent as possible. 7) Now when we back out and go into our picture folder we can see the pictures we've added! Note that if you add a nested folder (A folder that has other picture folders inside of it) Those will show up as a collection of pictures like the selection below to make organizing your photos easy. 8) If you press "C" you can bring up the Context menu which has several options, including "Start Slideshow Here" and also Picture information. 9) To configure Slideshow settings, Click "C" back at the main Picture menu and then click "Settings". Picture Viewtypes 1) By pressing the UP arrow and going into the Picture Menu you can choose from a variety of different way to view your pictures. 2) Each Viewtype has different settings that can be adjusted as well. Access the setting menu by pressing the correct directional key on your remote (usually up or left). Table of Contents Music Menu 1) Select the Music Menu. 2) This is what it should look like: 3) Click "C" and press "Go to Root" 4) We've already set a music folder under "E\Media\Music" as you can see here but let's walk through adding another. Press "C" on Music and then go to "Edit Source". If you do not have "Music" option press "C" and go to "Add Source" 5) Click "Add" then "Browse" to add an additional Music Folder or just "Browse" to replace the current Music folder as the library. 6) Navigate to your desired Music Library folder. Press OK. 7) You will now see your Music begin to populate. *Keep in mind that folder structure is important. The easiest option is to have folders for each artists and that is all. If you get into sub-folder after subfolder, metadata may not work perfectly or be missing. Music Extra Features 1)If you leave the music menu to go back to the main menu and browse around in Helix, it will continue to relay to you what is currently playing as well as some neat widgets such as most played albums and songs etc. If you start a movie. The Music will stop and the movie sound will take over. 2) We've also added some extra features, like by pressing the "C" button on a song or artist you are able to pull up more album information, extra information and even search for it on YouTube. * Also, we have enabled a widget that when you press the UP arrow you can quick browse the latest music additions that you've made directly from the Helix Main Menu. Music Viewtypes 1) By pressing the direction keys to get to the Music Menu. You can choose from many different ways to view your Music Library. We've included several here below. Table of Contents Streaming Music Submenu We've included four of the most popular streaming music services for you to enjoy. However, before you can use them you have to set them up and enter your credentials. 1) To set these up, select your main Music menu option. 2) From there press "C" and then "Go to Root" 3) Next Click on "Music Add-Ons" 4) From there you will see the add-ons we've included. *Note that trying to add more unapproved services will void your warranty (and yes we can tell by the log changes). 5) Press "C" on the streaming service you would like to set up and then select "Add-On Settings". 6) Now just enter in your username and password for each service and you will be able to use that service! Make sure you remember to click "OK". 7) Spotify does not require you to go into the back end and enter your username and password. It will prompt you when you launch Spotify for these. Table of Contents Movies Menu *Helix Movie Menu includes a "Live DVD Covers" as its background so it will actually scan your library and pull in the DVD covers/artwork from your most recent movie additions. The Helix Movies Menu is the cornerstone for the entire system. It handles movies better and in ways other systems can only wish they could.. 1) When you first enter the Movies menu there should be nothing in it and it should look like the below: 2) To add movies, back out and go to the support page and then the submenu "File Manager" 3) Here you will see we've already added a default Movies source folder. 4) Press "C" and then "Edit Source" 5) Here like with TV Shows you can Browse (replace) the existing movie library we have, or you can add (add then browser) additional libraries to the default Helix Library. 7) Once added, press ok and then make sure you tell it that this directory container Movies. Press ok. 8) Now when you return to the movies folder it should begin populating your movies. Table of Contents * Also, we have enabled a widget that when you press the UP arrow you can quick browse the latest movies that you've added directly from the Helix Main Menu. Changing Metadata within Helix Interface If you have incorrect metadata, most likely the culprit is you have not named the movie correctly; the best way to name the movie is Movie Name (Year). Keep in mind 99.9% of all wrong metadata showing up has to do with incorrect file name structure. Also, if you want a different background (fanart) or movie cover (poster) you can choose from a selection which Helix will automatically download and have ready for you. To change Metadata/artwork: 1) Click "C" on the movie. For this example we named the movie "Batman" instead of "Dark Knight" and it pulled in the information for the 1989 Batman movie instead of the Dark Knight movie. 2) Navigate right and Click "Refresh on the options. 3) This will automatically go out and search the internet for all movies related to have the word Batman in them. 4) You can navigate down to Batman Begins but for this example we will pretend our selection didn't automatically populate or we completely misnamed this movie and the option we want doesn't even appear. You can Manually select the movie by clicking the "Manual" button in the top right. 5) Now simply delete the movie name that is there and enter in the movie name you want. 6) It will now run a new search based on the new movie title you entered. 7) Once you select the movie you want it will retrieve all the information and artwork. 8) Now the Metadata has been changed to the correct movie! Table of Contents Changing Movie Artwork You can change movie artwork very easily if you grow tired or want different cover or background images. Each movie typically has several to choose from. 1) Press "C" on the movie and select "Movie Information" *You can see here there are several other options when you press "C" including "mark as watched", "Search for the Trailer " and "Manage" which allows even more options such as "Removing from Library" (deletes file permanently) and "Managing Movie Sets" for when you want lump movies into a set. 2) Navigate right to "Choose Art" Selection. *Note the Cast names above the options bar. You are able to press the up direction arrow and select a specific cast member which will then search your library for any other movies of TV shows that that cast member stars in! 3) Here you can see the different artwork options you can change. Depending upon your viewtype you are in will depend on what artwork shows. Most of the time the only 2 that matter are Poster, and Fan art (and sometimes Banner). 4) Now highlight the different Fan arts to see what your options are. When you find one you like select ok with it highlighted. 5) Here it shows you've selected the new Fan art. Press ok or back out to the main Movies section. 6) Here you can see your new artwork that we selected in the background. Table of Contents Additional Menus for Movies Depending upon what viewtype you are using, each viewtype one has other screens that you can access with the directional arrows. These screens generally will be for showing off the movie artwork or bringing up more movie information including run time, a synopsis, critic ratings, etc. Table of Contents Managing Box Sets and Collections within Helix Helix has a very easy way to manage collections of movies or box sets. It basically allows you to group any movies you want together, name that collection, and then let you use any of the artwork from the movies found in that collection as the artwork for it. 1) Here we show a lot of Muppet Movies we want all under one folder. First press "C" to bring up the menu. 2) Then select "Manage" 3) Then select "Manage Movie Set" 4) Next it will give you a screen with a couple options. You can put it in one of the movie sets it auto-populates. Add it to a New movie set on the top right, or keep it in its current one. It is less important here in choosing what you think is the correct movie set, and more important to just remember which you chose so you can add all the subsequent movies into the same movie set. 5) Once you have done this to all the movies you want in that specific movie set, you will see they no longer appear as individual movies on the main Movie Menu. 6) Now when you click on the Movie Collection, it will open up to a new Movie Menu with just those movies that are included in the movie collection. *You can change the artwork and metadata the same way you change a regular movie. All the artwork from any movie found within the collection can be used as your "Collection artwork" on the main movie menu. Table of Contents Movie Menu Viewtypes Below is a collection of some of the different ways you are able to view your movies. Table of Contents Cinema Mode w/ Helix Helix Media systems have a great alternative play option called Cinema Mode. What Cinema mode does is give you the full Cinema experience. You can even enable screen scramblers and movie quizzes that are on screen while waiting for the feature presentation to start. 1) To watch a movie in Cinema Mode all you have to do is at the main Helix Menu, navigate to Movies and instead of selecting movies, select the submenu option "Cinema". 2) The next menu will look the same except you will see that it has a pop up with directions that tell you to press "Q" or "0" to queue the movie. 3) Now it will launch into Cinema Mode. The default Cinema Mode schedule follows: 1) Feature Presentation Clip 2) Helix Media Clip 3) Coming Attraction to match MPAA Rating 4) Sound Technology Clip (DD, Atmos, DTS, THX, etc) 5) Movie *You can skip forward to the next slide during the trivia with the directional arrows or "enter" button or bypass the slideshow by pressing the "backspace" button (be patient as it will take a second for it to quit the slideshow and start the next step). Table of Contents TV Shows Menu Setting up TV Shows Setting up the Helix system for TV Shows is similar to setting up Movies. The initial TV Shows screen looks like the below: 1) To add TV Shows back out to the main Helix Menu and go to Support and the submenu File Manager (just like we did with Movies). 2) Here follow the same steps we did for Movies. Select TV Shows, press "C" and "edit source" or "add source". 3) Navigate to the library you want to add TV Shows (our default E drive is already added), an then press OK. 4) Make sure you tell it this directory contains TV Shows. 5) When you go back into your TV Shows folder it should now be populating your movie collection. Table of Contents Proper TV Show Folder Structure Folder Structure is always important and how your Helix system knows how to operate and act. We have tried to make the Helix folder structure system for TV Shows as simple and allencompassing as possible. If you look here we have structured five different TV Shows different ways: 1) E\Media\TV Shows\Show name\ Season 01\S01E01\episode file (30 Rock Example) 2) E\Media\TV Shows\Show name\S01\episode file (Breaking Bad Example) 3) E\Media\TV Shows\Show name\episode files w/ SxxExx naming scheme (Friends Example) 4) E\Media\TV Shows\Show name\Season 1\episode file (Game of Thrones Example) As you can see, each of these populated correctly and pulled in the corresponding metadata without issues. If for some reason one of these naming structures does not work. Try an alternative . Table of Contents Alternative Menus for TV Shows Just like with Movies, the directional arrows can bring up alternative screens with more information about the show such as the show status, when the next episode airs, and the critic rating. TV Shows Viewtypes Helix gives you many different ways to view your TV Shows and have several of them represented here: Table of Contents App Menu Helix Media Systems are equipped with a variety of apps that have additional functionality and applications that allow for an even greater user experience. Many of these apps can be used for free (experience may vary) and are an exceptional way to access media. The Apps menu in Helix can literally replace Netflix, Hulu, Amazon Prime, Vudu, Google Play, and every other streaming service that exists. You are able to add movies right into your movie library with the movies you have ripped and subscribe to almost any TV shows so that every time a new episode is aired its right there waiting for you the next day. Like the most amazing and unlimited DVR that you can image. YouTube Helix Media Systems allow you to browse (and download) Youtube.com either signed in or not. 1) To setup YouTube. Open up the YouTube Helix App. 2) Click "C" and then Add On Settings 3) Here you can enter the username and password as well as configure several options. 4) Please note we have pre-set the download location to go to "Movies". You may have other preferences. Streaming Video Apps Probably the most powerful tool in existence today. Helix plays nicely with streaming video apps such as Genesis, Icefilms, iStream, and 1 Channel. They have a variety of functions and some might perform better than other for you but all are free! *Helix does not develop or support these apps and area all designed and maintained by 3rd party developers. When using these apps the user assumes responsibility for following all local and national and international copyright laws. We've set up most of these apps for you already. However as you can see with the below iStream app, there might be some changes that you can tweak or make to each one (if you want to). We've gone into detailed about one of the app iStream below. You can configure the other apps (if you wat to) in the same manner. iStream iStream is one of the apps that we will go into detail about because it emcompasses almost all of the other functions of the other apps. You can find that many of the other apps do some of the things that iStream does as well and some might even do it better. It can be used as a free or a premium service. The free iStream service streams movies and TV shows from private file share across the world which are not regulated or filtered for quality. This means mixed with a handful of very high quality streams might be a dozen or more bad quality streams (especially for new releases). The premium service filters out these bad streams and only allows you to view certified high quality streams meaning your success rate goes up and frustration level goes down). You are not downloading or taking possession of any content so it is completely legal and has the same legalities surrounding it as watching a YouTube stream. *iStream's performance is largely dependent on your Network Speed. If you have bad network speed, then you may want to disable this menu option altogether. Setting Up iStream 1) Go to iStream from the main menu and select. 2) Scroll down and select settings. 3) Next Select iStream to go into iStream settings. Then Scroll down and select xbmc integration. 4) Verify the movie and TV folders are pointed to the designated drive. We have them by default pointed towards our onboard storage E: drive. 5) Go back to settings screen and select TV Shows. 6) Select general tab and make sure metadata is checked and auto play is deselected. Sort should be checked also. 7) The "Indexers" tab should be set to IMDB to give you the most options for movie and TV streams. Make sure you do not select more than one or you will have to choose which indexer to use every time and creates another step in searching for titles. Table of Contents iStream Premium Version (Recommended) This section can be a bit complicated as there are many sources to select from. Generally the cost of the premium version will be about $8-$12 per month depending upon what package and service plan you choose. There are some that are free and some that are paid(premium). The premium services are reliable, have good streams, are confidential, have little downtime, and are trustworthy files. These include Furk.net, Easy News and Noobroom. All the other "sources" listed are free services and are not recommended without heavy trial and error first. We have used Primewire and Icefilms with very good success, but no free source is 100%. If you feel you want to use the free services, use at your own risk as some of these services have broken files, low quality files and time out before loading. However some do have good streams. It will not harm the system as they are merely streaming the files (not downloading and installing anything) however it can become frustrating for the end user if the files will not load. *You know your customers than we do. Some will understand the value and tradeoffs of using iStream as a free service. Others you will only want to install the premium service and manage their subscriptions for them. Others you might want to have them manage their subscriptions on their own, and others yet you may want to avoid iStream altogether if you think it is too much for them technology-wise to handle. Use your best judgment to maximize customer satisfaction. 1) Continuing from the same menu screen we left off above, select the "Sources" tab on the left sidebar (to recap we are in iStream\Settings\iStream\TVShows\Sources Tab). Here we make sure we enable which streaming services we want to activate and see. We have several selected for the free version but recommend for best results to only have the one(s) you have subscribe to activated (Furk.net, Easy News and Noobroom). 3) Back out and repeat for movies: (iStream\Settings\iStream\Movies\Sources Tab) 4) Now you will have to go back out one level of the settings menu to just iStream\Settings\TVShows and iStream\Settings\Movies. 5) In both the Movies and TV Shows menu's you can see a list of the streaming websites that will allow you to enter in your username and password for the premium content. 6) You will now need to set your client up with an account online. Go to the following web addresses to complete registration. www.easynews.com, www.furk.net and www.noobroom9.com Once you have signed up for an account you will need to enter the corresponding username and password here. 7) Once you have done that you will want to select the file sizes you prefer to offer. If you have a great internet connection you can make the max size up to 10GB which will give you practically zero loss of quality. If you have a slower internet connection you will want to limit the file sizes your customer sees. Anything above 2GB is generally a pretty good quality HD stream and anything above 700MB is a good quality DVD Quality. 1GB is a good filter to filter out all non-HD quality streams. 8) You will want to do the same thing for the other paid services if you subscribed to more than one (or left them activated on the sources menu screen). 9) Once you have completed the setup you can now browse for movies and TV shows and use the most advanced streaming system every created. Table of Contents Using iStream Movies with iStream 1) Click on iStream and then Movies. 2) This will bring you to a new windows that has a lot of different ways to sort movies by. 3) Once you select how you want to view them, you now are presented with a list of movies corresponding with what you selected. 4) You can either watch the movie directly from this screen by clicking on it and then clicking on an available stream. *The more you use iStream the more you will be able to recognize which streams and size of file work the best for you in your location. 5) If you like the movie so much you want it to live in your library forever. The beauty of Helix and the iStream is you can press "C" on the movie (instead of clicking it) and then press "Add to Helix Library". It will give you confirmation that addition has occurred. 6) Now when you go back out to the main menu, and into your Movie Library. Your added movie is waiting for you right alongside all your other ripped and stored movies. Table of Contents TV Shows with iStream Helix with iStream does TV Shows even better than Movies (if you can even believe that). 1) Click iStream Main Menu. 2) Click TV Shows 3) Press "C" on TV Show you want to Subscribe to and click "Subscribe" 4) It will give you confirmation at the bottom of the screen that subscription has been successful. 5) TV Shows that you have subscribe to will have yellow tallies next to them. 6) You can unsubscribe from a TV Series by selecting it and pressing "C" 6) Go back out into the Helix Main Menu and into your TV Shows folder and your subscribed to TV Shows will appear right alongside of all of your ripped or saved content. *You can also go the menu of iStream\TV Shows and manage your subscriptions easily and quickly by clicking the "Subscriptions" option. Remember, to unsubscribe. If not when you delete the show in the TV Shows section, you are still subscribed so it will be re-added to your library. Table of Contents Content Ripping on Helix Helix Media Systems has the most advanced and robust ripping engine that exists on the market today. With simple dual rip options it allows you the option of quickly and easily ripping a DVD or Blu-ray or fine tuning your rip to include deleted scenes, alternate endings, even foreign subtitles and specific quality of audio tracks. *Because we wanted the most diverse ripping program this procedure is actually done outside our media interface which means depending upon your control interface, you may or may not be able to use your control device to enter movie names, etc. when ripping movies and TV shows and may have to use the included RF keyboard w/ touchpad. Auto-rip Helix is setup with Auto-rip function which means in two clicks your content will be ripped to the Movies folder setup on Helix media systems "E" drive. 1) To use Auto-rip simply select the "Auto-rip" option on the Helix Main Menu: 2) Make sure the name is correct and preferably in the format "Movie Name (Year)" 3) Click Start and when the movie finishes it will let you know by eject itself out of the tray! You can track its progress by the on screen display! *Typical Ripping time does vary a bit but is usually 15minutes for a DVD and 40-50 minutes for a Blu-ray. Table of Contents Manual Rip 1)Navigate to Auto-rip on the Helix Main Menu and then select "Manual Rip" in the submenu. 2) This will open up our robust ripping software. The first thing it will do is open scan for the disc. 3) Next you will want to open up the disc to see what contents it has inside that you want to keep. To do this press the icon in the Left Center. 4) It will then open up the disc: 5) Here you can see the contents. 6) Now you can select whatever files you want to include in the rip. *Almost always the largest file is the movie itself. The other files can be deleted scenes, alternative endings etc. Sometimes there are two files around the same length. This could be a director's cut or a version with narration included. Auto-rip works by ripping the largest file it finds which 99% of the time is the correct file. However, if it chooses one of these other versions and you do not want it you will need to manually rip that disc. 7) You can also change the name of the Movie here to ensure accuracy: 8) If you want to change the output location of the movie to a different directory than our default one on the Helix E drive. Then here you can change the output folder to wherever you would like. 9) Next, to start the rip, click the icon in the top right with the green arrow. Table of Contents Ripping TV Show Discs To rip TV Show DVD or Blu-ray you have use "Manual Rip" because TV Shows simply title each episode of each disc Title 1, Title 2, etc. This means if a season is 5 discs long, there will be (5) Title 1's, and (5) Title 2's etc. You have to manually assign the name so the Helix System can go out and retrieve the metadata information. The best way to title each episode is SxxExx (Season ## and Episode ##). So the third episode in the second season of a show would be title S02E03 inside of that Season's folder, inside of that shows parent folder. 1) Click Manual Rip 2) Click on the Icon to open up the disc. 3) Here we see the content of the Disc (I love Lucy Season 2 Disc 1). 4) We need to rename the Episodes which are listed under "Title". Click the Description of each Title and then rename them according to preferred format (S##E##). 5) The next thing we must do is select the Output Folder since Helix is defaulted to drop any rips into its "Movies" library. Click "Set Output Folder" in the top right part of the box. 6) Now Navigate to E\Media\TV Shows 7) The Last thing we must do is create a folder for our new TV Shows and then preferably a folder for the Season # inside of that where we want these files to go to. Select Create a New Folder and Name it "Show Name (Year)" or just "Show Name" if you do not know the year. 8) After it finishes ripping we can look inside the output folder and see our newly ripped episodes. 9) Now when we navigate to our TV Shows Menu you can see Helix has already searched and found the artwork and metadata for the shows we just ripped. Table of Contents Support Menu The Support Menu offers many various options to getting the most out of your Helix Media System and fixing issues when they arrive. It consists of a submenu of several items: Remote Support, File Manager, Media Files, Helix A/V Setup, Manual Metadata Scraper, Parental Controls, and Network Settings Remote Support - Select this to open "Teamviewer" which can be used to receive remote technical support. Video Manager - Used to setup Movie and TV Show Libraries Media Files - Opens up a physical view of your Media Files for you to manipulate if needed. File Manager: The Helix File Manager is used for importing files from flash drives, discs, or external hard drives. It's a great tool for importing pictures, music, and even video files from external devices. 1) When you open up file manager you will see similar screens. You can use this to transfer files between two locations. 2) Navigate to your source on one side and destination folder on the other side. Here we have our source disc on the left and our music folder on the right (as indicated by paths you can see at the bottom). 3) Click "C" on the source side and press "C" and then Copy. 4) Your files will be transferred over (process will be indicated on top right) and then will appear on your destination folder if everything went correctly! *Helix Media System has the ability to interact and work with any external device and file type. Another reason why the Helix Media System is the most robust media system available. Table of Contents Metadata: Helix knows how important getting the right Metadata is for the overall experience. That is why every Helix comes with a backup manual Metadata scraper that can be used in case of a metadata emergency. 1) Select " Metadata" from Support submenu. 2) This opens up our manual Metadata scraper which is a very powerful tool. As you can see it already has listed in it the Movies and TV Shows located on the Helix E Drive. *The Helix Manual Metadata scraper is set to monitor all of the default Helix Libraries on our E drive. You can add more directories for it to monitor by going to "Application" menu and then "Set Scan Folders" then "Add New" 2) We want it to collect all the artwork and metadata for all of our files. Files with missing metadata are highlighted in Red, and ones with incomplete metadata are highlighted in yellow. Incomplete metadata shown highlighted in yellow can mostly be ignored as it is not always urgent and can mostly as it could just be missing some non-essential detail like the budget. Click on "Media" then "Refetch all Media Titles" to have it rescan and recollect all the media metadata. *If all of your titles are not appearing, you can refresh the list of Media by clicking "Media" and then "Refresh the list of media". 3) If a title is giving you issues. You can right click on the title and give it some guidance on how to find the exact movie or TV Show you are looking for with the options it presents. 4) First try Fetching as Movie (forced) or TV Show (Forced). If that does not work, clear out the metadata (right click then "Clear out metadata") and then click Fetch "as Movie (by IMDB ID). 5) This will launch a small dialogue box that will allow you to enter the IMDB tt# located in the URL of each show or movie on IMDB website and also allow you to manually lookup he IMDB information by clicking the blue "IMDB Lookup" link. Copy and paste the tt# located in the URL so it tells the Metadata program the exact location of where to look. 6) You can also convert a group of movies into a box set or collection. Simply right click on the parent folder they all exist in and click "Convert to Collection." For the example here we have all the James Bond movies inside a "James Bond Collection" folder. Now it will make sure to look inside that folder for media titles to scan for. Table of Contents Parental Controls - Allows you to setup parental controls where you must enter a pass code to watch content above a certain MPAA rating of your choosing. 1) Select "Parental Controls" from submenu. The first time it runs it will ask you to set a password using the directional arrows. 2) Enter your pass code to get to the settings. *The Default Parental Code Pass code is Up, Down, Left Right. 3) Once in your settings you can choose what the highest rating you want to be able to be watched without entering in the pass code for TV and Movies individually. Network Settings - Allows you to set your Network/Home group Settings Helix A/V Setup - Used during initial setup to set up your Audio and Video Table of Contents Shutdown Menu We recommend running Helix 100% of the time and never turning it off. However if you have to the shutdown menu gives you several power options, and even a sleep timer that you can set. Table of Contents Advanced Customizations to Helix (These will require the Master Code password from your Custom Installer Professional) We've tried to incorporate s many of the features as we can within Helix Media System however there are several options you may want to take advantage of. We can set these up for you for additional support costs or you can do them yourself. Custom Libraries Many people want their movies separated into separate categories. Whether they want a separate folder for kids movies, or movies by their own custom cataloging system; Helix Media Systems can handle any requests without losing much functionality to the media libraries. In order to make a custom library (i.e. a kids only movie folder) where you want to completely separate out a selection of movies is very simple. 1) Collect the movies you want into the same parent folder (i.e. make a "Kids Movies" folder in your "E\Media" folder. Either rip directly to that folder or use the drag and drop method. 2) Press "S" and select "Settings" 3) Navigate down to "Skin" 4) Select "Customizers" and then "Main Menu Customizers" *By selecting "Customize Home Window Furniture" instead, you can change some of the settings of the main menu such as the move the location of the menu from the bottom of the screen to the middle. 5) Now you are in the backend of our Menu. Navigate to an unused menu icon and select it. 6) Turn off Disable and Select "Choose Type" 7) Select "Video Library Node" 8) Navigate to your designated folder and press ok. 9) Change the name of the menu item by selecting "Choose Label" 10) You can even navigate it to a folder of pictures or background that you want to use for the background images for your new menu item. 11) Navigate to the folder the images are located in. *Clients often enjoy it when you incorporate pictures of their lives and families and friends into the background images of some of the menu options. 12) Once done, back out all the way to the main Helix menu and your new menu is waiting. Table of Contents Disabling a Menu Option 1) Press "S" and select "Settings" 2) Navigate down to "Skin" 3) Select "Customizers" and then "Main Menu Customizers" 4) Navigate to the activated menu icon or submenu item you want to turn off and select it. 5) Activate "Disable" and then back all the way out. Your menu item will no longer appear at the main Helix Menu! Table of Contents Disabling Viewtypes (Enabling Kiosk Mode) Sometimes you may want to disable the ability to change view types if your customer keeps getting into problems. Kiosk mode allows the user to experience Helix Media Systems but have a completely locked down system that cannot be change or altered. To disable this is a very easy solution. 1) Press "S" and enter Settings. Go to Skin. 2) Go to Kiosk Mode. Select "Disable Media Menu and hide option in Video Info" Table of Contents Changing the Color of the Helix Main Menu If you need to change the color of the Helix main Menu you can do it very easily. 1) Click "S" for Settings. 2) Navigate to "Skin" 3) Select "Customizers" on left menu. Then navigate to "Set area color for Home Window" Table of Contents Changing the Screen Saver Settings Your Helix Media System is defaulted to show a slideshow of pictures found in the Picture folder on your Helix Storage Drive. So after 30 minutes, it will dim slightly and automatically begin playing a slideshow of the pictures contained in that folder. There are several different screensavers you can choose from (None, Black, Dim, Random Trailers, and Slideshow (picture slideshow). 1) Click "S" and then "Settings" 2) Click Appearance. 3) Navigate down to Screensaver. 3) Choose which Screensaver mode you prefer and change any of the desired settings you choose to! Table of Contents PLEX Media Server on Helix Media Systems Because we love our customers. We've partnered with PLEX to bring you full access to your content stored on Helix Media Servers across all platforms. This means that ANY device can access the content on Helix Media Servers on ANY device. iPhone, iPad, Android, Mac, etc. Plex shares content across all platforms as long as you are on your network and have the Plex App installed. Helix Media Servers have Plex configured to run quietly in the backend automatically meaning you can access your content on any Plex compatible device (which are all devices). The Plex App will automatically find the Helix Server. You don't need to do anything to enjoy Helix and Plex. Simply download the Plex App on any device and if it doesn't automatically find your content ask your custom installer to set it up for you. There are several advanced features on Plex that you will need your Custom Installer Professional for which include "Publishing" your Plex account so you can access your content from any location in the world, and download your content to mobile devices to watch on the go. Troubleshooting your Helix Media System Ripped Movies Not Showing in Helix Library *99.99% of all "Missing Media" is due to improper naming. Make sure the folders AND file names are named correctly. If your ripped movies are not showing up in your library. There are a couple very simple steps to make sure they are recognized. 1) Make sure the file name AND file folder name are named correctly. Remove any extra words or letters that may have been assigned to it automatically or by accident. Sometimes when you use rip a video file it will assign a .tt00 after it to indicate the first track. Remove all items in the name except for video name and year (or season number and episode number for TV Shows). 2) When you are first adding media, the library might need some "seeding" before it recognizes what your library consists of. Sometimes the first couple media files take some extra effort to get recognized. An easy way to do this is refresh the Video Manager and have it rescan for content by following the below steps. Go to Support and then Video Manager: Click "C" on what video files you need to have rescanned and then "Change Content" Make sure the content is still set correctly (to Movies or TV Shows) and then press OK. Click "C" again on media type and then click "Rescan for New Content" Table of Contents Hard Resetting the Helix Libraries Helix comes with the ability to perform a hard reset on your libraries if for some reason they are giving you issues. This does NOT delete any data but merely causes your Helix system to re-build the library from scratch. *The only time you would really need to perform this reset is if you make drastic large changes to the library and the Helix Server is not recognizing the changes. (for instance; you delete a lot of movies but the deleted movies are still showing up in your library). 1) Click Support then Media Files. 2) On the left sidebar click "desktop" then "Database Shortcut". 3) There are two databases that are important. MyVideos78 and MyMusic46. The Video file will delete video and TV show information and the Music files will delete the music database causing the Media System to rebuild these libraries from scratch. Simply Delete whichever (or both) you want rebuilt. 4) Restart the system. Table of Contents Helix Warranty and Replacement Policy Helix Media Systems Warranty Our standard warranty is one year from date of delivery. Extended warranties cover both hardware and software for additional years. We will warranty all parts in your system during the warranty period as long as they are used in the manner they are delivered in and not tampered with. This can be verified by checking the systems bios, operating system logs and bios history. In the event the logs are tampered with the warranty is voided. Additional hardware or software additions/replacements by the user that has not been performed by a Helix representative will result in the warranty being voided. This includes any addons within the Helix Media Interface. Jail breaking the Helix Media Systems to gain access to the operating system and activating the built in web browser also immediately voids all warranties. At your request, we may be able to fix some issues by connecting remotely to your system with already installed software. This service may be recorded for quality assurance and privacy purposes. Custom work: There are no refunds for custom work under any circumstances. This does NOT mean custom configurations guided by our online website which are covered under our standard warranty but represents specialized custom work geared towards a specific individual (i.e. custom parts, cases, paint or graphics, cabling, etc). Customer Directed Components - For configurations that have been directed by the customers or whose components have been selected by the customer; Helix can only guarantee that the individual components are functioning as expected at the time of shipment. We cannot guarantee or offer any warranty that the components will work in conjunction with each other or with their home theater system. Replacement, service, repairs, etc. for any incompatible components selected by the customer will be done so at full cost. International Shipments: We always will try our best to solve any international issues remotely. Shipping internationally is expensive. We ship all international shipments double boxed with CIF incoterms. If product must be shipped back for any reason it is customer responsibility to pay shipping both ways. We reserve the right (bur rarely do so) to charge up to a 15% restocking fee on any systems returned for any reason. Replacement Policy: Defective merchandise will be replaced with a like item, upon return of the defective merchandise. Helix Media Systems are not responsible for any damages caused by either internal or external equipment, shorted connections or components not installed by or purchased from Helix. Helix is not responsible for damages to any components or loss of any data inadvertently caused by products, under normal or abnormal use, including those purchased from Helix. International customers are responsible for shipping both ways. Helix will not replace, repair or refund any purchase if an item’s serial number does not match what was originally sold according to our internal records which are kept for a minimum of 5 years and all warranties will be voided. Table of Contents