Download User Manual - Twilight Render
Transcript
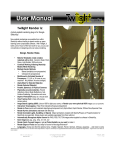
User Manual
Twilight Render is:
A photo-realistic rendering plug-in for Google
SketchUp*.
Now realistic renderings are possible from
within SketchUp without having to spend
months or years learning some complicated
software. With Twilight, it takes care of much
of the hard work for you, so you can
concentrate on designing and even enjoy
rendering.
Design. Render. Relax.
•
•
•
•
•
•
•
•
•
•
•
•
•
•
•
Continue Working in/Saving SketchUp
Models While Rendering
Multiple Render Methods
• Biased (multiple) (non-progressive)
• Unbiased (3) (progressive)
Multithread to Unlimited Number of
Processors. (1,2,4,8, or 16 cores in your
machine? No problem. No extra charge!)
Alpha Mask for Selected Object(s)
Render Selected Object(s)
Parallel, Spherical, or Physical Cameras
Physically accurate materials, Fresnel
reflections, Blurry Metal Reflections, Sub
Surface Scattering, Volumetrics and more.
Depth of Field (DOF)
Image Based Lighting (HDR), Use an HDR to light your scene, or Render your own spherical HDR images
Interactive Tonemapping = Real Time Interactive Exposure Adjustment
Render to Pass (works with selected object too!) such as Alpha Mask, Depth Render, Diffuse Pass,Specular Pass
Render fly-thru animations and more with little fuss
Render Animated Lights, Sun&Sky, or Objects Object animations created with SketchyPhysics or
ProperAnimation for SketchUp are supported. (these plugins are available separately from their authors.)
Render Quick Concept Images or get as Photo-Realistic as you want to make it.
Render Edges of Faces and you keep full control of the edge thickness**
*Wherever the name “SketchUp” is used, it is noted that it means Google SketchUp. Google Inc. and SketchUp are copyrighted/trademarked entities and are not affiliated
with Twilight Render.
**Edges that do not form faces can not be rendered.
Ver. 1.00 - slf
Back to Top
© Twilight Render 2009
by: Twilight Render
08/25/09 - Date
1 of 38 - Page
Contents
Twilight Render User Manual Table of Contents
Twilight Render is:......................................................................................................................................................1
Overview......................................................................................................................................................................4
To render your completed SketchUp model using Twilight follow these (6) simple steps......................................4
Great renderings need four (4) things.....................................................................................................................4
The Twilight Toolbar.................................................................................................................................................4
Section 1: The Render Dialog....................................................................................................................................5
Render Dialog Menu Bar.........................................................................................................................................6
Render Dialog Toolbar.............................................................................................................................................7
Settings Window Frame..........................................................................................................................................8
Camera Tab...........................................................................................................................................................12
Advanced Tab........................................................................................................................................................14
Animation Tab........................................................................................................................................................15
Render Window.....................................................................................................................................................17
Troubleshooting:....................................................................................................................................................18
Section 2: The Omni Light Tool...............................................................................................................................20
To place an Omni Light in your scene:..................................................................................................................20
Section 3: The Spot Light Tool ...............................................................................................................................21
To place a Spot Light in your scene:.....................................................................................................................21
Section 4: The Light Editor Dialog..........................................................................................................................22
Standard Light Options Tab...................................................................................................................................22
Spot Options Tab...................................................................................................................................................23
IES (Photometric) Light Options Tab.....................................................................................................................23
Projector Light Options Tab ..................................................................................................................................24
Sun & Sky Options Tab.........................................................................................................................................25
Section 5: The Material Tool....................................................................................................................................26
Section 6: The Twilight Options Dialog..................................................................................................................34
Directories and Files..............................................................................................................................................34
Dialogs...................................................................................................................................................................34
Advanced...............................................................................................................................................................34
About.....................................................................................................................................................................34
Section 7: Reference................................................................................................................................................35
Batch Rendering..................................................................................................................................................................35
Bump Mapping and Bump Maps..........................................................................................................................................36
Codec...................................................................................................................................................................................37
Edge Lines...........................................................................................................................................................................37
HDR.....................................................................................................................................................................................37
Model Processing Phase.....................................................................................................................................................38
Proper Animation for SketchUp by Morisdov.......................................................................................................................39
Reflection Maps (Specular Map)..........................................................................................................................................39
Spherical Sky (Skies) Background.......................................................................................................................................39
Ver. 1.00 - slf
Back to Top
© Twilight Render 2009
by: Twilight Render
08/25/09 - Date
2 of 38 - Page
Overview
Overview
To render your completed SketchUp model using Twilight follow these (6) simple steps.
1. Insert Lights (The physical Sun & Sky are automatically set using SketchUp's™ Sun and Shadow settings)
2. Apply Twilight Material Templates to SketchUp Materials (metal, glass, plastic, ceramic, stone, light emitter...)
3. Choose a Render Setting (quick, medium, high quality, or multiple unbiased progressive rendering methods are available)
4. Choose a Render Size (output resolution)
5. Start the Rendering
6. Save the Rendered Image
Great renderings need four (4) things.
1. Good Models (A poorly detailed model will look as such, or even more clearly so, in a rendering.)
2. Good Lighting (A well-lit model is simple in Twilight if you follow the principal of “light it as you would do so in real life”.)
3. Good Materials (Quality materials are key to convincing renderings. Learn to observe the world around you closely.)
4. A Quality Render Engine like Twilight Render.
The Twilight Toolbar
The Render Dialog button, or “Power Button,” for short, Opens the Rendering dialog allowing you to choose all rendering
parameters such as resolution, camera settings, animation settings, and to start your rendering.
The Omni Light Tool allows you to insert an Omni Light. An Omni Light casts equal amounts of light in all directions.
The Spot Light Tool allows you to insert a Spot Light. A spot light is manually adjustable to cast light in a certain direction
with a definable “HotSpot” angle and a “Falloff” angle.
The Light Editor Dialog (+Sky) is a listing of all lights in the scene, allowing easy access to full lighting control. This is
also where you can choose Sun & Sky parameters as well as utilize an HDR or Spherical Sky or other type of background
image.
The Material Tool allows you to quickly apply physically accurate material properties to any SketchUp material painted on
a face in your scene.
The Twilight Options allow you to set various advanced options for Twilight, as well as control licensing.
Ver. 1.00 - slf
Back to Top
© Twilight Render 2009
by: Twilight Render
08/25/09 - Date
3 of 38 - Page
Rendering
Section 1: The Render Dialog
Click a topic to jump to it's link below.
1.
Render Dialog Menu Bar
2.
Toolbar
3.
Settings Window
4.
Render Window
Ver. 1.00 - slf
Back to Top
© Twilight Render 2009
by: Twilight Render
08/25/09 - Date
4 of 38 - Page
Rendering
Render Dialog Menu Bar
Render Menu
The Render menu allows you to start the rendering or exit and close the Twilight Render
Dialog.
View Menu
The View menu allows you to re-open the Toolbar or the Settings Window if they have
been closed.
Cameras Menu
The Cameras menu lists all cameras in the scene. If you choose a camera in the list,
Twilight will render only that view, no matter what is showing in the Google SketchUp
view window. This forces a rendering of a certain camera while editing the model.
Layers Menu
The Layers menu allows you to choose a layer or layers to be ignored during the
rendering. De-selecting the dot next to any layer name in the menu list means that you
will see the layer in the Google SketchUp View, but it will not be processed or rendered
by Twilight.
This could be a quick way to turn off all your lights, by de-selecting the TWL_Light_layer
Layouts Menu
The Layouts menu allows you to save different configurations of the render dialog, and
recall them at any time. This is useful if you like to close the Toolbar and Settings
Window to give more screen real estate to the Rendering Window. Then you can use a
previously saved layout to restore the Settings Window and Toolbar quickly.
Closing the Render Dialog
After clicking the “X” to close the Render Dialog, Twilight will prompt you to let you know
that even though you have closed the dialog, the rendering will continue in the
background.
Ver. 1.00 - slf
Back to Top
© Twilight Render 2009
by: Twilight Render
08/25/09 - Date
5 of 38 - Page
Rendering
Render Dialog Toolbar
Start Render Button
The Start Render Button begins rendering the scene using the parameters defined in the render
dialog. If there has been no Render Setting chosen, it will use a preliminary test render setting.
Stop Render/Cancel Render
The Stop Render / Cancel Render button stops the rendering in progress. It is not available during
the Model Processing Phase.
Pause/Play Button
The Pause/Play Button allows you to pause a rendering in progress. When clicked the button then
becomes a “Play” button which, when clicked, resumes the rendering again... that is, it allows you to
continue the rendering from where it left off when it was paused. If SketchUp's session is closed,
you may not 'resume' a rendering.
Save Rendering Button
The Save Rendering Button allows you to save the rendering to the hard drive or network.
XML Export Button
The XML Export Button exports the scene for further development/rendering with Kerkythea
Rendering System. There you can utilize smooth animation rendering, and inserting hi-poly
vegetation content along with the Instancing Brush for populating quickly hundreds of thousands of
instances of objects. Also by leveraging Kerkythea you can do advanced/in-depth material editing,
save and share material libraries for future use, create and share specialized render setting presets
for use with Twilight, merge in other file formats (like models in .obj format) into your scene, and
much more.
Ver. 1.00 - slf
Back to Top
© Twilight Render 2009
by: Twilight Render
08/25/09 - Date
6 of 38 - Page
Rendering
Settings Window Frame
Render Tab
The Preset Tab has three parts.
1.
The Render Preset List
2.
Render Size (resolution of the rendering)
3.
Fit To View Proportions
1
Render Preset List
The Render Preset Window lists all the render setting presets available for use
with Twilight.
To set or choose the desired render preset, click the name of the desired
preset, double-click, or right-click a setting and choose “Use Preset”.
This window has a Presets Folder Tree. The Folder Tree is showing the folders
containing render presets that are located in the Twilight Plugins folder on your
hard drive. In WindowsXP (for example) it is located under “Google
SketchUp7\Plugins\Twilight\RenderSettings.”
By default Twilight uses the “Prelim” setting found in the “Easy Settings” folder.
Navigate the Presets Folder Tree by clicking on the plus sign next to a folder name to expand a category
folder, or by double-clicking a category folder name. Twilight comes with several folders set up for you. But you
may go into the folders and add/delete/create/arrange folders and settings however you wish.
These folders can be located on a network drive location... and found by Twilight by designating the
folder in the Options>Directories Dialog.
Easy Settings:
As a good rule of thumb: if the number of lights is low, higher settings may be required for good lighting
results, and therefore, as the number of lights increases you may want/need to use lower render settings. Also,
the larger the rendering resolution, the lower the render setting you may need.
With non-progressive render methods (Found in the “Easy” category under the names “Low, Medium, and
High”) the render setting preset assigns more than 100 different parameters automatically. But choosing wisely is
important. It will be the tendency of an inexperienced person using Twilight to automatically choose “High” as their
render setting. In actuality an experienced user may find that Medium gives great results in many cases. Also, it
is wise to choose the lowest render setting possible when rendering preliminary renderings.
Ver. 1.00 - slf
Back to Top
© Twilight Render 2009
by: Twilight Render
08/25/09 - Date
7 of 38 - Page
Rendering
If there are many lights (more than 10), and no metallic or blurry reflective surfaces the “Low” render setting
could serve quite well and render very quickly indeed. While if there are blurry metals or blurry reflections on
surfaces then a settings with a “+” will be a better choice. “09. Indoor Progressive” will be one of the best quality,
but will have longer render times in most cases. However, it may serve well as a fairly quick preview for larger
scenes.
While some materials are specially made to 'fake' some effects (no shadows, fake light) and can only be
rendered this way with Low-High Render Presets, others will render ok with the Low-High render presets, but will
be best shown in the progressive rendering methods (blurry metals, translucent and SubSurface Scattering
materials). All materials render well with the progressive rendering method, but these methods do not allow things
to be “faked”, so a material that “fakes” casting no shadows will still render with shadows in a progressive render
method. Also, a fake light emitting surface will actually emit light in a progressive render method. For this reason
one should avoid fake emitting surfaces which are curved or high-polygon (hi-poly).
People experienced with Twilight will likely find themselves choosing Preset #09 the most for interiors, while
for exteriors they will usually choose Preset #08. For exteriors lit only with Sun & Sky Preset “#08 Exterior
Progressive” will be not only the highest quality, but possibly also the fastest method. This is especially true for
those with multiple processors.
Advanced Settings:
Alpha Mask : This is used for isolating geometry in post-process image editing.
1.
Select an object.
2.
Choose “Alpha Mask” as your
render method. (Camera Tab: Be sure
exposure and gamma = 1.0)
3.
Start the rendering.
4.
When asked to render only
selected objects choose “yes”.
5.
A black and white image will be
created of the object.
6.
Save the rendered mask image.
This black and white “mask” is for use with photo editing programs in post-processing. By placing the
generated mask in the Mask Slot for a layer in your image editing program, the item rendered will be isolated.
Most common uses for this are for isolating furniture for post-processing objects behind the furniture such as
people. Also it is commonly used in architecture for post-processing in a high-resolution (hi-res) sky image.
Ver. 1.00 - slf
Back to Top
© Twilight Render 2009
by: Twilight Render
08/25/09 - Date
8 of 38 - Page
Rendering
Ambient Occlusion: This is a quick way of rendering “ambient” lighting.
It works best if the sun and lighting are turned off. It quickly calculates/approximates the adjacent shadows from
nearby objects. This is commonly known as how one object's lighting may “occlude” another's lighting.
Animation Interior
One possible render preset optimized for interior renderings.
Depth Render
Renders a greyscale image that assigns different values of grey for different distances from the camera. Useful for
post-production in a photo editing program when manually recreating a Depth Of Field effect, or complex masking,
fog effects, or other post-production tonemapping or highlighting techniques.
Light Pass
Renders an image showing only the light sources in the view.
Tech Settings:
The Tech settings contain more Render Setting Presets organized by render method. Also included under the
Tech Setting heading are the Clay Render Presets.
The Clay Render is a way of saying “check the lighting without materials/textures”. It is useful when you have
a model either untextured, or partially textured and are looking for a quick preliminary rendering. This setting is
more advanced than many other render engines and their clay render settings because it automatically replaces
all materials in the scene with a clay material for you, and returns them to their original state when finished. It is
also a “Smart” preset that leaves Light Emitting Surfaces and Thin Glass (Architectural Glass) as they are, to allow
for easily running clay renderings for interior images.
You may create your own settings by opening a copy of any setting inside of a text editor like “Notepad”
and changing the values you wish to modify then save it with a logical name into the Custom folder. You will
need to close and re-open the Render Dialog in order to see/make the new setting available for use. You
may also use Kerkythea 2008 Echo to create a render preset and then save this into your Twilight Render
Settings folder structure. Please refer to Kerkythea's documentation to learn more about this method.
Ver. 1.00 - slf
Back to Top
© Twilight Render 2009
by: Twilight Render
08/25/09 - Date
9 of 38 - Page
Rendering
2
Render Size
This is the resolution of the rendering in pixels. Click the chain link to
toggle the proportion lock. When the proportions are locked, changing
either number first will determine which number will be the “dominant”
size.
Clicking the magnifying glass will reset the resolution to match the size of
the SketchUp viewport.
3
Fit to view proportions
With this box checked, no matter what resolution you choose for the
“Render Size”, Twilight will render the image using the proportions shown
on the screen, and show you the resultant “actual size” resolution in
pixels of the rendering below..
Ver. 1.00 - slf
Back to Top
© Twilight Render 2009
by: Twilight Render
08/25/09 - Date
10 of 38 - Page
Rendering
Camera Tab
1
Projection:
Planar = Match SketchUp's Camera (Default)
Cylindrical = Render a Cylindrical Panoramic view. For use in
virtual tours, or as cylindrical background images.
Spherical= Render a Panoramic Spherical Image, an image with
spherical projection. For use in virtual tours for example.
When saved in .hdr format Cylindrical and Spherical image
types can be used to light other scenes in Twilight.
Parallel = Render the scene without taking perspective vanishing
point convergence into account. Great for rendering an elevation,
isometric, or section view. (SketchUp's Section Cuts are not
rendered automatically in Twilight. However, plugin ruby scripts like
“Zorro2” by Whaat are available which can be used to modify a
model quickly for rendering a section perspective.
2
F-Number:
Lighting and Cameras in Twilight are best thought of just as in
Photography. Depth Of Field (DOF) (blurring of objects as a
function of distance from the camera) in Twilight is a function of the
F-number and the camera focus. It is also a function of the View
Angle set in SU using the magnifying glass and holding down the
Shift key. The higher the F-number, the DOF effect will be less
noticeable. The F-Number must be used in conjunction with the
right-click Twilight menu item “Set Camera Target”. Right-click an
object in your scene where you want the camera to be in sharp
focus and choose “Set Camera Target”. Then change the F-stop
on the camera here (ex. 2.8). When rendered, you will now see
Depth of Field, depending on the scene. Things in front of or
behind your focus object should be a bit blurry, depending on their
relative distance to the camera.
Set up your SketchUp camera “Scene” AFTER choosing “Set
Camera Target” from the context menu. This will save your
DOF view for later use. Choosing a previously created scene after
setting the camera's target will change the focus of the camera.
Ver. 1.00 - slf
Back to Top
© Twilight Render 2009
by: Twilight Render
08/25/09 - Date
11 of 38 - Page
Rendering
3
Filter:
Filter = type of Tonemapping.
Tonemapping is simply the modification of an image to control it's
highlights and dark areas to achieve an image “look”.
Tonemapping is as crucial for getting a nicely rendered image as
the exposure setting is to a real camera.
Tonemapping in Twilight is achieved in the Camera Tab. Choose
the Type of Tonemapping Filter, then set the parameters such as
the Exposure or Gamma.
It is recommended to adjust the Exposure first, and change the
Gamma only when absolutely necessary.
You may think of Tonemapping like adjusting a camera's exposure
on-the-fly. You can tonemap the image manually by increasing or
decreasing the exposure of the image at any time during the
render process.
Tonemapping may be adjusted at any time during or after the
render process. As long as the rendered image remains in the
window.
Ver. 1.00 - slf
Back to Top
© Twilight Render 2009
by: Twilight Render
08/25/09 - Date
12 of 38 - Page
Rendering
Advanced Tab
1
Content Updates:
There are several ways to have the scene updated:
“All” makes Twilight process everything in the scene for every
frame or image that will be rendered.
For more tips on controlling processed
content, see the section entitled
“Model Processing Phase.”
“Camera & Lights” or ““Camera Only” tells Twilight that you
have not changed anything in the scene except a light or
camera. This causes the processing phase of test rendering
progress to go much more quickly for doing a series of test
renderings on large scenes since it will only be updating the
lights and cameras. “None” will re-render with last-exported
content, as if there have been no changes to the scene at all.
"Camera & Lights Only mode should be used cautiously
because it is easy to 'forget' this option has been set, If
something changes in the geometry or materials of the model,
the user will wonder why they have not been incorporated into
the rendering. If your model is not updating materials or
geometry when you render, be sure to check that this setting
is set to “All” and re-render. This settings remains across
sessions, so remember to set back to “All” when closing the
SketchUp file.
2
Rendering Selected is an additional way
you can choose the content to render
from the Scene. Choose an object to
render and start the rendering. Twilight will
ask to only render the selected object. If
you choose “yes”, you must be sure to
select a light to render with the object as the
lights selected are taken into account. This
method 'overrides' the two methods given in
the Processing Content dialog drop-down
menu.
Ver. 1.00 - slf
Back to Top
Grouping Method:
There are two methods of grouping the content of a scene.
One fast, and one slow. They are both of equal quality.
Definitions/Instances processes any component definitions in
the model as an instance for Twilight to render. This not only
increases the speed and efficiency of processing, but also the
speed and efficiency of rendering. Per Material ignores
components in the scene. This method could be very slow for
larger scenes. It will also increase render times for larger
scenes, or cause your machine to run out of RAM.
It is not recommended nor likely that you will ever need to
change this method.
© Twilight Render 2009
by: Twilight Render
08/25/09 - Date
13 of 38 - Page
Rendering
3
Threads:
Threads = Number of Processors (also known as “Cores”) to employ
in rendering the image. Multithreading means that the computer is
utilizing more than one processor to do a task. Theoretically
unlimited, if left alone Twilight will render with the maximum number
of threads found on the machine. Twilight render process is always
in Low Priority Mode so as not to disrupt other processes on the
machine. You may continue working in SketchUp and other
To find out how many processors your
programs while rendering with little performance degradation,
depending on the machine and render method. Progressive render
computer has: Open Task Manager in
Windows (right-click your desktop) and look at methods seem to effect performance the least.
the “Performance Tab”. This example shows
a machine with 2 processors (aka: dual core). Animation Tab
1
Animation Pull-down Menu:
Choosing “Only View” will “turn on” animation rendering and
cause Twilight to render the fly-thru animation as it has been
set up to do in your scene's tabs utilizing SketchUp's native
scene animation feature.
Any scene which has been excluded from the animation by
unchecking the “Include in Animation” check box in the
SketchUp Scene Manager Dialog Box will likewise be excluded
from the rendered animation in Twilight.
*See Also: Proper Animation for SketchUp
*See Also Batch Rendering
*See Also Codec Info
Set Scene Delay to Zero (0) before rendering your animation. If you do not, SketchUp's animation
control will tell Twilight to render the same frame over and over for the duration of the Scene Delay in
order to make the animation video appear to have the delay time specified. To add delay later, use your
video animation production software to create scene delays.
Since all lighting in the scene is taken into account by Twilight whether it is contributing light to the
currently rendered frame or not, it is wise to turn off lights that do not contribute in a significant way to
that particular scene. This becomes vital in reducing rendering times for animations.
Twilight will calculate all direct and indirect lighting for all lights on all geometry processed in the
scene, whether it is seen by the camera or not. For example, one may want to set animation scenes
to turn off hi-polygon geometry such as furniture in certain spaces if these spaces will not actually be seen
or need to be rendered during a portion of the animation.
Ver. 1.00 - slf
Back to Top
© Twilight Render 2009
by: Twilight Render
08/25/09 - Date
14 of 38 - Page
Rendering
Animating the turning on and off of lighting is achieved by leveraging Scene Tabs to control layers or
hidden geometry. By putting lights on layers whose visibility is turned on and off via the SketchUp Scene
Manager they will be turned on and off during animation. In the animation pull-down, simply choose “Has
Animated lights/Sun. If rendering with animated objects be sure to choose appropriate pull-down option.
2
Start (s):
This will read as (0) “zero” at first. You may leave it at (0), or if
rendering an animation in “pieces” may choose any second of time
to start the animation rendering sequence.
3
Stop (s):
This will read as (0) “zero” at first. If you have 3 frames, you have 2
transitions between them. If SketchUp's Animation Transition Time
is set to 2 seconds, then 2 transitions x 2 seconds = 4.00(s) of
video. If rendering an animation in “pieces” you can specify any
second where you want to stop the animation.
4
Jump
Clicking this button will cause the view in SketchUp to “jump” to the
frame at the time specified in the dialog box... or step through the
animation using the
Arrow Radio Buttons.
Commonly Used Frame Rates
30 24 15 10 5-
5
Frame Rate
Standard television
The “Number of Frames (Images) Needed per Second of Video”,
Standard film, good for computer playback
also thought of as the “Rate the Frames Are Shown Per Second.”
When in a hurry for your animation, reasonable rate
When in a big hurry, animation choppy
6
Base Name:
Test Render frame rate for animations
When rendering the frames of the animation, Twilight will automatically change the name of each frame to have a
number after it. Click the “Browse” button to find the folder where you want the animation images to be placed.
Type the name you want to use as the “Base Name” for all the animation images. No need to type in an
extension. The frames will be automatically saved in .jpg format for best quality and compression of color images.
7
Allow SketchyPhysics to run*:
SketchyPhysics is a free plugin for SkechUp available here. It allows you to specify physical characteristics for objects
in your model, then to play an animation to see how they will act in the real world. This animation can now be
rendered using Twilight! Simply check the box allowing it to run while rendering the animation. Then uncheck the box
for reusing lighting information. Obviously must also change the method from “Only View” to “Has Animated Objects.”
Ver. 1.00 - slf
Back to Top
© Twilight Render 2009
by: Twilight Render
08/25/09 - Date
15 of 38 - Page
Rendering
Render Window
Viewing the rendered image within the Render
Window can be controlled with the scrollbars.
Clicking the Save Button will allow you
to save your image by default in the
highest quality .jpg format at any time
during the rendering process. You may save the
image in .tif, .bmp, .png, by typing the extension
after the file name
The rendering progress information is displayed
on the notification line. During a rendering
made using a Progressive Rendering Preset it
will tell you how many passes of how many total
have been completed. i.e. “822/10000”
Progressive rendering means that it will
continue to render until the rendering is stopped
or until it reaches 10000 passes.
It is not intended or suggested that the image
be considered finished when it reaches 10000
passes, stop the render process when you
consider the image to be sufficiently 'clear'.
The Number of Threads (processors) being used while rendering is displayed like this (Threads:#)
The percentage complete of a particular “Pass” (not necessarily of the entire rendering process) is displayed
next to the number of threads. The Anti-aliasing (AA) pass must be allowed to continue to completion or it is not
applied to the rendering. A “Pass” can be thought of as a “phase” in a rendering process. Different Render
Settings have different phases or “Passes”. Examples of a “Pass” are “Ray Tracing” and “Anti-Aliasing”.
For progressive renderings, a temporary backup file is saved to your hard drive in the application's data file.
This can be found on Windows systems in a path something like :
C:\Documents and Settings\Customer\Application Data\Twilight\temp
Ver. 1.00 - slf
Back to Top
© Twilight Render 2009
by: Twilight Render
08/25/09 - Date
16 of 38 - Page
Rendering
Troubleshooting:
1
I have started a rendering and it is in the “Ray Tracing” phase, but the Render Window is
empty or showing only black.
1. Did you turn off all the lights using the Light Editor Dialog?
2. Did you turn off all the lights by hiding the TWL_Light_Layer?
3. Did you turn off the Sun and set the background to the color of black?
4. Did you neglect applying a Twilight glass material template such as “Thin Glass” to any windows/glass for
an interior rendering so that it will allow light to pass through the face? If your glass has an opaque
material applied, light can not reach your scene.
5. Did you insert any Twilight Omni or Spot light inside of a component that is opaque, or did you accidentally
change the glass material of your lighting component to be opaque using the SketchUp material's opacity
slider or the Twilight material's alpha slider?
2
I have changed a material in my scene, but the rendering keeps showing the old
material and will not update it.
1. If your model is not updating materials when you render, be sure to check that the setting for Updating
Content is set to “All” and re-render.
2. If you paint the objects inside of a group or component with a material, then you paint the entire group or
component with a different material, the material that is painted directly on a face will take precedence.
3. Materials painted on the front face will take precedence of the materials painted on the back face. Set the
view of your model in SketchUp to “Monochrome” in order to quickly see if it is the front face that has been
correctly painted with the desired material.
4. Be sure that there are not 2 planes with different materials sharing the same 3D space. If this happens,
sometimes you will see one material rendered in SketchUp's view, but the other plane and material will
show in the rendering.
3
I have changed some geometry in my scene but the rendering keeps showing the old
geometry and will not update it.
1. If your model is not updating geometry when you render, be sure to check that the setting for Processing
Geometry is set to “All” and re-render.
4
There are black speckles (noise) all over my rendering.
Be sure that any light (spotlight or omni light) is not touching/sharing 3D space with other geometry or another
object in the scene. Keep lights approximately 2 inches (5cm) away from adjacent geometry.
Ver. 1.00 - slf
Back to Top
© Twilight Render 2009
by: Twilight Render
08/25/09 - Date
17 of 38 - Page
Rendering
5
When I start the render, it says “Processing had errors” but continues rendering.
1. Are there layers or materials with strange or non-latin characters in their names? (~ ^ ' “ ) Some strange
characters may cause problems with processing. Using only non-accented letters may help.
2. Was a material applied in the model from a material library which is not installed on the machine having
the error? Find the missing material library and put it in the Plugins\Twilight\Materials folder.
3. Was there a material applied for which a texture file is now missing for some reason? Find the missing
texture and put it in the same file with the .skp file.
4. Was there a light in the scene which incorporated an IES (photometric) file in it's definition that is now
missing (now on a different computer)? Find the IES file and put it in the same file with the .skp model.
6
I can not render my scene using “Medium” or “High” settings, but it will render with
“Low”.
Some may find that for high geometry scenes with a lot of lights will simply not render at all on their machine
with the Medium or High settings. This is due to the fact that the machine will be running out of RAM to contain all
the information necessary to complete the render. The scene should render well with Easy Setting “09. Interior
Progressive”. Another possible solution would be to eliminate any lights that are not significantly contributing to
the scene, also to be sure anything in the model that appears more than once is made into a component, and the
components are copied, not the non-component geometry. Leveraging the power of components in SketchUp will
save much time in processing and rendering.
It is wise to be extremely cautious when utilizing models posted to the internet and available for free.
(Downloading models such as from the Google 3D Warehouse.) This is due to the fact that many of these models
are not built with the intention to render them, they are not built correctly, they may contain a lot of superfluous
geometry or materials, or they may not be built to correct scale. Typically packages made professionally and
posted as groups of models as a resource from a manufacturer are “safe” to utilize... but many of them have
problems as well.
Ver. 1.00 - slf
Back to Top
© Twilight Render 2009
by: Twilight Render
08/25/09 - Date
18 of 38 - Page
Lighting
Section 2: The Omni Light Tool
The Omni Light Tool allows you to insert an Omni-directional Light. An Omni Light casts equal amounts
of light in all directions (a little bit like a real light bulb). All lights in Twilight are by default set to attenuate
light, just as in real life, by the distance2. The exception to this is the Sun which effectively has no
attenuation.
To place an Omni Light in your scene:
1. Click the Omni Light Tool
2. Click your light's Base Point. This is the place in your scene on a face or point near where you want the
light to be placed. Drawing a temporary line where you intend to place the light may be helpful for guiding
placement of a light. For example: draw a line crossing a circle so you can snap to the midpoint for the
light.
3. Now click a second time to pick the insertion point of the Omni Light Component. To avoid lighting
artifacts or problems, the component must not be touching an adjacent face. Moving the mouse in a
direction you can specify the insertion point for the light itself. Use the Shift key to lock the inferencing,
just as with many tools in SketchUp. With the mouse inferencing a direction you may also type in the
distance and hit “Enter”. Now click to place the Omni Light Component. You should now see the Omni
Light appear in your model.
4. Twilight will automatically give the light a power. This power can be changed manually using the Light List
and Settings Dialog later.
If you see black speckles in your renderings it can be due to the fact a light is sharing 3D space with an
adjacent face. For a 'standard' sized lightbulb, keep the Omni Light approximately two (2) inches (5cm)
away from adjacent geometry. If you change the radius of your Omni Light to be greater than two (2)
inches (5cm), then move it even further away from adjacent geometry to avoid potential conflicts/light
artifacts.
Place an Omni Light into a light component fixture you have in your scene. This way when you copy the
fixture the light goes with it. Also, if properties for an omni or spot light placed inside of a component are
edited once, it will change the light inside all instances of that fixture allowing control of many lights at
once.
Twilight places all light components (Omni or Spot Lights) on the layer called “TWL_Lights_Layer”. This is so
that one can easily hide all the lighting components from within SketchUp's Layers Dialog. Hiding a layer
containing lights effectively turns those lights off when rendering in Twilight.
After placing an Omni Light component into your scene, if you copy it to another place in your model, you
need only change it's properties in the Light Lister and Settings Dialog once, as all other copies of that light will
change with it.
Ver. 1.00 - slf
Back to Top
© Twilight Render 2009
by: Twilight Render
08/25/09 - Date
19 of 38 - Page
Lighting
Section 3: The Spot Light Tool
The Spot Light Tool allows you to insert a Spot Light. A spot light is manually adjustable to cast light in a
certain direction with a definable “Hotspot” angle and a “Falloff” angle.
To place a Spot Light in your scene:
1. Click the Spot Light Tool
2. Click your light's Basepoint (the place in your scene on a face or point near where you want the light to be
placed) (drawing a temporary line where you intend to place the light may be helpful for guiding placement
of a light, for example a line crossing a circle so you can snap to the midpoint of the line with your light.)
3. Now you need to click a second time to place the insertion point of the Light Component. To avoid lighting
artifacts or problems, the component must not be touching an adjacent face. Moving the mouse in a
direction you can specify the insertion point for the light itself. Use the Shift key to lock the inferencing,
just as with many tools in SketchUp. Now click to place the Spot Light Component or type a distance.
4. Click a third time to place a Direction Point, this is how to “point” the Spot Light in a certain direction.
5. Twilight will automatically give the light a power. This power can be changed manually using the Light List
and Settings Dialog later.
If you see black speckles in your renderings it can be due to the fact a light is sharing 3D space with an
adjacent face. For a 'standard' sized light bulb, keep the Spot Light approximately two (2) inches (5cm)
away from adjacent geometry. If you change the radius of your Spot Light to be greater than two (2)
inches (5cm), then move it even further away from adjacent geometry to avoid potential conflicts/light
artifacts.
Place a Spot Light inside of a light component fixture you have in your scene. This way when you copy
the fixture the light copies with it. Also, if properties for an omni or spot light placed inside of a component
are edited once, it will change the light inside all instances of that fixture.
It is with a Spotlight that one may utilize Photometric (IES) data. Load a Photometric Data File (IES) into
the spotlight's definition by choosing the IES tab in the dialog and clicking the Load button to browse to
and load the IES file. IES files are found for light fixtures, not for bulb types. They are provided by most
commercial lighting manufacturers for free on their websites.
To Convert an Omni into a Spot light, choose the Omni Light in the the Light List and Settings Dialog and
click the “Convert” menu item at the top of the dialog. Choose “Spot” to convert the Omni into a Spot
Light, then it will be able to be loaded with IES data.
Ver. 1.00 - slf
Back to Top
© Twilight Render 2009
by: Twilight Render
08/25/09 - Date
20 of 38 - Page
Lighting
Section 4: The Light Editor Dialog
The Light List and Settings (+Sky) is a listing of all lights in the scene, allowing easy access to full
lighting control. This is also where you can choose Sun & Sky parameters as well as utilize an HDR or
Spherical Sky.
The Sky contributes to lighting in most rendering methods* in Twilight. This is why the sky is found in the
Light List and Settings Dialog. The Sun & Sky work hand-in-hand by default in Twilight with the Physical
Sky setting.
*specialized render methods do not take sky light into account such as Alpha Mask or some other render passes. Also, simple raytracing
method is possible with Twilight, and sky light is not taken into account with this method.
Standard Light Options Tab
Naming lights is important for good scene organization
and for ease of the next user to find what they
are looking for.
“Enabled” check box turns the light on or off.
“Casts Shadow” check box only works for lights when
rendering with non-progressive rendering
methods such as the Low-High render presets.
“Soft Shadows” check box turns the soft shadow on or
off. Realistic lights usually have soft shadows.
Light Color box will accept RGB values as well as the
common color names. Cicking the color swatch
button will pull up the Color Swatch dialog.
Light Bulb Size is a radius size, so type accordingly.
This controls not only how the light will interact
with adjacent geometry, but also the soft effect
of the soft shadow. The larger the radius, the
softer the shadow.
Light Strength: With IES files, the light strength should
be set to a power of 1. Light Strength and
hotspot/falloff information for spots play crucial
roles.
The Attenuation is the amount a light will dissipate to
zero. In physics this is typically by the Inverse
Squared.
Ver. 1.00 - slf
Back to Top
© Twilight Render 2009
by: Twilight Render
08/25/09 - Date
21 of 38 - Page
Lighting
Spot Options Tab
Spot Lights have (2) two main parameters, the Falloff,
and HotSpot.
Falloff
Falloff defines the angle which the light will “Fall Off”
from full strength to zero. It starts at full strength from
the angle defined in the HotSpot. It fades to zero
using the angle defined in the “Falloff” parameter.
Therefore the Falloff angle must be greater than the
HotSpot.
HotSpot
HotSpot defines the angle through which the light will
remain at its full power. Outside of this angle, the
“Falloff” will begin.
IES (Photometric) Light Options Tab
After loading an IES data file, the spotlight's
component will change shape in an attempt to
approximate the direction and strength the light will
shine. The smaller the 'leg' the less light output from
that area of the light. This allows the user full control
for easily placing the IES light and orienting it correctly.
Ver. 1.00 - slf
Back to Top
© Twilight Render 2009
by: Twilight Render
08/25/09 - Date
22 of 38 - Page
Lighting
Projector Light Options Tab
A Projector Light allows you to load a .jpg image into the light definition so
that the light will actually cast the image onto a surface. This is useful not
only when rendering an auditorium or classroom space where a projector
might be displayed but may also be used for special lighting effects.
1.
Convert a Spot or Omni into a Projector.
2.
Click Texture button on the Projector Tab and browse to the image.
3.
Set Width and Height proportions of Light to match image
dimensions.
Ver. 1.00 - slf
Back to Top
© Twilight Render 2009
by: Twilight Render
08/25/09 - Date
23 of 38 - Page
Lighting
Sun & Sky Options Tab
The Sun & Sky Options Tab gives full control over the environment.
Here it is shown “out of the box” with all the default settings. The
default settings should work for most cases. Here is where you can
“turn of the sun”. The sun is enabled for your convenience whether
or not the shadows are turned on inside of SketchUp. This allows
one to work on larger models with the shadows off in SketchUp, but
still have them on when hitting the render button.
Background/Sky Type:
Choose the type of sky you want.
Physical Sky
is best to start, as it changes with the time of day and location set in
SketchUp. Physical Sky also contributes good lighting from all
directions onto the model.
Background Color, Centered Image, Tiled Image, Fit Image
These options have the least control over placement of image, and
do not contribute as lighting from the sky.
Sky Color
is best to use when wanting a single color projected onto the scene
from all directions. Light Grey works well as a quick “soft box” for
product shots. It contributes to both scene lighting and reflections.
Hemispherical Sky and Spherical Sky
Insert an image that is meant for use as a spherical sky or
hemispherical sky (upper half only of the sphere). It contributes to
both scene lighting and reflections.
Sky Probe
This is for HDR images that are mapped specifically as a sperical
“probe”. It contributes to both scene lighting and reflections.
Ver. 1.00 - slf
Back to Top
© Twilight Render 2009
by: Twilight Render
08/25/09 - Date
24 of 38 - Page
Materials
Section 5: The Material Tool
The Material Tool allows you to quickly apply physically accurate material properties to any SketchUp
material painted on a face in your scene. Good materials are key to a good rendering. With Twilight's
Material Tool they are also fast and easy to create.
With Twilight you are not creating new materials, but modifying the materials you already have painted in
SketchUp. Hi-res textures applied in SketchUp are automatically optimized by SketchUp for quicker
display while working, but the hi-res texture linked to the material will be passed through to Twilight and
used for rendering. If there is no material applied, it can not be edited with the Material Tool.
It is important to note that the “Default” material in SketchUp will render as flat white. In order to edit the
Default Material with Twilight's Material Tool you must paint the surface with a color or texture.
The quickest way to paint all Default Material faces inside of a SketchUp model is to choose a color or
texture in the SketchUp material editor, then while holding the Shift key paint any Default Material face.
All faces with the Default Material in the model will be now painted with the new material. To do this for
only the faces connected to the face chosen, hold the Ctrl key while painting a face.
Material Previews
There are several previews to choose from in Twilight. Clicking the pulldown menu
under the preview image will allow you to choose from several spheres in different
lighting studios, as well as cubes with different sizes for previewing architectural
materials.
Spheres work best with materials without textures, such as glass and metal. While
the cubes work best with texture-driven materials like stone, wood, and other
patterns with real-world dimensions.
The size of the texture you see rendered in the SketchUp view window should be
exactly what you will see in your rendering, so remember that the Preview Scenes
are only approximations and actual render results depend on many complex factors.
There are two (2) ways to apply Twilight's Material properties to SketchUp's™
materials, Material Templates and Material Libraries.
Ver. 1.00 - slf
Back to Top
© Twilight Render 2009
by: Twilight Render
08/25/09 - Date
25 of 38 - Page
Materials
Material Templates
Material Templates are the quickest and most flexible way to apply Twilight Material Properties to SketchUp
Materials. Therefore it is recommended to utilize templates whenever possible (in lieu of using Material Libraries).
Some features of Twilight's Material Templates:
1. Template's flexibility allows you to create almost any material extremely quickly and easily
2. Templates share seamlessly among all Twilight users
3. Templates are guaranteed physically accurate unless specifically designed and stated otherwise
4. Templates will not increase a model's file size
5. Templates eliminate the need for project specific libraries, and reduces the chance of missing textures.
How To Apply a Twilight Material Template
Click the Twilight Material Tool, then choose a material in your scene you
would like to add special properties to. Then apply a Template by
choosing one of the Template names from the Material Tool's dialog
Template Pull Down Menu.
When to use a Material Template
Use templates to create a mirror, add reflection and bump mapping to
ceramic tiles, add reflections to porcelain, add light emitting properties to
any surface in any color, to create a translucent material such as wax, to
create water or frosted glass or blurry metal like stainless steel.
Do NOT use templates on any material that does not need it. Adding
special material properties unnecessarily will only add render time with
little or no visual gain.
Adding reflections (especially soft or “blurry” Specular Reflections) will
drastically increase realism in a rendering as most materials, even brick,
display specular reflections, but be aware that it will add render time and
requires higher quality render settings to look correct.
Generic*
Use this template to give a quick touch of reflection to a surface. This template is designed to be quick, but not
necessarily the highest quality nor physically accurate. So use it wisely. Use this template also to reset a
material. Sometimes it is quicker to just 'start over'. Here you will find the reset button for any material.
Ver. 1.00 - slf
Back to Top
© Twilight Render 2009
by: Twilight Render
08/25/09 - Date
26 of 38 - Page
Materials
Paint
As it's title suggests, if you have a surface painted the color you want in SketchUp, simply choose your paint finish
here. Using a seamless texture for noise in the bump channel with the paint template can add much realism.
Stone
This template will not apply any image of stone, but if you have painted a stone material onto a surface in your
scene, choosing this template will make it look great.
Ceramic
This template will not apply any image of tiles, but if you have painted a ceramic tile material onto a surface in your
scene, it will give it the properties of a ceramic tile. Then you need only add a bump map or simply click the chain
link icon next to the word “Bump” to link the SketchUp material into the “Bump Channel” Twilight material
definition. See also more on Bump Maps. Using a Reflection Map to eliminate reflections on the grout joints will
add much realism.
Plastic
Many materials we see every day have a lot in common with plastic. A wooden floor, a table top, furniture
surfaces, etc. This is a powerful template setting up your material so that you can set the precise reflection type
and Bump Map and Reflection Mapping you wish.
Realistic Glass
If it's Realistic Glass you wish for, you must build the model accurately/realistically/to proper scale. If using the
Realistic Glass template, be sure the model you apply it to has a thickness and can 'hold water'. That is, that it is
a 6-sided cube if using a rectangle in a model of a glass table top for example. One should also always be certain
that the Normals for all Faces on realistic glass models are facing “out” as the normals are used for calculating
much about the light passing through and bouncing from this surface.
Architectural Glass*
The fastest rendering and best looking glass for most architectural renderings will be found in this template. For
the quickest architectural renderings with glass, draw a single face to represent the glass surface, paint this face
with a glass material from SketchUp, and then apply a choice from this template to that glass material. When
using a non-progressive rendering method the template without shadows will render very quickly and allow the
most light to enter an interior room. Set IOR to 2.2 and change color of reflection to darker grey for a “tinted” glass
look.
Ver. 1.00 - slf
Back to Top
© Twilight Render 2009
by: Twilight Render
08/25/09 - Date
27 of 38 - Page
Materials
Metal
Making a great-looking metal is as simple as a click here. After applying a template you can change the color,
shininess, reflection color, bump mapping, etc. to make it look however you like. Remember that metals will look
great in Twilight, but require high render quality and may take a long time to render nicely. Using an Easy Render
Setting with a “+” sign will bring nice results.
Brushed Metal
Looking for a brushed stainless steel? Look no further. Aluminum, or other brushed look metals can be based on
these Templates. Remember that metals will look great in Twilight, but require high render quality and may take a
long time to render nicely. Using an Easy Render Setting with a “+” sign will bring nice results. Progressive
render settings will bring best results.
The key with many Templates is to use the SketchUp texture only in the bump channel.
To do this after applying the Brushed Metal Template>Aluminum to
the “Cladding_Siding_White” SketchUp Texture:
1.
Click the Chain Link Button to break the link of the SketchUp
Texture Image to the Material Color Channel.
2.
Click the Chain Link Button to enable the link of the SketchUp
Texture Image to the Bump Channel.
3.
Click the Texture pull-down menu choice in the Material Color
Channel and choose “Color” to remove the texture completely from the
Color Channel.
4.
Now the SketchUp image is driving the bump instead of the color.
5.
Adjust the metal color further by changing it in the color channel,
change the shininess to 20 to make it even more 'brushed' and mattelooking... maybe go even to 5. You can also add a color to the reflection
channel to create other types of metal. This material will continue to
remain physically accurate (obey the laws of physics).
For instance, use this method (without Click-3) to create ceramic tiles by
combining a SketchUp Ceramic Tile Material with a Twilight Ceramic
Template, or create concrete by combining SketchUp's Concrete material
with the Rough Stone Template, or SketchUp's Wood Flooring by
combining it with the Shiny Plastic Template.
To create a Zinc metal using the Brushed Metal Template
Apply the Brushed Metal Template, set the Color to 90% grey, and Reflection to 30% grey, set Shininess to 15.
Ver. 1.00 - slf
Back to Top
© Twilight Render 2009
by: Twilight Render
08/25/09 - Date
28 of 38 - Page
Materials
To Create a Good Brick Material with Twilight Material Templates
For bricks, start for example by applying SketchUp's “Brick_Rough_Dark” brick
material in the “Bricks and Cladding” SketchUp material category.
1.
Apply Template “Stone>Natural” Template with Twilight's Material Tool.
2.
Click the Chain Link Button next to the Bump Channel, this links the image of the brick to
the Bump Channel, driving the “Bumpiness” with the image of the bricks.
3. Check the Invert box next to the Bump Channel. Inverting the image makes the joints
appear darker than the brick which is essential for correct bump mapping in renderings.
4.
To get a more 'bumby' effect, increase the “Size” number of the bump from “1” to “2” if still
not enough, increase it to “4”.
5.
Change the “Shininess” from the default “20” to “5” to get a very subtle specular reflection.
Fast*
These materials may be the place to turn when lower quality settings are
required for speed. If using “Medium” settings, but the Brushed Metal requires
higher setting, try “Fast Aluminum” (modify color as desired). It will render
much cleaner in that setting than the highest quality metals will.
Light Emitter
Another way to create truly realistic light sources is with a Light Emitting
Surface (LES). Paint your surface with a color (white), and apply the Light
Emitter template to that color to make it shine. Remember that great light
comes at a cost of render time and that higher quality render settings are
required. It is recommended to use LES only with progressive indoor rendering
methods. Each light emitting rectangle is considered as two (rectangles are
divided into triangles during processing in order to be rendered with Twilight's
engine. Therefore turning a sphere into a Light Emitting Surface could result in
Twilight's engine thinking about hundreds of little “lights”. Use Light Emitting
surfaces wisely.
After applying the Light Emitter Template you can see a new parameter appear
called “Emitter”. “Fake” makes it 'look' lit, but it will not increase render times as
it does not actually shine any light when rendered with a non-progressive
rendering method. Fake Emit is great for making a quick-render TV screen
material. Or good for inside of a light fixture where no actual light may be
shining. Invisible makes it so that it will shine light, but not be visible in the
rendering as the light source. You may also choose to load an IES file into a
Light Emitting Material with this pull-down menu.
Ver. 1.00 - slf
Back to Top
© Twilight Render 2009
by: Twilight Render
08/25/09 - Date
29 of 38 - Page
Materials
SubSurface Scattering
SubSurface Scattering is the phenomena of light “scattering” along/underneath the surface of a material causing a
“glow” in some lighting conditions. A good example is a piece of translucent plastic covering a light fixture, jade
stone, or of a wax candle. SubSurface Scattering can require higher quality render settings to look satisfactory.
They will not show up correctly at all in prelim or low render settings. Using a progressive rendering method will
guarantee the best results. SubSurface Scattering template will not render correctly on a single face. The model
must have a real-world thickness and follow similar rules to modeling for using the Realistic Glass Template.
*These material templates are by nature not physically “accurate” but are useful for many artistic applications.
Material Libraries
If you can not seem to get what you want from the Templates, the material libraries can be a huge help.
There are several useful libraries installed by default with Twilight. Gems, Translucents, SubSurface Scattering,
Illuminants, and more. These are libraries of materials that may be difficult to achieve any other way. They were
created and provided by various contributing artists and are used/distributed with permission for Twilight Render.
Ver. 1.00 - slf
Back to Top
© Twilight Render 2009
by: Twilight Render
08/25/09 - Date
30 of 38 - Page
Materials
There are hundreds of high quality free materials available for free download from Kerkythea.net. Users of
Kerkythea may also create their own material libraries using Kerkythea, then either point Twilight to the Kerkythea
Material Libraries folder via the Twilight Options Dialog, or copy a library folder from the Kerkythea Material
Libraries folder into the “...SketchUp\Plugins\Twilight\Materials” directory.
To install a material pack
To install a material pack downloaded from Kerkythea.net:
1. Change the name of the file from “Example.mat.zip” to be “Example.zip”.
2. Unzip the file into your “...SketchUp\Plugins\Twilight\Materials” directory.
3. Re-open SketchUp to see it in your Library List.
Ver. 1.00 - slf
Back to Top
© Twilight Render 2009
by: Twilight Render
08/25/09 - Date
31 of 38 - Page
Options
Section 6: The Twilight Options Dialog
The Options For Twilight dialog allows you to set various default background parameters and file paths
for Twilight.
Directories and Files
Specify here any directory (I.e. network directories) for Material
Libraries, Material Preview Scenes, and Rendering Presets.
Dialogs
Reset all your dialog answers, show the system log file (if
having an an issue with an error), or Choose a different Twilight
Editore User Interface Theme.
Advanced
If you prefer to specify the filename for your image every time
before you render,.choose it here.
About
Gives information about specific version of Twilight being used,
registered user information and other credits.
This is also where one may Request a License and Install a
License.
In order to create a license request:
Ver. 1.00 - slf
Back to Top
1.
Push the Request License button.
2.
Save the file.
3.
Email the file to [email protected].
4.
Then Twilight Render will generate a license and email it back.
5.
Save the license file on your computer
6.
Push the Install License button.
7.
Navigate to the license file and load it. License install complete.
© Twilight Render 2009
by: Twilight Render
08/25/09 - Date
32 of 38 - Page
Reference
Section 7: Reference
Batch Rendering
Batch Rendering is the process of Rendering Multiple Views but only clicking the Start Render button once.
To Batch Render with Twilight, utilize the Animation feature.
Example with 3 scenes to render, CamA, CamB, CamC.
1. Set SketchUp's Animation Transition Time in Seconds to (1). (Window>Model Info>Animation)
2. Set SketchUp's Animation Scene Delay Time in Seconds to (0). (Window>Model Info>Animation)
3. Specify these settings in Twilight's Render Dialog Animation Tab
Start=(0)
Stop=(2) (the easiest way to think of this number is “the number of transitions between scenes”)
Set Frame Rate to (1)fps
4. Specify a Base Name for the rendered image files.
5. Twilight will render 3 frames: Frame000 = CamA Frame 001 = CamB Frame002 = CamC
Ver. 1.00 - slf
Back to Top
© Twilight Render 2009
by: Twilight Render
08/25/09 - Date
33 of 38 - Page
Reference
Bump Mapping and Bump Maps
Using a Bump Map allows a render engine to use a Grey Scale
Image to create an illusion of geometry that is not actually
there. Bump Maps do not create geometry (i.e. displacement)
Bump Maps only work on surfaces that have some measure of
reflectivity. They will not really be noticeable on a flat colored
surface.
Bump Maps work like this: 50% Grey = “no change” in
appearance for the height of the surface. Darker= “in” or
“down”, Lighter = “out” or “up”.
The easiest way to apply a Bump Map in Twilight is to first,
apply a template similar to what you are trying to create. If it's
painted metal, use a “paint” template. If there is no template
applied, increase the IOR number from the default of “1” to be
something higher, I.e. “1.1”. If the IOR is not increased, the
bumps will not appear. Second, click the Chain Link button
next to the Bump Map slot. This links the image of the material
into the Bump Map slot.
To assign a Bump Map in Twilight after assigning a Template:
1.
Choose “Texture” in the Material's Bump Slot
2.
Browse to and load the Bump Map texture image.
3.
Set the “Size” or “Strength” of the bump. A size of “1”
or Less than one is usually sufficient. Over “5” is rarely used.
In the case of a Brick Wall image, for example, if the bricks are light and the mortar lines are dark, it will work well
as a Bump Map. The dark mortar will enhance the depth when in the Bump Map Channel. If the bricks are dark,
and the mortar lines are light, using the 'invert' check box for the Bump Map Channel will allow you to quickly
invert the lights and darks of the image in the Bump Map Channel, making the mortar lines recede “in” to the wall
and the bricks bump “out”. This method works well in most cases, but in some cases, will not give satisfactory
results.
The best way to apply a Bump Map is to create a True Bump Map. A True Bump Map is actually made specifically
with the Bump Map Channel characteristics in mind. (Dark = “in/down” Light = “out/up”) Open the image file you
want to use as a base for creating a Bump Map into your preferred image editing program, such as Adobe
Photoshop. Duplicate the layer, turn it to grey scale, increase contrast, and paint areas 50% grey where you want
no bump. Paint areas black where you want the deepest recesses, and vice versa. This was done for the bump
map for the Wood_Bamboo_Medium flooring example in the image above.
Ver. 1.00 - slf
Back to Top
© Twilight Render 2009
by: Twilight Render
08/25/09 - Date
34 of 38 - Page
Reference
Codec
A Codec is used during processing of an animation using a separate video editing program such as the free and easyto-use VirtualDub. Using a Video Editing program one may open a series of .jpg images, just as rendered from Twilight,
and save them as an .avi video. Using a Codec allows the program to compress this .avi video resulting in a much
smaller file size.
It is important to remember that most codecs require a certain size or image proportion in order to be used. For
example, when using the Xvid or DivX codecs, the Width of the image must be divisible by 4 and the height must be
divisible by 2. Paying special attention to the size of the rendered image for animations therefore becomes critical in
post-processing.
Edge Lines
Checking the Edge Lines box in the Material Template Properties Dialog will render lines similar to the edge lines you
see in the SketchUp view. Edge Line thickness in Twilight is not linked to edge line sizes in SketchUp. To define edge
lines use a simple rule of thumb:
Lonely Edges can not be rendered. That is, an edge that does not define the edge of a face will not be processed by
Twilight. To render a “Lonely Edge” simply make it into a face by using a free ruby plugin for SketchUp such as
“Extrude Lines 2 Points.rb” which may be found at the Ruby Library Depot maintained by Didier Bur. Using this tool
you may extrude the line a small distance with 2 clicks, such as ¼". Then the line will render with Twilight's Material's
Edge Lines feature.
.1= .1 meters = approximately 4” use this for large exteriors such as large buildings or interiors of very large spaces.
.01= .4” use this for fine lines around smaller buildings such as a house and elements like stairways
.001= .04” Use this for fine lines around detailed elements such as furniture objects and cabinetry.
HDR
High Dynamic Range (HDR) images contain 32bits of information per pixel as opposed to 8bits with a .jpg. In rendering
one typically uses a spherically mapped HDR image to actually project light onto a 3D scene from all directions at once.
In this manner, if an HDR is created in a specific place (St. John's Cathedral, for example) and then used to light a 3D
object, one should be theoretically able to visualize the object as if it were lit with the exact light that it would get in St.
John's Cathedral. There are thousands of HDR images available for download via many different websites.
In Twilight one also has the ability to save an image as an HDR. In this case, one would do so in order to have the
ability to take advantage of the darkest and lightest areas of the image, where in a normal image some of these areas
may not be able to be seen clearly, with an HDR one may tonemap them using a photo editor to get the greatest visual
tonal range. Of course, if the Camera is set to Spherical, and the image is saved as HDR, you will have a spherically
mapped HDR image of your model.
Ver. 1.00 - slf
Back to Top
© Twilight Render 2009
by: Twilight Render
08/25/09 - Date
35 of 38 - Page
Reference
Model Processing Phase
The Model Processing Phase happens just after you click the Start Render Button. It is the part of the rendering
phase when Twilight processes all geometry, components, lighting, cameras, materials, and animation information
in your scene. Hidden geometry is not processed. Objects on a layer that has been turned off are not processed.
You can control what is processed from your scene in many ways:
1
Select an object and tell Twilight to render only that object
1. Select the object you wish to render by itself.
2. Click the Twilight Power Button to open the render dialog.
3. Click the Start Render Button.
4. Twilight will then ask you if you want to render only the selected object(s).
5. Click “Yes”. This will then cause Twilight to render only the selected object(s).
2
Turn off a layer containing objects you wish to hide.
1. It is wise in SketchUp to draw everything on the default layer (Layer0).
2. This way if you wish to hide some objects (such as furniture, or Phase 1) you can create a layer (such as
one called “Furniture” or “Phase 1”).
3. Then, in SketchUp's Pull-down Menu “View” go to “View>Toolbars>Layers”.
4. Now selecting an object(s) in your scene you can force that object onto another layer by simply going to
the Layers' pull-down menu and choosing your layer (such as one called “Furniture””).
5. Now open the SketchUp Layers dialog via SketchUp's pull-down menu “Window > Layers” and uncheck
the box next to the layer name holding the objects you wish to hide.
6. Or simply go to Twilight's Render Window, and choose the pull-down menu “Layers” and deselect the
name of the layer you wish to hide by clicking the name of the layer. This will leave it visible in SketchUp's
scene view, but not render it.
3
Hide an object or group inside of Google SketchUp.
Select an object and context-click (right-click), choose “Hide”. Or go to Sketchup's Menu “Edit > Hide”
4
In the Advanced Tab you can set the processing to work only on lights and cameras.
Under the Content Updates : Update Method > Lights, Cameras.
Ver. 1.00 - slf
Back to Top
© Twilight Render 2009
by: Twilight Render
08/25/09 - Date
36 of 38 - Page
Reference
If you have not yet already processed the entire scene once it will automatically do so. This speeds processing
greatly on large scenes after the full model has been processed once and you are working only on modifying lights
or cameras and find yourself re-rendering multiple tests. It is also great for speeding up the rendering process of
architectural animations where the camera is the only animated object.
If you find you have changed geometry or materials, and they are not being updated in the rendered scene, be
sure to check if this option is enabled. If so, change it to process “All” once again.
Proper Animation for SketchUp by Morisdov
This is an animation plugin for SketchUp that allows one to animate objects, such as the opening of doors, or
moving of an object from one place to another. When used properly, it's animations will be automatically rendered
by Twilight. Set up the Animation Options appropriately as described in the Animation Tab section of this manual.
Reflection Maps (Specular Map)
Using a Reflection Map or “Specular” Map one can precisely
control the amount of light reflected. Related to Alpha Mask, or
Bump Maps, the Reflection Map reacts so:
Black = No Reflection,
Gray = Percentage of Reflection
White = Perfect Reflection
Combining a good reflection map with a good Bump Map will
make extremely photo-realistic materials.
To assign a Reflection Map in Twilight after assigning a Template:
1.
Choose “Texture” under “Reflection” Material slot.
2.
Browse to and load the reflection map texture.
Spherical Sky (Skies) Background
A Spherical Sky Background is an image that is made especially to be used for surrounding your model inside a
seamless “sphere” that looks like a sky or like a sky and ground. This image may be a High Dynamic Range
image, or may only be a .jpg format. Either way, it will contribute light to the rendering. An HDR will contribute a
lot more light than a .jpg format image. Typically with HDR lighting, it is best to disable the sun.
Ver. 1.00 - slf
Back to Top
© Twilight Render 2009
by: Twilight Render
08/25/09 - Date
37 of 38 - Page
Reference
Credits
Twilight Render is built on the exceptional quality of the Kerkythea Echo 2008 Render Engine.
Kerkythea has quietly been the render engine of choice for professionals, students, and hobbyists around the world for many years. Now
Twilight allows anyone using Google SketchUp, from the extreme novice to the hi-end professional rendering specialist easy access to
the world-renowned Kerkythea from within Google SketchUp. For questions regarding Kerkythea and its usage, please refer to the
Kerkythea Website.
Contributing Artists
Material Libraries are used and distributed with permission from their authors. Claudio Pilustrelli, Patrick Nieborg, Alexandre Mur. Thank
you for your generosity and creativity! For access to many more great material libraries that are compatible with Twilight Render, please
refer to the Kerkythea Website.
A special “thank you” goes to Ioannis Pantazopoulos, who has given so much rendering power and enjoyment so generously to so many
people for so many years.
Ver. 1.00 - slf
Back to Top
© Twilight Render 2009
by: Twilight Render
08/25/09 - Date
38 of 38 - Page


