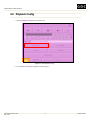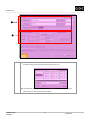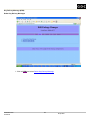
1
Document Revision History DSRTM DSR EN-2000 Encoder User Manual Date Version Author Description 11 february 2007 0.1 Julius Nebril en-2000 User Manual 11 Februrary 2008 DSR™ Digital Film Agile Encoder Model No. EN-2000 User Manual Software Version 5.3cvs EN - 2000 A SOFTW ARE-BASED DIGITAL FILM ENCODER W ITH UNCOMPRESSED STORAGE AND PLAYBACK CAPABILITIES 1 TM Thank you for purchasing a EN-2000 DSR Digital Film Agile Encoder from GDC Technology Limited. To ensure proper operation and to maximize the encoder’s value, please allot a few minutes to review this User Manual. It will guide you through all the features and benefits of the new EN-2000 Encoder. ABOUT THIS MANUAL This EN-2000 Encoder user manual is intended to provide the reader with an overview of the main features and benefits of the DSR TM Digital Film Agile Encoder. For more information, please refer to the GDC Technology website (www.gdc-tech.com) or contact one of our offices. COPYRIGHT NOTICE Copyright © 2007 by GDC Technology Limited All Rights Reserved. No part of this manual may be copied or distributed, transmitted, transcribed, stored in a retrieval system, or translated into any human or computer language, in a form or by any means, electronic, mechanical, photocopying, recording, magnetic, optical, manual or otherwise, or disclosed to third parties without prior written permission of GDC Technology Limited. TRADEMARKS AND SERVICE MARKS DSR (Digital Super Realism) is a registered trademark of GDC Technology Limited . Other products names mentioned herein are used for identification purposes only and may be trademarks of their respective companies. MANUAL DISCLAIMER This manual is made with version 5.3cvs and might have slight differences depending on the software version the client is running. The contents, features and specifications stated in this manual are subject to change without notice due to continuous product development and improvements. In no other event shall GDC Technology Limited be liable for any loss of profit or any other commercial damages, including but not limited to special, consequential, or other damages. 2 CONTACTS AND OFFICES Website: www.gdc-tech.com Email: [email protected] 24/7 Engineering Support Hotline: North America and Europe +1 877 743 2872 (Toll Free) China +86 400 886 0966 (Toll Free) South East Asia +65 6100 4328 North Asia +852 3520 0920 USA (Los Angeles, CA) USA (Sterling, VA) GDC Technology (USA) LLC Burbank, CA 91505 3500 W. Olive Ave, Suite 940 GDC Technology of America LLC 21155 Whitfield Place, Suite 207, Sterling, VA 20165 Tel: (+1) 877 743 2872 (Toll Free) Fax: (+1) 877 643 2872 Tel: (+1) 877 337 0868 (Toll Free) Fax: (+1) 571 313 0468 Singapore GDC Technology Pte Limited 6 Changi South St. 2 Fedex Building, Level 7 Singapore 486349 Tel: (+65) 6222 1082 Fax: (+65) 6222 1089 Hong Kong GDC Technology Limited th Unit 1-7, 20 Floor, Kodak House II 39 Healthy Street East, North Point, Hong Kong Tel: (+852) 2523 6851 Fax: (+852) 2579 1131 China (Beijing) China (Shenzhen) GDCTechnology(Shenzhen) Limited th 5 Floor GDC Building, No.9 Hi-tech Middle 3 Road, Science & Technology Park, Nanshan District, Shenzhen, P.R. China 518057 Tel: (+86) 755 8611 0889 Fax: (+86) 755 8611 0899 3 GDC Technology (Beijing) Limited Rm. 518-520, Tower B, No.11 De Wai Street, Beijing, P.R. China 100088 Xi Cheng District Tel: (+86) 10 6205 7040 Fax: (+86) 10 6205 7054 TABLE OF CONTENTS 1. Introduction...................................................................................................................................... 5 1.1. 1.2. 2. ABOUT THE MANUAL ..............................................................................................................................................6 ELECTRICAL SAFETY..............................................................................................................................................6 chassis description .......................................................................................................................... 7 2.1. 2.1.1. 2.1.2. 3. 3.1. 4. COMPONENTS ..................................................................................................................................................8 Front Panel .............................................................................................................................................................. 8 Back Panel .............................................................................................................................................................. 9 encoder setup................................................................................................................................ 11 GETTING STARTED ....................................................................................................................................... 12 Understanding the User Interface .................................................................................................. 15 4.1. 4.2. MAIN MENU ........................................................................................................................................................ 16 PLAYBACK CONFIG............................................................................................................................................. 20 4.2.1. Config menu .......................................................................................................................................................... 21 4.2.2. Local Disk menu .................................................................................................................................................... 23 4.2.3. Audio menu ........................................................................................................................................................... 27 4.2.4. VTR menu ............................................................................................................................................................. 29 4.2.5. Analog/Sync menu ................................................................................................................................................ 30 4.2.6. Clip menu .............................................................................................................................................................. 31 4.2.7. TimeCode menu .................................................................................................................................................... 32 4.3. RECORD CONFIG ............................................................................................................................................... 33 4.3.1. Config menu .......................................................................................................................................................... 33 4.3.2. Local Disk menu .................................................................................................................................................... 35 4.3.3. Record Config/Audio menu ................................................................................................................................... 38 4.3.4. VTR menu ............................................................................................................................................................. 39 4.3.5. Append menu ........................................................................................................................................................ 40 4.3.6. Analog/Sync menu ................................................................................................................................................ 41 4.3.7. TimeCode menu .................................................................................................................................................... 42 4.4. VTR MASTER .................................................................................................................................................... 43 4.4.1. Remote VTR Control ............................................................................................................................................. 43 4.5. ADVANCE OPTIONS ............................................................................................................................................ 46 4.5.1. Edit/Delete ............................................................................................................................................................. 46 4.5.2. Password ............................................................................................................................................................... 48 4.5.3. Orders menu ......................................................................................................................................................... 49 4.5.4. Export .................................................................................................................................................................... 55 4.5.5. Diagnostics ............................................................................................................................................................ 66 4.5.6. Remote .................................................................................................................................................................. 67 4.5.7. DDR Info ................................................................................................................................................................ 71 5. 5.1. 5.2. 5.3. 6. 6.1. 7. Case Study – from recording to encoding to packaging ................................................................ 72 RECORDING FROM A SDI/HDSDI SOURCE TO THE ENCODER................................................................................ 73 ENCODING THE SEQUENCE USING MPEG2 COMPRESSION ................................................................................... 74 PACKAGING AND TRANSFERRING ENCODED SEQUENCE TO A FIREW IRE HARD DISK ................................................ 75 Appendix A .................................................................................................................................... 76 FORMATTED INPUT CONVERSION SPECIFIERS IN C PROGRAMMING LANGUAGE ....................................................... 77 ABOUT THE jpeg2K encoder ........................................................................................................ 82 INTRODUCTION ................................................................................................................................................................... 83 7.1. ACCESSING JPEG2K UI .................................................................................................................................... 83 8. 8.1. 8.2. 8.3. 8.4. 8.5. 9. 9.1. 9.2. Encoding a cliP .............................................................................................................................. 85 ADDING JOB ...................................................................................................................................................... 86 IMAGE PREPROCESS .......................................................................................................................................... 90 DELETE IMAGE PREPROCESS ............................................................................................................................. 94 MODIFYING ENCODING PARAMETERS .................................................................................................................. 95 ENCODING STEPS............................................................................................................................................... 98 system management ................................................................................................................... 100 FRAME MANAGEMENT ...................................................................................................................................... 101 HARD DISK MOUNTING ...................................................................................................................................... 103 4 1. INTRODUCTION 5 INTRODUCTION The EN-2000 DSR™ Digital Film Agile Encoder is a cost-effective encoder with uncompressed storage and playback capabilities. The EN-2000 Encoder has scalable storage capacity and features frame accurate software encoding for audio and video, encrypting and packaging 2K, HD or SD picture resolution images. It provides a flexible, open architecture that can be easily updated with the latest compression algorithms and new requirements. 1.1. About the manual This EN-2000 Encoder User Manual is intended to provide the reader with an overview of the main features and benefits of the EN-2000 DSRTM Z Encoder. For more information, please refer to the GDC Technology website (www.gdctech.com) or contact one of our offices. 1.2. Electrical safety Safety Warning The encoder is intended for installation in a restricted access location. If possible, place the encoder in a static-free environment. The operation environment required for the encoder should be 5ºC - 40ºC. For PLUGGABLE EQUIPMENT, the socket outlet shall be installed near the equipment and shall be easily accessible. Do not expose the encoder to rain or moisture to prevent fire or electrical shock hazard. Handle the encoder with care. Careless handling can result in damage to the components inside the encoder. Use dry cloth when cleaning the encoder. Do not block any ventilation openings. Do not install near any heat sources e.g. radiators, stove or other apparatus that produce heat. Refrain from removing the top cover of the encoder to prevent electric shock. Refer to or call Tech Support for servicing or maintenance of the encoder. Before operating your encoder, please read this manual thoroughly, and retain it for future reference. All instructions for operating and use of the encoder must be followed precisely. You are cautioned that any change or modification not expressly approved in this manual or approved in writing by an authorized representative of GDC Technology could void your warranty and/or authority to operate this encoder. Rating & Grounding This product should be operated from an AC power source. Check if the mains voltage and capacity matches the electrical ratings of the encoder. The encoder uses the mains plug as the means to disconnect the unit, this encoder remains powered unless disconnected from the mains source. 6 2. CHASSIS DESCRIPTION 7 CHASSIS DESCRIPTION 2.1. COMPONENTS 2.1.1. Front Panel 1 Figure 1. Encoder Front Panel. 2 3 Encoder Front Panel LCD display panel Touch screen option available. Users can operate the encoder via the LCD display panel and the touch screen. Instead of the touch screen option, users can use an external mouse to control the encoder. Contents in the encoder can also be previewed on the LCD display. Power switch Switch ON and OFF the encoder by gently pressing the power switch. Power LED The power LED will glow a steady green if the encoder is switch on. If red light is seen instead, this means the encoder is not in proper working condition. Please call for technical support immediately. DSRTM DSR EN-2000 Encoder User Manual 11 February 2008 2.1.2. Back Panel 3 20 5 4 7 6 21 9 8 1 10 12 13 14 18 19 2 11 15 Figure 2. DSRTM DSR EN-2000 Encoder User Manual 16 17 Encoder Back Panel. 9 11 February 2008 Encoder Back Panel 1 Fan for Power Supply Unit 2 Power supply input 3 Fans (6x) for encoder ventilation Video Interface: 4 VGA output - Outputs video contents. 5 DVI output - Outputs video contents. 6 XLR Video input and output connectors Audio Interface: 7 SPDIF digital audio output via RCA connector 8 XLR Audio input and output connectors 9 USB port Control Interface: 10 Mouse - Can be connected to the encoder to control the User Interface. 11 Keyboard - Can be connected to the encoder for diagnostics. 12 LAN port 13 Gigabit port 14 GPI port 15 Modem port 16 Node ports (8x) 17 ASI IN / ASI OUT 18 Remote IN / OUT – For RS422 connection (from Remote OUT) of encoder to VTR (via Remote IN) to control VTR from encoder when recording to the VTR. 19 SCSI connector 20 SDI IN / LOOP / OUT (2x) 21 IEEE1394 IN / OUT - For downloading content (DSR packages) from FireWire® disks to the encoder. FireWire® disks have to be qualified by GDC for use with the encoder. DSRTM DSR EN-2000 Encoder User Manual 10 11 February 2008 3. ENCODER SETUP DSRTM DSR EN-2000 Encoder User Manual 11 11 February 2008 ENCODER SETUP 3.1. GETTING STARTED 1. Connect the power cable to the encoder. Input power required is 100-240VAC ± 10%, 50/60 Hz @15 amps max. Please do not attempt operation if the AC supply and cord are not within the specified voltage and power range. Ventilation holes at the back of encoder Connect power cable to the encoder Figure 3. Connecting power to the encoder. 2. Power up the encoder by gently pressing the circular power switch on the front panel. Ensure the button is fully pressed. The power LED above the power button should glow a steady green. If red light is seen instead, this means the encoder is not in proper working condition. Please call for technical support immediately. Green light on power LED Power switch Figure 4. TM DSR DSR EN-2000 Encoder User Manual Powering up the encoder. 12 11 February 2008 ENCODER SETUP 3. After the encoder boots up, a start up menu will appear on the screen as shown below. Figure 5. Start-up menu for EN-2000 encoder. 4. Click the Start Normal Encoder button on the start-up menu. A new window for the encoder Main menu will appear as shown below. Figure 6. DSRTM DSR EN-2000 Encoder User Manual Encoder User interface. 13 11 February 2008 ENCODER SETUP 5. When supporting JPEG2K, click the Start JPEG2K Encoder button. A new window for the main menu of JPEG2K encoder will appear as shown below. Figure 7. DSRTM DSR EN-2000 Encoder User Manual JPEG2K Encoder menu. 14 11 February 2008 4. UNDERSTANDING THE USER INTERFACE DSRTM DSR EN-2000 Encoder User Manual 15 11 February 2008 UNDERSTANDING THE USER INTERFACE 4.1. Main menu 8 1 5 2 6 7 3 4 9 10 11 12 13 14 15 16 Figure 8. DSRTM DSR EN-2000 Encoder User Manual Main menu. 16 11 February 2008 UNDERSTANDING THE USER INTERFACE 1 [] Press [] to start playback (to a monitor, digital projector) / transfer (to a local disk, remote machine, external hard drive) / record (to a VTR, DDR). But make sure the playback configuration is properly set. If not, the system will pop up the Playback Config menu for your entry. The timecode display (below [] and []) shows the time elapsed since start of the current sequence. The button is only active when there is at least one uncompressed sequence in the encoder. The button will be inactive when the encoder is in the playing (i.e. playing / transferring / recording some sequences) or paused mode. 2 [] 3 Slider Bar Press [] to pause a playback. It will start advancing when [] is pressed to start a playback (to a monitor, digital projector) / a transfer (to a local disk, remote machine, external hard drive) / a record (to a VTR, DDR). One sequence will take one complete cycle from the left to the right. The Slider Bar always returns to the starting point (extreme left) after a sequence is finished. When [] is pressed, the Slider Bar will stop and return to its starting point. When a playback is paused, the Slider Bar can be moved. The Slider Bar can be moved leftward (for rewinding) or rightward (for forwarding). [] 4 [] Move to the first frame of the sequence. Rewind (move back) by the number of frames indicated in . May use [] or [] to adjust the number of frames required. [] Forward (move forward) by the number of frames indicated in . May use [] or [] to adjust the number of frames required. [] [] 5 Move to the last frame of the sequence. When [] is pressed, the playback (to a monitor, digital projector) / transfer (to a local disk, remote machine, external hard drive) / record (to a VTR, DDR) stops. The Slider Bar will stop and return to its starting point. [] 6 Press [] to start the record of uncompressed sequences to the encoder. The record can be from an SD/HD-SDI player, local disk, external disk, and remote machine via network transfer. 7 [] Press [] to open the Playlist menu to create a playlist. 8 [] Press [] to lock the screen to prevent any unintentional screen touches on the LCD display panel of the encoder or mouse clicks to disturb a playback / transfer / record. No access to the Main menu (or any other menu) is allowed when the screen is locked. The correct user or maintenance password is needed to unlock the screen. Status 9 10 [Playback Config] Press [] to open the Playlist menu to create a playlist. Press [Playback Config] to open the Playback Config menu. You can use the Playback Config menu to configure parameters for playback (to a monitor, digital projector) / transfer (to a local disk, remote machine, external hard drive, SCSI tape, USB storage, FireWire storage) / record (to a VTR, DDR). 11 [Record DSRTM DSR EN-2000 Encoder User Manual Press [Record Config] to open the Record Config menu. The menu is for you to specify the 17 11 February 2008 UNDERSTANDING THE USER INTERFACE Config] parameters for recording uncompressed sequences from SDI/HDSDI sources (VTR, DDR, playback encoder, scanner, telecine equipment, color corrector), SCSI tape, local disk, external disk mounted on the encoder, external machine connected to encoder via IP. 12 [VTR Slave] The encoder can be put to slave mode and you may control the encoder remotely from a VTR via RS422. Before setting the encoder to slave mode, make sure you have selected a workspace to work on. Go to Playback Config menu (press [Playback Config]) and select the uncompressed sequence you wish to work on from the list of sequences in the Name dropdown. The Status will show “Remote Mode => Current Workspace: (name of sequence selected)”. 13 [VTR Master] The encoder can remotely control a VTR via RS422. Upon pressing [VTR Master], the Remote VTR Control menu will open and you can operate the VTR remotely using the menu. Note that this VTR function operates differently from VTR function in Playback Config/VTR and Record Config/VTR menu. The former allows the encoder to act like a VTR controller and give commands to remotely control the VTR, while the latter enables the encoder to control the playback and record process between the encoder and the VTR. 14 [Advance Allows you to delete, rename or copy video sequences, and also to export (encode) the video Options] sequence. Passwords can be changed by specifying the old password and entering the new password. It enables you also to transfer the DSR package to a hard disk. DSRTM DSR EN-2000 Encoder User Manual 18 11 February 2008 UNDERSTANDING THE USER INTERFACE 15 [MPEGPlayer] A new window for entering Maintenance Key pops up when [MPEGPlayer] button is pressed. Enter the correct maintenance password. Figure 9. Enter correct Maintenance password. A new window appears as shown below. Figure 10. User interface for MPEG player. [Quit] Press [Quit] to shutdown encoder or restart application. Note that restarting the application will not reboot the encoder. Restarting the application only restarts the software without affecting the hardware. Allow some time for the encoder to shutdown properly. You will need the ScreenSaver password to shutdown the encoder. Other means to shutdown encoder: Gently press the circular power switch on the front panel. „Forced shutdown‟ - Gently press the circular power switch on the front panel and hold until the encoder starts to power off. This will not shut down the encoder properly and it‟s not recommended. Use this method only when the above-mentioned methods cannot work. DSRTM DSR EN-2000 Encoder User Manual 19 11 February 2008 UNDERSTANDING THE USER INTERFACE 4.2. Playback Config 1. Select the Playback Config button on the Main menu. Figure 11. Select Playback Config. 2. A new window for Config menu appears as shown in Fig. 11. DSRTM DSR EN-2000 Encoder User Manual 20 11 February 2008 UNDERSTANDING THE USER INTERFACE 4.2.1. Config menu 6 1 2 3 4 5 7 Figure 12. Config menu. DSRTM DSR EN-2000 Encoder User Manual 21 11 February 2008 UNDERSTANDING THE USER INTERFACE Name The dropdown contains the list of uncompressed sequences in the encoder. Press [] to see full list and select the sequence you wish to play or preview. Duration Indicates the time duration (in hh: hours, mm: minutes, ss: seconds, ff: frame number) of selected sequence in Name. # Frames Shows the total of frames the selected sequence in Name has. Size Indicates the resolution of each frame of the selected sequence in Name. FrameRate Initially shows the frame rate at which the sequence is captured (which is mostly the actual frame rate of the sequence). The first dropdown is enabled with a list of other frame rates. You can choose to output the sequence at a different frame rate. However, changing the output frame rate will affect only the video and will cause the video to be out-of-sync with its associated audio. The second dropdown initially shows the video format at which the sequence is captured – whether it is in ‘P’ (progressive), ‘I’ (interlaced), ‘sF’ (segmented frame) format. You may choose to output the video format. The third dropdown should show ‘1x’. Other options available in the dropdown include ‘2x’ and ‘3x’. The options are for slow motion playback (with repeat frames). For example, selecting „2x’ will play each frame twice, effectively reducing the frame rate by two times. Shows the raw frame format - color space (RGB or YUV), color bit depth (8 or 10) at which the sequence is captured on the encoder. [Preview] Press [Preview] to see the selected sequence in Name. The preview is built for the users to make sure they have selected the right sequence. It is not intended for accurate playback and the sequence will not play at its specified frame rate. Note that a SD sequence will move faster than a HD sequence since a SD sequence has lesser information to process. If you want a more accurate playback, you will need to connect the encoder to a playback device (e.g. a monitor or a digital projector). Target Indicates the target destination of the selected sequence in Name. Available options include ‘HD-SDI’, ‘SCSI Tape’, ‘Local Disk’, and ‘Network Transfer’. ‘HD-SDI’ means outputting the selected sequence to a HD-SDI device (e.g. playout to a HD-SDI monitor, playout a digital projector with a HD-SDI input or record to a HD-SDI VTR). Upon selecting this option, you may return to the Main menu and start playback by pressing []. You can control the playback with playback functions like the [], [], [], [], [], [] buttons on the Main menu. You can choose to play or record without audio by de-selecting the Audio checkbox option. ‘SCSI Tape’ means transferring the selected sequence to a SCSI Tape via SCSI interface. If you want to transfer video only, de-select the Audio checkbox option. If you want to transfer audio only, de-select the Video checkbox option. ‘Local Disk’ means copying the selected sequence to a local disk. It could be to a directory or mounted directory on the encoder, or a USB or a FireWire storage mounted on the encoder. You may specify the local disk that you will be using and any other requirements on the Playback Config/Local Disk menu, which will be enabled once the ‘Local Disk’ option is selected. Once the requirements are set, the transfer to the local disk will start upon pressing the [Ok] button. If you want to transfer video only, de-select the Audio checkbox option. If you want to transfer audio only, de-select the Video checkbox option. DSRTM DSR EN-2000 Encoder User Manual 22 11 February 2008 UNDERSTANDING THE USER INTERFACE 4.2.2. Local Disk menu 1. On the Playback Config menu, click the drop-down list on the Target option. Figure 13. Select Local Disk. This will enable the Local Disk button on the Playback Config menu. DSRTM DSR EN-2000 Encoder User Manual 23 11 February 2008 UNDERSTANDING THE USER INTERFACE 2. Click the Local Disk button. A new menu will appear as seen below. Figure 14. Local Disk menu. Folder Name Specify the directory you wish to copy the selected sequence (video file) to. Use the keypad . Figure 15. On-screen keypad. You can also use the [Browse] function on the keypad to navigate to your target directory. Filename Format The Filename Format has to be specified in C programming language. A concise explanation of the formatted input conversion specifiers in C programming language can be found at Appendix A of this manual. Use the keypad DSRTM DSR EN-2000 Encoder User Manual 24 . 11 February 2008 UNDERSTANDING THE USER INTERFACE Example 1: ‘%06d’ – This is the default format. The frame will be named 000000.uyvy, image000001.uyvy, image000002.uyvy and so on. Example 2: ‘frame%03d’ – The frame will be named frame000.uyvy, frame001.uyvy, frame002.uyvy and so on. Filename Ext Filename Extension. Use the keypad Start Offset Specify the starting number in the file numbering system. Use the keypad . . By default, the numbering starts from ‘0’ for e.g. from 000000.uyvy, image000001.uyvy, image000002.uyvy and so on. If ‘20’ is specified, then the numbering would start from ‘20’ for e.g. from 000020.uyvy, image000021.uyvy, image000022.uyvy and so on. Compression Specify the compression method used to compress each frame of the selected sequence. If no compression is required, select ‘None’ from the dropdown list. The frame will be copied to the target directory as raw frames. Compression options available include ‘Gzip’, ‘Bzip2’, ‘Tiff’, ‘TGA’, ‘DPX’, ‘MPEG2’, ‘JPEG2000’, ‘Cineon’ and ‘Custom’. Note that MPEG2 is different from the other options; the MPEG2 compressed sequence will appear as a single compressed video file (.m2v). This is unlike the other options, which will has a separate compressed image file for each frame. Encryption Key This option is only enabled when the selected compression option is ‘JPEG2000’. Use the keypad. A new window will appear as seen below. Figure 16. Enter the encryption key. Audio Directory Specify the directory you wish to copy the audio file of the selected sequence to. By default, the audio directory is the same as the video directory. Use the keypad . You can also use the [Browse] function on the keypad to navigate to your target directory. DSRTM DSR EN-2000 Encoder User Manual 25 11 February 2008 UNDERSTANDING THE USER INTERFACE [Disk] Press [Disk] if you want to mount an external folder (on a remote machine which supports SAMBA protocol and is connected to the encoder via IP) or external disk to the encoder. The following menu will appear. Figure 17. Disk menu. Mount Type – The options available includes ‘SMB Share’, ‘Local USB Disk’ and ‘Local Firewire Disk’. ‘SMB Share’ - Mount an external folder on a remote machine to the encoder. The remote machine must support SAMBA protocol and be on the same IP network as the encoder. ‘Local USB Disk’ - Mount an external USB Disk to the encoder. Make sure the USB Disk is formatted and connected to the encoder before you press [OK] to start the mounting process. The file systems supported by the encoder are ‘EXT2’, ‘EXT3’, ‘FAT’, ‘UDF’ and ‘NTFS’. ‘Local Firewire Disk’- Mount an external Firewire Disk to the encoder. Make sure the Firewire Disk is formatted and connected to the encoder before you press [OK] to start the mounting process. The file systems supported by the encoder are ‘EXT2’, ‘EXT3’, ‘FAT’, ‘UDF’ and ‘NTFS’. Local Mount Point - Specify the directory the external disk will be mounted to on the encoder. Use the keypad . You can also use the [Browse] function on the keypad to navigate to your target directory. Remote IP – Enabled if ‘SMB Share’ is selected. Specify the IP of the remote machine. Use the keypad . Remote Share – Enabled if ‘SMB Share’ is selected. Specify the name of the shared folder on the remote machine. Use the keypad DSRTM DSR EN-2000 Encoder User Manual 26 . 11 February 2008 UNDERSTANDING THE USER INTERFACE 4.2.3. Audio menu 1. Enabled only when Audio checkbox option is selected on the Config menu – which means only when audio is involved in the playout/copy. Figure 18. Audio option is checked. Figure 19. Audio menu. DSRTM DSR EN-2000 Encoder User Manual 27 11 February 2008 UNDERSTANDING THE USER INTERFACE Sequence Name Shows the name of the audio sequence that will be playout/copied to the Target specified on the Playback Config/Config page. By default, it shows the name of the audio sequence that is associated with the selected video sequence. You may however choose to playout/copy another audio sequence with the selected video sequence. Press [] to see full list of audio sequences available in the encoder and select the audio sequence you want. Num Channels Displays the number of channels of the selected audio sequence. Not to be altered. Num Bits Displays the number of bits per audio sample. Not to be altered. Frequency Displays the sampling rate of the audio sequence. Not to be altered. Format Displays the file format of the audio sequence. Cannot be altered. Audio Delay Use the keypad to specify audio delay. Example 1: Audio delay = ‘+6’ delays the audio by 6 frames. This means the audio starts 6 frames later than the video. Example 2: Audio delay = ‘-6’ advances the audio by 6 frames. This means the video starts 6 frames later than the audio. DSRTM DSR EN-2000 Encoder User Manual 28 11 February 2008 UNDERSTANDING THE USER INTERFACE 4.2.4. VTR menu 1. Enabled when ‘HD-SDI’ or ‘Local Disk’ is selected as a Target on the Config menu. This menu is only applicable if you want to record the sequence to a VTR and control the VTR from the encoder. Figure 20. VTR menu. Enable VTR Select the Enable VTR Control checkbox option if you want to remotely control the VTR Control from the encoder via RS422. Start / # Frames Specify either the timecode or the frame number at which the recording will start. End / # Frames Displays the timecode at which the recording will end. Note the End timecode is automatically computed based on the inputs at the Start timecode and Duration (on the Config page). VTR Tolerance Makes sure the VTR Tolerance is set to ‘Rough’. This sets the noise tolerance on the VTR/RS422 control. Rough tolerance allows better error-correction and can be safely used always. DSRTM DSR EN-2000 Encoder User Manual 29 11 February 2008 UNDERSTANDING THE USER INTERFACE 4.2.5. Analog/Sync menu 1. Enabled only when ‘HD-SDI’ is selected as a Target on the Config menu. Figure 21. Analog/Sync menu. 2. This menu sets the input/output synchronization between the encoder and the VTR. The values are set to the default values. You are advised not to make any changes on this menu unless otherwise advised by a professional. DSRTM DSR EN-2000 Encoder User Manual 30 11 February 2008 UNDERSTANDING THE USER INTERFACE 4.2.6. Clip menu Figure 22. Clip menu. Enable Clipping Select the Enable VTR Control checkbox option if you want to playout/copy/record only a portion of the entire sequence. Start / # Frames Specify the timecode to start. End / # Frames Specify the timecode to start. DSRTM DSR EN-2000 Encoder User Manual 31 11 February 2008 UNDERSTANDING THE USER INTERFACE 4.2.7. TimeCode menu Figure 23. TimeCode menu. Start / [Save New TimeCode] DSRTM DSR EN-2000 Encoder User Manual Specify the new start timecode of the sequence in the encoder and press the [Save New TimeCode] button. This old start timecode of the sequence will not be retained. 32 11 February 2008 UNDERSTANDING THE USER INTERFACE 4.3. Record Config 3. Select the Record Config button on the Main menu. Figure 24. Record Config menu. 4.3.1. Config menu Figure 25. Config menu. TM DSR DSR EN-2000 Encoder User Manual 33 11 February 2008 UNDERSTANDING THE USER INTERFACE Name Use the keypad to give a name to the sequence you wish to record. The sequence will be stored in the encoder under this name. Duration / Specify the duration you want to record. You can either specify in terms of hh:mm:ss:ff # Frames (using [][])or number of frames (using keypad ). Both entries are interlinked; change in one will automatically change the other entry. Size FrameRate Indicate the size you want to capture for each frame. This should coincide with the resolution of the frame. You should select the frame rate of the source you wish to record. Also indicate whether it is in ‘P’ (progressive), ‘I’ (interlaced), ‘sF’ (segmented frame) format. The recorded signal will be stored as the uncompressed raw frames in the encoder. Indicate whether you want the recorded signal to be stored in RGB or YUV color space. Also select the color bit depth (8 or 10) for the raw frames. [Create New Press [Create New Workspace] to create a new empty workspace for VTR slave Workspace] operation. Make sure you have indicated a Name for this new workspace. Upon creation of the workspace, you can go to the Playback/Config menu and you should find your new workspace listed under the Name dropdown. If you want to work on this workspace, make sure you select the workspace before you set the encoder to slave mode. Pressing [VTR Slave] on the Main menu will set the encoder to slave mode. Source Select the source of the sequence you want to record. Available options include ‘HDSDI’, ‘SCSI Tape’, ‘Local Disk’, and ‘Network Transfer’. Select ‘HD-SDI’ if you want to record from SDI or HD-SDI sources like VTR, DDR, playback encoder, scanner, telecine equipment, and color corrector. If you want to record without the audio, de-select the Audio checkbox option. You can start the record by pressing [] on the Main menu. Select ‘SCSI Tape’ if you want to record from a SCSI Tape via SCSI interface. If you want to transfer video only, de-select the Audio checkbox option. If you want to transfer audio only, de-select the Video checkbox option. You can start the record by pressing [] on the Main menu. Select ‘Local Disk’ if you want to record from a local disk (local directory on the encoder / a USB or FireWire storage mounted on the encoder) or from an external device which has SAMBA protocol. If you want to transfer video only, de-select the Audio checkbox option. If you want to transfer audio only, de-select the Video checkbox option. The Playback Config/Local Disk menu will be active once the ‘Local Disk’ option is selected. Go to Playback Config/Local Disk menu to specify where in the local disk you can find the files you want to record and the format of the files you want to record. You can start the record by pressing [] on the Main menu. Select ‘Network Transfer’ if you want to record from an external device which has the DSR™ Remote Utility software to transfer the files to the encoder via IP. Once you have selected ‘Network Transfer’, go back to the Main menu and by press [] to start the transfer. The encoder will probe for the connection with the external device and wait for the external device to send the files. DSRTM DSR EN-2000 Encoder User Manual 34 11 February 2008 UNDERSTANDING THE USER INTERFACE 4.3.2. Local Disk menu 1. Enabled only when ‘Local Disk’ is selected as a Source on the Config menu. Figure 26. Local Disk menu. Folder Name Using the keypad , specify the directory where the files are. On the keypad, there is a [Browse] button on the keypad, which you can use to navigate to your target directory. The encoder will record the required files from this directory. If you are importing files from an external storage or shared folder (on SAMBA protocol), make sure you have already mounted them on the encoder. You can use [Disk] to perform the mounting. Filename Format Use the keypad to specify the Filename Format of the files to be recorded. The naming format has to be specified in C programming language. A concise explanation of the formatted input conversion specifiers in C programming language can be found at Appendix A of this manual. Example 1: ‘%06d’ – This is the default format. The frame will be named 000000.uyvy, image000001.uyvy, image000002.uyvy and so on. Example 2: ‘frame%03d’ – The frame will be named frame000.uyvy, frame001.uyvy, frame002.uyvy and so on. Filename Ext DSRTM DSR EN-2000 Encoder User Manual Use the keypad to specify the Filename Extension on the files to be recorded. 35 11 February 2008 UNDERSTANDING THE USER INTERFACE Start Offset Specify, using the keypad , the file number of the first frame to be recorded. The system assumes the files are named in consecutive ascending order. Example: If ‘20’ is specified, the encoder will search for the file starting image000020.uyvy, and start recording from 000020.uyvy onwards i.e. image000020.uyvy, image000021.uyvy and so on. Compression Indicate if the files to be imported to the encoder are compressed files. If no, select ‘None’ from the dropdown. If yes, specify the compression format. The encoder will decompress the files before storing them as uncompressed raw files (either in YUV or RGB format) on the encoder. Encryption Key This option is only enabled when the selected compression option is ‘JPEG2000’. Use the keypad. A new window will appear as seen below. Figure 27. Enter the encryption key. Audio Directory This entry will be active if Audio checkbox option on the Record Config/Config menu is selected. By default, the audio directory is the same as the video directory. However, if the audio directory is different from that of the video, specify the correct directory using the keypad . There is a [Browse] function on the keypad, which you can use to navigate to your target directory. [Disk] Press [Disk] if you want to mount an external disk or external folder (on a remote machine which supports SAMBA protocol and is connected to the encoder via IP) onto the encoder. The following menu will appear. DSRTM DSR EN-2000 Encoder User Manual 36 11 February 2008 UNDERSTANDING THE USER INTERFACE Figure 28. Disk menu. Mount Type – The options available includes ‘SMB Share’, ‘Local USB Disk’ and ‘Local Firewire Disk’. Depending on your source, select the correct option. Select ‘SMB Share’ if you want to mount an external folder on a remote machine to the encoder. The remote machine must support SAMBA protocol and be on the same IP network as the encoder. Select ‘Local USB Disk’ if you want to mount an external USB Disk to the encoder. Make sure the USB Disk is formatted and connected to the encoder before you press [OK] to start the mounting process. The file systems supported by the encoder are ‘EXT2’, ‘EXT3’, ‘FAT’, ‘UDF’ and ‘NTFS’. ‘Local Firewire Disk’- Mount an external Firewire Disk to the encoder. Make sure the Firewire Disk is formatted and connected to the encoder before you press [OK] to start the mounting process. The file systems supported by the encoder are ‘EXT2’, ‘EXT3’, ‘FAT’, ‘UDF’ and ‘NTFS’. Local Mount Point - Use the keypad to specify the directory on the encoder the external disk will be mounted to. You can also use the [Browse] function on the keypad to navigate to your target directory. Remote IP – Enabled if ‘SMB Share’ is selected. Use the keypad to specify the IP of the remote machine. Remote Share – Enabled if ‘SMB Share’ is selected. Use the keypad to specify the name of the shared folder on the remote machine. DSRTM DSR EN-2000 Encoder User Manual 37 11 February 2008 UNDERSTANDING THE USER INTERFACE 4.3.3. Record Config/Audio menu 1. Enabled only when Audio checkbox option is selected on the Config menu – which means only when audio is involved in the recording. Figure 29. Audio menu. Sequence Name Specify, using the keypad , a name for the audio sequence you will be recording. By default, the name given is the same as the name you had given for the video sequence. You may change it to a different name. Num Channels Specify the number of channels you want to record. It has to match the number of channels of the original source. Num Bits Specify the number of bits per audio sample of the audio source. Frequency Specify the sampling rate of the audio source. Format Specify the file format of the audio source. Embedded Audio This option is only applicable for recording from SDI/HDSDI sources. Select the Embedded Audio checkbox if audio is embedded in the SDI/HDSDI connection. Note the embedded audio will be stored on the encoder as a separate file from the video file. DSRTM DSR EN-2000 Encoder User Manual 38 11 February 2008 UNDERSTANDING THE USER INTERFACE 4.3.4. VTR menu 1. Enabled only when ‘HD-SDI’ is selected as a Source on the Config menu i.e. you are recording a SDI or HDSDI signal. 2. This menu is only applicable if you want to record the sequence from the VTR to the encoder and you want to control the VTR remotely from the encoder. Make sure the VTR is set to slave mode or remote mode. Figure 30. VTR menu. Enable VTR Select the Enable VTR Control checkbox option if you want to remotely control the VTR Control from the encoder via RS422. Start / # Frames Specify either the timecode or the frame number at which the recording will start. End / # Frames Displays the timecode at which the recording will end. Note the End timecode is automatically computed based on the inputs at the Start timecode and Duration (on the Record Config/Config page). VTR Tolerance Makes sure the VTR Tolerance is set to ‘Rough’. This sets the noise tolerance on the VTR/RS422 control. Rough tolerance allows better error-correction and can be safely used always. DSRTM DSR EN-2000 Encoder User Manual 39 11 February 2008 UNDERSTANDING THE USER INTERFACE 4.3.5. Append menu 1. On the Record Config menu, select Append. Figure 31. Append menu. Append to Video You can choose to append the video sequence you will be recording to an existing Sequence video sequence on the encoder. Select the Append to Video Sequence checkbox. The Sequence Name dropdown will become active. The Sequence Name dropdown consists of the list of existing video sequences currently in the encoder. Press [] to see full list and select the required sequence. Append to Audio You can choose to append the audio sequence you will be recording to an existing Sequence audio sequence on the encoder. Select the Append to Audio Sequence checkbox. The Sequence Name dropdown will become active. The Sequence Name dropdown consists of the list of existing audio sequences currently in the encoder. Press [] to see full list and select the required sequence. Request Num Frames Some movie may come as separate reels. But you can only record one reel at a time. The Request Num Frames option will enable you to store the different reels as a continuous complete movie on the encoder. When you record the first reel, you will need to reserve space for the subsequent reels. To reserve space, you will have to specify the total number of frames of the subsequent reels you will be recording. When you are recording the subsequent reels, just make sure you append the sequence to the correct existing sequence on the encoder. 2. Note that even if you are recording video with embedded audio, the video and audio will be stored as separate files on the encoder. Hence, you will still be able to append the video file to an existing video sequence on the encoder and append the separate audio file to an existing audio sequence on the encoder. DSRTM DSR EN-2000 Encoder User Manual 40 11 February 2008 UNDERSTANDING THE USER INTERFACE 4.3.6. Analog/Sync menu 1. Enabled only when ‘HD-SDI’ is selected as a Source on the Config menu. Figure 32. Analog/Sync menu. 2. This menu sets the input/output synchronization between the encoder and the VTR. The values are set to the default values. You are advised not to make any changes on this menu unless otherwise advised by a professional. DSRTM DSR EN-2000 Encoder User Manual 41 11 February 2008 UNDERSTANDING THE USER INTERFACE 4.3.7. TimeCode menu 1. On the Record Config menu, select TimeCode. Figure 33. TimeCode menu. Start The sequence you want to record can have a different start timecode from the original source. Specify the timecode you want to have using [][] before you start recording. The sequence will be stored on the encoder with the start timecode you specified here. DSRTM DSR EN-2000 Encoder User Manual 42 11 February 2008 UNDERSTANDING THE USER INTERFACE 4.4. VTR Master 1. Select VTR Master on the Main menu. Figure 34. Press VTR Master button. 4.4.1. Remote VTR Control DSRTM DSR EN-2000 Encoder User Manual 43 11 February 2008 UNDERSTANDING THE USER INTERFACE Figure 35. Remote VTR Control. [] Press [] to start playback on the VTR. [] Press [] to pause the playback on the VTR. [] Press [] to stop the playback on the VTR. [] Press [] to start recording on the VTR. The incoming signal (SDI/HD-SDI) to the VTR will be recorded. [Eject] Press [] to eject the tape source on the VTR. [] Press [] and the VTR will start rewinding until [] is pressed or when the playback ends. The timecode display shows the location of the VTR playback pointer. It also tracks the time elapsed since start of a playback on the VTR. [] Press [] and the VTR will start forwarding until [] is pressed or when the VTR reaches the beginning/first frame of the playback. Goto You may jump directly to the frame you want to go to. Specify the timecode of the required frame using [][], then press [Goto]. The timecode display will show the new location of the VTR playback pointer. [Remote Device Live/EE] input output VTR loop Press [Remote Device Live/EE] to set the VTR to Live/EE (Live/Electronic Echo) mode. This means that the LOOP output of the VTR will echo the signal input to the VTR. [Local Device Live/EE] input output Encoder loop Press [Local Device Live/EE] to set the encoder to Live/EE (Live/Electronic Echo) mode. This means that the LOOP output of the encoder will echo the signal input to the encoder. Record Offset Use [][] to adjust the record offset. Example: Record offset = ‘+6’ delays the sequence by 6 frames. This means the VTR will start recording the sequence 6 frames later and 6 blank frames (blacks) will be added to the beginning of the recorded sequence. Display Offset Use [][] to adjust the display offset. Example: DSRTM DSR EN-2000 Encoder User Manual 44 11 February 2008 UNDERSTANDING THE USER INTERFACE Display offset = ‘+6’ delays the sequence by 6 frames. This means the VTR will start displaying the sequence 6 frames later. The VTR will show 6 blank frames (blacks) before playing the sequence. [Close] DSRTM DSR EN-2000 Encoder User Manual Closes the Remote VTR Control menu once it is pressed. 45 11 February 2008 UNDERSTANDING THE USER INTERFACE 4.5. Advance Options 1. Select the Advance Options on the Main menu. Figure 36. Press Advance Options button. 4.5.1. Edit/Delete DSRTM DSR EN-2000 Encoder User Manual 46 11 February 2008 UNDERSTANDING THE USER INTERFACE Figure 37. Edit/Delete menu [Delete] Select the sequence you want to delete from the Delete/Rename dropdown and press [Delete]. You can only delete one sequence at a time. You will have to delete the video and audio sequence separately, even if they are associated. [Rename] Select the sequence you want to rename from the Delete/Rename dropdown, then specify the new name at the As entry using the keypad and press [Rename]. The sequence will appear in the Delete/Rename dropdown with the new name – you can check. You can only rename one sequence at a time. You will have to rename the video and audio sequence separately, even if they are associated. Note that renaming a sequence will not automatically rename the sequence it is associated to. Also note that renaming a sequence will not change its association with other sequence. The association still stays even though the name of one sequence has changed. [Create Copy] Select the video sequence you want to copy from the Sequence Name dropdown and press [Create Copy]. A new copy of the video sequence is created with name „nameofvideosequence_2‟. You can only copy one video sequence at a time. Note that the copied video sequence will not hold any audio association information, which the original video sequence might have. You will need to use [Assoc] to associate the copied sequence with some audio sequence. [Assoc] Select the video and audio sequence you want to associate from the Video and Audio dropdown respectively and press [Assoc]. To check that the association is indeed done, go to the Playback Config/Config menu and select the video sequence you have just associated from Name dropdown. Make sure you have selected the Audio checkbox. Go to Playback Config/Audio menu, you should be able to see the name of the audio sequence which you have associated with the video sequence on the Sequence Name entry. DSRTM DSR EN-2000 Encoder User Manual 47 11 February 2008 UNDERSTANDING THE USER INTERFACE 4.5.2. Password 1. This menu is allows you to change the passwords. The DSR Password is used to login to the encoder. The ScreenSaver Password enables you to unlock a locked screen and to shutdown the encoder. The Maintenance Password allows you to use the MPEGPlayer on the encoder. Figure 38. Password menu. 2. To change any password, specify, using the keypad , your old password (Old Password) and new password (New Password). Repeat your new password (Repeat New Password) to confirm your new password. DSRTM DSR EN-2000 Encoder User Manual 48 11 February 2008 UNDERSTANDING THE USER INTERFACE 4.5.3. Orders menu 1. The menu is for users to prepare a DSR package and transfer the package to hard disk. The menu can also transfer SMPTE Packages to hard disk. Figure 39. Orders menu. DSRTM DSR EN-2000 Encoder User Manual 49 11 February 2008 UNDERSTANDING THE USER INTERFACE Sequence/ The Sequence dropdown shows the list of encoded sequences in the encoder. [Delete]/ Selecting ‘custom sequence’ will allow you to transfer/package more than one [Add] encoded sequences at one go to a hard disk. Figure 40. List of encoded sequence. The left column shows the list of encoded sequence in the encoder. Use [], [-], [][] to create the custom sequence you want. [] – Add the selected encoded sequence in the left column to the custom sequence in the right column. [-] – Remove the selected sequence in the right column. [] – Move up the selected sequence to before the sequence currently above it. [] – Move down the selected sequence to after the sequence currently behind it. Pressing [Delete] will remove the selected sequence in the Sequence dropdown. Pressing [Add] will enable you to create a sequence. Associating an existing encoded video sequence in the encoder with another audio sequence will create the new sequence. The following menu will appear when [Add] is pressed. DSRTM DSR EN-2000 Encoder User Manual 50 11 February 2008 UNDERSTANDING THE USER INTERFACE Figure 41. This window appears when [Add] button is selected. Sequence Title – Use the keypad to assign a new name for the new sequence. Video From – Select the encoded video sequence that makes up the new sequence. The video sequence could be associated with ‘Audio from Encoded Content’, ‘Audio from Wave File’ or ‘No Audio’. Select the required option from the dropdown. ‘Audio from Encoded Content’ – You may associate the video sequence with some audio sequences already used by existing encoded sequences in the encoder. These audio sequences are listed in the menu. ‘Audio from Wave File’ – Selecting this option will allow you to associate the new sequence with a new audio wave file. The following menu will pop up when this option is chosen. Figure 42. An entry for associating new audio wave file with new sequence pops up. Select the number of channels the audio has. Available options include ‘Two TM DSR DSR EN-2000 Encoder User Manual 51 11 February 2008 UNDERSTANDING THE USER INTERFACE Channels’, ‘Four Channels’, ‘Six Channels’ and ‘Eight Channels’. Press [] to add the new audio sequence. A keypad will appear for you to specify the directory to find the audio file(s). You can use [Browse] to navigate to your target directory. Make sure the audio file(s) are already in the encoder or if it is in the external storage, make sure the storage is already mounted on the encoder with a local mount point defined. It is possible that the audio sequence is made up of more than one audio files. Upon pressing [Add], the audio files will be merged to one audio wave file to form an audio sequence. You can use [-] to remove any unwanted audio files. ‘No Audio’ – Select this option if you do not want to associate any audio with the new sequence. Note that this function is only applicable for DSR packages. System This function is for user to restrict the number of encoders that can download the encoded sequence. The encoded sequence will be transferred to a hard disk as a DSR package, so note that this function is only applicable for DSR packages. Playback encoders in the field can be categorized into different segments by using System IDs. System ID is defined in this format: (System Name) – (System ID) (Serial Number). Example: ABC – ID:1 SA1xxxxx All encoders under ABC has system ID = 1 and serial number starting with „SA1‟. You may select from System dropdown the group of encoders (according to their ID), which will be able to download the DSR package. This information will be attached to the encoded sequence when [Transfer] is pressed. Only the encoders with the system ID specified in the package can download the encoded sequence. You may add or remove a new system ID using [Add/Delete System]. To delete a system, you have to select from the System dropdown the system you want to remove. To add a system, you need to enter the new system name, new system ID and common digits in the serial numbers of the encoders within the system. The latter is just for easy identification. E.g. in the above example, encoders under ABC have serial numbers starting with „SA1‟. DSRTM DSR EN-2000 Encoder User Manual 52 11 February 2008 UNDERSTANDING THE USER INTERFACE Automation Select the Automation Metadata checkbox if you want to define the metadata points for the encoded sequence. Figure 43. This window appears when Automation Metadata is selected. You can specify define the frame number for each metadata point using [][] or the keypad Subtitle Zip . This function is for users to attached subtitle file (in zip format) to the encoded sequence. Use the keypad to specify the directory where the zip file is located. You can use the [Browse] button on the keypad to navigate to your target directory. Force subtitles This function is to fix a subtitle cinecanvas™ presentation file to the encoded sequence. The subtitle file may be downloaded to the encoders separate from the encoded sequence at a later date. The purpose is to make sure the encoded sequence cannot play without the subtitle files, which contain the watermarks. Conditional Access This is to enforce the playback conditions (starting date, ending date and the number of playbacks allowed) on the encoded sequence. Use [][] to specify the required restrictions. [Transfer] Pressing [Transfer] will start the transfer of the selected encoded sequence(s) to one of the following targets: ‘FireWire Disks’, ‘DVD Disks’, ‘Remote Encoder’ or ‘Add to FireWire Disks’. Selecting ‘FireWire Disks’ will override any content currently in the FireWire disk. Selecting ‘Add to FireWire Disks’ will append the sequence(s) to existing content in the FireWire disk. The sequence(s) will be transferred as a DSR package. The conditions specified on this menu will be enforced on the package. If you have selected to transfer to a FireWire disk, make sure the FireWire disk is attached to the encoder and can be detected by the encoder. If you are transferring to a remote encoder, make sure the encoder and encoder are connected on the same LAN network and the encoder can communicate with the encoder. Figure 44. This window pops up when [Transfer] button is selected. DSRTM DSR EN-2000 Encoder User Manual 53 11 February 2008 UNDERSTANDING THE USER INTERFACE [SMPTE Packages] The function is for you to export SMPTE Packages to a local or mounted directory in the encoder. When [SMPTE Packages] is pressed, the following menu will pop up. Figure 45. Select the packages you want to transfer and indicate the target directory. You can use keypad to specify your target directory or use [Browse] on the keypad to navigate to the target directory. If you are transferring to an external device, make sure you have mounted the external device on the encoder. DSRTM DSR EN-2000 Encoder User Manual 54 11 February 2008 UNDERSTANDING THE USER INTERFACE 4.5.4. Export Figure 46. Advance Options/Export menu Export Video Select the video sequence you want to export (encode). Sequence [Export to MPEG2] Press [Export to MPEG2] if you want to encode the video sequence using MPEG2 compression. A menu will pop up and you can use this menu to set the parameters for MPEG2 encoding and to edit the sequence (e.g. to encode just a portion of the sequence instead of the whole sequence, to merge more than one sequences together and encode them as a single title/movie, or to create a batch job for more than one title). DSRTM DSR EN-2000 Encoder User Manual 55 11 February 2008 UNDERSTANDING THE USER INTERFACE Figure 47. Export to MPEG2 menu. [Export to MJPEG] Press [Export MJPEG] if you want to encode the video sequence using MJPEG compression. A menu will pop up and you can use this menu to set the parameters for MJPEG encoding and to edit the sequence (e.g. to encode just a portion of the sequence instead of the whole sequence, to merge more than one sequences together and encode them as a single title/movie, or to create a batch job for more than one title). Figure 48. Export MJPEG menu. [Export Archive] This function is for you to archive any encoded sequences in the encoder. Upon pressing [Export Archive], the system will ask you to select the sequence you to archive and then generate a DSR™ Archive file (an xml file) about the sequence you want to archive. Figure 49. Select a movie to archive from a dropdown list. The xml file contains information like sequence name, video file, audio file, audio format, video format, aspect ratio, color space, video compression etc. The video file, audio file and archive file (xml) will all be in the /data directory of the encoder. You can copy these files from the /data directory to your central storage system, workstation or any external storage for archiving. Note that the exported files are not packaged or wrapped. Suppose you want to copy these archived files from the encoder to your workstation, you must first make sure that your workstation and the encoder are on the same LAN network. Then from your workstation, you connect to the encoder and log into the encoder using the username and password given to you. Go to /data directory and you will be able to see the exported archive. Copy the files to your workstation. You can read the xml file on the browser application (e.g. internet explorer). By default, the /data directory is not made public and a set of username and password is needed to access the /data directory. Hence when you are accessing the /data directory for the first time, please contact a GDC engineer or an engineer authorized by GDC for DSRTM DSR EN-2000 Encoder User Manual 56 11 February 2008 UNDERSTANDING THE USER INTERFACE support. [Import Archive] This function is for you to import archived files (video, audio and xml metadata file) to the encoder. The xml file contains information like sequence name, video file, audio file, audio format, video format, aspect ratio, color space, video compression etc. Make sure the files are all in the /data directory of the encoder. Upon pressing [Import Archive], the encoder will request for the xml metadata file. Figure 50. Search for the archived file you want to import. If the corresponding video and audio files listed in the xml are also in the /data directory, the encoder will import these files to the encoder and the sequences will be listed in the Export Video Sequence dropdown on the Advance Options/Export menu. By default, the /data directory is not made public and a set of username and password is needed to access the /data directory. Hence when you are accessing the /data directory for the first time, please contact a GDC engineer or an engineer authorized by GDC for support. DSRTM DSR EN-2000 Encoder User Manual 57 11 February 2008 UNDERSTANDING THE USER INTERFACE PROCESSORS MENU 1. Upon selecting Export to MPEG2 menu, a new window for Processors menu will appear. Figure 51. Processors menu. Hostname/CPUs/ The encoder uses the compute nodes to do the encoding. Each node has two Status processors. Each row here represents one processor. The number of rows that appears depends on the number of nodes/processors there are connected to the encoder. E.g. if there are four nodes connected to the processors, they should be eight rows (representing 8 processors) shown on the menu. Hostname – Name given to the processor. By default, the two processors from the same node are given the same name e.g. “node0”. CPUs – Number of CPUs the processor has. Normally it should be “1”. Status – Shows status of the processor. When [Check] is pressed, Status will show either or . : Processor not detected by the encoder. The processor (or node) could be malfunctioning, not turned on, not activated, or not connected to the encoder. If there are any malfunctioning processors (or nodes), make sure they are removed before you start encoding. : Processor detected by the encoder. When processor is encoding, Status will show the percentage of encoding done. These buttons are used to manipulate the processor settings. [Remove]/ [Remove] – Remove the processor entry you have selected. [Check]/ [Check] – Check and report the status of all listed processors. Status will show either or . DSRTM DSR EN-2000 Encoder User Manual 58 11 February 2008 UNDERSTANDING THE USER INTERFACE : Processor not detected by the encoder. The processor (or node) could be malfunctioning, not turned on, not activated, or not connected to the encoder. If there are any malfunctioning processors (or nodes), make sure they are removed before you start encoding. : Processor detected by the encoder. [Add]/ [Add] – Add a new processor entry. You may use [Edit] to give a name to the processor. [Edit] – For naming or renaming a processor. A keyboard will pop up upon pressing [Edit] [Edit] and you can enter the new name using the keyboard. [Options]/ [Options] – Open a menu for you to set the MPEG2 encoding parameters. [Run]/ [Run] – Run the encoding. [Close]/ [Close] – Return to Advance Options/Export menu. All MPEG2 settings done will be lost upon pressing [Close]. [Stop] [Stop] – Stop the encoding. Processors / Options menu 1. On the Processors menu, select Options. Figure 52. Press the Options button. DSRTM DSR EN-2000 Encoder User Manual 59 11 February 2008 UNDERSTANDING THE USER INTERFACE 2. A new window for Encoding Parameters will appear as shown below. 1 2 3 4 5 6 7 8 9 10 11 Figure 53. Processors / Options menu. DSRTM DSR EN-2000 Encoder User Manual 60 11 February 2008 UNDERSTANDING THE USER INTERFACE Movie Rating You can indicate the rating associated with the movie. The rating will be included in the metadata file, which is attached to the encoded video sequence. Options available include ‘G’, ‘PG’, ‘PG-13’, ‘R’, and ‘NC-17’. ‘G’ is selected by default. Subtitled in You can indicate the subtitled language for this movie. This information will be included in the metadata file attached to the encoded video sequence. Options available include ‘None’, ‘English’, ‘Chinese’, and ‘Malay’. ‘None’ is selected by default. Number of Frames First Frame Shows the number of frames in the selected sequence title that will be processed and encoded. This entry is not editable by user. Shows the first frame of the first sequence that will be encoded. This entry is not editable by user. Aspect Ratio You can select the display aspect ratio – the aspect ratio at which you want the sequence to be displayed. This information will be included in the metadata file attached to the encoded video sequence. When the playback encoder processes the encoded video sequence, the encoder will read the metadata file and find out how to process the sequence and tell the projector to display the movie in the intended aspect ratio. Options available include ‘1:1 Square’, ‘4:3 Academy Standard’, ’16:9 Academy Flat’, and ‘2.35:1 CinemaScope’. Frame Rate Select the frame rate for the encoded sequence. It should match the frame rate of the pre-encoded sequence. Output Resolution Select the resolution at which you want to display the sequence. The encoder will preprocess this information to capture the required resolution before encoding the sequences. Options available include the following: (a) ‘1920x1080’, (b) ‘1280x1024 Crop’, (c) ‘1280x1024 Squeeze’, (d) ‘1280x720 Crop’, ‘720x576 (PAL)’, (e) ‘720x486 (NTSC)’, (f) ‘PAL to HD (1280x1024)’, (g) ‘PAL to HD (1280x1024) Squeeze’. ‘1920x1080’, ‘1280x1024 Crop’, ‘1280x1024 Squeeze’ are options for 1920x1080 sources. ‘1920x1080’ – No change to the 1920x1080 source. The 1920x1080 source will be encoded without any preprocessing. ‘1280x1024 Crop’ – The encoder will pick up 1280x1024 from the center and crop off the remaining area before encoding. 1920 1920x1080 1280x1024 Before preprocessing 1080 1280x1024 After preprocessing ‘1280x1024 Squeeze’ – The encoder will squeeze the 1920x1080 source to DSRTM DSR EN-2000 Encoder User Manual 61 11 February 2008 UNDERSTANDING THE USER INTERFACE 1280x1024 (horizontal squeezing). This will result in some loss of information. Squeezing is necessary for projectors (e.g. 1.3k projector) that cannot accept 1920x1080 input. Anamorphic lens (or electronic scaling either on the playback encoder or projector) will be needed to un-squeeze the encoded sequence. Playing without anamorphic lens will distort the images - images will look tall and thin. 1920 1080 Before preprocessing 1280x1024 After preprocessing ‘1280x720 Crop’ is option for 1280x1024 sources. ‘1280x720 Crop’ – The encoder will pick up 1280x720 from the center and crop off the excess top and bottom before encoding. 1280 1280x720 1024 Before preprocessing 1280x720 After preprocessing ‘720x576 (PAL)’, ‘720x486 (NTSC)’, ‘PAL to HD (1280x1024)‟, and ‘PAL to HD (1280x1024) Squeeze‟ are options for SD sources. ‘720x576 (PAL)’ – No change to the PAL source. The PAL source will be encoded without any preprocessing. ‘720x486 (NTSC)’ – No change to the NTSC source. The NTSC source will be encoded without any preprocessing. ‘PAL to HD (1280x1024)’ – The encoder will up-convert the PAL source to 1280x1024 using software up-conversion algorithm. 720x576 upconvert Before preprocessing 1280x1024 After preprocessing ‘PAL to HD (1280x1024) Squeeze’ – The encoder will up-convert the PAL source and squeeze it to 1280x1024 using software up-conversion algorithm. This is necessary if you are planning to play this sequence with some scope contents with anamorphic lens. You would save you trouble to remove the anamorphic lens when you are playing the PAL content and to reattach the anamorphic lens when you are playing the scope contents. 720x576 upconvert Before preprocessing DSRTM DSR EN-2000 Encoder User Manual 62 1280x1024 Squeezed After preprocessing 11 February 2008 UNDERSTANDING THE USER INTERFACE Frame Structure Chroma Format Bit Rate Select the frame structure for the encoded sequence. It should match the frame rate of the pre-encoded sequence. Options available are ‘Progressive’ and ‘Interlaced’. Select the color space for the MPEG2 encoding. Options available are ‘4:2:0’ and ‘4:2:2’. Select, using [][], the bit rate for the MPEG2 encoding. Recommended bit rates for the different sources as follows: HD – 70Mbps SD – 30 to 40 Mbps You can either choose ‘CBR’ (Constant Bit Rate) or ‘VBR’ (Variable Bit Rate). No preference between the two but ‘VBR’ is recommended if you want the encoded sequence to have a smaller file size. 11 Audio Select if you want to encode audio together with the video. Options include ‘No Audio‟ or ‘PCM Audio’. DSRTM DSR EN-2000 Encoder User Manual 63 11 February 2008 UNDERSTANDING THE USER INTERFACE EDIT SEQUENCE MENU 1. On the Export to MPEG2 menu, select Edit Sequence. Figure 54. Edit Sequence menu. The left column shows the list of uncompressed video sequences in the encoder. The right column shows the sequence you have selected to encode (export). You can add on more sequences to be encoded together with this sequence. These sequences will be merged and encoded into one sequence. These sequences must have the same video and audio formats. Merging will be impossible if the sequences have different video and audio formats. You can give the new merged sequence a new name (Sequence Title). By default, the merged sequence will have the same as the first sequence. You may change the name – go to Sequence Title and change to a new name using the keypad . The [][-][][] buttons are for manipulating the sequences in the right column. [] – Add the selected uncompressed sequence in the left column to the right column. [-] – Remove the selected uncompressed sequence in the right column to the left column. [] – Move up the selected uncompressed sequence in the right column to before the previous sequence. [] – Move down the selected uncompressed sequence in the right column to after the next sequence. Start Frame / You can specify the portion of the sequence you want to encode. Use the keypad End Frame / to specify the Start Frame and the End Frame. The encoder will start encoding from Audio Delay DSRTM DSR EN-2000 Encoder User Manual the First Frame and stop encoding at the End Frame. 64 11 February 2008 UNDERSTANDING THE USER INTERFACE You can also use the keypad to adjust audio delay. Example 1: Audio delay = ‘+6’ delays the audio by 6 frames. This means the audio starts 6 frames later than the video. Example 2: Audio delay = ‘-6’ advances the audio by 6 frames. This means the video starts 6 frames later than the audio. Note that the Start Frame, End Frame and Audio Delay for one sequence will not affect the other sequences in the same sequence list (right column). Every sequence in the sequence list (right column) can have different Start Frame, End Frame and Audio Delay. Sequence Title This is the name of the sequence list in the right column. After encoding, the sequences in this list will be merged as a single encoded sequence. By default, the merged sequence will have the same as the first sequence in the sequence list. You may change it to a different name using the keypad . You may add another sequence list by pressing []. A new empty sequence list (in the right column) will appear. Add the sequences you want to be in this list and press [Options] to set the encoding parameters for this sequence list. You may use the keypad to rename the sequence list. You may press [] to see the number of sequence lists created. Upon pressing [Run] these lists will be encoded at one go as a batch job. The sequence lists may have different encoding parameters and each sequence list will output an encoded sequence. [Options]/ [Options] – Open a menu for you to set the MPEG2 encoding parameters. (Same [Run]/ function as Processors/Options). [Close]/ [Run] – Run the encoding. [Close] – Return to Advance Options/Export menu. All MPEG2 settings done will be [Stop] lost upon pressing [Close]. [Stop] – Stop the encoding. DSRTM DSR EN-2000 Encoder User Manual 65 11 February 2008 UNDERSTANDING THE USER INTERFACE 4.5.5. Diagnostics 1. On the Advance Options menu, select Diagnostics. Figure 55. Diagnostics menu. 2. This menu is for diagnostics purposes and it should be operated under the advice of a GDC engineer or a technician authorized by GDC. 3. Press all buttons – [Check Disks Read Speed], [Check Disks Write Speed] and [Check Stray Files] buttons to run a check on the encoder. Record and report the listed results to a GDC engineer or a technician authorized by GDC who will be able to advise you on the condition of the encoder. DSRTM DSR EN-2000 Encoder User Manual 66 11 February 2008 UNDERSTANDING THE USER INTERFACE 4.5.6. Remote 1. On the Advance Options menu, select Remote. Figure 56. Remote menu. [Dialin Encoder] Press [Dialin Encoder] to open up a menu for you to configure the necessary settings to enable GDC engineer or an engineer authorized by GDC to dial in to encoder via modem to work on the encoder remotely. You will to have available a serial or USB modem and a telephone line for this to work. Figure 57. Dialin Encoder menu. DSRTM DSR EN-2000 Encoder User Manual 67 11 February 2008 UNDERSTANDING THE USER INTERFACE [Local Dialup] Press [Local Dialup] to open up a menu for you to configure the necessary settings to enable GDC engineer or an engineer authorized by GDC to dial in to encoder via modem to work on the encoder remotely. The connection is through an ISP, which will provide you with an IP address. You will need to let inform the GDC engineer or the engineer authorized by GDC the IP address assigned by the ISP to you for them to dial in to the encoder. You will to have available a serial or USB modem, a telephone line, an ISP registration (ISP phone, ISP username and ISP password are needed) for this to work. Figure 58. Local Dialup menu. [Local Network] Press [Local Network] to open up a menu for you to configure the necessary settings to enable GDC engineer or an engineer authorized by GDC to dial in to encoder via IP network to work on the encoder remotely. You must make sure your network is open to global and not firewalled. Once you have place the encoder on your network and assigned an IP to the encoder, inform the GDC engineer or the engineer authorized by GDC of the IP address so they can dial in to the encoder. Figure 59. Local Network menu. DSRTM DSR EN-2000 Encoder User Manual 68 11 February 2008 UNDERSTANDING THE USER INTERFACE [Mount External Press [Mount External Disk] if you want to mount an external disk or external folder (on Disk] a remote machine which supports SAMBA protocol and is connected to the encoder via IP) onto the encoder. The following menu will appear. Figure 60. Mount External Disk menu. Mount Type – The options available includes ‘SMB Share’, ‘Local USB Disk’ and ‘Local Firewire Disk’. Depending on your source, select the correct option. Select ‘SMB Share’ if you want to mount an external folder on a remote machine to the encoder. The remote machine must support SAMBA protocol and be on the same IP network as the encoder. Select ‘Local USB Disk’ if you want to mount an external USB Disk to the encoder. Make sure the USB Disk is formatted and connected to the encoder before you press [OK] to start the mounting process. The file systems supported by the encoder are ‘EXT2’, ‘EXT3’, ‘FAT’, ‘UDF’ and ‘NTFS’. ‘Local Firewire Disk’- Mount an external Firewire Disk to the encoder. Make sure the Firewire Disk is formatted and connected to the encoder before you press [OK] to start the mounting process. The file systems supported by the encoder are ‘EXT2’, ‘EXT3’, ‘FAT’, ‘UDF’ and ‘NTFS’. Local Mount Point - Use the keypad to specify the directory on the encoder the external disk will be mounted to. You can also use the [Browse] function on the keypad to navigate to your target directory. Remote IP – Enabled if ‘SMB Share’ is selected. Use the keypad to specify the IP of the remote machine. Remote Share – Enabled if ‘SMB Share’ is selected. Use the keypad to specify the name of the shared folder on the remote machine. DSRTM DSR EN-2000 Encoder User Manual 69 11 February 2008 UNDERSTANDING THE USER INTERFACE [Unmount External Disk] Figure 61. Unmount External Disk menu. Local Mount Point - Use the keypad to specify the directory on the encoder, which you want to un-mount. You can also use the [Browse] function on the keypad to navigate to your target directory. Upon pressing [OK], the system will un-mount the external disk or external folder from the encoder. DSRTM DSR EN-2000 Encoder User Manual 70 11 February 2008 UNDERSTANDING THE USER INTERFACE 4.5.7. DDR Info 1. On the Advance Options menu, select DDR Info. Figure 62. DDR Info menu. Version You will see the software version used in the encoder here. Video DDR Space The DDR has separate storage spaces for video sequences and audio sequences i.e. Utilization / the uncompressed video and audio sequences are stored separately in the DDR. From Audio DDR Space Utilization the Video DDR Space Utilization and Audio DDR Space Utilization status bars, you can gather how much DDR space is used and how much is still available. Data Disk Space The Data Disk space stores the compressed/encoded sequences. You can gather how Utilization much Data Disk space is used and how much is still available from the Data Disk Space Utilization status bar. DSRTM DSR EN-2000 Encoder User Manual 71 11 February 2008 5. CASE STUDY – FROM RECORDING TO ENCODING TO PACKAGING DSRTM DSR EN-2000 Encoder User Manual 72 11 February 2008 CASE STUDY – FROM RECORDING TO ENCODING TO PACKAGING 5.1. Recording from a SDI/HDSDI source to the encoder 1. Make sure the connections from SDI/HDSDI source to the encoder are correct. The video and audio signals should be coming OUT of the source and going IN to the encoder. If you are recording from a VTR and want to control the VTR from the encoder, make sure there is a RS422 connection from REMOTE_OUT of the encoder to REMOTE_IN of the VTR. 2. Make sure there is enough DDR space in the encoder for recording. On the Main menu, press [Advance Options] then click on [DDR Info] tab. You should be able to view the amount of space left in the encoder. If more space is required, you will have to delete some sequences to free up space. Click on [Edit/Delete] tab and see the list of sequences currently in the encoder from the Delete/Rename dropdown. Select the sequence you want to remove and press [Delete] – repeat to delete more sequences if necessary. 3. Check if the VTR control works, if you are using RS422 to control the VTR remotely from the encoder, On the Main menu, press the [VTR Master] button. The Remote VTR Control menu will appear. Play with [], [], [], [], [], etc to see if the remote control is working properly. If error message ‘Error in sending VTR commands’ appears, this means that there is something wrong with the RS422 connection from the encoder to the VTR. If error message ‘VTR is local command’ appears, this means that the VTR is set to the local. Change the VTR to remote mode and try again. 4. On the Main menu, press [Record ‘VTR is local command’ Config] to open the Record Config menu, so you can set recording parameters. Refer to Understanding the User Interface chapter of this manual to help you understand the various entries on the Record Config menu. Make sure you have selected ‘HD-SDI’ from the Source dropdown. 5. When the parameters are set, press [Ok] to return to the Main menu. Press [] to start recording. If error message ‘Recording stopped due to error’ appears at the start of recording, it is fine. Try recording again. If error message ‘Error getting fifo buffer – No input video or audio signal‟ appears, this means that the encoder is not able to detect the video or audio signal. Check signal compatibility and connection. Note that the input signal should be at the same frame rate as the one specified for recording. Check if the video signal is ok by recording video only. If video is fine then most likely the problem lies with the audio. If you are still not able to detect the problem, call for technical support. 6. After recording, check that the recorded sequence is ok. You can preview (without audio) the sequence from the encoder. On the Main menu, press [Playback Config] button. The Playback Config menu will appear. Select this sequence from the Sequence Name dropdown and press [Preview]. For a more thorough check on both the video and audio, you can connect the encoder to an SDI/HD-SDI monitor and sound system, and play through the entire sequence. If you have no time to check through the whole sequence, check at least the beginning, middle and end portion of the recorded sequence. If the recorded sequence is ok, you are now ready to encode the sequence. DSRTM DSR EN-2000 Encoder User Manual 73 11 February 2008 CASE STUDY – FROM RECORDING TO ENCODING TO PACKAGING 5.2. Encoding the sequence using MPEG2 compression 1. Make sure the compute nodes are correctly connected to the encoder via cross cables. If you are using 4 nodes, normally the connections should be: node 0 (first node) -> LAN (port of the encoder), node 1 -> Gigabit, node 2 -> 1, and node 3 -> 2. If you are unsure, please call for technical support. Always power on the nodes then the encoder. 2. On the Main menu, press [Advance Options] and click on the [Export] tab. From the Export Video Sequence dropdown, select the sequence you need to encode and press [Export to MPEG2]. 3. From the menu that pops up, you should see the list of nodes that are connected to the encoder. Make sure that the number of processors (CPUs) connected to the encoder tallies with the number of entries on the list. If you have 4 nodes (8 processors/CPUs) connected to the encoder, make sure you see 8 entries on the list. Press [Check] to verify if all nodes are ok. If nodes are ok, you should see next to all nodes. If you see , this may mean that the node is malfunctioning, not powered on, or because the node is properly connected to the encoder. If there are any malfunctioning nodes, you will have to remove them before you start encoding. On the list, click on the malfunctioning node and press [Remove] to remove it – repeat if you have to remove more nodes. 4. Press on the [Edit Sequence] tab. Make sure the name of the sequence you have selected appears on the Sequence Title dropdown. If you want to encode only a portion of the whole sequence, you can specify where you want to start encoding at Start Frame and where you want to stop encoding at End Frame. Adjust the Audio Delay required if necessary. You may also merge more than one sequence together (form a sequence list) and encode them as one clip. The sequences have to be of the same video and audio format for the merging to take place. The left column shows the list of uncompressed sequences in the encoder. Select the sequence you want to encode and add them to the sequence list on the right. For each sequence in the list, you can specify the portion you want to encode. 5. Press [Options] to set the encoding parameters. This step is very important and depends on content. Please verify values before encoding. Please call for technical support whenever in doubt. Refer to UNDERSTANDING THE USER INTERFACE chapter of this manual to help you understand how to set the encoding parameters. 6. Once you have set and confirmed the parameters, press [Ok] then [Run]. The encoding should start. If you are not on the Processor menu, press [Processor] tab to go to that menu. On the Processor menu, you will be able to see the progress of the encoding. Each node will report its current encoding status. Do not disturb the encoder and the nodes while the encoding is proceeding. Do not press any buttons until all nodes show „DONE‟ and the status bar shows „Encoding Complete‟. 7. After the encoding is completed, press [Stop] followed by [Close] to return to Main menu. Check the encoded sequence using the MPEGPlayer on the encoder. If the encoded sequence is ok, you can package and transfer the encoded sequence to a FireWire hard disk. DSRTM DSR EN-2000 Encoder User Manual 74 11 February 2008 CASE STUDY – FROM RECORDING TO ENCODING TO PACKAGING 5.3. Packaging and transferring encoded sequence to a FireWire hard disk 1. Connect the FireWire disk to IEEE1394 port at the back of the encoder. The disk for containing DSR Packages needs not be formatted must the disk must have at least one single partition. This partition can be created on any PC. 2. On the Main menu, press [Advance Options] followed by the [Orders] tab. Select the encoded sequence you want to package from Sequence dropdown. If you want to transfer more than one sequence to the disk, select ‘custom sequence’ from the dropdown. A menu will pop up and from there you can create the list of sequences you want to export to the disk. 3. At the System entry, you have to specify the group of encoders (encoders with the same systemID) that is able to download the encoded sequence in the hard disk. 4. If you want to define the metadata points for the encoded sequence, press on the Automation Metadata checkbox. A new menu will pop up. Use [] [] or keypad to define the frame number for each metadata point. 5. At Subtitle Zip entry, you may attach subtitle files (zip format) to the encoded sequence. 6. You can fix a subtitle Cinecanvas™ presentation file to the encoded sequence. The purpose of fixing the subtitle file to the encoded sequence is to make sure the sequence cannot play without the subtitle files, which contain the watermarks. You only fix the name of the subtitle presentation file, not the actual subtitles, to the sequence. The actual subtitles may be downloaded to the encoders later, separate from the encoded sequence. Select the Force subtitles checkbox and use the keypad to specify the name of the subtitle presentation file. 7. Click on the Conditional Access checkbox if you want to enforce the playback conditions (starting date, ending date and the number of playbacks allowed) on the encoded sequence. Use [][] to specify the required restrictions. 8. Once the settings are done, press [Transfer]. A system will prompt for the export target (where do you want to export the sequence to?). Select ‘FireWire Disks’ or ‘Add to FireWire Disks’. The former will override wherever content that is in the disk while the latter will append the encoded sequence to existing content in the disk. 9. If the encoder can detect the FireWire disk attached to it, the transfer will proceed. A window tracking the transfer status will appear. The transfer will take approximately as long as the duration of the sequence you are transferring. Once the transfer has completed, remove the disk from the encoder. Download the content to a encoder to make sure the transfer is ok. DSRTM DSR EN-2000 Encoder User Manual 75 11 February 2008 6. APPENDIX A DSRTM DSR EN-2000 Encoder User Manual 76 11 February 2008 6.1. Formatted input conversion specifiers in C programming language (Extracted from http://crasseux.com/books/ctutorial/Formatted-input-conversion-specifiers.html) c Matches a fixed number of characters. If you specify a maximum field width (see below), that is how many characters will be matched; otherwise, %c matches one character. This conversion does not append a null character to the end of the text it reads, as does the %s conversion. It also does not skip whitespace characters, but reads precisely the number of characters it was told to, or generates a matching error if it cannot d Matches an optionally signed decimal integer, containing the following sequence: 1. An optional plus or minus sign (+ + or -). 2. One or more decimal digits. Note that %d and %i are not synonymous for scanf, as they are for printf. e Matches an optionally signed floating-point number, containing the following sequence: 1. An optional plus or minus sign (+ + or -). 2. A floating-point number in decimal or hexadecimal format. The decimal format is a sequence of one or more decimal digits, optionally containing a decimal point character (usually .), followed by an optional exponent part, consisting of a character e or E, an optional plus or minus sign, and a sequence of decimal digits. The hexadecimal format is a 0x or 0X, followed by a sequence of one or more hexadecimal digits, optionally containing a decimal point character, followed by an optional binary-exponent part, consisting of a character p or P, an optional plus or minus sign, and a sequence of digits. E Same as e. f Same as e. g Same as e. G Same as e. i Matches an optionally signed integer, containing the following sequence: 1. An optional plus or minus sign (+ + or -). 2. A string of characters representing an unsigned integer. If the string begins with 0x or 0X, the number is assumed to be in hexadecimal format, and the rest of the string must contain hexadecimal digits. Otherwise, if the string begins with 0, the number is assumed to be in octal format (base eight), and the rest of the string must contain octal digits. Otherwise, the number is assumed to be in decimal format, and the rest of the string must contain decimal digits. Note that %d and %i are not synonymous for scanf, as they are for printf. You can print integers in this syntax DSRTM DSR EN-2000 Encoder February 2008 User Manual 77 11 with printf by using the # flag character with the %x or %d output conversions. s Matches a string of non-whitespace characters. It skips initial whitespace, but stops when it meets more whitespace after it has read something. It stores a null character at the end of the text that it reads, to mark the end of the string. x Matches an unsigned integer in hexadecimal format. The string matched must begin with 0x or 0X, and the rest of the string must contain hexadecimal digits X [ Same as x. Matches a string containing an arbitrary set of characters. For example, %12[0123456789] means to read a string with a maximum field width of 12, containing characters from the set 0123456789 -- in other words, twelve decimal digits. An embedded - character means a range of characters; thus %12[0-9] means the same thing as the last example. Preceding the characters in the square brackets with a caret (^ ^) means to read a string not containing the characters listed. Thus, %12[^0-9] means to read a twelve-character string not containing any decimal digit. % Matches a percent sign. Does not correspond to an argument, and does not permit flags, field width, or type modifier to be specified (see below). In between the percent sign (% %) and the input conversion character, you can place some combination of the following modifiers, in sequence. (Note that the percent sign conversion (% %%) doesn't use arguments or modifiers.) An optional * flag. This flag specifies that a match should be made between the conversion specifier and an item in the input stream, but that the value should not then be assigned to an argument. An optional a flag, valid with string conversions only. This is a GNU extension to scanf that requests allocation of a buffer long enough to safely store the string that was read. An optional ' flag. This flag specifies that the number read will be grouped according to the rules currently specified on your system. For example, in the United States, this usually means that 1,000 will be read as one thousand. An optional decimal integer that specifies the maximum field width. The scanf function will stop reading characters from the input stream either when this maximum is reached, or when a nonmatching character is read, whichever comes first. Discarded initial whitespace does not count toward this width; neither does the null character stored by string input conversions to mark the end of the string. An optional type modifier character from the following table. (The default type of the corresponding argument is int * for the %d and %i conversions, unsigned int * for %x and %X, and float * for %e and its synonyms. You can use these type modifiers to specify otherwise.) h Specifies that the argument to which the value read should be assigned is of type short int * or unsigned short int *. Valid for the %d and %i conversions. l For the %d and %i conversions, specifies that the argument to which the value read should be assigned is of type long int * or unsigned long int *. For the %e conversion and its synonyms, specifies that the argument is of type double *. DSRTM DSR EN-2000 Encoder February 2008 User Manual 78 11 L For the %d and %i conversions, specifies that the argument to which the value read should be assigned is of type long long int * or unsigned long long int *. On systems that do not have extra-long integers, this has the same effect as l. For the %e conversion and its synonyms, specifies that the argument is of type long double *. ll Same as L, for the %d and %i conversions. q Same as L, for the %d and %i conversions. z Specifies that the argument to which the value read should be assigned is of type size_t. (The size_t type is used to specify the sizes of blocks of memory) Valid for the %d and %i conversions. DSRTM DSR EN-2000 Encoder February 2008 User Manual 79 11 JPEG2K-ENCODER USER MANUAL Software Version 3.1b DSRTM DSR EN-2000 Encoder February 2008 User Manual 80 11 TABLE OF CONTENTS 7. ABOUT THE jpeg2K encoder ................................................................................................. 82 INTRODUCTION............................................................................................................................................................. 83 7.1 8. ACCESSING JPEG2K UI .......................................................................................................................................... 83 Encoding a cliP ....................................................................................................................... 85 8.1. ADDING JOB.................................................................................................................................................................. 86 8.2. IMAGE PREPROCESS ................................................................................................................................................. 90 8.3. DELETE IMAGE PREPROCESS ................................................................................................................................. 94 8.4. MODIFYING ENCODING PARAMETERS .................................................................................................................. 95 8.5. ENCODING STEPS ....................................................................................................................................................... 98 9. system management ............................................................................................................. 100 9.1. FRAME MANAGEMENT ............................................................................................................................................. 101 9.2. HARD DISK MOUNTING ............................................................................................................................................. 103 JPEG2000 Encoder 81 29 April 2008 User Manual 7. ABOUT THE JPEG2K ENCODER JPEG2000 Encoder 82 29 April 2008 User Manual ABOUT THE JPEG2000 ENCODER Introduction This JPEG2K section is to provide an easy reference for accessing and using the JPEG2000 option of the EN-2000 Encoder. 7.1. Accessing JPEG2K UI Figure 1 - EN-2000 Encoder start up menu. Power up the encoder by gently pressing the circular power switch on the front panel. Ensure the button is fully pressed. The power LED above the power button should glow a steady green. If red light is seen instead, this means the encoder is not in proper working condition. Please call for technical support immediately JPEG2000 Encoder 83 29 April 2008 User Manual ABOUT THE JPEG2000 ENCODER After the encoder boots up, a start up menu will appear on the screen as shown in Figure 1. Click on Start A new window opens as seen in Figure 2 below. JPEG2K Encoder button. Figure 2 - JPEG2K User Interface. JPEG2000 Encoder 84 29 April 2008 User Manual 8. ENCODING A CLIP JPEG2000 Encoder 85 29 April 2008 User Manual ENCODING A CLIP 8.1. Adding Job Figure 3 - JPEG2K Main menu. JPEG2000 Encoder On the Main menu, press Add Job. A new window opens as seen in Figure 4 below. 86 29 April 2008 User Manual ENCODING A CLIP Figure 4 - Creating an encoding job. [a] On Frames option, press the Directory button. A small window opens showing a directory where the folder containing the file is located. Select the clip and press Open. [b] The total number of frames of the clip is seen on Total Frame. You can modify the number of frames using an on-screen keyboard as shown below. JPEG2000 Encoder 87 29 April 2008 User Manual ENCODING A CLIP [c] You can edit the file name of the selected clip on the Format option using an on screen keyboard as seen below. [d] Press Offset to set the frame number where offset would start. Use the screen keyboard as seen below. [e] The number of digits in the file name of the clip would be highlighted by pressing Select Digit. JPEG2000 Encoder 88 29 April 2008 User Manual ENCODING A CLIP [a] [c] [b] [a] At Format option, select the type of format of the clip from the dropdown list. In this example, the clip is in TIFF format. [b] At Depth option, select the number of depth from the dropdown list. [c] Select the type of picture resolution for the clip from the dropdown list. JPEG2000 Encoder 89 29 April 2008 User Manual ENCODING A CLIP 8.2. Image Preprocess Figure 5 - Image Preprocess menu. Set the parameters of the image by selecting the options from a dropdown list seen below. NOTE: Press Add after completing each setting. The settings you made will be shown on the small window on the left side of the screen as seen in Figure 5. [a] At Crop option, set the X and Y positions. Use [▲] [▼] to adjust each value. Changing the X and Y positions will change the width and height of the image. JPEG2000 Encoder 90 29 April 2008 User Manual ENCODING A CLIP [b] At Pad option, set the value of RGB colors of the image. Use [▲] [▼] to adjust each value. [c] At Resize option, you can edit / change the width and height of the image. [d] At LUT option, search for the location of the LUT file from the directory. [1] [3] [2] (h) Opens up a directory to search for the location of the LUT file. Select the folder where the file is located and press Open. JPEG2000 Encoder 91 29 April 2008 User Manual ENCODING A CLIP (i) Opens a dropdown list of LUT files previously selected from the directory. Select one LUT file from the list. Once the LUT file is added, the Gamma, White Point and Black Point of the LUT file are entered. You can modify the Gamma, White Point and Black Point using an on-screen keyboard by pressing their respective buttons. (j) You can delete the LUT file from the dropdown list. (k) If more than one LUT is selected, a small window pops out indicating an error. [e] At Colorspace option, a small menu for Colorspace Conversion opens. Select RGB or XYZ for Source and Target. Note: If RGB is selected for Source, the Target automatically becomes XYZ, and vice versa. JPEG2000 Encoder 92 29 April 2008 User Manual ENCODING A CLIP JPEG2000 Encoder Select OK after the settings are complete. 93 29 April 2008 User Manual ENCODING A CLIP 8.3. Delete Image Preprocess Figure 6 - Deleting LUT file. To delete the preprocess settings, select the last setting that you added and press Delete. Only the last setting added can be deleted first. JPEG2000 Encoder 94 29 April 2008 User Manual ENCODING A CLIP Figure 7 - Selected files are deleted. 8.4. Modifying Encoding Parameters Figure 8 - Accessing Encoding parameters menu. JPEG2000 Encoder 95 29 April 2008 User Manual ENCODING A CLIP Select Encoding Parameters. A new window opens as seen in Figure 10. Figure 9 - Encoding Parameters menu. At JPEG2000 Parameters, you can set the FrameRate and Bitrate using [▲] [▼] and select At Clip Information, you can edit the title of the clip using an on-screen keyboard. RateControl from a dropdown list. Search for the Video and Audio locations by browsing through the directory. JPEG2000 Encoder 96 29 April 2008 User Manual ENCODING A CLIP JPEG2000 Encoder 97 29 April 2008 User Manual ENCODING A CLIP 8.5. Encoding steps Figure 10 - Starting the encoding process. JPEG2000 Encoder Press [START] to begin encoding as shown below. 98 29 April 2008 User Manual ENCODING A CLIP [a] Select Job Info to display information about the clip such as UUID, Directory, Format, Resolution and Bit depth. [b] Select Job Log to display errors in encoding process. JPEG2000 Encoder 99 29 April 2008 User Manual 9. SYSTEM MANAGEMENT JPEG2000 Encoder 100 29 April 2008 User Manual SYSTEM MANAGEMENT 9.1. Frame Management Figure 11 - Managing the frames. Press System to open a small menu for Frame management. Select Content DB. A new window opens a Content Manager menu as seen in Figure 12 below. JPEG2000 Encoder 101 29 April 2008 User Manual SYSTEM MANAGEMENT Figure 12 - Content Manager menu. [a] To add new clips, press New. A small window opens as seen below. Set the parameters of the clip and press OK. [b] To view or edit the parameters of the clip, select the clip on the list. A green tick indicates the selection as seen in Figure 13. The same window opens as in [3a] above. Press OK to confirm and exit the window. [c] Pressing Deselect all will de-select all the files that are marked for selection. [d] Pressing Delete will delete the file that you selected. [e] Pressing Refresh will update the system after modifications are made. JPEG2000 Encoder 102 29 April 2008 User Manual 9.2. Hard disk mounting Figure 13 - Mounting a hard disk. JPEG2000 Encoder 103 29 April 2008 User Manual On the System menu, select Mount Disk. A new window opens as seen below. [a] [b] [c] [a] [a] Select Mount Type from a dropdown list as seen below. [b] At Local Options, enter the Local Mount Point using an on-screen keyboard . [c] At Remote Options, enter the Remote IP address, Remote Data, Username and Password using the on-screen keyboard. [d] Press OK after completing the settings. JPEG2000 Encoder 104 29 April 2008 User Manual To remove a disk, select Unmount Disk. On the Local Options, use the on-screen keyboard to edit the local mount point. Press Format Disk if you want the disk to be reformatted. A small window opens to confirm if you want to clean or format the disk. JPEG2000 Encoder 105 29 April 2008 User Manual DSR™ Package Manager User Manual Software Version 1.37 JPEG2000 Encoder 106 29 April 2008 User Manual COPYRIGHT NOTICE Copyright © 2005 GDC Technology Limited. All Rights Reserved. No part of this manual may be copied or distributed, transmitted, transcribed, stored in a retrieval system, or translated into any human or computer language, in a form or by any means, electronic, mechanical, magnetic, optical, manual or otherwise, or disclosed to third parties. TRADEMARKS DSR is a trademark of GDC Technology Limited. All other trademarks mentioned herein belong to their respective owners. DISCLAIMER This manual is made with version 1.37 and there might be slight differences depending on the software version the client is running. The contents, features and specifications stated in this manual are subject to change without notice due to continuous product development and improvements. In no other event shall GDC Technology Limited be liable for any loss of profit or any other commercial damages, including but not limited to special, consequential, or other damages. CONTACTS AND OFFICES Website: www.gdc-tech.com Email: [email protected] 24/7 Engineering Support Hotline: North America and Europe +1 877 743 2872 (Toll Free) China +86 400 886 0966 (Toll Free) South East Asia +65 6100 4328 North Asia +852 3520 0920 JPEG2000 Encoder 107 29 April 2008 User Manual Contents Introduction.........................................................................................................................109 Basic Terminology ............................................................................................................. 109 MXF Workflow Overview .................................................................................................... 112 Composition Playlist (CPL)..................................................................................................... 114 Create new Composition Playlist......................................................................................... 114 Import Composition Playlist .............................................................................................. 119 Delete Composition Playlists ............................................................................................ 123 Add subtitles to a Composition Playlist .............................................................................. 126 Export Composition Playlist .............................................................................................. 130 Key Delivery Message (KDM)............................................................................................... 132 Create new Key Delivery Messages.................................................................................. 132 Import Key Delivery Message ........................................................................................... 135 Delete Key Delivery Messages ......................................................................................... 139 Export Key Delivery Message(s)....................................................................................... 142 Packing List (PKL) ................................................................................................................. 144 Create new Packing List................................................................................................... 144 Delete Packing Lists ........................................................................................................ 148 Subtitles.................................................................................................................................151 Import Subtitles ............................................................................................................... 151 Delete Subtitles ............................................................................................................... 156 Projector Configuration File (PCF) ........................................................................................ 159 Import Projector Configuration File.................................................................................... 159 Delete Projector Configuration Files.................................................................................. 162 Recipient Certificates............................................................................................................. 165 Import Recipient Certificates............................................................................................. 165 Delete Recipient Certificates ............................................................................................ 169 Rename Recipient Certificates ......................................................................................... 172 View Certificate Contents ................................................................................................. 175 Projects................................................................................................................................... 178 Load new project ............................................................................................................. 178 Case Study 1 ........................................................................................................................... 181 Creating a new Composition Playlist (to add subtitles) for a package ............................... 181 JPEG2000 Encoder 108 29 April 2008 User Manual Introduction Basic Terminology 1. Composition – A feature, a trailer, a logo or an advertisement. Any single complete piece of content. A Composition is built from “reels”. Reels include parallel track files of different Picture, Sound, and Subtitles etc. 2. Composition Playlist (CPL) – Defines a Composition. Ties together the “reels” – the parallel track files of different Picture, Sound, and Subtitles etc. An example: Figure 1: Sample Composition Playlist (CPL) 3. Key Delivery Message (KDM) – The mechanism used to transport keys, which are required to “unlock” or “unscramble” the Composition/CPL at the authorized auditorium during play out. Figure 2: Key Delivery Message (KDM) 4. SMPTE D-Cinema Package – Packages are used to transport assets, which include the CPLs, picture reels, sound reels, KDMs, Subtitles and PCFs. Each asset can either be packaged individually or with other assets; a package may contain any number of assets and in any combination – from just one CPL in a package to all assets listed above in a package. 5. Packing List (PKL) – Defines the assets in a Package. JPEG2000 Encoder 109 29 April 2008 User Manual 6. Exhibition Show Playlist – The method used on the server to connect the Compositions/CPLs together to create a complete show. Figure 3: Sample Exhibition Show Playlist 7. CineCanvas™ Watermarking - The process of marking the content with unique marks in the picture using CineCanvas™ subtitles, to trace the origin of the stolen content. 8. CineLink™ Local Link Encryption – The process of scrambling the HDSDI video connection from the server to the projector so that someone cannot steal the content by tapping into the link. 9. Projector Configuration File (PCF) – The *.pcf file defines the configurations (e.g. color space, resolution, aspect ratio etc) needed on the projector to playout a particular Composition/CPL. A metadata *.xml file will be created for the PCF once it is imported to the encoder. The *.xml file contains reference to the PCF. Use this *.xml file when attaching the PCF to a CPL or PKL. The PCF will be transported in a Package, either individually or with other assets, to the server. Before playing any Composition/CPL, the server will check if there is a PCF attached to a Composition/CPL. If a PCF is detected, the server will inform the projector and the projector will retrieve the PCF from the server. The projector will configure the projector to the required settings specified in the PCF before proceeding to play the Composition/CPL. 10. Subtitles – All the subtitles files – data file(s), font file(s) and image file(s) – should be grouped into a single zip file. This zip file is used to assemble and distribute the multiple subtitles files. The data file has to be an *.xml file, the font file has to be a *.ttf file, and the image file has to be *.png file. There should be no spaces in the file names (may want to use underscores „_‟ to replace any spaces required). For MXF, normally there is one zip file per reel. Each zip file has a main file, which “represents” the entire zip file. The main file contains pointers to the other files and explains how the files are linked to one another. The main file can either be a list or data file. For example, for a Composition with three reels, if there are subtitles for all the three reels, there should be three zip files for the Composition. When creating a CPL for the Composition, attach the main file of each zip file to each reel. JPEG2000 Encoder 110 29 April 2008 User Manual How to identify the main file (for each reel)? If the reel has only one data file, then this data file is the main file. The data file will contain pointers to the font and image files. Figure 4: Case 1 - The reel has only one data file If the reel has multiple data files, there should be a list file, which assembles the data, font and image files together. This list file is the main file. The list file will contain pointers to the data, font and image files. SUBTITLES (track file) (Chinese) MOVIE_V1_LIST.XML POINTERS SUBTITLES (track file) (Chinese) MOVIE_R1_V1_DATA.XML REEL 1 SUBTITLES (track file) (Chinese) MOVIE_R1_V1_DATA.XML SUBTITLES (track file) (Chinese) MOVIE_R1_V1_DATA.XML Figure 5: Case 2 -The reel has multiple subtitle data files JPEG2000 Encoder 111 29 April 2008 User Manual Introduction MXF Workflow Overview 1. Mastering Process: Recording -> Encoding -> Packaging -> Exporting If real-time encoder is used, Recording and Encoding can be done in a single step. 2. Packaging is done using the optional web-based DSR™ Package Manager software installed on the encoder. You can access the software using the browser on your PC. The PC has to be on the same network as the encoder. Specify the IP of the encoder on the browser and the software should appear. Make sure the encoder is already powered on. 3. Packaging Process (Basic steps required to prepare a MXF package for a server): Step 1: Load project. Create a new project if you are working on a new movie. When a new project is created, you will have access to all the video, audio sequences and certificates on the encoder. But you will have no access to the CPLs, KDMs, PKLs, subtitles, and PCFs imported to the encoder for other projects. Step 2: Create a Composition Playlist (CPL) for the Composition you want to create. Make sure the Picture and Audio files are ready on the encoder. If Subtitles and (Projector Configuration File (PCF) are needed, import them to the encoder using the DSR™ Package Manager. The CPL should be created with reels referring to the sequences on the encoder. By sequences, we refer to the encoded picture (video) sequences and their associated sound (audio) sequences. Step 3: If the content is to be encrypted (you can specify whether you want to encrypt the picture or sound for each reel when you are creating the CPL), then create a KDM for the CPL you created. The recipient server certificates (*.pem files), which are unique for each server, are needed to create the KDMs. These certificates contain the public key to create a KDM for a particular server. The server manufacturers should provide the certificates. For example, GDC can provide certificates for our servers. Step 4: Create a Packing List (PKL) to put all assets (CPLs, picture reels, sound reels, KDMs, Subtitles and PCFs) into a package. Step 5: Export/Transfer the package to an external FireWire disk. • • • Format the disk with ext2/ext3 file-system. Connect the disk to the encoder. Mount the disk to a directory on the encoder. • From the main menu, press [Advance options] -> press [Remote] tab -> press [Mount External Disk]. • Select Mount Type = ‟Local FireWire Disk‟. • Specify the Local Mount Point. The directory should exist on the encoder e.g. /mnt/fw/ • Press [OK]. JPEG2000 Encoder 112 29 April 2008 User Manual • Export the package. o Press [Orders] tab -> press [SMPTE Packages]. o If the mounting is successful, the Target Directory will list the mount point created as one of the entries. *The Target Directory is the directory to which the package is transferred. o Choose the package to transfer and specify the mount point as the Target Directory. o Press [OK]. • Un-mount the disk from the encoder before removing it from the encoder. o From the main menu, press [Advance options] -> press [Remote] tab -> press [Unmount External Disk]. o Specify the Local Mount Point (e.g. /mnt/fw) to unmount. o Press [OK]. •Attach the disk to your PC and check if all assets in the package are successfully transferred to the disk. JPEG2000 Encoder 113 29 April 2008 User Manual Composition Playlist (CPL) Create new Composition Playlist 1: Click on CPLs and select Create new Composition Playlist. JPEG2000 Encoder 114 29 April 2008 User Manual 2: Enter Composition Information: (a) Annotation Text – Explain some annotation about the CPL. For example, it could be about the resolution or type of audio used in the Composition. (b) Issue Date – Date and time the CPL is created. The time is taken from the encoder and generated automatically by the encoder. Can change the date and time but the format has to be the same. (c) Issuer – Information about the organization/person who issued the CPL. (d) Creator – Indicate the software used to create the CPL. (e) Content Title Text – Enter name of the Composition. (f) Content Kind – Choose from the following options: „feature‟, „trailer‟, „test‟, „teaser‟, „rating‟, „advertisement‟, „short‟, „transitional‟, „psa‟ or „policy‟. (g) Projector Config File (PCF) – Choose the PCF for the Composition. Select „None‟ if Composition does not have a PCF. Make sure you have imported the PCF to the encoder or else the PCF will not be shown as an option. If you have not, you can import the PCF to the encoder using this package manager (PCFs -> Import Projector Config File). (h) Number of Ratings – Specify the number of rating agencies for this Composition. There should only be one single rating per agency. (i) Number of Reels – Specify the number of reels in this Composition. When you have entered all information, press [>-Next->]. JPEG2000 Encoder 115 29 April 2008 User Manual 3: Enter information for each reel: Sequence – Select the encoded sequence to attach to the reel. Only encoded sequences in the encoder are shown. You may use the [Import Archive] functionality on the encoder to import other encoded sequences to the encoder. The sequence should include the picture file and its associated sound file (if any). You may create/change the picture-sound (video-audio) association from the encoder UI. (b) Picture Entry Point – Specify, in HH:MM:SS:FF format, when you want the picture to start playing. Entries accepted: • WW (no colon entered) – picture to start playing from frame number „WW‟. • XX:WW (one colon entered) – picture to start playing from ‟00:00:XX:WW‟. • YY:XX:WW (two colons entered) – picture to start playing from ‟00:YY:XX:WW‟. • ZZ:YY:XX:WW (three colons entered) – picture to start playing from ‟ZZ:YY:XX:WW‟. (c) Sound Entry Point – Specify, in HH:MM:SS:FF format, when you want the sound to start playing. Entries accepted: • WW (no colon entered) – sound to start playing from frame number „WW‟. • XX:WW (one colon entered) – sound to start playing from ‟00:00:XX:WW‟. • YY:XX:WW (two colons entered) – sound to start playing from ‟00:YY:XX:WW‟. • ZZ:YY:XX:WW (three colons entered) – sound to start playing from ‟ZZ:YY:XX:WW‟. (d) Subtitle Entry Point – Specify, in HH:MM:SS:FF format, when you want the subtitles to start playing. Entries accepted: • WW (no colon entered) – subtitles to start playing from frame number „WW‟. • XX:WW (one colon entered) – subtitles to start playing from ‟00:00:XX:WW‟. • YY:XX:WW (two colons entered) – subtitles to start playing from ‟00:YY:XX:WW‟. • ZZ:YY:XX:WW (three colons entered) – subtitles to start playing from ‟ZZ:YY:XX:WW‟. (a) JPEG2000 Encoder 116 29 April 2008 User Manual (e) Duration – Specify, in HH:MM:SS:FF format, the duration for the reel. Normally the duration for the picture, sound and audio should be the same. If „FULL‟ is entered, the reel will play from the entry point (as you specified entered above) till the end of reel. Entries accepted: • WW (no colon entered) – reel is „WW‟ frames long. • XX:WW (one colon entered) – reel is „XX‟ seconds and „WW‟ frames long. • YY:XX:WW (two colons entered) – reel is „YY‟ minutes, „XX‟ seconds and „WW‟ frames long. • ZZ:YY:XX:WW (three colons entered) – reel is „ZZ‟ hours, „YY‟ minutes, „XX‟ seconds and „WW‟ frames long. (f) Encrypt Picture – Indicate with a whether you want to encrypt the picture. AES-128 encryption algorithm will be used. The encryption will be done when you export the picture. It is not done at this point - when you create the PCL. (g) Encrypt Sound– Indicate with a whether you want to encrypt the sound. AES-128 encryption algorithm will be used. The encryption will be done when you export the audio. It is not done at this point - when you create the PCL. (h) Subtitle – Select the zip file to attach to the reel. Attach the zip file using its main file. The main file can be a *list.xml or *data.xml file. Make sure you have imported the correct zip file to the encoder. If you have not, you can import the zip file to the encoder using this package manager (Subtitles -> Import Subtitles). The zip file should contain all the subtitles files (list, data, font and image files) required by this reel. When information has been entered for all reels, press [>-Next->] JPEG2000 Encoder 117 29 April 2008 User Manual 4: The system will inform you when the CPL is successfully created and saved on the encoder (in the directory of the current project). Press [<-Home-<] to return to main menu. JPEG2000 Encoder 118 29 April 2008 User Manual Composition Playlist (CPL) Import Composition Playlist This functionality enables you to import CPLs, which may be created by other parties, to your encoder. You may then use the CPLs to create new Packages/Packing Lists (PKL). 1: Click on CPLs and select Import Composition Playlist. JPEG2000 Encoder 119 29 April 2008 User Manual 2: Make sure the CPL you want to import is already at one directory on your PC. Press [Browse] to navigate to the CPL. The CPL should be a *.cpl.xml file. You may only import only one CPL at a time. JPEG2000 Encoder 120 29 April 2008 User Manual 3: Select the CPL required and press [>-Next->]. JPEG2000 Encoder 121 29 April 2008 User Manual 4: The system will inform you when the CPL is successfully imported to the encoder. Press [<-Home-<] to return to main menu. JPEG2000 Encoder 122 29 April 2008 User Manual Composition Playlist (CPL) Delete Composition Playlists 1: Click on CPLs and select Delete Composition Playlists. JPEG2000 Encoder 123 29 April 2008 User Manual 2: Select the CPL(s) you wish to remove and press [>-Next->]. Only the CPLs, which are in the encoder in the current project, are listed. You may remove more than one CPL at one go - press the [Shift] button on your keyboard while selecting the CPLs. JPEG2000 Encoder 124 29 April 2008 User Manual 3: The system will let you know the number of CPLs successfully deleted from the encoder. Press [<-Home<] to return to main menu. JPEG2000 Encoder 125 29 April 2008 User Manual Composition Playlist (CPL) Add subtitles to a Composition Playlist You may add subtitles to the CPLs, which you have created yourself or imported from other parties. 1: Click on CPLs and select Add Subtitles. JPEG2000 Encoder 126 29 April 2008 User Manual 2: Select the CPL you want to edit and press [>-Next->]. Only CPLs, which are on the encoder in the current project, are listed. You may edit only one CPL at a time. JPEG2000 Encoder 127 29 April 2008 User Manual 3: System will show the subtitle information for all reels in the Composition/CPL. Make the necessary changes required: (a) Subtitle Entry Point – Specify, in HH:MM:SS:FF format, when you want the subtitles to start playing. Entries accepted: • WW (no colon entered) –subtitles to start playing from frame number „WW‟. • XX:WW (one colon entered) – subtitles to start playing from ‟00:00:XX:WW‟. • YY:XX:WW (two colons entered) – subtitles to start playing from ‟00:YY:XX:WW‟. • ZZ:YY:XX:WW (three colons entered) – subtitles to start playing from ‟ZZ:YY:XX:WW‟. (b) Subtitle – Select the zip file to attach to the reel. Attach the zip file using its main file. The main file can be a *list.xml or *data.xml file. Make sure you have imported the correct zip file to the encoder. If you have not, you can import the zip file to the encoder using this package manager (Subtitles -> Import Subtitles). The zip file should contain all the subtitles files (list, data, font and image files) required by this reel. When you have entered the required information, press [>-Next->]. JPEG2000 Encoder 128 29 April 2008 User Manual 4: The system will inform you when the new CPL is created and saved on the encoder (in the directory of the current project). The new CPL contains information about the added subtitles. The new CPL will not replace the old CPL. The old CPL will still be in the encoder. Press [<-Home-<] to return to the main menu. JPEG2000 Encoder 129 29 April 2008 User Manual Composition Playlist (CPL) Export Composition Playlist 1: Create a Packing List (PKL) to put the CPL into a package using the DSR™ Package Manager. • From the main menu, press PKLs -> select Create new Packing List. • Select the required CPL and click [>-Next->]. • A new package with the CPL will be created and saved on the encoder. 2: Export/Transfer the package to an external USB/FireWire disk. • Format the disk with ext2/ext3 file-system. The USB disk may have FAT file-system. • Connect the disk to the encoder. • Mount the disk to a directory on the encoder. o From the main menu, press [Advance options] -> press [Remote] tab -> press [Mount External Disk]. o Select Mount Type = „Local USB Disk‟ or ‟Local FireWire Disk‟. o Specify the Local Mount Point. The directory should exist on the encoder e.g. /mnt/fw/ o Press [OK]. If your PC supports SAMBA protocol, you can share your local directory and have it mounted to a directory on the encoder. The package can then be transferred from the encoder to your local directory directly. • Make sure the encoder and your PC are on the same network. • Mount your local directory to a directory on the encoder. o From the main menu, press [Advance options] -> press [Remote] tab -> press [Mount External Disk]. o Select Mount Type = „SMB Share‟. o Specify the Local Mount Point. The directory should exist on the encoder e.g. /mnt/ o Specify the Remote IP (IP of your PC) and Remote Share (shared directory on your PC). • Export the package. o Press [Orders] tab -> press [SMPTE Packages]. o If mounting is successful, the Target Directory will list the mount list created as one of the entries. *The Target Directory is the directory to which the package is transferred. o Choose the package to transfer and specify the mount point as the Target Directory o Press [OK]. o The package should be exported to the USB/FireWire disk or shared directory on your PC. • Un-mount the disk from the encoder before removing it from the encoder. The shared folder also need to be un-mounted, if you are using one. o From the main menu, press [Advance options] -> press [Remote] tab -> Press [Unmount External Disk]. o Specify the Local Mount Point (e.g. /mnt) to unmount. o Press [OK]. 3: Check that you have transferred the package to the disk/the local directory on your PC. The disk/directory should have four files, one of which is the CPL file in *.cpl.xml format. JPEG2000 Encoder 130 29 April 2008 User Manual 4: You may send the CPL to the recipient either as a package or a single CPL (*.xml) file. If the CPL is intended for a server to enable playback of a composition, send the CPL as a package. On the server, to import the package: • On the main menu, press [Import]. • Select „SMPTE D-Cinema Package‟. • Press [OK]. If the CPL is intended for another encoder to create KDMs or PKLs for other servers, send the CPL as a single CPL (*.xml) file. Extract just the CPL file and email it to the recipient. Upon receiving the file, the recipient just needs to import the CPL to the encoder using the DSR™ Package Manager. JPEG2000 Encoder 131 29 April 2008 User Manual Key Delivery Message (KDM) Create new Key Delivery Messages 1: Click on KDMs and select Create new Key Delivery Message. JPEG2000 Encoder 132 29 April 2008 User Manual 2: Enter KDM Information: (a) Issue Date – Date and time the KDM is created. The time is taken from the encoder and generated automatically by the encoder. Can change the date and time but the format has to be the same. (b) Key IDs • Composition Playlist – Select the CPL from which the system can extract the Key IDs (Picture/Sound encryption keys) to create the KDM. • Key Delivery Message – Select the KDM from which the system can extract the Key IDs (Picture/Sound encryption keys) to create the KDM. * Specify either a Composition Playlist or a Key Delivery Message, and not both. Specifying both will generate an invalid KDM with multiple Key IDs. (c) Recipient Certificates – Select the recipients who need the KDM (with the specified Key IDs). A unique KDM will be generated for each selected recipient. (d) Not Valid Before – The KDM is not valid before the listed date. Can change the date and time but the format has to be the same. (e) Not Valid After – The KDM is not valid after the listed date. Can change the date and time but the format has to be the same. When you have entered the required information, press [>-Next->]. JPEG2000 Encoder 133 29 April 2008 User Manual 3: The system will let you know the number of KDMs successfully created and saved on the encoder (in the directory of the current project). Press [<-Home-<] to return to main menu. JPEG2000 Encoder 134 29 April 2008 User Manual Key Delivery Message (KDM) Import Key Delivery Message 1 1: Click on KDMs and select Import Key Delivery Message. JPEG2000 Encoder 135 29 April 2008 User Manual 2: Make sure the KDM you want to import is already at one directory on your PC. Press [Browse] to navigate to the KDM. The KDM should be a *.kdm.xml file. JPEG2000 Encoder 136 29 April 2008 User Manual 3: Press [>-Next->] once you have chosen the required KDM. JPEG2000 Encoder 137 29 April 2008 User Manual 4: The system will inform you once the KDM is successfully imported to the encoder (to the directory of the current project). Press [<-Home-<] to return to main menu. JPEG2000 Encoder 138 29 April 2008 User Manual Key Delivery Message (KDM) Delete Key Delivery Messages 1: Click on KDMs and select Delete Key Delivery Message. JPEG2000 Encoder 139 29 April 2008 User Manual 2: The system will list the KDMs on the encoder. Only the KDMs available for the current project will be shown. Select the KDM(s) you wish to delete and press [>-Next->]. You may delete more than one KDM at one go. JPEG2000 Encoder 140 29 April 2008 User Manual 3: The system will let you know the number of KDMs successfully deleted from the encoder. Press [<-Home-<] to return to main menu. JPEG2000 Encoder 141 29 April 2008 User Manual Key Delivery Message (KDM) Export Key Delivery Message(s) 1: Create a Packing List (PKL) to put the KDM into a package using the DSR™ Package Manager. • From the main menu, press PKLs -> select Create new Packing List. • Select the required KDM and click [>-Next->]. A new package with the KDM will be created and saved on the encoder. * You may put KDMs for the different recipients into a single package. The package can be sent to the different recipients. Each recipient will only recognize KDM(s) that are created using its certificate. 2: Export/Transfer the package to an external USB/FireWire disk. • Format the disk with ext2/ext3 file-system. The USB disk may have FAT file-system. • Connect the disk to the encoder. • Mount the disk to a directory on the encoder. o From the main menu, press [Advance options] -> press [Remote] tab -> press [Mount External Disk]. o Select Mount Type = „Local USB Disk‟ or ‟Local FireWire Disk‟. o Specify the Local Mount Point. The directory should exist on the encoder e.g. /mnt/fw/ o Press [OK]. If your PC supports SAMBA protocol, you can share your local directory and have it mounted to a directory on the encoder. The package can then be transferred from the encoder to your local directory directly. • Make sure the encoder and your PC are on the same network. • Mount your local directory to a directory on the encoder. o From the main menu, press [Advance options] -> press [Remote] tab -> press [Mount External Disk]. o Select Mount Type = „SMB Share‟. o Specify the Local Mount Point. The directory should exist on the encoder e.g. /mnt/ o Specify the Remote IP (IP of your PC) and Remote Share (shared directory on your PC). • Export the package. o Press [Orders] tab -> press [SMPTE Packages]. o If mounting is successful, the Target Directory will list the mount list created as one of the entries. *The Target Directory is the directory to which the package is transferred. o Choose the package to transfer and specify the mount point as the Target Directory Press [OK]. o The package should be exported to the USB/FireWire disk or shared directory on o your PC. • Un-mount the disk from the encoder before removing it from the encoder. The shared folder also need to be un-mounted, if you are using one. o From the main menu, press [Advance options] -> press [Remote] tab -> press [Unmount External Disk]. o Specify the Local Mount Point (e.g. /mnt) to unmount. o Press [OK]. JPEG2000 Encoder 142 29 April 2008 User Manual 3. Check that you have transferred the package to the disk/ the local directory on your PC. The disk/directory should have at least four files. The KDM file should be in *kdm.xml/format. 4: You may send the KDM to the recipient either as a package or a single KDM (*.kdm.xml) file. If the KDM is intended for a server to enable playback of a composition, send the KDM as a package. . On the server, to import the package: • On the main menu, press [Import]. • Select „SMPTE D-Cinema Package‟. • Press [OK]. If the KDM is intended for another encoder to create more KDMs or PKLs for other servers, send the KDM as a single KDM (*.kdm.xml) file. Extract just the KDM file and email it to the recipient. Upon receiving the file, the recipient just needs to import the KDM to the encoder using the DSR™ Package Manager. JPEG2000 Encoder 143 29 April 2008 User Manual . Packing List (PKL) Create new Packing List 1: Click on PKLs and select Create new Packing List. JPEG2000 Encoder 144 29 April 2008 User Manual 2: Enter Package Information: (a) Annotation Text – Explain some annotation about the PKL. It could be any information about the package, to identify and differentiate it from other package. The annotation text will appear as part of the package name. (b) Issue Date – Date and time the PKL is created. The time is taken from the encoder and generated automatically by the encoder. Can change the date and time but the format has to be the same. (c) Issuer – Information about the organization/person who issued the PKL. (d) Creator – Indicate the software used to create the PKL. (e) Composition Playlists – Select the CPL(s) you want to include in the package. Only the CPLs, which are in the encoder, in the current project, are listed. (f) Picture Reels – Select the picture reels you want to include in the package. Only those picture reels, which are in the encoder, in the current project, are listed. (g) Sound Reels – Select the sound reels you want to include in the package. Only those sound reels, which are in the encoder, in the current project, are listed. (h) Add More Assets – if you want to add more assets to the package. Press [>-Next->] once you have entered the relevant entries. JPEG2000 Encoder 145 29 April 2008 User Manual 3: If you have selected to Add More Asset to the package, the above window will appear. (a) Key Delivery Messages (KDM) – Select the KDMs you want to include in the package. Only the KDMs, which are in the encoder, in the current project, are listed. (b) Subtitles – Select the zip files you want to add to the package. Only the main files are listed. Attach the zip file using its main file. The main file can be a *list.xml or *data.xml file. Make sure you have imported the correct zip file to the encoder. If you have not, you can import the zip file to the encoder using this package manager (Subtitles -> Import Subtitles). (c) Projector Config Files – Select the PCFs you want to include in the package. Only PCFs, which are in the encoder, in the current project, are listed. Press [>-Next->] once you have entered the relevant entries. JPEG2000 Encoder 146 29 April 2008 User Manual 4: The system will inform you once the PKL is successfully created and saved on the encoder. It will also list out the assets in the package referenced by the PKL you created. Only the PKL is created at this point of time. The package is only created when you export the package from the encoder. Press [<Home-<] to return to the main menu. JPEG2000 Encoder 147 29 April 2008 User Manual Packing List (PKL) Delete Packing Lists 1: Click on PKLs and select Delete Packing Lists. JPEG2000 Encoder 148 29 April 2008 User Manual 2: Select the PKL(s) you wish to remove and press [>-Next->]. Only the PKLs, which are in the encoder, in the current project, are listed. You may remove more than one PKL at one go - press the [Shift] button while selecting the PKLs. JPEG2000 Encoder 149 29 April 2008 User Manual 3: The system will let you know the number of PKLs successfully deleted from the encoder. Press [<Home-<] to return to main menu. JPEG2000 Encoder 150 29 April 2008 User Manual Subtitles Import Subtitles 1: Click on Subtitles and select Import Subtitles. JPEG2000 Encoder 151 29 April 2008 User Manual 2: All the subtitles files – data file(s), font file(s) and image file(s) – should be grouped into a single zip file. This zip file is used to assemble and distribute the multiple subtitles files. The data file has to be an *.xml file, the font file has to be a *.ttf file, and the image file has to be *.png file. There should be no spaces in the file names (may want to use underscores „_‟ to replace any spaces required). Make sure you already have the zip file at one directory on your PC. Press [Browse] to navigate to the zip file. JPEG2000 Encoder 152 29 April 2008 User Manual 3: Press [>-Next->] once you have selected the required zip file. You may import only one zip file at a time. JPEG2000 Encoder 153 29 April 2008 User Manual 4: The system will auto-detect and list the .xml file(s) (list and data files) in the zip file. Indicate which is the main subtitle file and press [>-Next->]. Each zip file has a main file, which “represents” the entire zip file. The main file contains pointers to the other files and explains how the files are linked to one another. The main file can either be a list or data file. JPEG2000 Encoder 154 29 April 2008 User Manual 5: The system will inform you when the zip file is successfully imported to the encoder (to the directory of the current project). Press [<-Home-<] to return to main menu. JPEG2000 Encoder 155 29 April 2008 User Manual Subtitles Delete Subtitles 1: Click on Subtitles and select Delete Subtitles. JPEG2000 Encoder 156 29 April 2008 User Manual 2: The system will list the subtitles saved in the current project on the encoder. Only the main file of each set of subtitles will be listed. Select the set you wish to delete and press [>-Next->]. You may delete more than one set at one go - press the [Shift] button on your keyboard while selecting. Each set of subtitles has a main file, which “represents” the entire zip file. The main file contains pointers to the other files (data, font or image files) and explains how the files are linked to one another. The main file can either be a list or data file. JPEG2000 Encoder 157 29 April 2008 User Manual 3: The system will inform you the number of sets of subtitles successfully deleted from the encoder. Press [<Home-<] to return to main menu. JPEG2000 Encoder 158 29 April 2008 User Manual Projector Configuration File (PCF) Import Projector Configuration File 1: Click on PCFs and select Import Projector Config File. JPEG2000 Encoder 159 29 April 2008 User Manual 2: Enter the following entries: (a) Projector Config File – Press [Browse] to navigate to the .pcf file you want to import to the encoder. Make sure you already have the .pcf file at one directory on our PC. You may import only one .pcf file at a time. (b) Movie Title (no spaces) – Specify the movie, which will need this PCF. There should be no spaces in the name (might want to use underscores „_‟ to replace any spaces required). Press [>-Next->] once you have entered both entries. JPEG2000 Encoder 160 29 April 2008 User Manual 3: The system will let you know when the PCF is successfully imported to the encoder (to the directory of the current project). A metadata xml file will be generated for the PCF. The xml file will have reference to the PCF. Press [<-Home-<] to return to main menu. JPEG2000 Encoder 161 29 April 2008 User Manual Projector Configuration File (PCF) Delete Projector Configuration Files 1: Click on PCFs and select Delete Projector Config Files. JPEG2000 Encoder 162 29 April 2008 User Manual 2: The system will list the PCFs saved in the current project on the encoder. Select the PCF(s) you wish to delete and press [>-Next->]. You may delete more than one PCF at one go - press the [Shift] button on your keyboard while selecting. JPEG2000 Encoder 163 29 April 2008 User Manual 3: The system will inform you the number of PCF(s) successfully deleted from the encoder. Press [<-Home-<] to return to main menu. JPEG2000 Encoder 164 29 April 2008 User Manual Recipient Certificates Import Recipient Certificates 1: Click on Certs and select Import Recipient Certificates. JPEG2000 Encoder 165 29 April 2008 User Manual 2: Make sure the recipient certificate(s) (.pem file) you wish to import is (are) already at one directory on your PC. Press [Browse] to navigate to the certificate(s). You may import up to five certificates at one go. JPEG2000 Encoder 166 29 April 2008 User Manual 3: Press [>-Next->] once you have selected the required certificate(s). JPEG2000 Encoder 167 29 April 2008 User Manual 4: The system will let you know the number of certificates successfully imported to the encoder (to the directory of the current project). Press [<-Home-<] to return to main menu. JPEG2000 Encoder 168 29 April 2008 User Manual Recipient Certificates Delete Recipient Certificates 1: Click on Certs and select Delete Recipient Certificates. JPEG2000 Encoder 169 29 April 2008 User Manual 2: The system will list the recipient certificates on the encoder. Select the certificate(s) you wish to delete and press [>-Next->]. You may delete more than one certificate at one go - press the [Shift] button on your keyboard while selecting. JPEG2000 Encoder 170 29 April 2008 User Manual 3: The system will let you know the number of certificates successfully deleted from the encoder. Press [<Home-<] to return to main menu. JPEG2000 Encoder 171 29 April 2008 User Manual Recipient Certificates Rename Recipient Certificates 1: Click on Certs and select Rename Recipient Certificates. JPEG2000 Encoder 172 29 April 2008 User Manual 2: Make sure the recipient certificate you want to rename is already on the encoder. (a) Recipient Certificates – Select the certificate you want to rename. (b) New Name (without .pem) – Enter the new name. Any naming format for the .pem file is acceptable. A recommend format would be Location-SerialNumber.pem. Press [>-Next->] once you have entered both entries. JPEG2000 Encoder 173 29 April 2008 User Manual 3: The system will let you know if the renaming is successful. Press [<-Home-<] to return to main menu. JPEG2000 Encoder 174 29 April 2008 User Manual Recipient Certificates View Certificate Contents 1: Click on Certs and select View Certificate Contents. JPEG2000 Encoder 175 29 April 2008 User Manual 2: Make sure the recipient certificate you want to view is already on the encoder. Select the certificate you want to view and press [>-Next->]. You may view only one certificate at a time. JPEG2000 Encoder 176 29 April 2008 User Manual 3: You should be able to see the certificate contents. Press [<-Home-<] to return to main menu once you have finished reading. JPEG2000 Encoder 177 29 April 2008 User Manual Projects Load new project The encoder/DSR™ Package Manager will work with huge number of files – CPLs, KDMs, PKLs, subtitles and PCFs. For better management of the files, the concept of „Projects‟ was introduced. Each project has its own set of files – CPLs, KDMs, PKLs, subtitles, and PCFs. These files are specific to a project. The video, audio and recipient certificates on the encoder are however accessible to all projects. An example would be to treat every movie as a separate project. When you load a new project for a new movie, all files (CPLs, KDMs, PKLs, subtitles, and PCFs), which you imported and created specific to the movie, will only be accessible within the project. This provides better file management and makes the system more organized. 1: Click on Projects and select Load Projects. JPEG2000 Encoder 178 29 April 2008 User Manual 2: Select the project you wish to work on. Choose „New Empty Project‟ if you want to start a new project. You have to specify whether you want to save the current project. By default, the option to save the current project is enabled. If the current project is not saved (by removing the ), files that you have added or deleted from the project since they were saved last will not be updated to the system. Press [>-Next->] once you have made your selection. JPEG2000 Encoder 179 29 April 2008 User Manual 3: The system will inform you when the new project is successfully loaded. Press [<-Home-<] to return to main menu. JPEG2000 Encoder 180 29 April 2008 User Manual Case Study 1 Creating a new Composition Playlist (to add subtitles) for a package Suppose you receive two packages. One package (Packing List PKL1) has the following contents: (a) Picture Track File (P1) (b) Sound Track File (S1) (c) CPL referring to P1 and S1 (CPL1). The other package has the KDM (KDM1) for CPL1. The following steps can be used to attach subtitles. 1: Import CPL1 and KDM1 to the encoder. 2: Import subtitles to the encoder. 3: Add the imported subtitles to CPL1. A new CPL (CPL2) will be created. 4: Create new KDM (KDM2) to playback CPL2 on the server. 5: Create new PKL (PKL2) to contain CPL2, KDM2, and the imported subtitles. 6: Download BOTH packages (PKL1 and PKL2) onto the server. Now the server will list two compositions out of which only the composition with the subtitles (CPL2) will be “green”. “Green” means the composition is valid. CPL1 will be “red” because the server does not have a valid KDM for CPL1. “Red” means the composition is invalid. The CPL2 still has references to P1 and S1, so the server can playback the composition (CPL2) without any problems. JPEG2000 Encoder 181 29 April 2008 User Manual