1
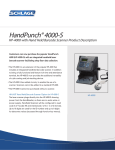
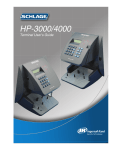
ATRx Biometric 1000
Quick Start
www.acroprint.com
1
Take Inventory
Before you proceed, let’s make sure
you have everything you need for a
successful installation.
Contents for the ATRx Biometric 1000™:
ATRx Biometric Enabled™
software CD
HP 1000
2
Installing the HandPunch
The quick start sheet reviews the installation
of software and the connection of the
HandPunch to your PC. For instructions on
preparing the HandPunch for wall mounting,
routing of wiring, and wiring connections,
please refer to the user manual on pages
15-21. Be sure to test and enroll the
employees prior to mounting the Handpunch.
3
Accessing the Software
User Manual
You can access the user manual in two ways:
A. Click on the Help menu in the Administrator
section of the software. Search for information
by topic.
Communication Cable
Power Transformer
Minimum System Requirements:
Hardware: IBM PC Compatible Computer, Intel
Pentium II 400 mhz or higher, 128 MB RAM, 150 MB
Free Space on HD, CD-Rom Drive, At least 256
SVGA video, Minimum 800 x 600 resolution
B. Go to http://www.acroprint.com/
acroprintstore/solutions/user-manuals.aspx to
download a complete manual from our website. The
user manual is offered in PDF format, which requires
Adobe Acrobat Reader to view.
Software: Microsoft® Windows 98SE, Windows
2000 Professional, Windows XP Professional,
Windows XP Home, Windows 2003 Server
4
Let’s Get Connected
FIRST, TURN OFF YOUR PC!
1. To avoid damage to the PC port, PC power
must be completely shutdown prior to
attaching the HP1000 communication cable.
2. Connect the serial connector of the
communication cable to a serial port on the
back of your PC.
5
6a
Getting Started
If you have completed all of steps listed above,
then you are ready to load the software.
1. Install ATRx Biometrically Enabled Software
by inserting the CD into the CD-ROM drive
and complete the installation wizard.
2. Select Restart the PC at the end of the
software installation.
3. Follow the on-screen Setup Wizard entering in
your company information, such as pay period
type, overtime rules, and shift settings. You
will be prompted to enter your employee
information at this time.
NOTE
If you do NOT complete the Setup Wizard the
program will not run successfully.
3. Connect the other end of the communication
cable to the RS232 port on the back of
HP1000.
6b Activate the
HandPunch 1000 to
PC Communications
2. To enable the HP1000, you must right click on the
System Tray and select System Utilities from
the menu by left clicking one time on the item.
Activate the
HandPunch 1000 to
PC Communications
1. Confirm Attendance Rx software is
running by verifying the system tray icon
appears in the bottom right-hand corner
of your computer desktop window next
to the Windows PC clock.
NOTE
Please write down your administrative password
and store in a safe place. You will be prompted
to enter the password in Step 6b of this quick
start guide.
6
6c Activate the
HandPunch 1000 to
PC Communications
4. Select the second tab labeled Biometrics in the
Systems Utilities screen.
7a
Enrolling Employee for
Punch Confirmation
NOTE
Employees must have a PIN assigned before enrolling.
5. Place a check in the Enable Attendance Rx
Biometric Functionality box by left clicking
one time in the check box field.
6. Under the text Install Biometrics Device, left
click one time on the drop down menu and
select the IR HandPunch 1000 (DEV-2).
7. Select YES on the Enable Terminal Manager
window to start the Terminal Manager
automatically.
3. Enter the Administrative password you created
during the installation and setup process into the
password field.
8. Close the Systems Utilites window by left
clicking one time on the Close button.
1. From your desktop open the Attendance Rx
Administrator by double clicking on the desktop
icon labeled Administrator.
2. Enter your password in the space provided.
3. Left click one time on the Employee button
located on the Navigation Bar to the left.
ATRx Biometric 1000
Quick Start
www.acroprint.com
7b
Enrolling Employee for
Punch Confirmation
4. Select an employee record from the list by left
clicking one time on the Last Name field.
5. Left click one time on the Enroll Hand button
at the bottom of the screen.
6. Left click one time on the Enroll Employee
button.
7. Select Yes to the message Enroll for PIN and
the employee PIN displayed.
8. Message about enrolling your handprint will
display. Follow the on-screen instructions
placing the employee’s hand in the hand
punch 3 times.
8
“How To” for Employees;
Using the Handpunch 1000
When your employees have been
successfully enrolled in the software and
HP1000 they are ready to clock in/out.
1. Employee enters assigned PIN
number on the keypad of HP1000.
2. Press Enter. (red placement lights will
display).
3. Place right hand into the HP1000 as
shown on the front panel of the hand
punch.
4. A green light will display with a
message confirming Okay and a
Read Score to let the employees know
their punch was good. *
* A Read Score reflects how accurately the
employee is placing their hand in the HP1000.
Score will vary greatly. Scores above 50
indicate incorrect hand placement.
NOTE: This equipment has been tested and found to comply with the
limits for a Class B digital device, pursuant to Part 15 of the FCC
Rules. These limits are designed to provide reasonable protection
against harmful interference in a residential installation. This
equipment generates, uses and can radiate radio frequency energy
and, if not installed and used in accordance with the instructions, may
cause harmful interference to radio communications. However, there
is no guarantee that interference will not occur in a particular
installation. If this equipment does cause harmful interference to radio
or television reception, which can be determined by turning the
equipment off and on, the user is encouraged to try to correct the
interference by one or more of the following measures: Reorient or
relocate the receiving antenna; Increase the separation between the
equipment and receiver; Connect the equipment into an outlet on a
circuit different from that to which the receiver is connected; Consult
the dealer or an experienced radio/TV technician for help.
5640 Departure Drive
Raleigh, NC 27616
1-800-334-7190
www.acroprint.com
To contact the Acroprint Support Department:
Email: [email protected]
Web: support.acroprint.com
Phone: 1-800-334-7190 option 3
Fax:
919-872-5967
7c
Enrolling Employee for
Punch Confirmation
Successful enrollment of hand will display:
7d
Enrolling Employee for
Punch Confirmation
NOTE
Repeat this process as needed to continue
enrolling employees. Also perform this
process for new hires.
9. Select OK.
10. Select Save on the employee Hand
Punch window.
11. After completing this process, select
Save in the Employee record main window.
Employees may begin using the HP1000
immediately after successful enrollment.
For instructions on preparing the
HandPunch for wall mounting, routing of
wiring, and wiring connections, please
refer to the user manual on pages 15-21.
Be sure to test and enroll the employees
prior to mounting the Handpunch.
Trouble Shooting the HP1000
I am trying to enroll my employee’s hands and do not see the “Enroll Hand” button on the
employee screen.
Check to confirm HP1000 biometric device has been enabled in the software.
Please refer to steps 6a, 6b and 6c.
I am trying to enroll my employee’s hand in the HP1000 and the following message displays:
“Attendance Rx is unable to communicate with the HandPunch 1000 reader, please make
certain the device is properly connected.”
Are you using the communications cable and adapter that came with the
ATRx Biometric 1000 package? This cable and adapter is specifically wired for PC
to HP1000 RS232 communication.
Is the communication cable and adapter secure on the PC serial port and in the back
of the HP1000?
Is the power transformer for the HP1000 plugged into a functional wall outlet?
Is the communication cable and adapter attached to a functional PC serial port?
Confirm your PC has available functional serial communication ports. (Contact the manufacturer of your
computer equipment for assistance). Many newer PC models come standard with one serial port and many
USB ports. Most PC’s have an internal modem installed. It is common for a modem to be assigned to a
virtual communications port, which may be using the same IRQ as the physical serial communications port
you have the HP1000 plugged into. Each serial port has an IRQ (Interrupt Request) value. That value
allows a device such as a modem, a printer, a HP1000 to interrupt the processes of your computer to send
and receive a signal to perform another task. Your printer uses an IRQ to send a message to the computer
to print. When a printer has finished printing, it sends an interrupt signal to the computer that interrupts the
computer so that it can decide what process to do next. Multiple signals to the computer using the same
interrupt value can cause one or more devices to NOT function as expected. To avoid this problem each
device must have a unique IRQ.
Is the HP1000 exposed to excessive airborne dust?
Avoid mounting the Hand punch in direct sunlight or in areas with excessive dust.
NOTE
Do NOT spray cleaning chemicals directly on HP1000. Use a clean cloth with a light
spray of solution to clean the HP1000.
Dramatic weight gain or loss may prevent employee from using the hand punch until he
or she is re-enrolled in the software. Please see Steps 7a -7d to Enrolling Employee for
Punch Confirmation.
Deep or multiple cuts on hand can cause punch failure.
Foreign objects on hand such as band-aids and or bandages may cause punch failure.
PN: 06-0326-000 Rev. A