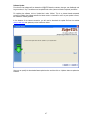
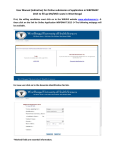
1
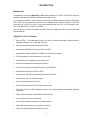
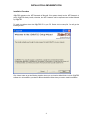
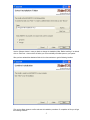
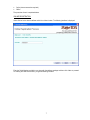
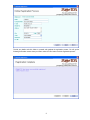
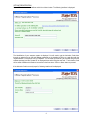
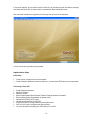
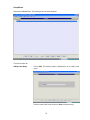
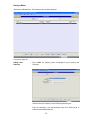
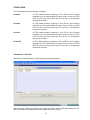
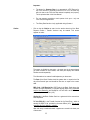
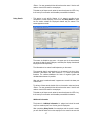
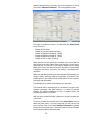
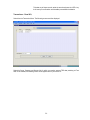
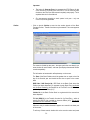
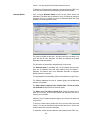
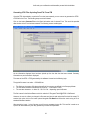
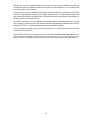
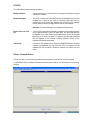
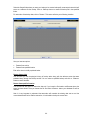
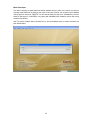
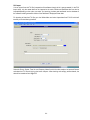
TABLE OF CONTENT Introduction … … … 02 Installation & Implementation … … … 04 Operational Guide … … … 12 … … … … … … … … … … … … … … … … … … … … … … … … 12 13 14 16 18 20 21 22 Transactions … … Form 24Q … … … … Form 26Q Form 27Q … … Form 27EQ … … Generating eTDS Files & Form 27A … … … … … … 23 23 29 33 37 41 Utilities Backup & Restore Master Data Import FVU Import Software Update … … … … … … … … … … … … … … … 43 43 45 46 47 Reports … … … 47 Help … … … 48 Menu Options Masters Group Company Deductee Employee Receipt No. Master CIT Details INTRODUCTION Welcome Note Congratulations on selecting JS@eTDS (FY: 2011-12) for generating your eTDS / eTCS Returns as per the stipulated requirements of the Income Tax Department, Govt. of India. It is a simple to use software, which will assist in processing your Returns pertaining to Forms 24Q, 26Q & 27Q & 27EQ and help generate the electronic files for submission with minimum of efforts. It prints TDS certificate (Form 16A) for Form 26Q, 27Q (non-salary deductee) and also (Form 16) for Employee. It also prints TCS certificate (Form 27D) for Form 27EQ. This User Manual introduces the software and would help you in getting the best out of its functionalities almost hassle-free. JS@eTDS (FY: 2011-12) Features Enter the TDS / TCS related data for each Form such as Company Information, Payment Challans, Deductee Information, etc. in a well laid out format Supports unlimited Companies with grouping facilities Generates the eTDS Returns for Forms 24Q, 26Q & 27Q Integrated File Validation Utility (FVU) of NSDL for automatic data validation FVU file generation for return submission in just one click Instant display of file validation errors at same location Option to auto download CSI file during file validation Prints out Form 27A to be submitted along with each eTDS Return Generates the eTCS Returns for Form 27EQ Prints out Form 27B to be submitted along with each eTCS Return Generates NIL returns on a single key stroke Option of Importing data from FVU files Prints out Forms 24Q, 26Q, 27Q & 27EQ for office records Prints Form 16A & 16 (TDS Certificates) pertaining to non-salary deductees and salaried deductees respectively. Option of Exporting reports in PDF/ WORD / EXCEL formats Internal log for the Returns file generated Online / Offline updation, Data Backup & Restore facilities Web based update system for easy updation of software System minimizes the duplication of data entry effort 2 Extremely user-friendly Windows based interface All data input screens has been designed such that you can work with the keyboard with minimum usage of the mouse to enhance the speed of operation Internal checks and balances minimizes human errors Minimum Hardware & Software Requirement PC-Pentium / 256 MB RAM CD-ROM Drive 150MB Hard disk space Windows XP or higher version System Settings Regional Setting should be set to English (United States) System Date should be in the format ‘dd/MM/yyyy’ and should be set to the actual current date Screen Resolution to be set at 1024 X 768 or higher Support Desk If you have any operational difficulty in the software, please contact us as under: Jaya Softwares. 20, Old Court House Street, 2nd Floor Kolkata 700001 Phone: 22430007, 22434150 Email: [email protected] 3 INSTALLATION & IMPLEMENTATION Installation Procedure JS@eTDS operates on the .NET framework of Microsoft. If the system already has the .NET framework in place, JS@eTDS directly installs, otherwise, the .NET framework and its components are installed followed by JS@eTDS. To install the software insert the JS@eTDS CD in your PC. Double click on setup file. You will get the following screen:- Click <Next> button to get the following interface where you can view the default folder in which JS@eTDS software is to be installed or you select a different destination folder where you want to install the software: 4 Use the <Browse> button in case you desire to change the installation folder. Before installing, if so desired click on <Disk Cost ..> button which will inform you on the availability of the disk space on your system. After you have selected the destination folder click on the next button to get the following interface: Click on the <Next> button to confirm and start the installation procedure. On completion of this you will get the following interface: - 5 Click on <Close> button to exit the installation. Click on the software icon created on the Desktop to launch the software. The software needs to be registered with Jaya Softwares before one can start using the same. For JS@eTDS registration you will get the following interface: Registration of the software can be done in the following ways: 6 Online (internet connection required) Offline The procedure of each is explained below: ONLINE REGISTRATION Select ‘Online’ on the above interface and click on <Next> button. The following interface is displayed: Enter the Serial Number provided to you along with the software package and then click <Next> to proceed. On entering the valid serial number, you get the following interface: 7 Provide your details and click <Next> to proceed and complete the registration process. You will get the following confirmation screen where you have to select <Finish> button to exit the registration process: 8 OFFLINE REGISTRATION Select ‘Offline’ on the above interface and click on <Next> button. The following interface is displayed: The identification of your computer system is displayed. You will need to get the Activation Code either through our website (as per the web address mentioned on the interface) by filling up a web form with the requisite details or over phone from our Helpdesk. You will need the Serial No. (as provided along with the software package) and the ‘System ID’ as displayed above while filling the web form. The Activation Code will be made available which needs to be entered in the form above. Click on <Next> button to proceed. If the Activation Code is correctly keyed in, following interface will be displayed: 9 In the above interface, you will need to enter the Serial No. (as provided along with the software package), User Name and Email. Click on <Next> button to complete the offline installation process. After successful installation and registration, the following start up screen will be displayed. You are now all set to proceed using the software Implementation Steps Initial Setup Create a Group <multiple Groups can be created> Create Companies (Deductors) under these Groups – for whom the eTDS Returns are to be processed Processing of Form 24Q Create Employee Information Select the Company Select the Quarter Enter the data related to Bank Payment Challans, Employee deduction information Enter the Salary Details (Computation) for Quarter 4 only Generate the eTDS file for Form 24Q Validate the authenticity of this eTDS file Copy the file onto CD / Floppy & label as per stipulated norms Print Form 27A & put in the signature at relevant places You are now ready for submitting your eTDS return for Form 24Q 10 Processing of Form 26Q Create Deductee Information Select the Company Select the Quarter Enter the data related to Bank Payment Challans and TDS details under the different applicable sections Generate the eTDS file for Form 26Q Validate the authenticity of this eTDS file. Copy the file onto CD / Floppy & label as per stipulated norms Print Form 27A & put in the signature at relevant places You are now ready for submitting your eTDS return for Form 26Q Processing of Form 27Q Create Deductee Information Select the Company Select the Quarter Enter the data related to Bank Payment Challans and TDS details under the different applicable sections Generate the eTDS file for Form 27Q Validate the authenticity of this eTDS file Copy the file onto CD / Floppy & label as per stipulated norms Print Form 27A & put in the signature at relevant places You are now ready for submitting your eTDS return for Form 27Q Processing of Form 27EQ Create Deductee Information Select the Company Select the Quarter Enter the data related to Bank Payment Challans and TCS details under the different applicable sections Generate the eTCS file for Form 27EQ Validate the authenticity of this eTDS file Copy the file onto CD / Floppy & label as per stipulated norms Print Form 27B & put in the signature at relevant places You are now ready for submitting your eTCS return for Form 27EQ 11 OPERATIONAL GUIDE MENU OPTIONS The Main Menu is available right on the top of the interface as per the picture illustration below: Clicking on each item on the menu will provide the sub-menu options for each. This menu / sub-menu is available at almost all and you could select an option that is required to be used. Each of these Menu / Sub-Menu options is detailed in this Operational Guide. 12 MASTERS The Masters Menu has the following sub-options Group Master : It is mandatory to create at least one group against which the companies (deductors) would be defined for whom the eTDS / eTCS Returns are to be generated. Company Master : Creation of Companies with all relevant information, which helps in avoiding duplication of entering common information for different Forms. Deductee Master : Here the non-salary Deductees is to be defined with all relevant particulars. This avoids re-typing the same particulars of a Deductee each time a TDS record is created for it. The deductees as defined will be common to all companies defined under a particular group. Employee Master : The Employees whose TDS is being deducted is to be defined here with all relevant particulars. Once defined here, the same employee can be selected without having to re-enter data each time. Receipt No. Master : After submission of the eTDS / eTCS returns for the different Forms, the Income Tax Department through their intermediaries provides an acknowledgement receipt. The receipt number as on the receipt is required to be printed in the TDS / TCS certificates, as such the same needs to be entered for each Quarter / each Form from this interface. This number subsequently gets printed in the TDS / TCS certificates issued by the Deductor. CIT Detail : The address details of the Commissioner of Income Tax (TDS) to which this Deductor is attached to. This detail is printed in the TDS / TCS certificates. 13 Group Master Select from the Master Menu. The following screen would be displayed: You have the option for: Adding a New Group : Click on Add. The following screen is displayed for you to create a new group: Enter the name of the Group and click on Save to record the entry. 14 Important: Identical Group Names will not be allowed to be stored. Each name has to be unique. Editing an existing Group : In case you desire to modify the name of an existing Group, either doubleclick on the Group or select the Group and click on Edit. The screen containing the original entry is shown which may be edited and recorded by clicking on the Save button. One can click on Cancel to exit without saving. Important: Deleting a Group Identical Group Names will not be allowed to be stored. Make sure that the edited name is unique. : Select a Group and click on Delete to delete it. It will prompt for your confirmation before actually proceeding with deletion. Important: Groups can only be deleted, if no companies have been defined under it. In case they are defined – to delete the Group – you will first need to change all Companies under it to an alternate Group and / or delete these Companies 15 Company Master Select from the Master Menu. The following screen would be displayed: You have the option for: Adding a New Company : Select the Group to which the Company would belong. Click on Add. The following screen is displayed for you to create a new company: Enter the information in the self-explanatory entry slots. Salient points of some the these labelled fields are: 16 TDS Account No: The TAN of the Company is compulsory to be entered. This field is of ten characters width and each character and each of these characters are to be entered. TAN is unique for each company. Permanent Account No: The PAN of the Company is compulsory to be entered. This field is of ten characters width and each of these characters are to be entered. PAN is unique for each company. Company Name: Enter the name of the Company Address: Enter the full address of the Company. Make sure that the State & Pin Code is entered correctly. Details of the Responsible Person for TDS: Name & Designation is mandatory to be entered. The Company address comes by default, which may be corrected in case of any changes. Company Code (3Chars): This is three-character unique prefix for the Company Code to be entered for each company. This would be used as the first three characters of the eTDS / eTCS file names generated for the company. As the software supports multiple companies, this code would differentiate the file names of the generated returns by the package. Once the entry is completed click on Save to record the entry. Editing an existing Company : In case you desire to modify information of an existing Company, select the Group followed by either double-clicking on the Company or select the Company and click on Edit. The data is displayed. Modify the information as required and once done click on Save to record the changes Deleting a Company : In case you desire to delete an existing Company, select the Group and followed by the Company and click on Delete. This would delete the Company. Important: Companies can only be deleted, if no forms have been created under it. In case they are created – to delete the Company – you will first need to delete all forms created under it. 17 Deductee Master Select from the Master Menu. The following screen would be displayed: You have the option for: Adding a New Deductee : Click on Add. The following screen is displayed for you to create a new deductee: Select the Group to which the Deductee belongs to. Enter the information in the self-explanatory entry slots. Salient points of some the these labelled fields are: 18 Deductee Code: Select between ‘01’ and ‘02’ for Company & NonCompany depending on the status of the Company. PAN No: It is expected that the PAN No. of the Deductee is entered here. In case the deductee has not yet been allotted a PAN No., you are to enter PANNOTAVBL. This should not be left blank. Address: Address may be left blank if a valid PAN No. has been entered. Just the City Name may be entered. Once the entry is completed click on Save to record the entry. Editing an existing Deductee : In case you desire to modify information of an existing Deductee, select the deductee followed by either double-clicking on the Deductee or select the Deductee and click on Edit. The data is displayed. Modify the information as required and once done click on Save to record the changes Deleting a Deductee : In case you desire to delete an existing Deductee, select the Deductee and click on Delete. This would delete the Deductee. Important: Deductees can only be deleted, if they are not referred in any of the forms that have been created for the company. In case it is referred – to delete the Deductee – you will first need to delete all its references from the forms. 19 Employee Master Select from the Master Menu. The following screen would be displayed: You have the option for: Adding a New Employee : Click on Add. The following screen is displayed for you to create a new Employee: Select the Group & Company to which the Employee belongs to. Enter the information in the self-explanatory entry slots. Salient points of some the these labelled fields are: 20 Define the Employee Category – General / Women / Senior Citizen PAN No: It is expected that the PAN No. of the Employee is entered here. In case the Employee has not yet been allotted a PAN No., you are to enter PANNOTAVBL. This should not be left blank. Once the entry is completed click on Save to record the entry. Editing an existing Employee : In case you desire to modify information of an existing Employee, select the employee followed by either double-clicking on the Employee or select the Employee and click on Edit. The data is displayed. Modify the information as required and once done click on Save to record the changes Deleting a Employee : In case you desire to delete an existing Employee, select the Employee and click on Delete. This would delete the Employee. Important: Employees can only be deleted, if they are not referred in any of the forms that have been created for the company. In case it is referred – to delete the Employee – you will first need to delete all its references from the forms. Receipt No. Master Select from the Master Menu. The following screen would be displayed: 21 Enter the Receipt No., Date of filling and Token No. of the TDS / TCS returns for each form and for each Quarter. CIT Details Select from the Master Menu. The following screen would be displayed: Enter the address details of the commissioner of Income Tax (TDS) for each Company (Deductor). 22 TRANSACTIONS The Transactions Menu has the following sub-options Form 24Q : All TDS related particulars pertaining to Form 24Q for each Company separately are to be created through this option. Once it is done, the eTDS file for this Form and the physical copy of Form 27A is to be generated directly from this option. Form 26Q : All TDS related particulars pertaining to Form 26Q for each Company separately are to be created through this option. Once it is done, the eTDS file for this Form and the physical copy of Form 27A is to be generated directly from this option. Form 27Q : All TDS related particulars pertaining to Form 27Q for each Company separately are to be created through this option. Once it is done, the eTDS file for this Form and the physical copy of Form 27A is to be generated directly from this option. Form 27EQ : All TCS related particulars pertaining to Form 27EQ for each Company separately are to be created through this option. Once it is done, the eTDS file for this Form and the physical copy of Form 27B is to be generated directly from this option. Transactions – Form 24Q Select from the Transaction Menu. The following screen would be displayed: Select the Group, Company and Quarter No. for which you need to process TDS data pertaining to Form 24Q. Once selected, the following screen would appear next for you to work on: 23 For the selected Company – if you are working on the Form for the first time, in that case the above screen is opened in disabled mode and can be enabled by clicking on <Save Form> button on top left. However, if you have worked earlier and saved the information – in that case the Form is loaded wherein the last stored information is available for making any changes, adding new information or for generating the eTDS file. Form 24Q is divided into the following four sections: Basic Information Challan Employee Details Salary Details These sections are visible as selection tabs on the upper part of the screen. Usage of each of these is explained: Basic Information : This contains the basic particulars of the Company. Most of the information here comes in automatically by default as these were entered at the time of creating the Company through the Company Master In case, there had been any change in the address of the Employee and / or the Person responsible to pay salary, it needs to be specified. To activate the other sections – you will be required to Save the Form For NIL returns, Select ‘YES’ against ‘NIL Returns’. The other section in the Form remains de-activated as one can now proceed with the generation of NIL return. To delete the Form, click on the Delete button. After seeking your confirmation, it would proceed to delete the Form. 24 Important: Challan : The button for Generate Form is to generate the eTDS Returns for this Form and also to physically print Form 27A. It is to be used only after the data on the Form has been entered completely and properly. This is explained later in this User Manual. For one company pertaining to each quarter in the year – only one Form 24Q can be generated . The Salary Detail section is only applicable during Quarter 4. Click on the tab Challan to enter into the section wherein all the Bank Payment Challan / Transfer Vouchers may be entered. This screen appears as under: The screen is divided into two parts – the upper part is the area wherein you enter the data for each Challan, and lower part displays the entered Challan records sequentially. The information to be entered is self-explanatory on the screen. The Date of the Bank Challan should be greater than or equal to the first day of the financial year and should be less than or equal to the current date. BSR Code / 24G Receipt No.- BSR Code is the Bank Code where the Challan has been deposited. For payment through Book Entry (applicable only for Govt. Deductor), this Receipt No. of Form 24G is to be entered as provided by Accounts Officer (A.O). Challan No. is the Bank Challan Serial no. against which the amount has been deposited. Trf Vch (DDO Sl.) is the Transfer Voucher No. for Book Entry - which is actually the DDO Sl No. provided by Accounts Officer (A.O). This is only applicable for Govt. deductor / collector. After each entry is made and saved, it appears as a record in the lower part of the screen. 25 To edit any of these record, double click on the record or select and press <Enter>. You may proceed with the edit and save the record. To delete any of these records, select the record and press the <DEL> key. It will seek your confirmation and thereafter proceed with the deletion. Employee Details : Click on the tab Employee Details to enter into the section wherein the Employee’s TDS details may be entered. A list of all Challans as entered is displayed. Click on the Challan for which the Employee details are being entered. This screen appears as under: The screen is divided into two parts – the upper part is the area wherein you enter the data for each Deductee, and lower part displays the entered Deductee records sequentially. The information to be entered is self-explanatory on the screen. The Employee Name is mandatory and is to be selected from the dropdown list of Employees that have been defined using the Employee Master. On selection most of the Employee information is displayed. Modify wherever it is required. The data related to each employee record is to be entered in the given slots. The software addresses the issue of negative figures and validates data wherever it is possible. The Dates related to Amount Paid / Credited Date and Date on which Tax Deducted should fall within the financial quarter. The Dates related Tax Paid to Central Govt. should be greater than or equal to the first day of the financial quarter and should be less than or equal to the current date. After each entry is made and saved, it appears as a record in the lower part of the screen. To edit any of these record, double click on the record or select and press 26 <Enter>. You may proceed with the edit and save the record. Use the edit mode to view the full record for an employee. To delete any of these records, select the record and press the <DEL> key. It will seek your confirmation and thereafter proceed with the deletion. Salary Details : This section is only valid for Quarter 4. It is meant to provide the tax computation of each Employee. Click on the tab Salary Details to enter into the section wherein the Employee’s details may be entered. This screen appears as under: The screen is divided into two parts – the upper part is the area wherein you enter the data for each Employee, and lower part displays the entered Employee records sequentially. The information to be entered is self-explanatory on the screen. The numerical data for each employee is to be entered in the given slots. Automatic calculations take place wherever it is based on specified formulae. The software addresses the issue of negative figures and validates data wherever it is possible. After each entry is made and saved, it appears as a record in the lower part of the screen. To edit any of these records, double click on the record or select and press <Enter>. You may proceed with the edit and save the record. Use the edit mode to view the full record for an employee. To delete any of these records, select the record and press the <DEL> key. It will seek your confirmation and thereafter proceed with the deletion. Additional Information The button for ‘Additional Information’ is optional and should be used only if one needs to print Form 16 to be given to Employees. After completing Salary Details of an employee and the record is saved, you will need to double click on the employee in the saved list to enter the 27 additional data pertaining to the salary and its tax computation, by clicking on the button ‘Additional Information’. This screen appears as under: The screen is divided into six parts – all parts linked with Salary Details record. These are: - Breakup of Total Salary Breakup of Any Income other than Salary Breakup of Deductions Chapter VI - 80CCE Breakup of Deductions Chapter VI - 80CCF Breakup of Deductions Chapter VI – Others Breakup of TDS u/s 192(1) & 192(1A) Please note that one will need to give a breakup of the amount that has been entered in the Salary Details sheet of the employee. You will have to make sure that the sum total of the breakup matches with the Salary Details total. In each of the above six sections, the amount in Salary Details is displayed and also the sum total of the breakup in also displayed for verification. Please note that after the breakup has been entered and subsequently, any change is made in the Salary Detail for the employee, all information in the relevant section in this interface will be nullified and one will be required to once again enter the breakup. The information to be entered is self-explanatory on the screen. The numerical data for each employee is to be entered in the given slots. Automatic calculations take place wherever it is based on specified formulae. The software addresses the issue of negative figures and validates data wherever it is possible. After each entry is made and saved, it appears as a record in the lower part of the screen. To edit any of these record, double click on the Salary Details record or select and press <enter>. You may proceed with the edit and save the record and then Click on the button Additional Information to proceed with the edit and save the record. Use the edit mode to view the full record for an employee Additional Information data. 28 To delete any of these records, select the record and press the <DEL> key. It will seek your confirmation and thereafter proceed with the deletion Transactions – Form 26Q Select from the Transaction Menu. The following screen would be displayed: Select the Group, Company and Quarter No. for which you need to process TDS data pertaining to Form 26Q. Once selected, the following screen would appear next for you to work on: 29 For the selected Company – if you are working on the Form for the first time, in that case the above screen is opened in disabled mode and can be enabled by clicking on <Save Form> button on top left. However, if you have worked earlier and saved the information – in that case the Form is loaded wherein the last stored information is available for making any changes, adding new information or for generating the eTDS file. Form 26Q is divided into the following three sections: Basic Information Challan Deductee Detail These sections are visible as selection tabs on the upper part of the screen. Usage of each of these is explained: Basic Information : This contains the basic particulars of the Company. Most of the information here come in automatically by default as these were entered at the time of creating the Company through the Master – Company To activate the other sections – you will be required to Save the Form For NIL returns, Select ‘YES’ against ‘NIL Returns’. The other section in the Form remains de-activated as one can now proceed with the generation of NIL return. In case there had been any change in the address of the Company it needs to be specified. The Status of the Deductor (Company) is to be specified by clicking on one of the two given choices. To delete the Form, click on the Delete button. After seeking your confirmation, it would proceed to delete the Form. 30 Important: Challan : The button for Generate Form is to generate the eTDS Returns for this Form and also to physically print Form 27A. It is to be used only after the data on the Form has been entered completely and properly. This is explained later in this User Manual. For one company pertaining to each quarter in the year – only one Form 26Q can be generated Click on the tab Challan to enter into the section wherein all the Bank Payment Challan / Transfer Vouchers may be entered. This screen appears as under: The screen is divided into two parts – the upper part is the area wherein you enter the data for each Challan, and lower part displays the entered Challan records sequentially. The information to be entered is self-explanatory on the screen. The Date of the Bank Challan should be greater than or equal to the first day of the financial year and should be less than or equal to the current date. BSR Code / 24G Receipt No.- BSR Code is the Bank Code where the Challan has been deposited. For payment through Book Entry (applicable only for Govt. Deductor), this Receipt No. of Form 24G is to be entered as provided by Accounts Officer (A.O). Challan No. is the Bank Challan Serial no. against which the amount has been deposited. Trf Vch (DDO Sl.) is the Transfer Voucher No. for Book Entry - which is actually the DDO Sl No. provided by Accounts Officer (A.O). This is only applicable for Govt. deductor / collector. After each entry is made and saved, it appears as a record in the lower part of the screen. To edit any of these record, double click on the record or select and press 31 <Enter>. You may proceed with the edit and save the record. To delete any of these records, select the record and press the <DEL> key. It will seek your confirmation and thereafter proceed with the deletion. Deductee Details : Click on the tab Deductee Details to enter into the section wherein the Deductee’s TDS details may be entered. A list of all Challans as entered is displayed. Click on the Challan for which the Deductee details are being entered. This screen appears as under: The screen is divided into two parts – the upper part is the area wherein you enter the data for each Deductee, and lower part displays the entered Deductee records sequentially. The information to be entered is self-explanatory on the screen. The Deductee Name is mandatory and is to be selected from the dropdown list of Deductees that have been defined using the Masters – Deductee. On selection most of the Deductee information is displayed. Modify wherever it is required. The data related to each deductee record is to be entered in the given slots. The software addresses the issue of negative figures and validates data wherever it is possible. The Dates related to Amount Paid / Credited Date and Date on which Tax Deducted should fall within the financial quarter. The Dates related Tax Paid to Central Govt. should be greater than or equal to the first day of the financial quarter and should be less than or equal to the current date. After each entry is made and saved, it appears as a record in the lower part of the screen. To edit any of these record, double click on the record or select and press <enter>. You may proceed with the edit and save the record. Use the edit mode to view the full record for a deductee. 32 To delete any of these records, select the record and press the <DEL> key. It will seek your confirmation and thereafter proceed with the deletion. Transactions – Form 27Q Select from the Transaction Menu. The following screen would be displayed: Select the Group, Company and Quarter No. for which you need to process TDS data pertaining to Form 27Q. Once selected, the following screen would appear next for you to work on: 33 For the selected Company – if you are working on the Form for the first time, in that case the above screen is opened in disabled mode and can be enabled by clicking on <Save Form> button on top left. However, if you have worked earlier and saved the information – in that case the Form is loaded wherein the last stored information is available for making any changes, adding new information or for generating the eTDS file. Form 27Q is divided into the following three sections: Basic Information Challan Deductee Detail These sections are visible as selection tabs on the upper part of the screen. Usage of each of these is explained: Basic Information : This contains the basic particulars of the Company. Most of the information here come in automatically by default as these were entered at the time of creating the Company through the Master – Company To activate the other sections – you will be required to Save the Form For NIL returns, Select ‘YES’ against ‘NIL Returns’. The other section in the Form remains de-activated as one can now proceed with the generation of NIL return. In case there had been any change in the address of the Company it needs to be specified. The Status of the Deductor (Company) is to be specified by clicking on one of the two given choices. To delete the Form, click on the Delete button. After seeking your confirmation, it would proceed to delete the Form. 34 Important: Challan : The button for Generate Form is to generate the eTDS Returns for this Form and also to physically print Form 27A. It is to be used only after the data on the Form has been entered completely and properly. This is explained later in this User Manual. For one company pertaining to each quarter in the year – only one Form 27Q can be generated Click on the tab Challan to enter into the section wherein all the Bank Payment Challan / Transfer Vouchers may be entered. This screen appears as under: The screen is divided into two parts – the upper part is the area wherein you enter the data for each Challan, and lower part displays the entered Challan records sequentially. The information to be entered is self-explanatory on the screen. The Date of the Bank Challan should be greater than or equal to the first day of the financial year and should be less than or equal to the current date. BSR Code / 24G Receipt No.- BSR Code is the Bank Code where the Challan has been deposited. For payment through Book Entry (applicable only for Govt. Deductor), this Receipt No. of Form 24G is to be entered as provided by Accounts Officer (A.O). Challan No. is the Bank Challan Serial no. against which the amount has been deposited. Trf Vch (DDO Sl.) is the Transfer Voucher No. for Book Entry - which is actually the DDO Sl No. provided by Accounts Officer (A.O). This is only applicable for Govt. deductor / collector. After each entry is made and saved, it appears as a record in the lower part of the screen. To edit any of these record, double click on the record or select and press 35 <Enter>. You may proceed with the edit and save the record. To delete any of these records, select the record and press the <DEL> key. It will seek your confirmation and thereafter proceed with the deletion. Deductee Details : Click on the tab Deductee Details to enter into the section wherein the Deductee’s TDS details may be entered. A list of all Challans as entered is displayed. Click on the Challan for which the Deductee details are being entered. This screen appears as under: The screen is divided into two parts – the upper part is the area wherein you enter the data for each Deductee, and lower part displays the entered Deductee records sequentially. The information to be entered is self-explanatory on the screen. The Deductee Name is mandatory and is to be selected from the dropdown list of Deductees that have been defined using the Masters – Deductee. On selection most of the Deductee information is displayed. Modify wherever it is required. The data related to each deductee record is to be entered in the given slots. The software addresses the issue of negative figures and validates data wherever it is possible. The Dates related to Amount Paid / Credited Date and Date on which Tax Deducted should fall within the financial quarter. The Dates related Tax Paid to Central Govt. should be greater than or equal to the first day of the financial quarter and should be less than or equal to the current date. After each entry is made and saved, it appears as a record in the lower part of the screen. To edit any of these records, double click on the record or select and press <Enter>. You may proceed with the edit and save the record. Use the edit mode to view the full record for a deductee. To delete any of these records, select the record and press the <DEL> key. 36 It will seek your confirmation and thereafter proceed with the deletion. Transactions – Form 27EQ Select from the Transaction Menu. The following screen would be displayed: Select the Group, Company and Quarter No. for which you need to process TCS data pertaining to Form 27EQ. Once selected, the following screen would appear next for you to work on: 37 For the selected Company – if you are working on the Form for the first time, in that case the above screen is opened in disabled mode and can be enabled by clicking on <Save Form> button on top left. However, if you have worked earlier and saved the information – in that case the Form is loaded wherein the last stored information is available for making any changes, adding new information or for generating the eTDS file. Form 27EQ is divided into the following three sections: Basic Information Challan Deductee Detail These sections are visible as selection tabs on the upper part of the screen. Usage of each of these is explained: Basic Information : This contains the basic particulars of the Company. Most of the information here come in automatically by default as these were entered at the time of creating the Company through the Master – Company To activate the other sections – you will be required to Save the Form For NIL returns, Select ‘YES’ against ‘NIL Returns’. The other section in the Form remains de-activated as one can now proceed with the generation of NIL return. In case there had been any change in the address of the Company it needs to be specified. The Status of the Deductor (Company) is to be specified by clicking on one of the two given choices. To delete the Form, click on the Delete button. After seeking your confirmation, it would proceed to delete the Form. 38 Important: Challan : The button for Generate Form is to generate the eTDS Returns for this Form and also to physically print Form 27B. It is to be used only after the data on the Form has been entered completely and properly. This is explained later in this User Manual. For one company pertaining to each quarter in the year – only one Form 27EQ can be generated Click on the tab Challan to enter into the section wherein all the Bank Payment Challan / Transfer Vouchers may be entered. This screen appears as under: The screen is divided into two parts – the upper part is the area wherein you enter the data for each Challan, and lower part displays the entered Challan records sequentially. The information to be entered is self-explanatory on the screen. The Date of the Bank Challan should be greater than or equal to the first day of the financial year and should be less than or equal to the current date. BSR Code / 24G Receipt No.- BSR Code is the Bank Code where the Challan has been deposited. For payment through Book Entry (applicable only for Govt. Deductor), this Receipt No. of Form 24G is to be entered as provided by Accounts Officer (A.O). Challan No. is the Bank Challan Serial no. against which the amount has been deposited. Trf Vch (DDO Sl.) is the Transfer Voucher No. for Book Entry - which is actually the DDO Sl No. provided by Accounts Officer (A.O). This is only applicable for Govt. deductor / collector. After each entry is made and saved, it appears as a record in the lower part of the screen. To edit any of these record, double click on the record or select and press 39 <Enter>. You may proceed with the edit and save the record. To delete any of these records, select the record and press the <DEL> key. It will seek your confirmation and thereafter proceed with the deletion. Deductee Details : Click on the tab Deductee Details to enter into the section wherein the Deductee’s TDS details may be entered. A list of all Challans as entered is displayed. Click on the Challan for which the Deductee details are being entered. This screen appears as under: The screen is divided into two parts – the upper part is the area wherein you enter the data for each Deductee, and lower part displays the entered Deductee records sequentially. The information to be entered is self-explanatory on the screen. The Deductee Name is mandatory and is to be selected from the dropdown list of Deductees that have been defined using the Masters – Deductee. On selection most of the Deductee information is displayed. Modify wherever it is required. The data related to each deductee record is to be entered in the given slots. The software addresses the issue of negative figures and validates data wherever it is possible. The Dates related to Amount Paid / Credited Date and Date on which Tax Deducted should fall within the financial quarter. The Dates related Tax Paid to Central Govt. should be greater than or equal to the first day of the financial quarter and should be less than or equal to the current date. After each entry is made and saved, it appears as a record in the lower part of the screen. To edit any of these record, double click on the record or select and press <enter>. You may proceed with the edit and save the record. Use the edit mode to view the full record for a deductee. To delete any of these records, select the record and press the <DEL> key. 40 It will seek your confirmation and thereafter proceed with the deletion. Generating eTDS Files & printing Form 27A / Form 27B Once the TDS data related to a particular Form has been entered, you are now set to generate the eTDS / eTCS file for the Form. The following steps are to be followed: Click on the button Generate File on the Basic Information tab of relevant Form. This would be possible after the data in the Form has been entered. The following screen would appear: All the information displayed here has been picked up from the data that has been entered. Summary information as per the format is displayed. The name of the eTDS / eTCS generated by the software is based on the following logic: The typical file name is as under – JCS24QQ4.txt The first three characters JSL denote the prefix of the company as defined in the Company Master The next three characters 24Q denote the Form No. – in this case it is 24Q The next two characters – is either Q1 / Q2 / Q3 / Q4 – depending upon the Quarter The file is saved in the folder eReturns which is under the C:\Program Files\JS@eTDS1112\eReturns\ However, the user is at liberty to change this file name and also the path where the file should be saved. To exercise this option click on the button placed alongside File Name and follow the usual saving of file in standard Windows interface. After everything is set – In the first step you will have to generate the text file. This text file is used as an input file for the validation by the utility provided by Income Tax Department. 41 Secondly, you can check / uncheck CSI file download option for which Internet connection is required. This will download a file from the NSDL’s website which will have the Challan details as per IT records provided by the Bank/PAO for cross verification. In the third step, you have to validate the text file generated in the first step for generating the FVU file for submission. While validating, if opted in for the CSI file download option, the Challan details entered in the returns and Challan Detail as uploaded by Bank / PAO will also be cross verified. Incase of any mismatch or discrepancy it will be accordingly informed. On validation the status in terms of successful / unsuccessful validation will be displayed and one can also view the report for subsequent action. After the return has been generated and validated the return has to be submitted to TIN-FC or it can also be uploaded as per the rules in NSDL’s website. Click on the open output folder and copy the file having extension .fvu and File Name with correct Form No. and Quarter No. for submission. After the eTDS / eTCS file has been generated, click on the button Print Form 27A / Form 27B, which will also be required for submission of return along with the .fvu file in Floppy / CD / Pen drive. You may print the same by clicking on the Printer Icon. Before clicking on this make sure your printer is connected and is on. 42 UTILITIES The Utilities Menu has the following sub-options Backup & Restore : Through this utility, you can take backup of your data and whenever required restore back the same. Master Data Import : This helps in importing all master data from another database into the current initialized one. It may be very useful in importing master data from the previous year to the current year. However, this will work only for database used by previous versions of JS@eTDS and not any other software. Important: For master data import your database should be blank. Import Data from FVU : You can import data from the FVU files (irrespective of the software through file which it was generated). In the FVU Import utility, only the master data can be imported or the entire Challan and Deductee data can also be imported depending on the option you select. On importing, the data gets transferred into the database of the software including automatic creation of the Deductee & Employee master data. Update Now : From time to time updates will be released on JS@eTDS based on statutory changes, user feedbacks and bug corrections, if any. The software can be updated both online (internet connection required) and offline from this option. Utilities – Backup & Restore Through this utility, you can backup your data and also restore the same back as and when required. In Utilities Menu, select on Backup & Restore and further click on Backup. This will take you to the following interface: 43 Select the Output folder where you want your backup to be created and specify some textual note which will serve as a reference for the backup. Click on <Backup> button to create the backup file in the specified folder. For restoration of backed up data, click on ‘Restore’. This restore will take you to following interface: Here you have two options: Restore from archive Restore from specified location Each of the above is briefly explained below: Restore from archive This will show you the chronological history of backup taken along with the reference notes that were submitted along through the Backup module. You can select a specified backup and click on <Restore> Button to restore the data. Restore from specified Location You can also use this option to restore the data only if you know the file location and filename where the same has been stored. Once you browse the file and select <Restore> button your database file will be restored. Note: It is very important to understand that restoration will overwrite the existing data and as such the current database will be lost. Before restoration, it is advisable to backup the current data. 44 Master Data Import This helps in importing all master data from another database into the current one. It may be very useful in importing master data from the previous year to the current year. However, this will work only for database used by previous versions of JS@eTDS. You will need to specify the path of the old database in the form below for data import. It is advisable to only import data immediately after installation and not after having worked on the software. Note: The Import of Master data is permitted only on the new database where no master information has been entered earlier. 45 FVU Import You can import from the FVU file (irrespective of the software through which it was generated). In the FVU Import utility, only the master data can be imported or the entire Challan and Deductee data can also be imported depending on the option you select. On importing, the data gets transferred into the database of the software including automatic creation of the Deductee & Employee master data. For Importing of data from FVU file, go to the Utilities Menu and select ‘Import data from FVU file’ which will transfer you to the following interface: Select the Group, Quarter, Form No. and Company Name for which the data needs to be imported. Browse and select the FVU file and click on the button <Import>. After checking and verifying relevant details, the data will be transferred into JS@eTDS. 46 Software Update From time to time updates will be released on JS@eTDS based on statutory changes, user feedbacks and bug corrections, if any. The software can be updated both online (internet connection required) and offline. For updating the software, click on ‘Update Now’ under ‘Utilities’. This is an internet based automated system for updating the software wherein the latest version is checked for and if any new update is found, the software is instantly updated. In the absence of the internet connection, you will need to download the update file from the website www.jcs-etds.com and update as per the interface as below: Here you can specify the downloaded latest update location and then click on <Update> button to update the software. 47 REPORTS The Reports Menu has the following sub-options Form 24Q : For office records, data for Form 24Q may be printed and filed. It is printed in three sections for Q1 to Q3. For Q4, four sections are printed. Please note that this is only for office records and not in the physical format of the department. Form 26Q : For office records, data for Form 26Q may be printed and filed. It is printed in three sections. Please note that this is only for office records and not in the physical format of the department. Form 27Q : For office records, data for Form 27Q may be printed and filed. It is printed in three sections. Please note that this is only for office records and not in the physical format of the department. Form 27EQ : For office records, data for Form 27EQ may be printed and filed. It is printed in three sections. Please note that this is only for office records and not in the physical format of the department. Form 16 (24Q) : This prints the TDS Certificate for Employees. Please note before printing Form 16, one will be required to enter the additional information that is required for printing Form 16. Form 16A (26Q) : This prints the TDS Certificate for Non Salary Deductees (Form 26Q) Form 16A (27Q) : This prints the TDS Certificate for Non Salary Deductees (Form 27Q) Form 27D (27EQ) : This prints the TCS Certificate (Form 26EQ) Deductee Detail Report : The deductions made for Deductees / Employees for the specified period across different Forms in details format. Group Master : This gives the list of Groups created Groupwise Company List : This gives the list of all companies sorted under the Groups Groupwise Company Details : This gives complete details of the companies in a selective mode Groupwise Deductee List : This gives the list of all Deductees sorted under the Groups Groupwise Employee List : This gives the list of all Employees sorted under the Groups Form Generation Log : Each time an eTDS file is generated, the software keeps a log of the same. Through this reporting option, you can get summary details of this log sorted company-wise. 48 HELP The Help Menu has the following sub-options User Manual : This user manual can be viewed through this option About JCS-eTDS : This displays the version no. of the software package and details about its developers. License Agreement : Here is the License Agreement which as a user has agreed to at the time of installation of this software. 49