1
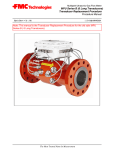
Multipath Ultrasonic Gas Flow Meter
MPU Series B
Transducer Replacement Procedure
Procedure Manual
PRD-0000022520 / Rev. 00C / FL / nb / April 2008
The Most Trusted Name In Measurement
MNKS006 0.0 (4/08)
Transducer Replacement Procedure
Transducer Replacement Procedure
Procedure
History
Version /
Revision
Issue Date
Editor
Checked
Approved
ECN
Status
Rev. 01 / A
31.01.2003
xxx
xxx
xxx
xxx
released
First edition
Rev. 02 / B
01.03.2007
xxx
xxx
xxx
500000058026
released
Took over from KOS
Rev. 03 / C
April 2008
NB
FL
FL
20207
released
New Logo, V6 considerations
Description
Important
All information and technical specifications in this documentation have been carefully checked
and compiled by the author. However, we cannot completely exclude the possibility of errors.
Smith Meter GmbH is always grateful to be informed of any errors.
______________________________________________________________________
Page 2 of 32
PRD-0000022520 Rev. 00C
MNKS006 0.0 (4/08)
MPU Series B
Ultrasonic Gas Flow Meter
_______________________________________________________________________
TABLE OF CONTENTS
1.
INTRODUCTION ..................................................................................... 5
1.1. Contact Address if Assistance is Required ............................................ 5
1.2. Copyright ............................................................................................. 5
1.3. Trademarks.......................................................................................... 5
1.4. Equipment Required ............................................................................ 6
1.5. Consumables ........................................................................................ 6
1.6. Reference Documents ........................................................................... 6
1.7. Warnings.............................................................................................. 6
2.
DISMOUNTING PROCEDURE................................................................ 9
2.1. General information on explosion protection ...................................... 10
2.2. Ex-relevant Data ................................................................................ 10
3.
DISMOUNTING THE TRANSDUCER................................................... 11
3.1. Dismounting, Short Form................................................................... 12
3.2. Dismounting, detailed form ................................................................ 12
4.
MOUNTING PROCEDURE.................................................................... 17
4.1. Preparing Procedure .......................................................................... 17
4.1.1. Cleaning ........................................................................................ 17
4.1.2. Visual Inspection ............................................................................ 17
4.1.3. Assumptions .................................................................................. 17
4.1.4. Prepare Transducer/ Adapter ........................................................... 17
4.2. Preparing Transducer ........................................................................ 17
4.3. Mounting, Short Form ....................................................................... 19
4.4. Mounting the Transducer................................................................... 20
4.5. Mounting the adapter......................................................................... 25
5.
PARAMETER CONFIGURATION ........................................................ 27
5.1. General .............................................................................................. 27
5.2. Calibration certificate ........................................................................ 28
5.3. Transducer delays .............................................................................. 29
5.4. Update path lengths............................................................................ 30
5.5. Documentation ................................................................................... 30
5.6. Example ............................................................................................. 31
______________________________________________________________________
PRD-0000022520 Rev. 00C
Page 3 of 32
MNKS006 0.0 (4/08)
MPU Transducer Replacement Procedure
______________________________________________________________________
Pictures
Picture 1 Equipment............................................................................................................. 6
Picture 2 Flame Paths........................................................................................................... 7
Picture 3 Transducer Assembly ......................................................................................... 11
Picture 4 Transducer mounting parts ................................................................................. 12
Picture 5 Cable gland and cover ........................................................................................ 13
Picture 6 Cable gland parts ................................................................................................ 13
Picture 7 Cable junction..................................................................................................... 14
Picture 8 Detailed picture how to release the wire............................................................. 14
Picture 9 Disassemble transducer ...................................................................................... 14
Picture 10 Transducer with O-rings and Back-up rings mounted...................................... 15
Picture 11 Mounting the transducer ................................................................................... 20
Picture 12 Assembly tool ................................................................................................... 20
Picture 13 Cable gland ....................................................................................................... 21
Picture 14 Wires................................................................................................................. 21
Picture 15Transducer with mounted wire .......................................................................... 22
Picture 16 Fasten the cover hand-tight............................................................................... 22
Picture 17 Mount the cable gland ...................................................................................... 23
Picture 18 Insert the rubber seal......................................................................................... 23
Picture 19 insert the blue plastic washer ............................................................................ 24
Picture 20 Dismount the cable gland ................................................................................. 24
Picture 21 Clean the transducer mounting surface............................................................. 25
Picture 22 Use the fit-up-aid for positioning ..................................................................... 25
Picture 23 Use the hexagon socket wrench for the srews .................................................. 26
Picture 24 Use torque key , torque is 24 Nm ..................................................................... 26
Picture 25 Transducer Calibration Report ........................................................................ 28
Tables
Table 1 Contact Adress........................................................................................................ 5
Table 2 Reference Documents............................................................................................. 6
Table 3 Transducer pair definition .................................................................................... 27
Table 4 Database object numbers for zero calibration nodes ............................................ 29
Table 5 Database object numbers for path lengths............................................................ 30
______________________________________________________________________
Page 4 of 32
PRD-0000022520 Rev. 00C
MNKS006 0.0 (4/08)
MPU Series B
Ultrasonic Gas Flow Meter
_______________________________________________________________________
1.
INTRODUCTION
This manual describes mounting and dismounting of the transducers for the MPU
ultrasonic gas flow meter delivered by FMC Smith Meter, previously FMC
Kongsberg Metering. If further information is needed, please do not hesitate to
contact our service department.
We reserve the right to make changes to the construction and/or configuration at any
time, this manual is based on the latest information, and may be subject to changes.
1.1.
Contact Address if Assistance is Required
Customer Support
Publisher
Contact
Address:
Telephone
No.:
FMC Measurement Solutions
Ellerbek Operation
Regentstrasse 1
25470 Ellerbek
Germany
FMC Technologies
(Service Department)
Regentstrasse 1
25474 Ellerbek
Germany
(49) 4101 304 - 0
(49) 4101 304 (-0)- 105
Telefax
No.:
(49) 4101 304- 255
(49) 4101 304- 152
E-Mail:
[email protected]
[email protected]
Internet:
www.fmctechnologies.com
Table 1 Contact Adress
1.2.
Copyright
All technical information contained in this manual, including any drawings and
technical specifications, shall remain the property of FMC Technologies and may
not be used (other than for the operation of this product), copied, multiplied, passed
on or communicated to a third party without prior written permission of FMC
Technologies.
© 2003 FMC Technologies
1.3.
Trademarks
Products listed are trademarks of their respective manufacturers. Company names
listed are trade names of their respective companies.
______________________________________________________________________
PRD-0000022520 Rev. 00C
Page 5 of 32
MNKS006 0.0 (4/08)
MPU Transducer Replacement Procedure
______________________________________________________________________
1.4.
Equipment Required
1. Jaw wrench 40mm
2. Combination wrench
22mm
3. Combination wrench
19mm
4. Fit-up aid
5. Transducer Assembly tool
(Ratchet with nut)
6. Torque key
7. Hexagon socket wrench
8mm
8. Hexagon socket wrench
6mm
9. Screwdriver
Picture 1 Equipment
1.5.
Consumables
•
•
•
•
•
1.6.
O-rings (ID=15, D=1, NBR 70)
Back-up rings (ID=17, OD=21,5, b=1,4, POM)
Copper Grease (Copaslip or equivalent)
Silicone grease (Gleitmo 750 or equivalent)
Loctite 577 or equivalent
Reference Documents
Document No.
Title
1
USM-0000020565
MPU User Manual, Series B
2
DOK-501
MPU Transducer Replacement Procedure
using Retraction Tool
Table 2 Reference Documents
1.7.
Warnings
Warning: Always make absolutely sure that there is no
pressure in the pipe, before removing the Transducer cover.
Do not use metal tools or similar that can damage the inner
thread of the Transducer when dismounting the Transducers.
The Transducer has a M20x1,5 thread to make it possible to
use the Transducer Retraction Tool.
______________________________________________________________________
Page 6 of 32
PRD-0000022520 Rev. 00C
MNKS006 0.0 (4/08)
MPU Series B
Ultrasonic Gas Flow Meter
_______________________________________________________________________
Caution: Special attention is required to avoid damages to
flame paths, see Picture 2.
If flame paths are damaged, parts must be replaced and
cannot be repaired.
Picture 2 Flame Paths
______________________________________________________________________
PRD-0000022520 Rev. 00C
Page 7 of 32
MNKS006 0.0 (4/08)
MPU Transducer Replacement Procedure
______________________________________________________________________
This page is intentionally left blank
______________________________________________________________________
Page 8 of 32
PRD-0000022520 Rev. 00C
MNKS006 0.0 (4/08)
MPU Series B
Ultrasonic Gas Flow Meter
_______________________________________________________________________
2.
DISMOUNTING PROCEDURE
This procedure describes how to remove and mount a Transducer
with NO PRESSURE in the pipeline. This can only be done before
the spool piece is installed in the pipeline, or if the operational
pressure is atmospheric and the pipeline is drained of any lethal or
flammable gases.
If it is necessary to remove a transducer from the MPU without
shutting down the line, this is possible by using the Transducer
Retraction Tool. This tool may be ordered as an option, and will be
delivered with its own operational manual. Alternatively, this can
be done by the supplier’s service engineer, bringing the suppliers
own Transducer Retraction Tool.
If the transducer is replaced by a new one, don’t forget to update
the acoustic path length and the zero calibration data in the
database. See USM-0000020565 “User Manual, MPU Series B” [1]
for details.
Unless otherwise stated, nuts and screws are removed by turning
counter-clockwise, and tightened by turning clockwise.
Make sure the workplace is suitable for this operation, protected
from rain- or sea water, dirt or oil spill. cover the MPU with a
protection hood if necessary.
______________________________________________________________________
PRD-0000022520 Rev. 00C
Page 9 of 32
MNKS006 0.0 (4/08)
MPU Transducer Replacement Procedure
______________________________________________________________________
2.1.
General information on explosion protection
The transducer is an explosion-protected, electrical appliance, safety-tested and certified.
***
No intervention, either mechanical or electrical, is permitted
***
RISK OF EXPLOSION
Repair of the transducer is not possible. In the event of a defect the entire transducer must be
replaced.
Installation and repair work must only be carried out by authorised dealerships or skilled
technical personnel having due regard to the assembly and installation instructions.
Electrical installation must take place in accordance with VDE 0165 (EN 70079-10).
All cables used must comply with the chemical and climatic requirements of the installation
site. All cables must be laid (protected) in such a way that they cannot be damaged. Wire end
sleeves must be used when connecting the wires. The mounting instructions of the cabling
manufacturer must be observed.
When wiring the US transducer, precautions must be taken which prevent electrostatic
discharge from causing damage to the US transducer.
The manufacturer’s EC Declaration of Conformity is only valid if the system is
installed according to the specifications of the manufacturer.
2.2.
Ex-relevant Data
Type of protection: II 2 G EEx d IIB T4 / T5
0102
EC type test certificate number. PTB 07 ATEX 1018
Type US -B-…
Tamb for T4: -55°C - +100 °C
Type US -A-…
Tamb for T5: -40°C - +80°C
______________________________________________________________________
Page 10 of 32
PRD-0000022520 Rev. 00C
MNKS006 0.0 (4/08)
MPU Series B
Ultrasonic Gas Flow Meter
_______________________________________________________________________
3.
DISMOUNTING THE TRANSDUCER
Picture 3 Transducer Assembly
______________________________________________________________________
PRD-0000022520 Rev. 00C
Page 11 of 32
MNKS006 0.0 (4/08)
MPU Transducer Replacement Procedure
______________________________________________________________________
3.1.
Dismounting, Short Form
1. De-energise the electronic system and observe any possible explosion-relevant information
on the type plate
2. Make sure that the pipe is de-pressurised
3. Loosen the locking nut of the cable gland and pull off toward the back
4. Completely loosen the M20 x 1.5 cable gland and pull off to the back.
5. Completely loosen the cover (3) and pull off to the back. Cable gland and cover
remain on the pipe.
6. using a screwdriver, open the locking mechanism of the connection terminal by
applying pressure on the white unlocking button, and pull out the cable (see Fig. 3)
7. Loosen the transducer (1) by unfasten with the Transducer Assembly Tool.
The transducer can be completely removed manually.
Attention: Do not loosen the Allen screws (4)! If the cylindric screws are loosened,
tighten again diagonally with 24 Nm.
Screw
M8 x 25
Adapter
Cover
Cable
Gland
Picture 4 Transducer mounting parts
3.2.
Dismounting, detailed form
It is necessary to dismount the cable gland from the cover before
removing the transducer.
______________________________________________________________________
Page 12 of 32
PRD-0000022520 Rev. 00C
MNKS006 0.0 (4/08)
MPU Series B
Ultrasonic Gas Flow Meter
_______________________________________________________________________
Picture 5 Cable gland and cover
4
3
2
1
Picture 6 Cable gland parts
Remove the clamping screw (1), the blue plastic washer (2), the sealing
rubber (3) and the body of the cable gland (4)
______________________________________________________________________
PRD-0000022520 Rev. 00C
Page 13 of 32
MNKS006 0.0 (4/08)
MPU Transducer Replacement Procedure
______________________________________________________________________
Picture 7 Cable junction
Unfasten the wires by pressing with a screw driver on the white release
button.
Picture 8 Detailed picture how to release the wire
Picture 9 Disassemble transducer
Disassemble the transducer with transducer assembly tool (15Nm)
______________________________________________________________________
Page 14 of 32
PRD-0000022520 Rev. 00C
MNKS006 0.0 (4/08)
MPU Series B
Ultrasonic Gas Flow Meter
_______________________________________________________________________
CAUTION: If any damage is discovered to the Transducer,
this Transducer adapter must be clearly marked
such that the Transducer Retraction Tool is NOT
used on this specific Transducer. This must also
be reported to the one responsible for the MPU.
Picture 10 Transducer with O-rings and Back-up rings mounted
______________________________________________________________________
PRD-0000022520 Rev. 00C
Page 15 of 32
MNKS006 0.0 (4/08)
MPU Transducer Replacement Procedure
______________________________________________________________________
This page is intentionally left blank
______________________________________________________________________
Page 16 of 32
PRD-0000022520 Rev. 00C
MNKS006 0.0 (4/08)
MPU Series B
Ultrasonic Gas Flow Meter
_______________________________________________________________________
4.
MOUNTING PROCEDURE
4.1.
Preparing Procedure
Before starting the mounting procedure, the following procedure
must be performed:
4.1.1. Cleaning
Pollutions must be removed using suitable tools and liquids,
preferably isopropanol.
4.1.2. Visual Inspection
•
•
•
Inspect the inside of the adapter and transducer for damages,
grease or pollution from the process.
Transducers with O-ring and Back-up rings.
Tolerances for cover mounting.
4.1.3. Assumptions
It is assumed that the Transducers are zero calibrated.
4.1.4. Prepare Transducer/ Adapter
4.2.
Preparing Transducer
A. Remove the old O-ring and Back-up rings.
B. Make sure that the mating faces are clean and dry. When
cleaning a joint face, use a tool which is not likely to score or
damage the face, and remove any burrs or nicks with an
oilstone or fine file.
CAUTION: Make sure that the flame paths (see Picture 4) do
not have any damage. If so, the part must be
replaced.
C. Replace the O-ring and the Back-up rings on the Transducer
(see Picture 3). Put silicon grease (Gleitmo 750 or equivalent)
on the new O-ring. Do not use too much silicon grease on these
O-ring; wipe off superfluous grease before mounting. The
silicon grease can make an acoustic contact between the
Transducer and the Spool Piece, which will disturb the
ultrasonic signals.
D. Make sure that the Transducer is clean and undamaged.
______________________________________________________________________
PRD-0000022520 Rev. 00C
Page 17 of 32
MNKS006 0.0 (4/08)
MPU Transducer Replacement Procedure
______________________________________________________________________
Note:
If the same transducer is re-installed, the O-rings and
backup rings must be replaced in any case. Only use
original spare parts.
______________________________________________________________________
Page 18 of 32
PRD-0000022520 Rev. 00C
MNKS006 0.0 (4/08)
MPU Series B
Ultrasonic Gas Flow Meter
_______________________________________________________________________
4.3.
Mounting, Short Form
CAUTION: Make sure the Transducers are mounted in correct
position according to the calibration certificate.
A. Replace o-ring and back-up rings. Use silicon grease on O-ring
and copper grease (e.g. Copaslip) on the screws.
B. Check the adapter internals, clean it before mounting..
CAUTION: Make sure that the flamepaths (see Picture 2) do
not have any damage. If so, the part must be
replaced.
C. Carefully insert the Transducer into the adapter.
D. Mount the Cable Gland (EU)
E. Connect the Transducer Cable Connector.
F. Mount the cover.
G. Update the database if transducers are replaced.
CAUTION: The screws must be of required quality, the
threads must be lubricated and correct torque
must be used (ref section 3.1).
______________________________________________________________________
PRD-0000022520 Rev. 00C
Page 19 of 32
MNKS006 0.0 (4/08)
MPU Transducer Replacement Procedure
______________________________________________________________________
4.4.
Mounting the Transducer
Make sure the Transducers are mounted in correct position according to
the calibration certificate.
Picture 11 Mounting the transducer
Make sure that the transducer and the thread is clean and screw it manually into
the adapter
Picture 12 Assembly tool
Use the transducer assembly tool and a torque wrench with 15 Nm to
tighten the transducer. Mounting the cover with cable gland
______________________________________________________________________
Page 20 of 32
PRD-0000022520 Rev. 00C
MNKS006 0.0 (4/08)
MPU Series B
Ultrasonic Gas Flow Meter
_______________________________________________________________________
Picture 13 Cable gland
Mount at first the cable gland and then the cover
Picture 14 Wires
Connect the wires to the cage clamp junctions. Use ferrules for the wires. Push the
wires into the junction; if necessary use a screw driver for support. You don’t need
to open the junction for mounting. Pull the wire slightly to check that connection.
______________________________________________________________________
PRD-0000022520 Rev. 00C
Page 21 of 32
MNKS006 0.0 (4/08)
MPU Transducer Replacement Procedure
______________________________________________________________________
Picture 15Transducer with mounted wire
Picture 16 Fasten the cover hand-tight
______________________________________________________________________
Page 22 of 32
PRD-0000022520 Rev. 00C
MNKS006 0.0 (4/08)
MPU Series B
Ultrasonic Gas Flow Meter
_______________________________________________________________________
Picture 17 Mount the cable gland
Dismount the cable gland completely and mount the bottom part of the cable
gland
Picture 18 Insert the rubber seal
______________________________________________________________________
PRD-0000022520 Rev. 00C
Page 23 of 32
MNKS006 0.0 (4/08)
MPU Transducer Replacement Procedure
______________________________________________________________________
Picture 19 insert the blue plastic washer
Picture 20 Dismount the cable gland
Mount the clamping screw hand tight. Check that the rubber seal clamps the cable
sheath completely. To check pull soft the cable, it must be impossible to pull the
cable out of the cable gland. Affix the transducer sticker
______________________________________________________________________
Page 24 of 32
PRD-0000022520 Rev. 00C
MNKS006 0.0 (4/08)
MPU Series B
Ultrasonic Gas Flow Meter
_______________________________________________________________________
4.5.
Mounting the adapter
To replace the adapter is only necessary if it is damaged!
Picture 21 Clean the transducer mounting surface
Picture 22 Use the fit-up-aid for positioning
______________________________________________________________________
PRD-0000022520 Rev. 00C
Page 25 of 32
MNKS006 0.0 (4/08)
MPU Transducer Replacement Procedure
______________________________________________________________________
Picture 23 Use the hexagon socket wrench for the srews
Picture 24 Use torque key , torque is 24 Nm
______________________________________________________________________
Page 26 of 32
PRD-0000022520 Rev. 00C
MNKS006 0.0 (4/08)
MPU Series B
Ultrasonic Gas Flow Meter
_______________________________________________________________________
PARAMETER CONFIGURATION
5.1.
General
It is necessary to update the database if transducers have been
replaced. During first time assembly database configuration will be
a part of the process, and this chapter will be irrelevant.
Updating the database requires knowledge of how to maneuver in
the MPU 1200 database, and shall be performed by trained
personnel.
Spare transducers are delivered in pairs, with a calibration
certificate for each temperature and pressure combination with
corresponding signal frequency, and measurement certificate of the
length of each transducer. The spare transducer pair is calibrated in
an arbitrary position. They can be mounted in any position, but it is
important that the transducers are kept within the same pairs.
A “Calibration Node” is defined as a combination of pressure and
temperature.
Definition of transducer pairs:
Position
Group A
1A
2A
3A
4A
5A
6A
Position
Group B
1B
2B
3B
4B
5B
6B
Table 3 Transducer pair definition
______________________________________________________________________
PRD-0000022520 Rev. 00C
Page 27 of 32
MNKS006 0.0 (4/08)
MPU Transducer Replacement Procedure
______________________________________________________________________
5.2.
Calibration certificate
The relevant data in the calibration certificate is stated in the header
and the 4 first rows of the table (see Figure 1 below).
The header shows:
• Date
• Pressure
• Temperature
• Signal frequency
The table shows:
• Path 1 to 6, referring to position 1A/1B to 6A/6B
• Transducer serial number (S/N), which is stamped on the
transducer
• Transducer length (L), listed in millimeters (mm)
• Tdelay adj, referring to Transducer delays in microseconds (µs)
to be inserted into the database
The rest of the table is for information and diagnostic purposes
only.
Picture 25 Transducer Calibration Report
______________________________________________________________________
Page 28 of 32
PRD-0000022520 Rev. 00C
MNKS006 0.0 (4/08)
MPU Series B
Ultrasonic Gas Flow Meter
_______________________________________________________________________
5.3.
Transducer delays
The transducers are calibrated in pairs. The transducer delays and
delta T for spare transducer pairs are found in the supplied
calibration certificates, one certificate for each calibration node.
These must be entered for the respective Calibration Nodes. Make
sure that the calibration data is inserted for the correct pressure and
temperature combination. The data can be entered using the MPU
WinScreen program. Instructions can be found in
USM-0000020565, “WinScreen User Manual, MPU Series B” [1].
The database object number for the respective Calibration Nodes
are shown in the table below.
Database Object Number
Description
Node 1
Node 2
Node 3
Node 4
Node 5
Node 6
Cal. Node x Pressure
Cal. Node x Temperature
Cal. Node x Signal Type
Cal. Node x Tr. Delay 1
Cal. Node x Tr. Delay 2
Cal. Node x Tr. Delay 3
Cal. Node x Tr. Delay 4
Cal. Node x Tr. Delay 5
Cal. Node x Tr. Delay 6
500
501
502
503
504
505
506
507
508
509
510
511
512
513
514
515
516
517
518
519
520
521
522
523
524
525
526
527
528
529
530
531
532
533
534
535
536
537
538
539
540
541
542
543
544
545
546
547
548
549
550
551
552
553
Table 4 Database object numbers for zero calibration nodes
______________________________________________________________________
PRD-0000022520 Rev. 00C
Page 29 of 32
MNKS006 0.0 (4/08)
MPU Transducer Replacement Procedure
______________________________________________________________________
5.4.
Update path lengths
Due to minor variations of the length of the transducers, new data
for the acoustic path length has to be entered when transducers are
changed. The measured transducer lengths for the original
transducers are stated in the Calibration Report for the meter. The
measured transducer lengths for the new transducers are stated in
the supplied measurement certificate. The acoustic path length is
given by:
PathLnew =
PathLoriginal
+ (LOriginal transd A - LNew transd A )
+ (L Original transd B - L New transd B)
PathLnew
PathLoriginal
LOriginal transd A
LOriginal transd B
LNew transd A
LNew transd B
= New acoustic path length
= Original acoustic path length
= Length of original transducer position A
= Length of original transducer position B
= Length of new transducer position A
= Length of new transducer position B
The new acoustic path length PathLnew must be calculated
according to the above formula and then entered into the database.
The corresponding database numbers are shown in the table below:
Description
Transducer Pair 1 Length
Transducer Pair 2 Length
Transducer Pair 3 Length
Transducer Pair 4 Length
Transducer Pair 5 Length
Transducer Pair 6 Length
Database Object
Number
401
402
403
404
405
406
Table 5 Database object numbers for path lengths
5.5.
Documentation
It is important that relevant documentation is updated if transducers
are replaced. A new printout of the database should be performed,
or at least the recently entered data must be noted in the log book.
______________________________________________________________________
Page 30 of 32
PRD-0000022520 Rev. 00C
MNKS006 0.0 (4/08)
MPU Series B
Ultrasonic Gas Flow Meter
_______________________________________________________________________
5.6.
Example
Imagine the following situation:
1. A fault is detected at transducer number 5A.
2. Spare transducers are calibrated at pair 1.
3. The system has 3 nodes.
What to do:
1. Replace transducer 5A with spare transducer 1A (position
Group A).
2. Replace transducer 5B with spare transducer 1B (position
Group B).
3. Check the pressure and temperature combination for the 3
nodes by reading the database (see Table 4).
4. Then locate the 3 correct calibration certificates according to
the right combination of pressure, temperature and frequency.
5. Enter the new transducer delay for the 3 nodes into the
database, data for spare transducer 1A at position 5A and data
for spare transducer 1B at position 5B.
6. Calculate new path length according to the formula in section
4.4.
7. Enter the new calculated path length for path 5A-5B into the
database (see Table 5)
8. Update documentation.
______________________________________________________________________
PRD-0000022520 Rev. 00C
Page 31 of 32
MNKS006 0.0 (4/08)
MPU Transducer Replacement Procedure
______________________________________________________________________
The specifications contained herein are subject to change without notice and any user of said specifications should verify from the manufacturer that the
specifications are currently in effect. Otherwise, the manufacturer assumes no responsibility for the use of specifications which may have been changed
and are no longer in effect.
Headquarters:
500 North Sam Houston Parkway West, Suite 100 Houston, TX 77067 USA, Phone: 281/260-2190, Fax: 281/260-2191
Gas Measurement Products:
Houston, TX USA +1 (281) 260-2190
Thetford, England +44 (1842) 82-2900
Kongsberg, Norway +47 (32) 286-700
Buenos Aires, Argentina +54 (11) 4312-4736
Integrated Measurement Systems:
Corpus Christi, TX USA +1 (361) 289-3400
Kongsberg, Norway +47 (32) 286-700
San Juan, Puerto Rico +1809 (787) 274-3760
United Arab Emirates, Dubai +971 (4) 331-3646
Liquid Measurement Products:
Erie, PA USA +1 (814) 898-5000
Los Angeles, CA USA +1 (310) 328-1236
Slough, England +44 (1753) 57-1515
Ellerbek, Germany +49 (4101) 304-0
Barcelona, Spain +34 (93) 201-0989
Moscow, Russia +7 (495) 564-8705
Melbourne, Australia +61(3) 9807-2818
Beijing, China +86 (10) 6500-2251
Singapore +65 6861-3011
Chennai, India +91 (44) 450-4400
______________________________________________________________________
PRD-0000022520 Rev. 00C
Printed in U.S.A. © 4/08 FMC Technologies Measurement Solutions, Inc. All rights reserved. PRD-0000022520 .00C/MNKS006
Issue/Rev.0.0
0.0 (4/08)
MNKS006
(4/08)
Visit our
website
www.fmctechnologies.com/measurementsolutions
Page
32 ofat32